HOW TO MAKE (ALMOST) ANYTHING
MAS.863 / FALL 2011
KELLY SHAW
M.ARCH LEVEL III
03 / PCB DESIGN, FABRICATION, AND ASSEMBLY
04 / WATERJET CUTTER AND CNC MILLING
11 / INTERFACE AND APPLICATION PROGRAMMING
12 / MECHANICAL AND MACHINE DESIGN
13 / NETWORKING AND COMMUNICATIONS
WEEK 06 / MOLDING AND CASTING
This week's assignment was to design a 3D mold, machine it and cast parts in it. We were
each given a block of purple wax about 3'' X 6'' X 1.25'' to mill our molds. These molds would
act as the POSITIVE. We'd then pour OOMOO silicone rubber into the molds to cast a NEGATIVE.
Once we had the negative we were given the option of using either Hydro-Stone or DryStone to
cast multiple positives. There was also the option to use either the Modela or the ShopBot to
mill the wax or use 2'' rigid foam.
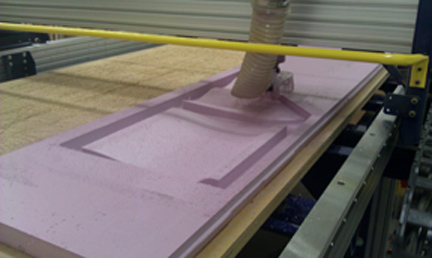
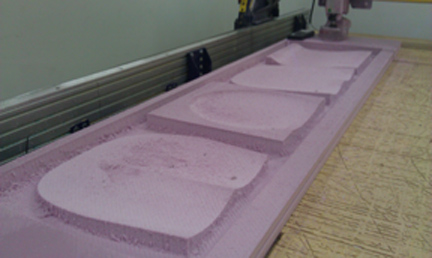
01. MILLING SOME SEATS
I wanted to use the ShopBot to try milling some seat prototypes now that we could introduce
3-axis milling into our projects. Foam was a cheap and easy way to do some quick form
studies. I modeled some prototypes in Rhino.
[model seat cushions]
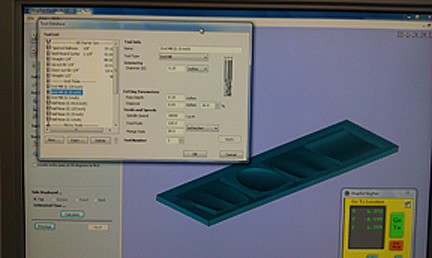
Using Partworks 3D was pretty simple given our previous tutorial with Partworks 3.0. The
most important thing to remember is to SET DEFAULT STARTING POINT TO BOTTOM LEFT.
Since the seat cushions were just prototypes, I used a 1/2'' ball nose endmill and skipped
the Roughing Pass at the suggestion of Costanza. There's a decent list of material settings on
the GSD's Fabrication Lab site. I ran just the Finishing Pass at the following settings:
2'' EPS using a 1/2'' tool diamater
Spindle Speed: 18,000 rpm
Feed: 300 ipm
Plunge: 120
Stepover: 30%
Using these settings I was able to mill almost the entire length of the foam in less than 2 hours.
[PartWorks 3D settings]
[milling with diagonal passes]
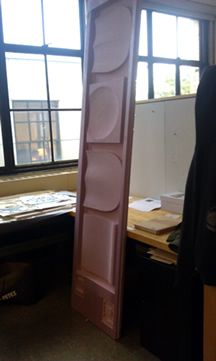
[finished piece]
I still need to cut these out and test them but for now I almost want to add some legs to them
and make it into a bench!
[finished prototypes blocking my studio space]
02. MILLING SOME WAX --> WHY DINOSAURS ARE EXTINCT
After the success of milling the seat cushions. I felt optimistic about milling the wax. Maybe
it was because we were only given 1 block, but the wax seemed really precious and like it
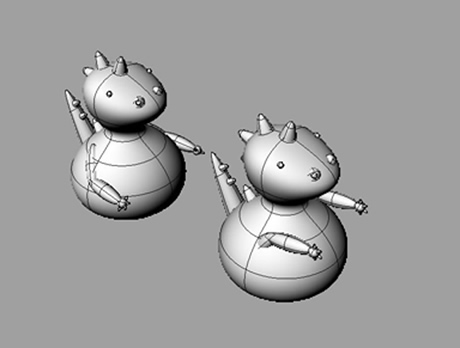
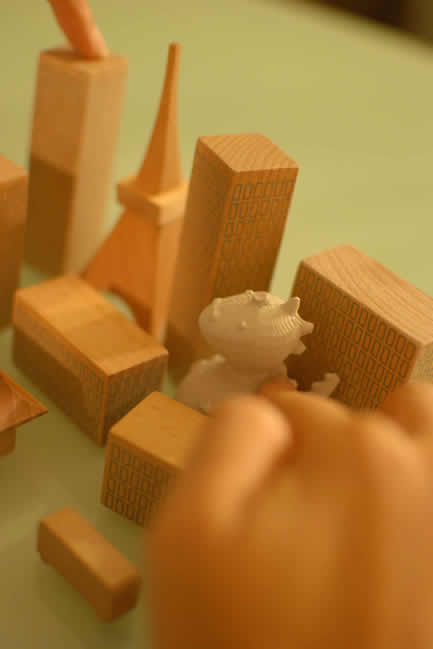
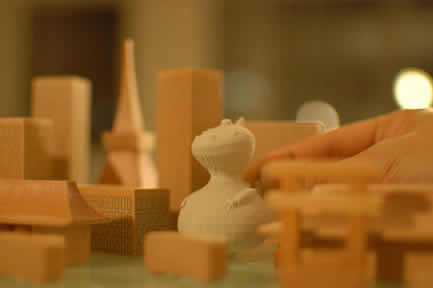
should have been milled on the daintier Modela. I had a set of blocks depicting the skyline of
Tokyo and I had always wanted to get a little Godzilla figurine to go along with it.
[a much cuter version than the one frequently depicted in films]
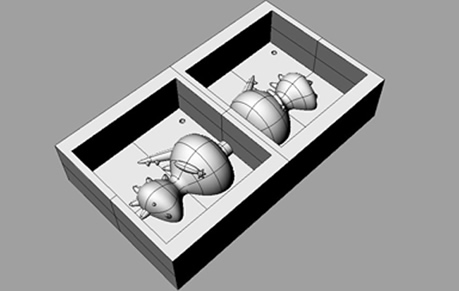
I started out by modeling several versions of my own Godzilla/Dinosaur creature in Rhino.
[first iterations of Dino]
As cute as Dino's outstretched arms were, I realized that the mill would not be able to make an
undercut to capture the arms properly.
I tried again, this time with Dino's arms stuck to his sides. When I shrunk Dino down to fit into
the mold I also realized that the amount of detail and curvature would be difficult to capture even
with a 1/32'' drill bit. Nevertheless, I decided to give it a go.
[final version of Dino]
Then began the series of ''learning through failure'' moments:
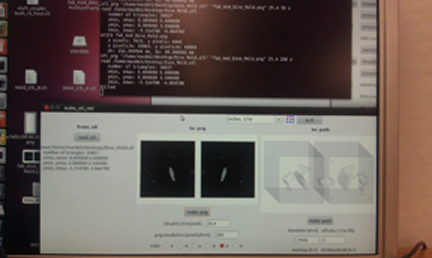
PROBLEM 1: When I brought in my .stl file into the fab module and created the .png I noticed
that Dino's body was sadly not showing up. The culprit seemed to be that I had some unclosed
surfaces somewhere.
SOLUTION 1: Re-split and re-boolean everything.
[Dino without a body path]
[Dino's body now appears]PROBLEM 2: Travis and I both saved our files with a space in between words. This generated
a Terminal error saying that the file couldn't be found.
SOLUTION 2: Neil has corrected this since we emailed him, but at the time we just ran out of
time and had to come back another day :(.
PROBLEM 3: On the following day I tried again to bring Dino to life. Unfortunately this time I
had a new issue which was getting the wax to stick to the surface.
SOLUTION 3: SECURE YOUR PIECE TO THE MODELA. I was left with a small gash
in my wax to remind me. You should be especially careful if everyone in the lab has been using
the Modela before you.
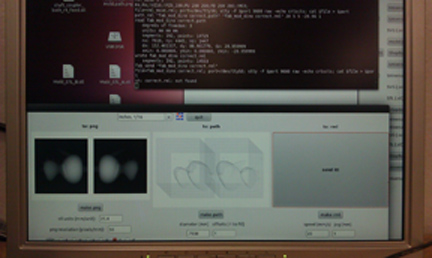
PROBLEM 4: The .png which had generated perfectly less than 24 hrs ago seemed very flat
and was no longer showing the black boxes Dino was sleeping in.
SOLUTION 4: Use the ShopBot. Despite having done nothing to my files, the .png and path
generated no longer looked correct.At this point I gave up on being dainty and went straight for the ShopBot.
I secured my piece to the table with 4 dabs of hot glue. I had been warned against putting too
much glue which would result in you needing to take a hammer to remove the piece.
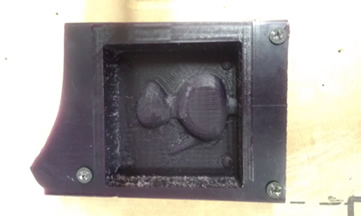
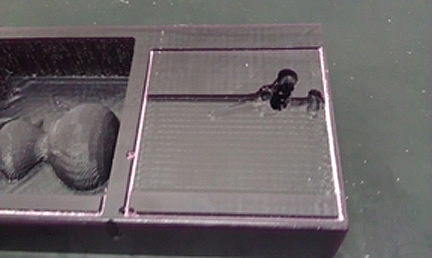
[this chunk was a demo which had been left in the shop]My first half of milling was relatively successful except for a few toolmarks left in the wax.
Settings for the 1/8'' flat endmill:
Spindle Speed: 9000 rpm
Feed: 120 ipm
Plunge: 30
Dino was slightly low res, but you could make out arms, a tail and some of his spikes.
PROBLEM 5: Unfortunately the second half was more problematic. 5 minutes into running
the other half of Dino, my wax came unglued and the piece was eaten alive by the machine.
[the aftermath]
SOLUTION: Use the extra scrap block. To get around the glued-up bottom I added more hot
glue and some screws. With Neil Legband''s help [THANKS NEIL], I made the most of Dino's
last hope.
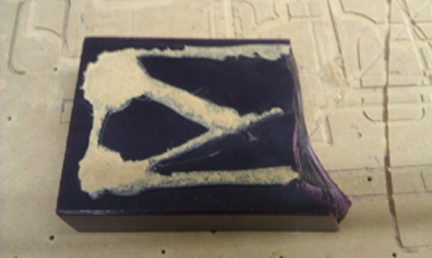
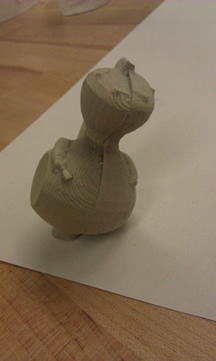
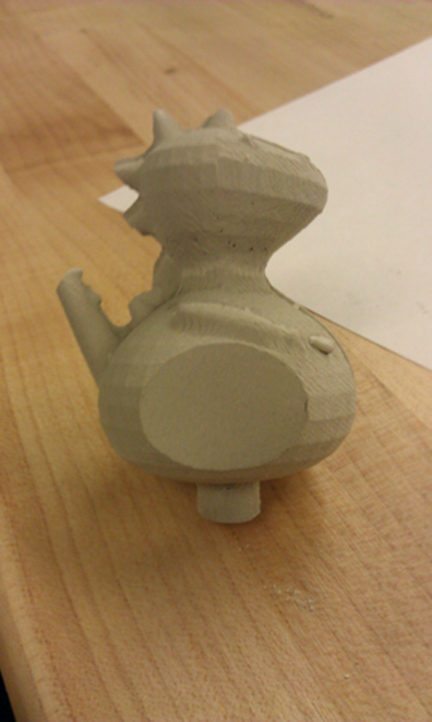
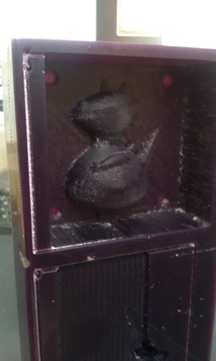
Luckily the piece came out, however this time Dino looked like he had a flattened thigh.
[second half where the side of his body was flat]
Not having access to any more wax, I decided to try casting Dino anyways.
03. CASTING -> BRINGING GODZILLA TO LIFE
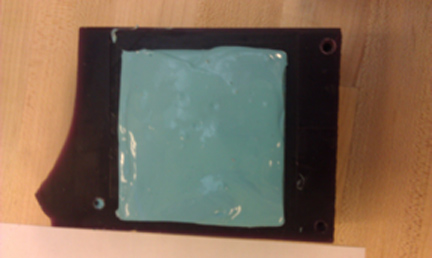
Before going home after a long day of problems I made the NEGATIVE for my casting
by stirring up the OOMOO and pouring it into the wax molds.
[slightly overfulll]
[better level but more bubbly]
Since I had so much negative space I was very worried that the silicone would begin to cure
before I could even finish pouring the thin beaded lines in. When it started to cure I was forced
to quickly dump the rest in and try to remove the air bubbles by vibrating the table underneath.
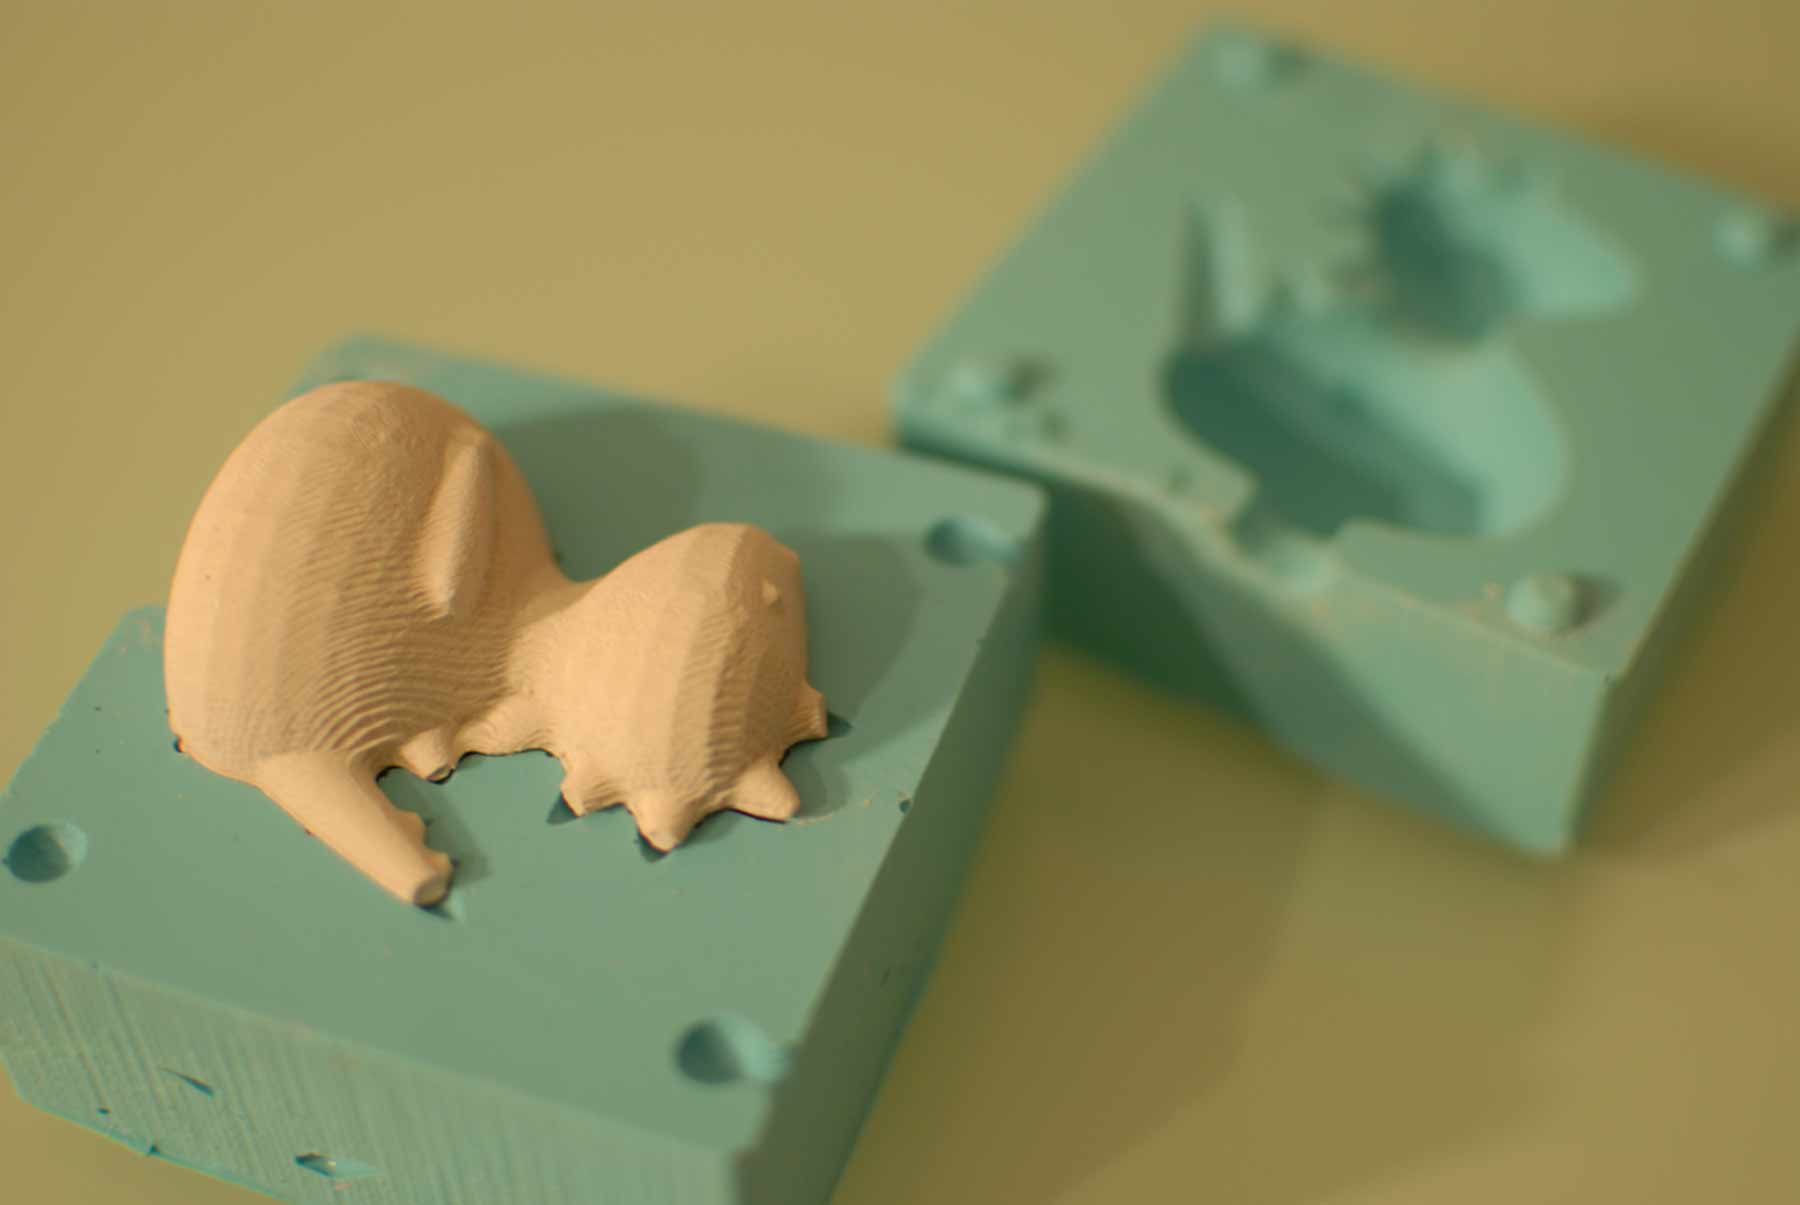
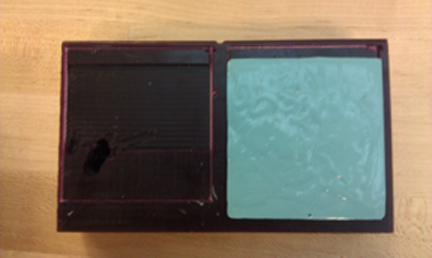
The following day I mixed up the Hydro-Stone and tried my best to align the two rubber molds
despite the fact that some of my registration marks had not milled out well.[TIP: use cyilnders to do your registration. I used 1/4'' spheres but with a 1/8'' flat endmill
some of the registrations were cut too shallow.]
[rubber molds]
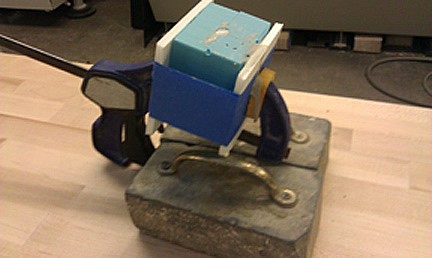
[setup for pouring the Hydro-Stone]
[first cast: registration marks slid past each other during the clamping]
I tried casting a second Dino and the second one cast with less of a seam. He wasn't
as perfect as I imagined he could be but he still had a presence. Rarrrrrrrr.