HOW TO MAKE (ALMOST) ANYTHING
MAS.863 / FALL 2011
KELLY SHAW
M.ARCH LEVEL III
03 / PCB DESIGN, FABRICATION, AND ASSEMBLY
04 / WATERJET CUTTER AND CNC MILLING
11 / INTERFACE AND APPLICATION PROGRAMMING
12 / MECHANICAL AND MACHINE DESIGN
13 / NETWORKING AND COMMUNICATIONS
WEEK 09 / INPUT DEVICES
Since my final project involves using sensors to turn on arrays of LEDs, I wanted to use this week's
assignment to explore potential sensing devices. I gave myself the task of taking the micro-controller
we made from the EMBEDDED PROGRAMMING week and adding some LEDs so that I could visualize
the change in proximity measured by an infrared proximity sensor.
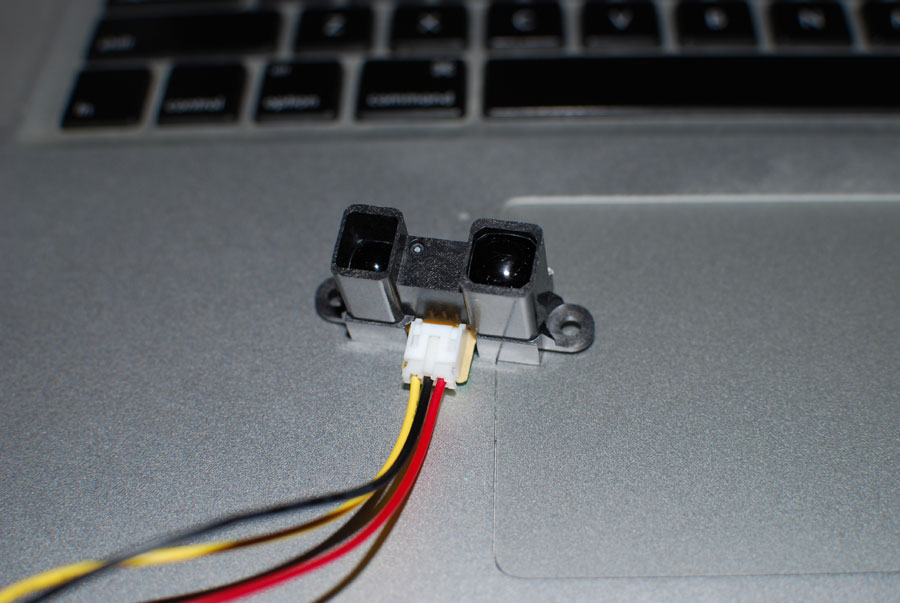
There were a bunch of IR sensors online but the one I ended up using was the SHARP Long Range
GP270A02YK0F. This sensor has an analog output varying from about 2.8 V to 0.4V and can give
decent inputs from 15 cm to 150 cm away. The basic principle behind IR proixmity sensors is that it
sends infrared light though IR-LEDs, which is then reflected by any object in front of the sensor. The
returning light is received by a detector.
STEP RESPONSE BOARDWhile I was waiting for my sensor to come in I decided to make Neil's Step Response board.
Milling and stuffing went normally and the results are below. I was having a little trouble getting the
Python visualization to run on my Mac but thanks to Shahar I've included the steps here:To setup Pyserial:
1. Open Terminal.
2. Type: sudo easy_install pip
3. Type: sudo pip install pyserial
To configure the USB port:
1. Type: ls /dev/tty.usb*\<backslash>
2. Hit ''Enter'' and you should get your port's name.
3. If you don't get a port name you need to install the VCP driver from here.
To run the .py file:
1. Type: python filename.py /dev/tty.usbserial<insert serial port's name>
[stuffed board and the accompanying .py visualizer]
[Neil's step respons circuit board]
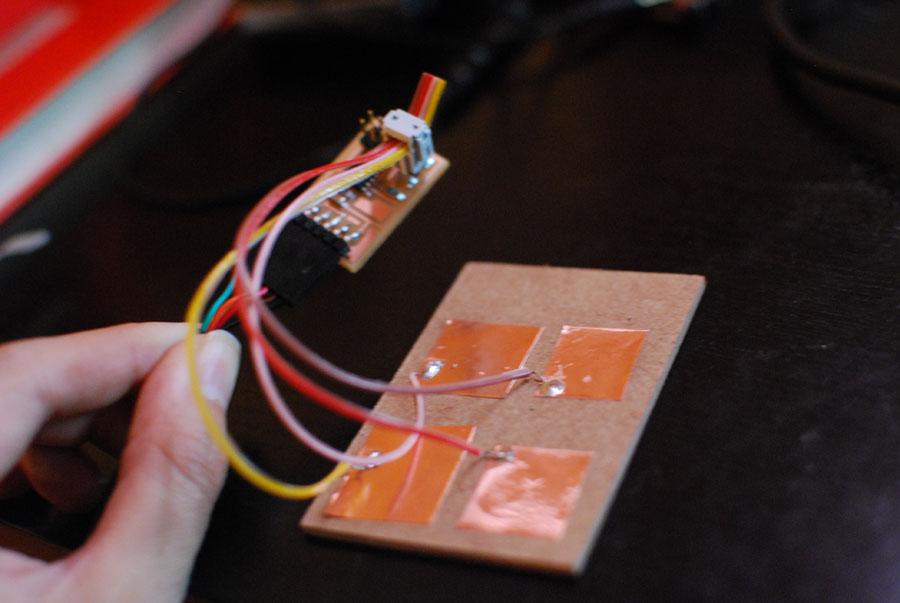
INFRARED PROXIMITY SENSOR BOARD
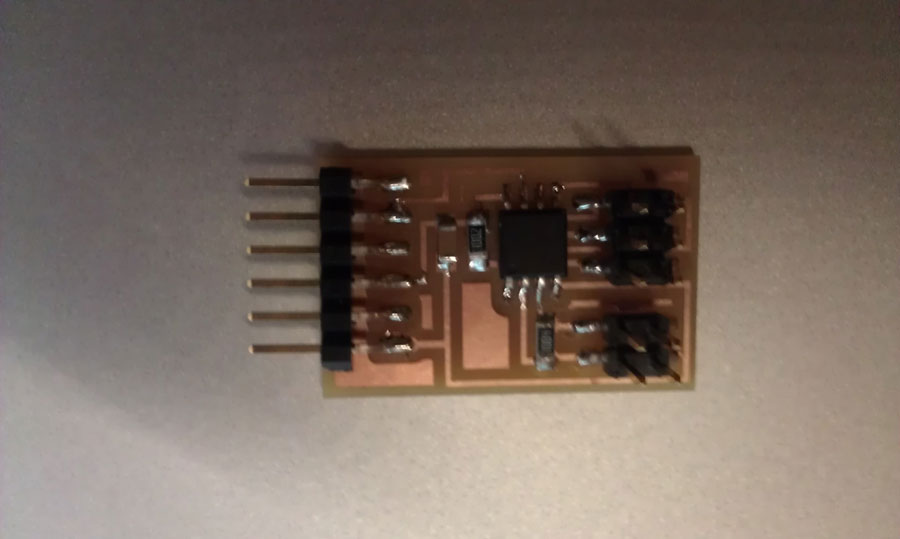
Thanks to Brian answering all my silly questions I was able to add some LEDs and a sensor to my
micro-controller from Week 7. It was pretty simple because the IR sensor I was using only had 3
wires to hook up: Ground, 5V, and Input.
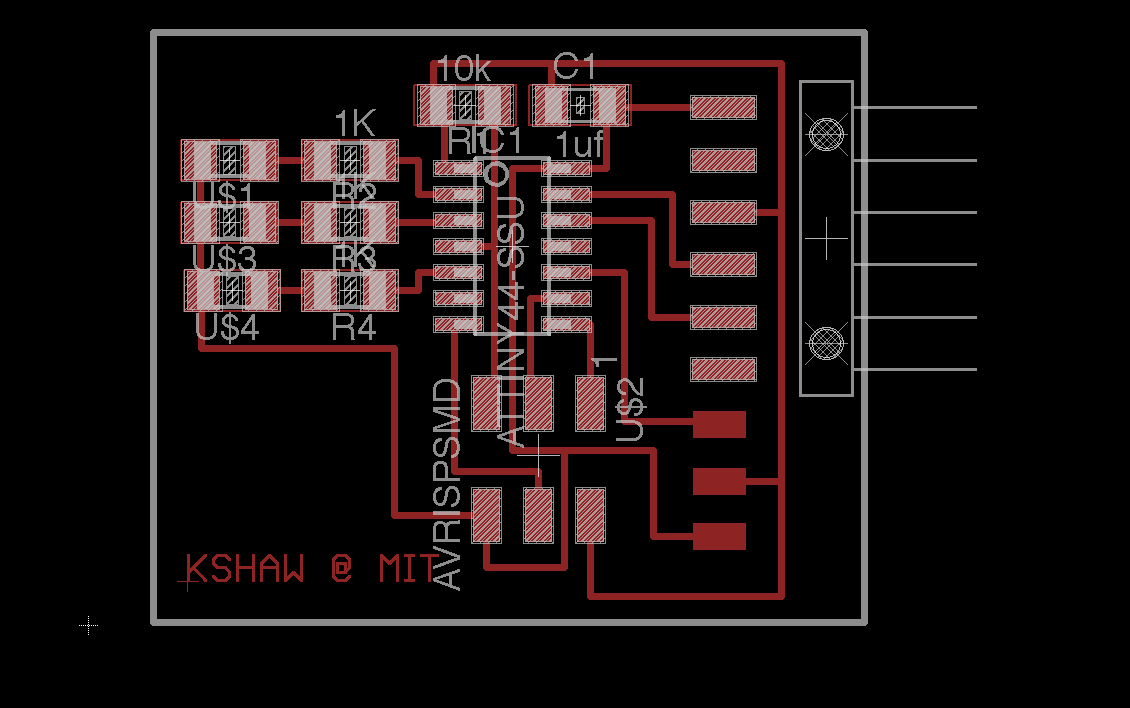
[layout in Eagle]
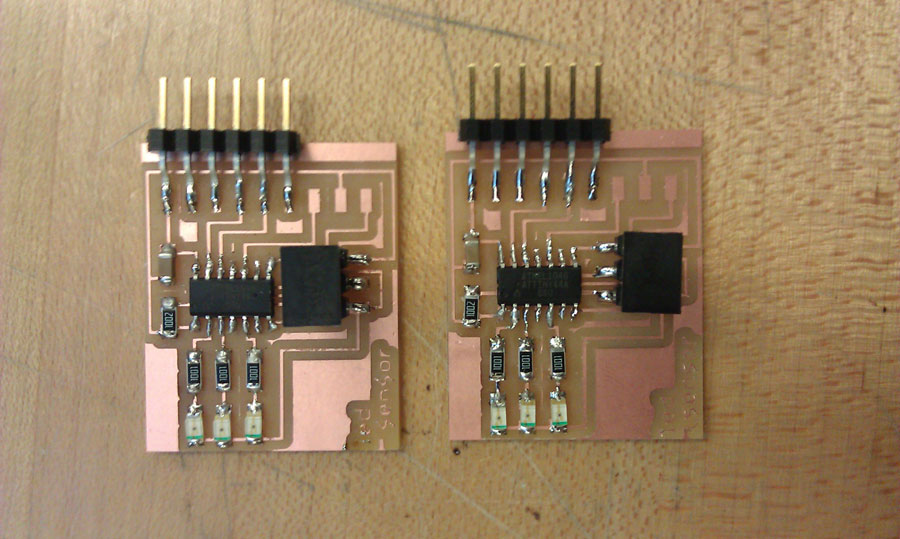
[milled and stuffed boards, I always make an extra!]
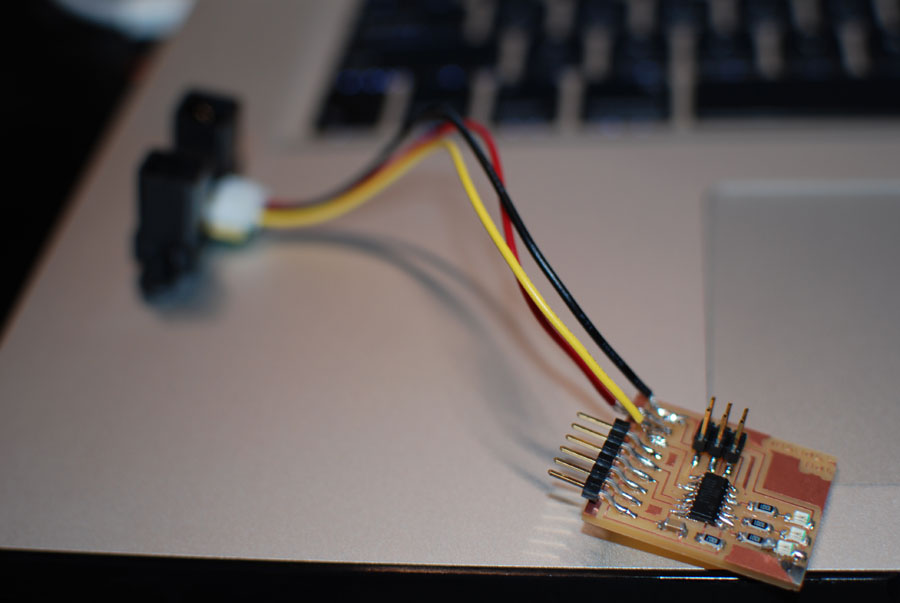
[close up of the board wired to my sensor]Having wired the sensor to my board I know that in future designs I should separate my ground pad
from the 5V pad to keep my board from shorting.
[sharp ir long-range sensor]
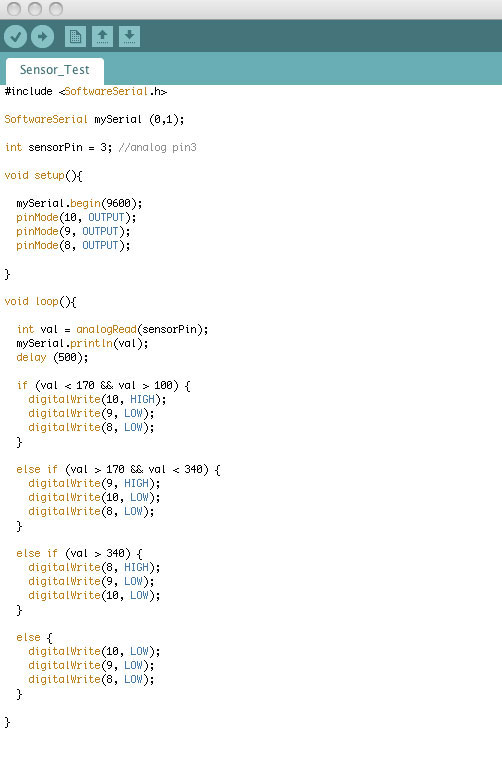
The sensor was picking up alot of noise, but after playing with the printout rates I was able to figure out
some stable values to code in Arduino with.The code below essentially takes the output of the sensor and compares it to some baseline values,
flipping a different LED on for each voltage output. I wanted to try to get the Serial Monitor to print out the
actual distance, but since the actual voltage-to-distance graph is exponential and I'd be working with decimals,
I realized I probably shouldn't run those calculations with my board.
Thanks to Moritz for teaching me about the oscilloscope and Tiffany for teaching me more about Arduino :)
[IR PROXIMITY SENSOR_LEDS]