HOW TO MAKE (ALMOST) ANYTHING
MAS.863 / FALL 2011
KELLY SHAW
M.ARCH LEVEL III
03 / PCB DESIGN, FABRICATION, AND ASSEMBLY
04 / WATERJET CUTTER AND CNC MILLING
11 / INTERFACE AND APPLICATION PROGRAMMING
12 / MECHANICAL AND MACHINE DESIGN
13 / NETWORKING AND COMMUNICATIONS
WEEK 08 / 3D SCANNING AND PRINTING
This week's assignment was to 3D scan an object and design and 3D print an object.
01. 3D SCANNINGWe used the 3D ZScanner to scan our objects this week. The scanner reminds me a bit of Wall-E.
Super cute and deceptively heavy.
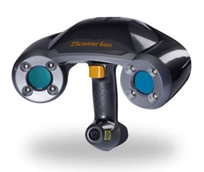
[ZScanner]
For future reference I documented the workflow:
- After setting up the laptop with power and plugging in the firewall, open the ZScanner program.
- Go to ''Configure'' in the menu options and select ''Sensor Configuration''.
- Place your object on the black foam with positioning dots and hit ''Auto Adjust''. Hold the trigger
down while pointing the crosshairs at the object. Move towards and away from your object until
you have ''Reliable'' data.- Hit ''Apply'' and then ''Ok'' to apply your settings.
- Go to ''Configure'' and select ''Sensor Calibration''.
- Open the top secret wood box and pointing the laser at the white X, hit the ''Acquire'' button.
Hold the laser trigger down, focusing the crosshairs on the white X until the screen counts
from 1 to 10.- Put your object back on the black foam and make sure there are no other points lying nearby.
- Choose the ''Scan Surface'' button from the menu and choose ''Scan Positioning Features''.
Hit ''Record'' and scan the gun over all your white positioning dots. Once all the dots show up
on screen, hit the ''Stop Scan'' button.- Choose the ''Scan Surface'' button again and choose ''Scan Surface''. Hit ''Record'' and this time,
scan over your object slowly without moving the object's position on the black foam.
* You can move the black foam around but be sure your object's position relative to the white
dots remains constant.- When you are happy with the result, hit ''Stop Scan''.
- You can adjust the resolution and shrink the volume of the scan from the Surface Parameters
options and using the ''Fit Volume'' and ''Move Volume'' buttons.- To export your file, go to ''File'' and then ''Save Facets'' to save your file as an .stl file.
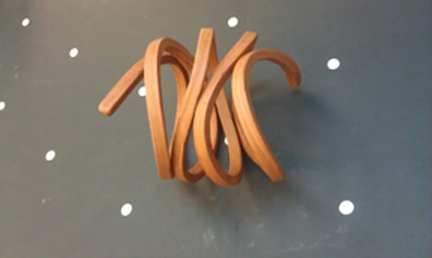
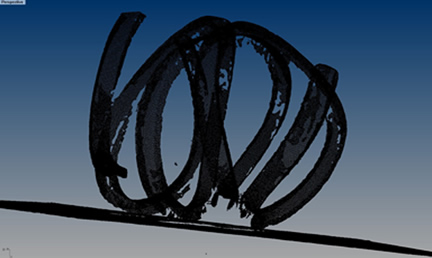
The first object I scanned was a wooden bracelet. I thought it would be interesting to try to capture
all of the edges and twists.
[wooden bracelet on positioning surface]
[SCANNING IN PROCESS]
[bracelet.stl in Rhino]
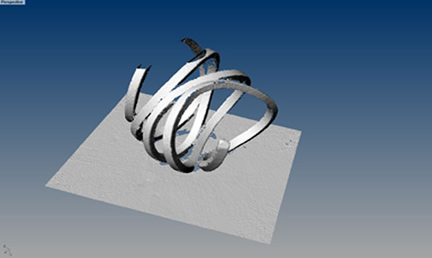
[rendered scan in Rhino]
I tried the scan again by putting the positioning dots on the surface of the bracelet. But for some reason
the scanner would only scan the dots. At first I thought maybe it couldn't differentiate between the wood
table behind it and the wooden bracelet, but even with a black background, the scanner was still only
scanning the dots.
[positioning dots on the bracelet]
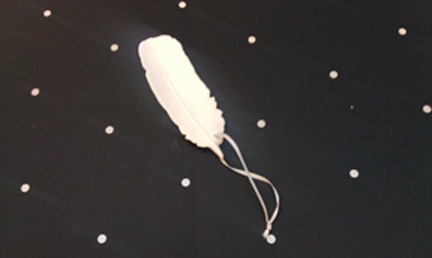
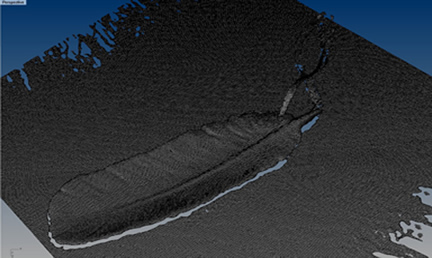
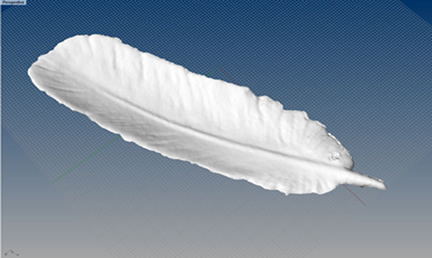
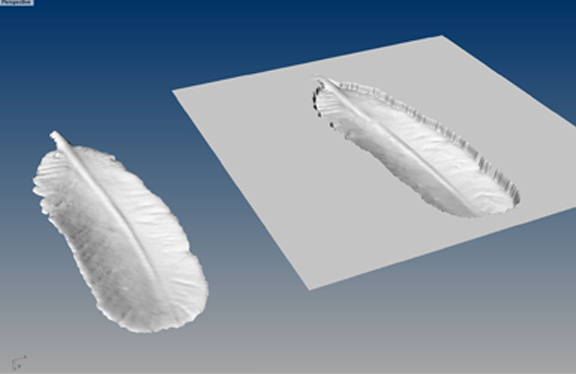
I had a little more time in the lab so I decided to try scanning an object with a detailed surface. I chose
a ceramic feather. I knew that it would be difficult to capture the underside of the feather and give it
the same thickness but I wanted to use the scan to more effectively render the real thinnesss of an
actual feather. These scans came out very well.
[feather placement on positioning surface]
[feather.stl in Rhino]
[feather after a little cleaning up]
[I have hopes to try to cast more copies of my feather...tbd]
02. 3D Printing
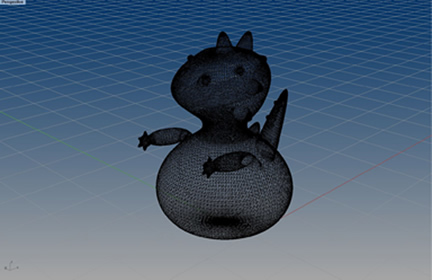
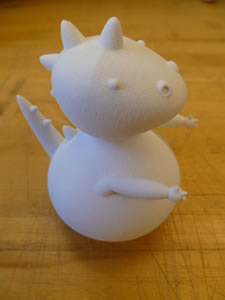
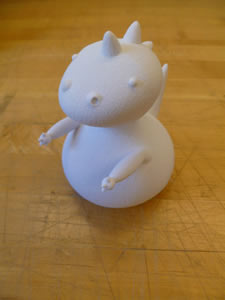
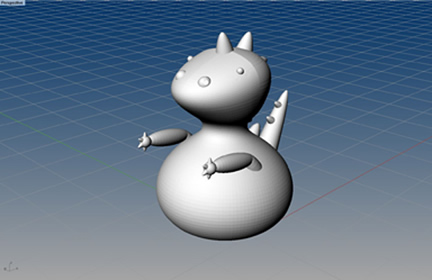
I was determined to give Dino [modeled in Rhino] a better twin this week via the ZCorp 3D printer.
[Dino wants a hug...using the 3D printer to get those undercuts]
[Dino.stl]
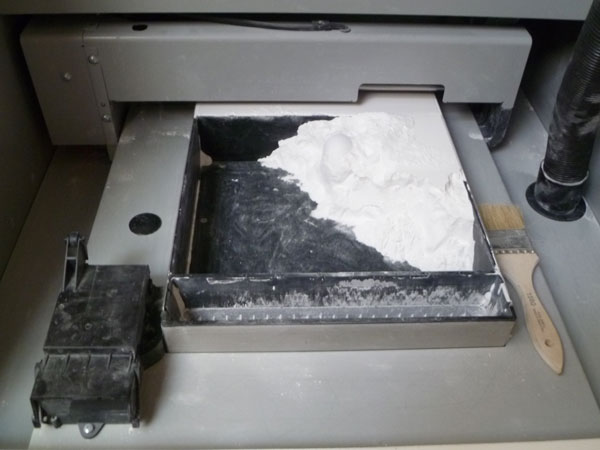
[excavating my dinosaur]
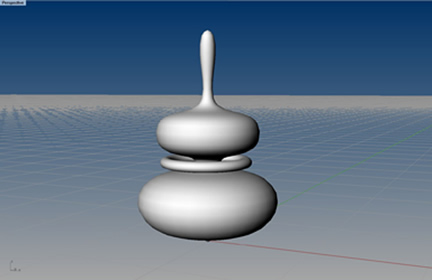
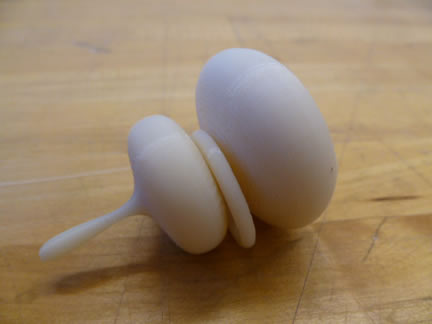
[clean Dino]We also had the option of using the ABS printer so I wanted to try a very small top with embedded
ring. A very nice advantage of using ABS Dimension is that you can have working and embedded
parts.
[spinning top modeled with an embedded ring]

[top.stl]
[printed top]
[SPINNING TOP]