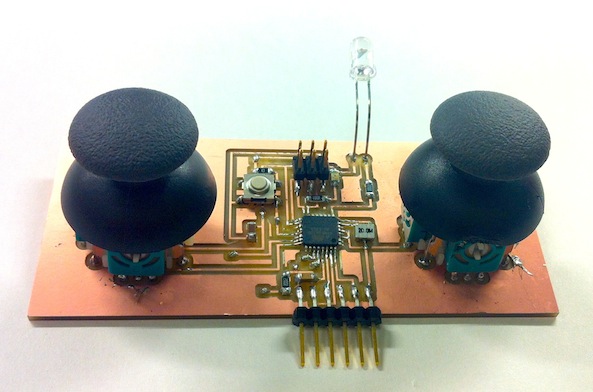
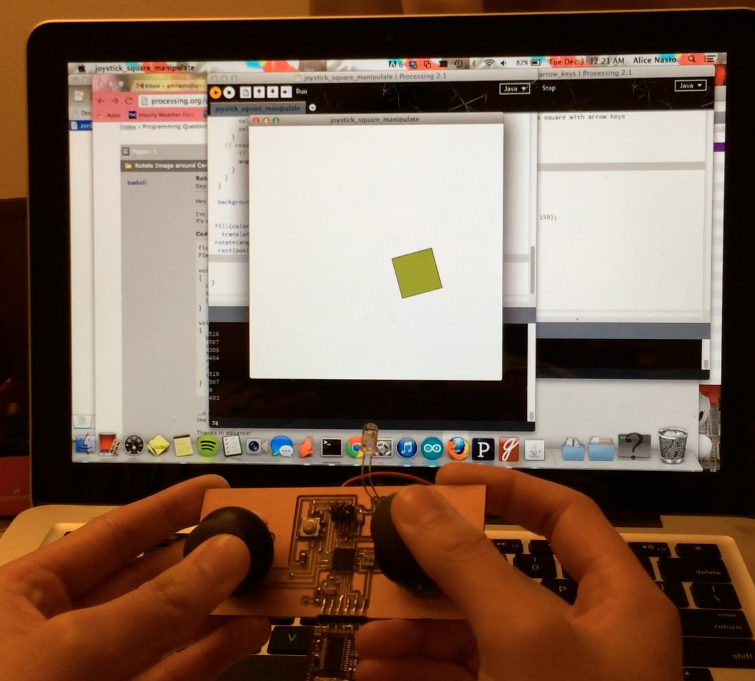
For this week's assignment, I used the controller board that I made last week with two potentiometer joysticks to manipulate a square in an applet.
I wrote a program in Arduino to write out the serial values (separated by commas) for each of the analog pins that the joysticks are attached to. There are two analog pins per joystick, one for vertical motion, and one for horizontal motion. When the joystick is pushed up or to the left, the pin value increases towards 1024. When the joystick is upsed down or to the right, the pin value decreases towards 0. Then, I wrote a Processing program that reads the serial values. Depending on the serial values (i.e. the joysticks' motions), different things happen in the applet, which has a square on a white background. The joystick on the right controls the translation of the square in the vertical and horizontal diretions. The up and down motions of the joystick on the left causes the square to increase or decrease in size. The left motion of the joystick on the left causes the RGB fill value to change randomly. The right motion of the joystick on the left causes the square to rotate through a randomly chosen angle.
Getting started with programming in Arduino and Processing
This was my first try at programming a graphical interface, so I followed a simple tutorial on making a virtual button with an Arduino and an applet made in Processing. In this example, mousing over the square in the applet writes out different characters to the serial port. In the Arduino program, the characters in the serial port are read and then the digital pin corresponding to an LED is written high or low depending on whether the mouse is on the square or not. Following this tutorial was helpful to gain an understanding of how to use the serial port to communicate between a microcontroller board and an applet.