Week 9: Composites
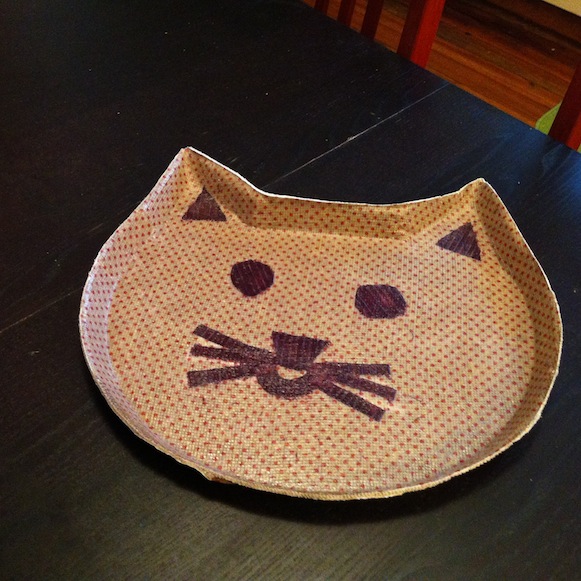
This week we made fiber composite parts, which involve a fiber (here I used cotton and burlap fabric) and a matrix (epoxy resin). This combination of materials creates a product that is both lightweight and strong. I made a tea tray shaped like a cat's face.
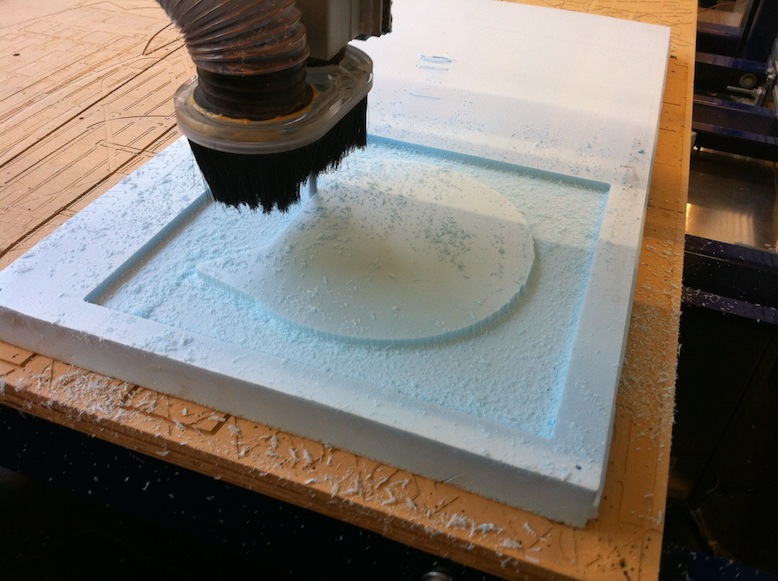
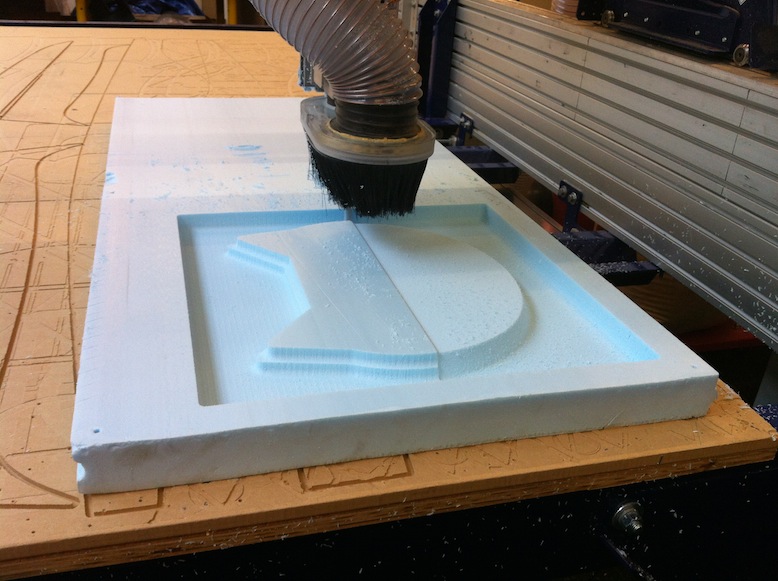
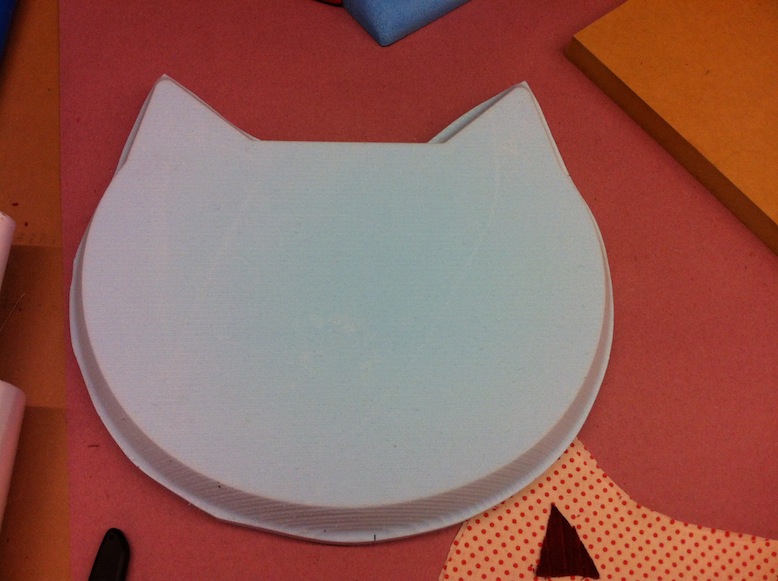
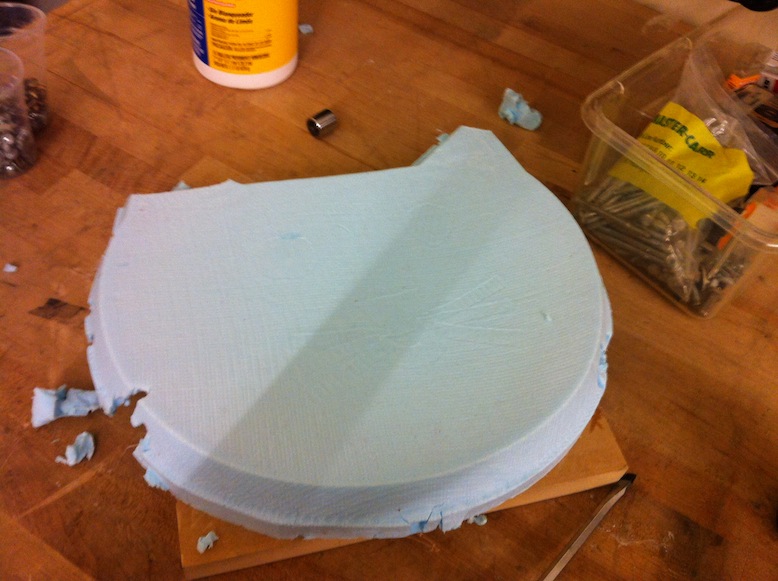
Machining the mold
I designed the positive of my part in SolidWorks and machined the mold out of foam using the Shopbot and 3D PartWorks software. This process was pretty straightforward and my part took about 50 minutes to machine. I used a 1/2" ball endmill, a spindle speed of 12000 rpm, a feed rate of 200 in/min, and a plunge rate of 75 in/min. For the roughing toolpath, I did a 25% stepover and for the finishing toolpath, I did a 15% stepover. I was pretty happy with the surface finish and everything went smoothly.
Making the composite
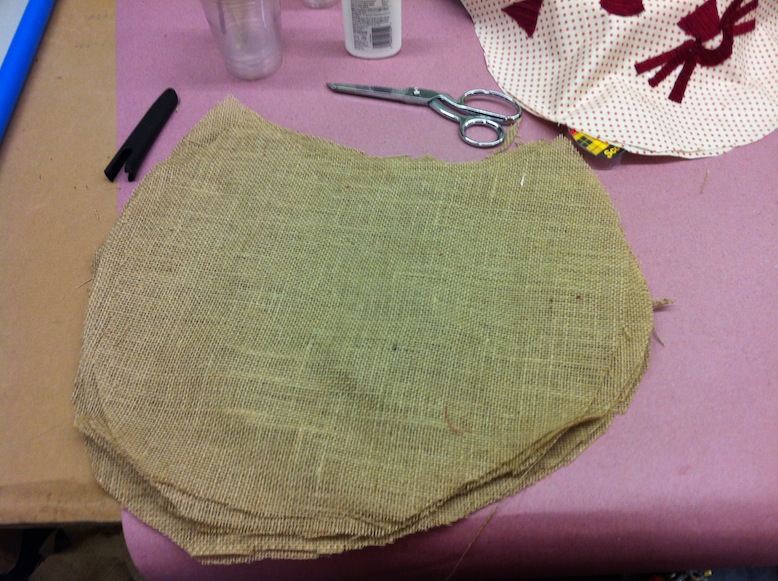
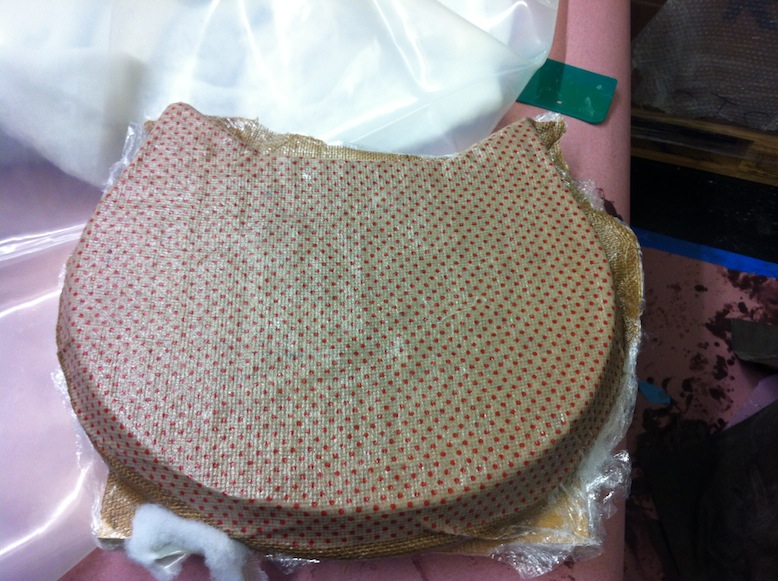
I bought some pink polka dot fabric and cut it to the shape of the mold, ensuring that the sides would be covered. I used scraps of red corduroy to make the features of a cat face. This fabric piece with the cat features was my first layer. I then cut 5 layers burlap to the shape of the mold and also created an outer layer with the polka dot fabric. I cut the foam mold on a band saw so that the edge followed the shape of the cat face to ensure that the vacuum would apply enough clamping pressure on the part.

I also double-stick taped some MDF to the back of my foam mold to give it some support and prevent the mold from bending under vacuum pressure. Unfortunately, I do not have pictures of mixing and applying the epoxy and setting up the part to be vacuumed, since it was quite a messy process and it was too difficult to photograph and do simultaneously.
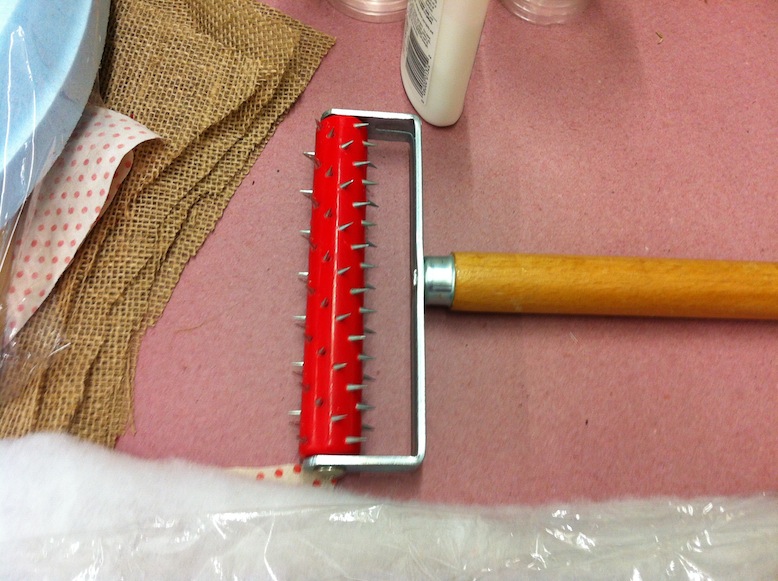
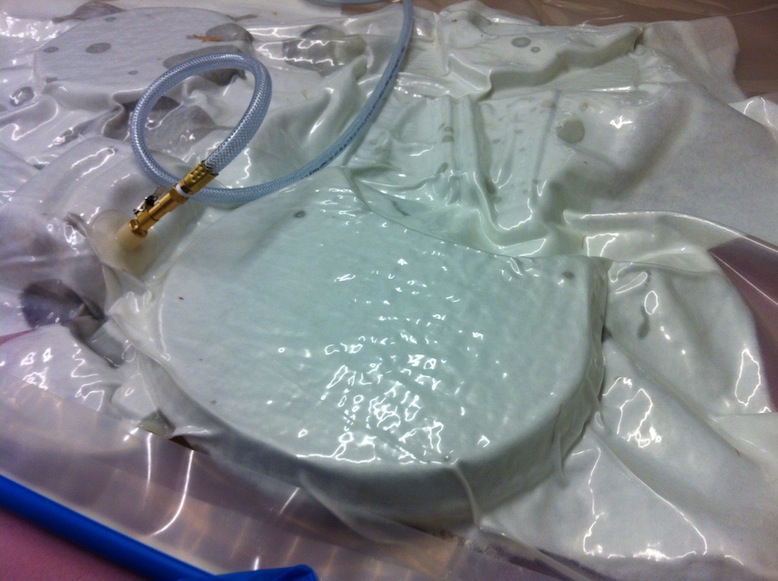
First, the foam mold is covered with plastic wrap to prevent the epoxy from sticking to the foam. Then the epoxy resin is mixed (the epoxy is dispensed in two parts) and then poured and scraped over the fabric layers to wet them. The fabric layers are then placed over the plastic wrap covered foam mold. On top of the fabric layers, I placed a layer of peel-ply, which was just a piece of plastic wrap punctured with this funny Medieval looking roller pokey tool. Then on top of that I placed a bleeder, which is a polyester batting that absorbs the resin that comes out of the holes on the peel ply when the part is vacuumed. The vacuum bag is then sprayed with mold release and then I put my part in and left it there for 24 hours to cure.
After 24 hours, I removed my part. The resin leaked out the sides and bonded the edges of the fabric to the MDF and foam mold, so I had to destroy the foam mold and use a screwdriver and mallet to get the part to come out. Then I cut away the excess material on the sides using a bandsaw.
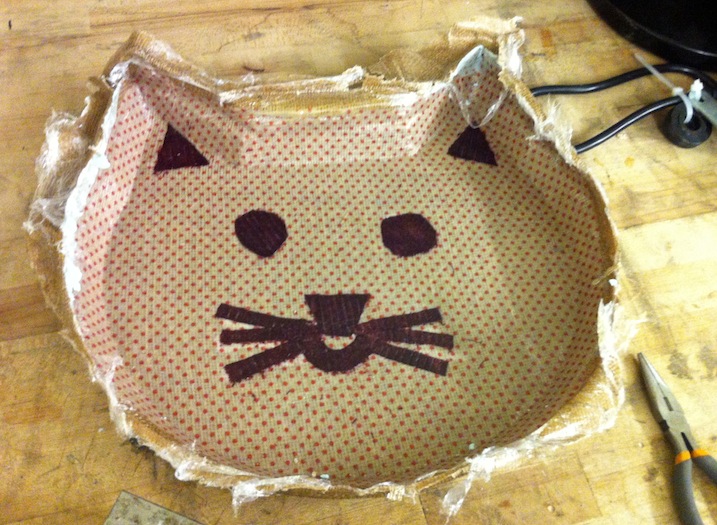
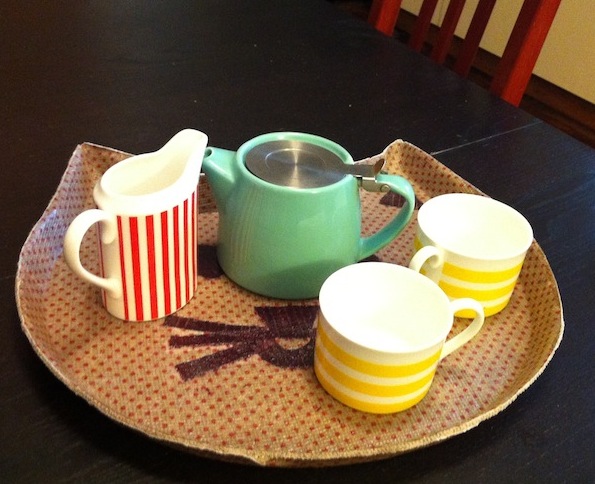
Here is my finished tea tray! My tea set fits nicely on it.