Final Project
Blimp!!
This blimp is made of helium filled balloons. Originally I intended to make my own balloon, which turned out to be more difficult than I had envisioned. So instead I used hot dog and cat balloons, which I thought was appropriate since two of my previous weekly projects feature either a hot dog or a cat. The blimp has three motors with 3D printed propellers. The motors are controlled remotely using IR communication between an IR LED on a joystick controller and an IR receiver on the PCB with the motors.
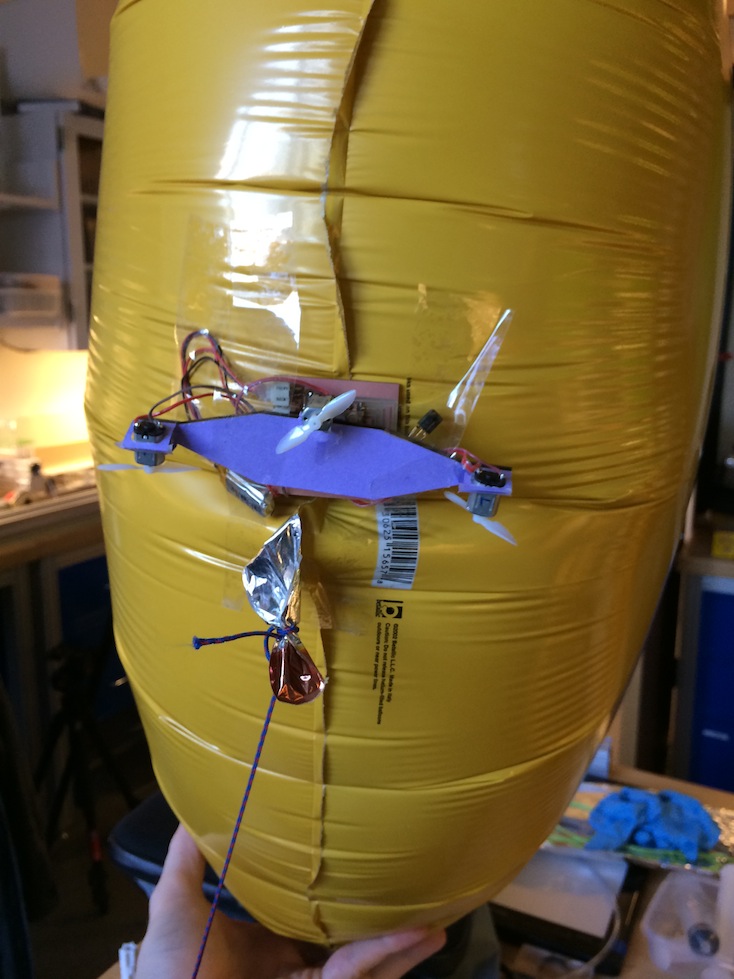
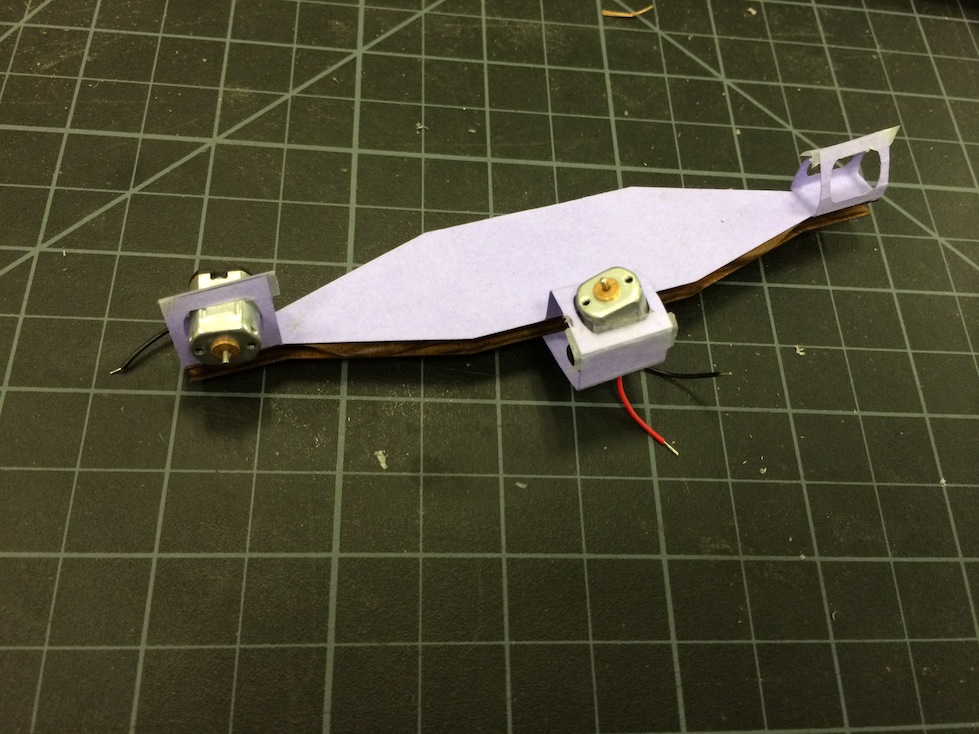
The motors with the propellers are attached to the underside of the blimp.
And it flies!
Admittedly, the blimp is difficult to control and is easily pushed by ambient air currents. It turns out propeller design and aerodynamics of the balloon are extremely non-trivial... So, here's a video of it crashing (not catastrophically... whew!) during a test flight.
Here's a close-up shot:
Testing the motors with the joystick controller
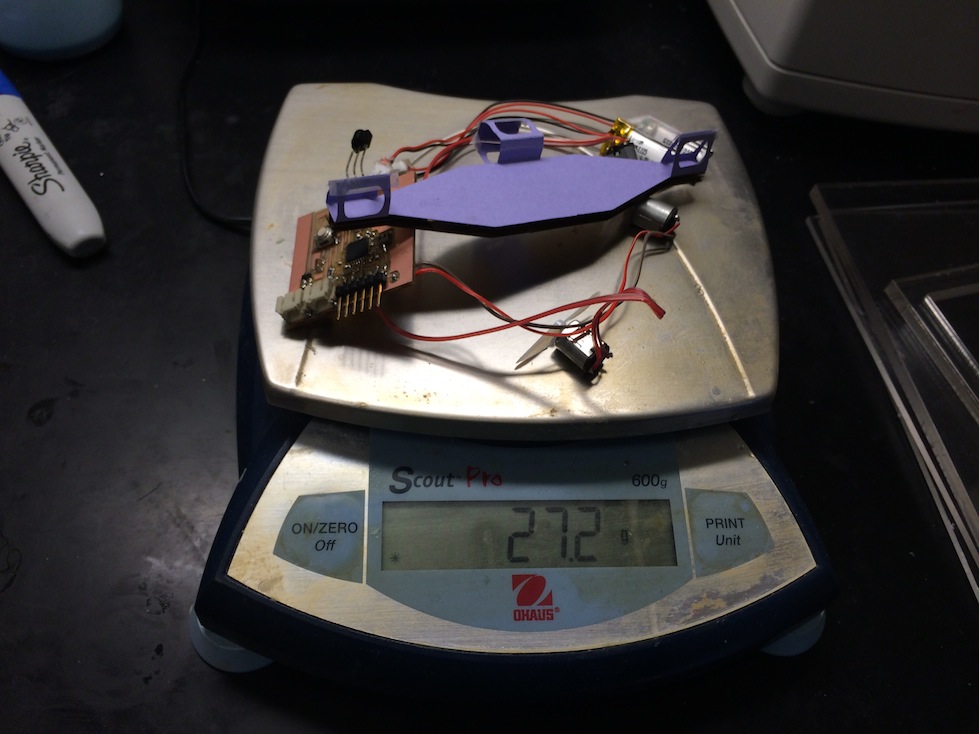
At first I couldn't get the motors to run on my first motor PCB. Then, from the datasheet for the H-bridges I was using, I figured out that I needed at least 7 volts for the H-bridge to drive the motor. However, weight was a huge issue for the blimp, so I couldn't just use a heavy 9V battery. So I had to re-designed the board and put two li-po batteries in series. Then I added a 5V regulator to bring the voltage down for the microcontroller. This worked, and the motors were then able to run.
Using an Arduino libary called called IR Remote, I programmed the joystick controller board to have the IR LED send out IR signals corresponding to different joystick motions. As a failsafe, I used the same hex codes from a TV remote I had at home for the up, down, left, and right buttons. This way, I could also use my TV remote to control the motors with the same codes. I programmed the motor PCB to receive the IR codes from the controller. In the code, I mapped the controller motions to the motion of the propellers. For forwards, I had both of the side motors go forwards, and opposite for backwards. For right, I had the left motor go forwards, and the right motor go backwards, and opposite for left. For up and down, I had the vertically oriented motor go forwards or backwards.
I tested my code with the joystick controller.
I was also able to control the motors with a regular TV remote.
Files:- Arduino code:joystick controller and IR sending code, motors and IR receiving code
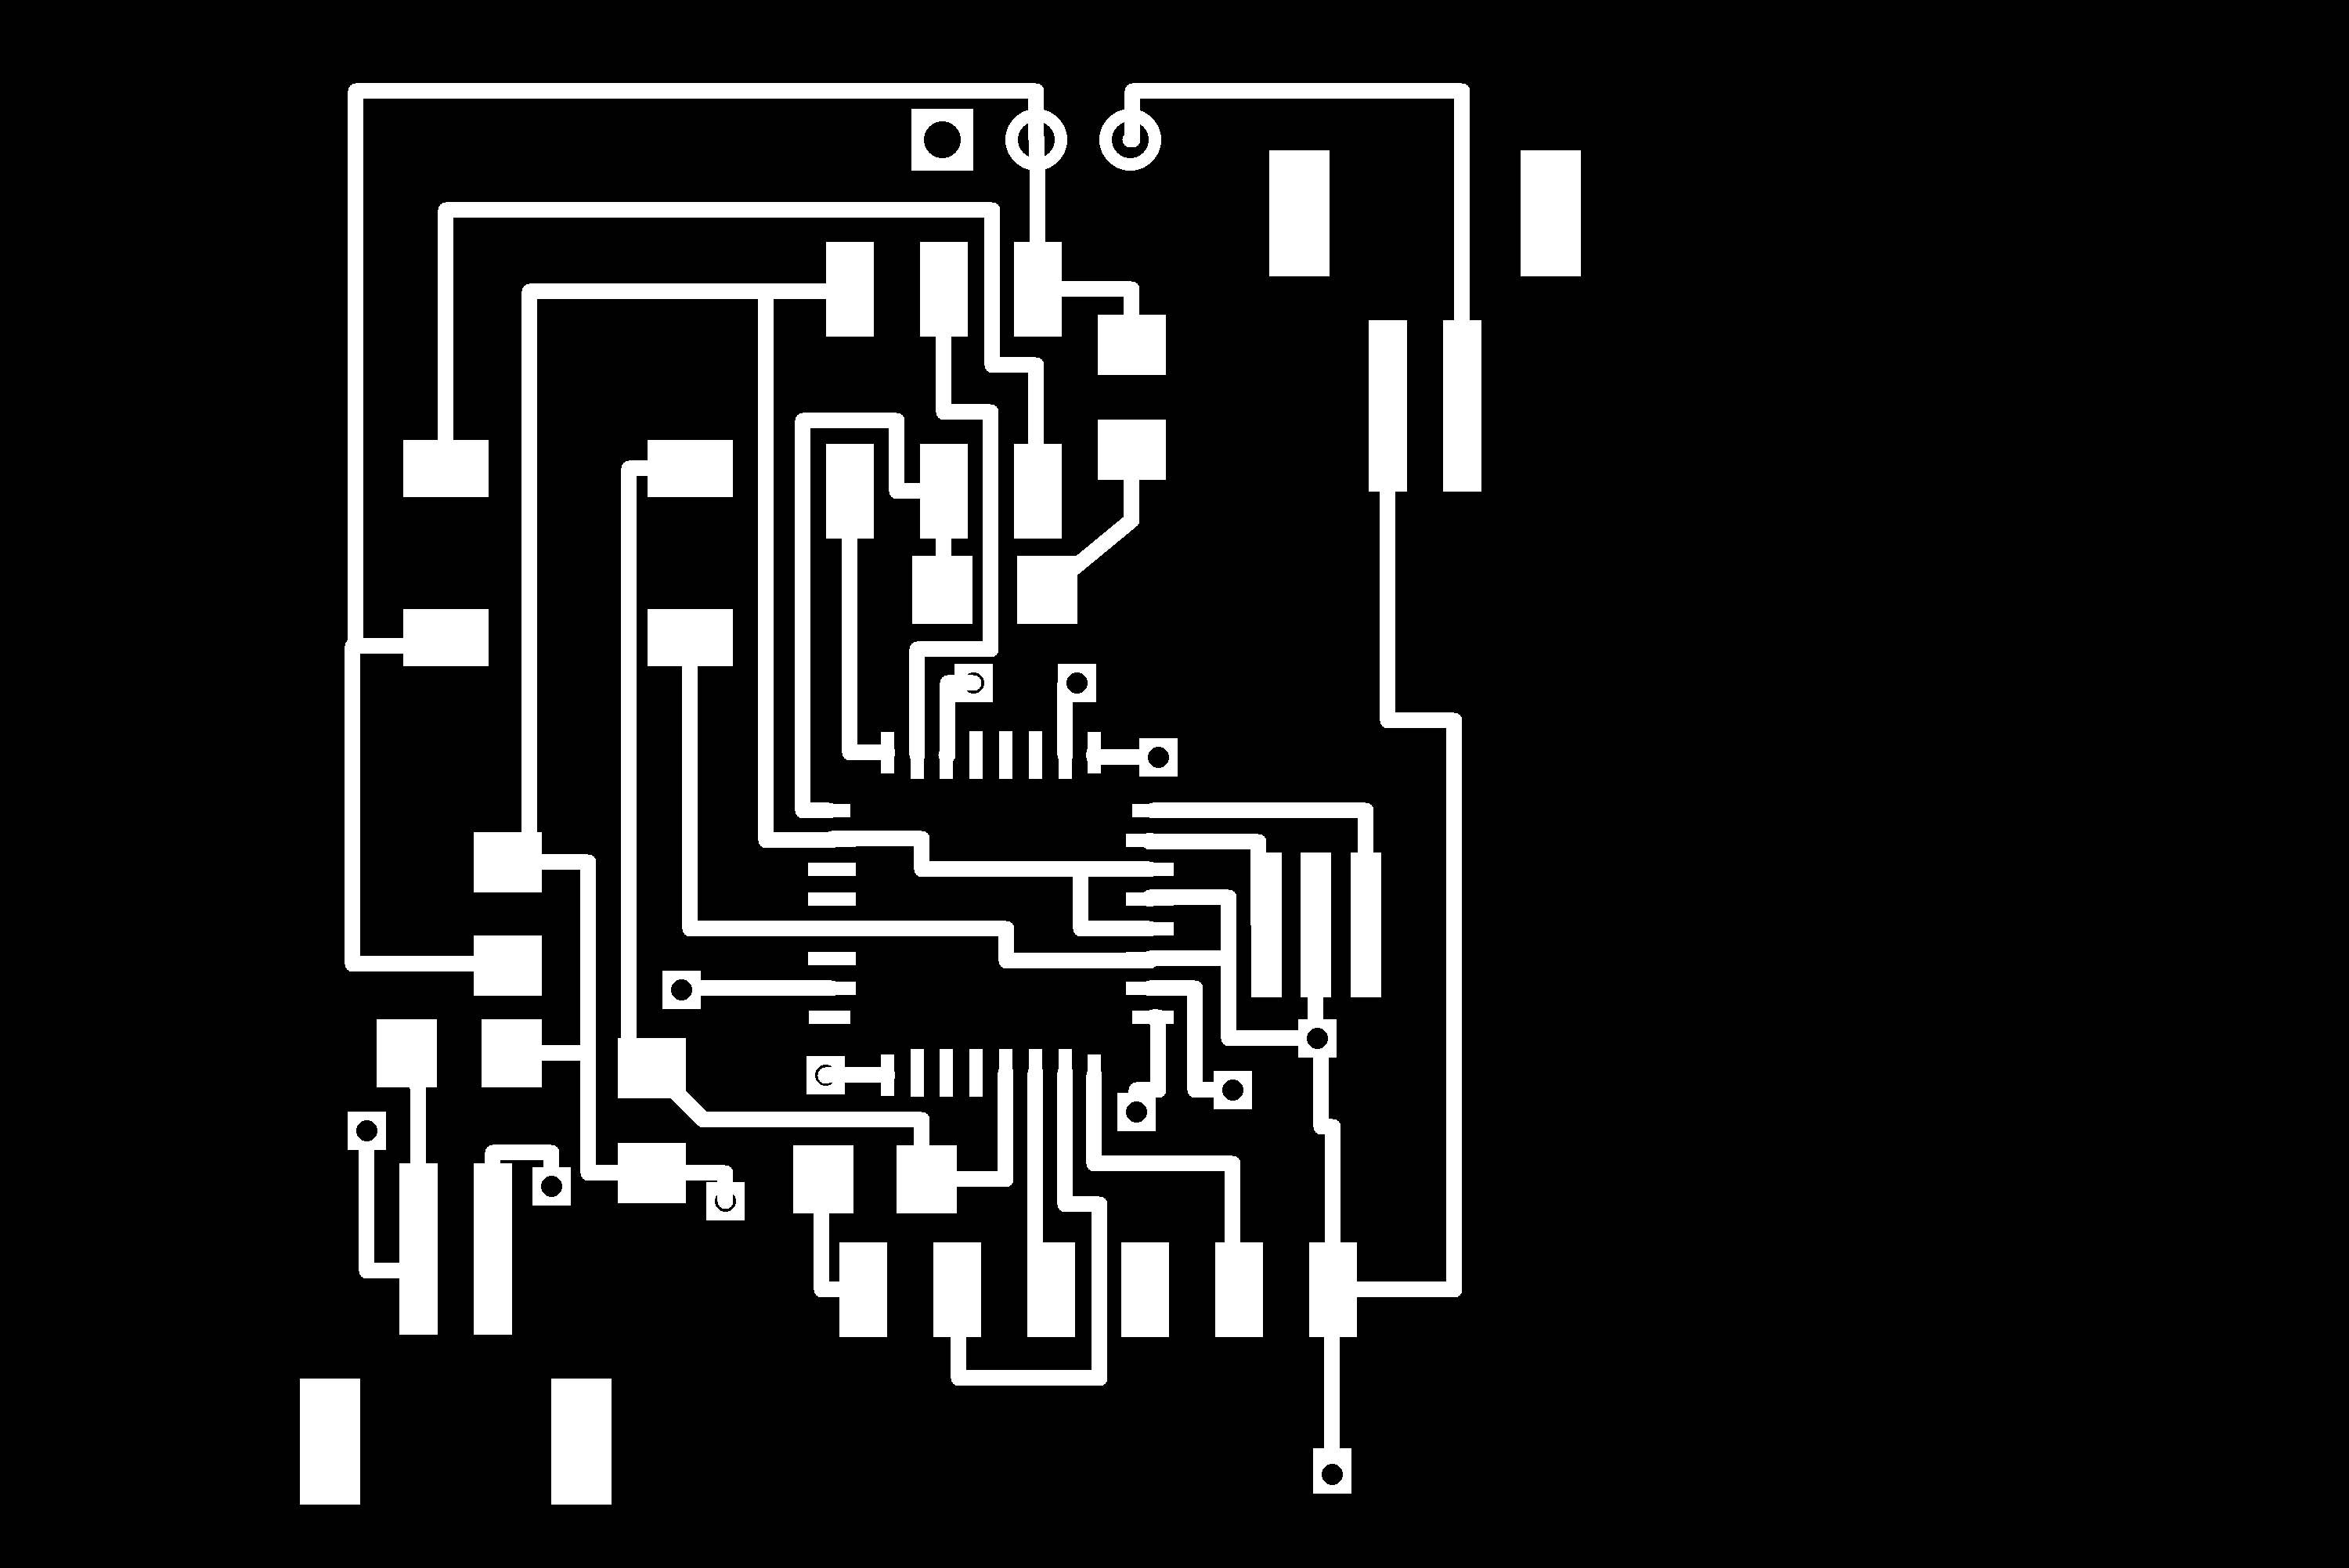
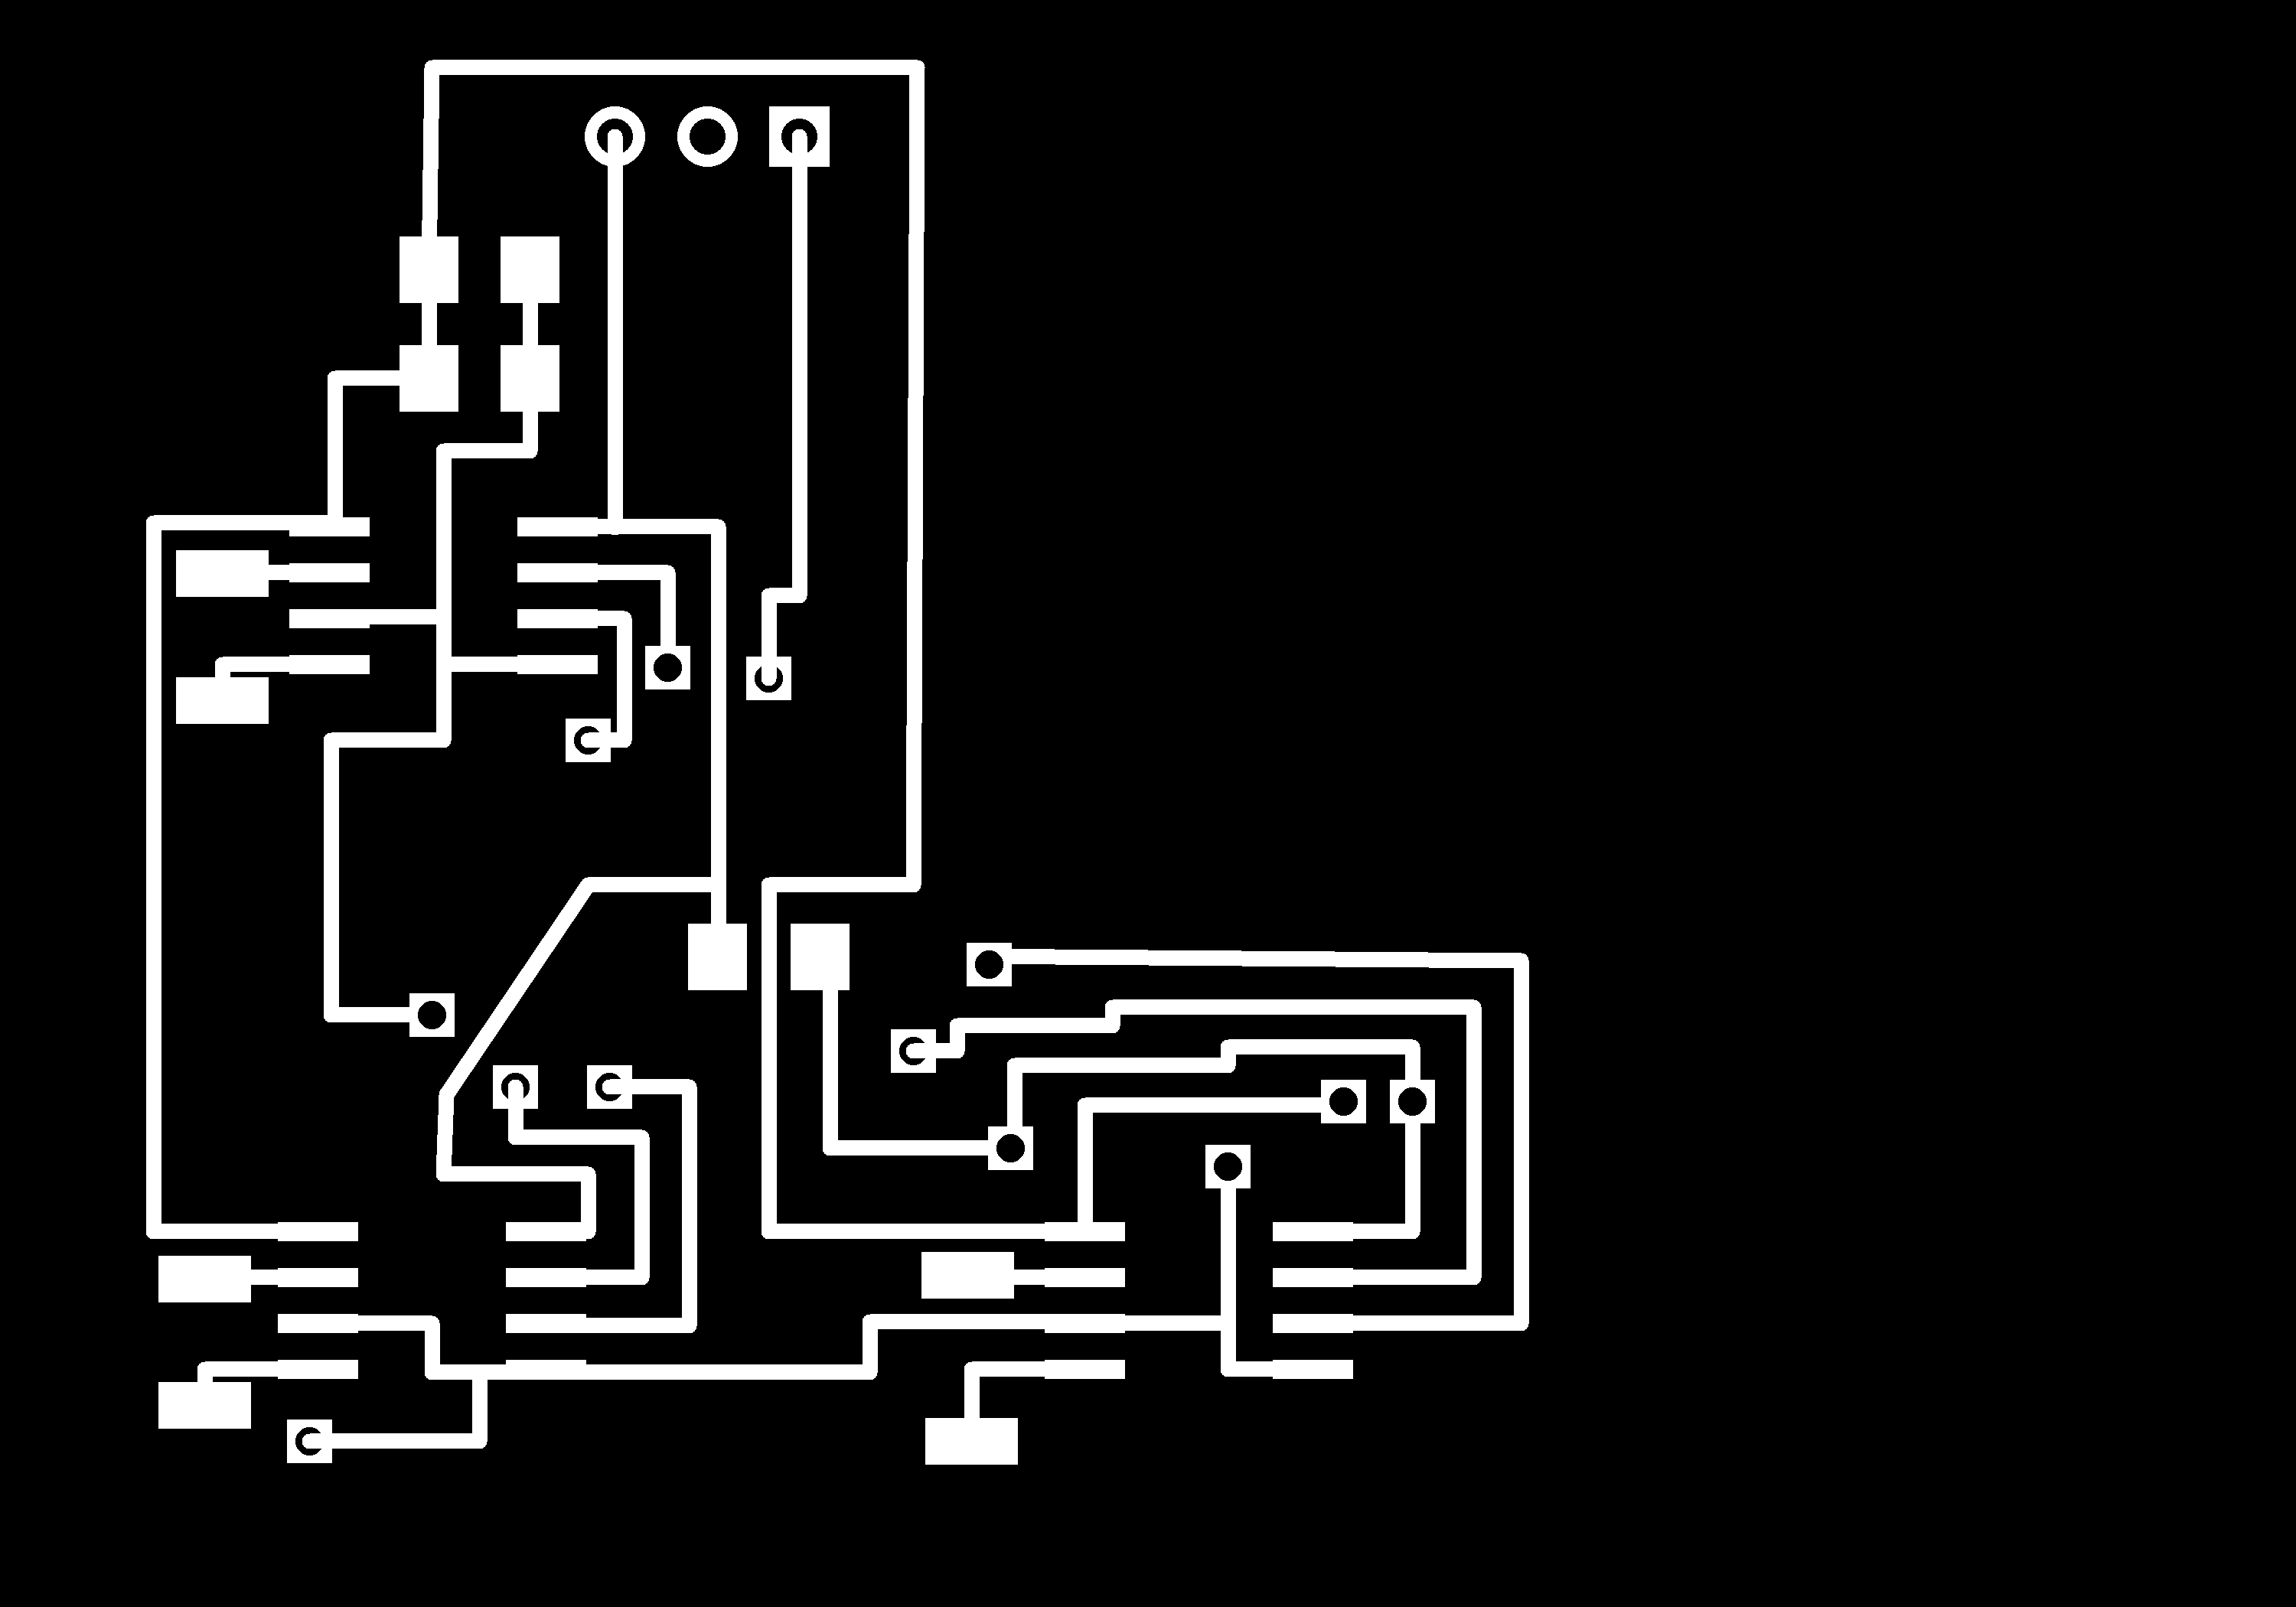
- DC motor PCB EAGLE files: schematic and board
- PNG files: front, back, holes, outline
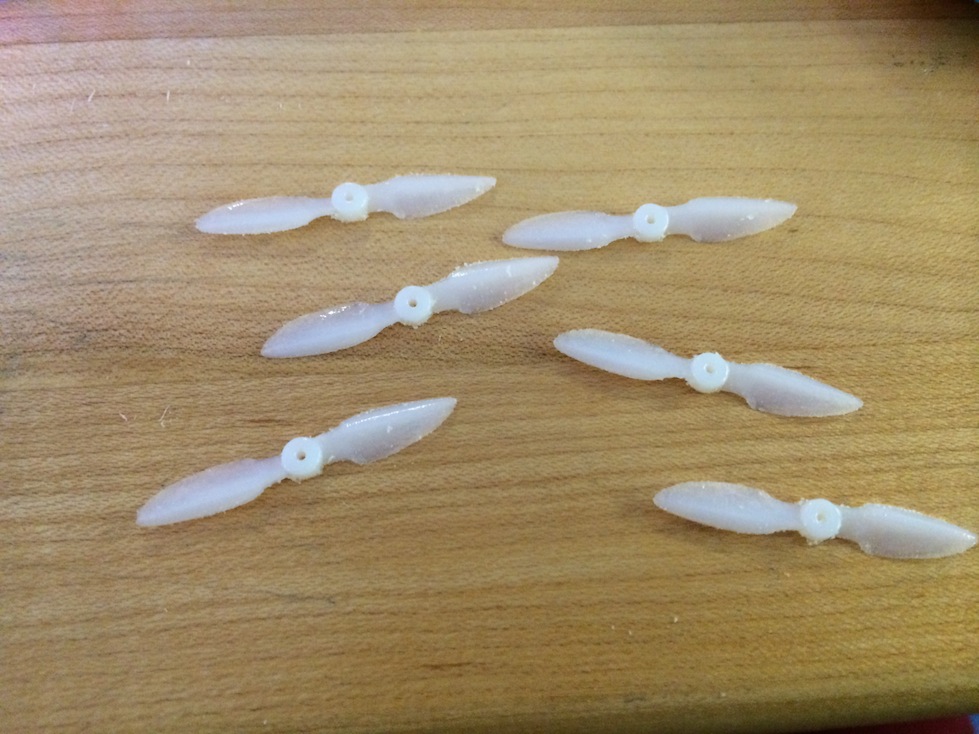
3D printed propellers
I found my previous propeller design to be a bit flimsy, so I thickened up the propellers for the final design and 3D printed them using the Objet 3D printer.
File: propeller STL
Laser cut controller box
For a finishing touch, I laser cut a box for my joystick controller. I was introduced to this really neat website that automatically designs press-fit boxes for you according to your desired dimensions. I used this tool and then modified my design to include cutouts in appropriate places.
File: controller box design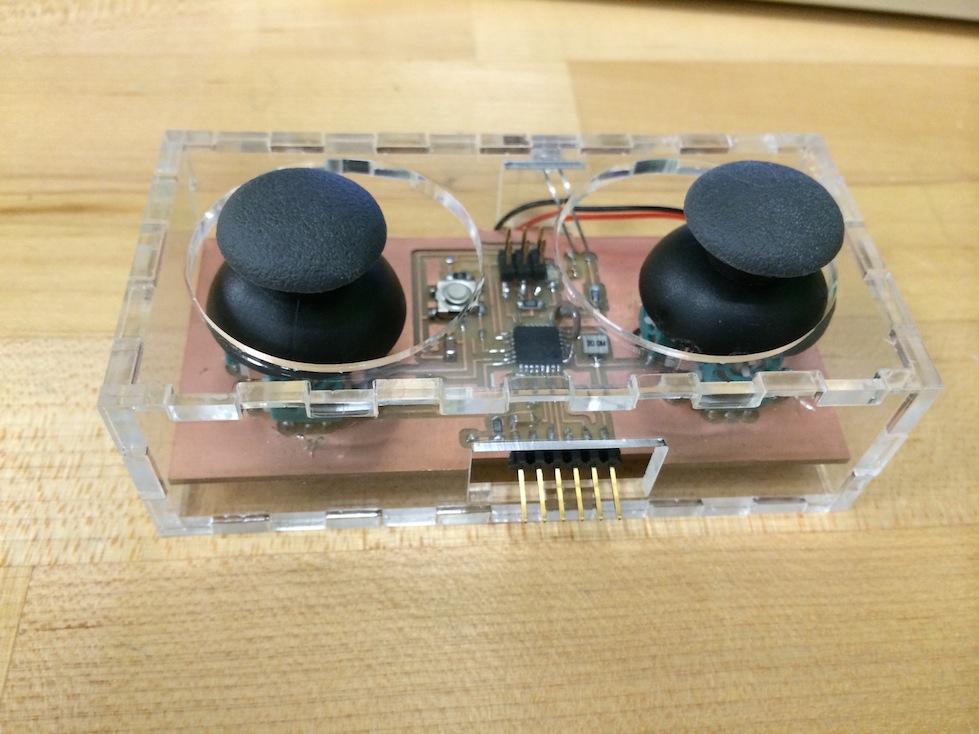
Laser cut blimp gondola
I had previously referred to what is known as the blimp's "gondola" as the "chassis", but after a little bit of research, I learned that the thing under the blimp holding the motors (and passengers) is called the "gondola". I sketched up the gondola in Adobe Illustrator and laser cut the shape out of cardboard and paper. The paper piece has holes for the motors. The paper was glued to the cardboard and folded to hold the motors in place.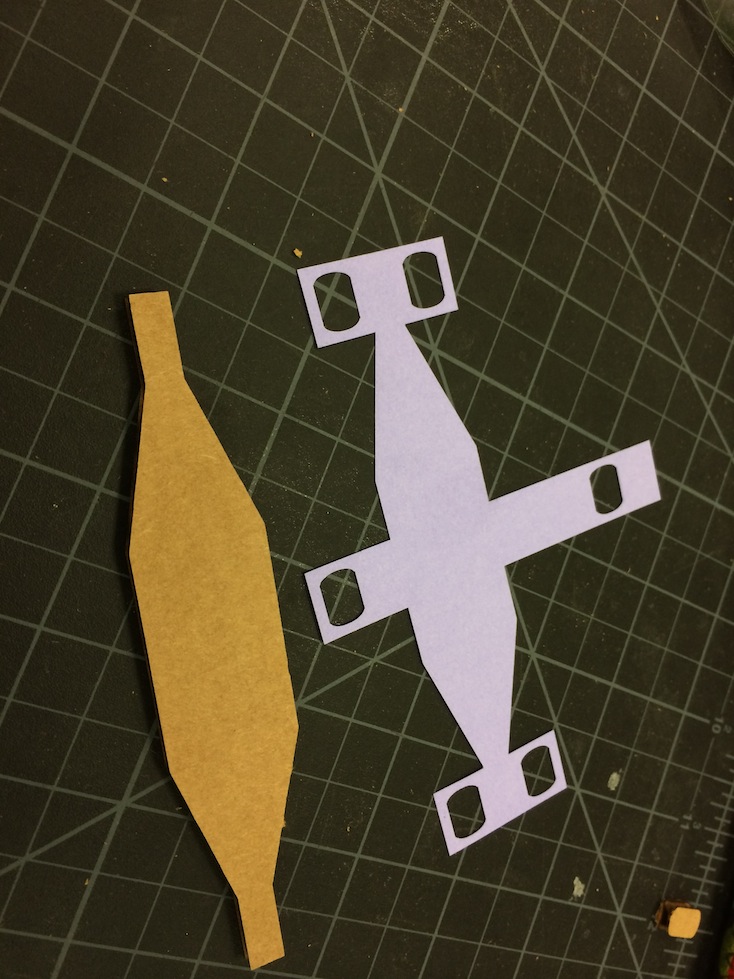
 File: blimp gondola design
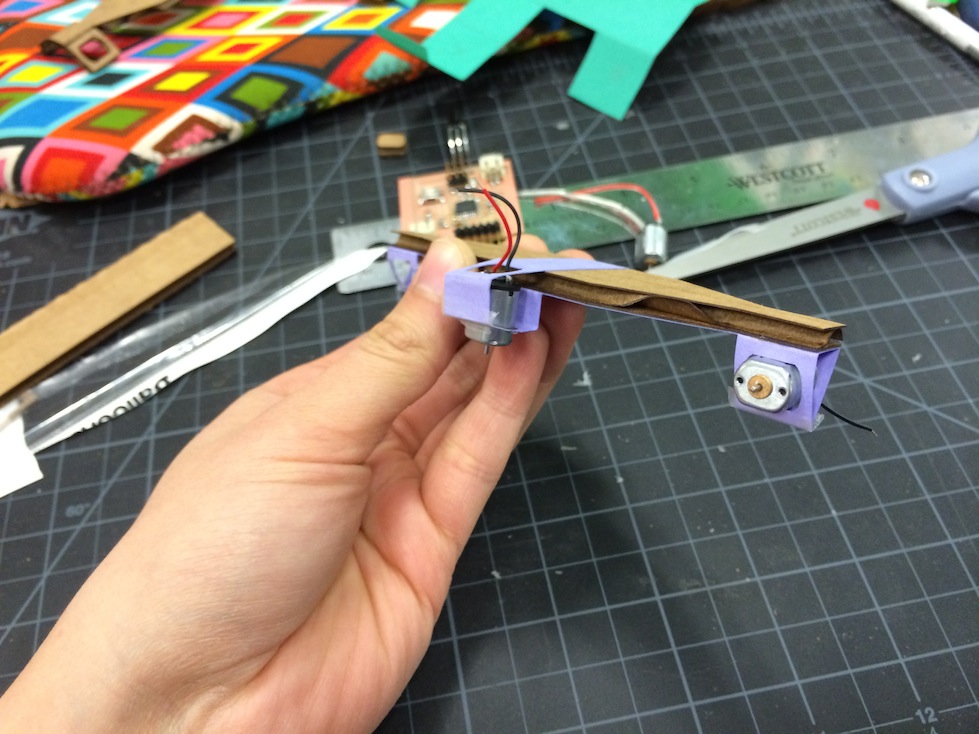
Inflatable body
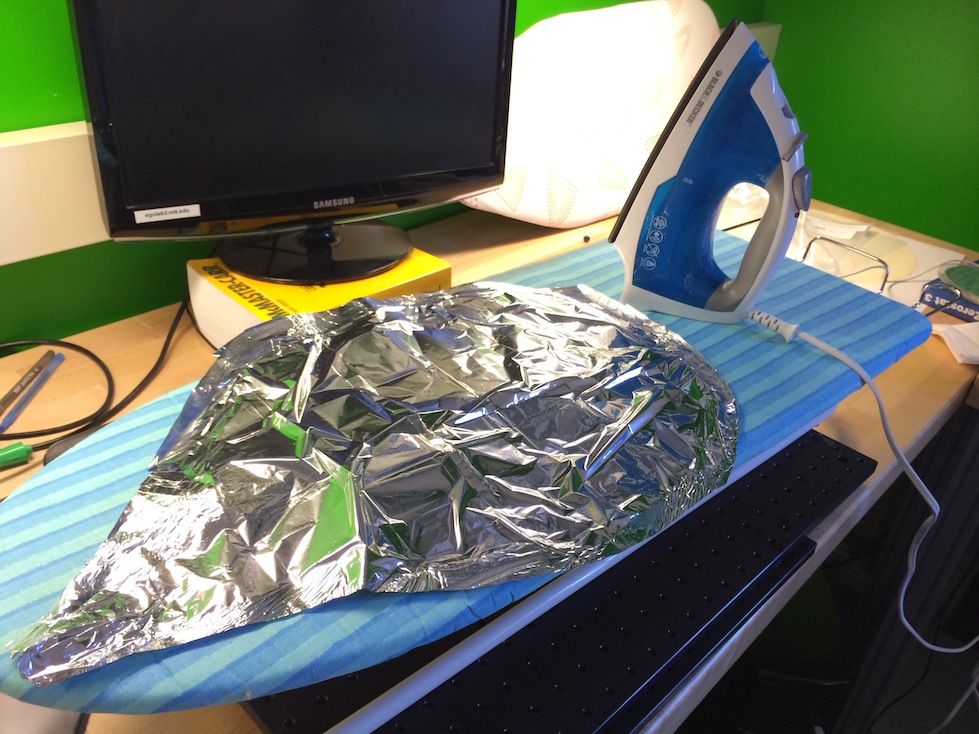
At first, I attempted to make my own balloon out of mylar. I bought mylar emergency blankets and cut out a simple balloon shape. I used an iron to make heat-sealed seams. From reading on several websites, I decided to use the wool setting on the iron. This seemed to work ok and I was able to make heat-sealed seams. However, the seams were really easy to pull apart. I tried increasing the temperature (using the highest cotton setting) to get a better seal, but this just melted holes in the mylar. When I tried inflating the balloon with air, the seams burst almost immediately under the smallest amount of pressure. Unfortunately, I didn't have any other balloon making materials on hand, and it was too late to get any. In the future, I would like to try plastic film sealing using the laser cutter as a method for making inflatables.
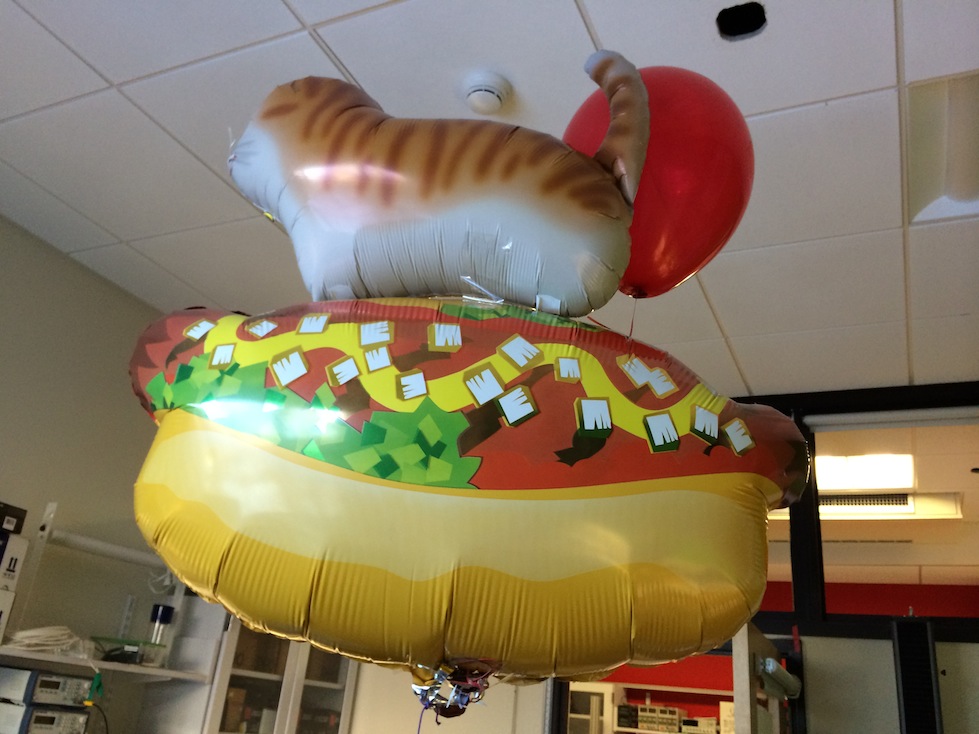
Seeing that I probably wouldn't be able to successfully make my own balloon in time, I decided to proceed with store-bought balloons. I knew weight was going to be a big issue. After inflating the hot dog balloon, I measured the lift by tying it to a 300 g weight and placing it on a scale. The scale read 277.1 g, meaning that the hot dog balloon had a lift capacity of 22.9 g. After iterating on my motor board and having to add an extra li-po battery, my components became too heavy for the hot dog balloon to carry. The motors, PCB, batteries, propellers, and gondola all together weighed 27.2 g.
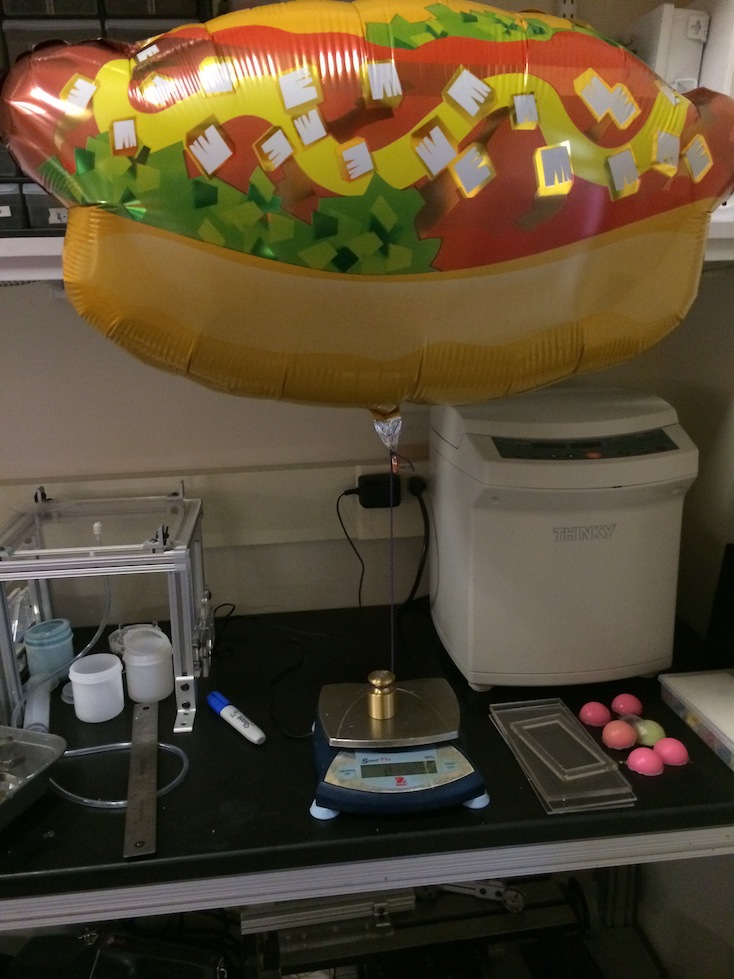
To add more lift capacity, I taped a cat balloon that I had also bought earlier to the top of the hot dog balloon. This was a little bit under the necessary lift capacity, so I also added a small red party balloon. That was just enough lift capacity to make the blimp almost neutrally buoyant, with the added weight of a small piece of card stock on the end of a string.
