Week 10 Composite
This week we need to make something with composite materials. I have never heard of composite before this class. I have been always
thinking of buying a laptop table which I can put on my bed. After the lecture of this week I decided to make one instead of buying one :D
For this session we are using burlap and epoxy. It will create pretty strong materials. The largest problem is, although cured epoxy poses
few health risks, liquid and partially cured epoxies may cause health threats including dermatitis and skin inflammation.
Thus we need to be very careful while working with this chemical. Protection suit, two layers of gloves and even mask will be needed.
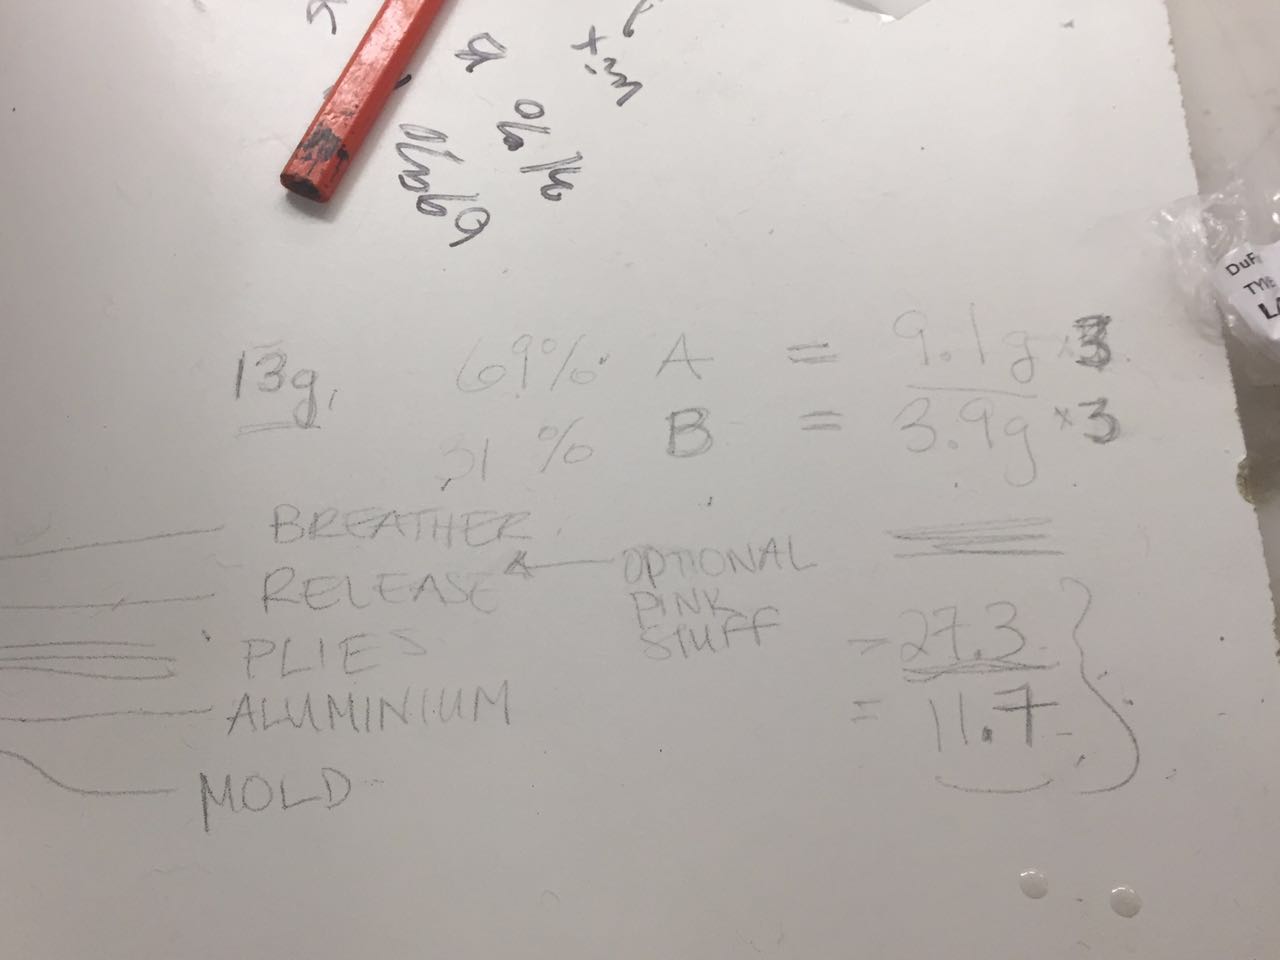
During TA session Calvin has showed us steps of mixing the resin and layering up fabric. The ratio of part A and B of epoxy is 100g to 43g,
and the ratio of epoxy to fiber is 3 to 1. Different from what we have done to the oomoo mixing during molding and casting week, this week
we have to be very precise about the quantity since partially cured resin will be dangerous.
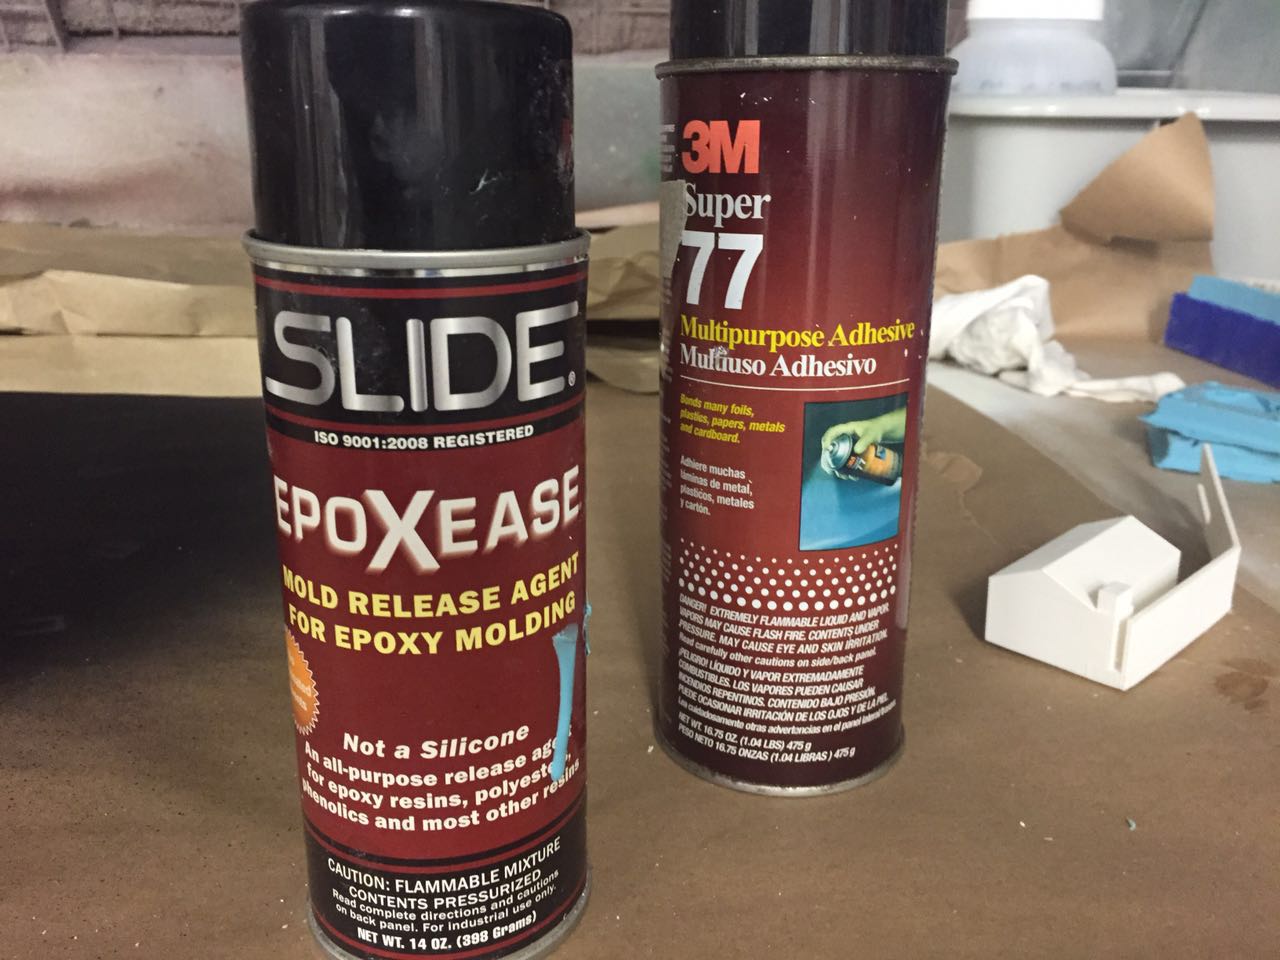
Also two spays will be needed: mold releasing and multipurpose adhesive. These two spray cans looks
very similar sometime but they are for totally opposite purpose, so don't mistake these two.
table design
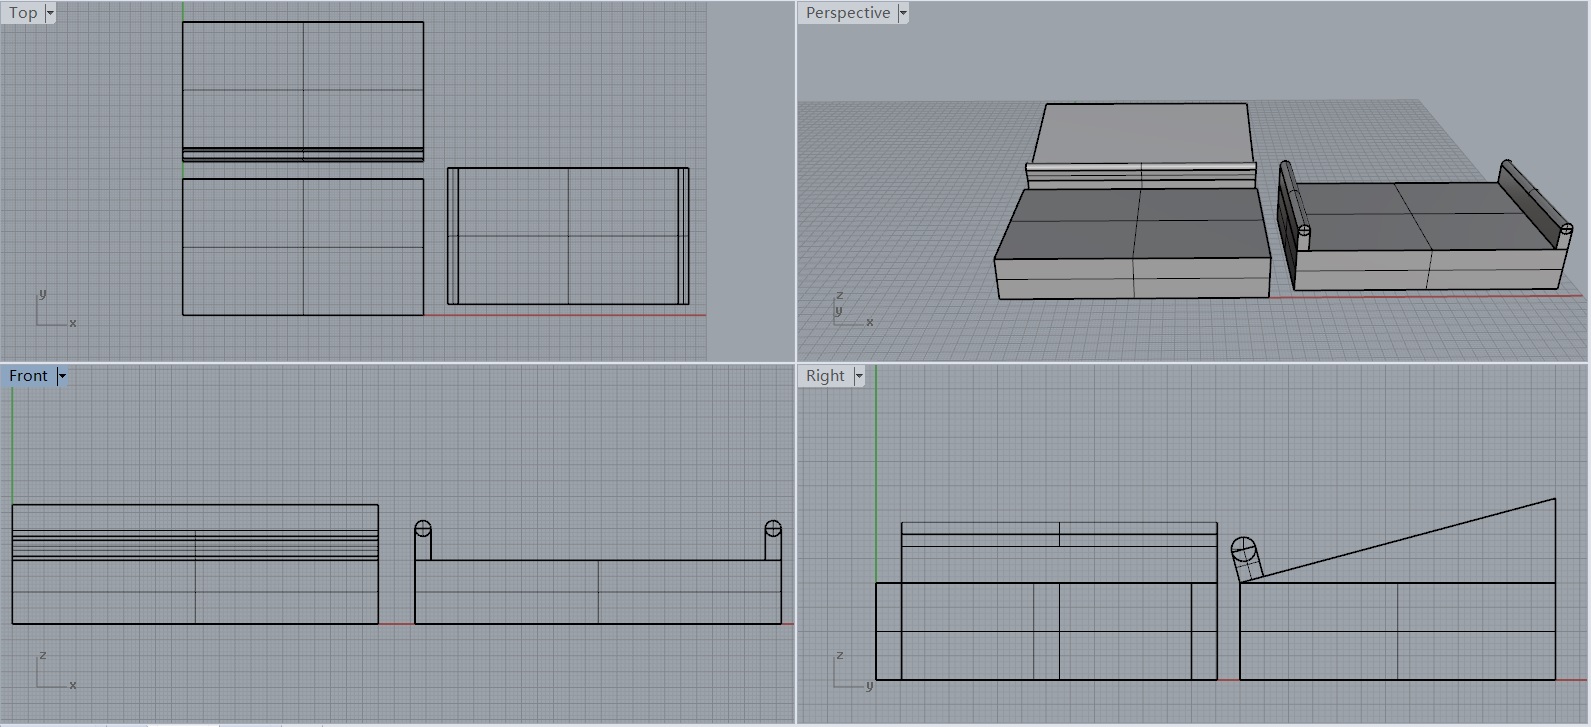 I measured the size of my bed and my own body to have a rough idea about the size of the table I want.
Since we are going to use CNC machine cutting 2 inch foam for the mold, I designed it in a way which could be
properly machined.
I measured the size of my bed and my own body to have a rough idea about the size of the table I want.
Since we are going to use CNC machine cutting 2 inch foam for the mold, I designed it in a way which could be
properly machined.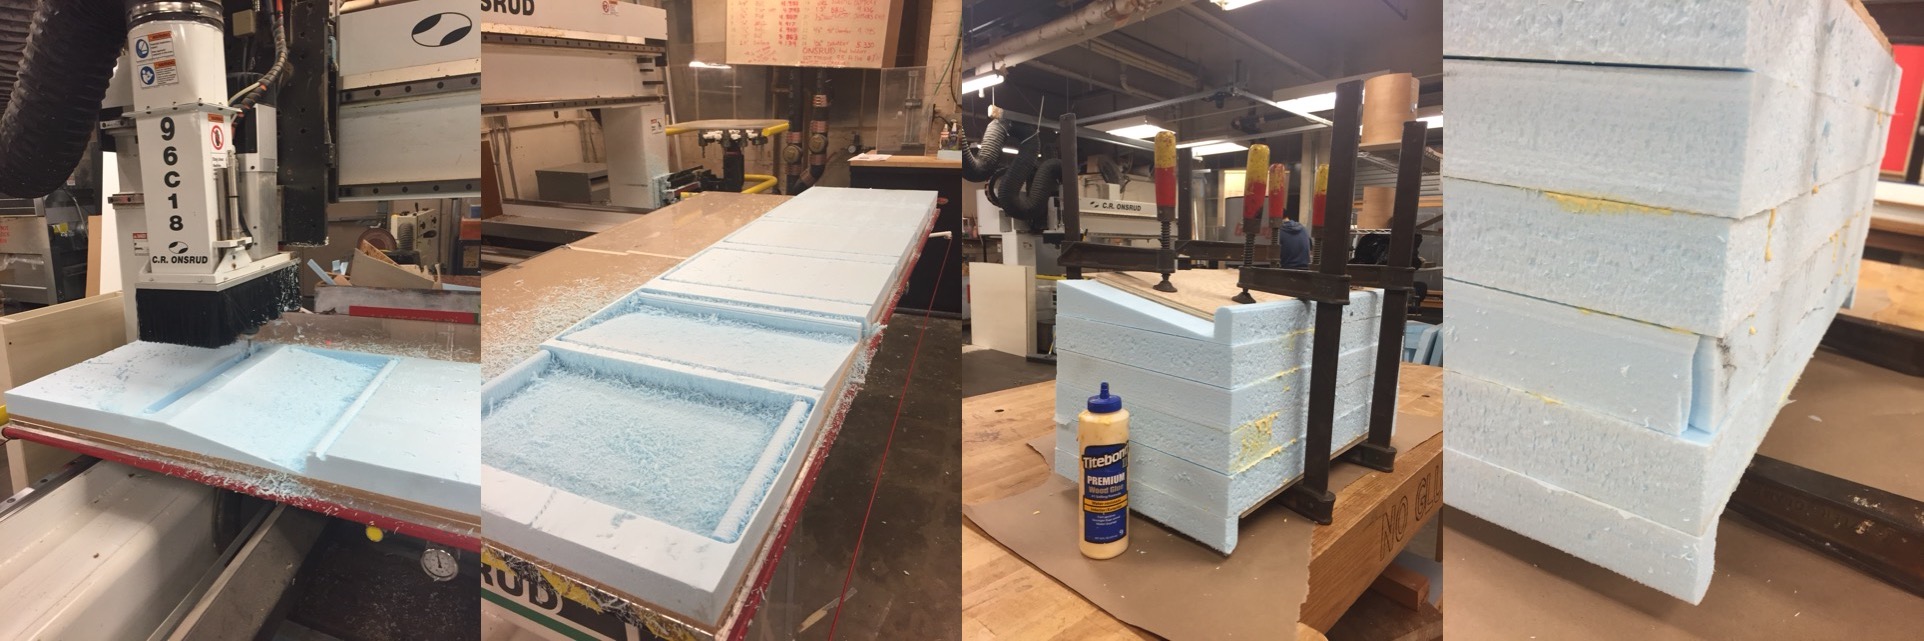 I went to the N51 shop, set up MasterCam files and run the machining. After cutting the foam I piled
them up and looked for glue to stick them together. I asked the shopkeeper on site at that time which
glue I can use for sticking these foams together. He said usually we use the Gorrilla glue but it was out of stock at that point,
so he gave me some yellow wood glue, said this will also work. I glued the foams, clamped them tight together, and went back home.
I went to the N51 shop, set up MasterCam files and run the machining. After cutting the foam I piled
them up and looked for glue to stick them together. I asked the shopkeeper on site at that time which
glue I can use for sticking these foams together. He said usually we use the Gorrilla glue but it was out of stock at that point,
so he gave me some yellow wood glue, said this will also work. I glued the foams, clamped them tight together, and went back home.The next day when I woke up I received an email from Christopher cc to all shop users saying that "using yellow wood glue to glue foam will not work. Use the Gorilla glue that looks like dark honey." So I rushed to the shop to check with my foam. Fortunately it seems to work this time in my case so I do not need to re-cut another piece of foam.
Layer up composites
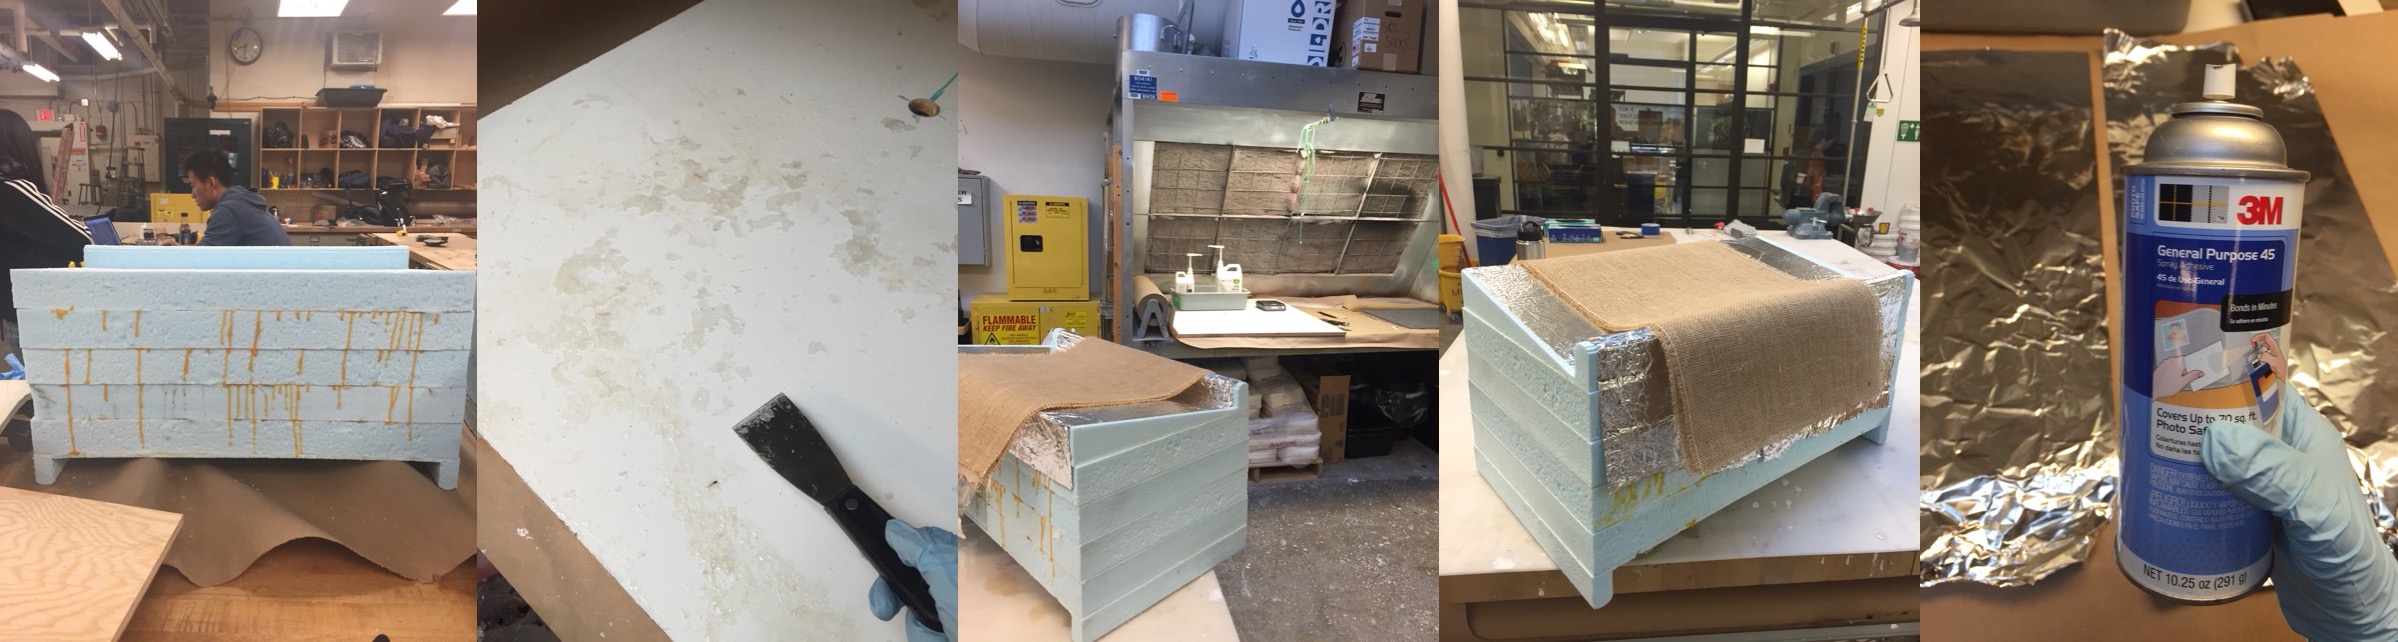 As mentioned before, this step could be dangerous, so we were not allowed to do this step alone. While I arrived the
shop there was leftover cured epoxies on the flat board I am going to use. So Jenn taught me
how to scrape these off and apply three layers of wax before I start to do my own layer up on it.
The process took me 2 hours of tough work…
As mentioned before, this step could be dangerous, so we were not allowed to do this step alone. While I arrived the
shop there was leftover cured epoxies on the flat board I am going to use. So Jenn taught me
how to scrape these off and apply three layers of wax before I start to do my own layer up on it.
The process took me 2 hours of tough work…Then Justin came in to supervise me. When he saw my foam piece he said it is too big and we may not have enough epoxy resin left for the whole piece. Maybe we can start from making part of it to get familiar with the process and then I can make the full piece if I still want it later.
So I ended up with just mapping the surface first.
 The tricky part for my design is it is not able to be fit in a vacuum bag, even we have a big enough
vacuum bag doing vacuum may break the foam legs. So we decided to place a piece of wood for pressing the
composite and form the sharp right corner I want, also use tape to hold the side parts tight.
The tricky part for my design is it is not able to be fit in a vacuum bag, even we have a big enough
vacuum bag doing vacuum may break the foam legs. So we decided to place a piece of wood for pressing the
composite and form the sharp right corner I want, also use tape to hold the side parts tight.After waiting for a night, I got my "semi" laptop stand!