Week 8 Molding and Casting
Our task this week is to design a 3D mold, machine it and then cast parts from the mold.
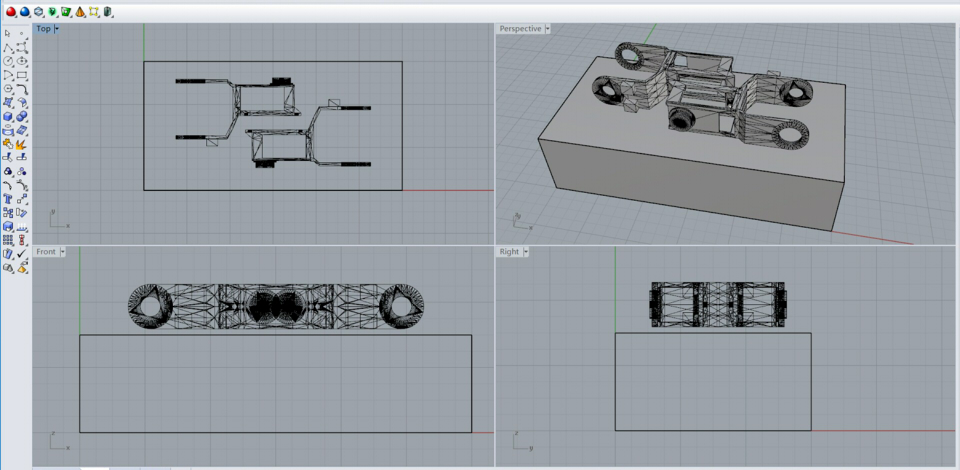
Since I would like to build a robotic arm for my final project, at first I was planning to cast
a spare part of it. But later I found the structure is hard to be machined, so I decided to just
cast something simple in order to go through the whole molding and casting process as well as
leave more time for me to focus on starting with my final project. Thus I designed a one side
mold with a set of two gears and a base, which ideally could be assembled and played with after casting.
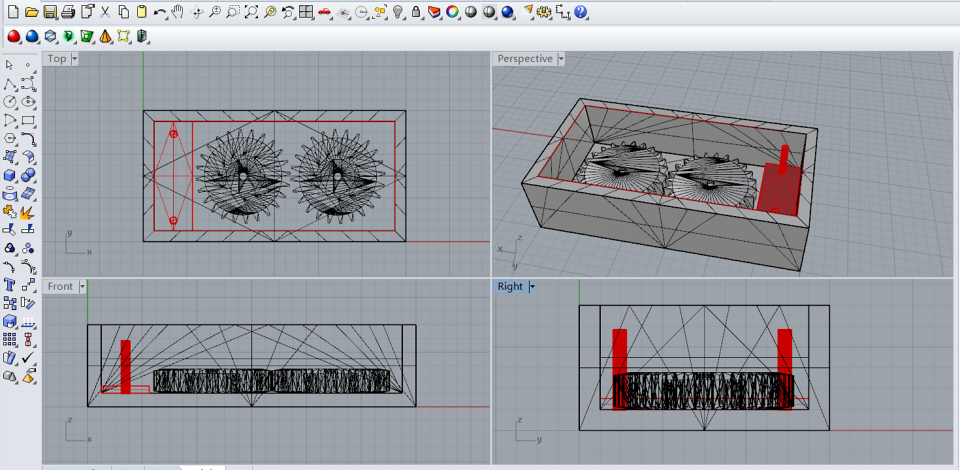
MasterCam
In our session we use Interlitek to machine the wax which is 6"x3"x1.5" in size. The TA has set up a Mastercam template for us with the rough parallel and finish toolpath, which would save us a lot efforts and time. Thank you Max!
A collision happened immediately in my first simulation of the finish toolpath because the end mill is going too deep and the holder is hitting on the edge of the wax. So I modified the positive mold design, left the base check level up. Then the Mastercam simulator went perfect so I exported the .NC files for the two toolpaths separately. At that moment I did not notice that I missed an important step which would lead to a disastrous result later at the machining step.
Second Board
 The steps to use intelitek are not complicated after watching the TA go through them once:
1. Hot glue the wax on the spoilboard (just for this week, there are other tools for fixing the materials if we are going to use the intelitek for other works)
2. Select the tool (end mill) I am going to use and install it in machine (for this work it is #6 3/8" flat and #1 1/8" ball)
3. Set zero for X, Y and Z using the control panel in software CNCBase
4. Open my GCode file
5. Start and run
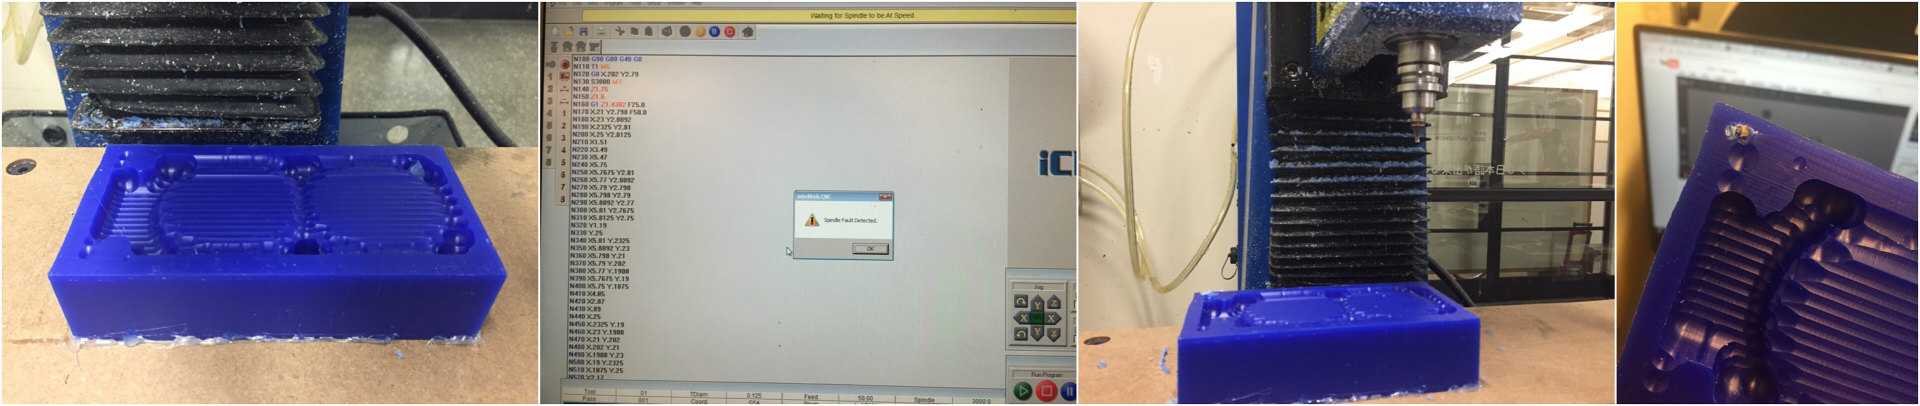
It worked well during the rough path, except for the end mill spinning above the wax and ran like that without cutting any wax. I stopped the machine and reset the Z zero but it still had the same problem. After checking the Mastercam I found it showed in the simulated path so I did not need to worry about my previous Z zero settings.
Nightmares started from the finishing path. After I changed the tool and reset the Z zero, the system showed "Spindle Fault Detected" when I clicked run. So I reset everything again from the beginning but it didn't work. Then I reopened my rough path GCode file and do the same setting as the first time, the "Spindle Fault Detected" was still there so I think maybe it's the problem of the machine. Finally it was solved by turning off the Intelitek controller power and re-activating the machine.
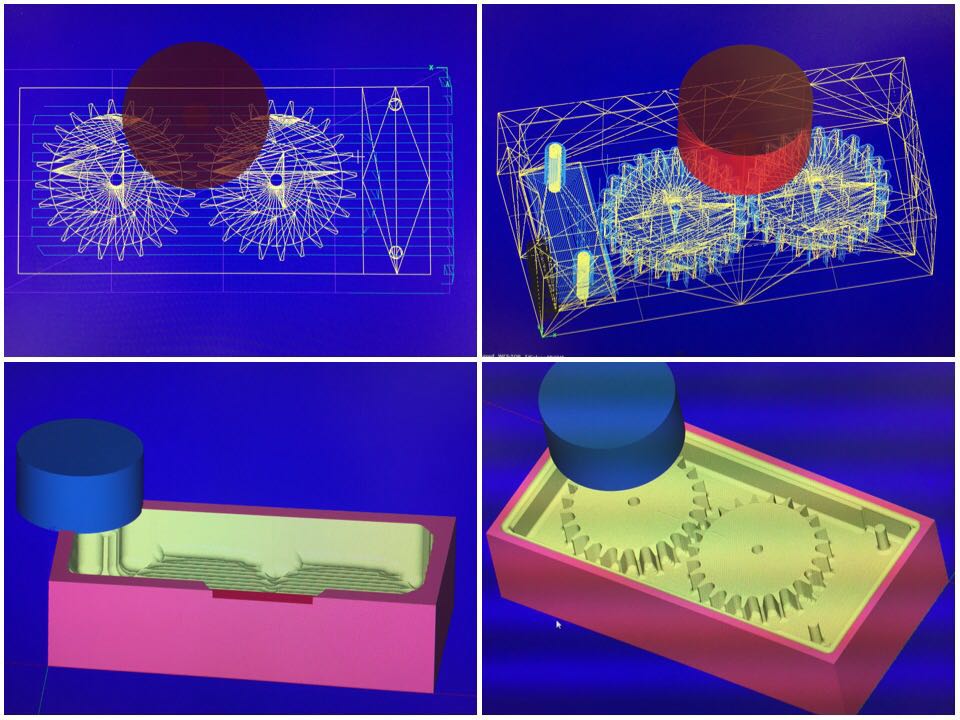
When the machine finally started to mill, I found the spinning speed is not as fast as I expected, so I turned to the screen and was about to try adjust it. At that moment I heard a crack sound so I stopped the machine again. This time I broke the #1 1/8" end mill. (I'm really sorry!!!) The cutting part was stuck inside the wax so it should be caused by a collision at the shank part. This confused me since there was no collision warning in the Mastercam simulation. Then I turned back to Mastercam to check through all steps and found the mistake I've made: I forgot to check shank and shoulder for the collision checking in the simulator, you need to check them yourself otherwise the simulator will only check the holder and cutting length.
Molding
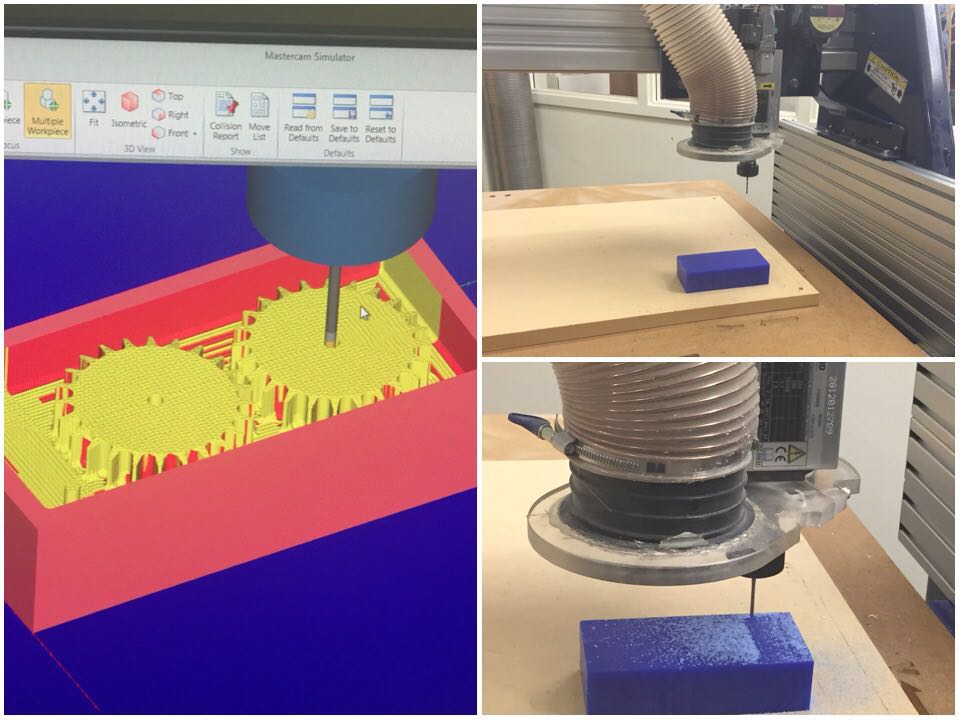
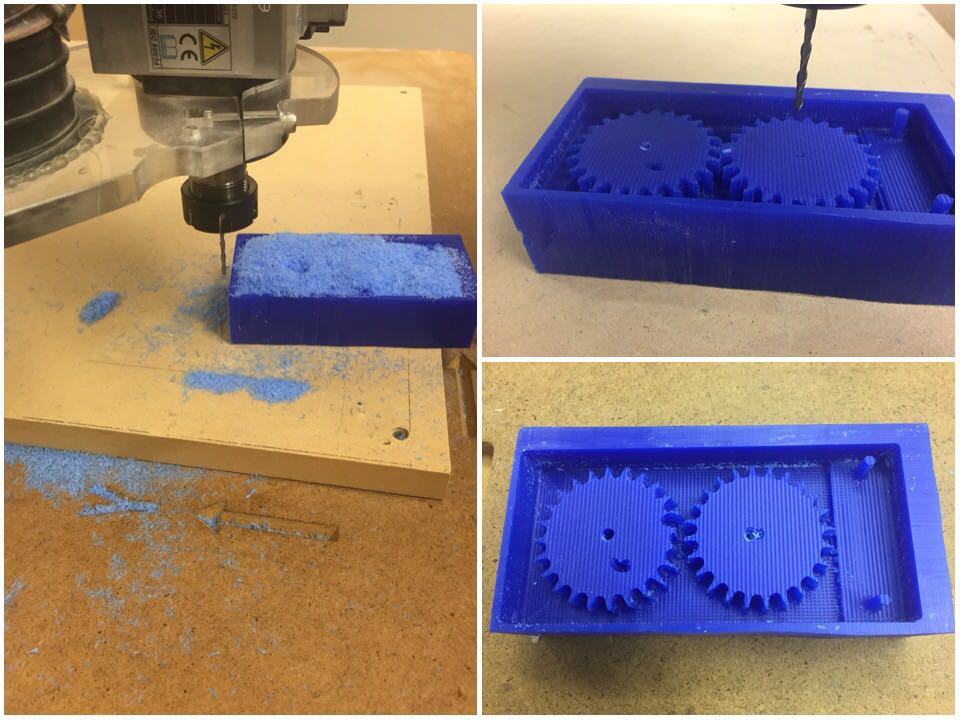
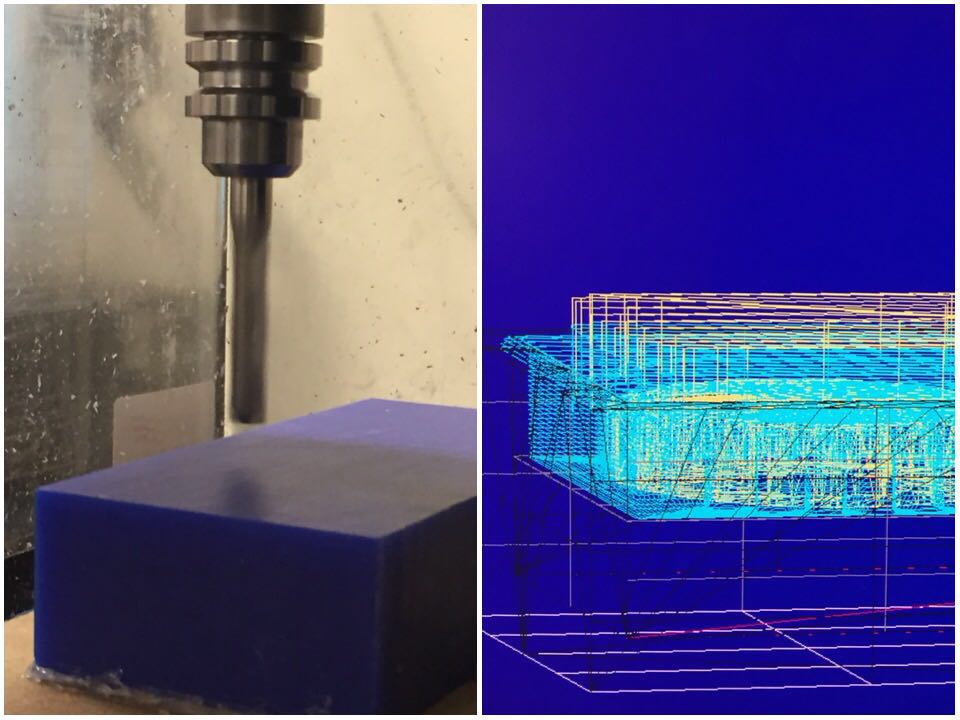
Now the problem is I could not avoid collision with the short 1/8" mill when working on the finish toolpath. So I asked TA for help after hours of fail attempts. Calvin suggested me to use the shopbot in this case since they have longer 1/8" end mills, and he kindly helped me with the set up. Everything went well… except (why so many "except"s) that the wax moved a bit in the middle of the milling process, so I stopped the machine and checked. There are unwanted mistakes but luckily it's not totally destroyed. It was Tuesday night already and there are waxes are out of stock. So I have no choice but to sticked the wax back again and resume the milling. I think at least I need to try casting once so I still pulled oomoo.
Casting
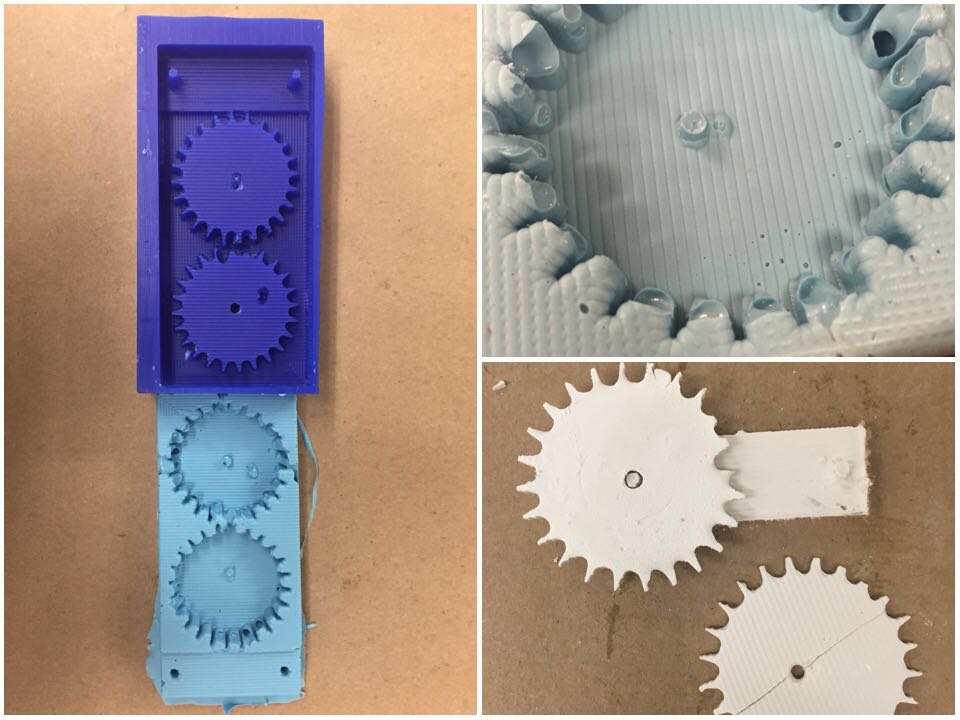
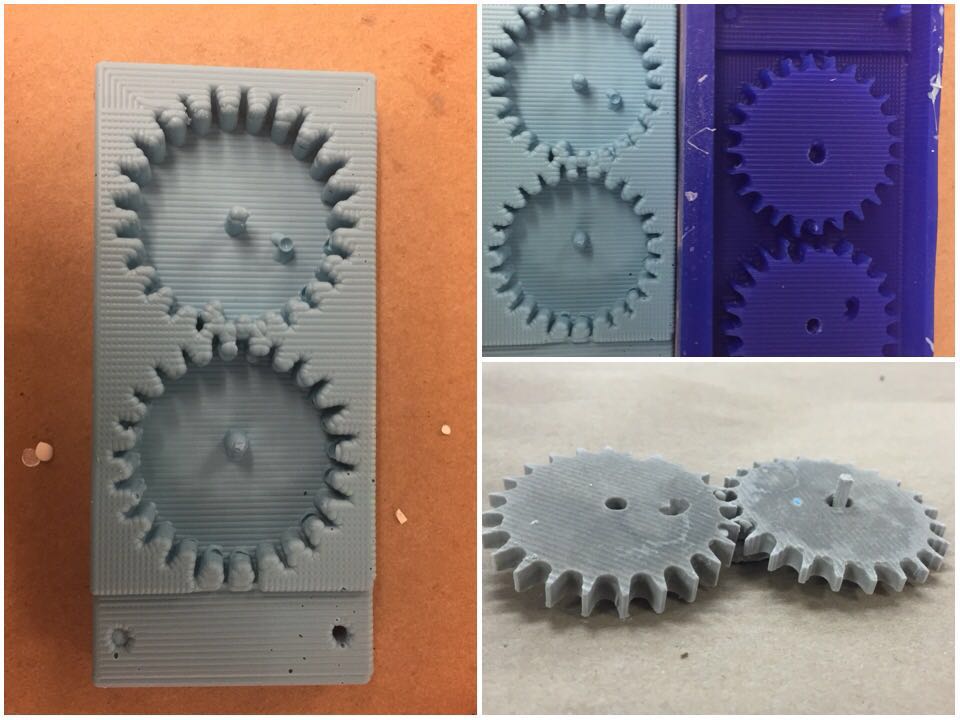
The first attempt of casting was not successful either, too much air and bubbles stuck in the gaps and holes of the gear. I also broke one of the sticks of the base when separating the oomoo and the wax. Now I am trying the second casting and hope this time it would be better… Hopefully. (but the wax was already problematic everywhere)
The sesond time was much better. Because I found out the oomoo I used in the first try was sort of contaminated. It is sticky and hard to stir and pour slowly as the thin string, which I was wondering why it does not seem like what it looked like in the TA session. At first I thought it was me that added Component A and B in a wrong ratio. Later I happened to check the oomoo other people were using, and realized "that should be how it looks like!". So I was able to stir it easily and pull it slowly, which reduced air bubble problem a lot and I got the best gear I could out of this disastrous week.