Input Device
According to my final project plan,
this week I choose to work on the input of images. I wanted to figure out how to use openCV
to do real-time face detection.
After spending some time researching, I found out that the VGA camera module was not what I want in this case,
so I purchased a really cheap webcam on Amazon, which is a bad decision that I only realized after I got it one week later.
This week's work actually took me over three weeks to reach what I wanted. So this blog would also be a very important part of my final project tracking page, as well as a tutorial of "Using OpenCV to do face detection: start from zero". (I am using PC so things may be a bit different for Mac users)
When I say start from zero, I mean it. So first let see what is opencv: Open Source Computer Vision is a library,
which is focused on real-time computer vision functions. It is a powerful library with lots
of powerful applications including Facial recognition, gesture recognition, 2D and 3D feature
toolkits, motion tracking and so on. For more basic introduction just check its Wikipedia.
OpenCV is primarily developed in C++ but it is now available for multiple languages including Python,
Java and Matlab. Since I have never used any of these languages, I choose to use Python because it is
heard that Python is quite powerful and it's the most "beginner friendly" language.
I booked a
webcam ($7.99) on Amazon, it took two days to be delivered.
So before that I will just use the build-in cam of my laptop.
(* Update 2 days later: It's not sent, there is some problem with my credit card and a payment revision was required.
Ordered it again but it takes two more days, seems I could only use the laptop cam for this week, which would not have
the chance to use a microcontroller board in this case.
(* Update again: I was so careless! It doesn't work on Windows 10!! Don't buy it if you are reading this page and planning
to the same thing! Don't waste your money like stupid me!!)
Install Python
I followed the "getting started" instruction of MIT course 6.0001 to install python with Anaconda. Here are the steps to do this, I believe there will also be bunch of tutorials for that:1. Go to the Continuum download page to get the installer. I downloaded Python 3.5 as the instruction required, which caused me 3 days struggling later. So far openCV only works under the environment of Python2.7, so either download Python2.7 version or I will mention how to shift the environment later.
2. Click the installer when finish downloading, a pop-up menu will ask whether or not to "Add Anaconda to myPATH environment variable" and "Register Anaconda as my default Python 3.5", accept both options.
3. After the installation, open spyder, an IDE for python to write and run the code. One way to reach it is through Anaconda Navigator, another way is type "spyder" in the terminal to launch it.
4. Now, if it was Python 2.7 installed, then there's no problem and we can start to install openCV and then test some code. But under the environment of Python 3.5, I got the error message of:
ImportError: No module named 'cv2'Even I had downloaded and installed opencv from its < http://opencv.org/> official site.
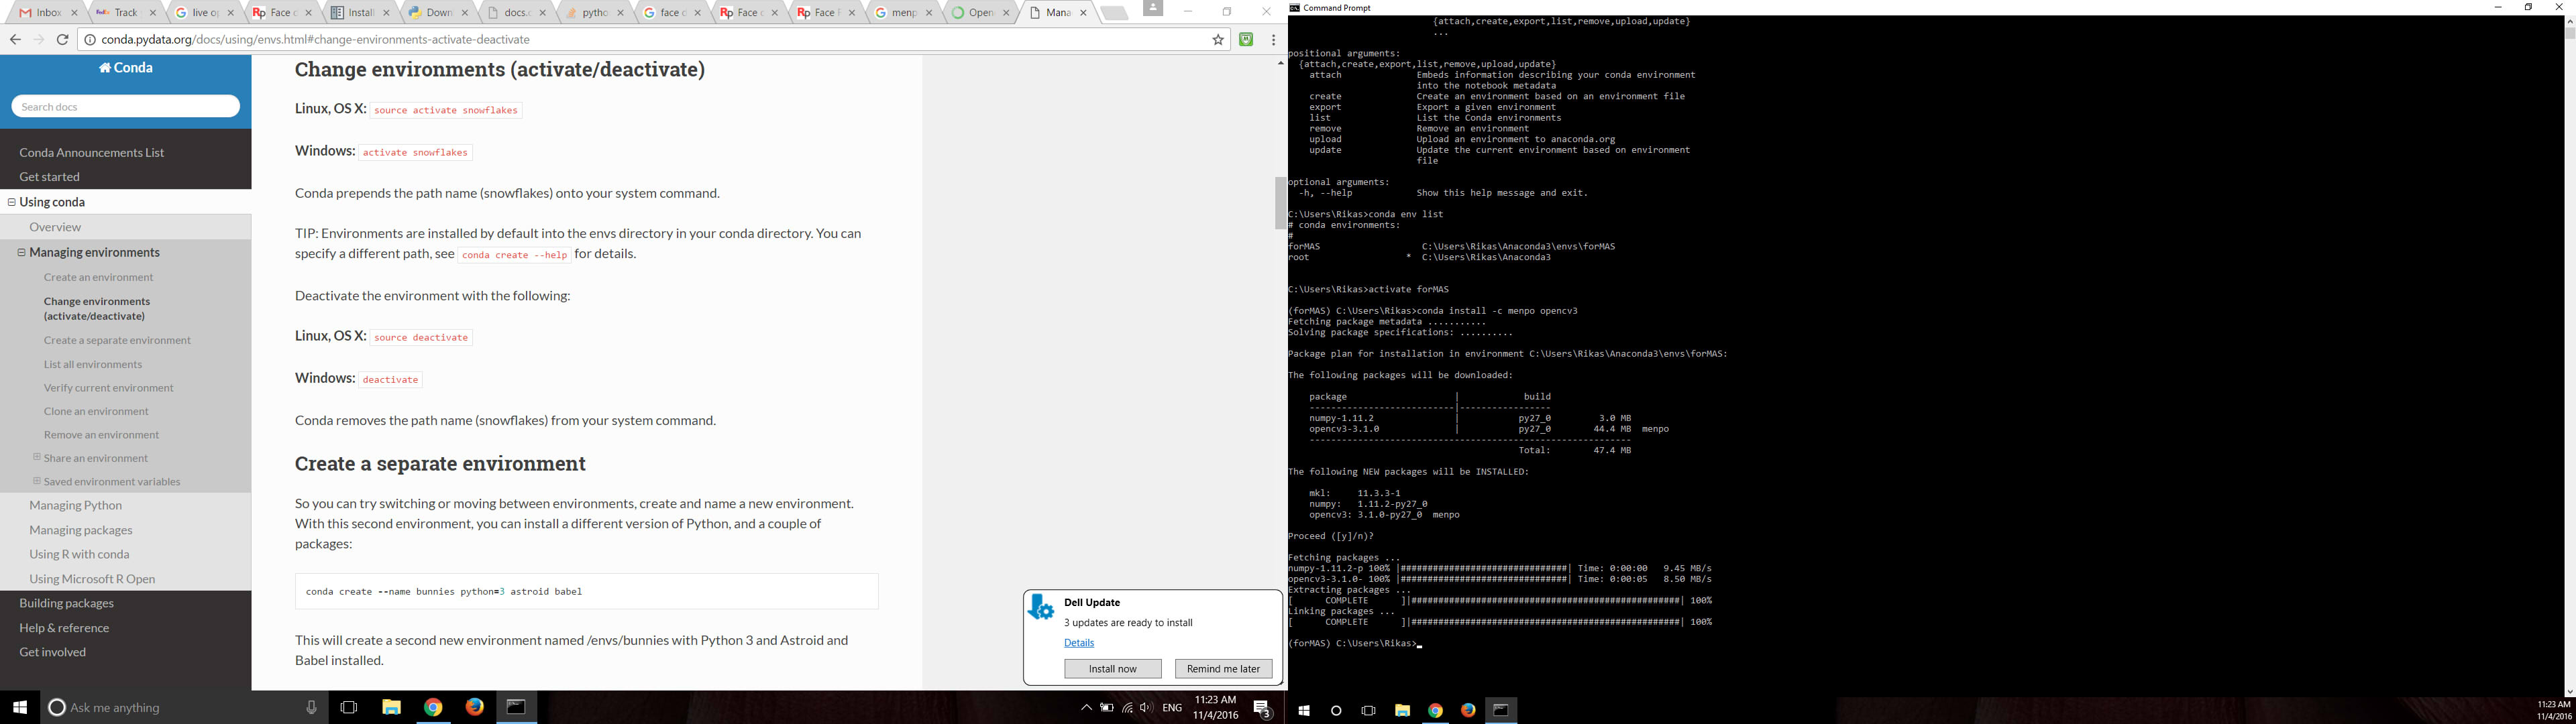
5. Struggled for days, found out it needs Python 2.7. So I created a new environment aside from the root in Conda, I followed this document to create a new environment named "forMAS" and installed packages including openCV under this environment. But later I found out that it is also very easy to create new environments in Anaconda Navigation, and it is more straightforward since it's a GUI.
6. Installing opencv in Anaconda: I installed menpo through conda. Just type "conda install -c menpo opencv3=3.1.0" in terminal.
After installed menpo opencv3, spyder & jupyter in the new environment forMAS, finally I tried to type import cv2 again.
ImportError: No module named 'cv2'"Whyyyyyyy???!!"
Turned out it is because that I did not start the ide under my new environment. The default root environment is still version 3.5, so need to type "activate forMAS" first and then start spyder or iPython or anything needed when there is a "(forMAS)" indicating you are running the following commands under this environment.
Test OpenCV & Exception Handling
First try to test OpenCV, using the code from OpenCV docs to get started with Videos:
import numpy as np
import cv2

cap = cv2.VideoCapture(0)

while(True):
    # Capture frame-by-frame
    ret, frame = cap.read()

    # Our operations on the frame come here
    gray = cv2.cvtColor(frame, cv2.COLOR_BGR2GRAY)

    # Display the resulting frame
    cv2.imshow('frame',gray)
    if cv2.waitKey(1) & 0xFF == ord('q'):
        break

# When everything done, release the capture
cap.release()
cv2.destroyAllWindows()
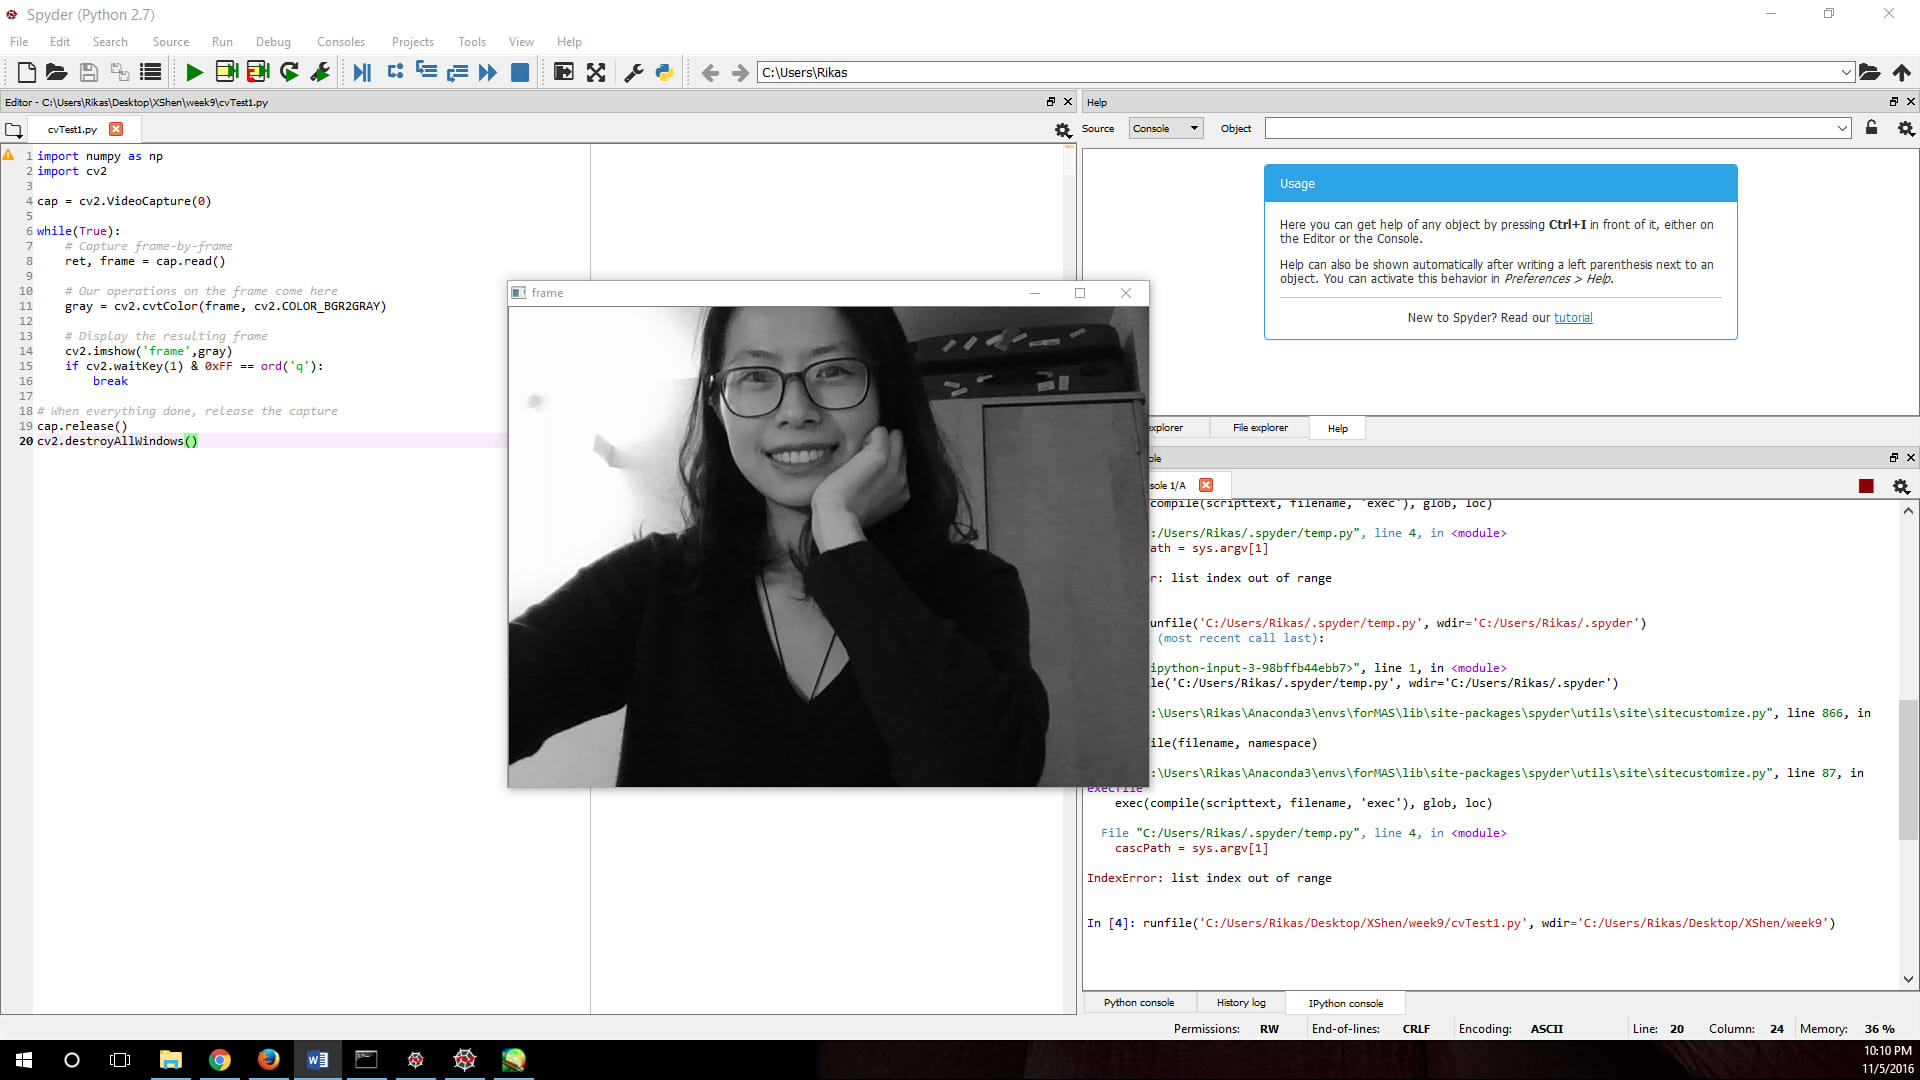 Success!
Exception Hanlding
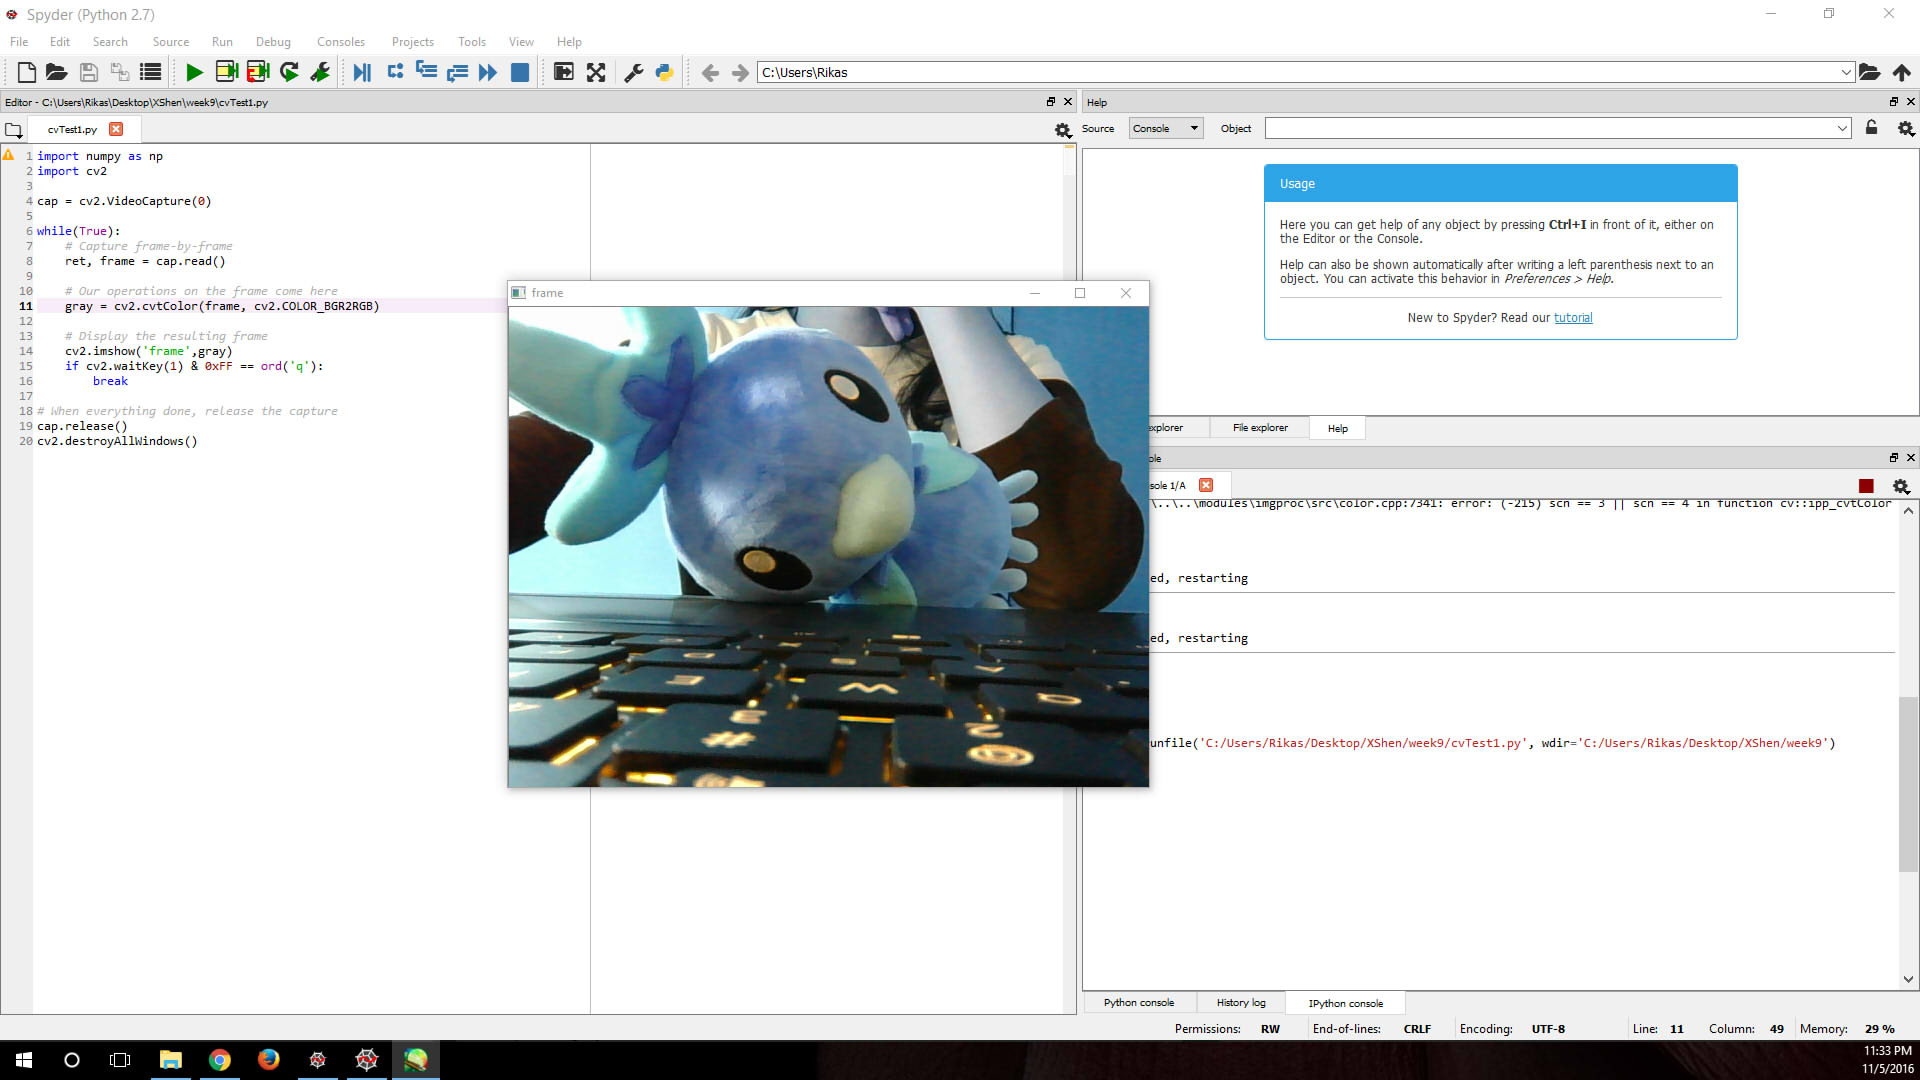
In the previous step the live video is showing in black and white, the next attempt is to convert it to RGB. But once I change "gray = cv2.cvtColor(frame, cv2.COLOR_BGR2GRAY)" to "gray = cv2.cvtColor(frame, cv2.COLOR_BGR2RGB)", the iPython console reported error:
runfile('C:/Users/Rikas/Desktop/XShen/week9/cvTest1.py', wdir='C:/Users/Rikas/Desktop/XShen/week9')
Traceback (most recent call last):
File "", line 1, in
runfile('C:/Users/Rikas/Desktop/XShen/week9/cvTest1.py', wdir='C:/Users/Rikas/Desktop/XShen/week9')

File "C:\Users\Rikas\Anaconda3\envs\forMAS\lib\site packages\spyder\utils\site\sitecustomize.py", line 866, in runfile
    execfile(filename, namespace)

File "C:\Users\Rikas\Anaconda3\envs\forMAS\lib\site-packages\spyder\utils\site\sitecustomize.py", line 87, in execfile
   exec(compile(scripttext, filename, 'exec'), glob, loc)
File "C:/Users/Rikas/Desktop/XShen/week9/cvTest1.py", line 14, in 	cv2.imshow('frame',gray)

error: ..\..\..\modules\highgui\src\window.cpp:281: error: (-215) size.width>0 && size.height>0 in function cv::imshow
when I turn back to the previous successful greyscale test sample, it also reported error this time:
runfile('C:/Users/Rikas/Desktop/XShen/week9/cvTest1.py', wdir='C:/Users/Rikas/Desktop/XShen/week9')
Traceback (most recent call last):

  File "", line 1, in
    runfile('C:/Users/Rikas/Desktop/XShen/week9/cvTest1.py', wdir='C:/Users/Rikas/Desktop/XShen/week9')

  File "C:\Users\Rikas\Anaconda3\envs\forMAS\lib\site-packages\spyder\utils\site\sitecustomize.py", line 866, in runfile
    execfile(filename, namespace)

  File "C:\Users\Rikas\Anaconda3\envs\forMAS\lib\site-packages\spyder\utils\site\sitecustomize.py", line 87, in execfile
    exec(compile(scripttext, filename, 'exec'), glob, loc)

  File "C:/Users/Rikas/Desktop/XShen/week9/cvTest1.py", line 11, in
    gray = cv2.cvtColor(frame, cv2.COLOR_GRAY2GRAY)

AttributeError: 'module' object has no attribute 'COLOR_GRAY2GRAY'
So I shut down the Spyder and rebooted it.
Still fail.
I was totally confused and scared by the error. (It seems like the problem in the library but I swear I never touched it!)
After consulting with my dearest TA, it seemed because of the improper releasing of the capture when the TypeError of losing "mat" happened. I could not get a valid frame form the webcam since last error caused the program abruptly stopped without the close statement getting executed properly.
In this case I had to restart the laptop. The first example code got run normally after this. But once I made any change to cause the code fail, I have to reboot the laptop again to get the camera run. This will be the worst situation.
Then I was mentioned that this problem can be avoided by using exception handling. By adding "Try" and "Exceptions" before and after each step (or section) will help me find out what's going wrong, and this will avoid the capture releasing improperly problem and I do not need to keep reboot the laptop now.
Great progress for me :D
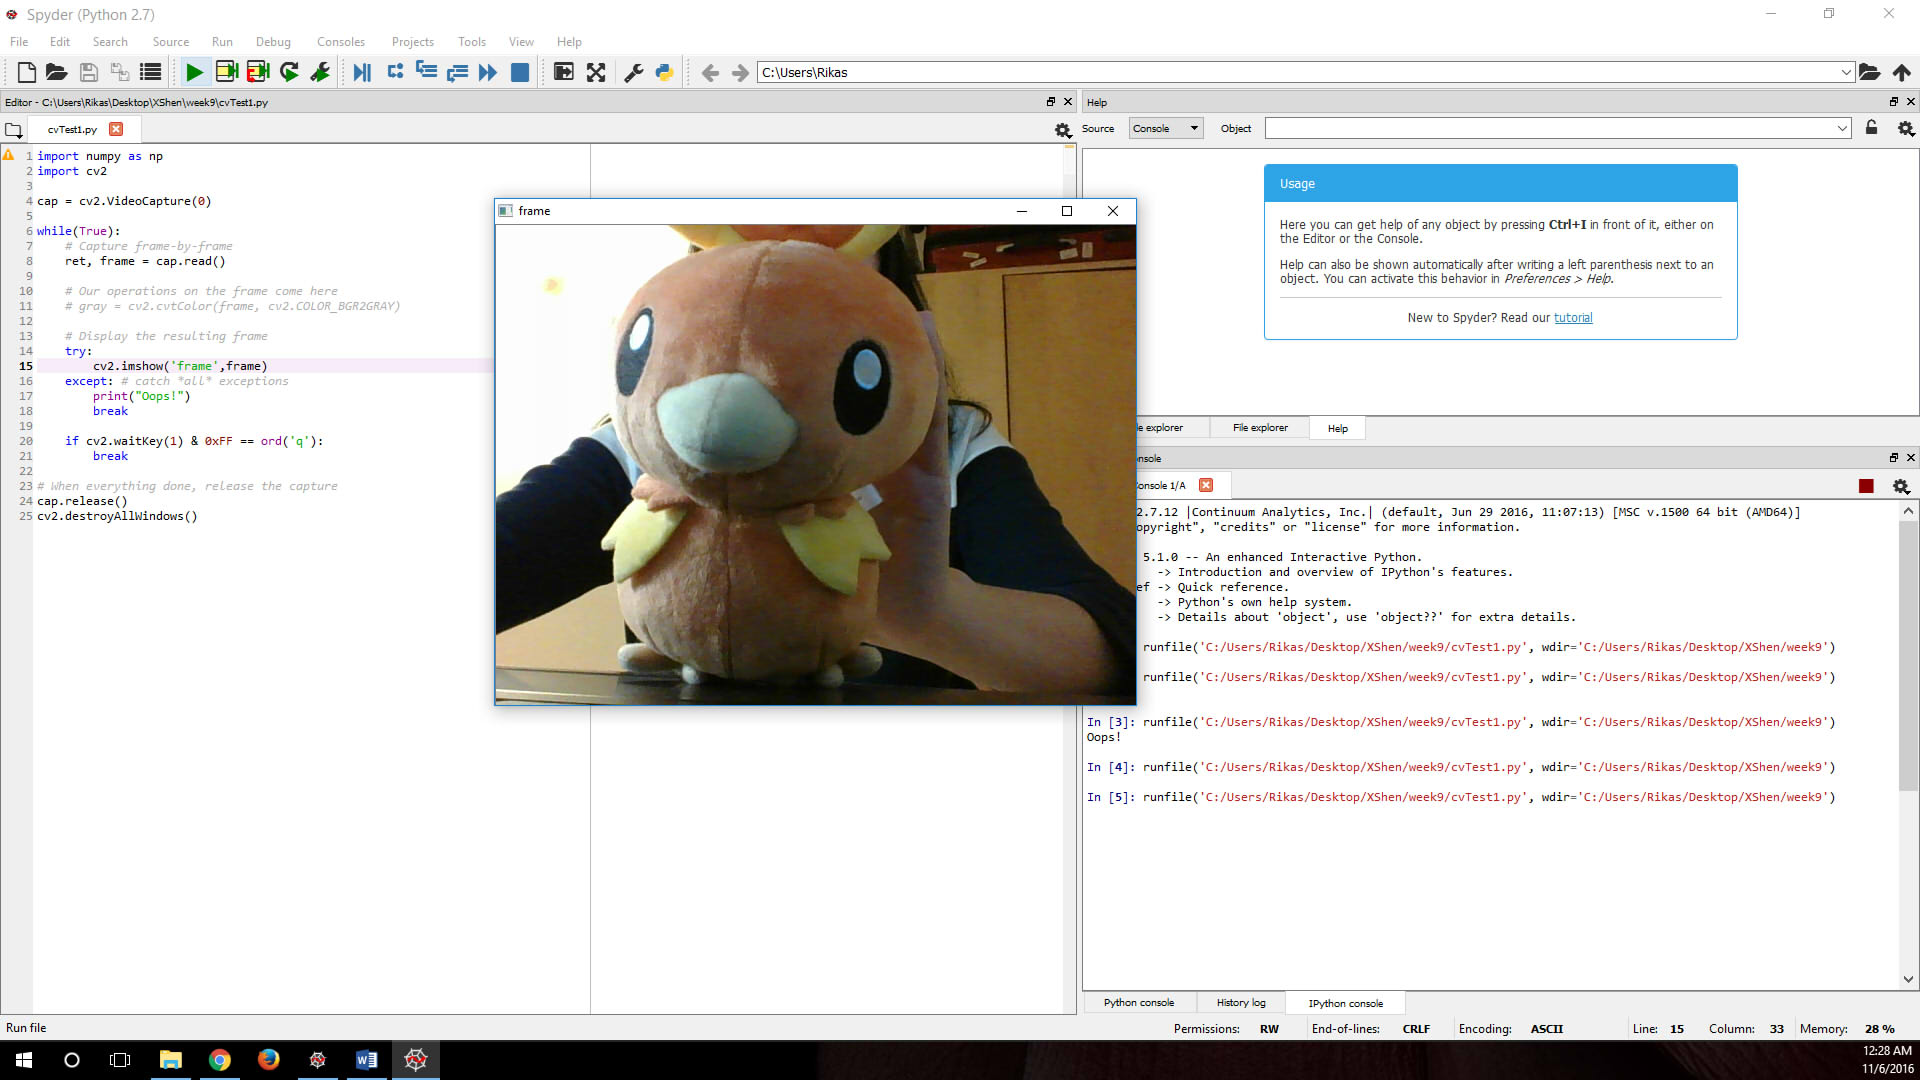
Although the previous problems are caused by 'TypeErrors' but I decided to use a general statement catching all possible exceptions in case something unexpected would happen.
About the strange color problem, I just need to comment the 'cvtColor' and use the regular webcam capture. Then a normal RGB live video is sending back to me.
Say Hi to Torchic! Yaaaaaay!!
Face Detection
Then next step is to realize face detection. I found and followed the instruction of a tutorial on face detection in using Haar Cascades. I copied the code in the last part of the tutorial into spyder and selected a previous screenshot as testing image. It failed when I run it.
It took me pretty much time to figure out that I was missing the pretrained XML. The website said "OpenCV already contains many pre-trained classifiers for face, eyes, smile etc. Those XML files are stored in opencv/data/haarcascades/ folder." But I could not find them. So I downloaded the needed files from GitHub: https://github.com/opencv/opencv/tree/master/data/haarcascades. After loading the XML classifiers, I ran the code again, ta-da!!
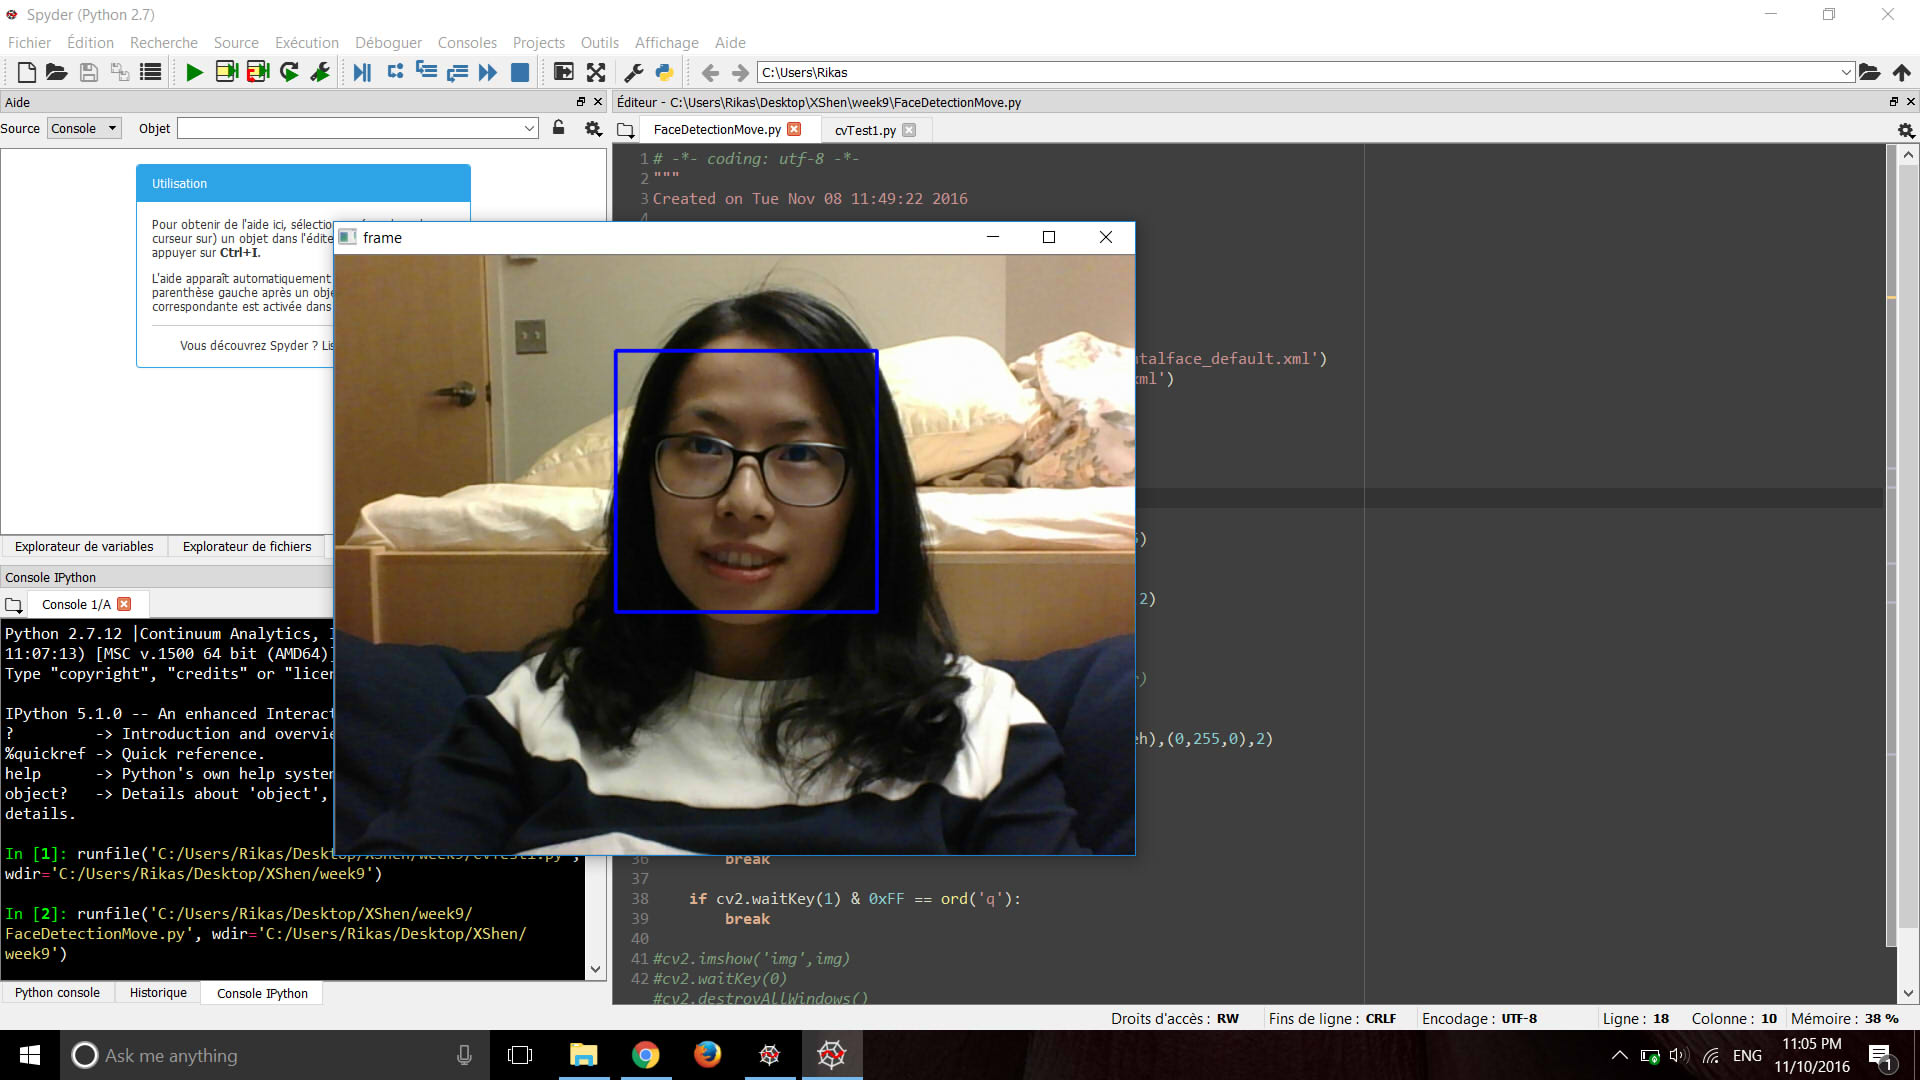
 This face detection code is working on single piece of preselected picture, now I need to make it work on a live
webcam. Since how OpenCV work on webcam capture and process is frame by frame, I just need to combine the previous
two samples together to realize what I want.
This face detection code is working on single piece of preselected picture, now I need to make it work on a live
webcam. Since how OpenCV work on webcam capture and process is frame by frame, I just need to combine the previous
two samples together to realize what I want.The face detection worked, but not as stable as I expected. The tracking frame would easily get lost when I moved my head every now and then. And the eyes detection is not working well at all, but it does not matter for what I want to do now and for my final project so I just removed the eye detection part. I tried to adjust the threshold from "faces = face_cascade.detectMultiScale(gray, 1.3, 5)" to "faces = face_cascade.detectMultiScale(gray, 1.1, 5)". The detection rectangle became more stable when I move, but problem is it retarded the video.
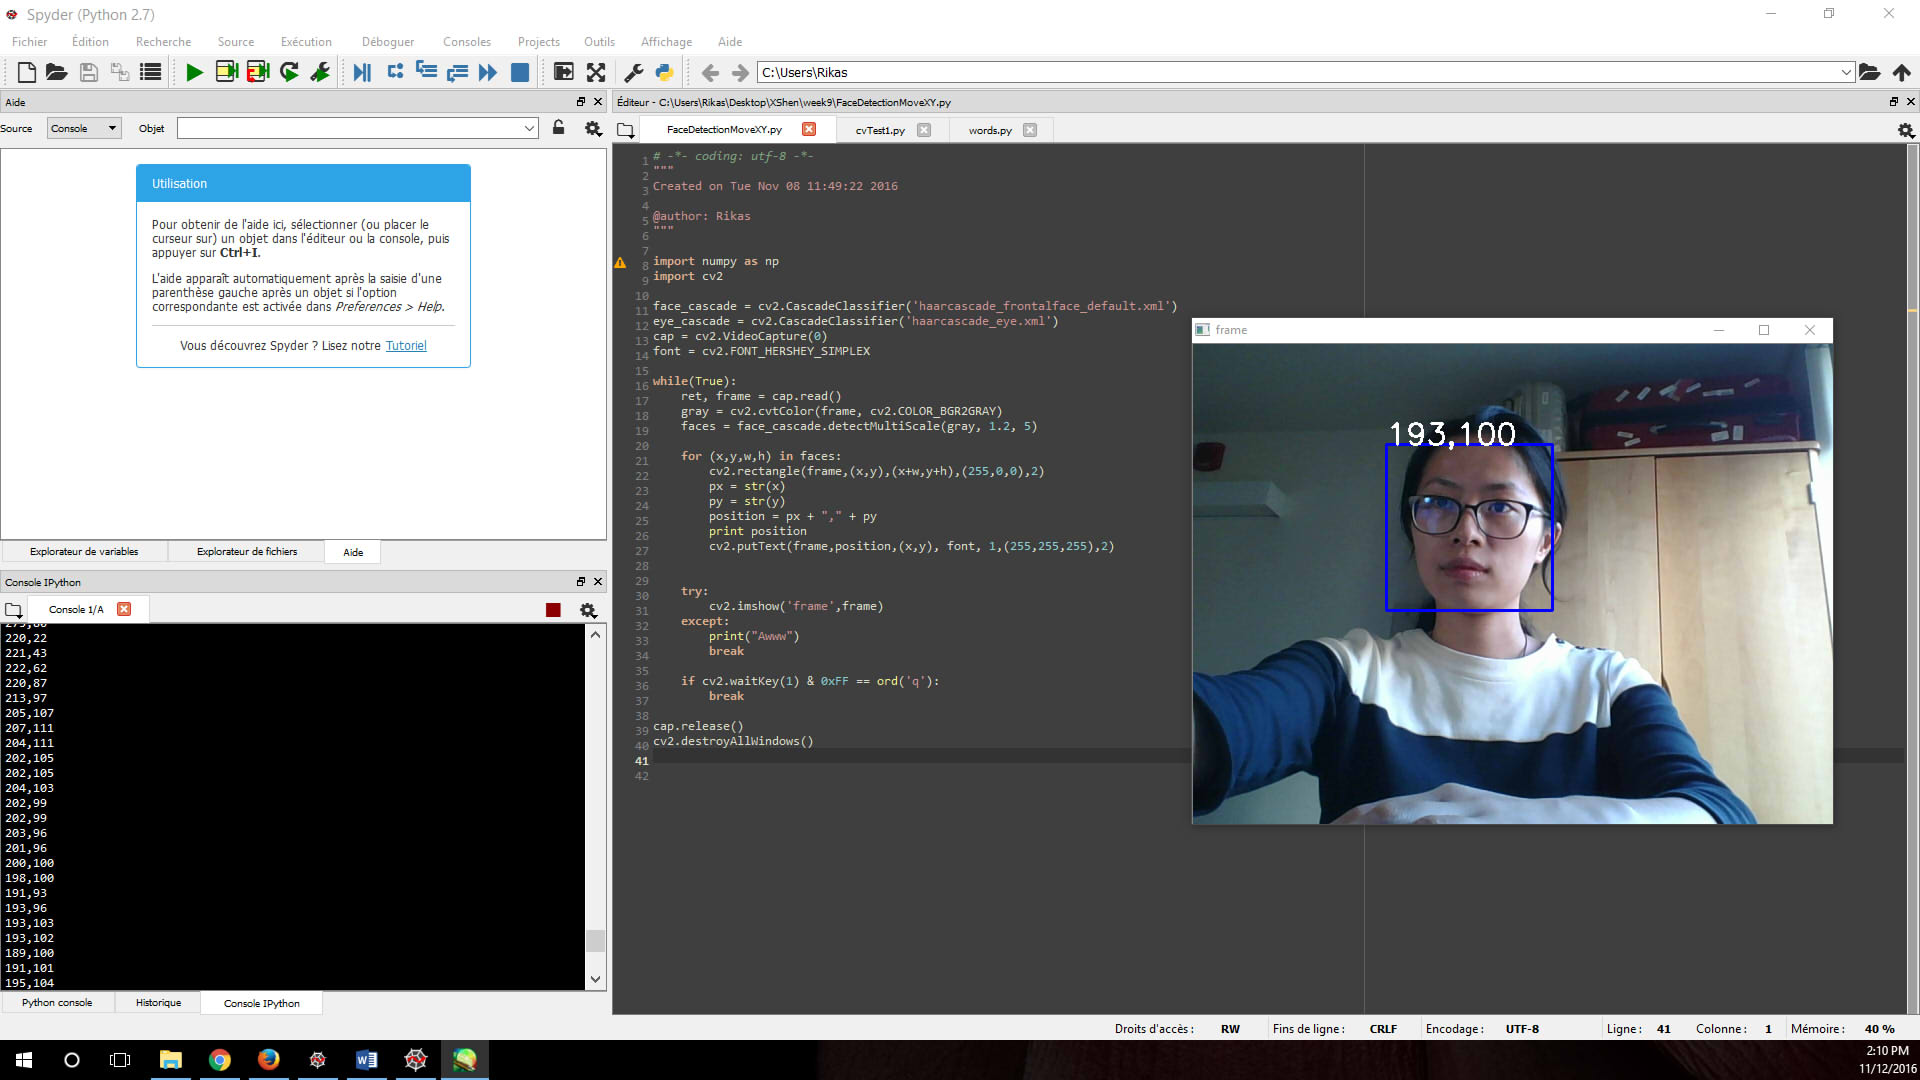
In order to make the position of my face clearer and make it easier to coop with the output device in the coming week, I used "cv2.putText" to label the position of the detected faces.