Pranam Tries To Make Things
MAS.863 - 2016
Week 1: Press-Fit Construction Kit
Carousel Pipette Stand
This week's task was very interesting (and honestly quite weird): build a press-fit construction kit from cardboard. Now, I never knew that cardboard was a great building material, but Neil's explanation in class totally made sense: it's a great prototyping tool that is easy to laser-cut and model in 2D.
Originally, I didn't have any exciting ideas for this week. I mean, what useful things could you build with cardboard? From my lab, Noah had constructed some fish cutouts, and Thras had built a phone stand for the lab downstairs when they were in the class. So, not much help there. I definitely wanted to build something that would be useful for me as a biologist in the lab. Eventually, I decided that replicating my carousel pipette stand on my bench would be a great idea! Now, if I could come up with a simple design, we'd be in business.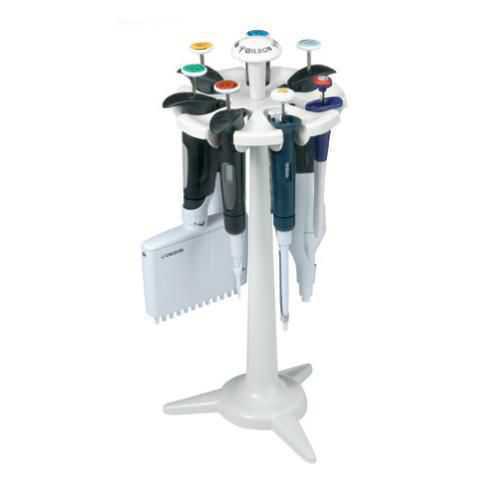
Figure 1. A standard carousel pipette stand.
The goal for this week was to really learn how to use the laser-cutter. To do so, we had to model our construction kit in 2D. My original plans were much too complicated and would require multiple moving parts. After consulting with Noah, we converged on a design that was far simpler, only requiring six parts, including the rotor for the pipettes, a 4-leg stand, and a sandwiched wheel system to hold the rotor in place while it would spin.
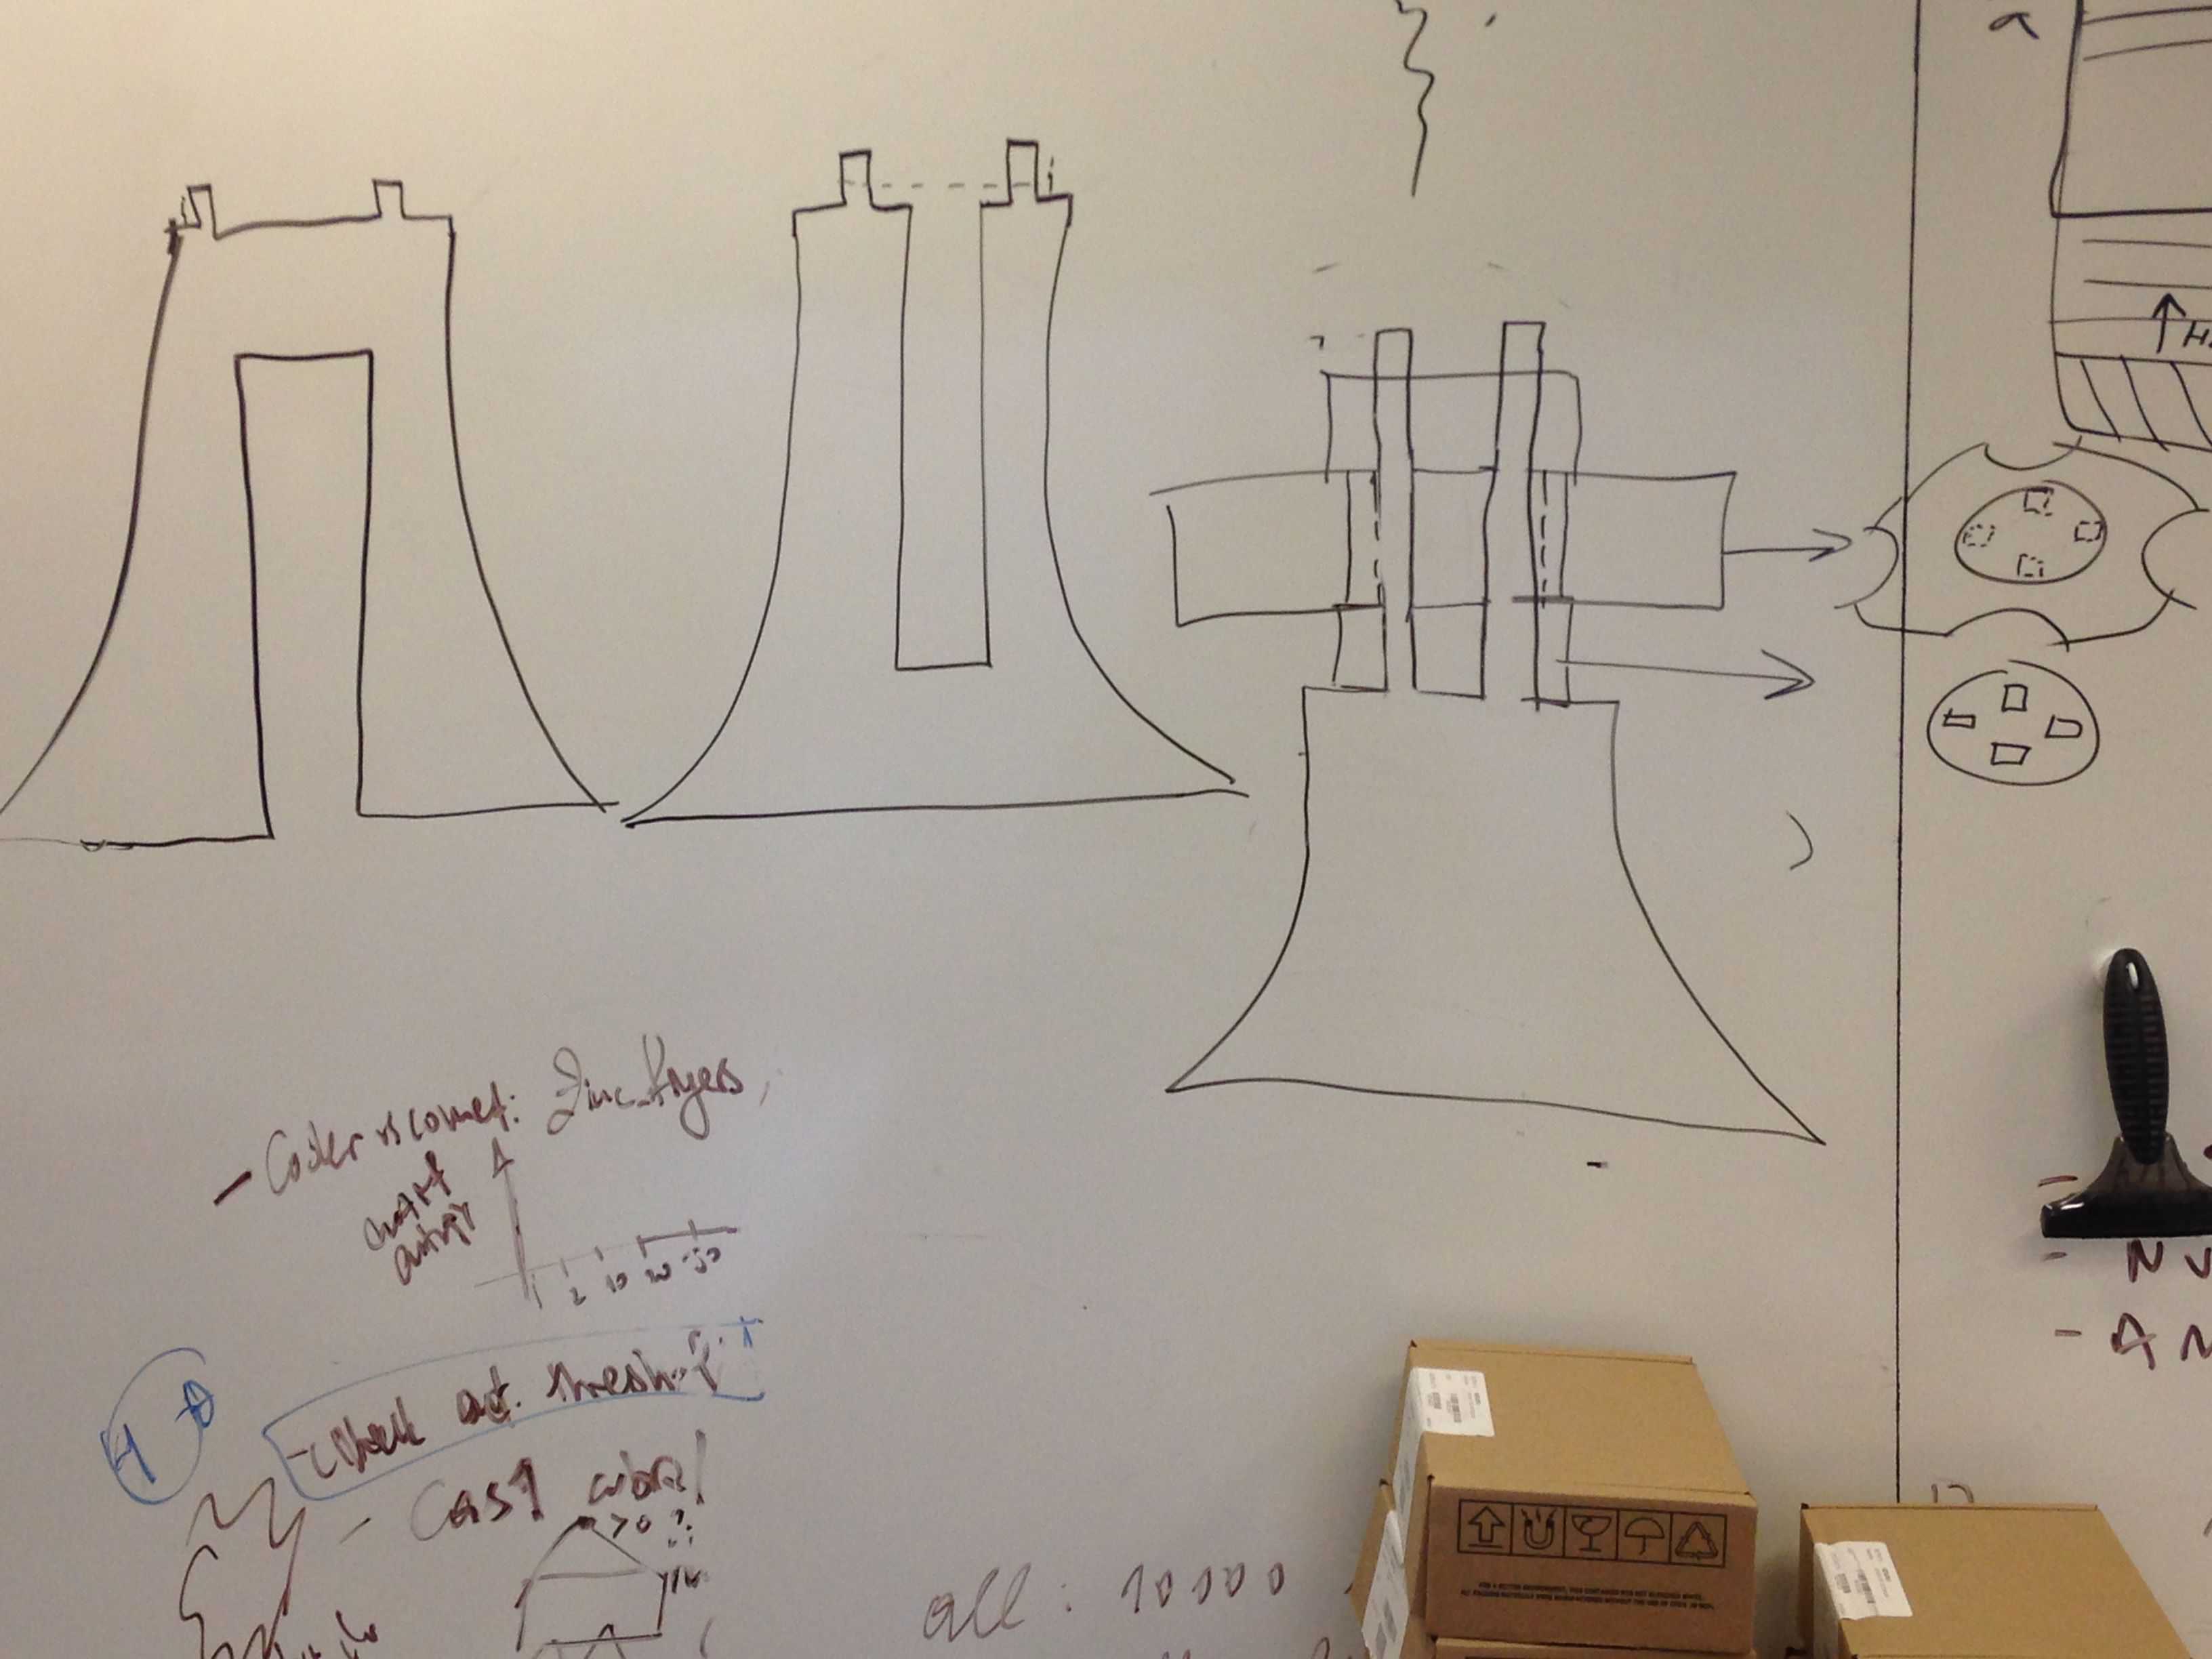
Figure 2. A rough sketch of the model, drawn on a white board. Two large base components will lock together to create a four-leg base. Each would have two struts that will attach to three wheels with four inserts for each strut. The inner wheel will be encompassed by the large rotor that will be sandwiched between the two larger wheels.
Now, with the sketch in hand, it was time to model. And thus returns my recurring problem: what software would I use that makes sense to me? Surely, Autodesk Fusion 360 would be way too much for this. After tinkering around, I realized that I would go with the non-parametric, but still functional, Rhinoceros. After taking a long time to get up and going with the Rhino interface (many thanks to Tom and Grace!) and acquiring an actual mouse for my laptop (I have caved in), I eventually became pretty adept with it and was able to construct a nifty 2D model of my parts.
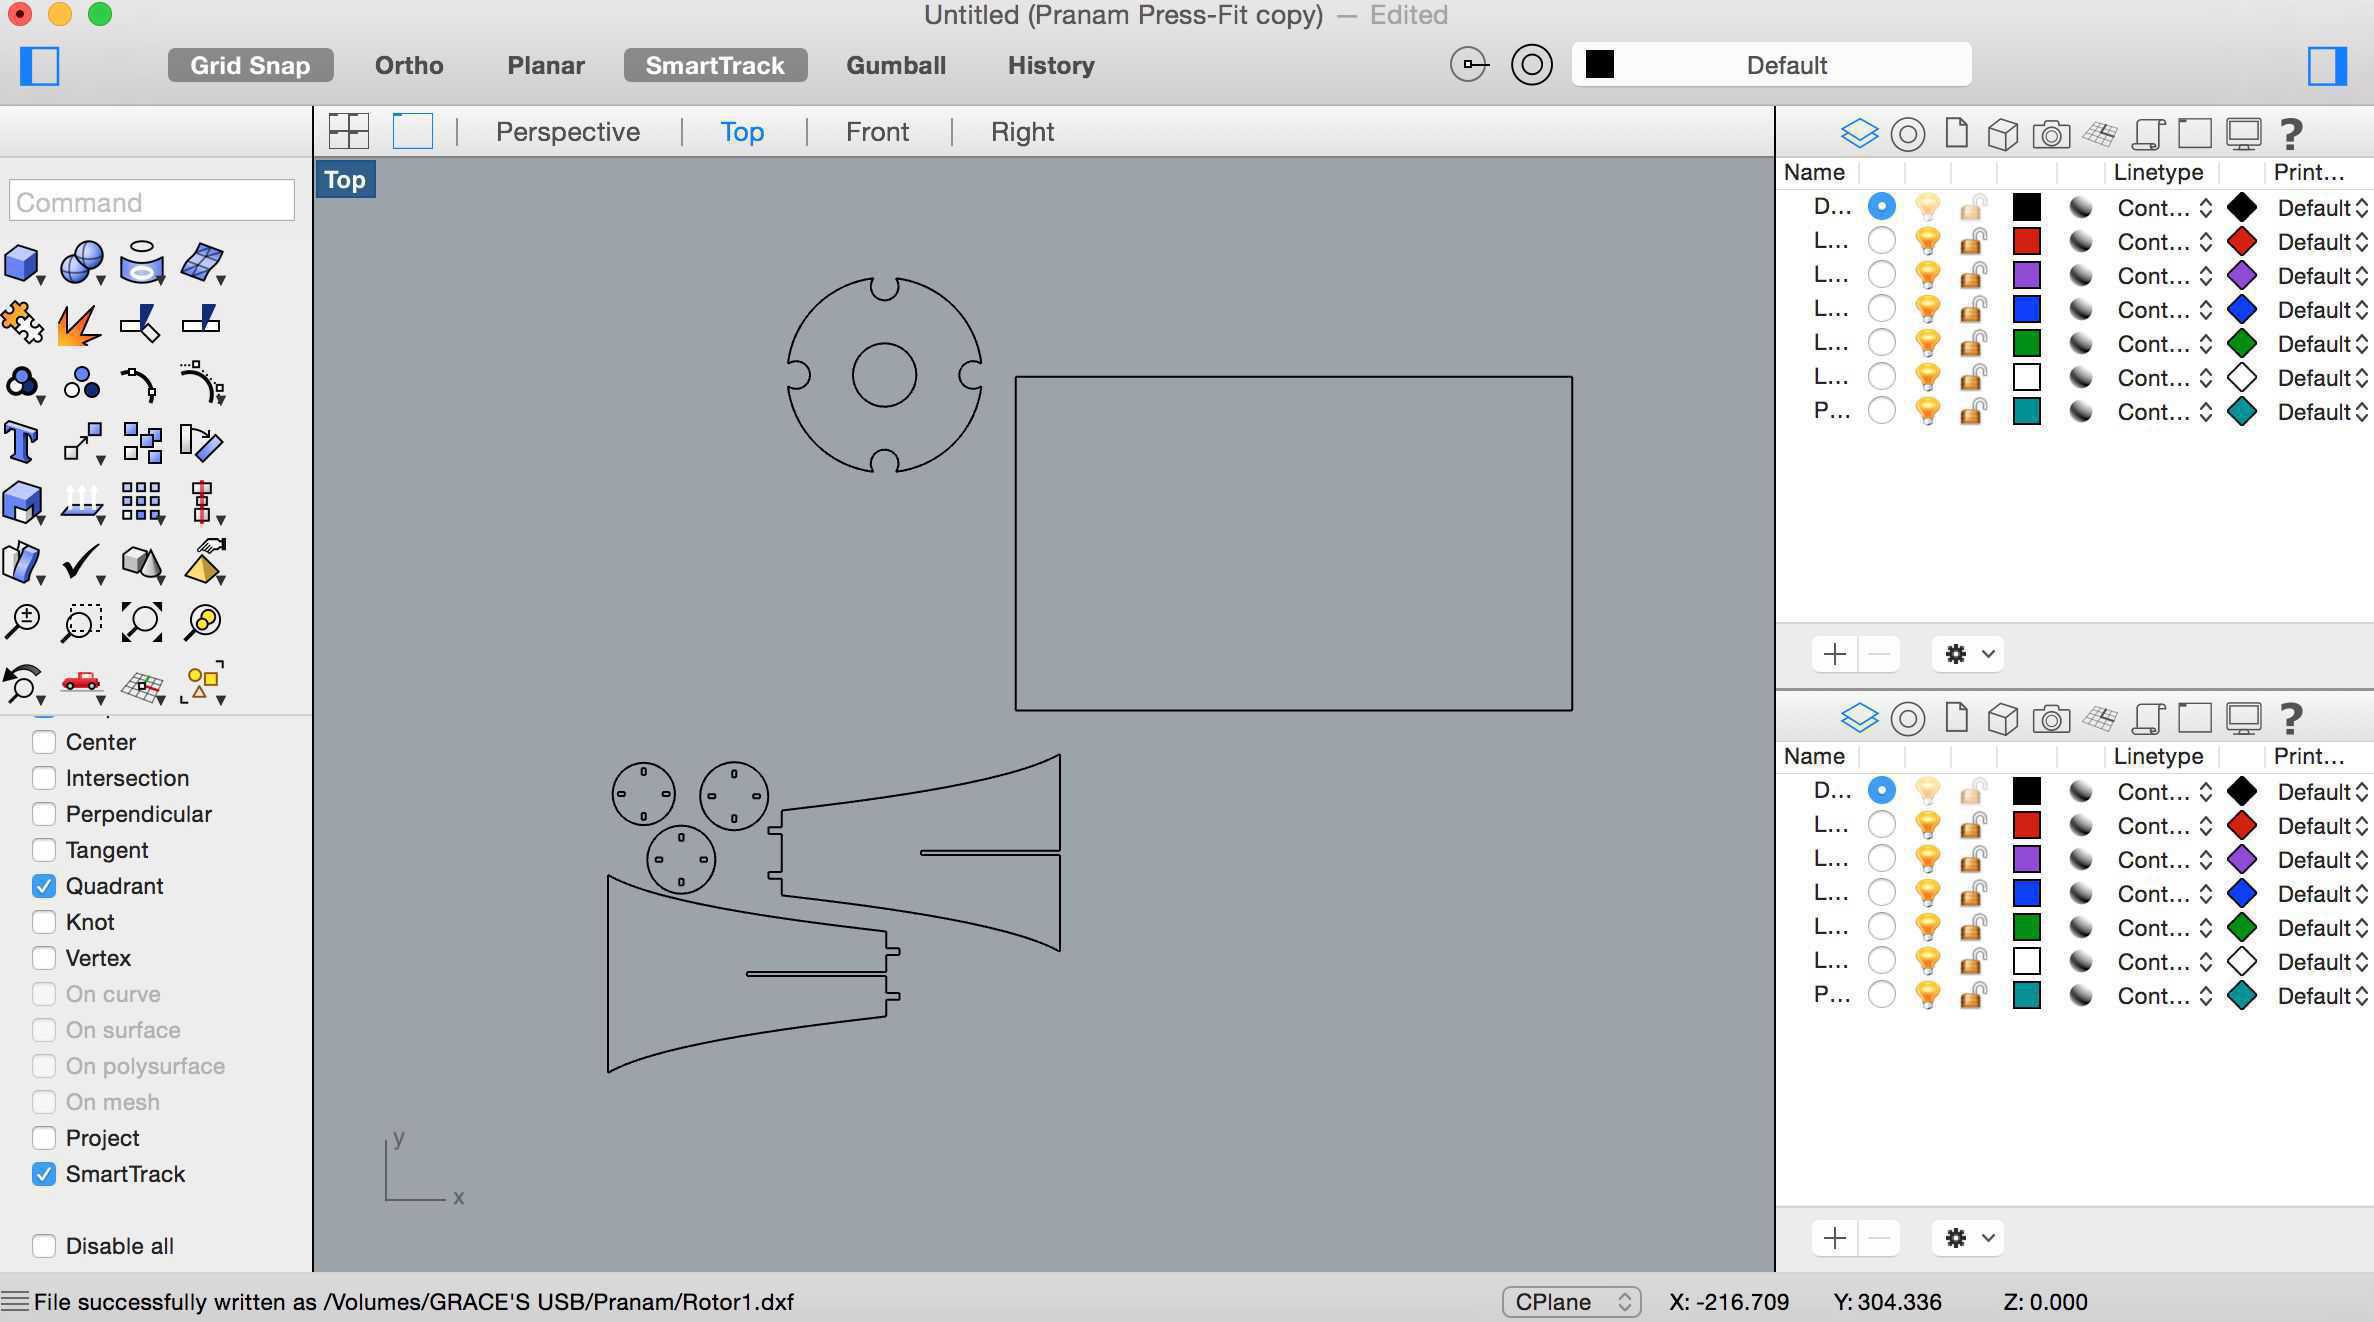
Figure 3. Rhino model of a carousel pipette holder. The model was drawn using estimated measurements of each part, and individually drawn in. Unfortunately, Rhino is not parametric, so any edits had to be made on the sketch by hand.
Finally, it was time to send this model to the laser-cutter! Grace was so nice and helpful, and oriented me on the laser-cutter down in E15-023, rather than the ones in the shop, which were quite busy due to the influx of MAS.863 students. The whole workflow was quite straightfoward, and in no time, I was producing some quite elegant cuts. Luckily, in one try, my press-fit model looked pretty darn good, though the pipettes would topple the structure over due to their heavy weight and awkward (lack of) symmetry. I tried quite a few iterations of the struts to balance the pipettes, including clips on top, but nothing seemed to hold the pipettors. Eventually, I just filleted the struts, so to easily fit the wheels, and put some adhesives on the top wheels so to keep the stand balanced with the weight of the pipettes. In the end, it looked pretty awesome and fit beautifully on my bench.
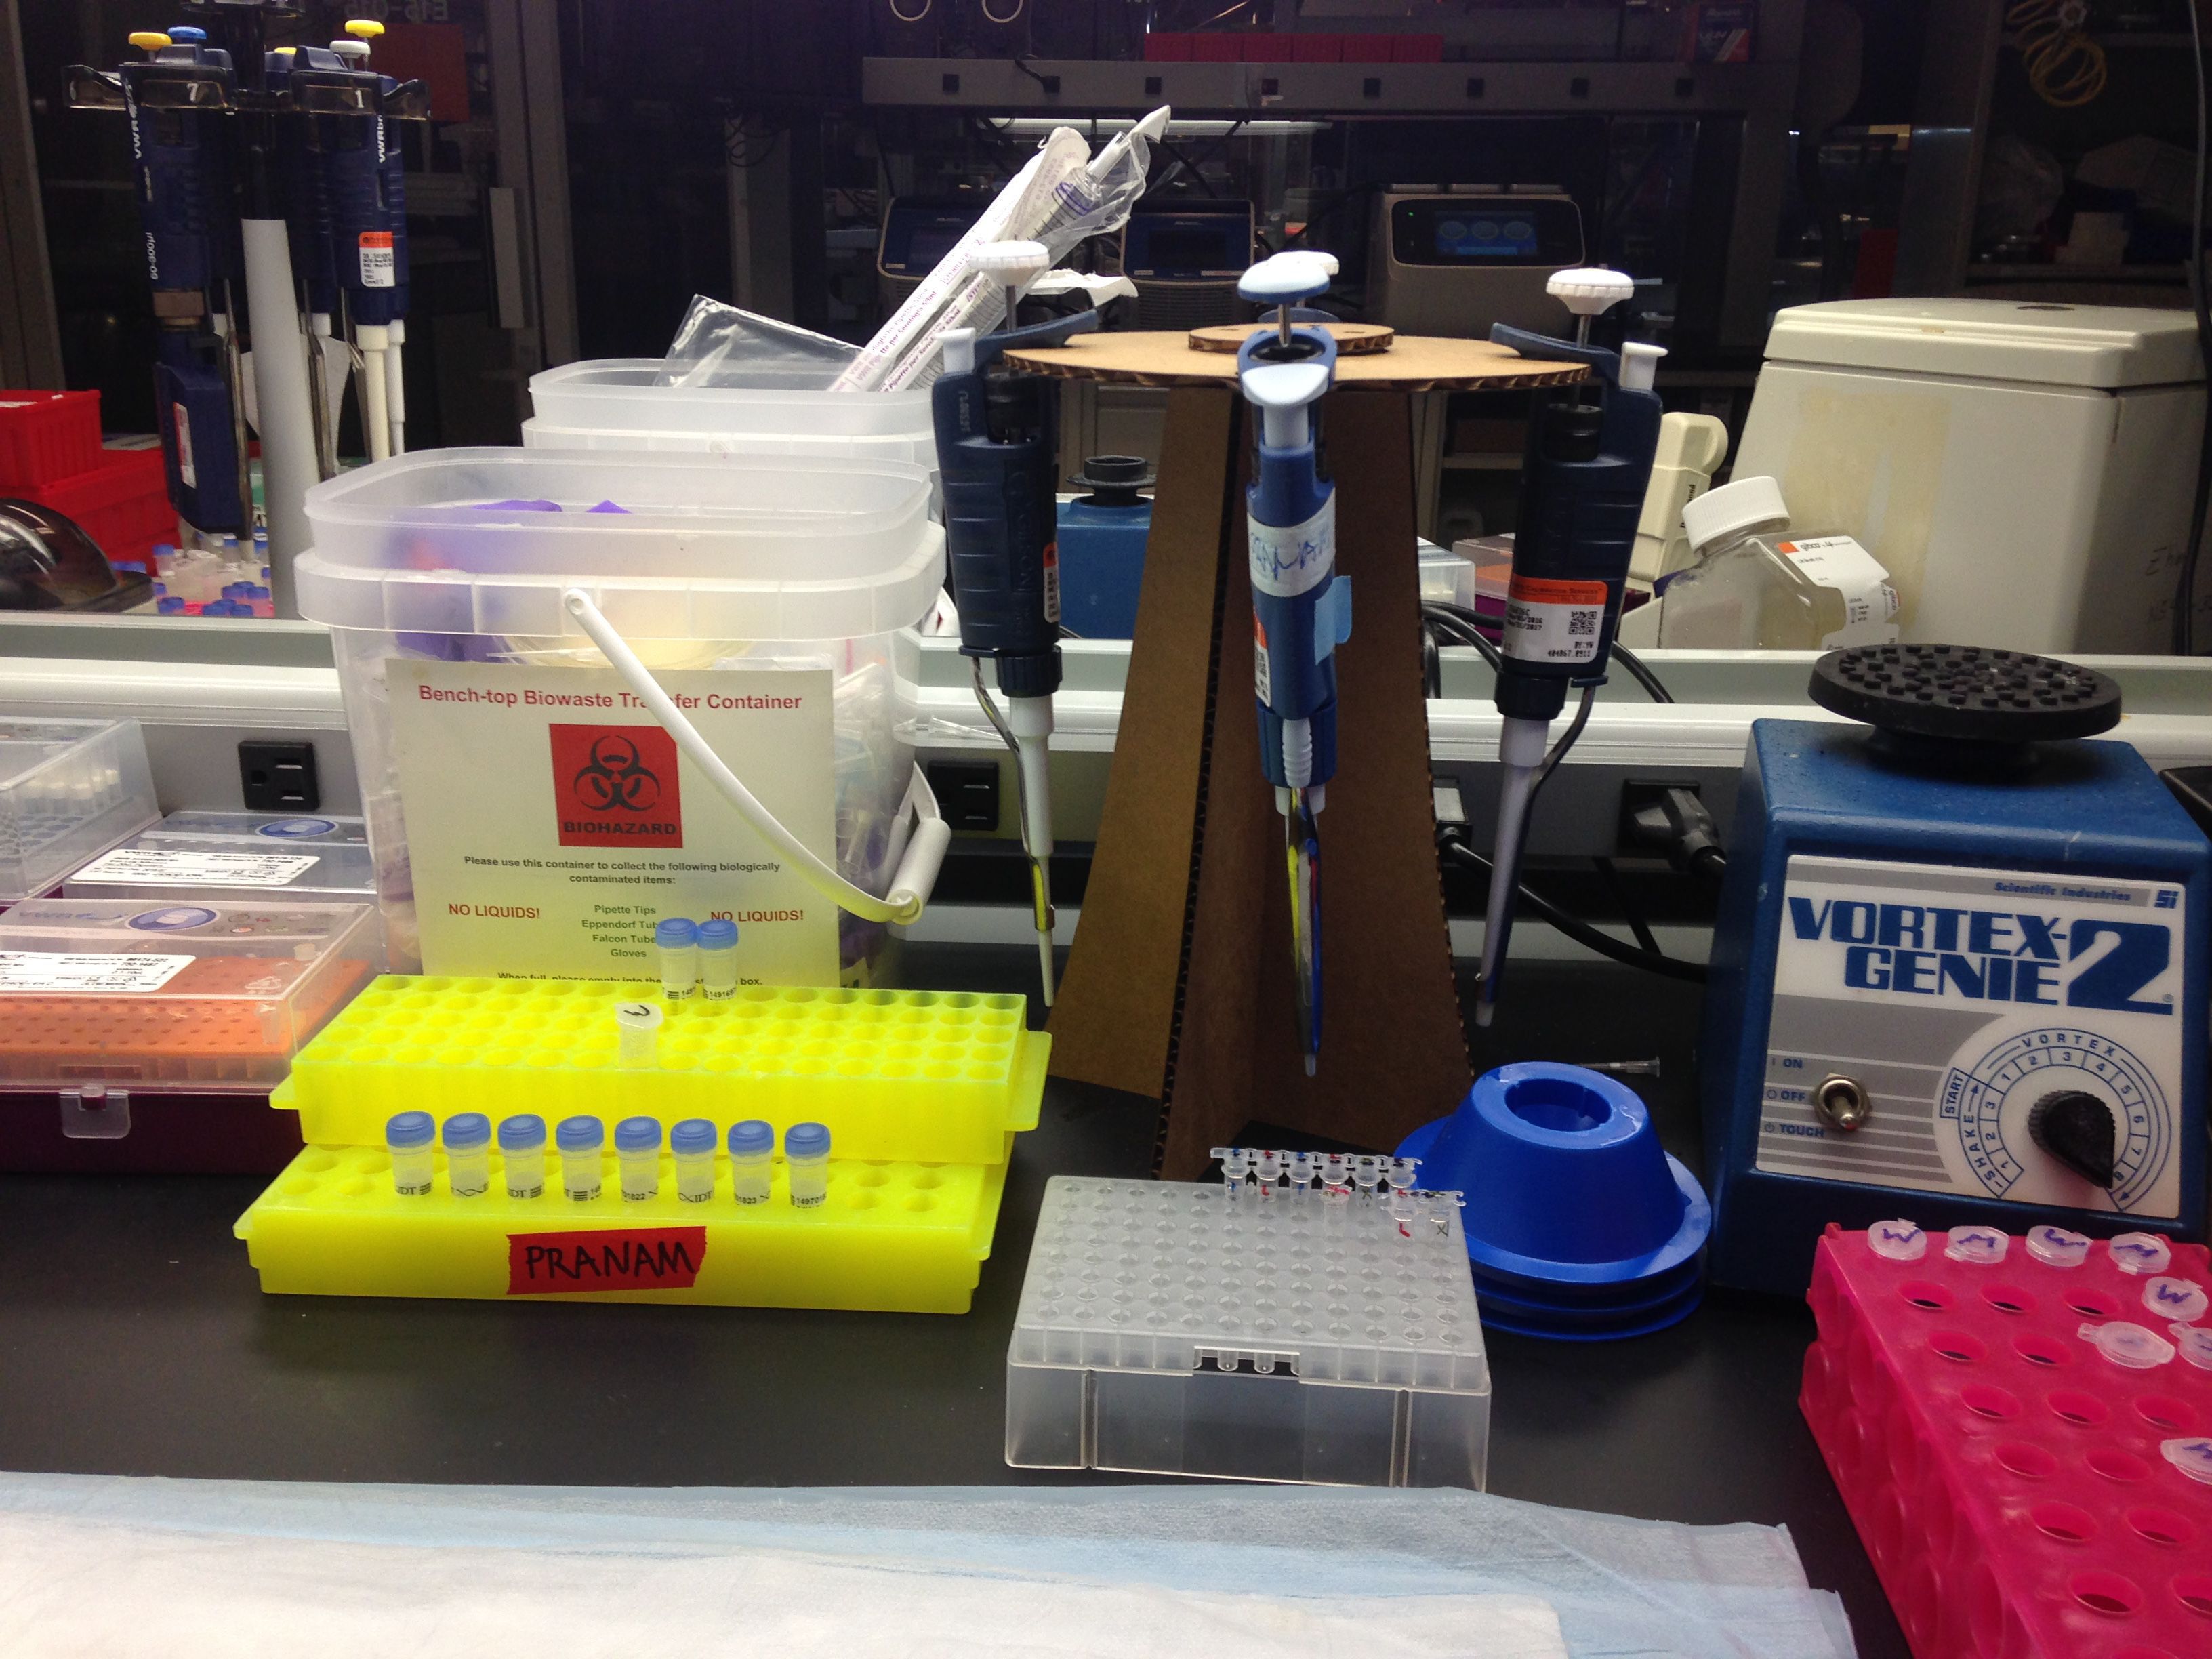
Figure 4. The finished carousel pipette stand on my bench. It replaces my old one -- let's hope this one lasts long!
| Activity | Tools Used |
|---|---|
| Modeling | Rhinoceros |
| Laser-Cutting | Trotec Speedy 300 |