Pranam Tries To Make Things
MAS.863 - 2016
Week 3: 3D Printing and Scanning
Printing Proteins and Scanning Ducky
Anybody who says they weren't excited for this week was obviously lying -- we finally get to 3D print stuff! Formally this week, we had two related assignments. The first was to 3D print an object that can't be formed by traditional subtractive methods of machining. The second was to 3D scan an object.
So, a little about me: I am a genome engineer, and I focus on designing novel gene editing technologies. You've all probably heard of the CRISPR/Cas9 system for gene editing. What makes CRISPR so amazing is that you can easily target any DNA sequence by constructing a complementary guide RNA sequence and co-expressing a cutting enzyme, Cas9. That is sufficient to induce breaks in the DNA, allowing either the gene to be silenced or inserting a new gene at that locus.
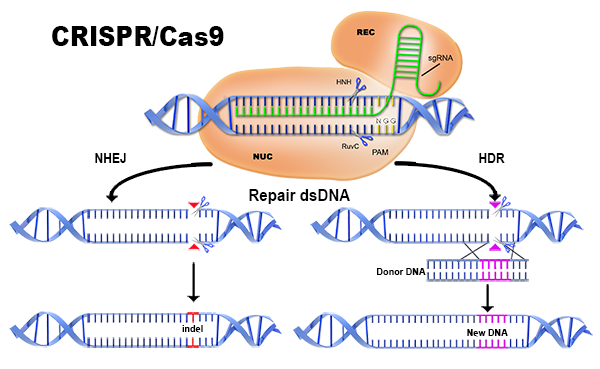
Figure 1. Different strategies for introducing blunt double-stranded DNA breaks into genomic loci, which become substrates for endogenous cellular DNA repair machinery that catalyze nonhomologous end joining (NHEJ) or homology-directed repair (HDR).
So that's all good and well. But what happened before the big discovery of CRISPR/Cas9? Well, many people don't know that before CRISPR, there were other, more tedious protein-methods of gene editing, one of them being the TALEN system. TALEN (Transcription Activator-Like Effector Nucleases) DNA-binding domains bind to specific sequences of host DNA and can be manipulated to produce a protein domain that binds specifically to any DNA sequence in the genome. These specifically modified DNA-binding protein domains can then be linked to a custom effector domain (e.g., a nuclease, or a transcription activator or repressor) to create a chimeric protein capable of precisely targeted DNA manipulation.
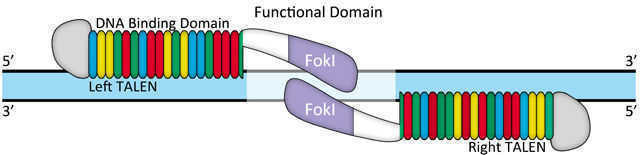
Figure 2. TAL effectors fused to FokI cleavage domains, dimerically recognizing and cutting a specific gene locus.
So, for this week, I 3D-printed a TAL effector binding to DNA! The modeling procedure is very different than designing a standard 3D part. A large part of the design came from mining the PDB files online, and adjusting and reformatting the protein's crystal structure to fit the 3D printer. Once I was able to do that, I converted the file to .stl and sent it to Tom in the CBA shop for printing.
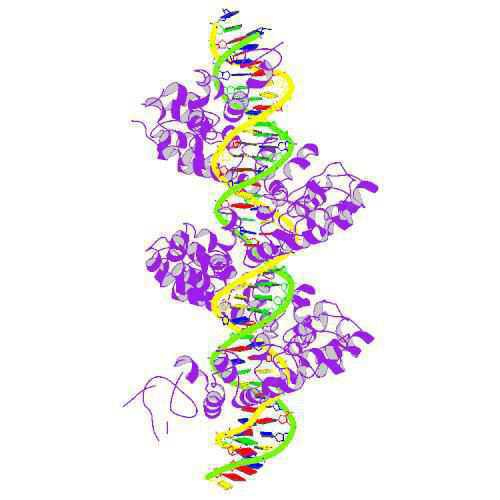
Figure 3. The crystal structure representation of a TAL effector binding to DNA.
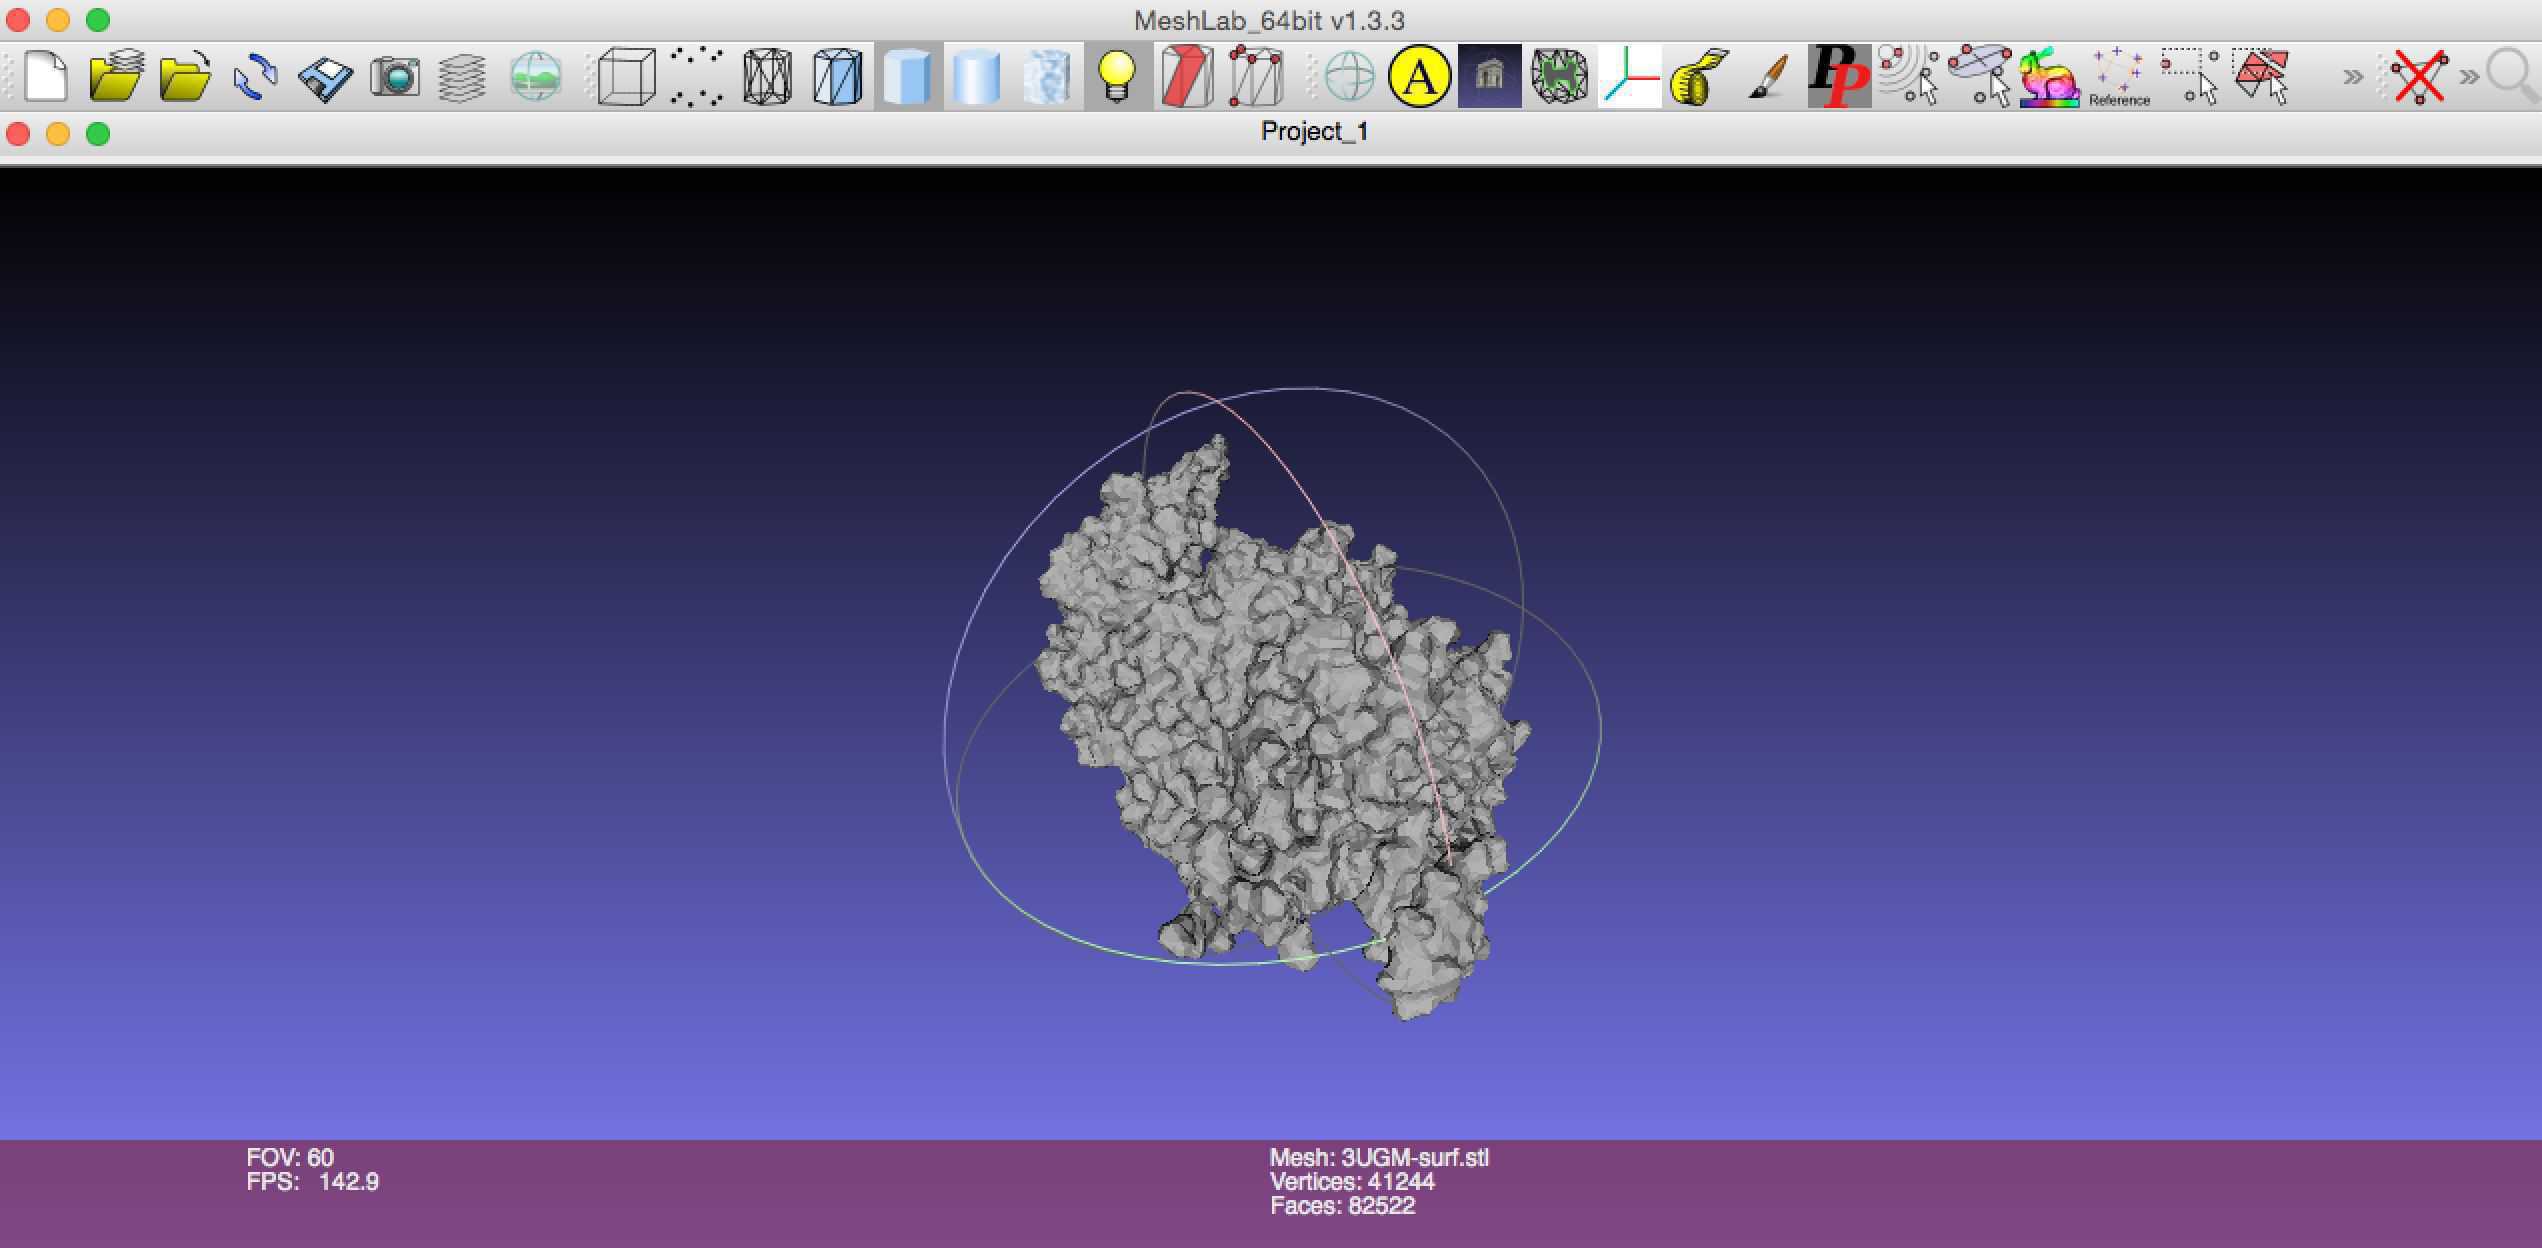
Figure 4. The .stl file model to be sent to the 3D printer!
We really didn't have to do anything for the actual printing exercise -- Tom and John handled that process for us. However, when we got our printed product, we had to remove the support material. For the protein design, since I used the Eden machine to print, I used the water blaster to do this, which was a lot of fun! In the end, I got a beautiful 3D TAL effector binding to DNA!
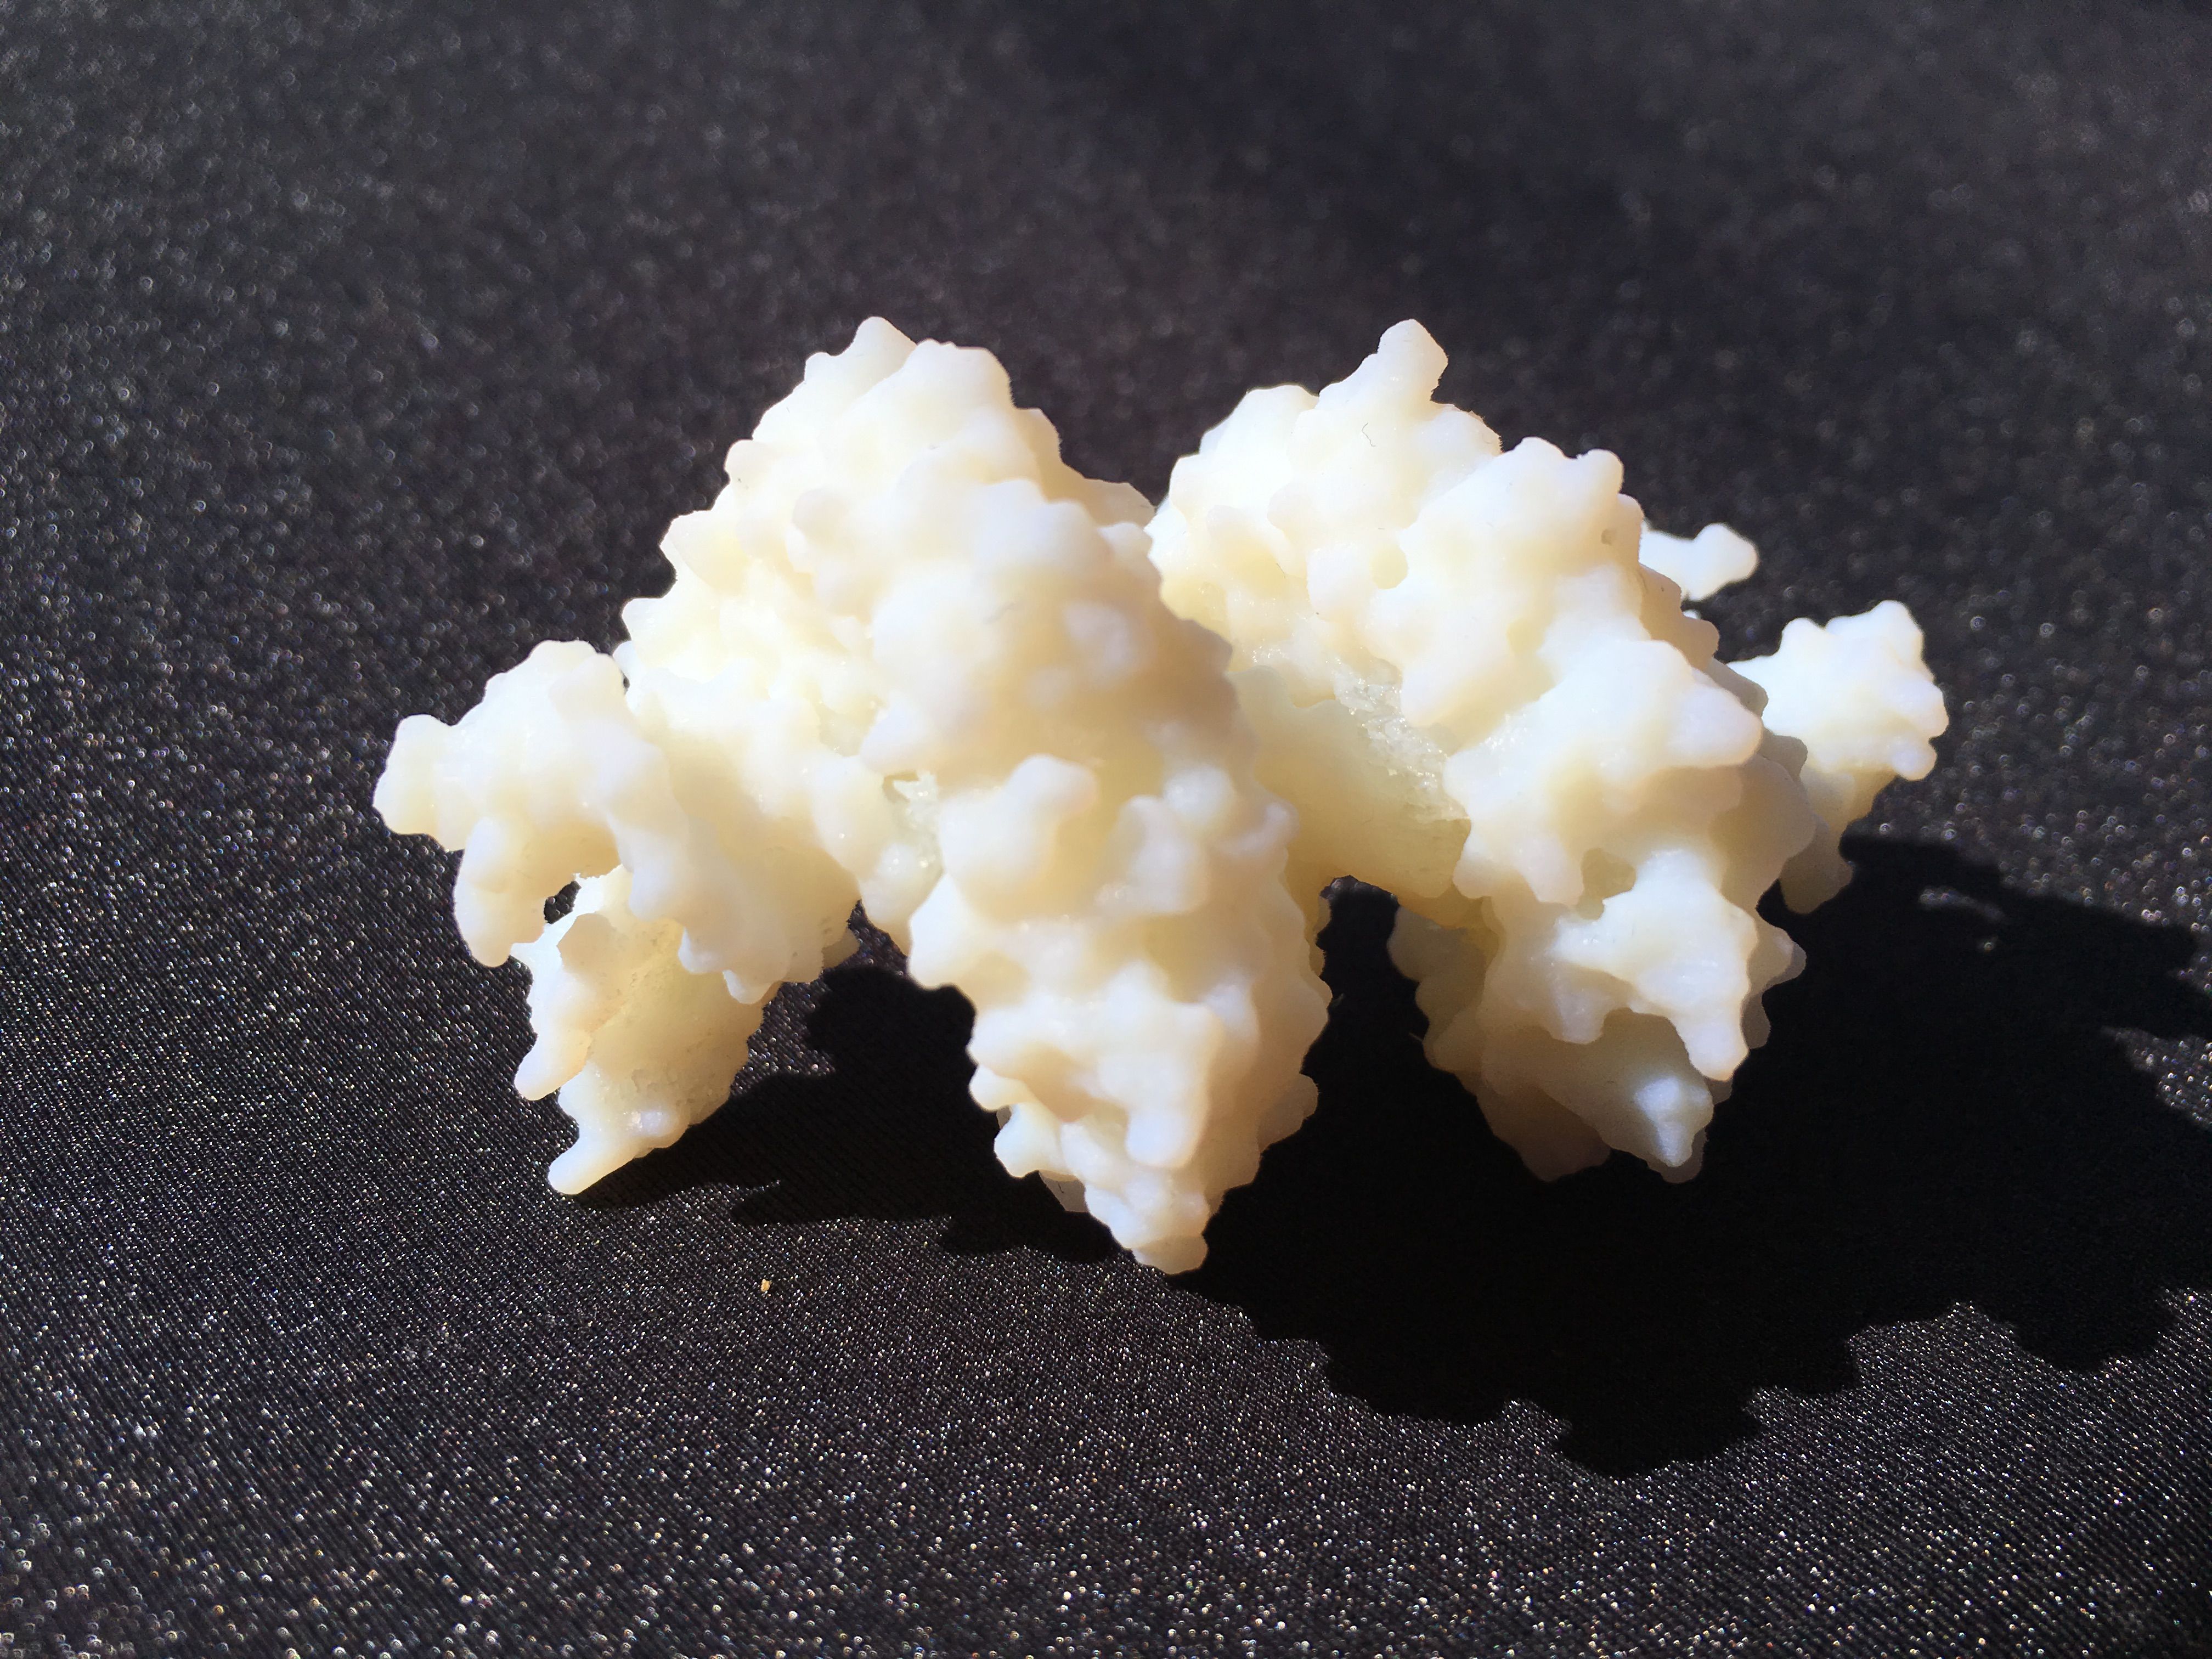
Figure 5. 3D-printed model of a TAL effector binding to its DNA target.
Now, onto the scanning portion of the assignment! So a little background: the day I was born, my grandmother gave me a stuffed duckling, appropriately named Ducky. Since then, Ducky and I have been inseparable -- if you watch any of my home videos from when I was an infant to a toddler, I was ALWAYS holding Ducky. Ducky even travels with me wherever I go, and is always in my room. As such, Ducky is now pretty ragged, but still very adorable! Thus, for the 3D scanning assignment, I scanned Ducky.
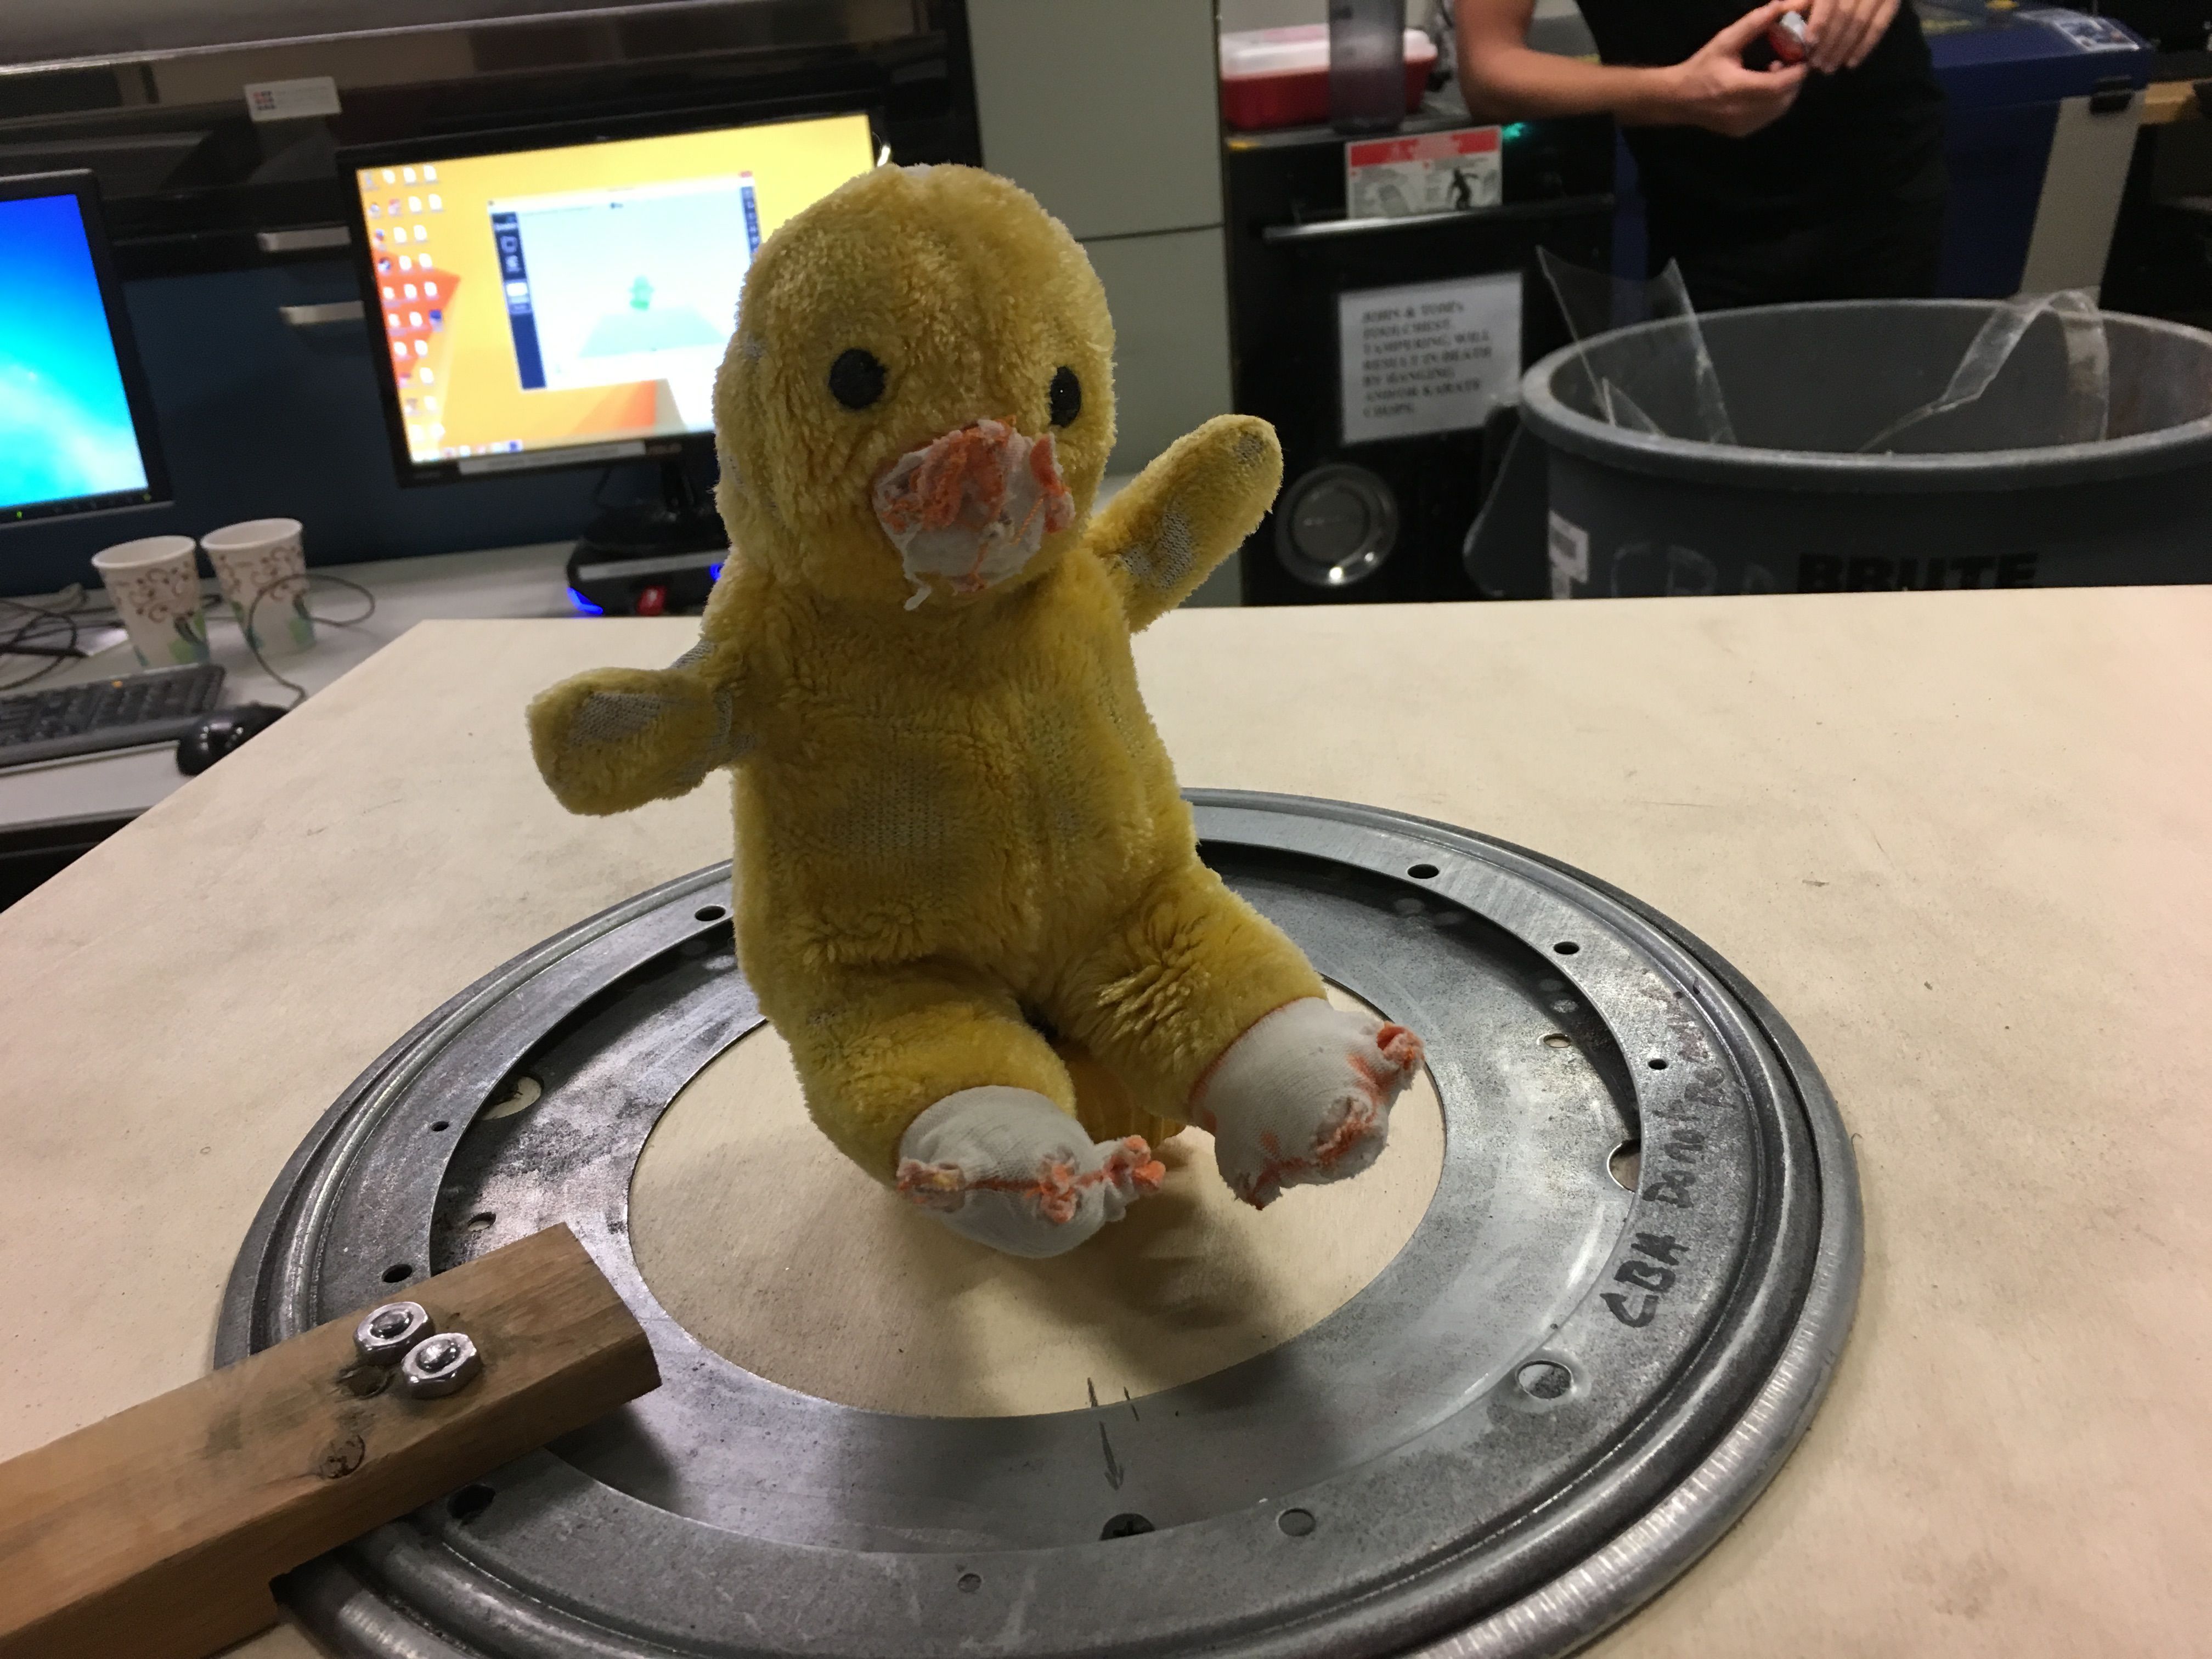
Figure 6. Ducky sitting on a tape measure ready to be scanned.
To scan Ducky using the Sense, I placed it on center of a rotor table, and velcroed the scanner on. After activating the software, and rotating the scanner around Ducky, I got a nice (and really cute) scanned image of Ducky!
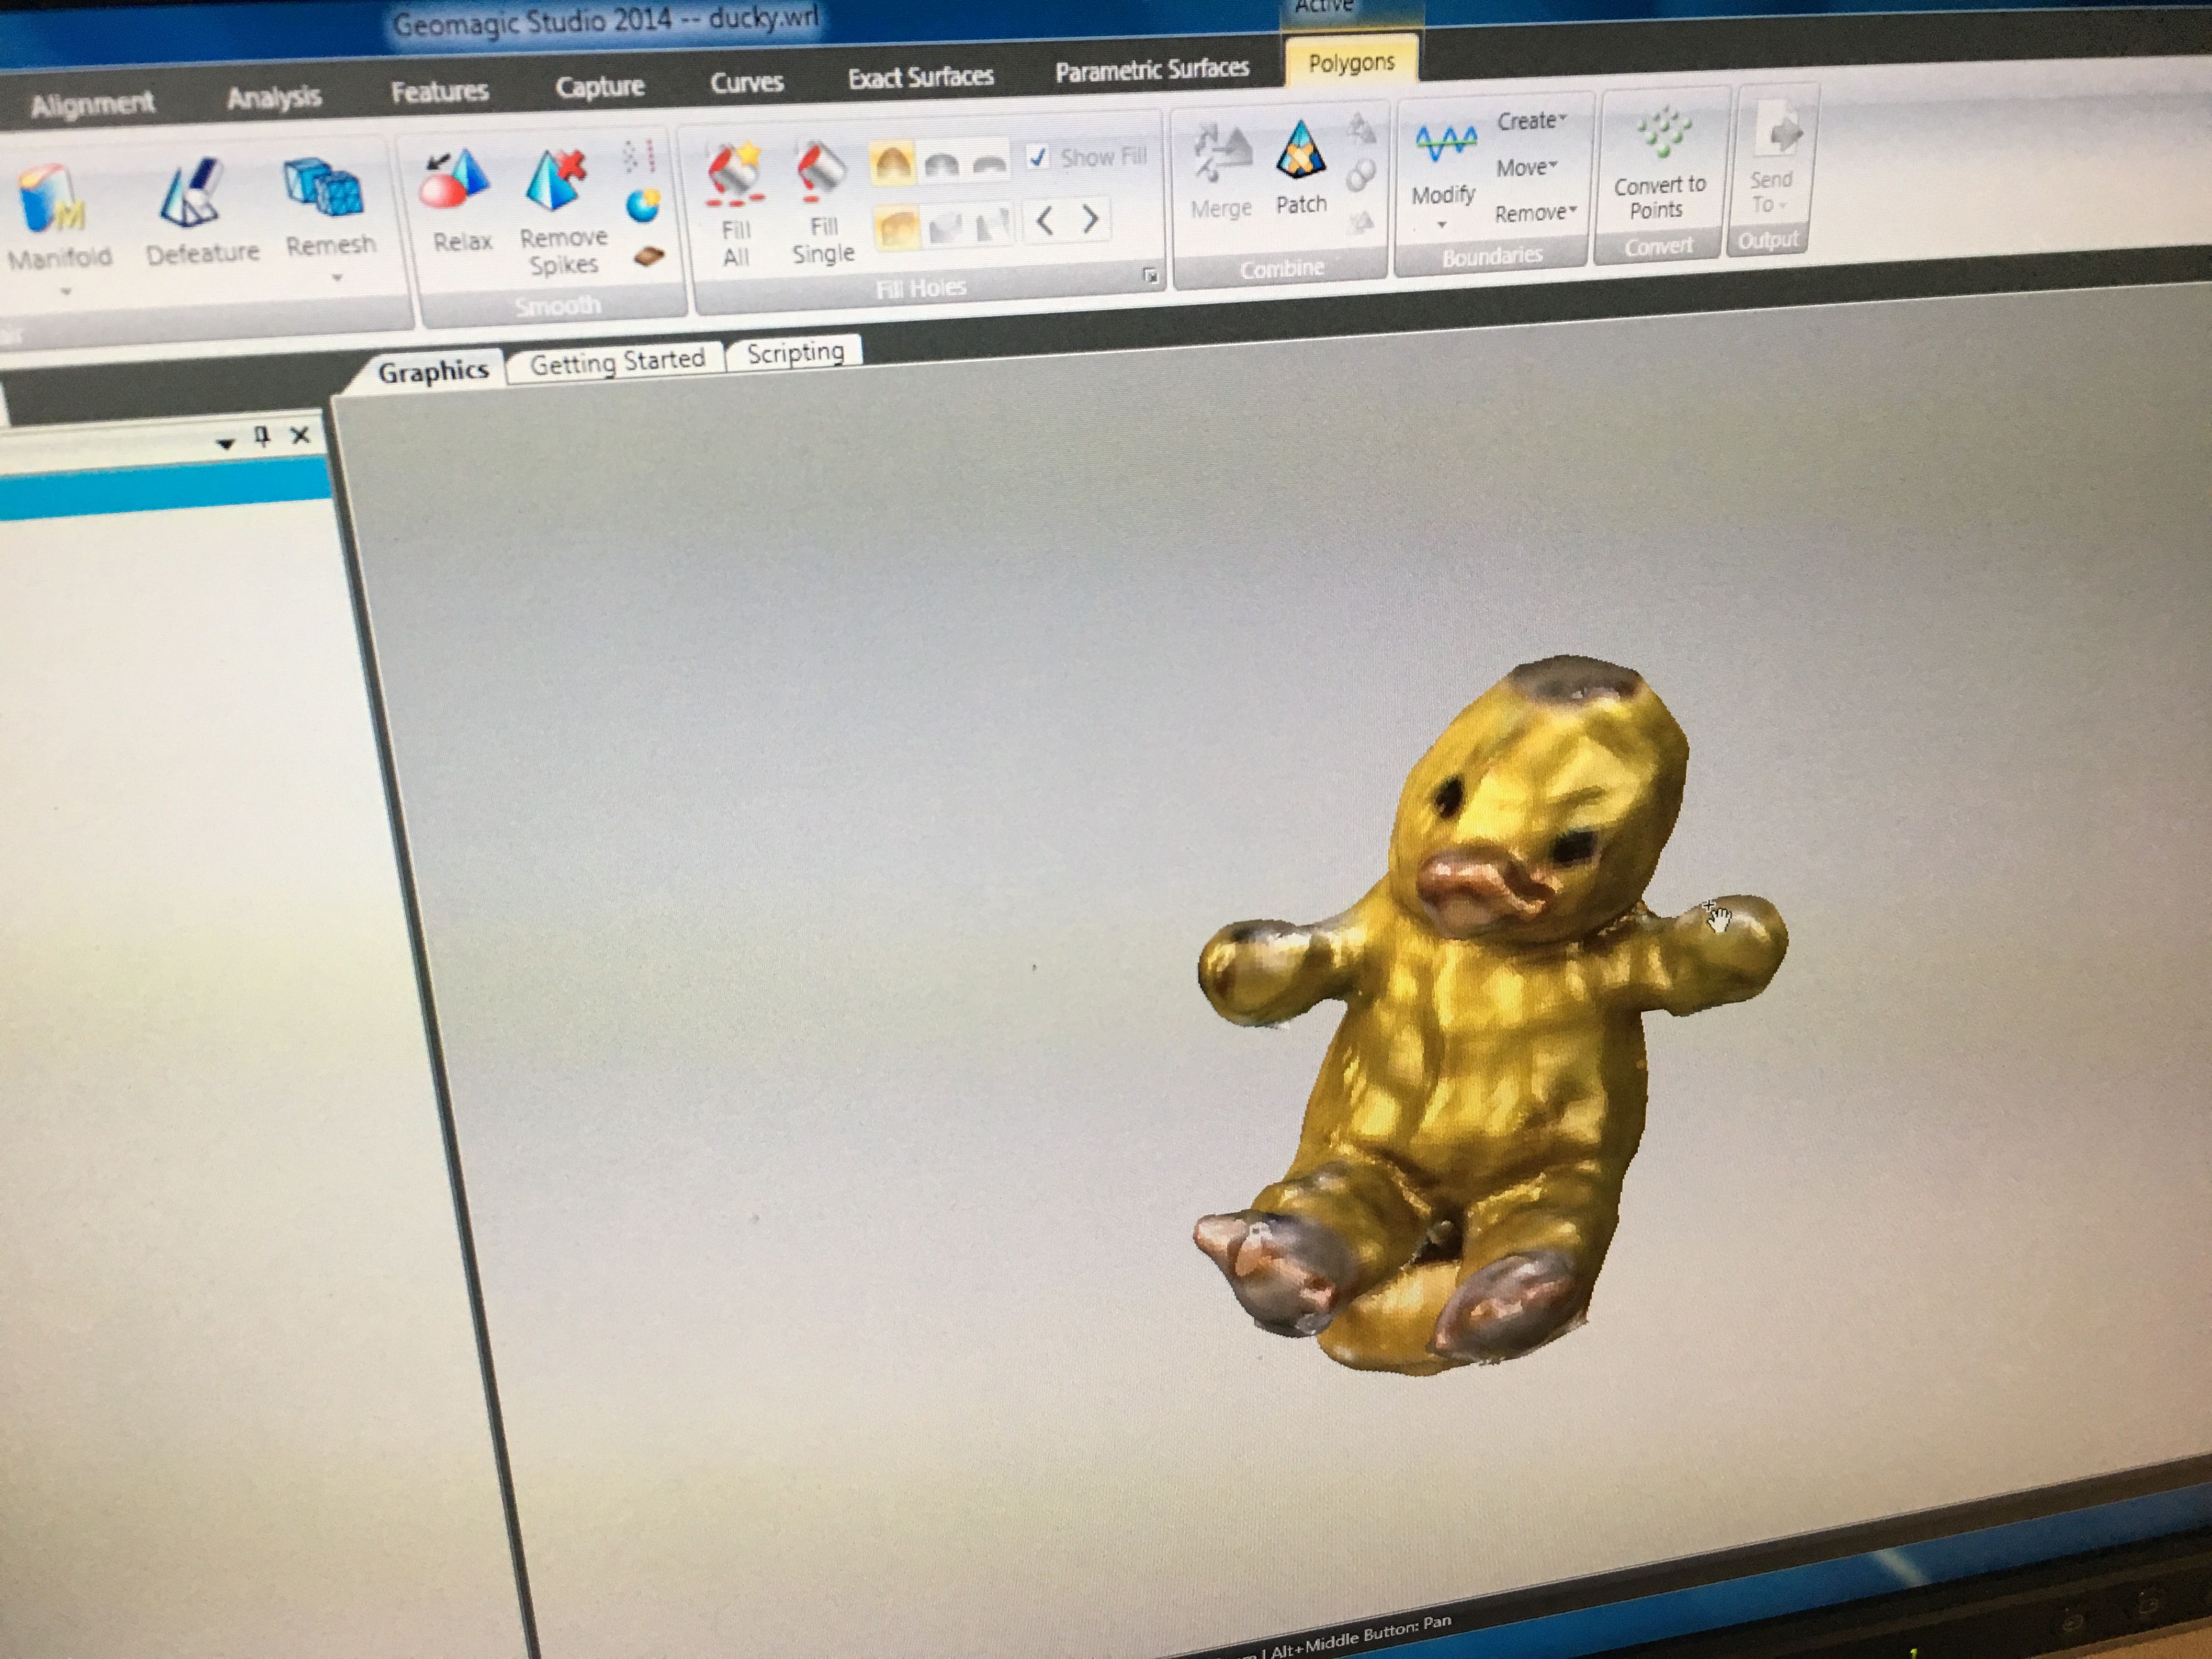
Figure 7. 3D-scan model of Ducky on GeoMagic software.
Next, I converted the file to a GCode format, and sent the printing job to the 3DWOX for printing. We had to scale the image down to print it in a good amount of time (1 hour) using less material. In the end, after removing the support material, I got a really cute replica of Ducky! What a fun week in HTMAA!
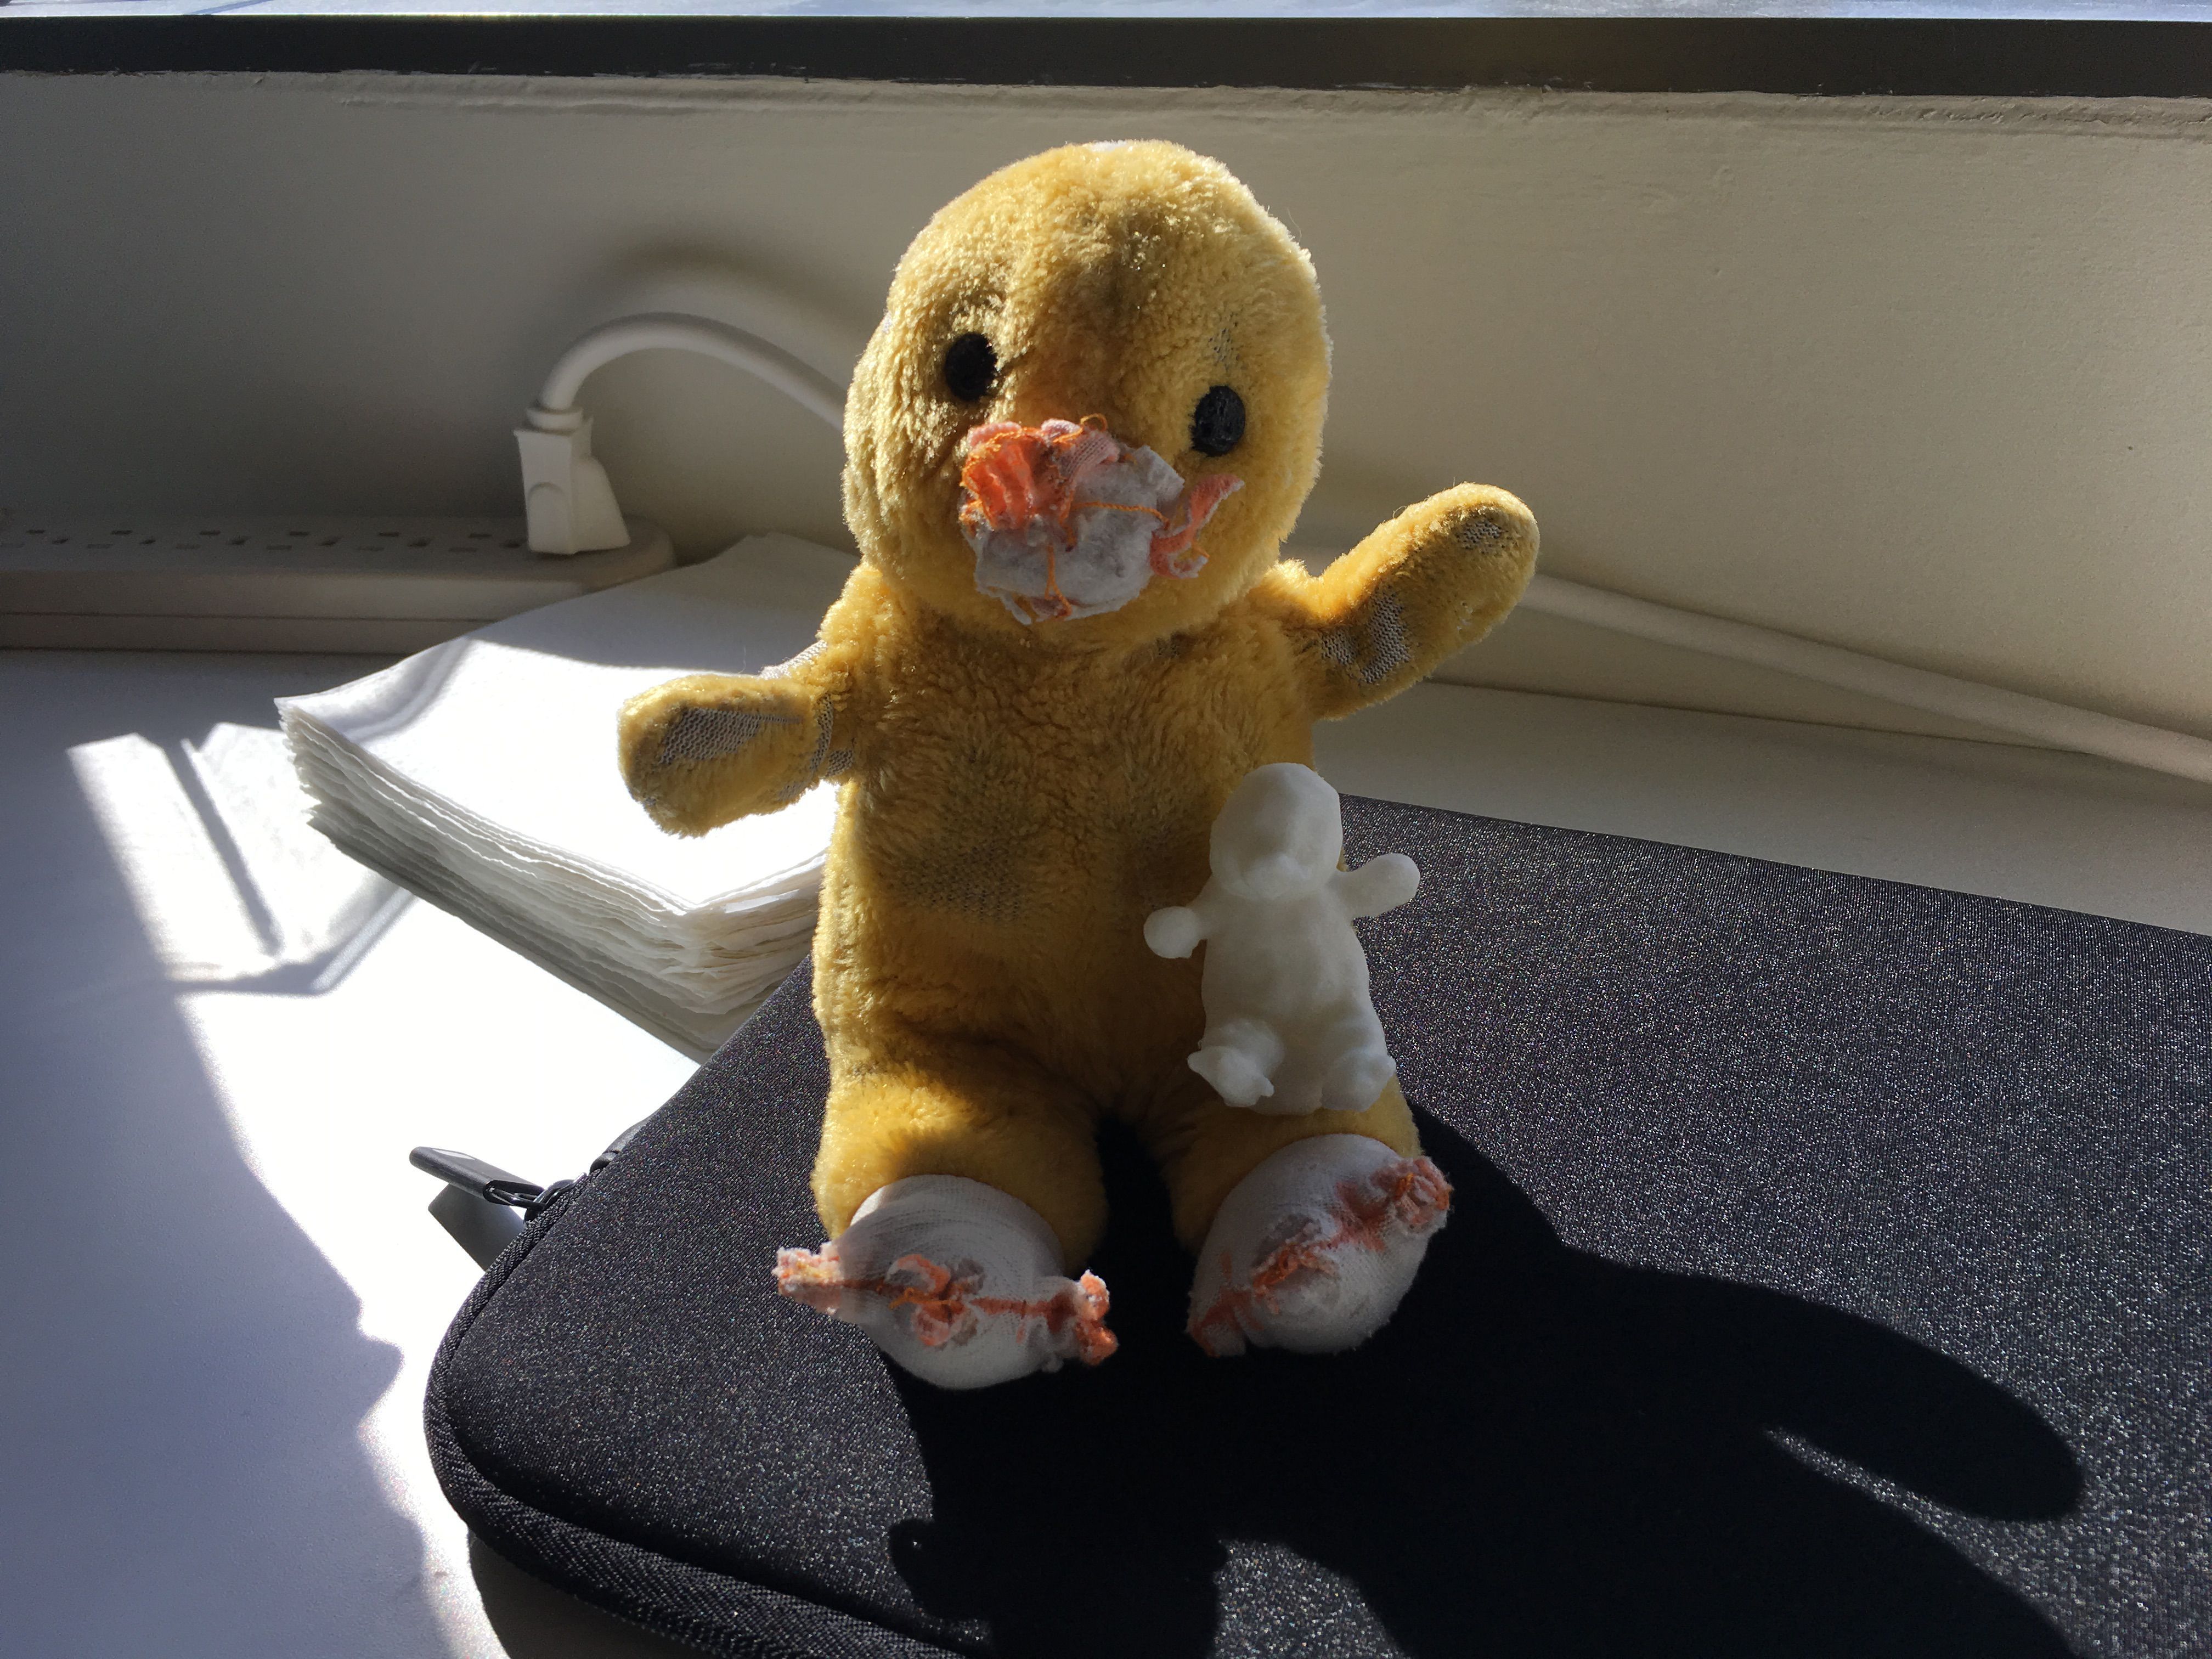
Figure 8. 3D-printed model of Ducky sitting on Ducky's lap.
| Activity | Tools Used |
|---|---|
| 3D Modeling | MeshLab, PyMOL |
| 3D Printing | Eden 260VS, 3DWOX |
| 3D Scanning | Sense |