week 01
COMPUTER-CONTROLLED CUTTING
Tools + Methods
Rhino
Grasshopper
Laser Cutter
Vinyl Cutter
Laser Cutting
Characterizing the Machine
I used to work in a laser cutting shop but I still like to check out the capabilities of every machine I use (especially since I’m new to MIT and every machine around here seems to run on different settings). I also seem to learn new things every time I get introduced to a laser cutter. For instance, this week our master maker Jen actually explained the optics of a laser to me for the first time. She explained that because lasers have one point of focus, you should actually manually focus the machine so that there are two inches between the bottom of the laser carriage and the middle of the material – I had previously always worked from the top of material. I also learned this week that you should offset your profiles by the diameter of the laser (still not sure of that dimension).
Teaming up with Zach and Rodrigo, we tested a 120 Watt Epilog Laser cutter with a quick array of squares using different combinations of speed and power. The shop we were in had recommended settings for 3/16” Corrugated Cardboard of S: 30, P:15, PPI: 500. Measuring our material with calipers, we realized it .162” which is somewhere between 1/8” than 3/32”. We set up an array of squares starting with 10-10 power/speed to 60-50 power/speed. Then we checked which boxes cut all the way through with minimal charring. We also found out that using the “EXPLODE” command on text in Rhino turns it into curves which makes for fast labeling. BUT once you use the explode command, you can’t edit the text so make sure you use it at the very end.
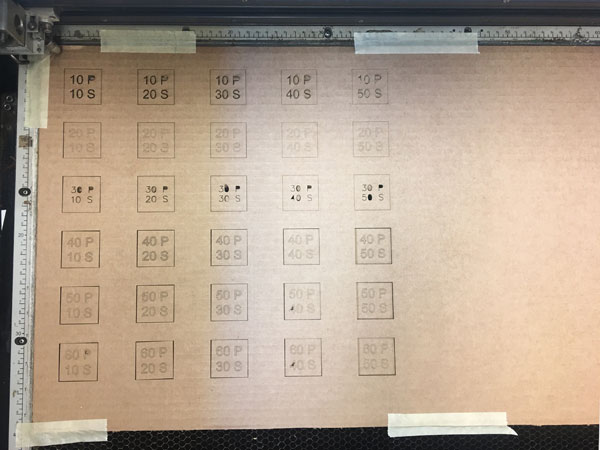
An array of test squares
Presskit 01
I used Rhino and Grasshopper to create my PressKit. Using Grasshopper, I made a tool that would generate a polygon and create a certain number of notches on each side at a given depth. The number of sides on the polygon, the number of notches per side, and the notch depth are all variables in this definition. The tool worked out okay although I think my programming was a little redundant because it took a long time to do (which means there’s probably a simpler way) and it doesn’t work on curves like circles. I’d like to develop it to also include notched circles where you can specify the angle of the notches.
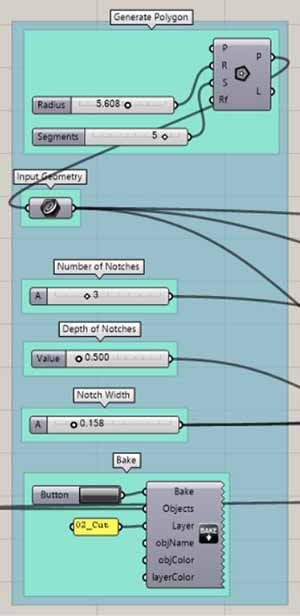
Grasshopper Parameters
Fabricating my first press kit, on the other hand, was humbling and a little embarrassing. I cut out a variety of shapes but made the depth of the notch too deep on them. I blame this on the fact that I’m used to creating slots for waffle structures in which you want either side of the material to be flush once connected. BUT, if you’re making a press kit set where you want multiple pieces to connect to the plate then you need to use a depth less than half. Basically, all the pieces I fabricated could only connect with one other piece and even though they made efficient use of the sheet space, it basically amounted to one large waste of material. :’-( I decided to go ahead and make a specific presskit in the way I normally would.
Looking good, Working terribly
Press kit 02 | Mannequin
So far, my only requirements for the final project is that I want it to interface with the body. Since this will likely be a wearable or, at least, reference the body, I decided to make a mannequin for sewing in case I go with the wearable route. I tried to find a free dress form mesh online but they were surprisingly elusive. Instead, I started with the generic Mesh Lady and guillotined her limbs off to make a torso form.
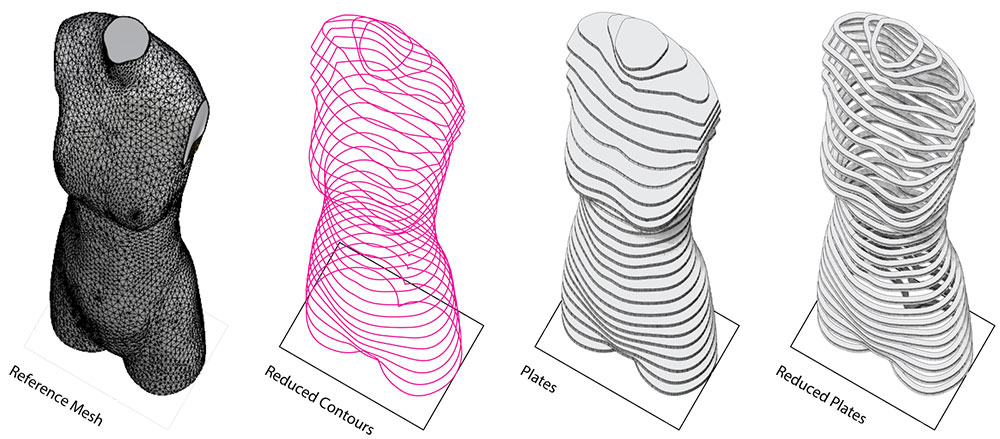
I contoured a mesh to make plates and then hollowed them to save material
Planning how to divide and layout my model took the most time. Once I had the mesh, I needed to decide how to break it up. I debated using LuBan, a software by Larry Sass, a professor in the computation group, which is great for making quick fabrication files. But my mesh was so faceted that it ended up crashing every time I ran it. Manual mode it is.
Rather than making a continuous contour model of plates, I decided to make a waffle scaffold which would save me a lot of material. I contoured the body vertically, using increments of the material thickness (.255”). To reduce material, I chose every fourth line and then offset it .5” so that I would be building a ribbed structure rather than a plated structure. I then debated whether the ribs in the V direction should be radial or orthogonal. I initially thought radial would look cooler but I could tell from the model that the angles would cause trouble and I would rather have a flush surface (especially since I can cover it with padding later). After a couple iterations, I decided on my rib orientation and it was time to make the notches. Unfortunately, I couldn’t use my cool new fab tool because these notches were so specific. I created the notches by moving the U ribs .25” inches away from the V ribs and using the Boolean Difference command. I did the same for the V ribs. I then exploded the ribs and always used the widest notch size (to accommodate for angled slots).
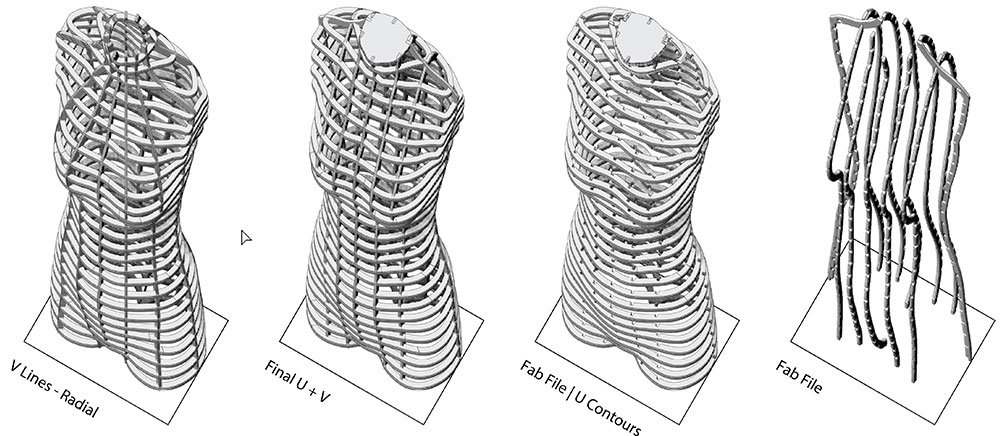
I compared radial and orthogonal models before creating notches.
Normally when laying out something with this many parts, I would use RhinoNest but my free subscription had expired and I was in a rush. Plus, I realized that if I were to cut each of these rings individually, I would use 6 sheets of material. Instead, I decided to cut rings for only every third U rib and divide the remaining ribs up into four pieces.
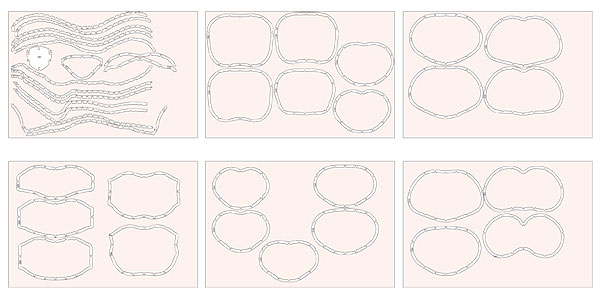
Originally the laser file would have been too many sheets
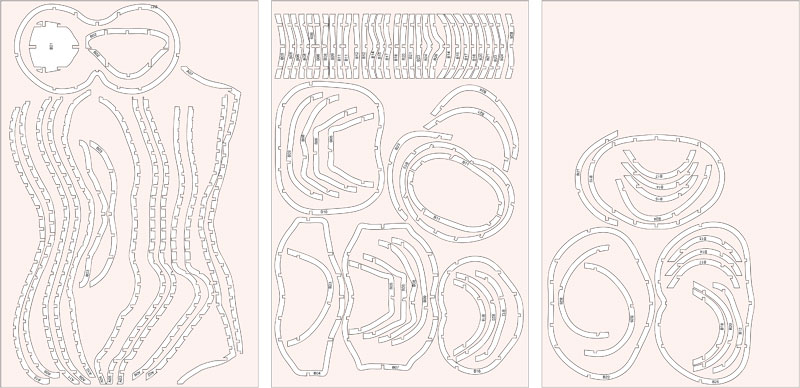
By splitting up some of the ribs I was able to reduce the number of sheets to 2.5
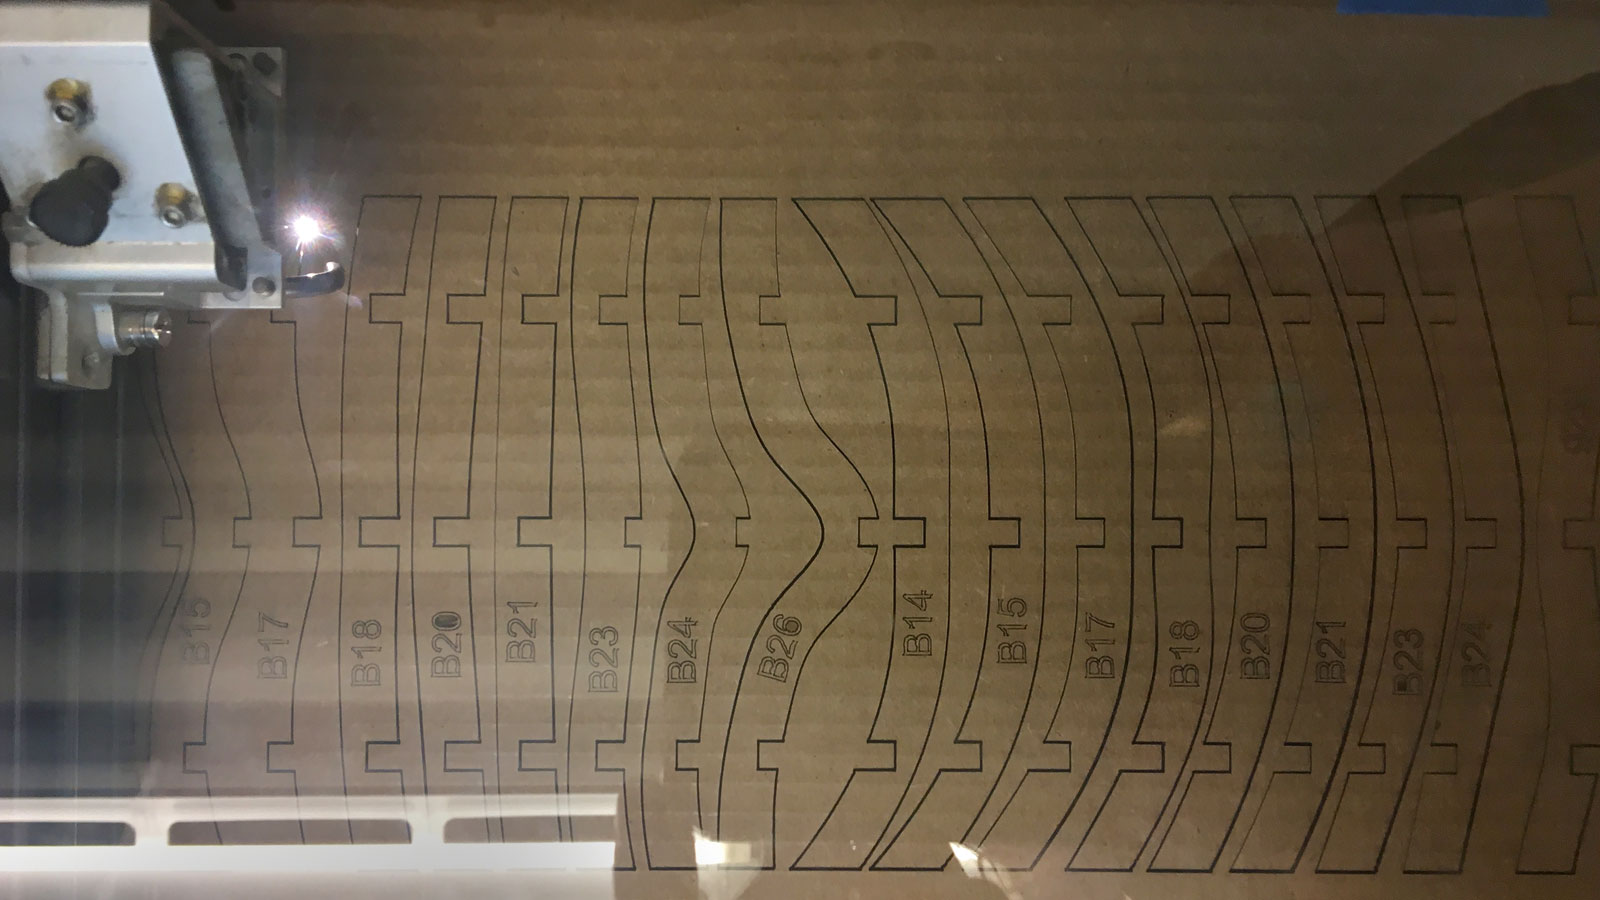
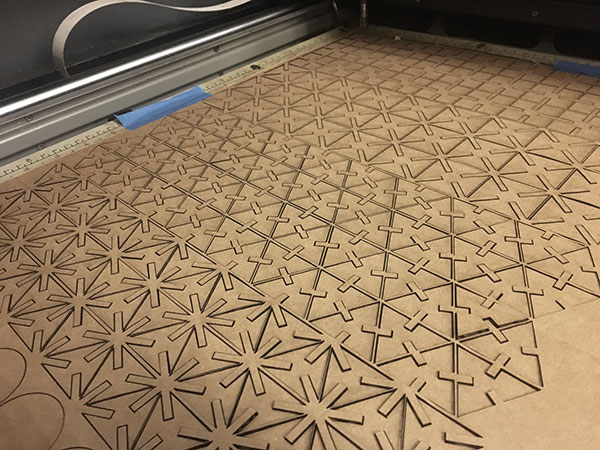
I cut my dress form on a 120 watt Epilog Laser Cutter in MIT’s Architecture Shops. I made sure to focus the laser by zeroing it 2” above the top of stock (or 2” the middle of stock if you want to be really precise). I realized I had characterized the laser cutter for a different thickness of cardboard earlier so I did a couple 1”x1” test squares on part of the sheet I knew I wasn’t using. I ended up using the settings 50s/100p/500ppi to CUT and 75s/8p/500ppi to SCORE – but ended up having to cut the first sheet twice. I used more aggressive settings on my second sheet (30s/100p/500ppi) (65s/5p/500ppi) because I really didn’t want to have to run this thing twice.
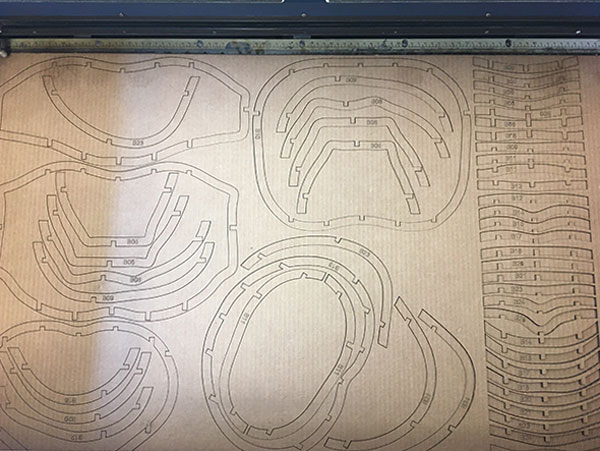
Laser cutting on the Epilog
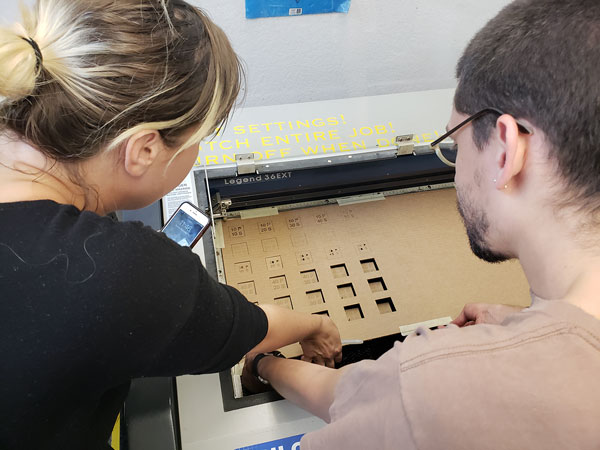
I made sure to carefully number each piece but assembly was still difficult. While I had characterized tolerances earlier, it had been for a different thickness of material. Therefore the connections were not as snug as I would have liked. Without snug connections it was difficult to assemble because the vertical pieces wouldn't stand up on their own. I improvised by assembling the model on it's side, using a Swiffer to suspend it from the center.
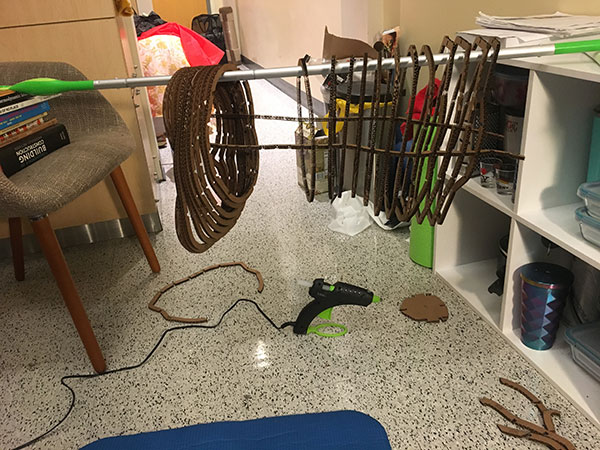
Some improvised assembly tactics
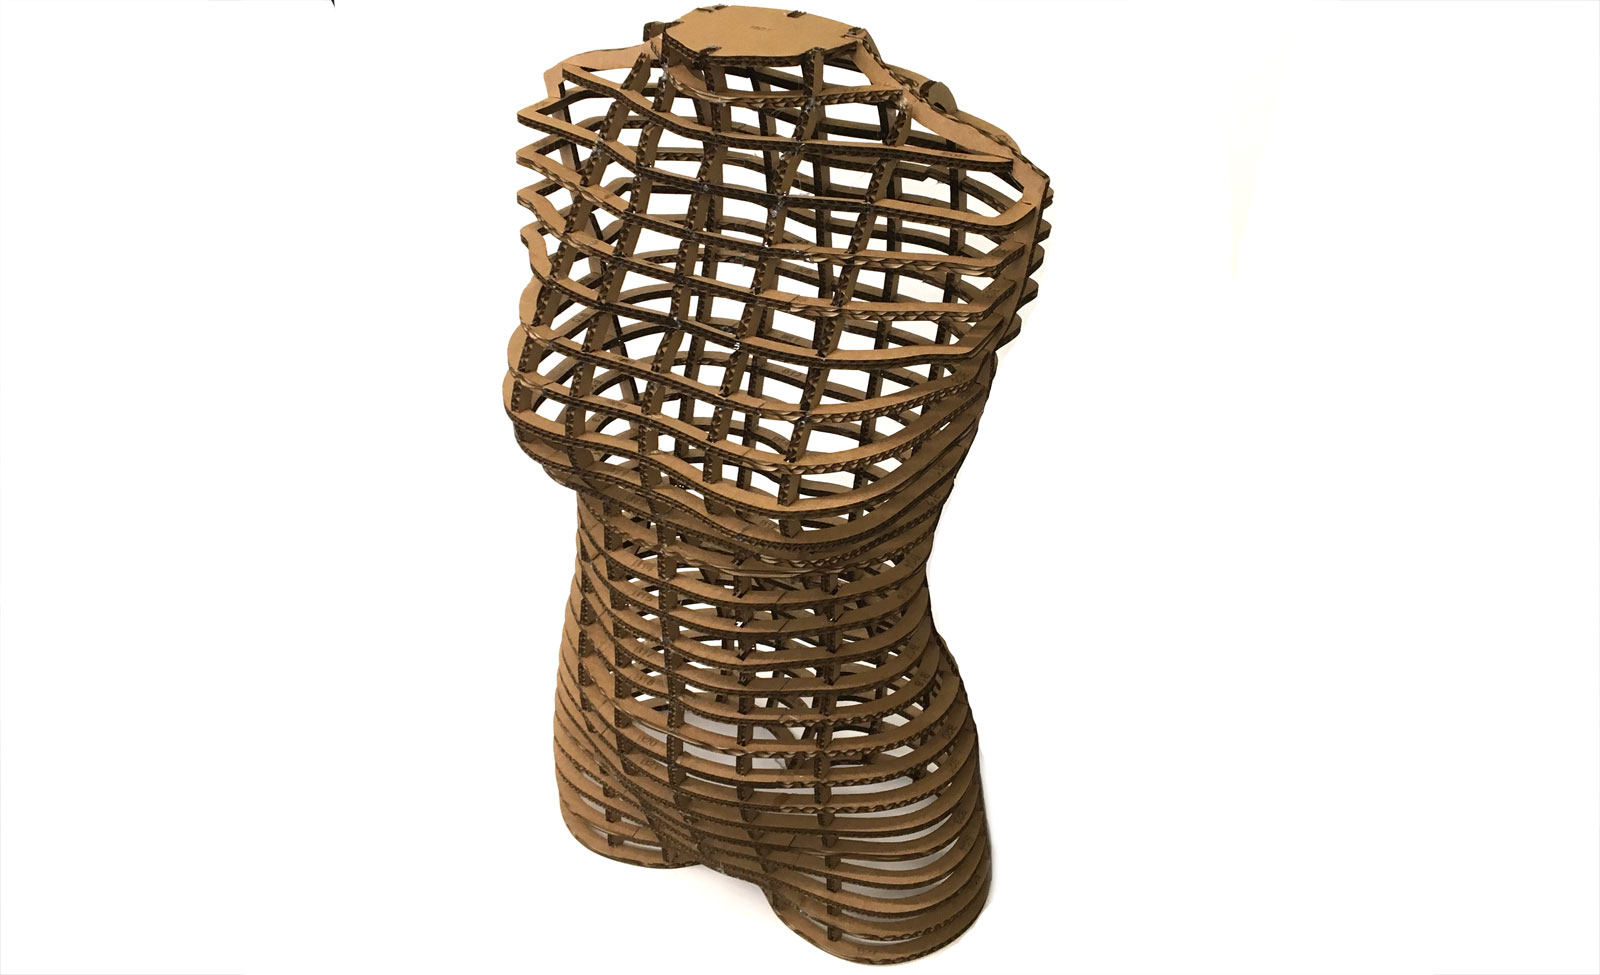
Assembled Mannequinn
Vinyl Cutting
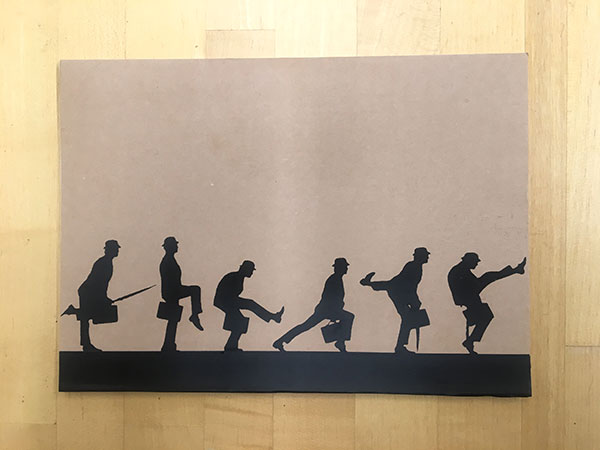
We also used the Vinyl Cutter this week. I have a feeling I will use this machine more in the future because I really like stickers. I decided to make something silly to start off with so I created some silhouettes of John Cleese's Ministry of Silly Walks. Frankly, it might be the best thing I've made so far here.
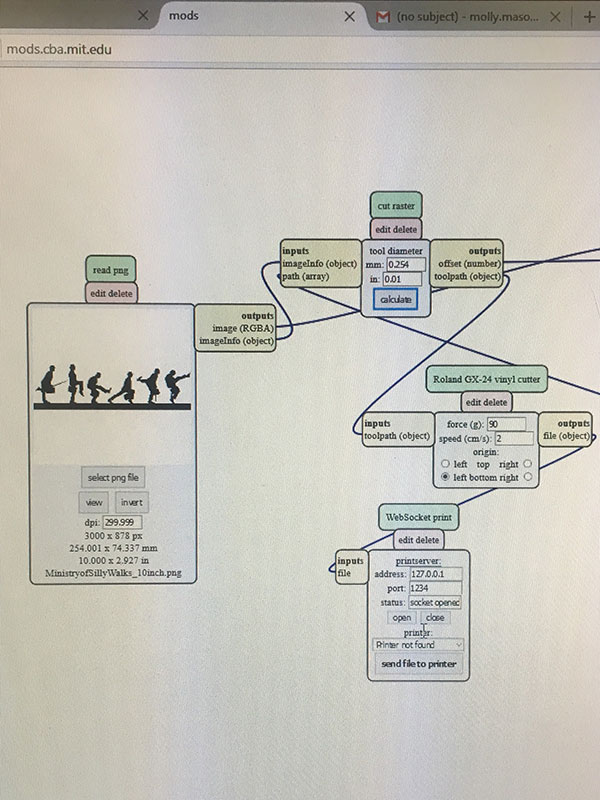
To set up the vinyl cutter, I used the Roland Vinyl Cutter and CBA Mods.
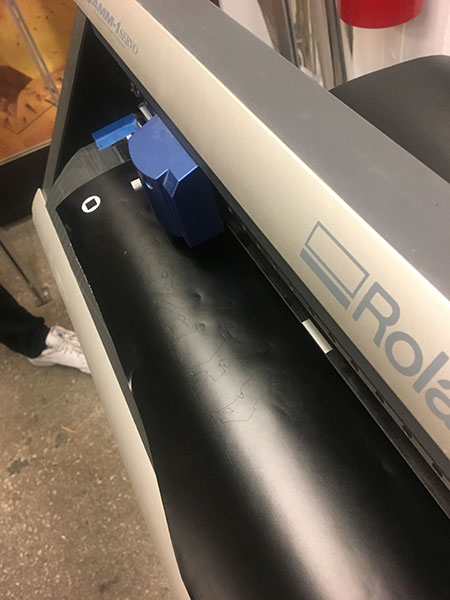
First zero the machine using the arrows and origin button the Roland Vinyl Cutter.
Hit the test button on the vinyl cutter - this will make a tiny square and circle and you can check your settings
Open the server on the lab computer
Go to Mods.cba.mit.edu
Right click on the Center for Bits and Atoms Icon. Select Programs>servers>Roland:Vinyl Cutter
Import the png or an svg (vector)
Default force should be 90. Speed =2
Hit calculate
Hit cut raster
Verify the socket is open / connected.
Send to Printer
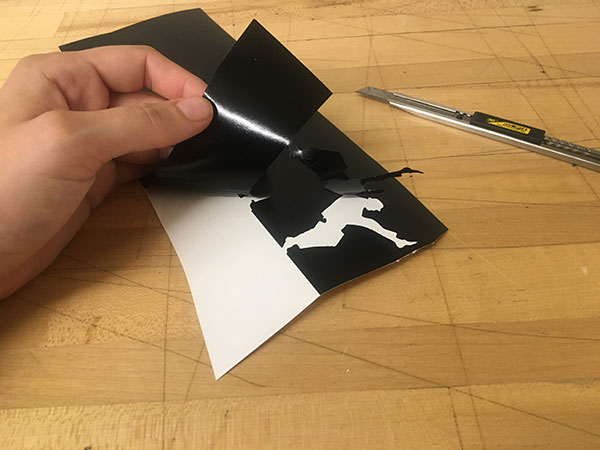
Gently peel stickers from backing.
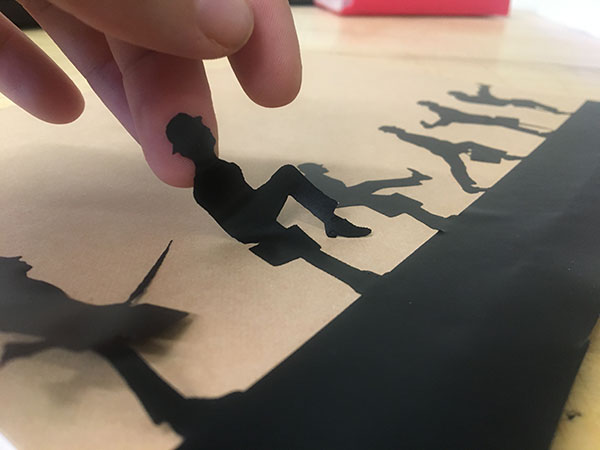
When placing the stickers, it's important to work from bottom to top and place one Cleese at a time.
Final Notebook, looking mighty sharp
Files