week 12
NETWORKING AND COMMUNICATIONS
Tools + Methods
Roland Modela Mill
Soldering
LightBlue
This week we were supposed to make a network of devices. To do this we had to give our board some kind of identity so other boards could find it and talk to it. I chose to use a Bluetooth device because it could easily interact with my phone and computer.
Board Design
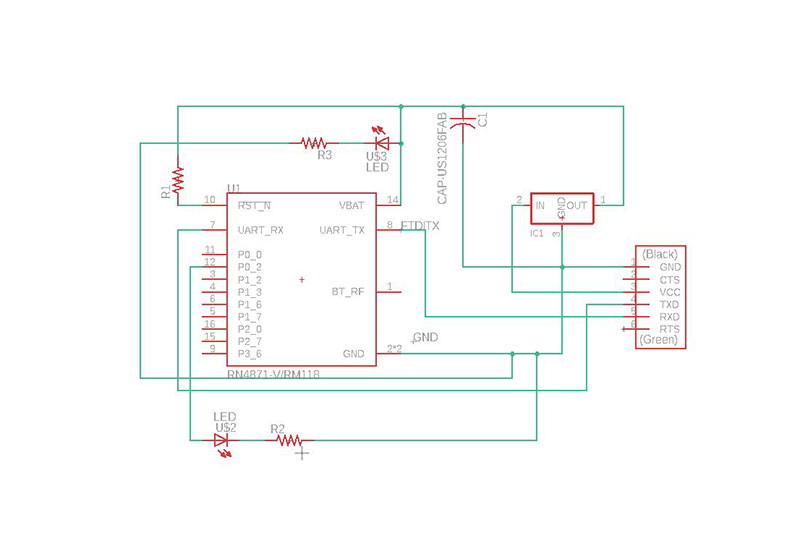
I chose to use make the RN4871 (2.4 GHz Bluetooth) because Rob Hart had already provided a solid tutorial. I started with Neil's board but at the advice of this tutorial added LED's to Pins XX and YY. The Blue LED would turn on when the board was connected. The Red LED should blink when the Bluetooth is talking. IN THEORY. I also used Rob's tutorial to add the Bluetooth component to my Eagle Library. To do this, I took the code from his website and saved it as a .lbr in Notepad. Then I moved that file to the Eagle/Libraries folder on my computer. Just like in Week 04, you have to make sure to activate the library when you open Eagle.
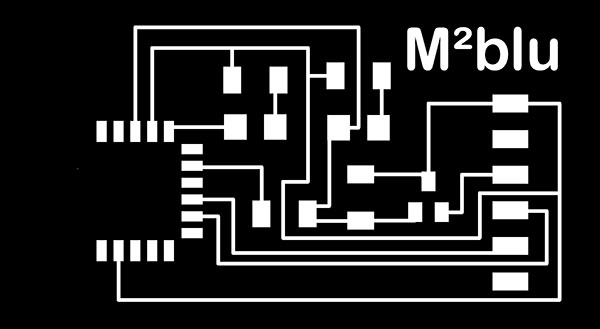
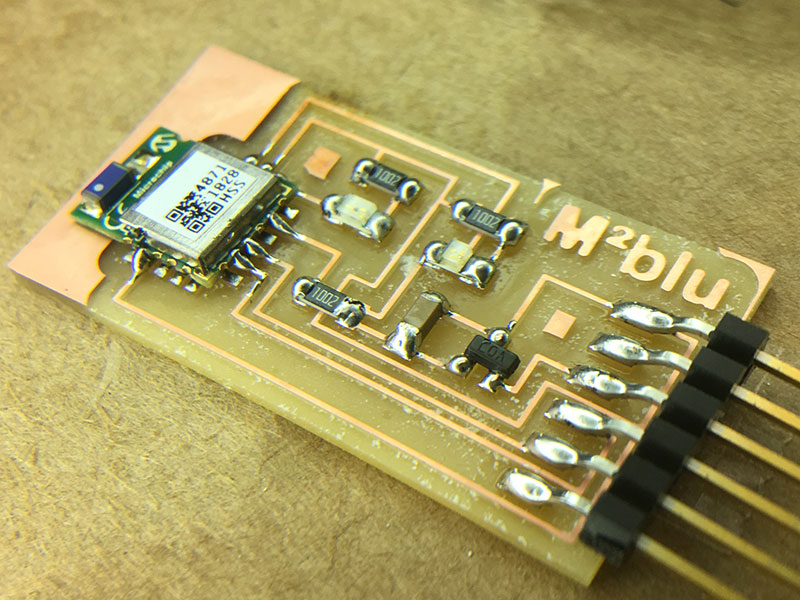
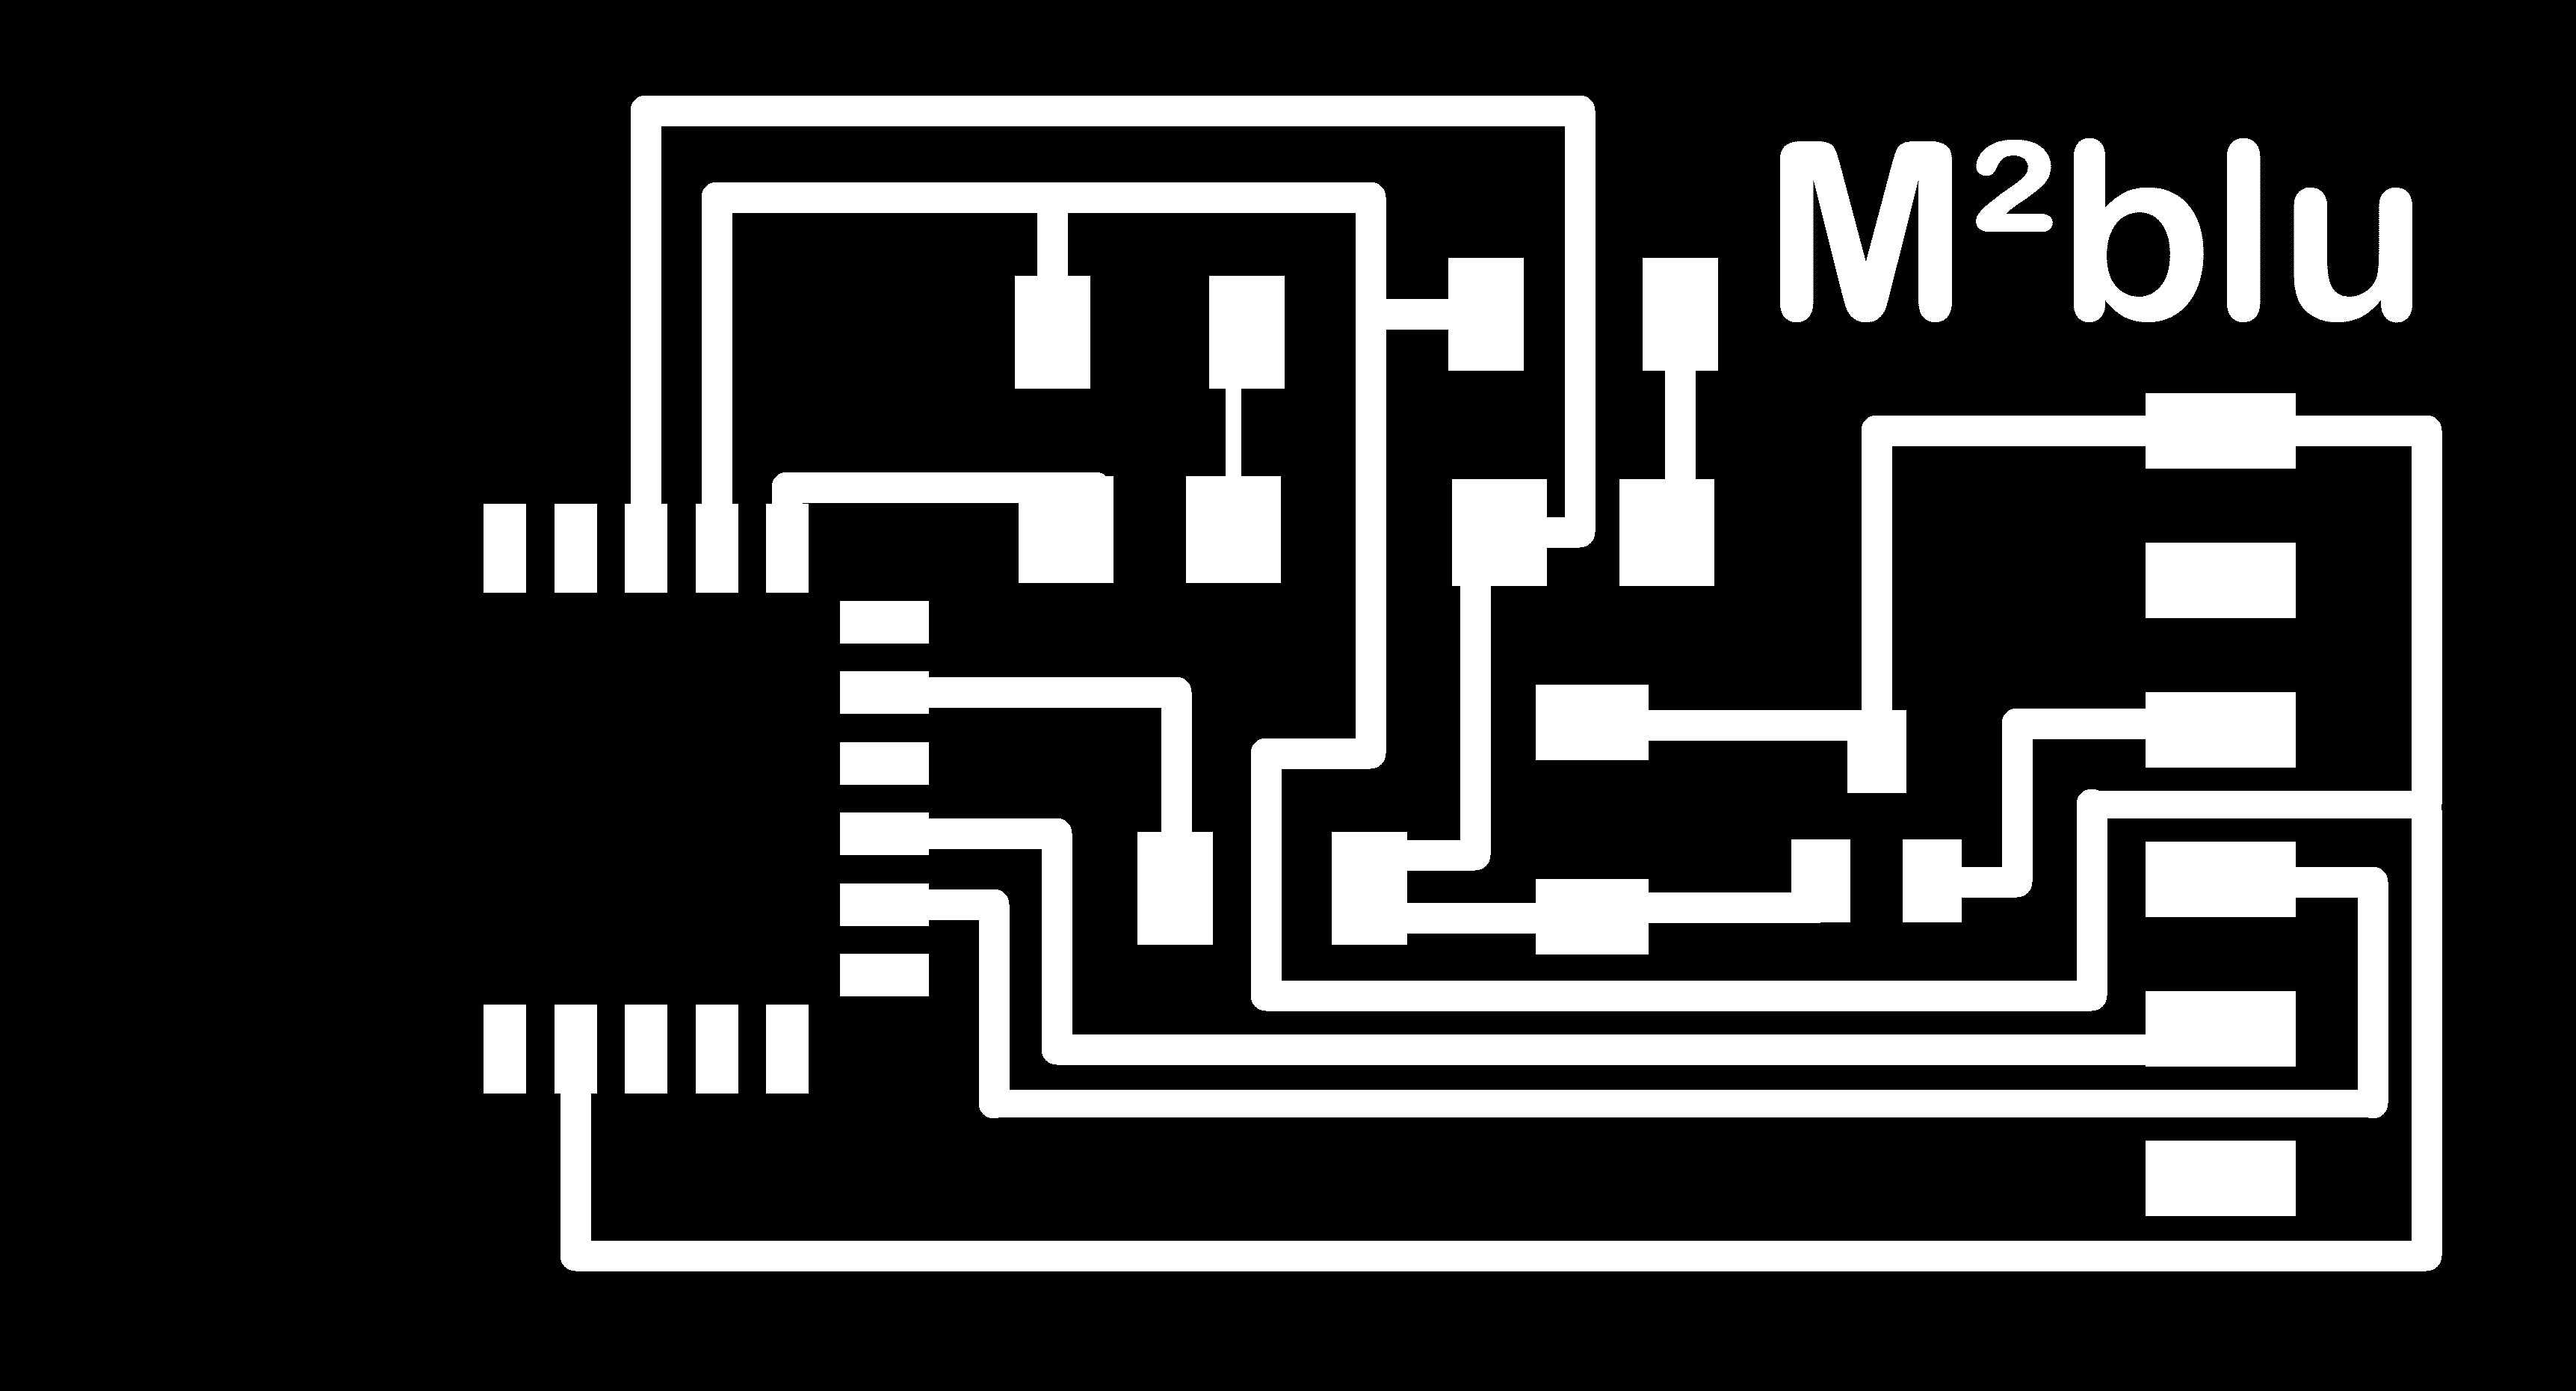
Making the Board
Fabricating the Board
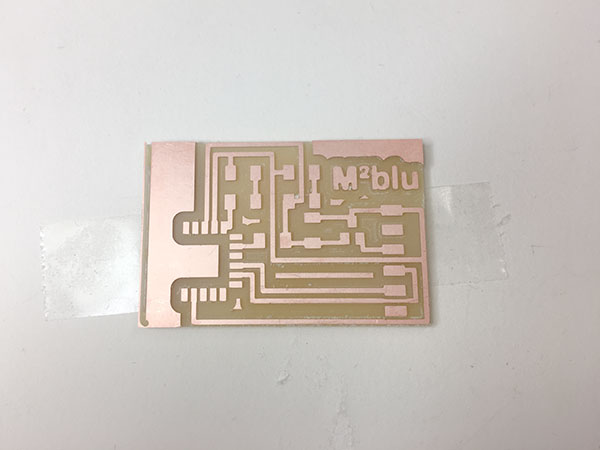
You know the drill – or, at least, I thought I did. Taking my traces from Eagle, I milled on a SRM-20 Modela. Milling went fine but soldering was trickier. The RN4871 didn't seem to have any feet - just weird concave semicircles. The first time I tried to solder all of the feet down by first applying a little bit of solder to every pad and a little to every "foot" and then heating it with a heatgun. This went terribly! Then I tried just soldering the pins I needed. This lead to what I think is the worst soldering job I've ever done. I tested it, it didn’t work. I removed and re-soldered the Bluetooth component several times to no avail. Finally, I remilled the board with thicker traces and that did the trick!
![]()

Talking to the Board
LightBlue
Now it was time to talk to the board. I did this using the LightBlue App on my phone. Ideally, when you hook up your new BlueTooth board to an FTDI cable both lights should turn on. Then you should be able to open LightBlue on your phone and see the device among all the other bluetooth device floating around MIT. My device was named BLE-A8E2. This means the wiring is correct but the device still isn't ready to be talked to. First you need to go to Terminal (which I did on our lab's Ubuntu VM). If you're using a VM, make sure that removable device is connected to the VM and not the host computer. Then in the terminal, you can type something like "ls /dev/tty*" which will bring up all the devices on connected to your computer. Yours will probably be the one that is different - in my case it was /dev/ttyUSB0.
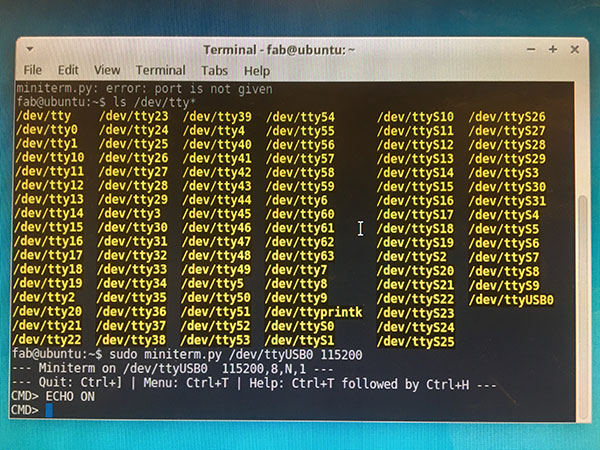
Once you have found your board, you should run the following commands
sudo miniterm.py /dev/ttyUSB0 115200 The address should be the address you found before when running the list command. The 115200 is something I followed from another tutorial. I think it has something to do with bit speed?
$$$
+ This turns the echo on
SS, C0
R,1 This reboots your board
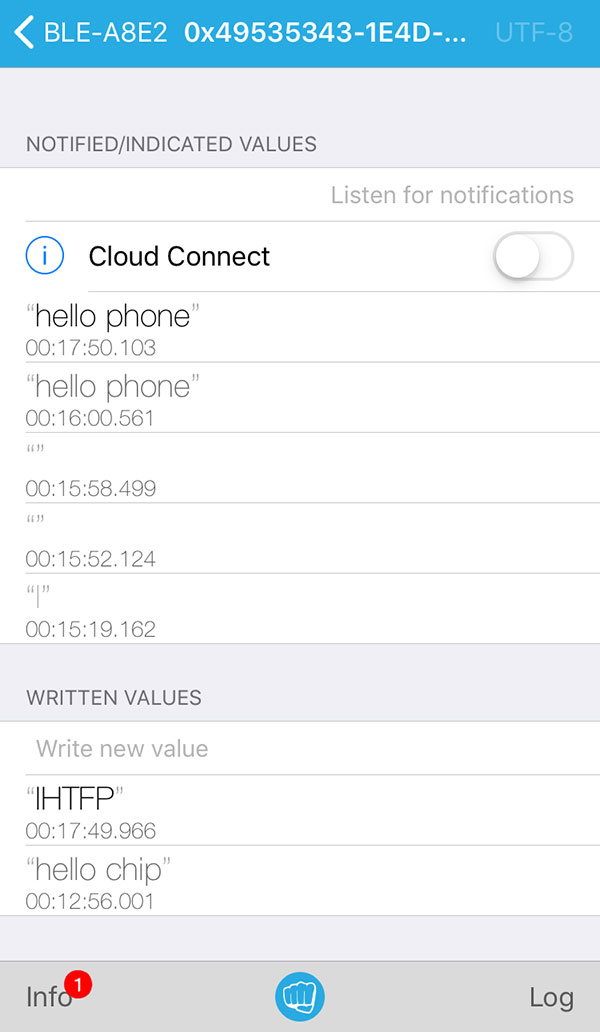
Now your board is ready to talk to your phone (through your computer). In your phone, open Light Blue and find your device again. This time click on it and you will be able to scroll down and see that it is able to "Write Notify Indicate." Select that then click on the upper right hand corner to change the Characteristic Format to UTF-8 String (rather than the default Hex).
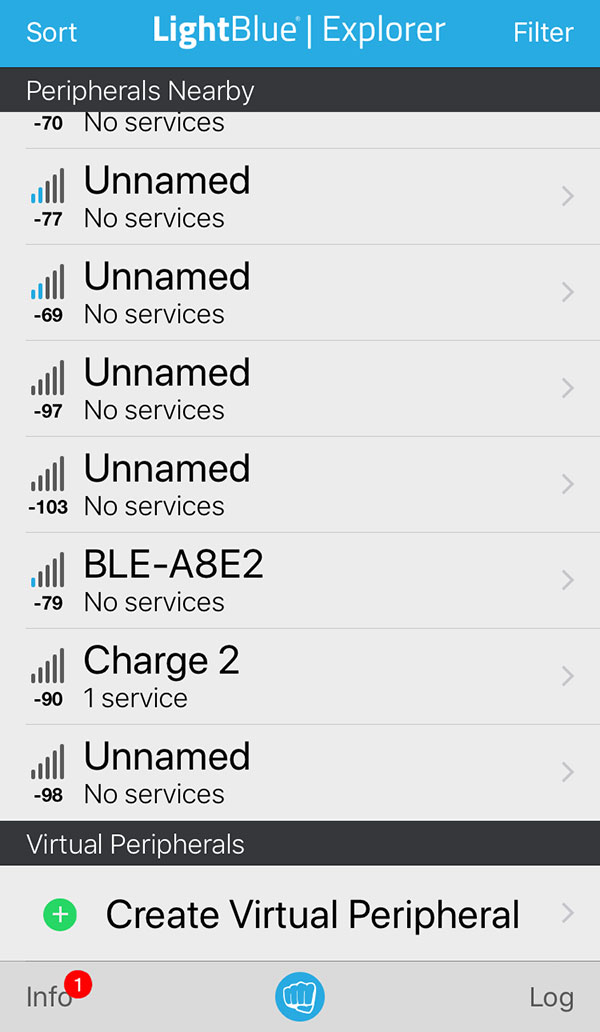 A list of floating Bluetooth Devices
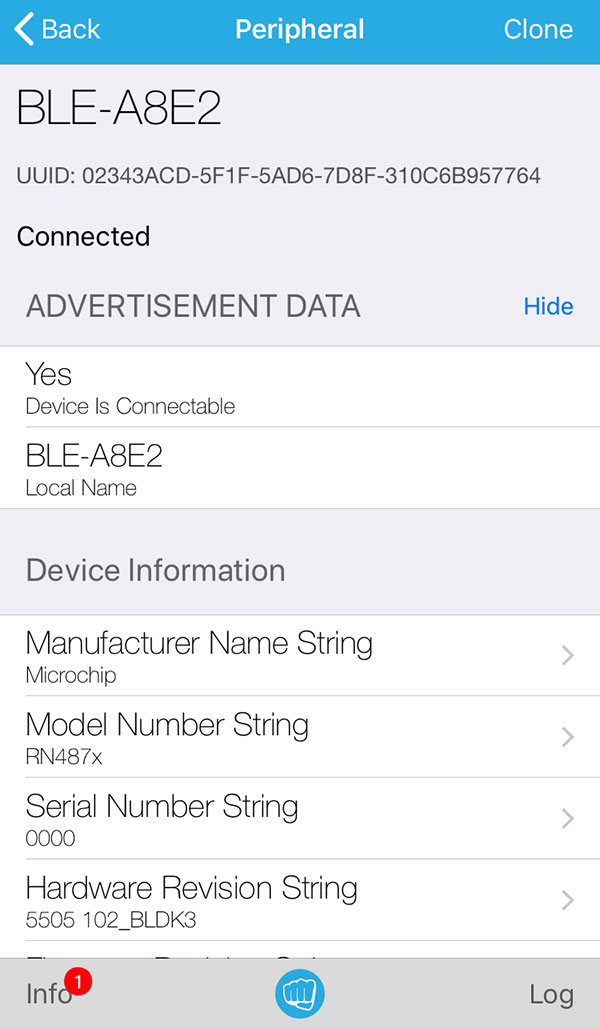 Using LightBlue, I was able to locate my board.
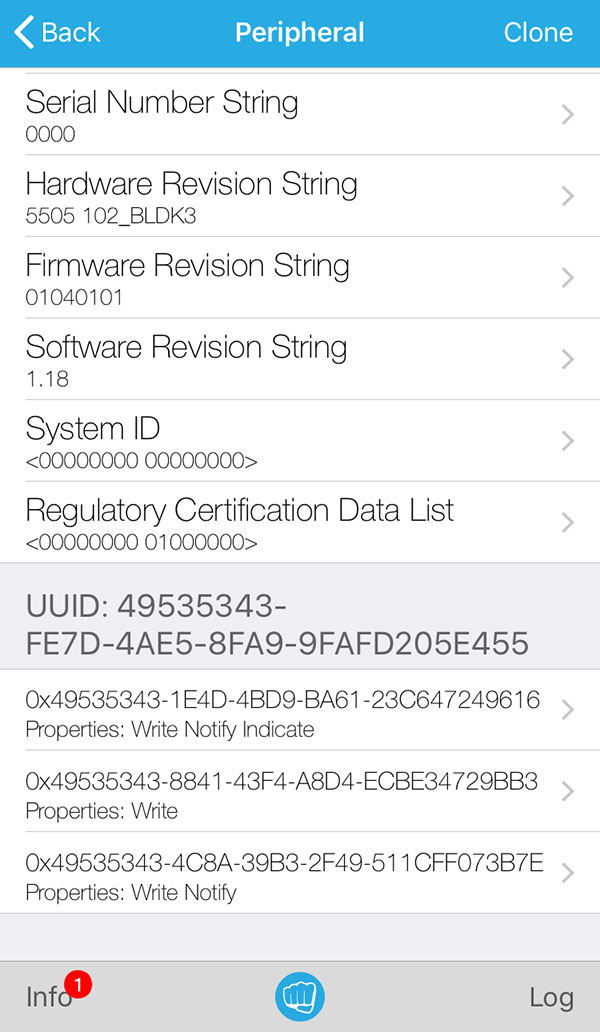 Scrolling down you can find the ability to Write Notify Indicate
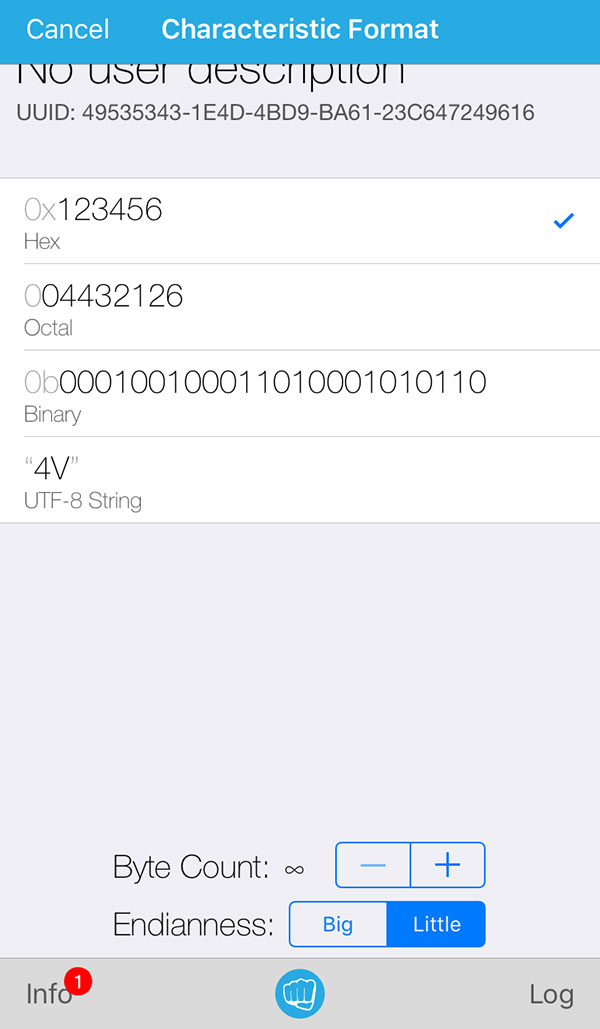 Switch your phone's language from Hex to UTF-8 String so you can send normal text
Once you open Write Notify Indicate you should be able to send messages from terminal/chip to the phone. Typing into the terminal, I send "hello phone." It's important to note that if you type, it will transmit the letters one by one. If you copy and paste, you can send a string. Then from my phone, I sent "hello chip" and saw it appear within my terminal window. I send a final "IHTFP" for good measure and called it a day.
 I sent "hello phone" from the terminal, transmitted through the board
 I send "hello chip" from the phone to the terminal as well as the ol' MIT Motto IHTFP
Files
Traces