week 05
COMPUTER-CONTROLLED MACHINING
Tools + Methods
Rhino
MasterCAM
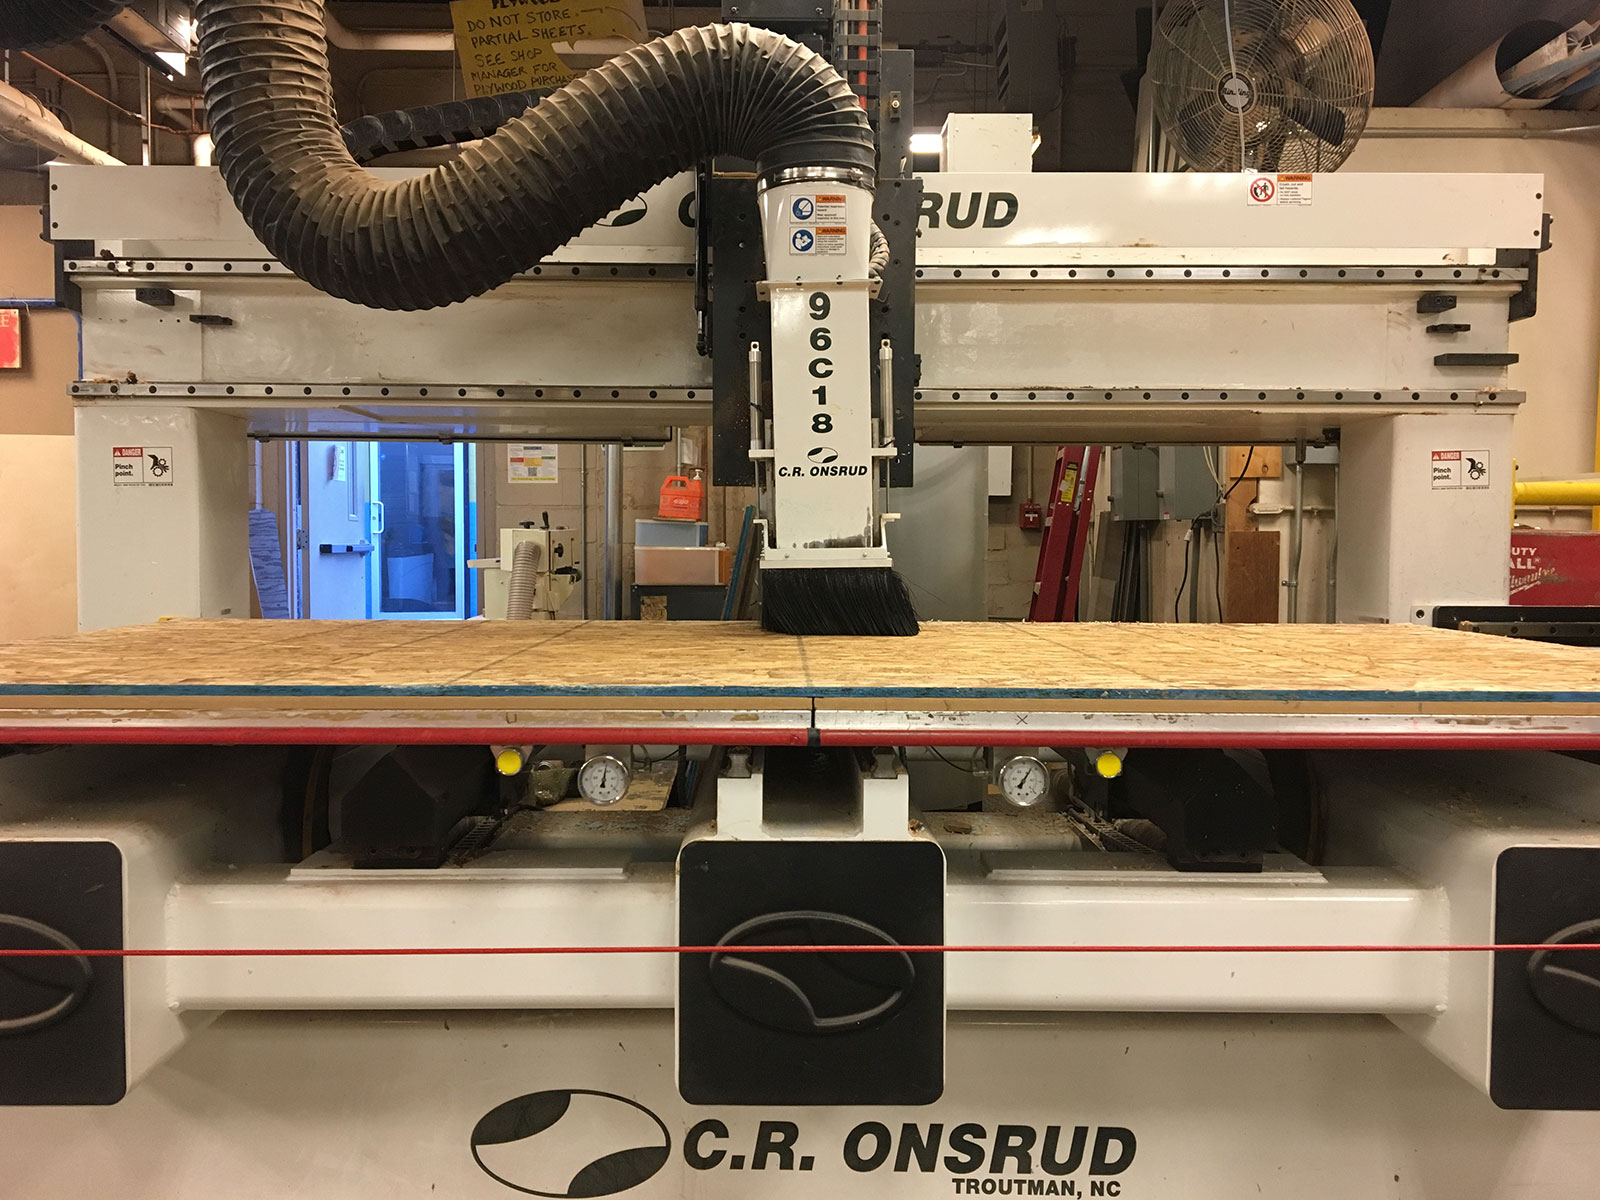
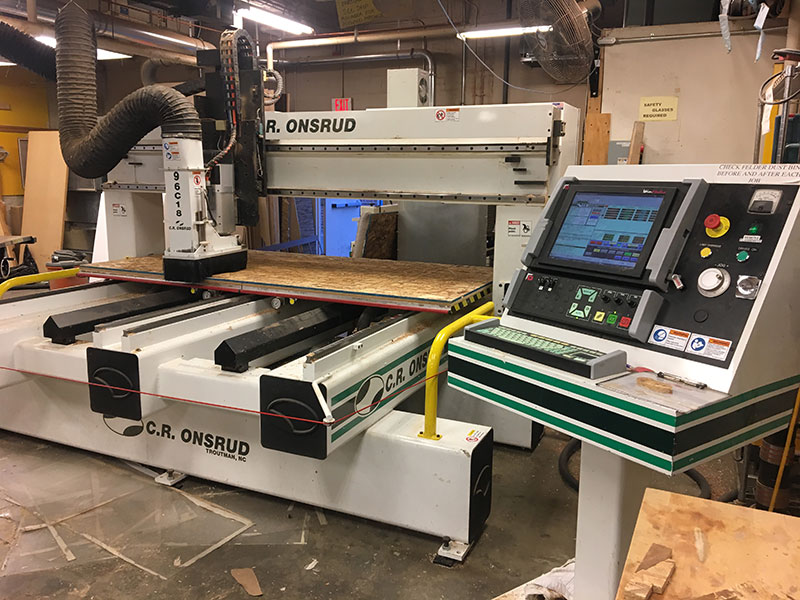
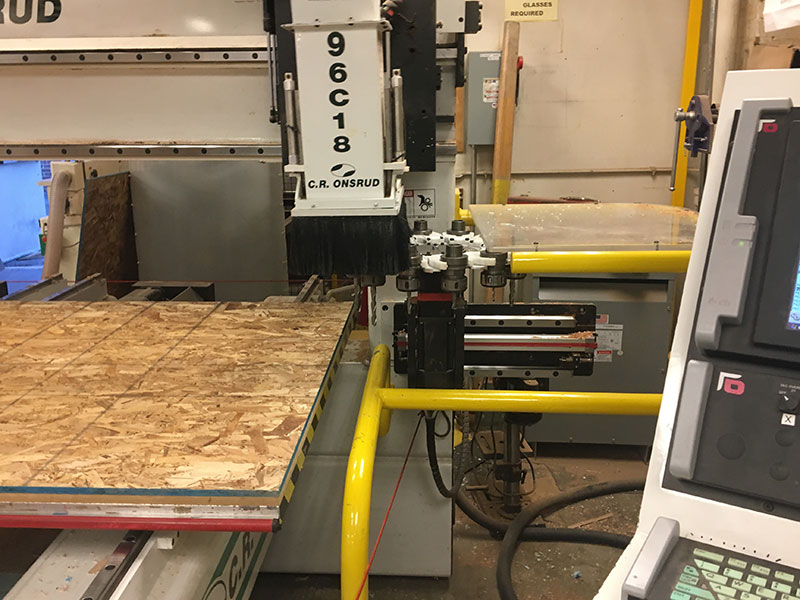
ONSRUD CNC Mill
Making a Table
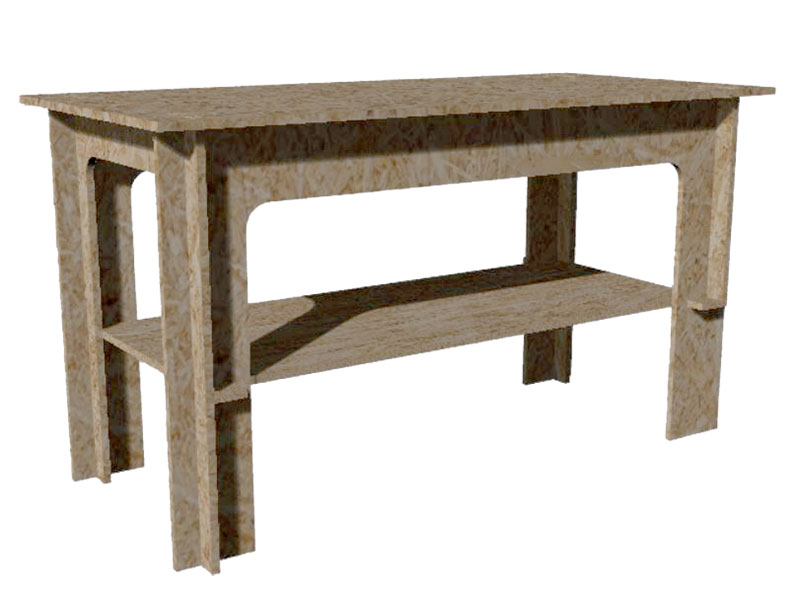
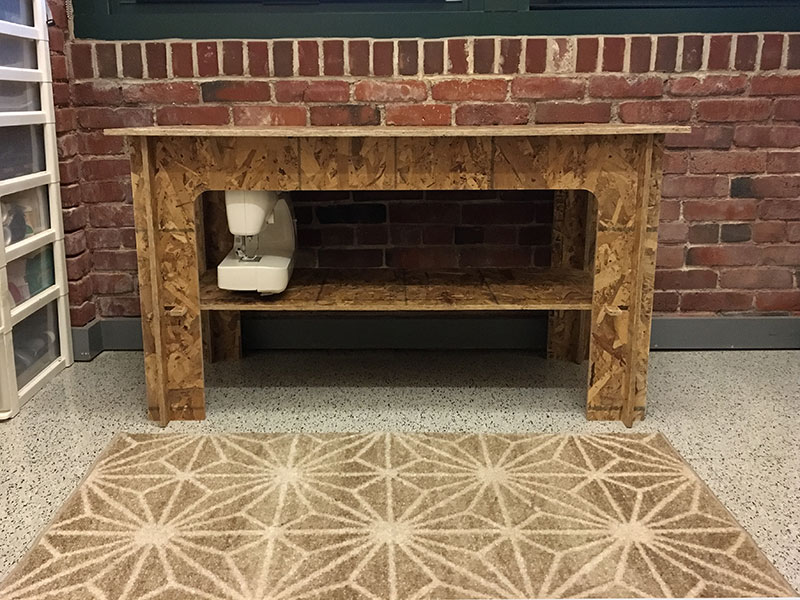
This week I decided to make a table- because I really need a table. I just moved to Cambridge a month ago and I have a strange corner next to my couch that I want to 1. Be the same height as my couch and 2. Have a shelf to hold my sewing machine and 3. that allows me place a specific storage container underneath it. I decided to make it a pressfit table because, after moving for the first time in over four years, I realized moving is always easier when things can be stored flat. I wanted something that could be taken apart later.
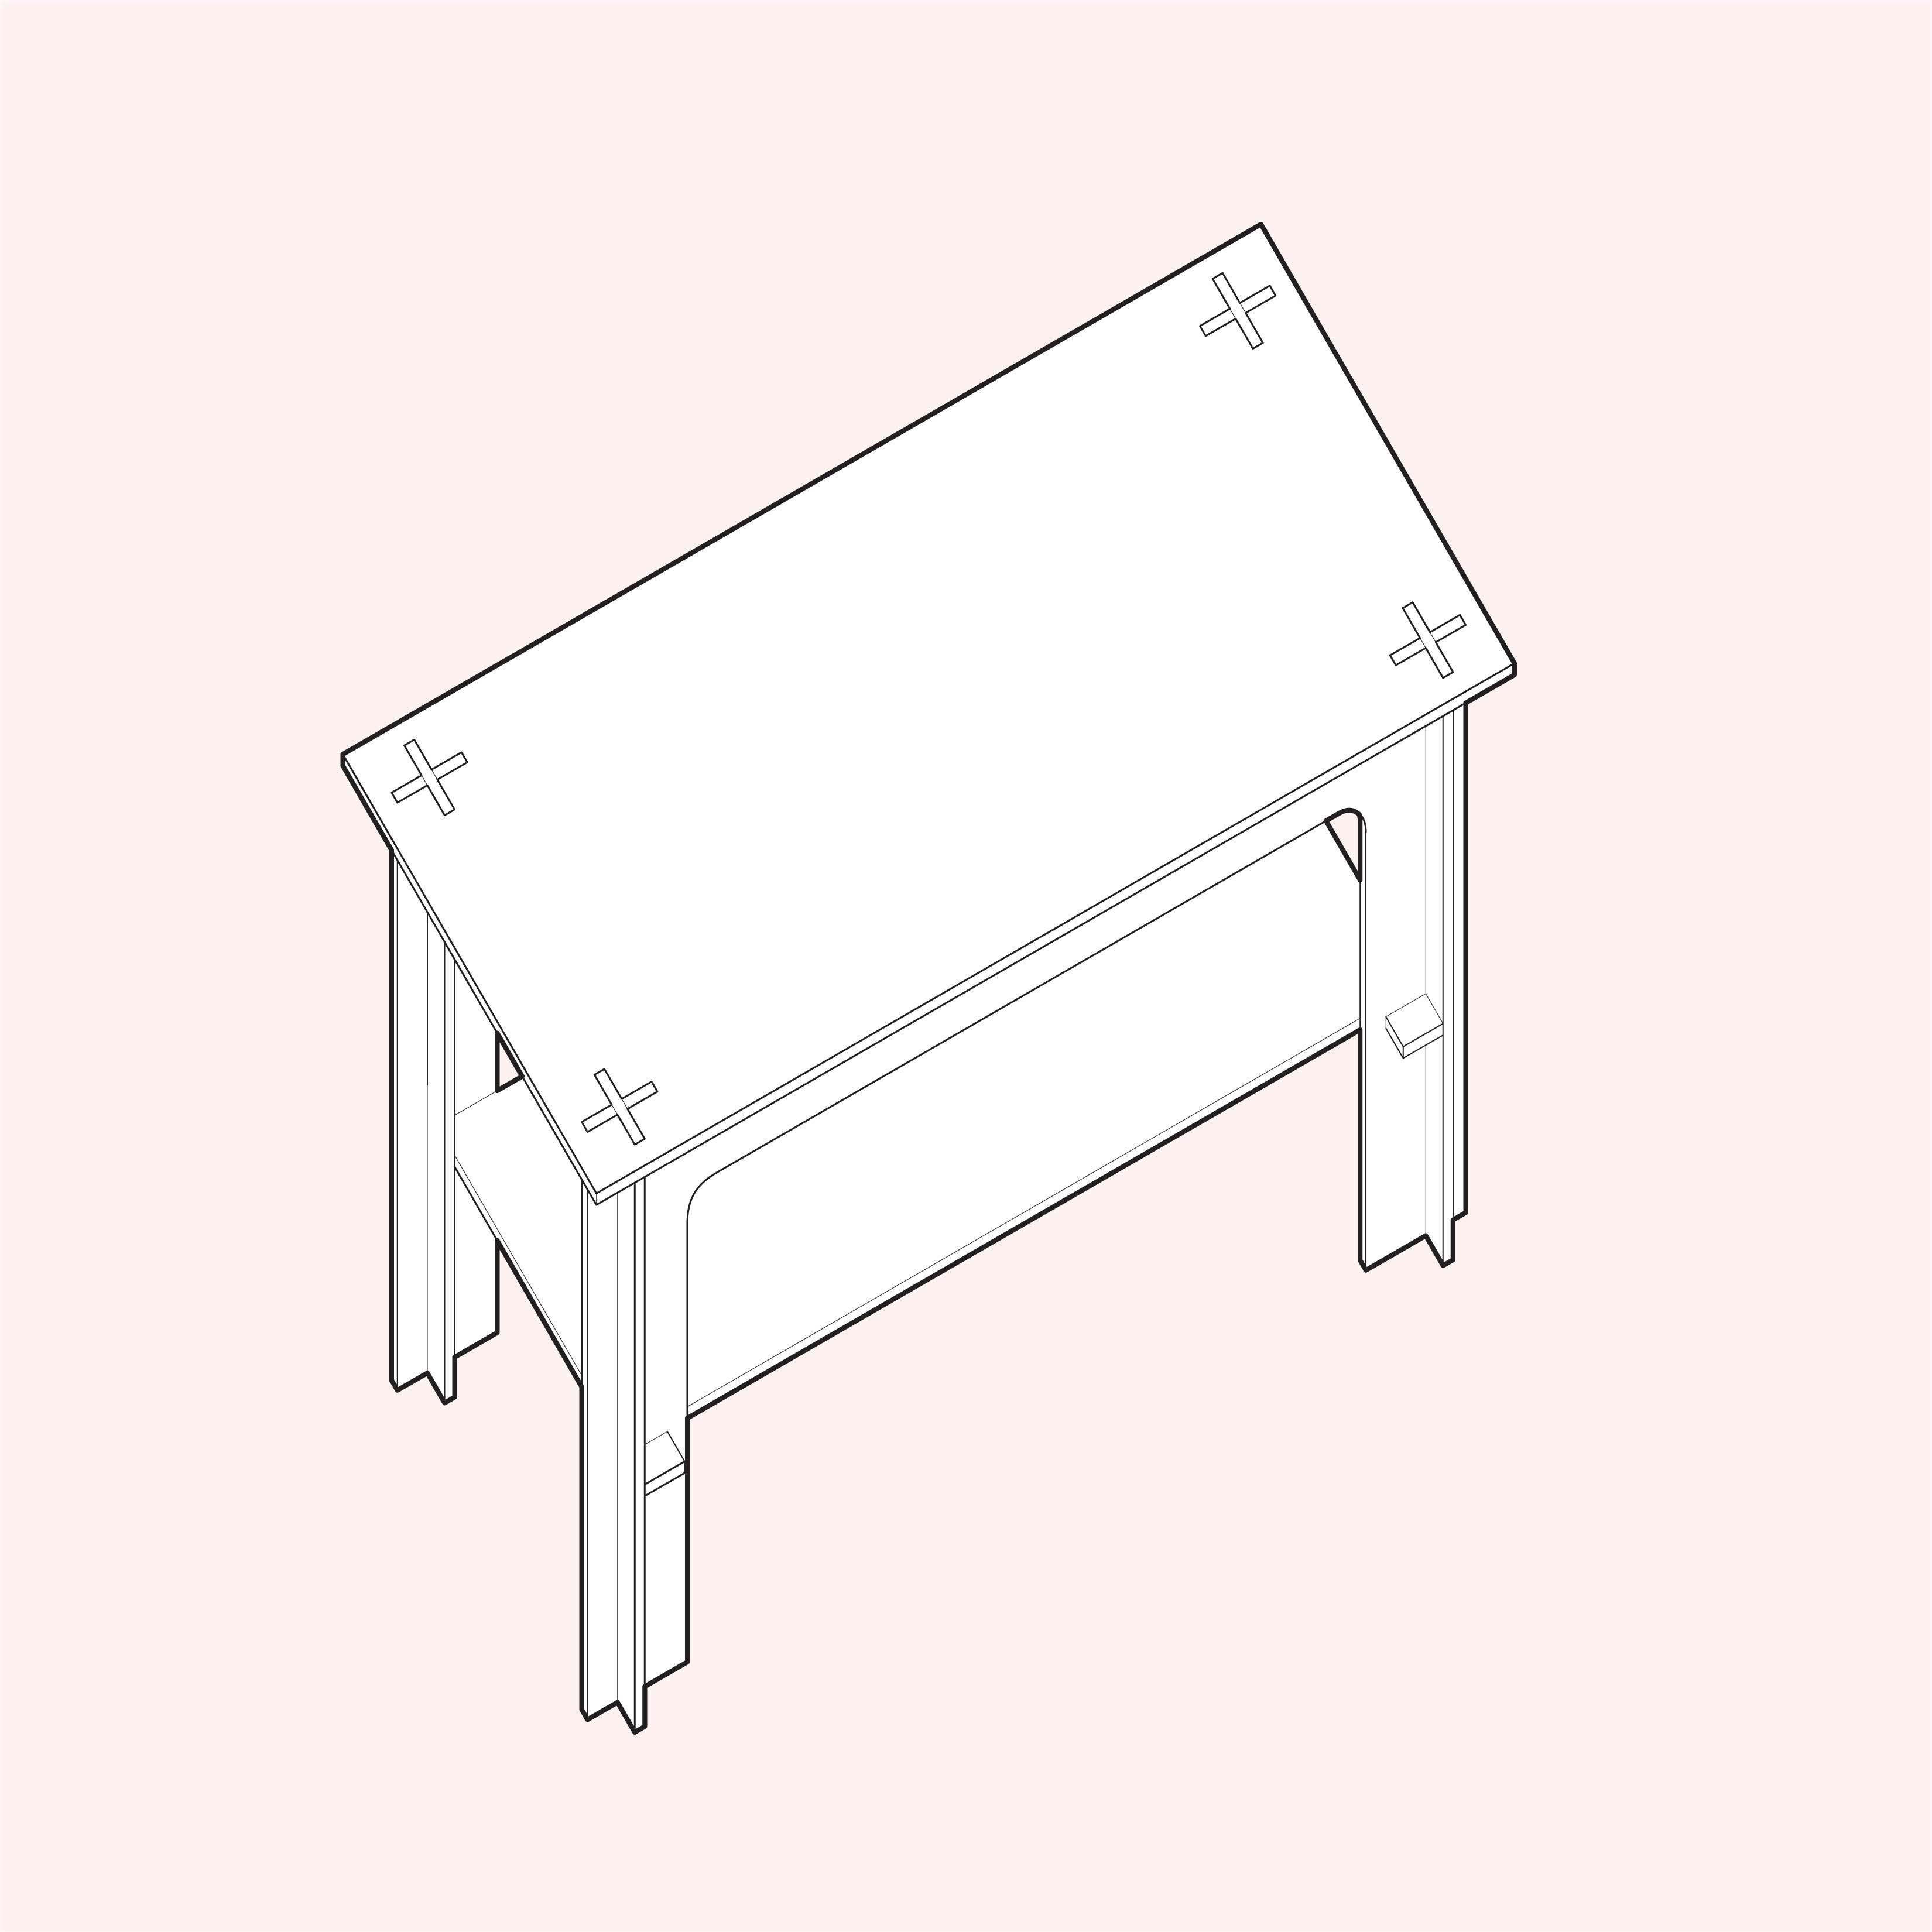
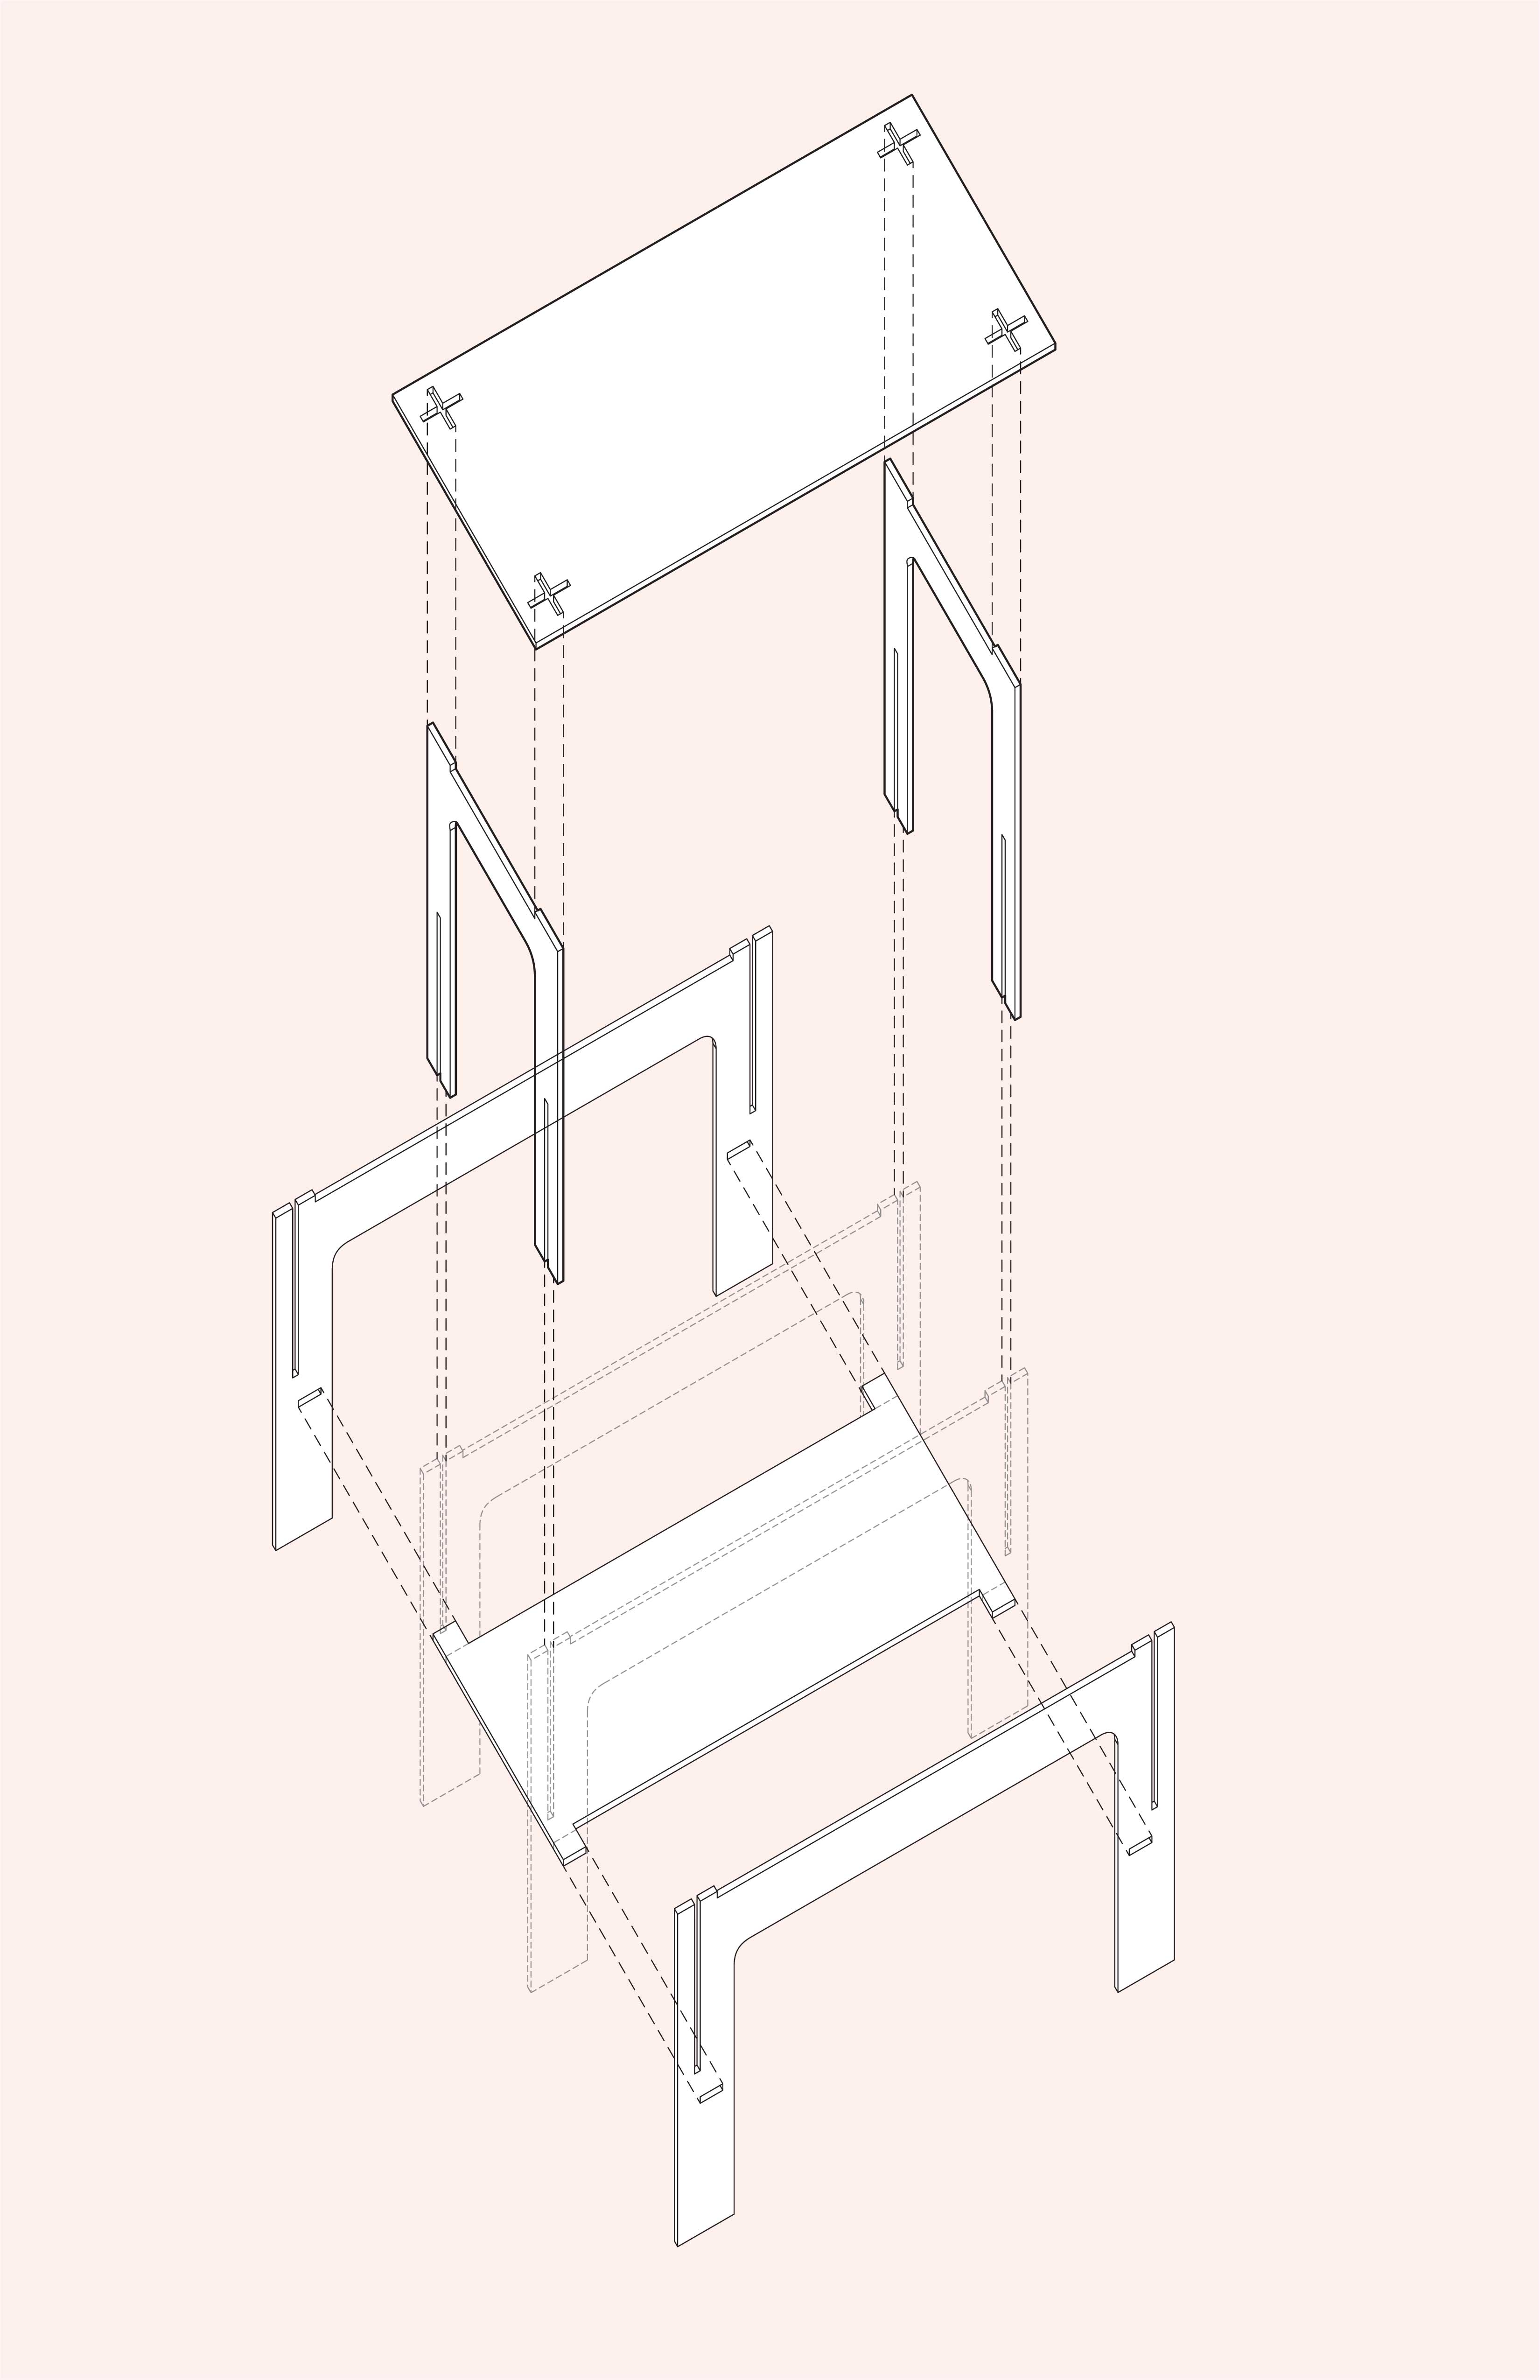
I modeled the table in Rhino using my room-specific dimensions of table top width and length and of the shelf height. I went through various designs, trying to make it more exciting but honestly ended up with a design that was strikingly similar to Standing Desk which Neil had shown during class. The main difference was that I added a shelf and four notches on top that would allow the legs to penetrate through the table top. These connections made the table much studier because it prevented the legs from shifting.
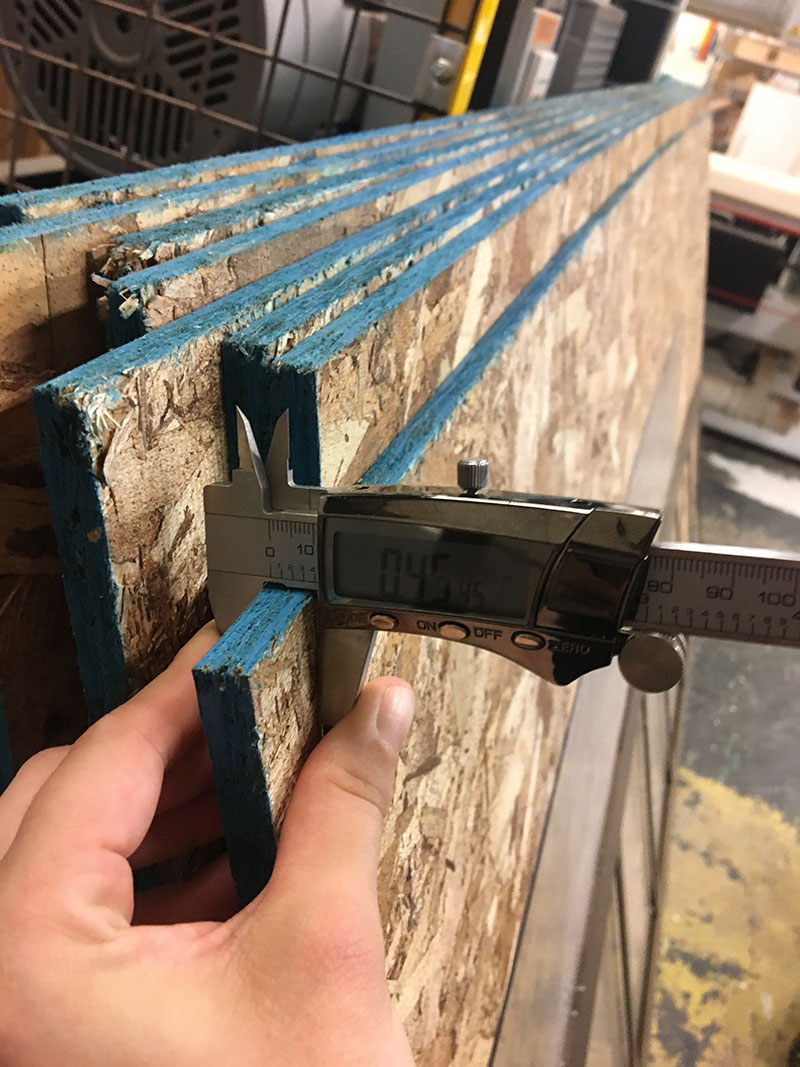
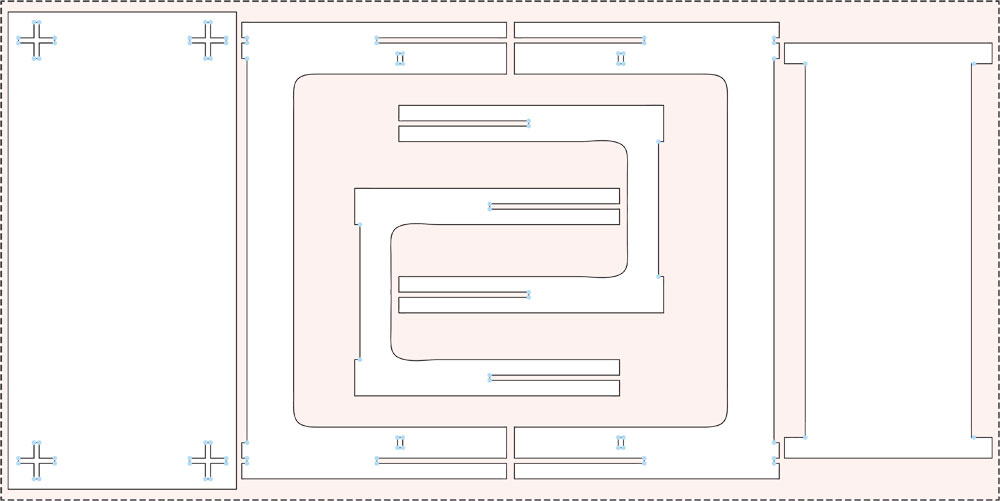
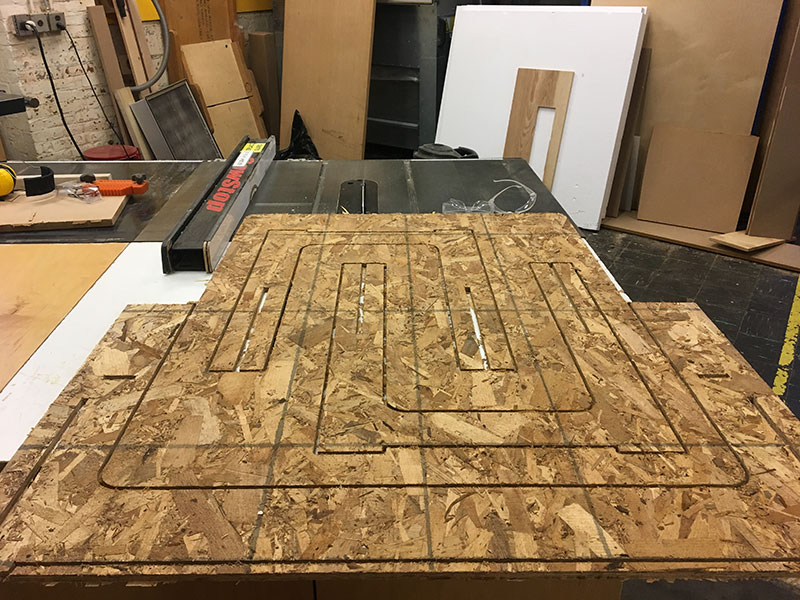
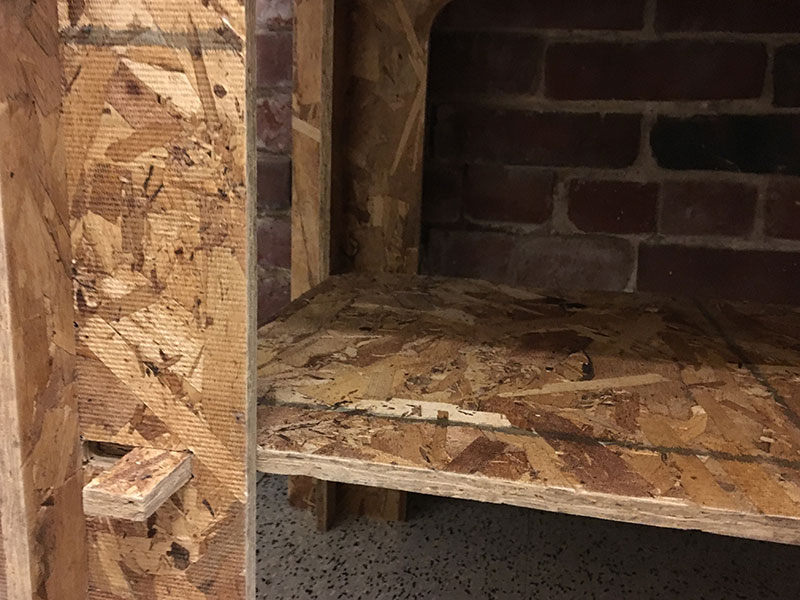
We were given a 4'x8' sheet of OSB to use so I made sure to keep in mind how all of these pieces would fit on a sheet while designing. I also made sure to double check the thickness of our material as it would effect my slot size. Our material was slightly less that .5". I used a thickness of .455” just to be safe. I added drill points at each corner to make sure I had square connections.
Fabrication
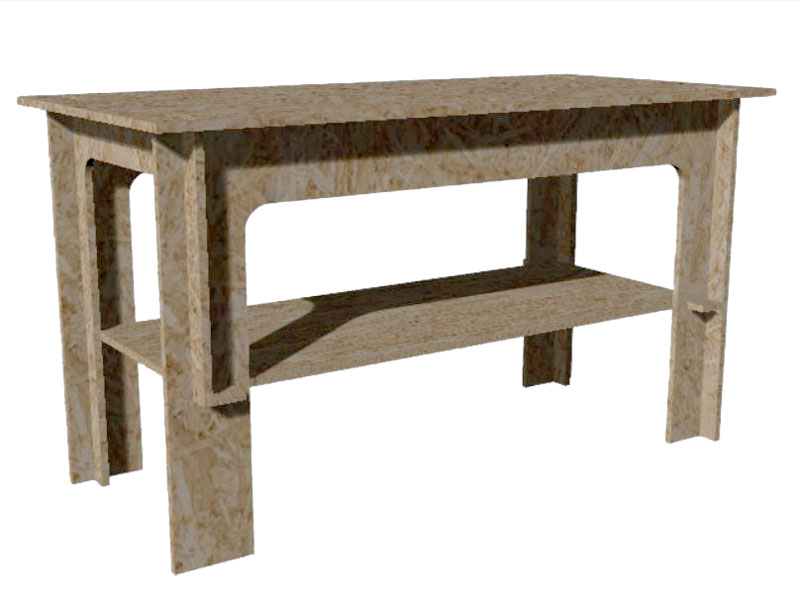
I brought my file to the Architecture shops at N52 and had Chris Dewart help me set up my MasterCAM file. Chris had advised me to cut off part of the leg because it wasn’t doing anything structurally and was likely to snap. I quickly modeled a revision but realized I didn’t really like the aesthetic. Even though he was likely right, I insisted on milling it any how (I find it really important to see things fail. I’m either a glutton for punishment or a scientist). I think the reason it DID work is because I make sure to reinforce the joints in three directions using the shelf and table top connections.
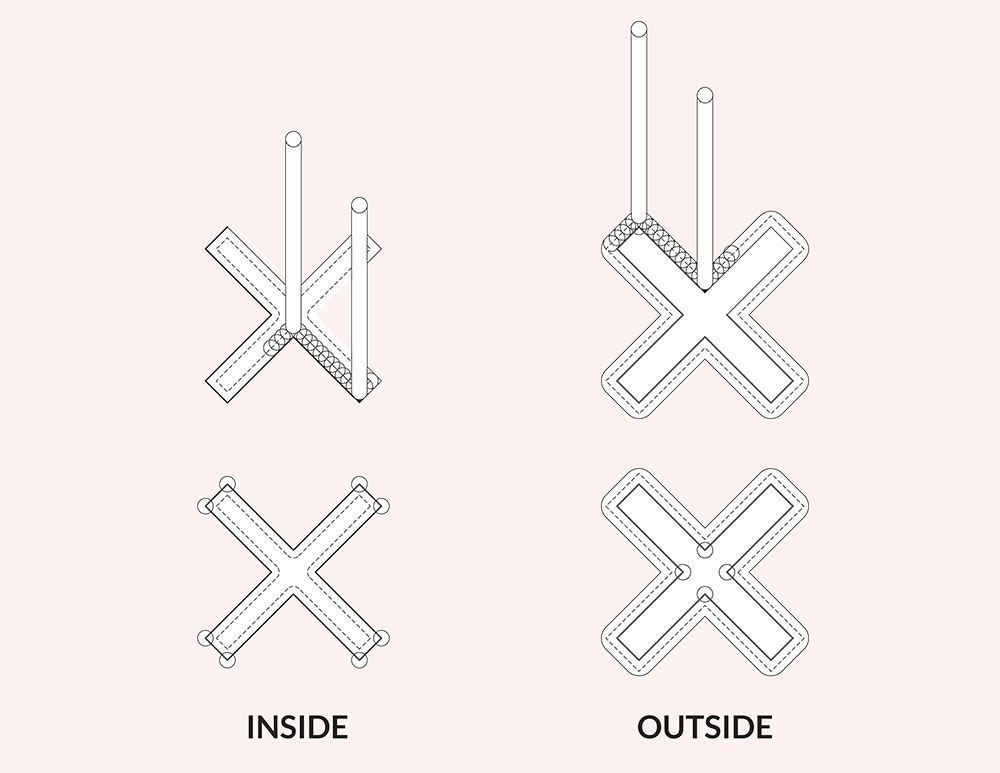
First we set up drilling operation for the corner points then we set up profiling operations for the cut outs. I had to set up two profiling operations because I wanted the outlines of the pieces to be offset OUTSIDE so that the bit thickness didn’t remove any materials. But for the table top X’s and shelf slot I needed it to offset INSIDE. This is where I made a huge mistake. I should have changed the location of the corner dots for the INSIDE operations. The important thing to remember about CNC routing is that no matter what type of end bit you’re using, it will always produce a rounded path which is why I put the corner dots there in the first place. This meant the X’s on my table top had a tiny pieces of material remaining that prevented a clean fit. I used a chisel to remove these edges but it took me about 20 minutes to do what a machine could do in 1.
We ran the file from the ONSRUD computer. Thanks to the automatic tool changer we only had to export one NC file and the machine did all the rest. Because I wasn’t cutting any small pieces we were able to rely on the vacuum bed to hold the piece down.
Assembly
The assembly was very easy once I removed the material from the top. In addition to the top, I realized I made some last second changes that included me forgetting to change to width of the shelf tabs Luckily they were too small rather than too big so it still fit together (I’ve fixed them in the final file below, though). I actually like the rough look of the OSB so I don’t plan on finishing it (especially since this will be a craft table that is going to take some abuse) but I do recommend a thorough sanding of the edges and surfaces. I witnessed some classmate get lethal splinters.
![]()
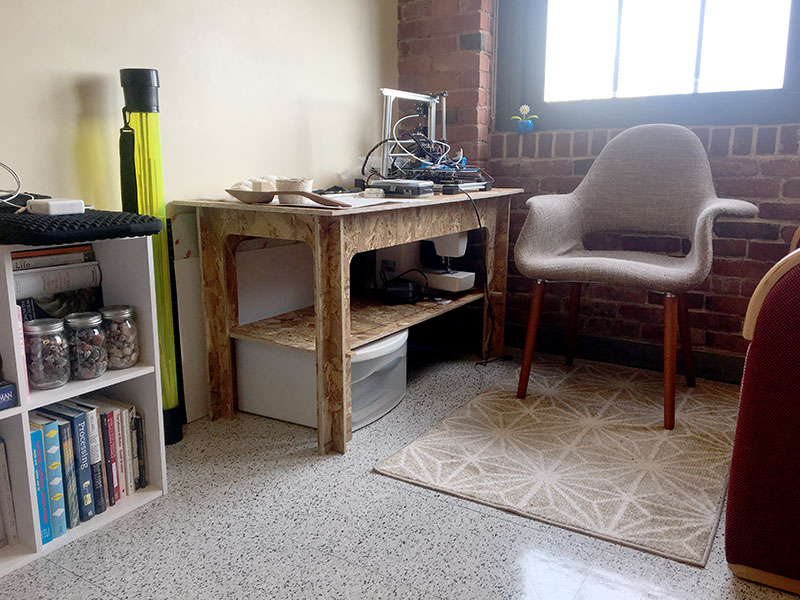
In the end, the table actually turned out super well and sturdy. I was able to carry it home in one piece. People told me OSB wasn’t sturdy enough to hold anything but the table is now happily collecting junk in my living room and I’m very pleased with it.
Files
Table File