3D scanning and printing
This week's assigment involved 3D printing and scanning: we had to (1) design and 3D print and object that could not be made subtractively, and (2) 3D scan an object.
3D Printing
We started with the group assignment by testing the rules of our 3D printers (ZCorp, Dimension, Sindoh). Lucky for us, someone had already printed a tolerance test for the Dimension ABS 3D printer. We also inspected a bunch of 3D models that were hanging around so we could get an idea of the resolution and design constrains for each printer.
The next step was to design a small object that could not be made subtractively. For this, I used Fusion 360 again. And simirlarly to the press-fit assignment, I started with a simple regular geometry: an hexagon.
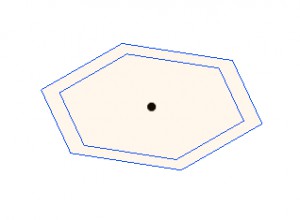
The basic unit of my 3D structure is an hexagon circumscribed in circle of radius 5mm, and offset 1mm.
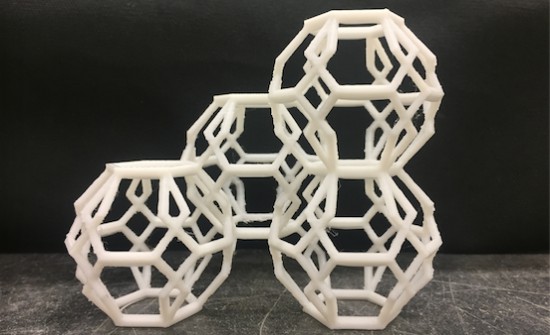
I used this basic unit to build a pseudo-globe, and them assembled four of them together.
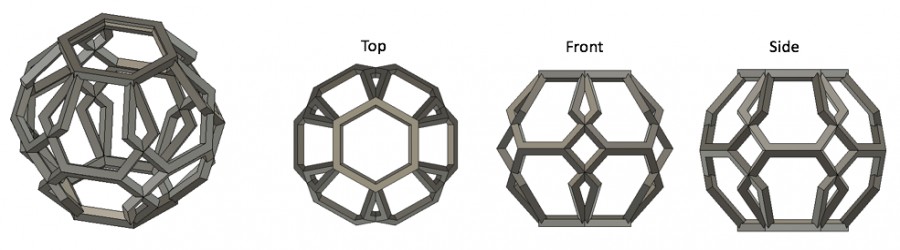
Perspective, top-, front- and side- views of the sphere assembled with regular hexagons.
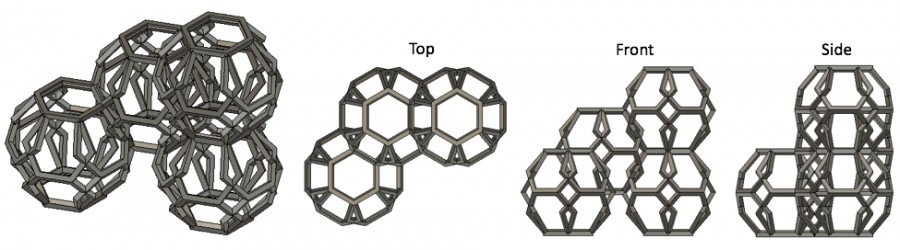
3D structure assambled using four hexagon-globes
Regarding the printer, I decided to use the ZCorp one. This a powder (some sort of gypsum mixture) printer, and a nice feature about it is that it doesn't need to add suports because the printed part is actually in a "pool" of gypsum powder (which acts as a support).
SO, since I didn't need supports, I decided to complicate the design a little bit more and add spheres inside the hexagon-globes. Here is my design...

The two newly added spehres are supported by six horizontal rods (marked with red arrows). And I know... not the smartest structural design...
... and here is the result:
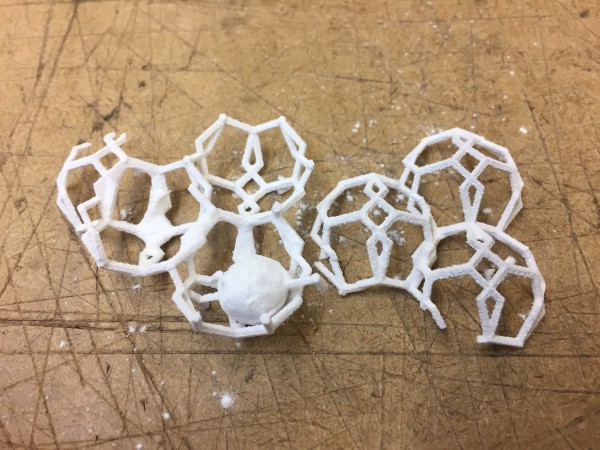
The whole structure collapsed when I tried to clean it
The part was perfectly printed. But, as I was excavating and vacuuming it, the structure colapsed. In the meanwhile, I was printing the same part using the PLA Sindoh printer (with no better luck):
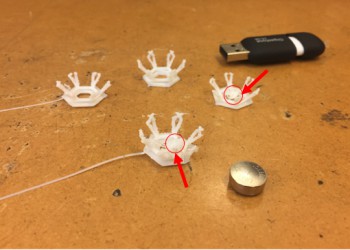
For some reason, the GCode generator didn't add additional supports por the sphere (red circle), and the printer just printed it on the air...
And I tried again. This time I eliminated the "hanging spheres" and scaled the whole structure x2. I realized my original design was not very realistic, and the hexagon thickness was somewhat close to the printer resolution. Also, in my design, the horizontal layers are not continuous (and the printer have to start the PLA deposition at multiple points within the same horizontal plane = more oportinities for errors). Here is the final result:
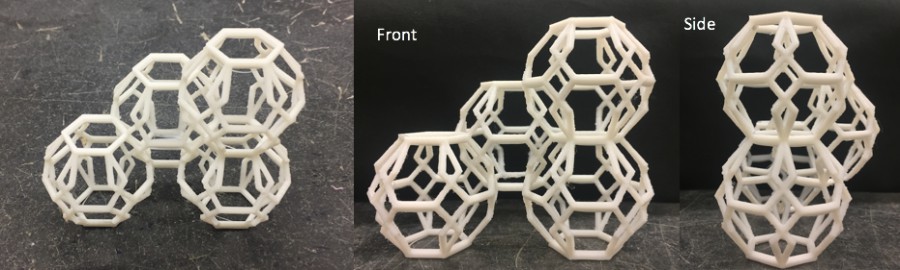
It took a while, but the final print looked pretty good. The part came out from the printer with some filaments and "thin hairs", but nothing that couldn't be fixed with a pair of pliers and sand paper.
3D scanning
For this part of the asignment I used a hand-held Sense 3D scanner. The scanner software is pretty straightforward: you can chouse beteen scanning an object (small/medium/large) or a person (whole body/from shoulders up). I started with a "small" body, which (afer a while I learnt that) means something larger than 20cm. Also, the scanner is not very happy with reflective (e.g. metallic) surfaces. Here is a scan of my backpack:
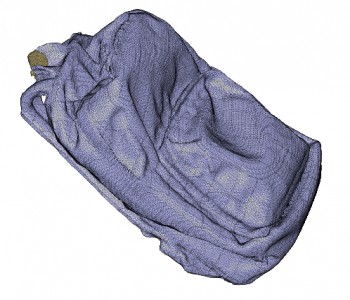
3D reconstruction of my backapck using Fusion 360
Once you finish the scan, the software allows one to do small modifications (fill gaps, cut and crop, adjust colors, etc.). Then you can export your scans as .obj .stl or .ply formats.
Last thing I did was to scan (and print) myself. I was actually surprised with the quality of my mini-me. Both the scanner and the printed did a great job, I barely had to fill some gaps (a big one in my ear) in the .stl file, and remove some extra filaments after the print was completed.
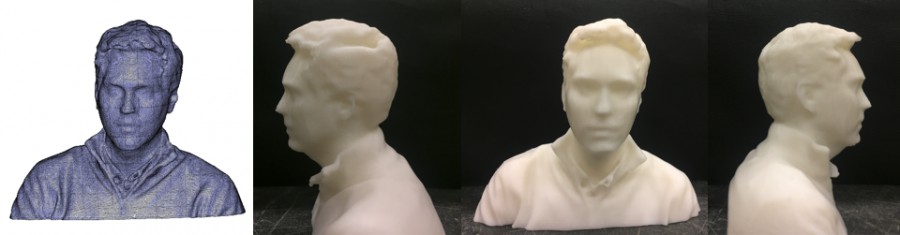
Myself: scanned and printed