Computer-controlled machining
This week we learnt about large-format machining (machines, materials, job shops, etc.). We also covered a little bit about tooling, speeds and feeds, as well as some design details (e.g. fixturing, joinery, flexures, etc.). As For the assingment, we were asked to make something "big"
Design
For this, I was not sure what I wanted to do. I knew I wanted some kind of furniture for my house. Also, I wanted to try/learn about slicer. This is a separate program from Fusion 360, but interacts very well with it. Slicer allows one to import a 3D (solid) geometry and automatically slices it for you. The UI is pretty straight forward, you need to specify some manufacturing settings (e.g. stock dimension, thickness, slot offset, ...) and then the construction technique (stacked-, interlocked-, curve-, radial-, folded-, or 3D slices). It also generates an animation with instructions for the assembly. This is very important because sometimes what Slicer wants to do is not physically possible (e.g. hanging two rings from each other).
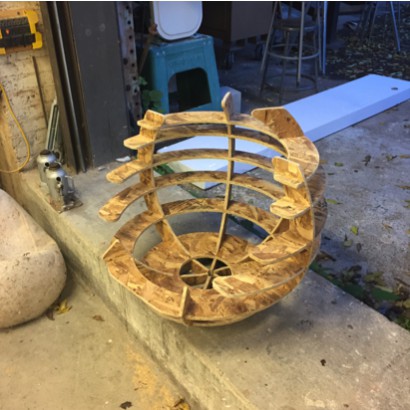
After a little bit of thinking I decided to make a sphere-version of a rocking chair. Unfortunately, due to material limit constrains I coulndt do it (also, another nice feature about Slicer is that it suggests a layout for your cutting, and tells you how many sheets you need). So, I decided to make a smaller version for my cat. I started with a simple design in Fusion 360:
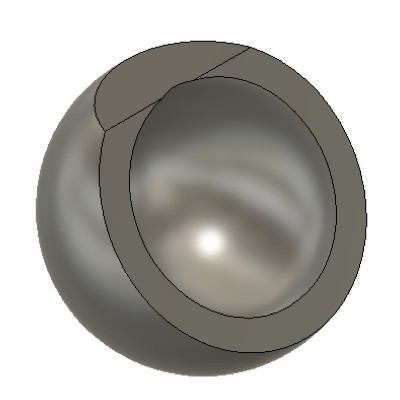
I started with a sphere, then I made two cuts (one for the base, another for the opening), and used the shell tool.
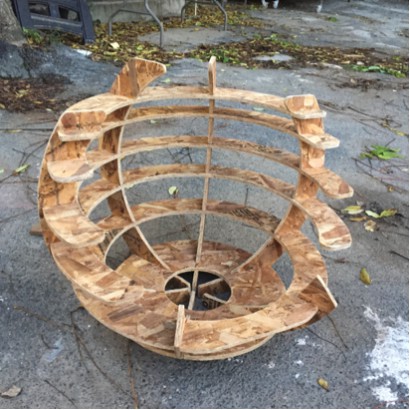
Next step was to call Slicer from Fusion 360, and play a little bit with construction the settings (I actually spent ~2 hours). Another nice feature about Slicer is that it inspects the parts from you: it tells if your design implies splitting some parts, if a part has to many slots, etc. After selecting the appropriate slicing method (for my geometry "radial" worked pretting well), I made some manual adjustment of the slice position (to avoid too large slots, or them to be very close to the edges). Then I exported it to as a DXF.
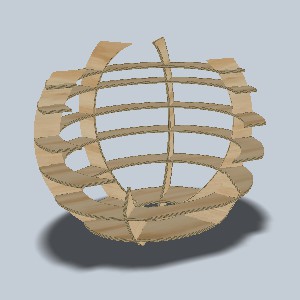
Sliced geometry.
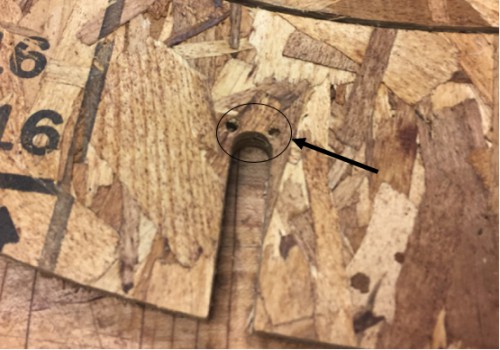
I opened it AutoCAD and adjusted the proposed layout so everything fits in a single 4"x8" OSB sheet. For some reason, the generated DXF was made of surfaces and not 2D lines... So I open the file in Rhino, and used the Make2D command. Finally, I used the fillet tool to smooth the corners, and added the necesary points for the drill (so I can make dogbone slots)
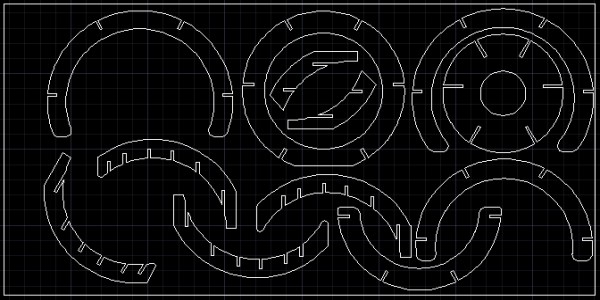
Final DXF ready to be imported to Mastercam
First trial
Once I finished my design, Chris helped me to set the Mastercam file. We used:
Before cutting my full design, I made a test consisting on two intersecting cirles.
Cutting test: two intersecting circles
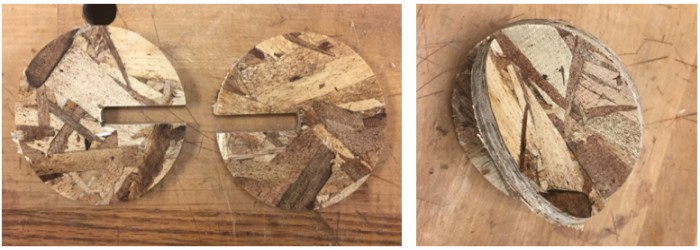
By the time I was ready to cut my design, the 0.25" endmill was broken, so I switched to 0.375" Flat Compression Endmill. The result was pretty bad... The cutting path didn't interset the holes for the dogbone... On top of that, it turned out the sheet I used had a different thickness, so any of my connections worked.
First trial: failure
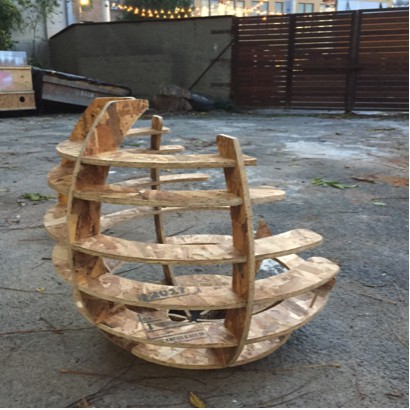
Second trial
I came back to the shop the next day, adjust my design to the actual thickness, and cut it again. I went back to the 0.25" flat endmill, and added a few tabs (in addition to onion skin ~0.01") to prevent parts moving. Also, we set the cutting to be done with two passes. The endmill had been breaking, and Chris wanted to reduce the stress on it. This time everything went pretty smooth, but there was some remaining work:
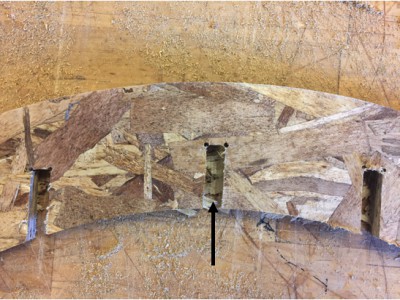
Due to the onion skin settings the edges ended up with a lot of roughness. Also, since I used tabs needed to sand them down...
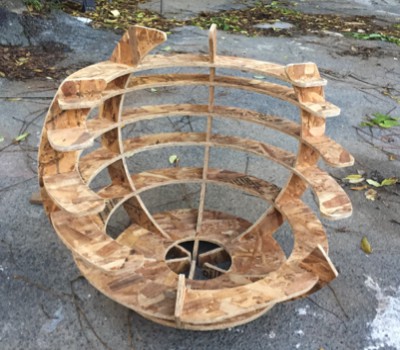
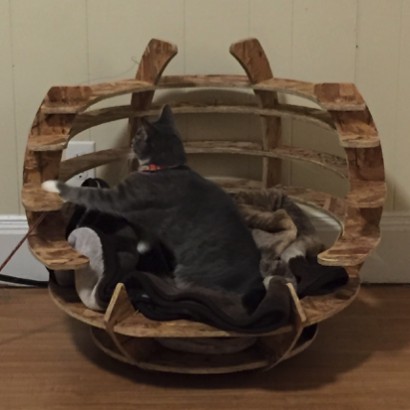
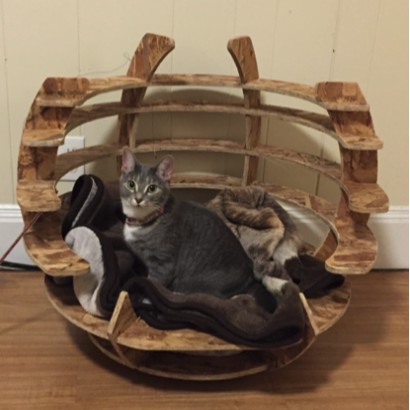
Once I finished the cutting, used the automatic sander, files, and sandpaper to clean the edges and slots (there were a few...). And finally, here it is the cat-throne!
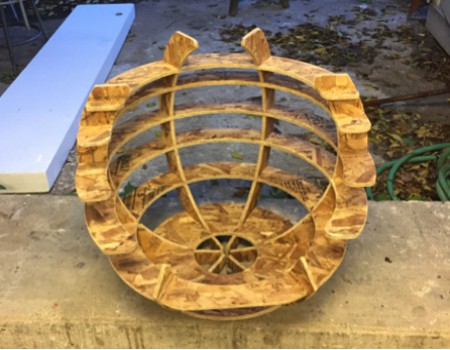
Cat chair assembled!
Files