Input devices
This week we learnt about a bunch of different input devices (sensors). We were asked to measure something: add a sensor to a microcontroller board and read it. Since I wanted to build a whack-a-mole game, I looked for something that can measure distances. I decided to try the sonar: I want the mole to hide when you are about to hit it!
Building the board and adding the sonar
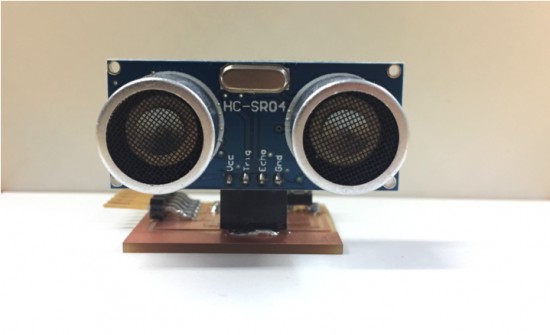
Initially, I wanted to try a couple of different sensors, but I didn't know how well this was gonna go... so for the hardware part I went for an easy solution: use Neil's examples. The sonar board was pretty simple: the ATtiny45, one resistor, one capacitor, and the ISP and FTDI headers. I also added a 2x4 female header to connect the HC-SR04 sonar (actually, I only needed a 1x4, but I couldn'f find one...)
Sonar board
I milled the board, stuffed it, and add the sensor. This part was quite easy.
Programming the board: FabFTDI
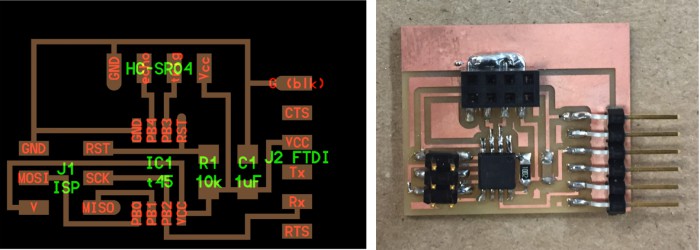
I had this in mind for a while. Everytime I want to program a board I have to go to the ArchShop because I don't have any USB to Serial converter... so this week I decided to make my own! I followed the fab tutorial posted in the class site. Everything was very well documented, step by step (including how to solder the 32 legs of the microprocesor...). Almost all the components were in the inventory. However, I couldn'f find the two 22Ω resistors. After a little bit of search I found two in my lab. They were not the ones with the R1206 footprint, but more like the old-fashion typical resistors. Anyway, they worked, and added a little bit of color to the board.
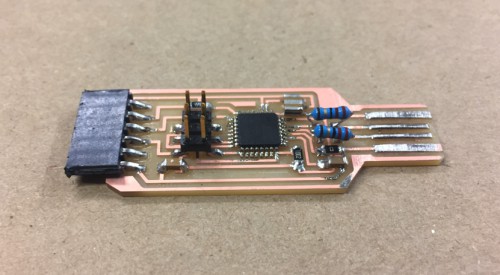
Fab FTDI - USB to Serial converter
Programming the board: Arduino IDE
I started with the terminal. I tried to flash Neil's examples into the board...

Error setting the fuses
I didn't work, so I used the Arduino IDE instead. Paloma suggested this tutorial that explains how to use the ultrasonic sensor HC-DR04 with Arduino. Very well explained and straightforward: it starts with the basics behind sonar sensors, how to trigger the signal, read the echo and transfrom the time delay into distance, and print the value on the serial monitor.
At the begining, the serial communication was not working. Apparently, some ATtiny chips do not have direct support for hardware based serial, and the Serial object is unavailable in the code. I found this other tutorial about how to add a SoftwareSerial object and view the output in the Arduino IDE. At the end my code looked like this:

Arduino code for HC-SR04
I used the serial plotter to see how the signal changed as I moved an object forward and backwards in front of the sonar.
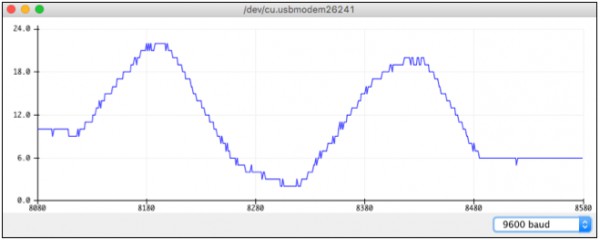
Arduino IDE serial plotter: Distance readings (y-axis in cm).
It worked pretty well. I checked with a ruler up to 15 cm. When the object was too close (i.e. less than 1 cm), the sensor was outputing weird numbers... Also, sometimes, if I moved the object very fast or did a weird movement I got readings about 20 meters...

Weird readings
Programming the board: Arduino IDE - Fuses (burn Bootloader
This I should have learnt before. In previous weeks, I noticed that my programs in Arduino only worked if I used the default clock frequency (i.e. 1MHz). In Aruino>Tools you can specify your microcontroller and the clock (e.g. internal/extenal, frequency). This tells the program which clock and speed you write the program for, BUT it does NOT set the fuses for that specific clock. For that, you need to go to Aruino>Tools>Burn Bootloader before flashing the program into the microcontroller.
Programming the board: Terminal
After I finished with the Arduino IDE, and learnt how to set the fuses, gave another oportunity to the terminal. I started with the makefile.
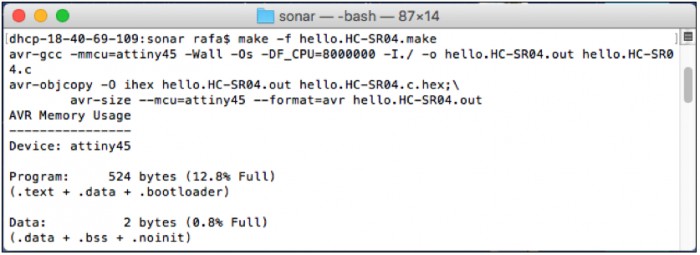
MakeFile
Then I set the fuses (i.e. internal clock to 8MHz) using the Arduino IDE. And I flashed the program with the terminal.
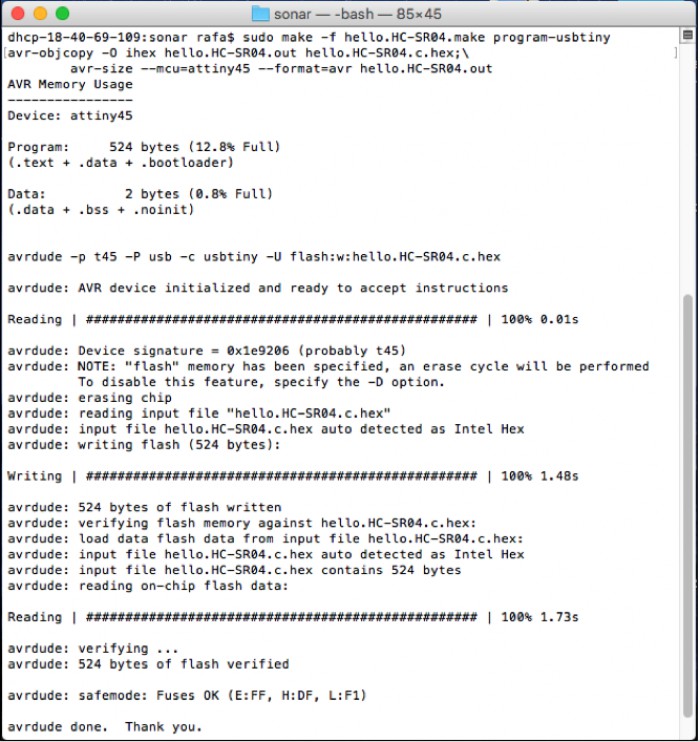
Flashing the program
In order to find my serial port I used the following line:

Find serial port
Finally, I had everything ready to run the Neil's python code (for some reason I also had to install pySerial again...).
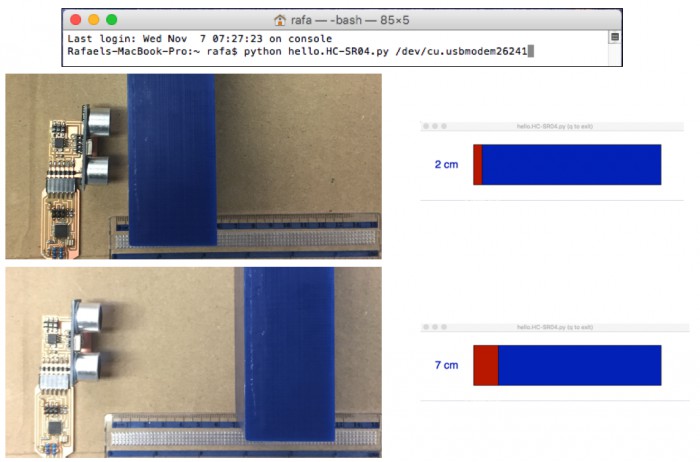
Neil's python example