Molding & Casting
This week was the turn of molding & casting. We learnt about different molding/casting methods, materials, and safety! Actually, the group assignment was to review the safety data sheets of our molding (i.e. Oomoo 25) and casting (i.e. drystone) materials. For the indivividual assignment we were asked to design a 3D mold around the stock and tooling that we will be using, mill it, and use it to cast parts.
First project: beaver heads
We've came back to a "creative" week. I also wanted it to be an useful week. So I decided to do something for my final project (finally). It seems I'll be making a whac-a-mole game, well a cat-friendly, MIT version of it: Whac-A-Beaver. For this, I will need to have some beaver heads that Lula (my cat) can hunt.
I started by browsing for 3D beaver models. I, actually, spent a lot of time on this... I found a few good candidates, and decided to cast the crazy-and-cute-beaver from thingiverse.com:
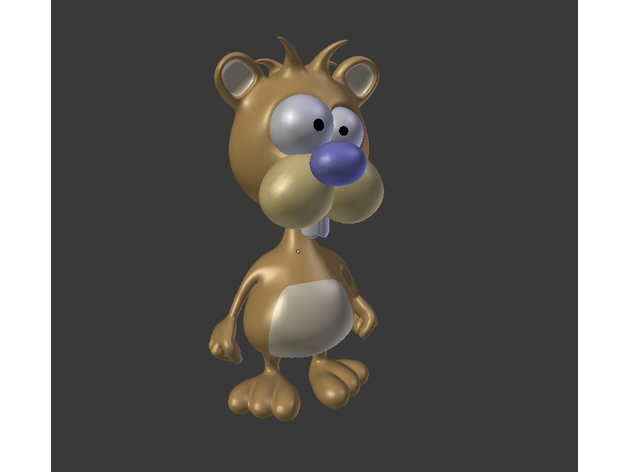
Crazy & cute beaver
The first step was to design the 3D mold. The beaver model I downloaded was quite heavy (~30MB, and about ~600k facets), so I had to import it to Fusion 360 and use the Reduce/Remesh tool in the "Mesh workspace" in order to have a manageable geometry (i.e. less than 10k facets).
After those operations, the model was still a mesh, and somewhat difficult to work with, so I converted it into a body:
Now that the beaver was of an adequate size and easy to modify, I beheaded it, split the head in two halves, aligned them in the mold, and add some registration marks
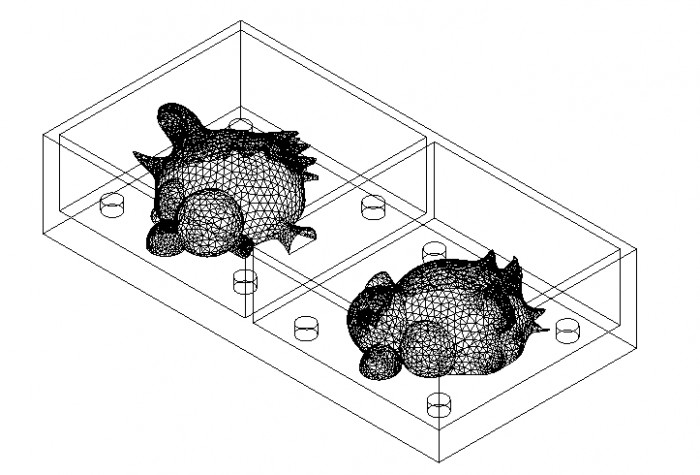
Beaver head mold
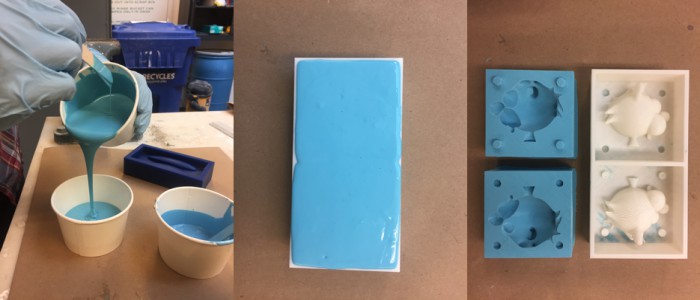
With the mold design finished, I went to the shop and... Ups! I discovered I couldnt mill it. The reason: the hairs and the ears were hanging from the head... Well, I spent quite a bit of time on this, and I needed it for my final project, so I cheated: I 3D printed the mold...
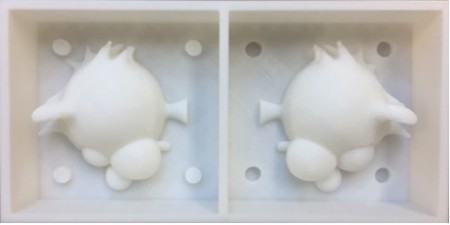
3D-printed mold
That was the positive. For the negative, I used Oomoo 35. It is a pretty easy (and sticky) product to use: just mix 1-to-1 ratio by volume, stirr, pour into the mold, and wait for 1-2 hours. The demolding was a little bit tricky due to the elongated hairs and ears, but it managed to do it without damaging the rubber.

Molding materials
Molding procedure
Last step was casting. I used drystone. It's super easy to use, and it solidifies in less than 30 min. You can mix 100 parts of powder by 20 parts of water (by weight). I actually added a little bit extra water. Anyway, I made a hole in the rubber mold, used tape to keep both parts together and to prevent leakages, and poured the mix.
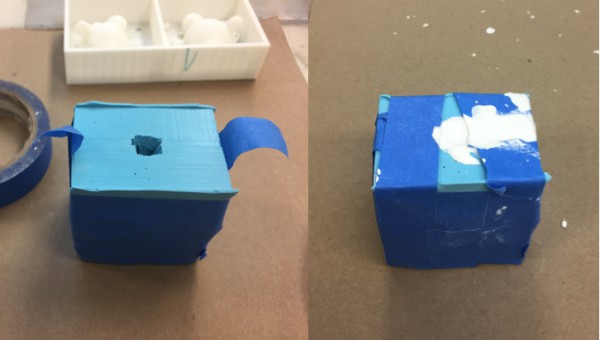
Casting using drystone
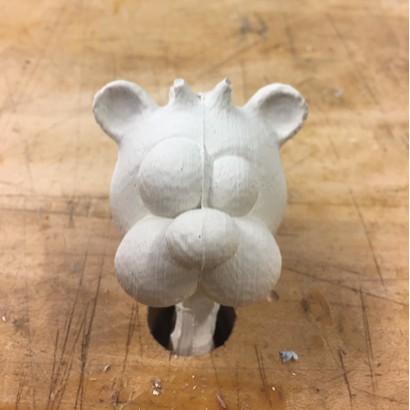
After half an hour, I demolded the cast and it came out pretty nicely. There were a few bubbles, and I had to sand down the joint of the molds. But besides that, I was quite happy
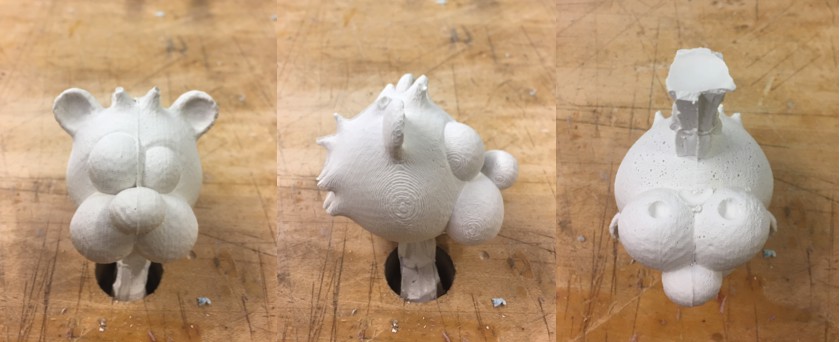
A beaver head!
Second project: rock fractures
This week I felt like I had to do a second project. I had cheated in the first one since I skiped the milling, so it was reasonable to try something else.
In my research, I use fractured rock cores to study fracture permeability. In experimental rock mechanics is quite challenging to conduct systematic testing due to specimen variability (each time you fracture a rock, the geometry is usually different). A smart way to overcome this s to use fracture replicas. And this week, I decided to cast my own.
The design is pretty basic: a two-part mold consisting of a half-cylinder and a rough surface. I used AutoCAD to design the cylinder part (DWG), and MATLAB to generate a rough surface (PNG). The idea was to use the ShopBot for the cylinder (with an endmill of 1/8") and the Roland SRM-20 for the rough surface (with an end mill of 1/16" or 1/32")
Jenn helped me to set the toolpaths in Mastercam. I used two rough passes, and one smooth path with a 1/4" flat endmill, and one smooth path with an 1/8" flat endmill. Feeds and other details can be found in the mastercam file in the section below. Here is the result of the semi-cylinder part

Semi-cylinder mold and cast part
For the rough fracture surface part I wanted to use the Roland SRM-20 mill. However, the Fab modules were not working properly, and I run out of time... I guess I still have some work for this week...
Files