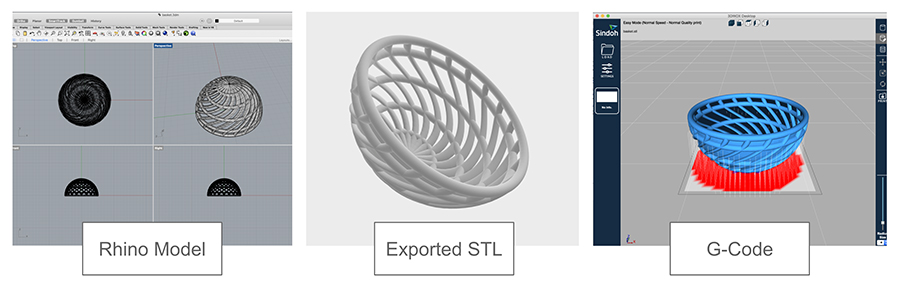
I wanted to use this project to get comfortable with Rhino, as the architecture shop's machines are generally set up with that software in mind
For my first model, I created a twisted basket shape that was intended to be hollow.
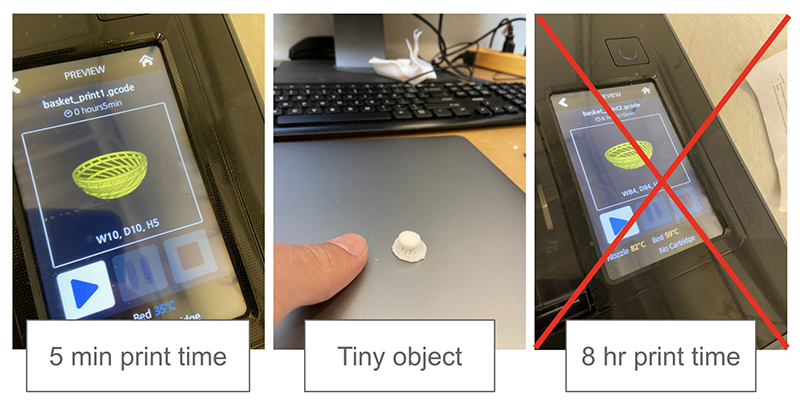
My first prints were a learning experience. I broke one of my own rules and tried to rush the export of my files. The first print that came from this rushed workflow
came out with a 6mm diameter, not a 6cm one. I thought I solved the issue in my next export, but I scaled up the model too much, and the printer projected it would take 8hrs to complete the print.
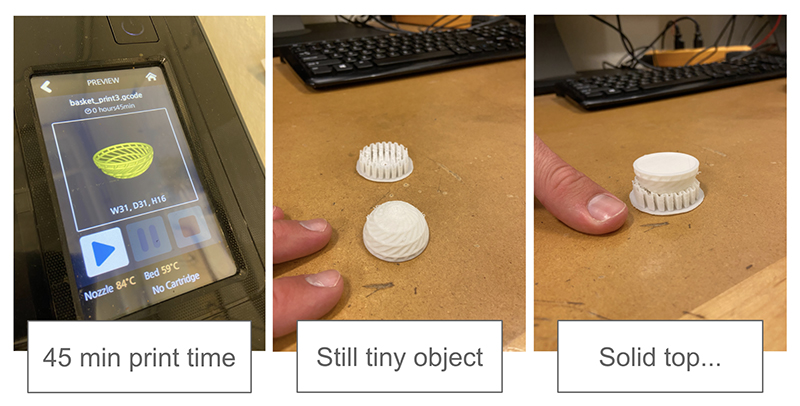
For the third file, I shrunk the model to a size that would take under an hour to print. It did, but the object came out solid.
I decided to take a few minutes to reeveluate the model and review the best practices for file prep.
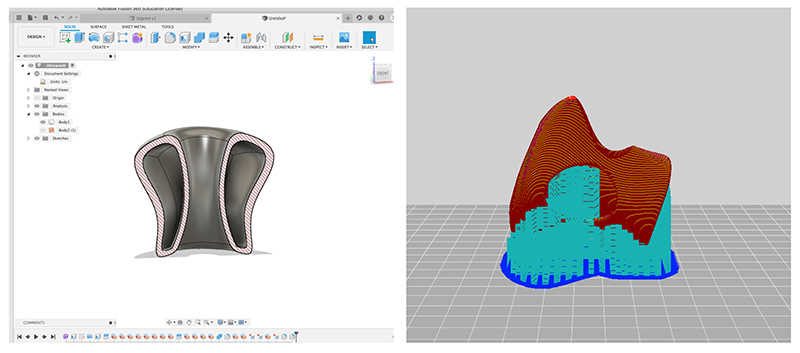
I returned to Fusion360 for the second model I made. I'm more comfortable with the software, and I wanted to speed up the modeling process
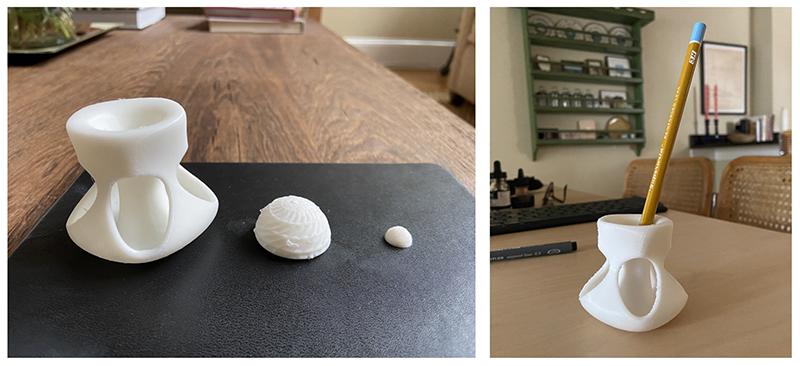
to make up for the time I spent fussing with my first few prints. I was able to create an interesting, organic shape with some internal structures that would print well and allow for easy clean up.
The Vase model set up well in the Sindoh software. I adjusted the model to account for the print layers, added some supports, and the G-code came out well.
The print took about 5.5hrs, and the supporting material detached easily.
And here we have the full set as well as a final potential use for the successfully printed object.
Assignment 2: 3D Scan an Object
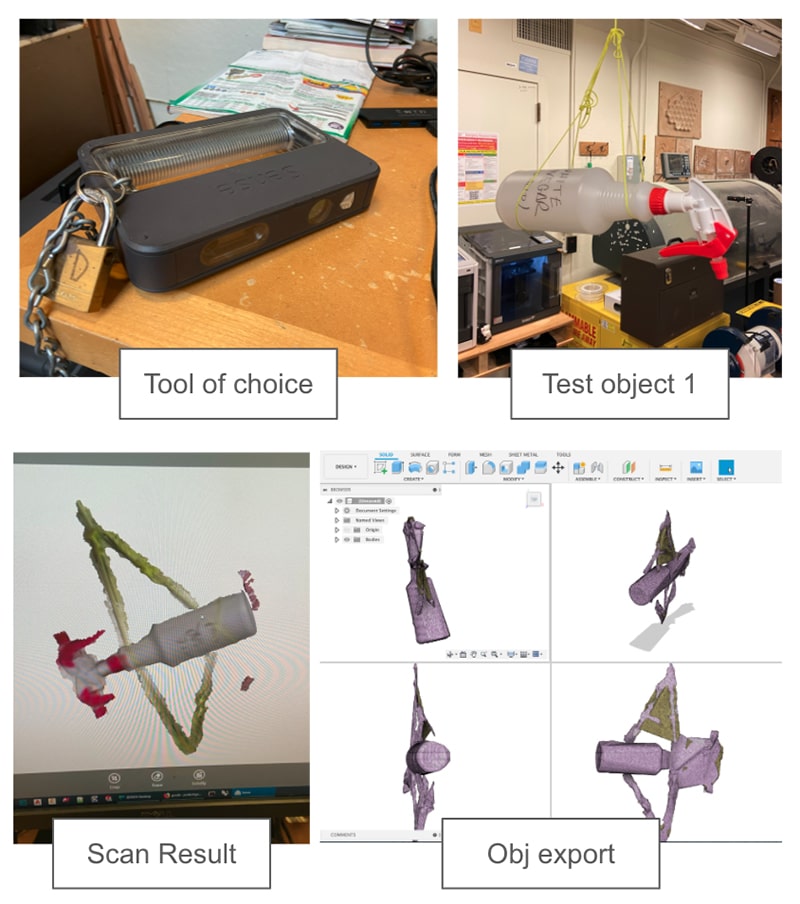
I started experimenting with the Sense scanner by myself, thinking that I would be able to scan something small if I used the provided string cradle.
I tried to spin the object itself rather than move with the scanner. The result was a pretty poor scan.
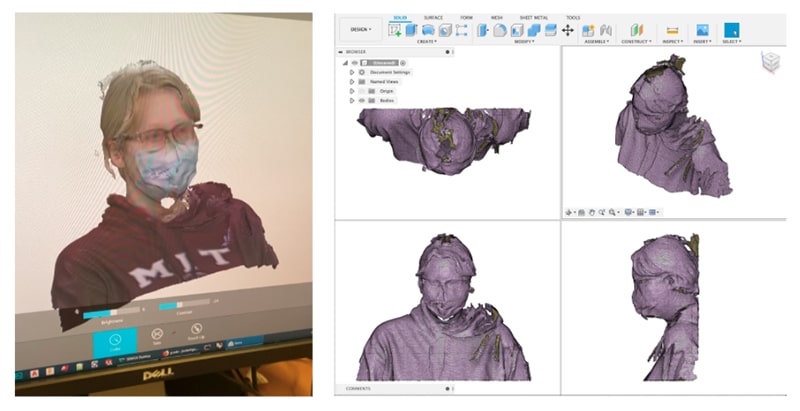
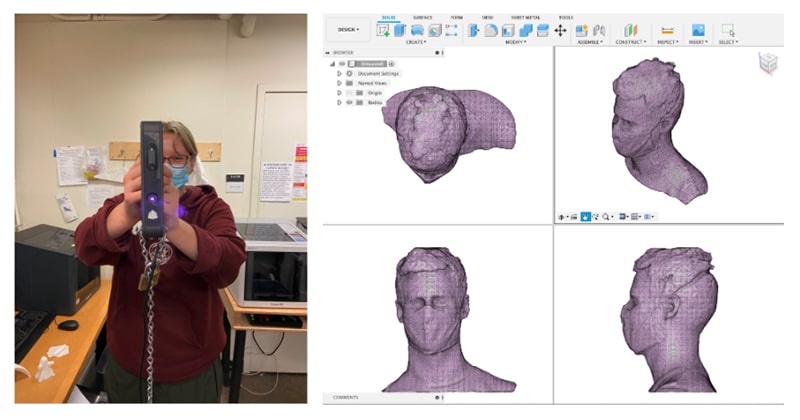
By the time I was ready to try another scan, Emma was in the shop. So we teamed up. She was kind enough to volunteer as a subject, and while she spun very
steadily, and the scanner read her face and sweatshirt fairly well. If you look at the image on the right, however, you can see that the scanner was unable to render her back.
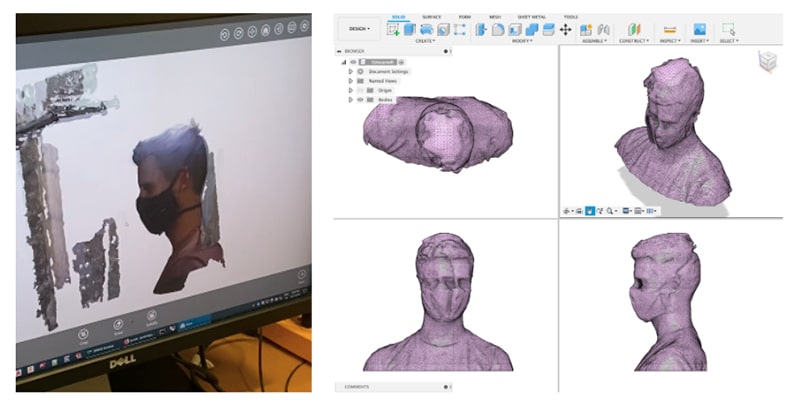
We tested the same method with me as a subject, and while we were able to get a more complete scan, my face was duplicated and twisted in a bizarre way.
Finally Omar arrived, and he showed us where we were going wrong. He demonstrated how to move with the scanner to generate a more complete model.
Our highest fidelity scan of my head and shoulders is shown above. The Fusion360 file is ready for export to a printer.