[01 Laser Cut Construction Kit and Vinyl Cutting]
This week we're learning how to use the laser cutter and the vinyl cutter. We are designing construction kits with a laser cutter and have been given free reign to design anything with the vinyl cutter.
Laser Cutting: Brainstorming
For our construction kits we need to create a laser cut parametrically designed construction kit that will account for the lasercutter kerf, which can be assembled in multiple ways, and for extra credit include elements that aren't flat. I really like the look of the live hinges and wanted to use these somehow in my design. I began by brainstorming some ideas of how to include all of the elements into one design.

Laser Cutting: Design Selection
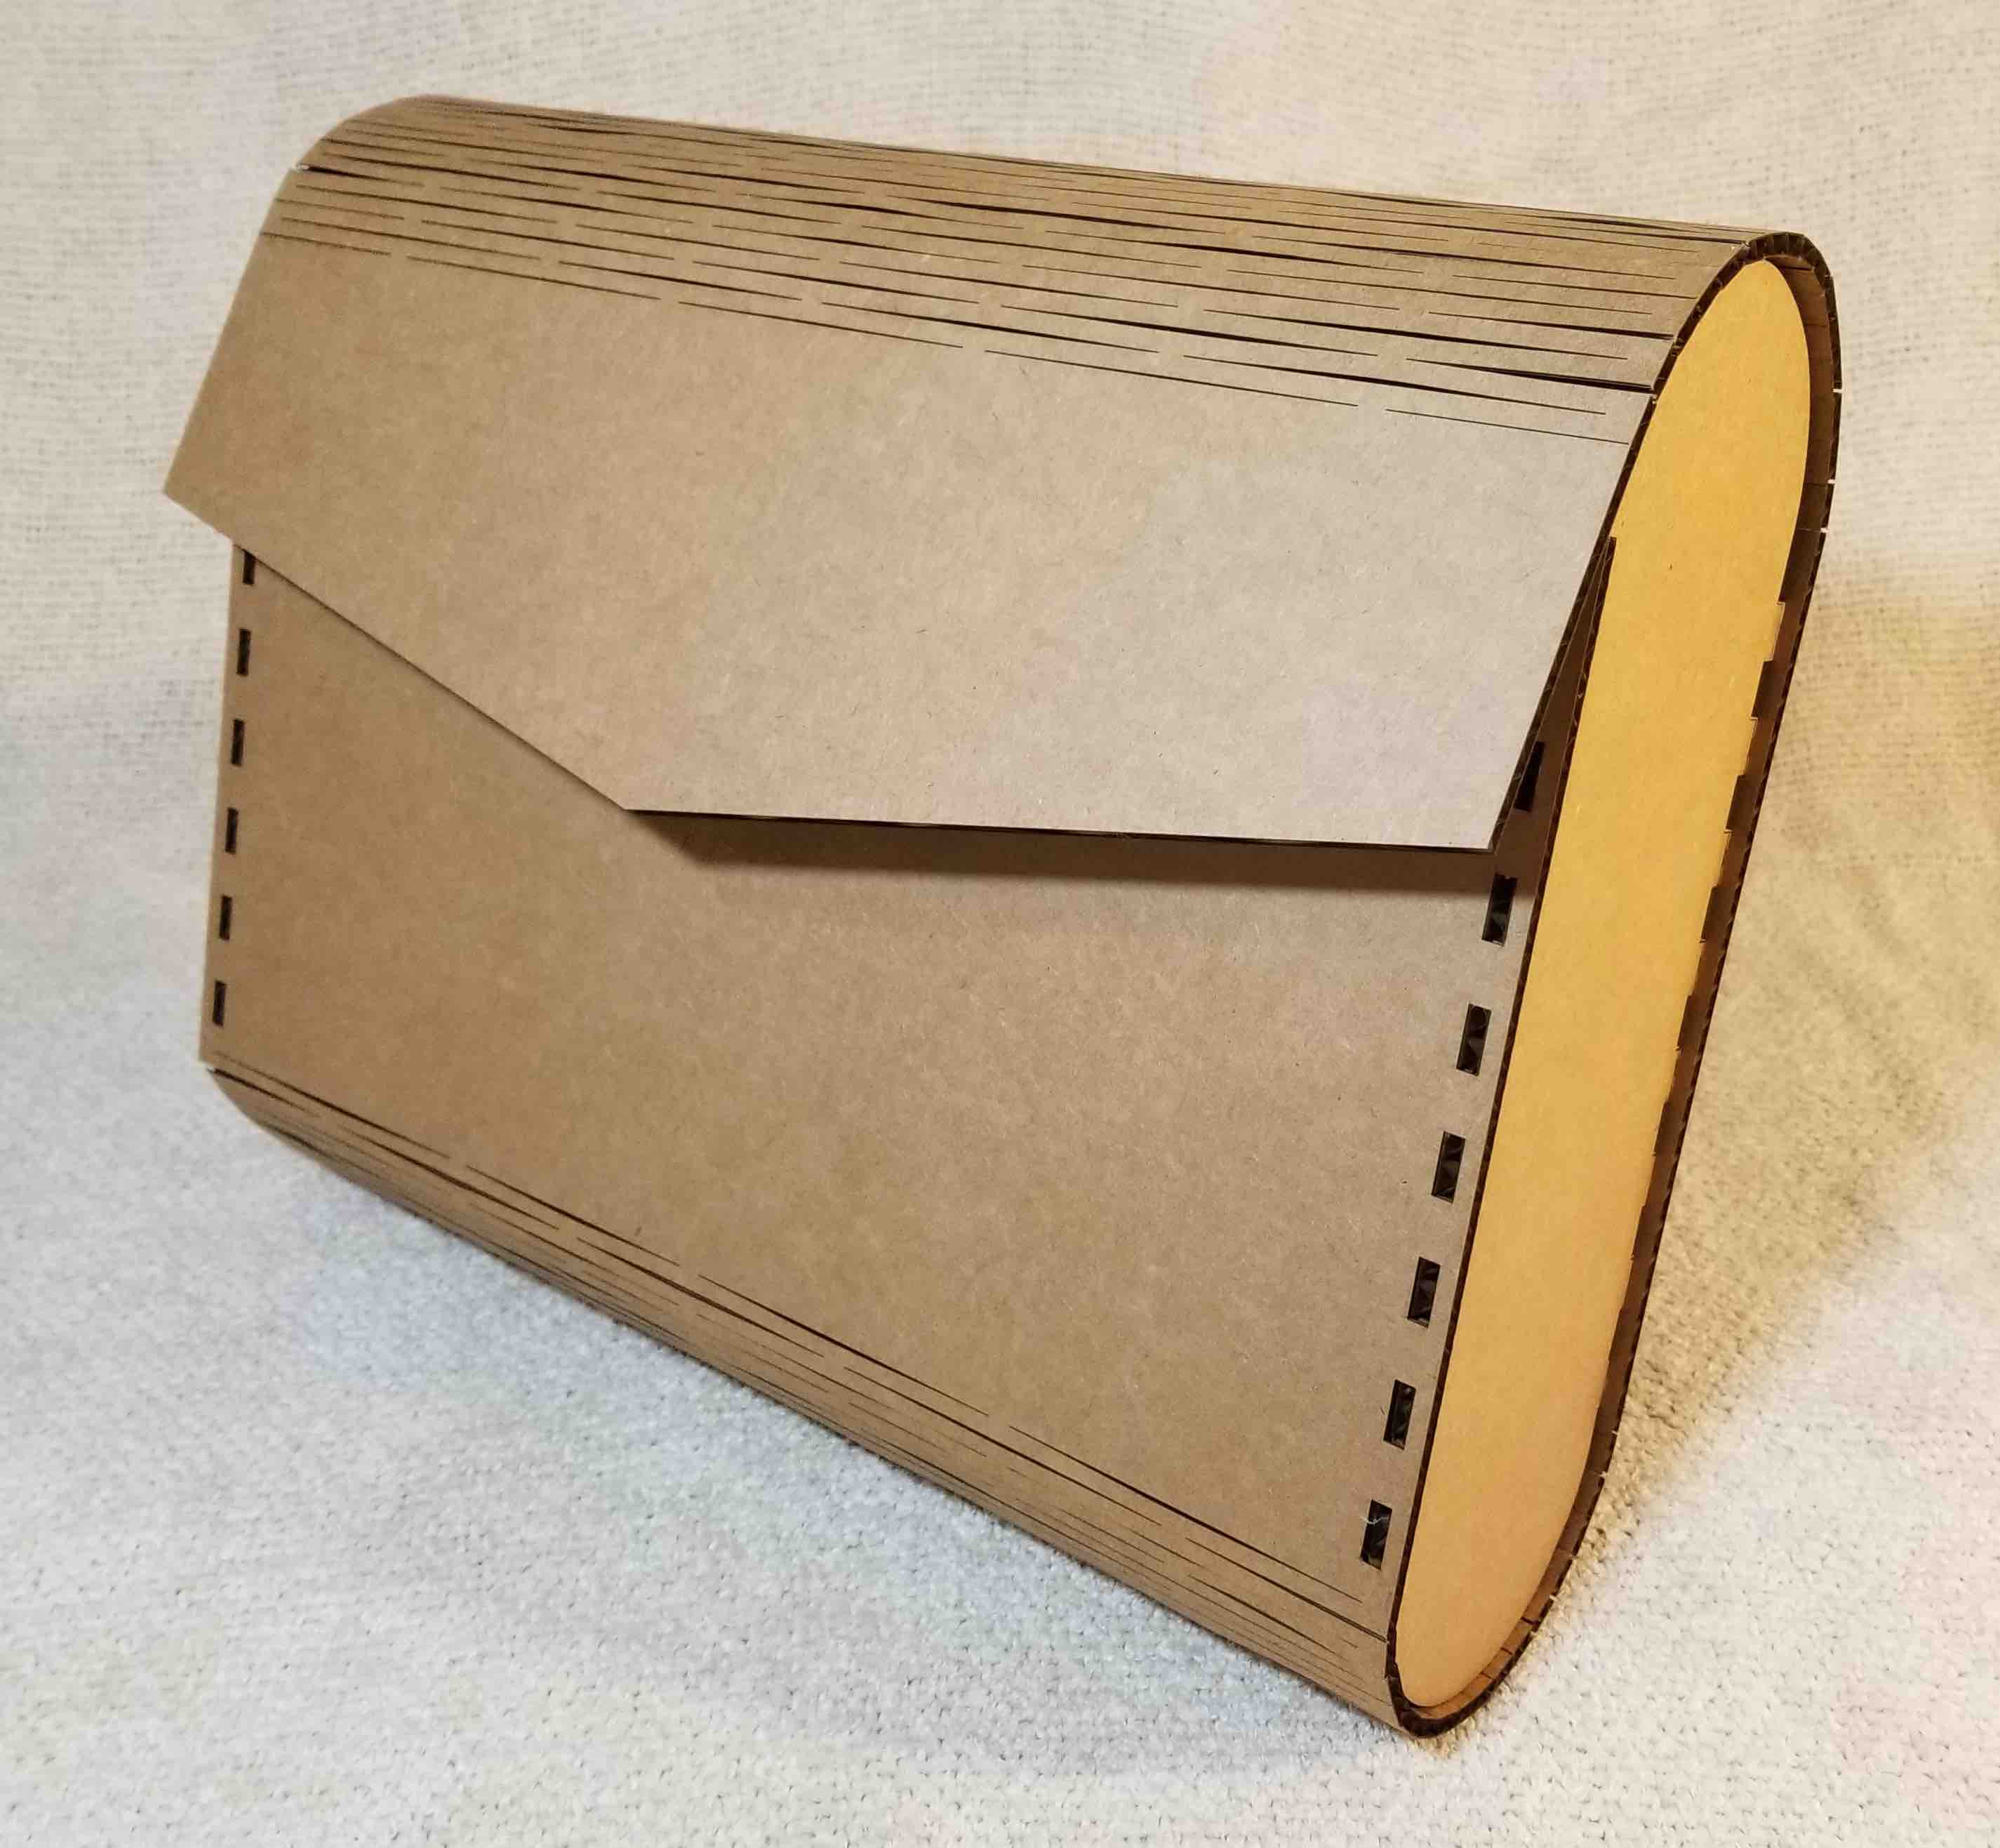
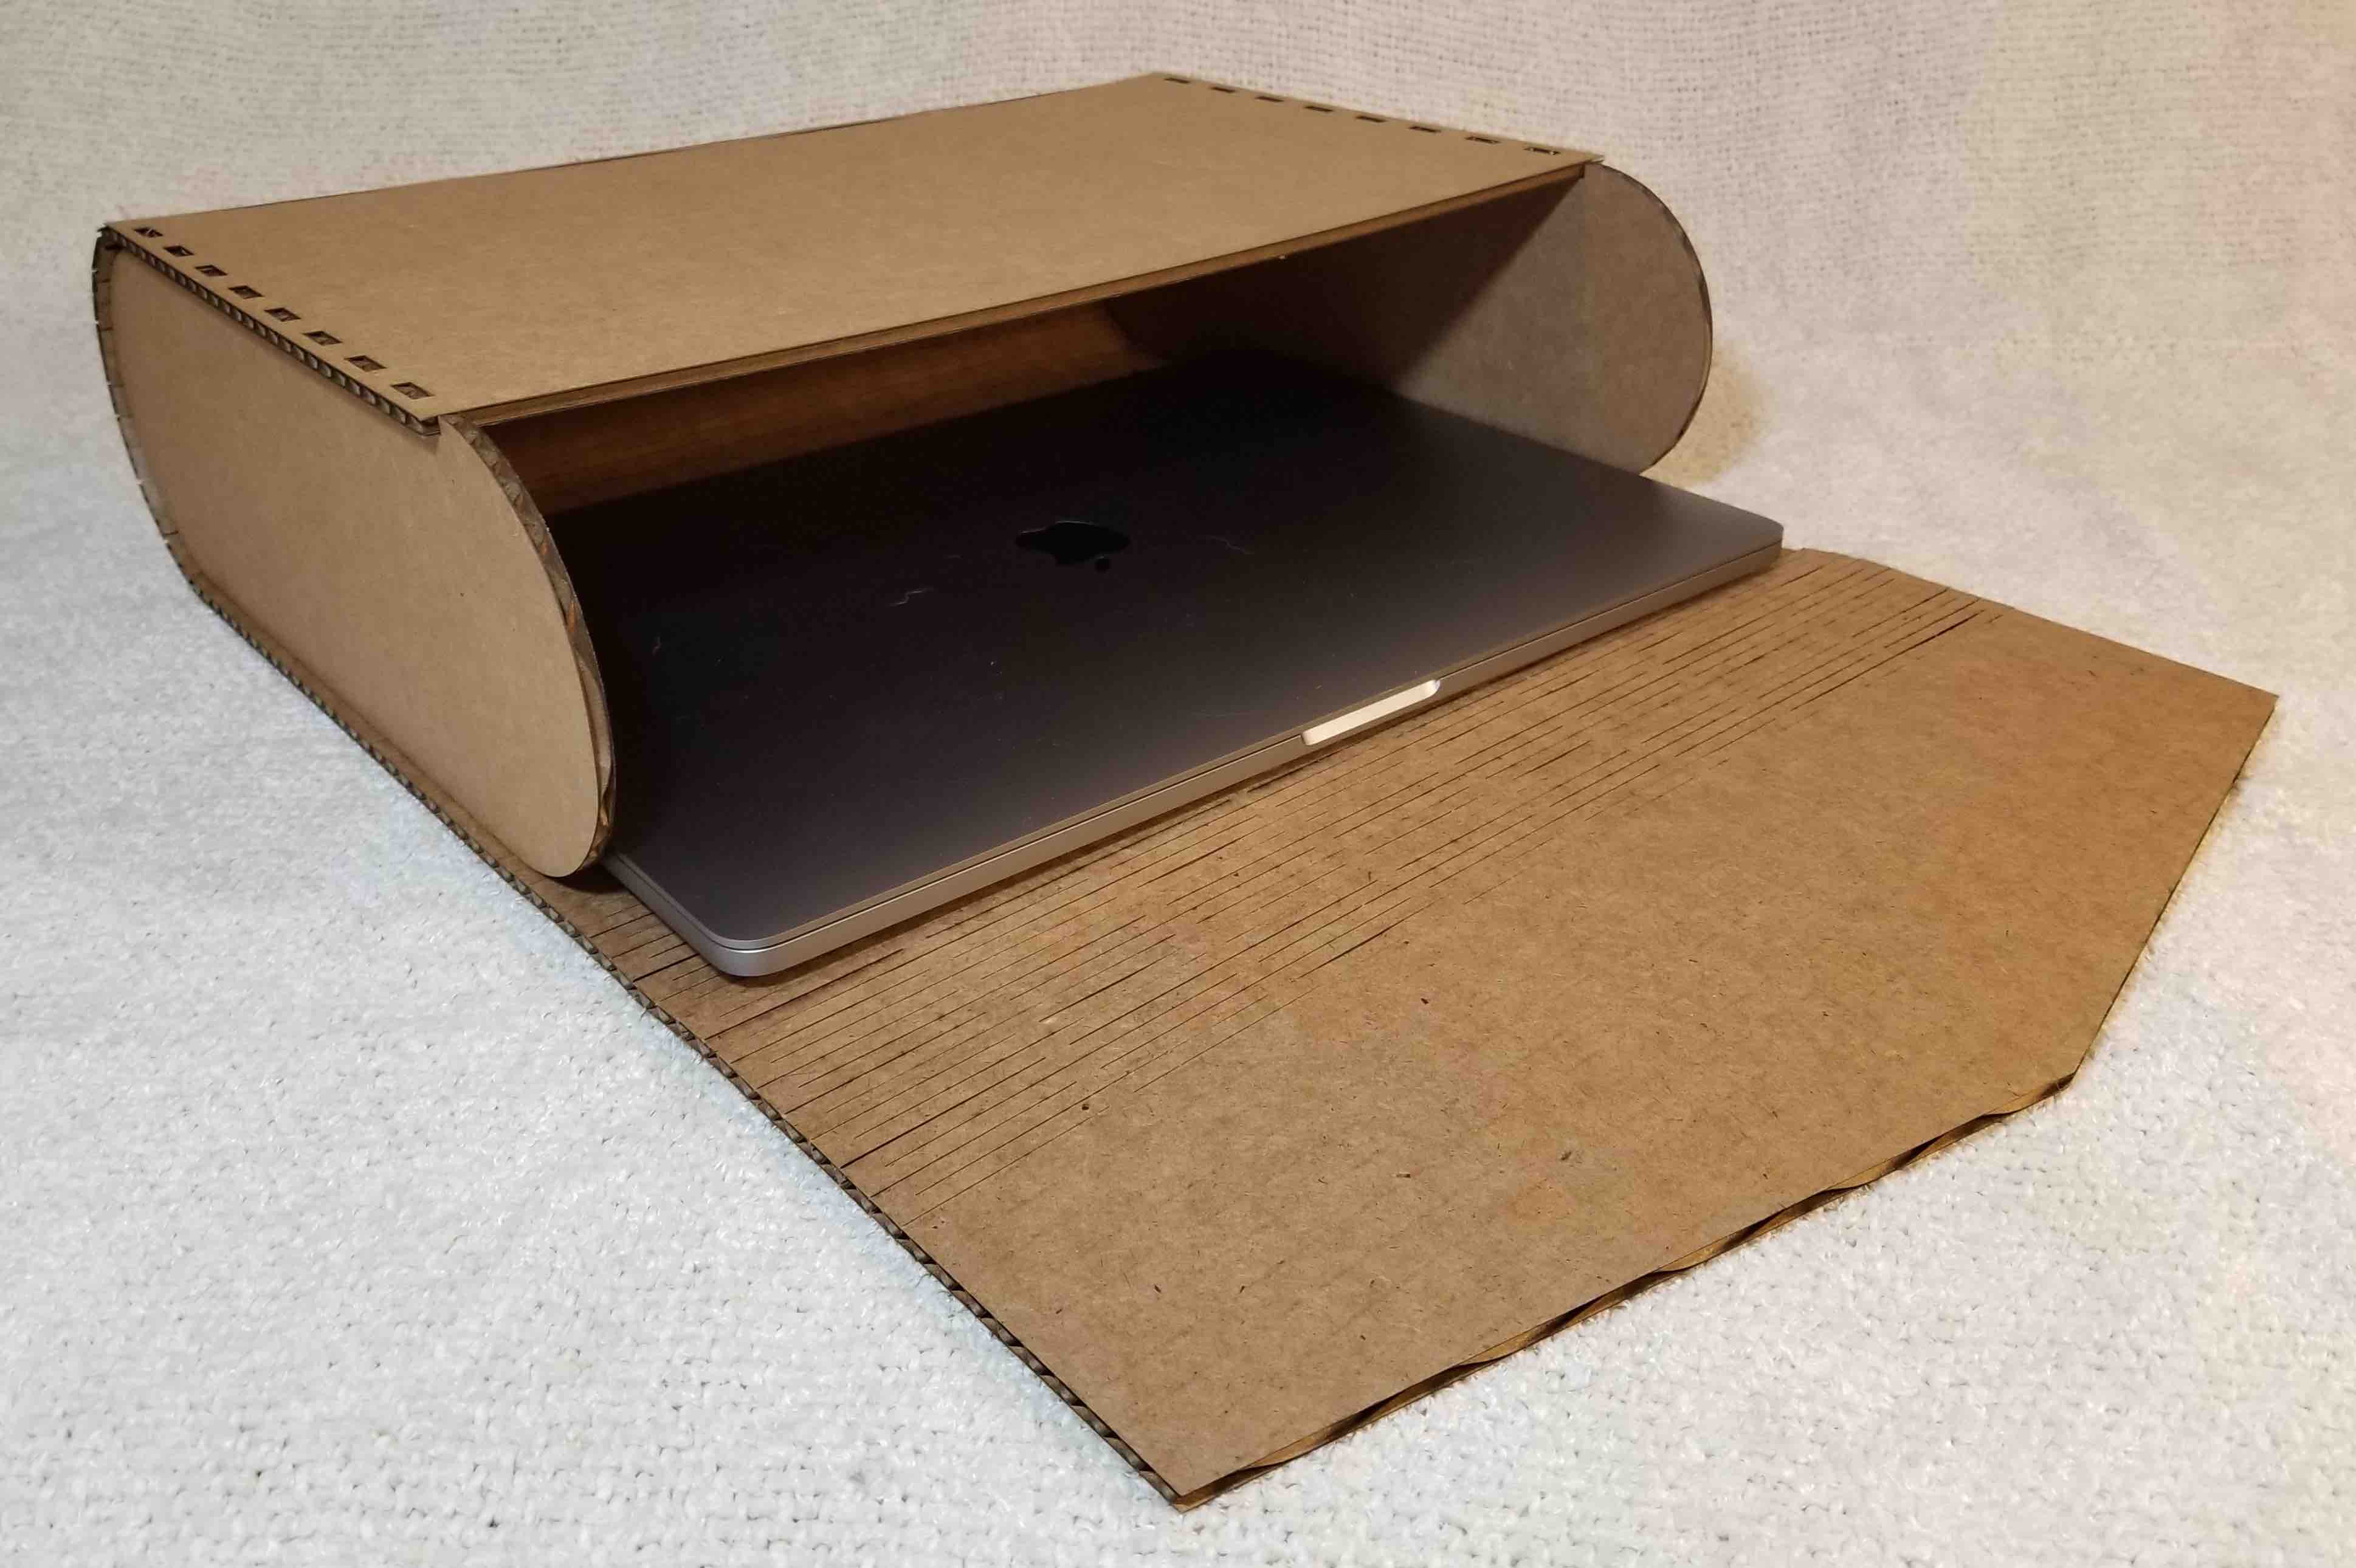
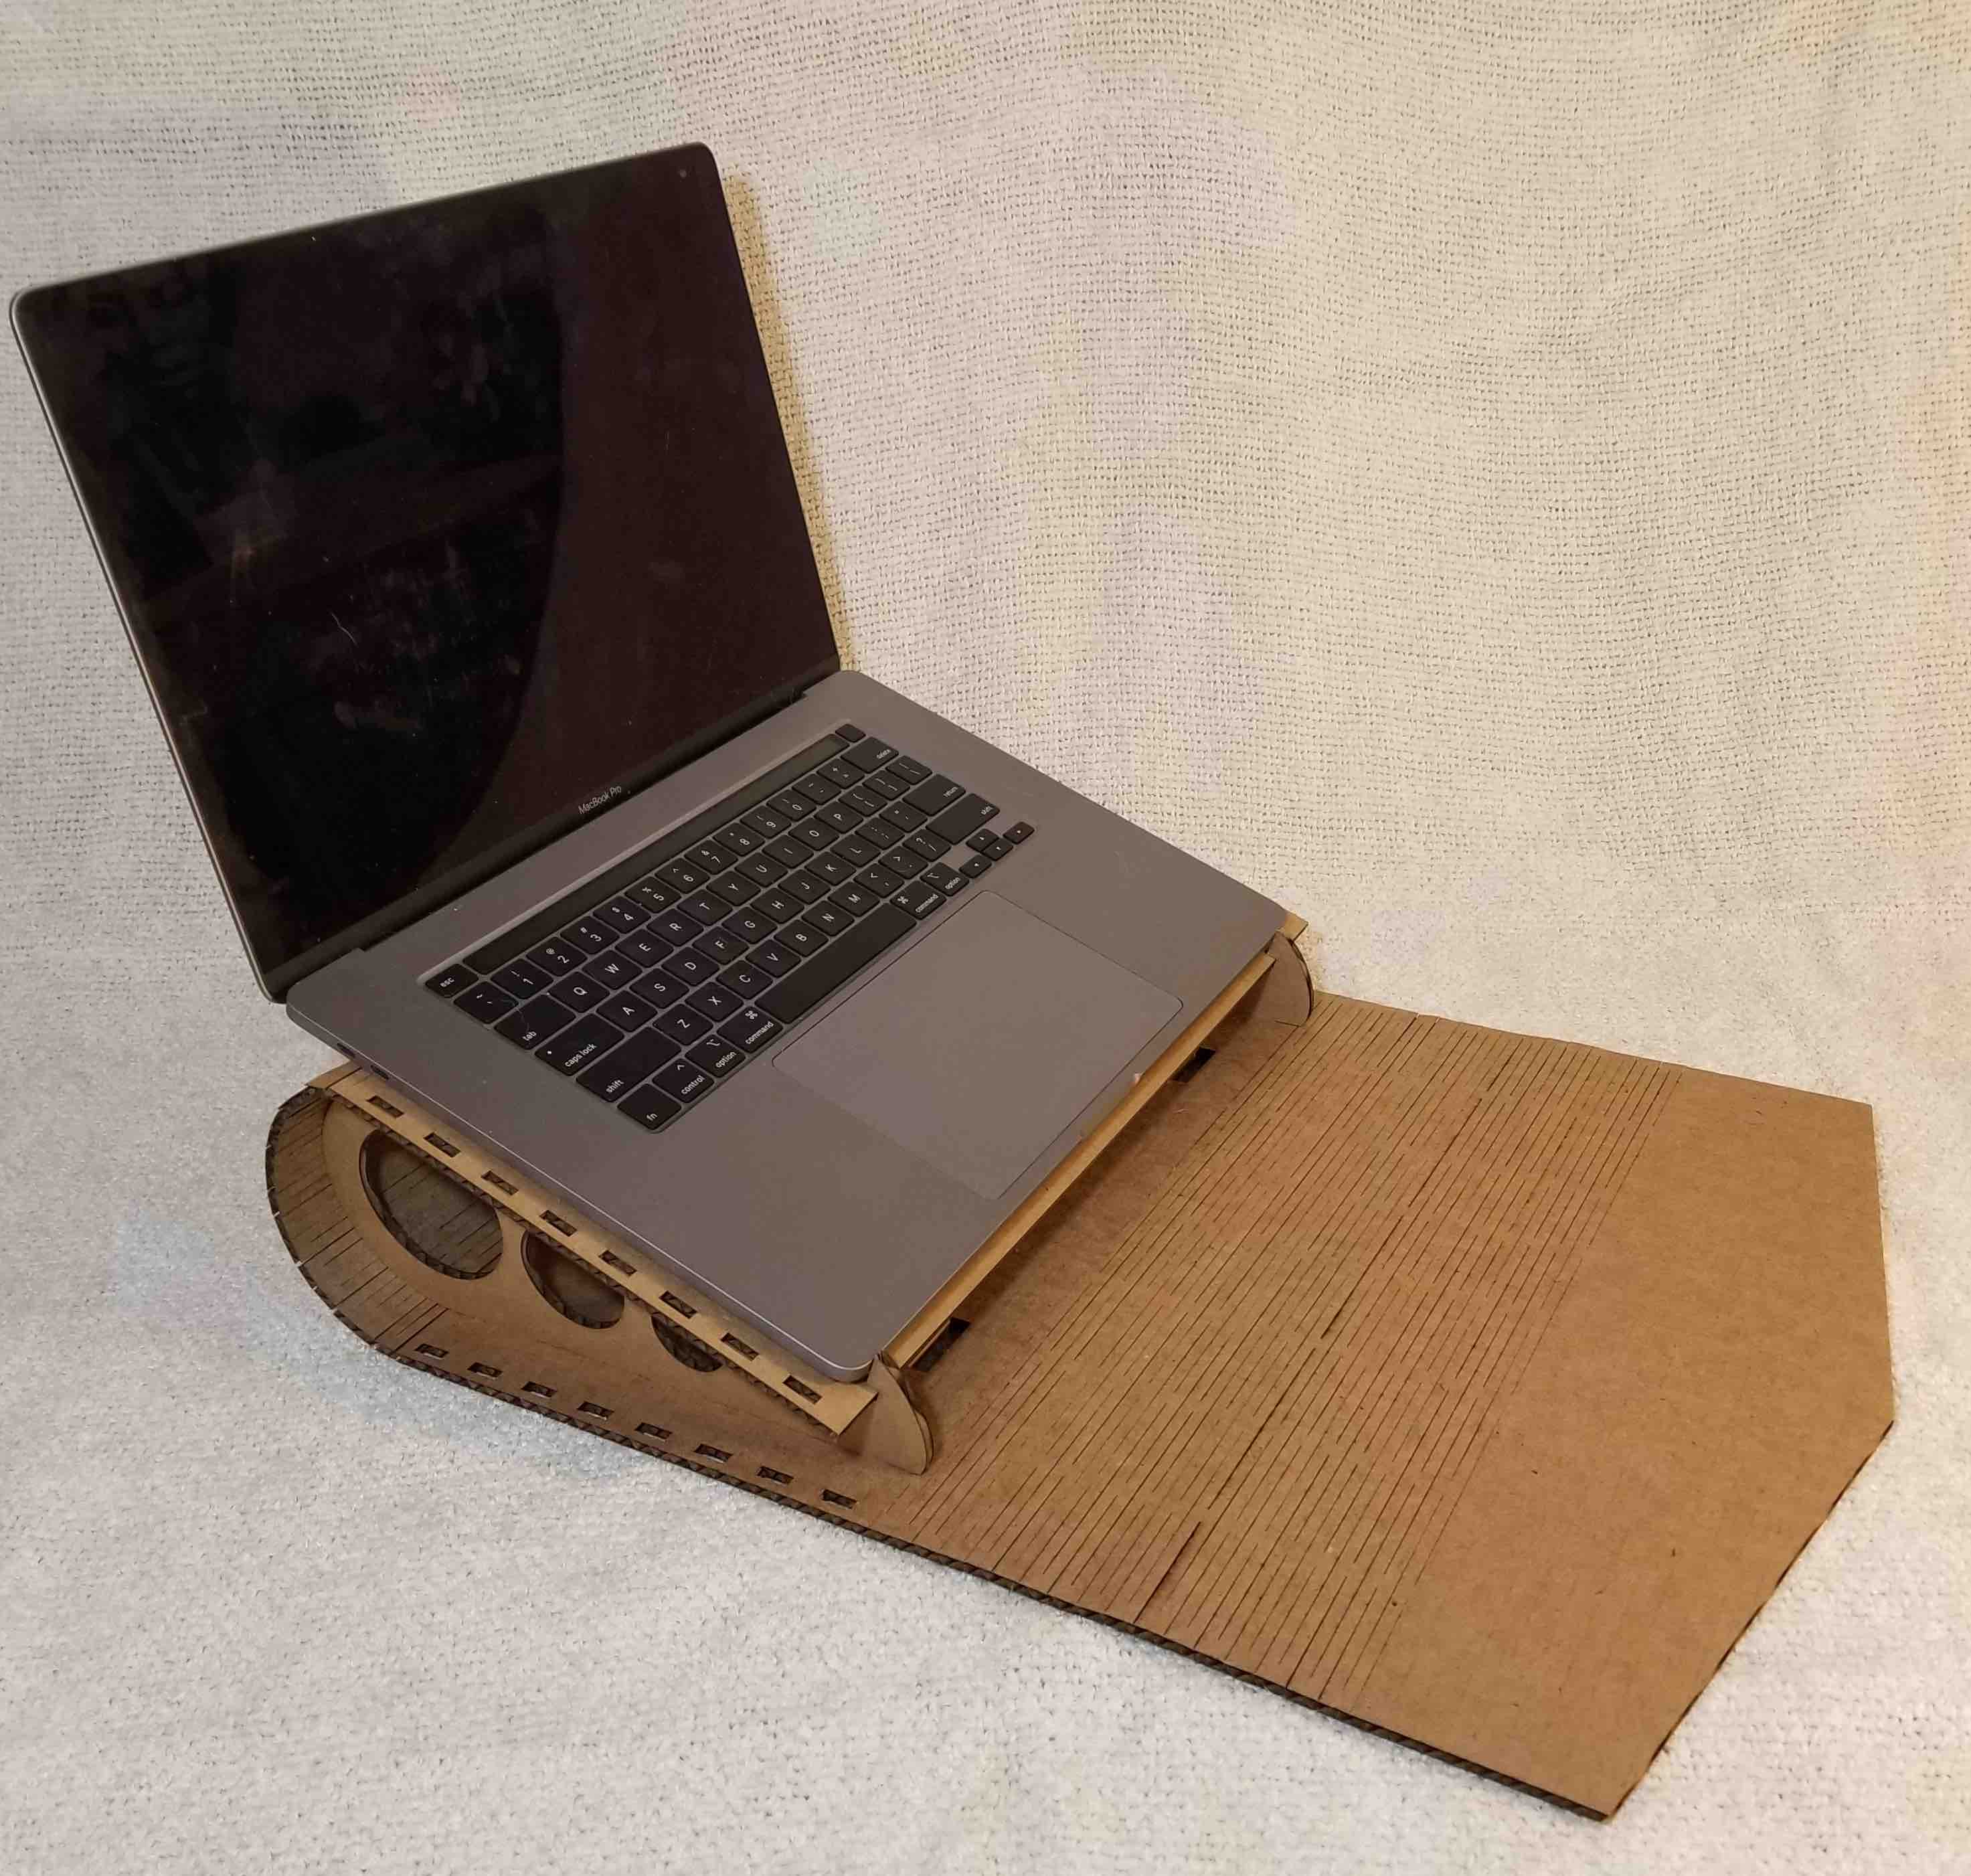
I ended up combining two of my concepts - the computer stand and the purse - into one transformable concept. The idea is to have an old-school backpack that can turn 'inside-out' into a computer stand. Some of the challenges I found in thinking through the design were:
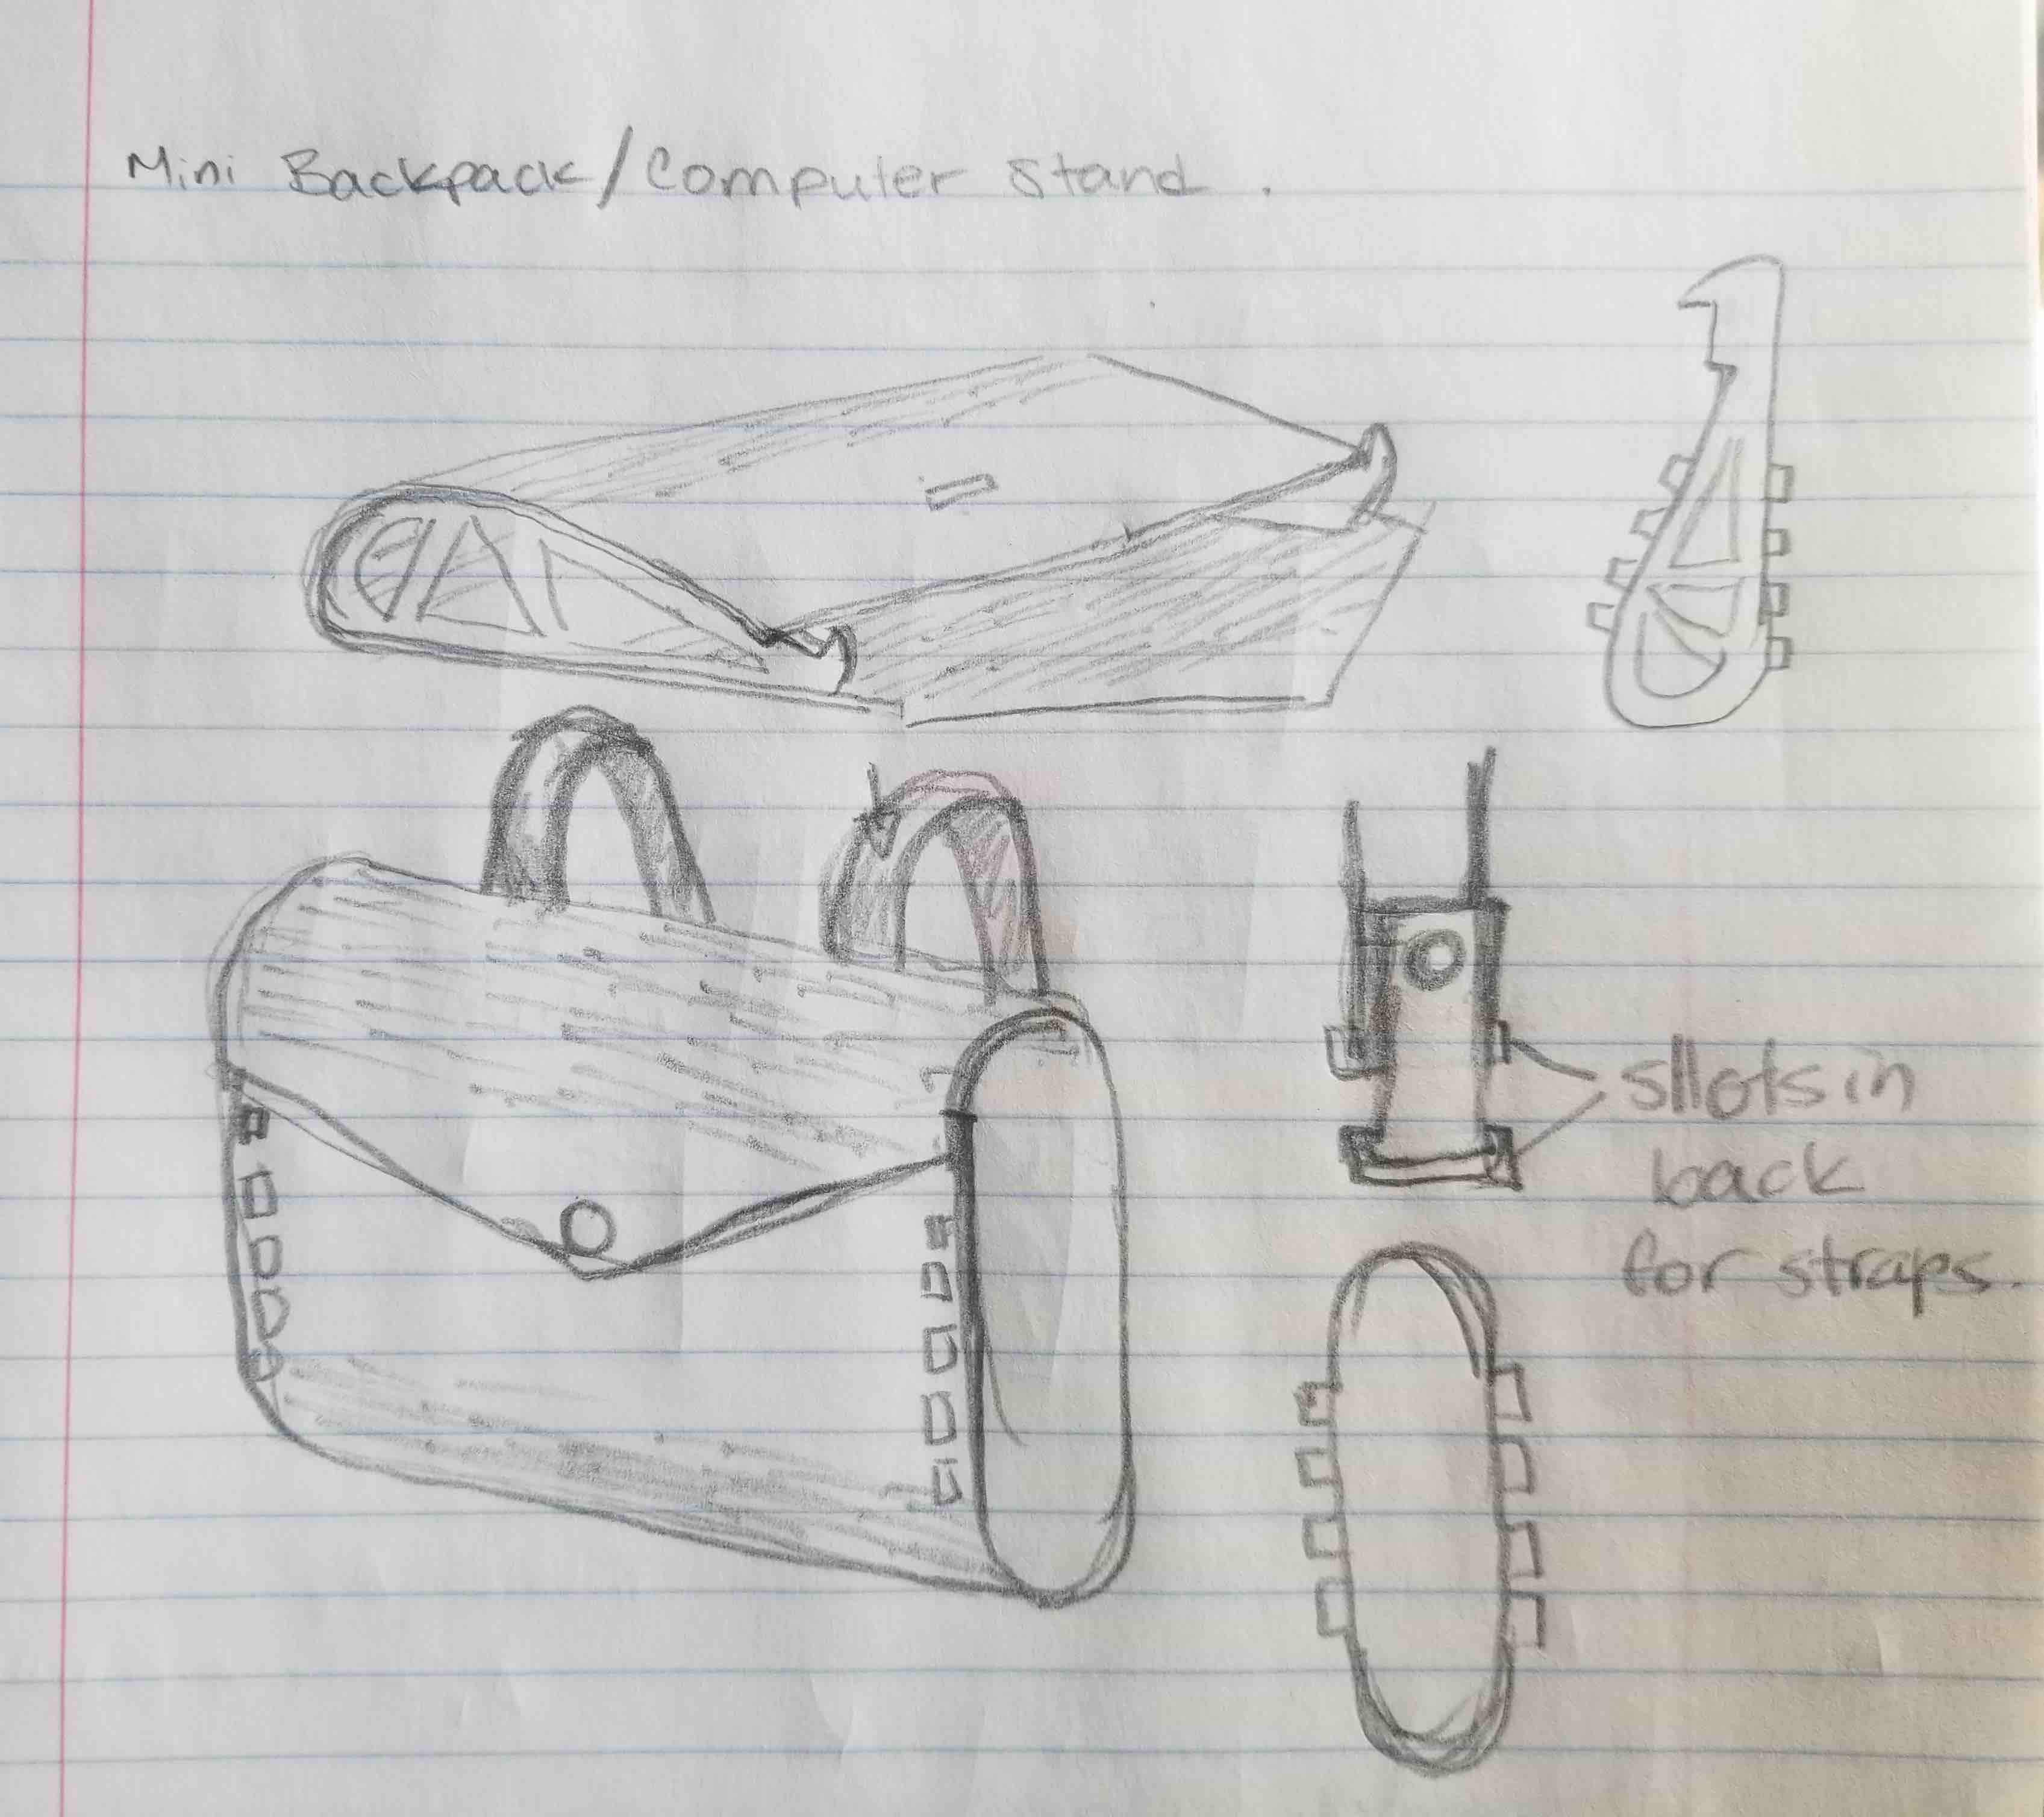
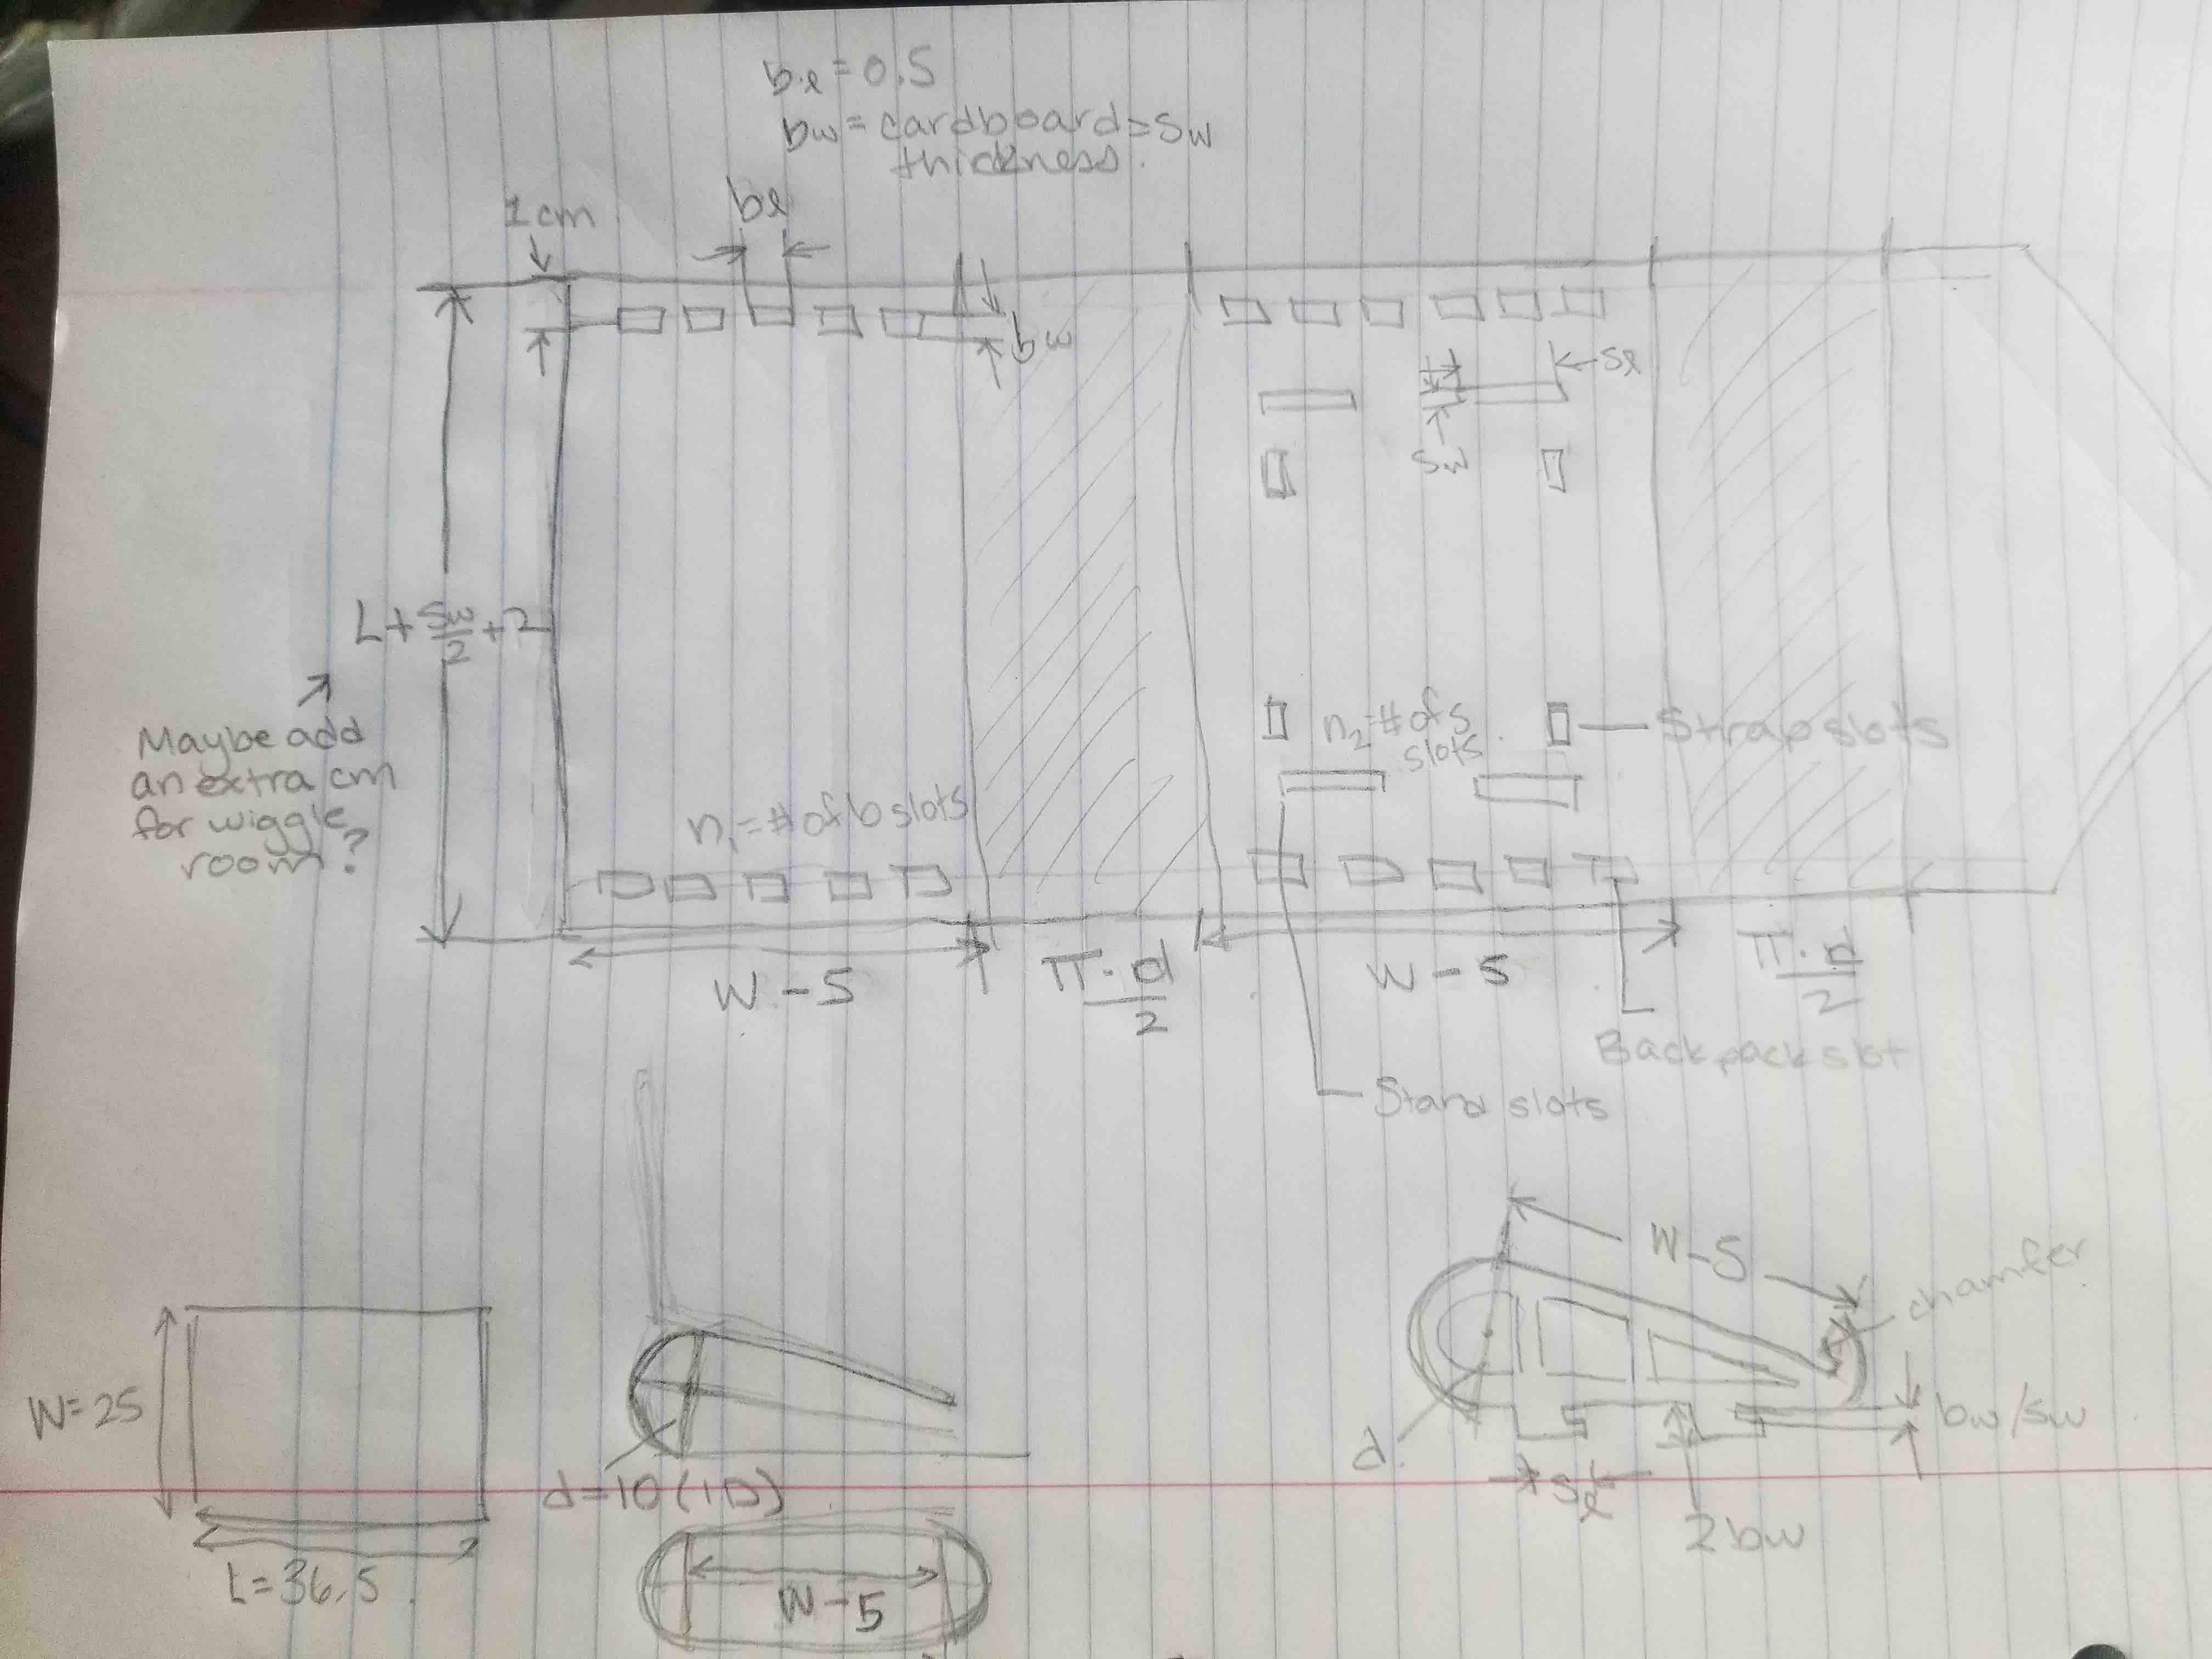
I did a more detailed sketch of what the parts would like to to answer these questions and to have an idea of the dimensions I would need before starting in on the CAD software (sketching is much easier for me by hand!).
Laser Cutting: Modelling in Fusion 360
Next up was putting this into a 3D CAD model. At first I tried using SolidWorks, since this is a program I am familiar with, however, I was finding that what I knew of SolidWorks would have had me make the design flat. This would have made it difficult to check my work without actually cutting it. I chose to use Fusion 360 mostly because I wanted to haave the timeline bar which allows you to move back to any point in time in your design and make changes. I learned in Fusion 360 as well how to use the sheet metal tool. This is great for a project like this that folds since it allows you to make your design it the 3D format but then to unfold it and create flat patterns out of your 3D design.
Some key learning moments for me with this design were:
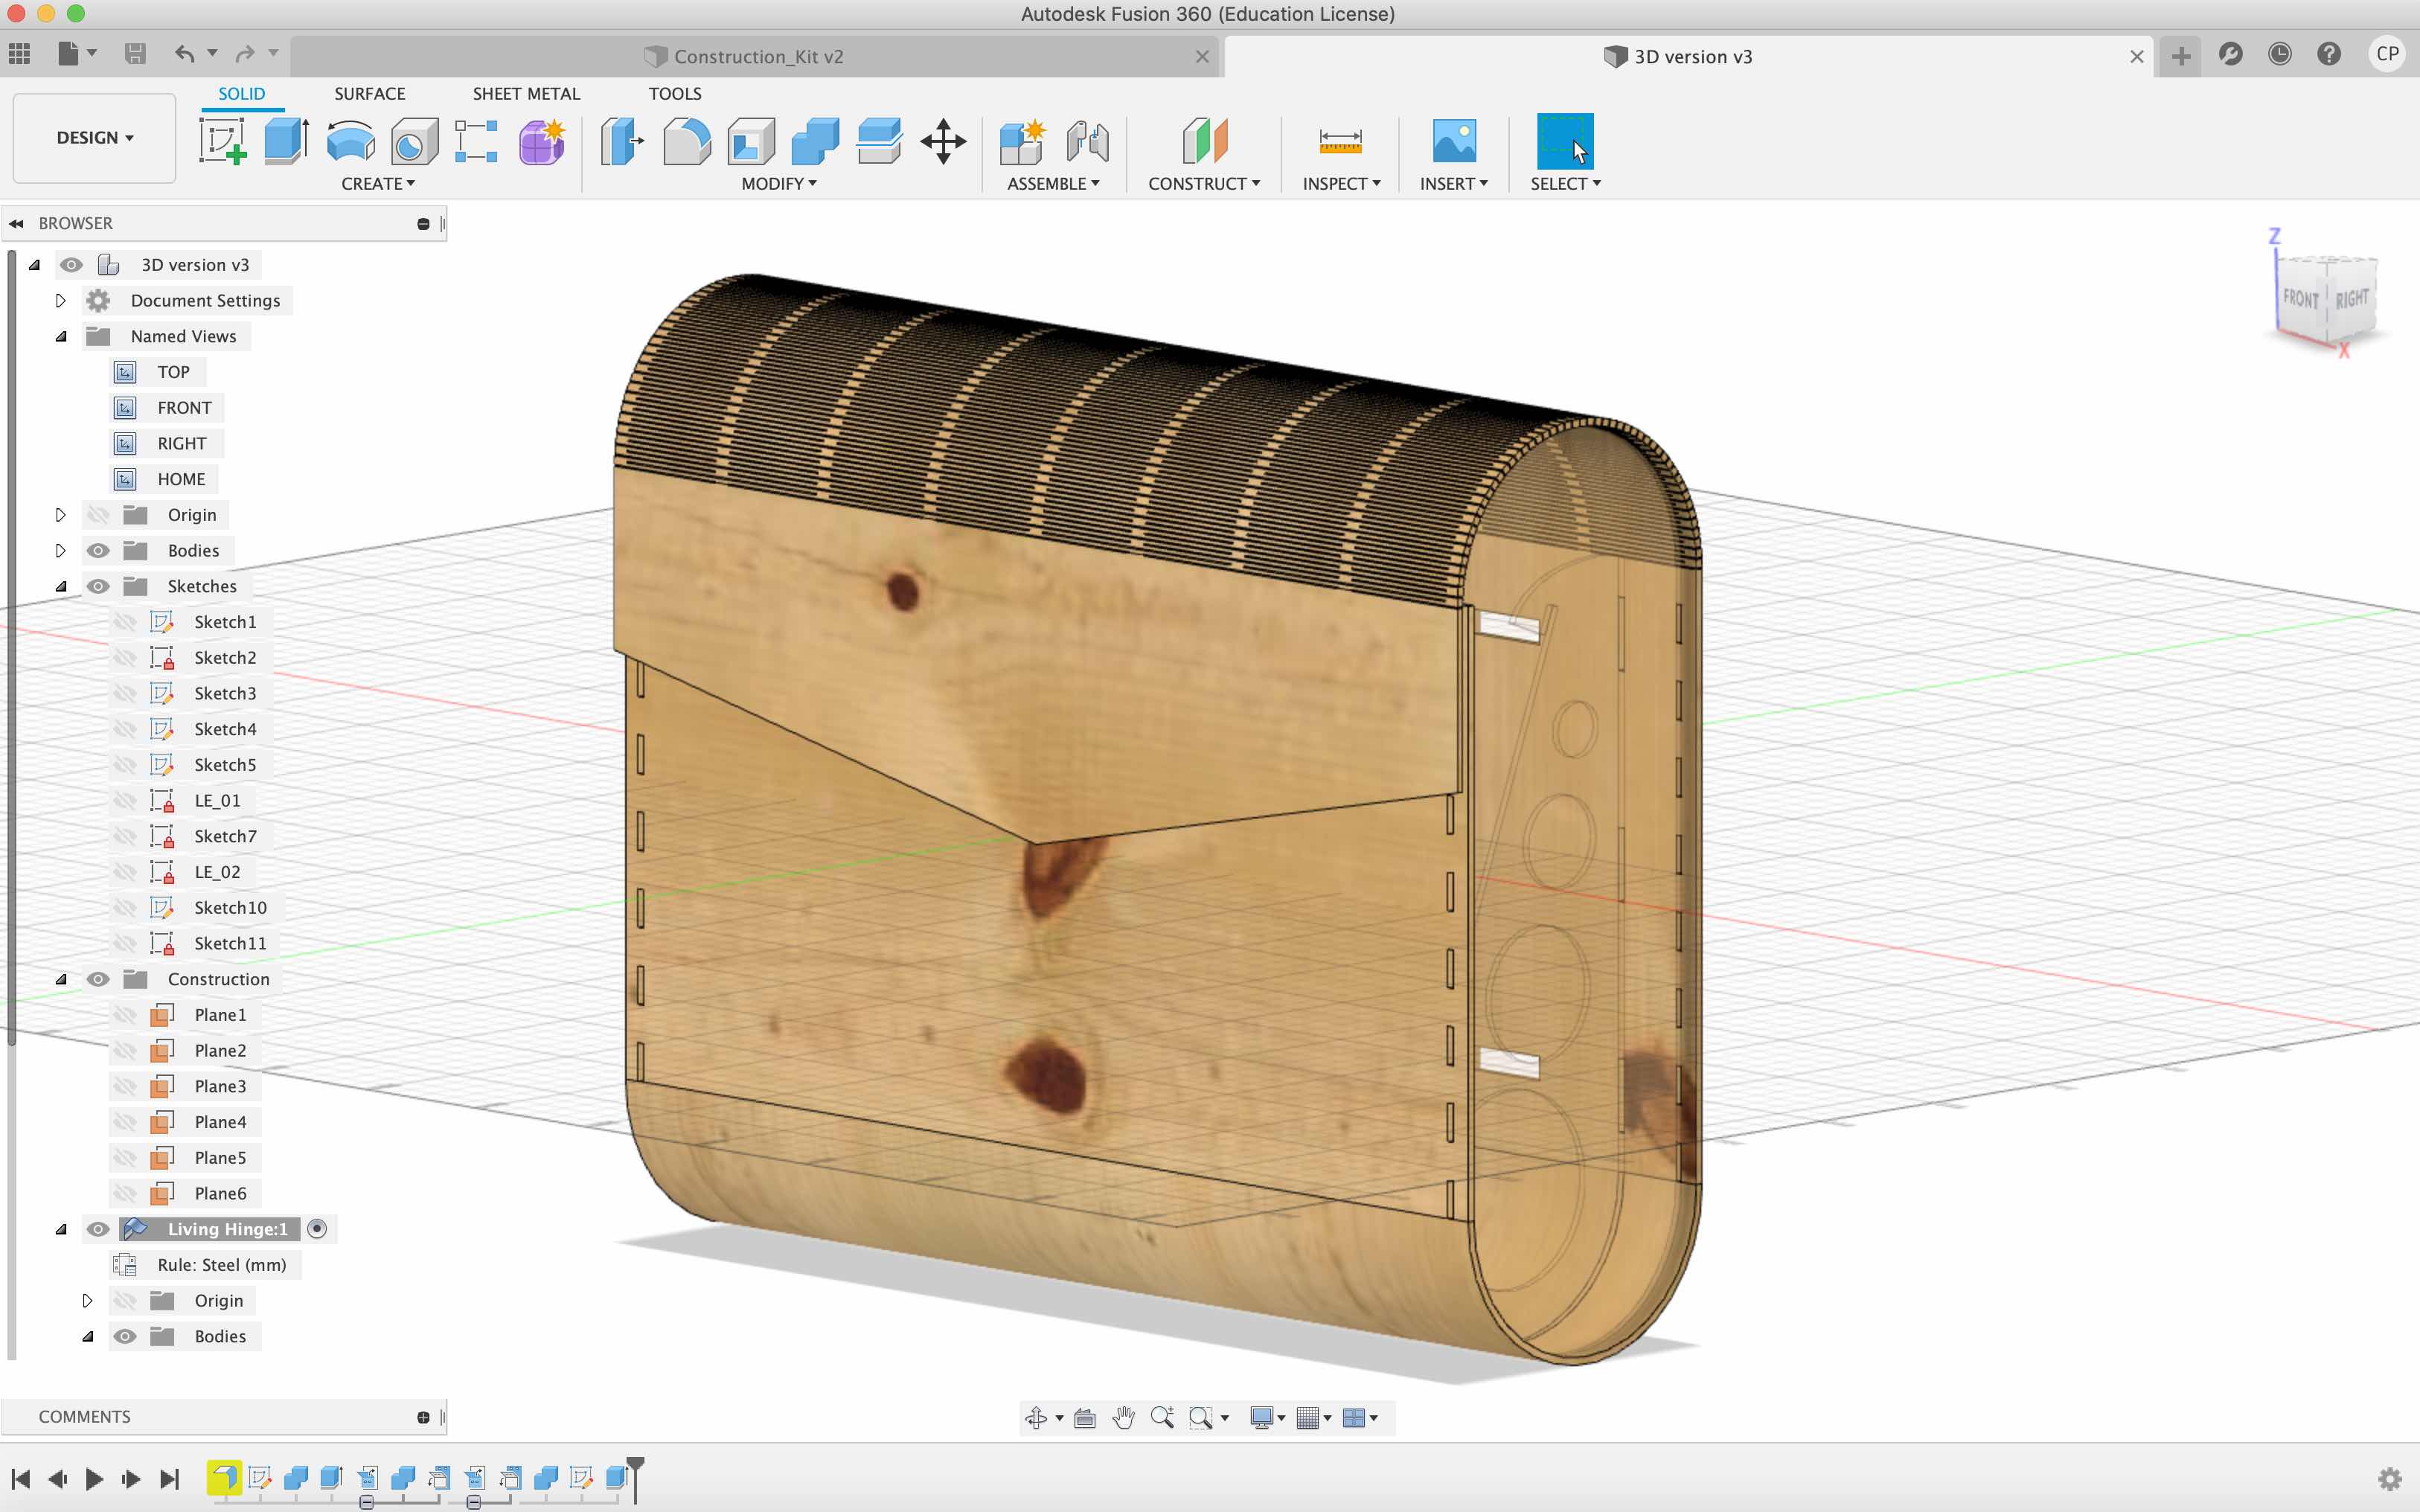
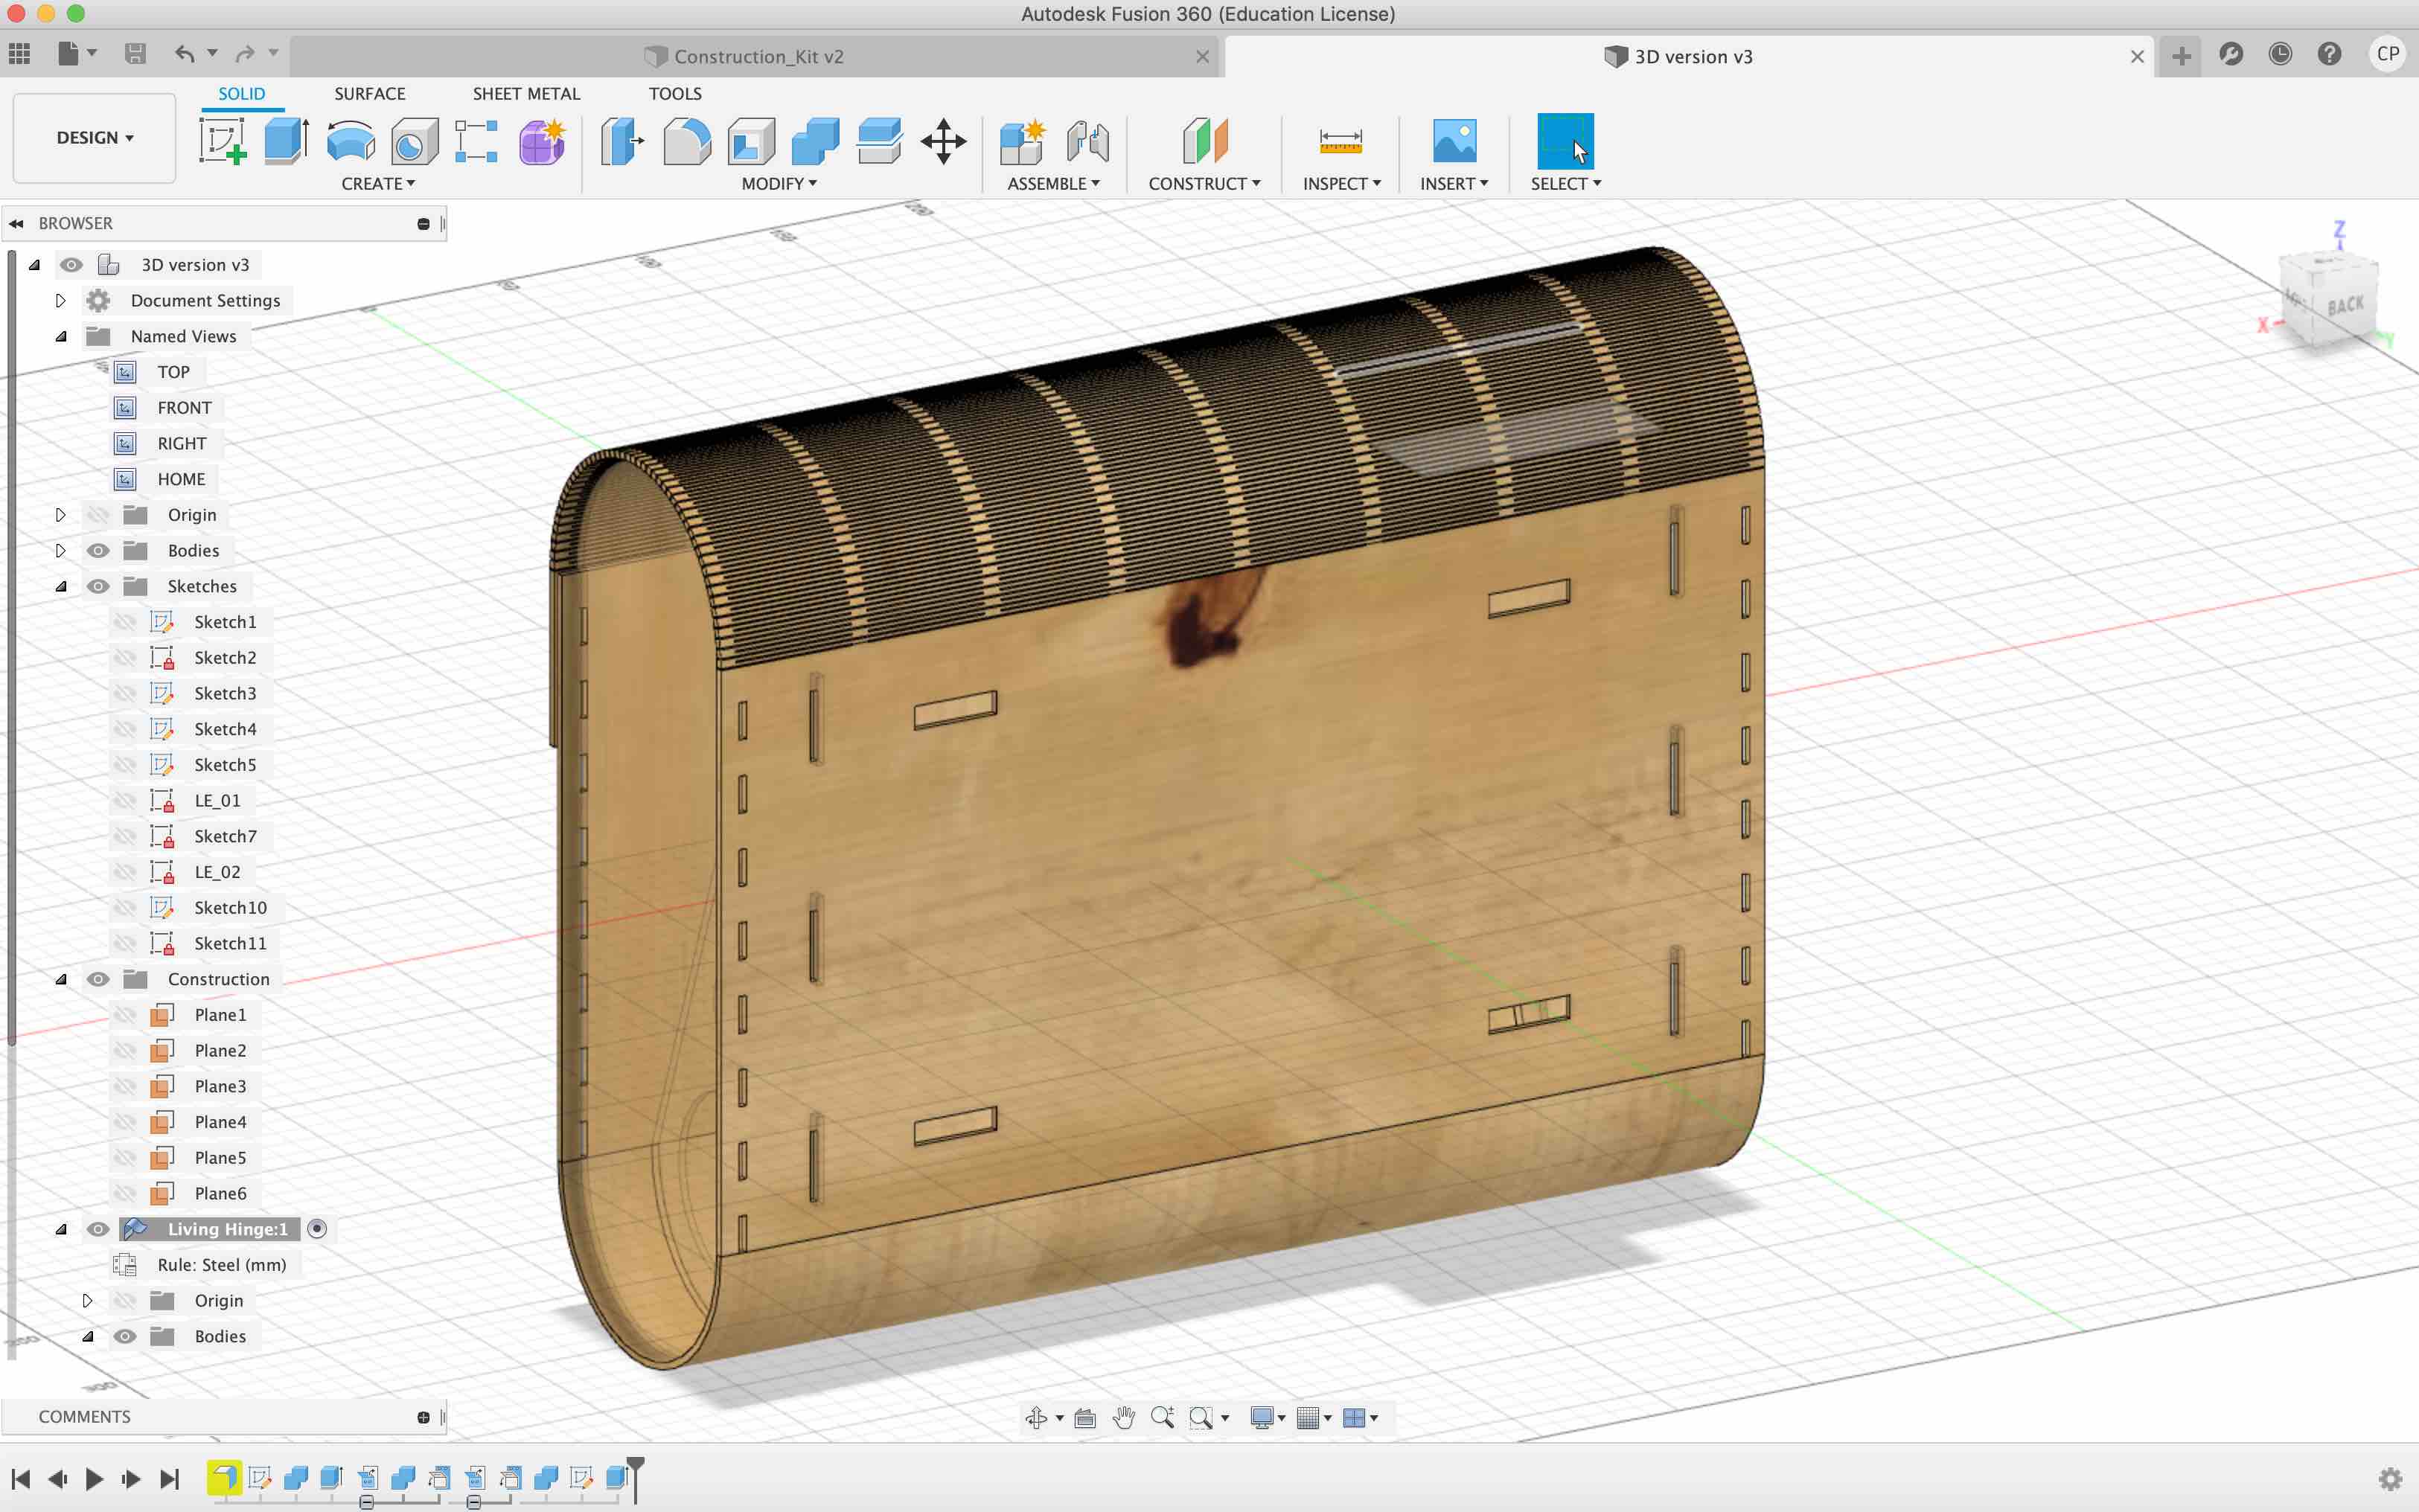
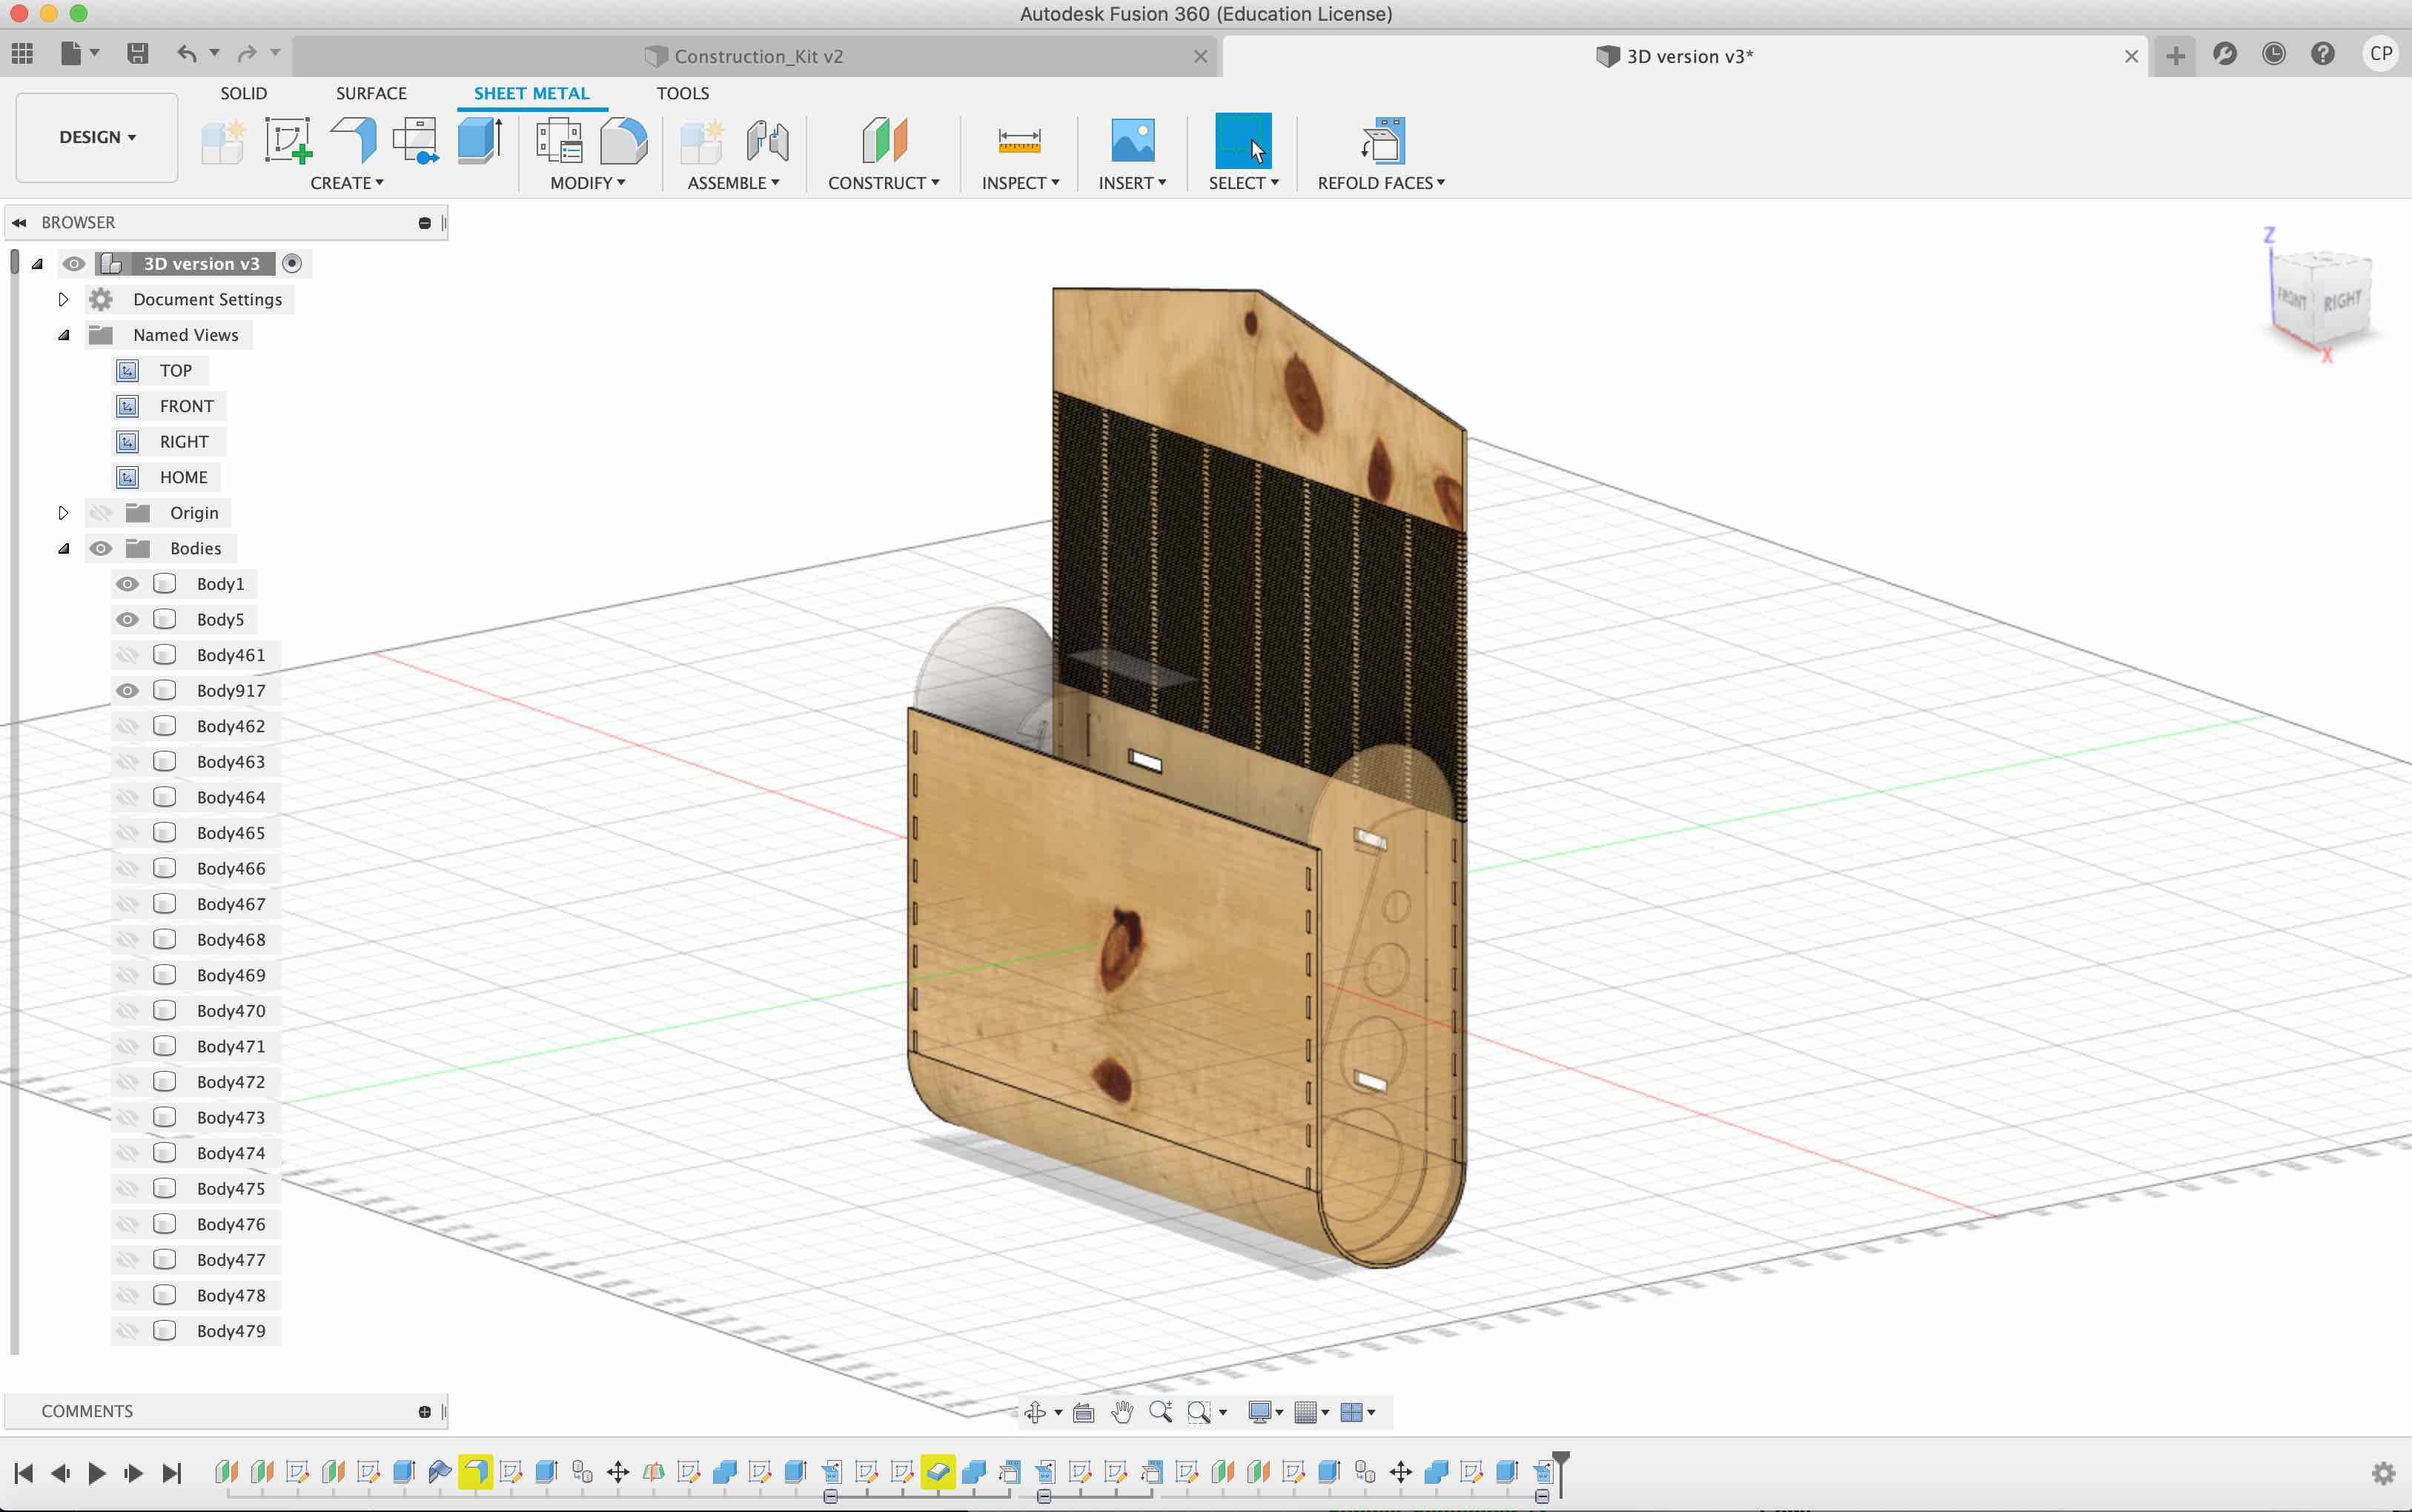
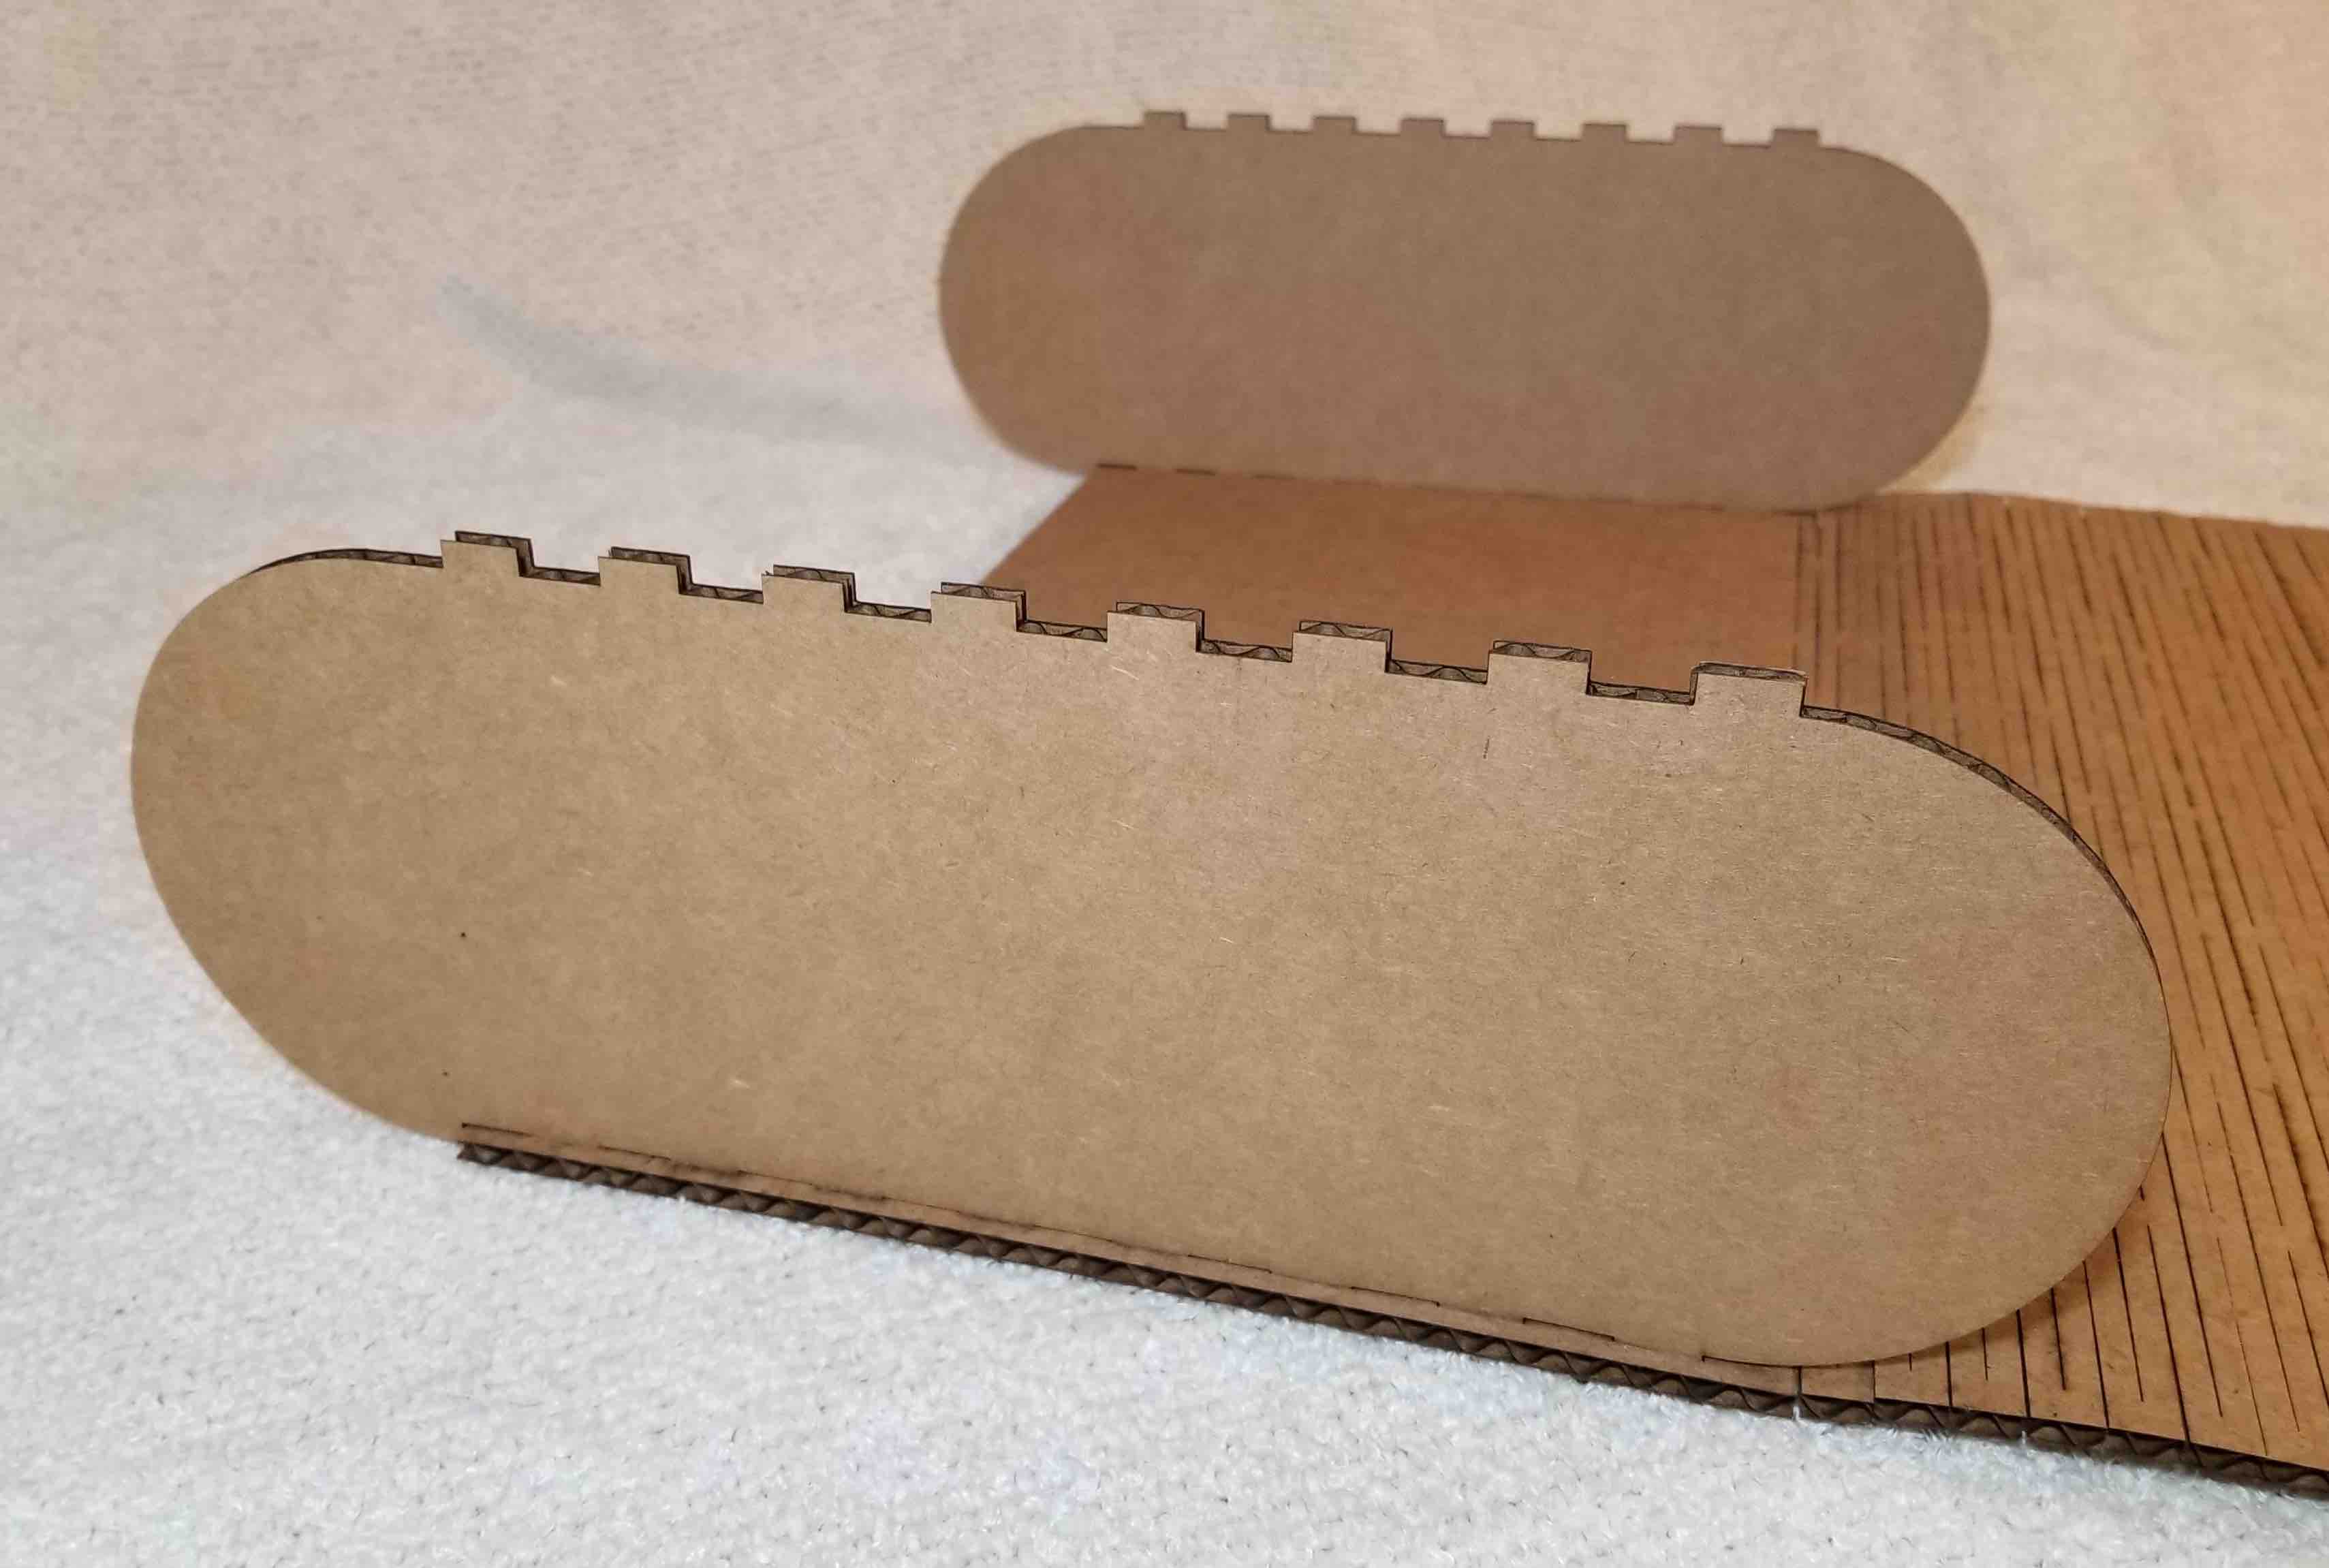
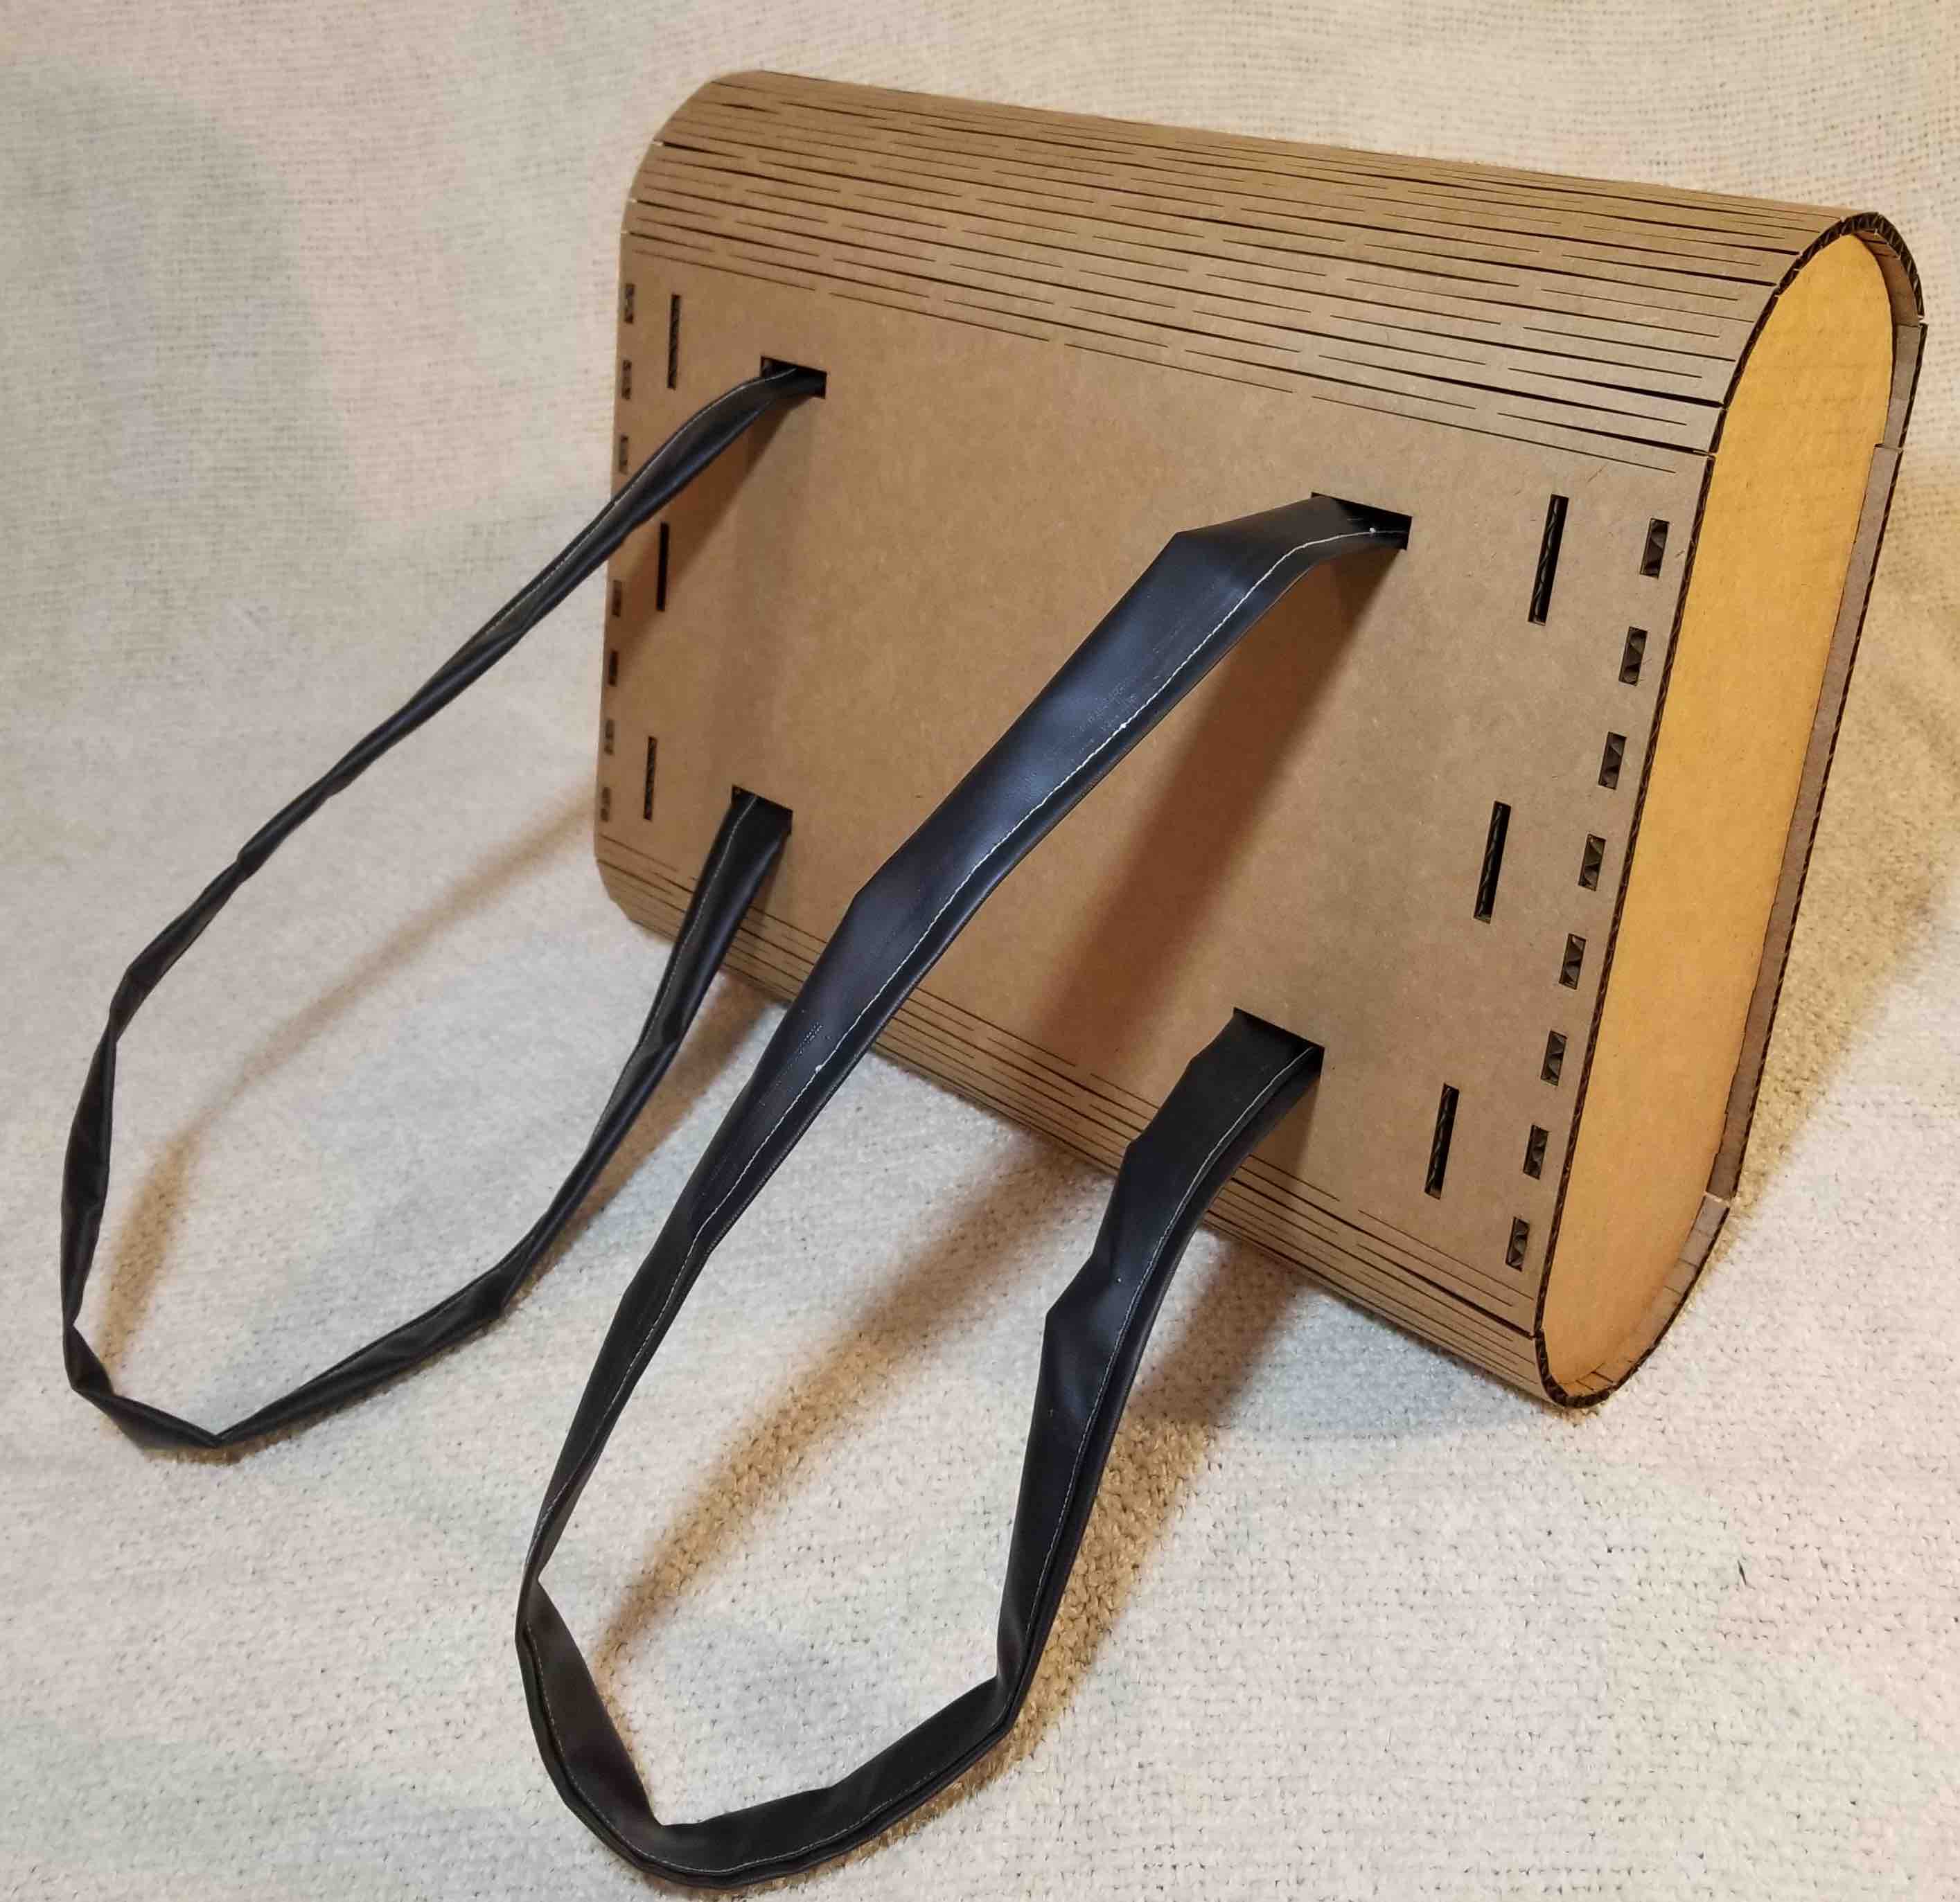
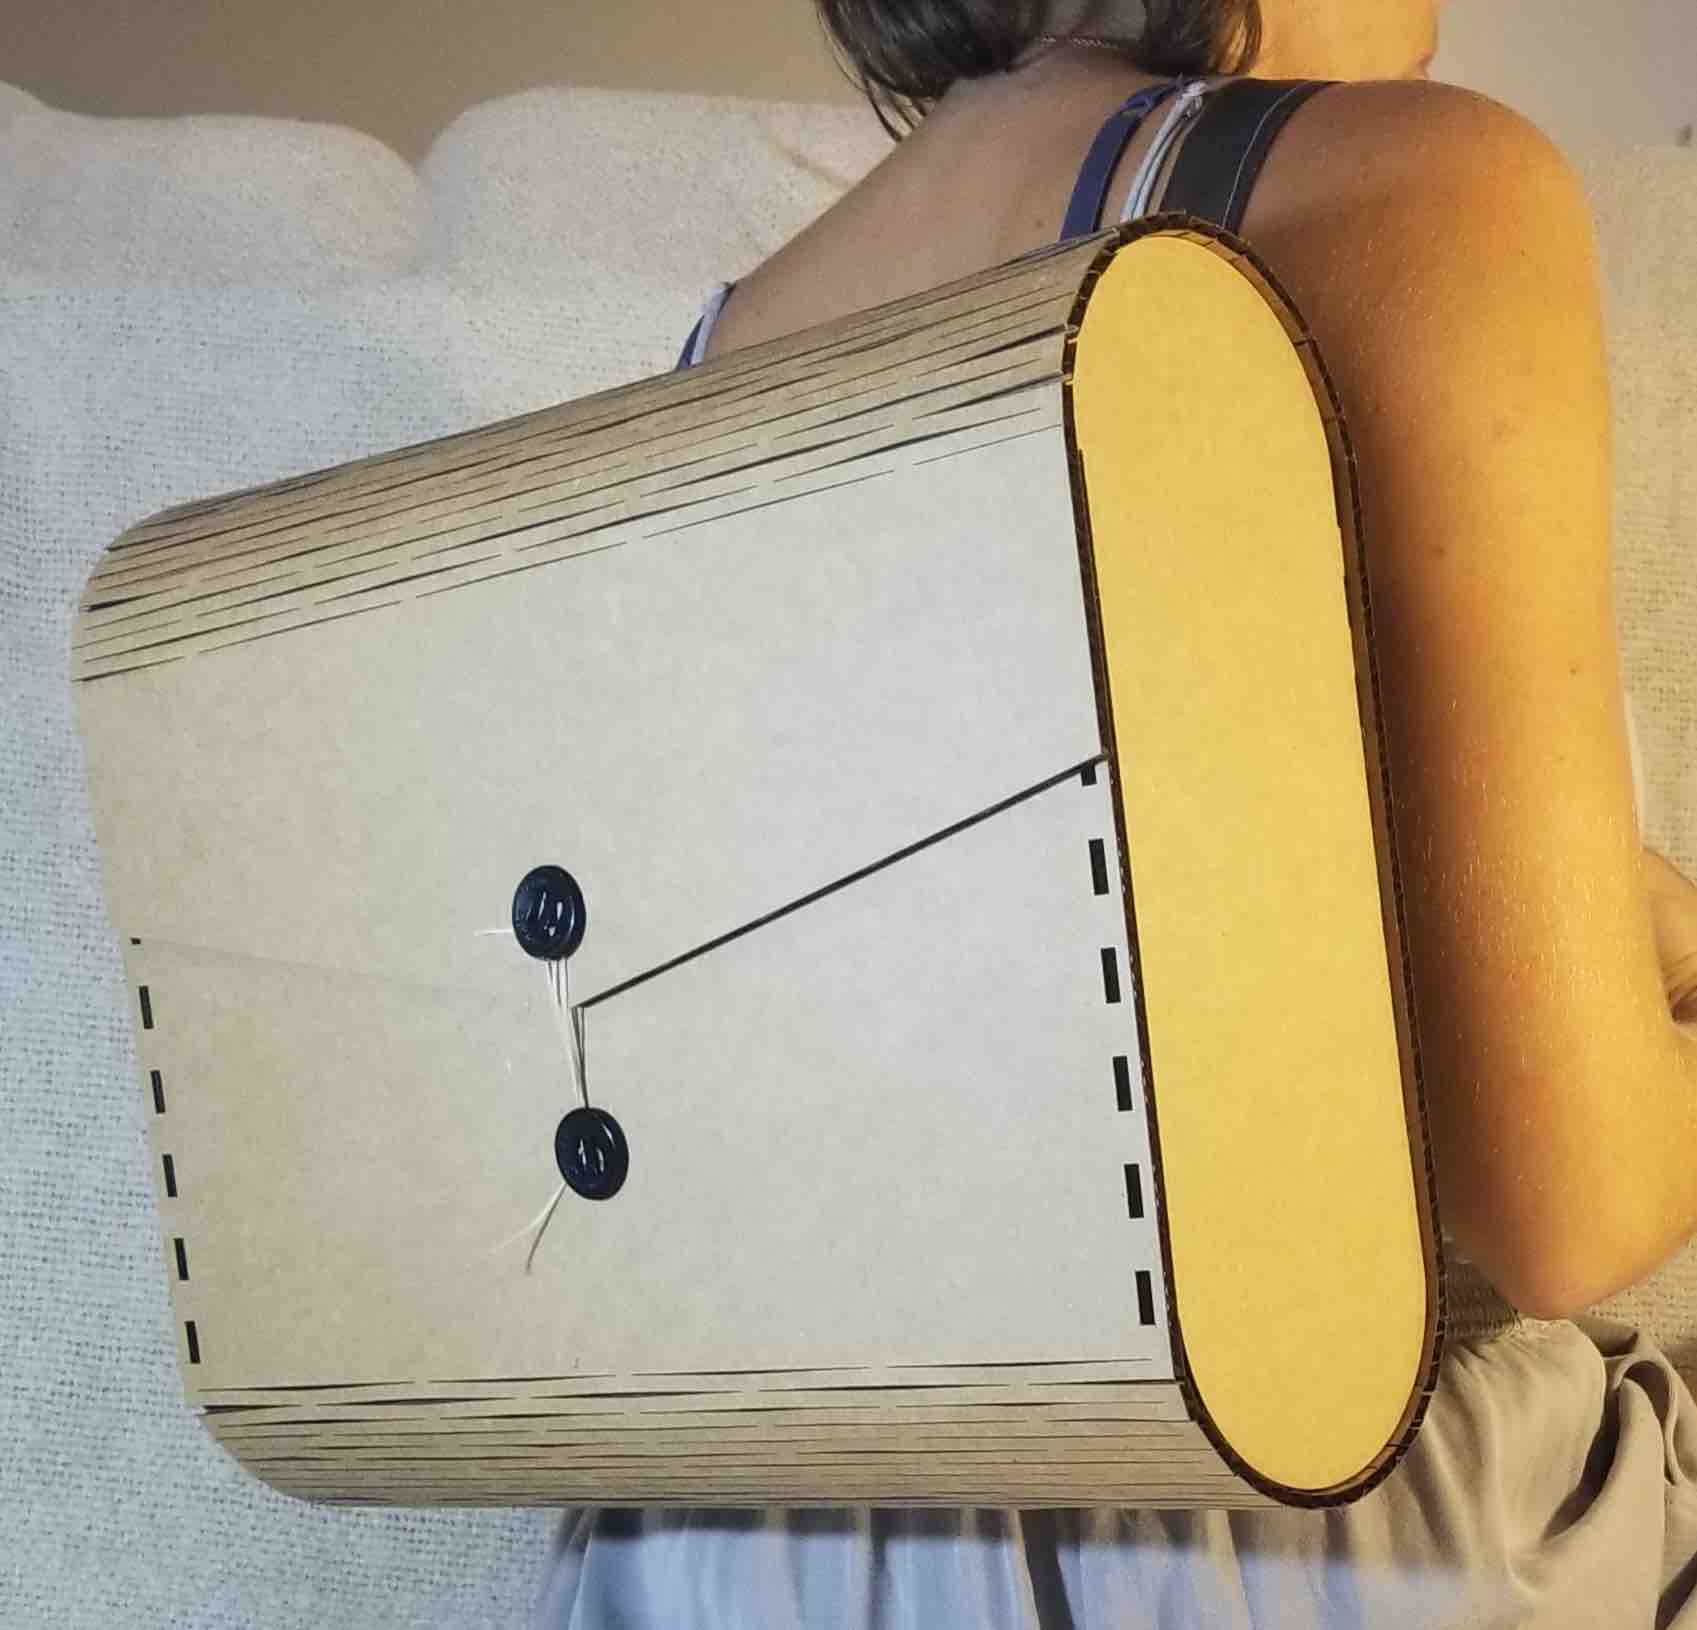
Here is what I ended up with! I have the top living hinge shown here, bottom is only in sketch. The side panels are see-through so you can see the backpack panel is on the outside and the computer stand panel is on the inside. The back view here shows slots for the straps as well!
Laser Cutting: Path Planning
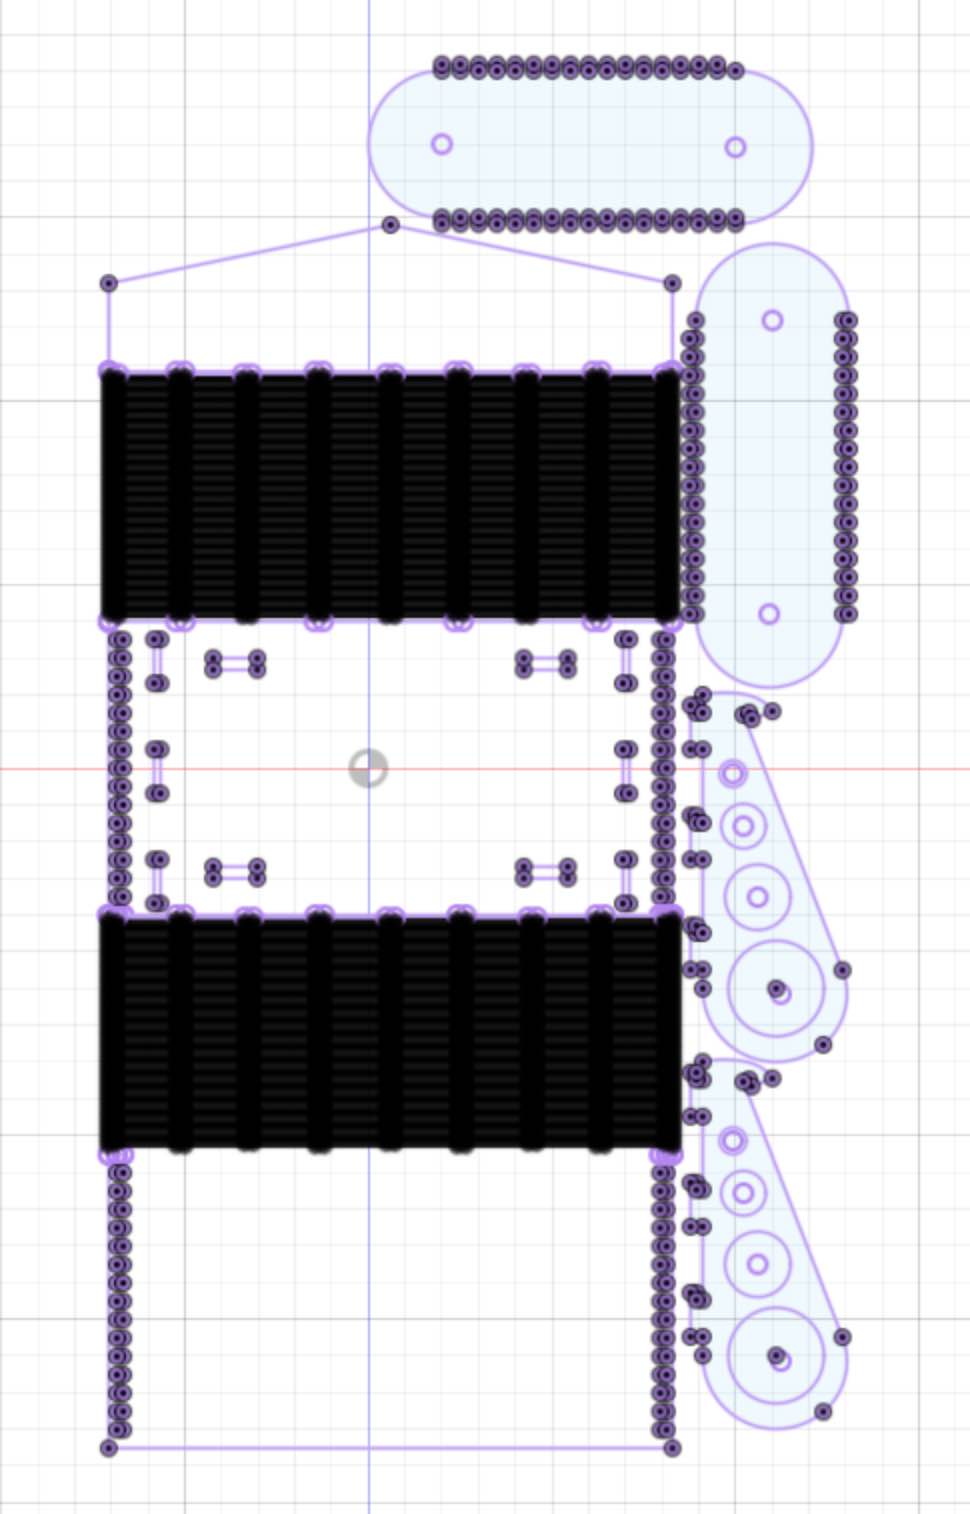
Next up I needed to turn this into a 2D image for path planning. The first thing we did was the group project which was to characterize the laser cutter, which you can find the results of that here. I then completed sketches of each of my parts. To do this so that I was taking advantage of space appropriately, I copied the panel parts and set them up flat next to the central panel of the backpack. I linked all of these panels and sketches to make sure that if I changed any parameters down the road, they would all update automatically (tested this out when I updated the board thickness).
Laser Cutting: The Final Cut
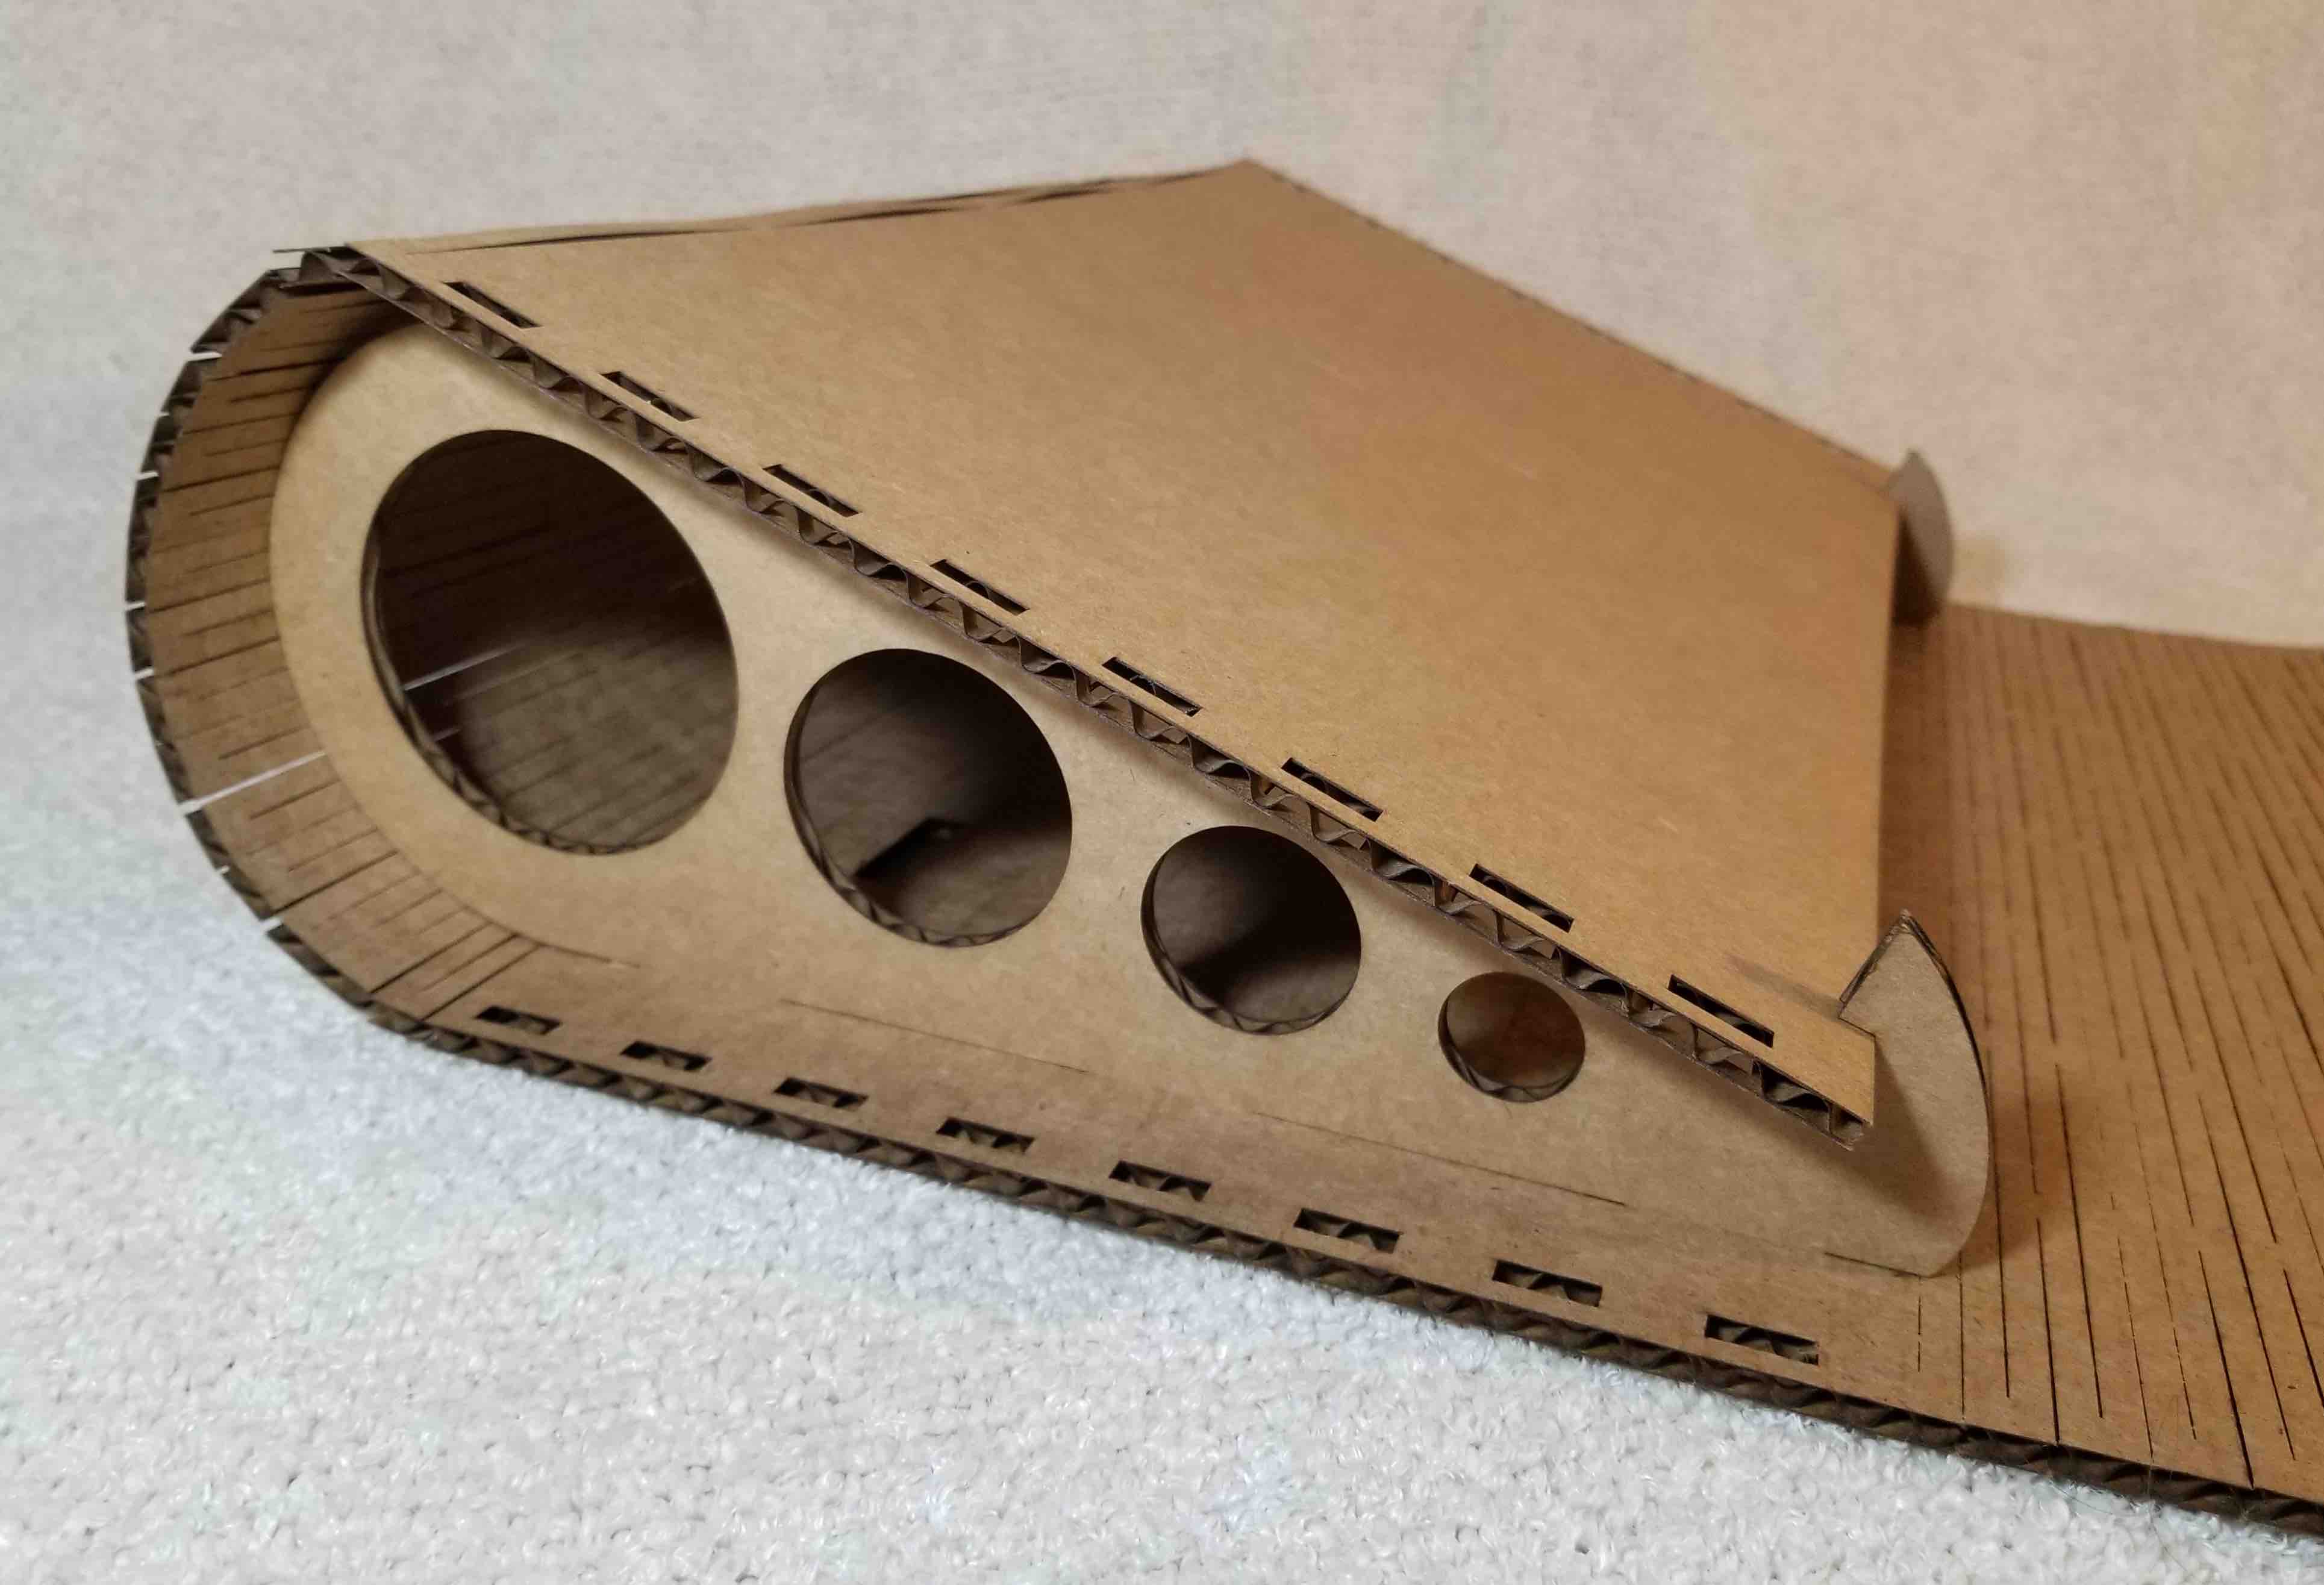
I used the laser cutting characterization that our group did to figure out the bet size to use for the finger joints, and the settings for the laser. The first run I did I found the gaps for the living hinge were too small. The cardboard started to lift and because the laser cut the ends of the hinge first, it made that even worse.
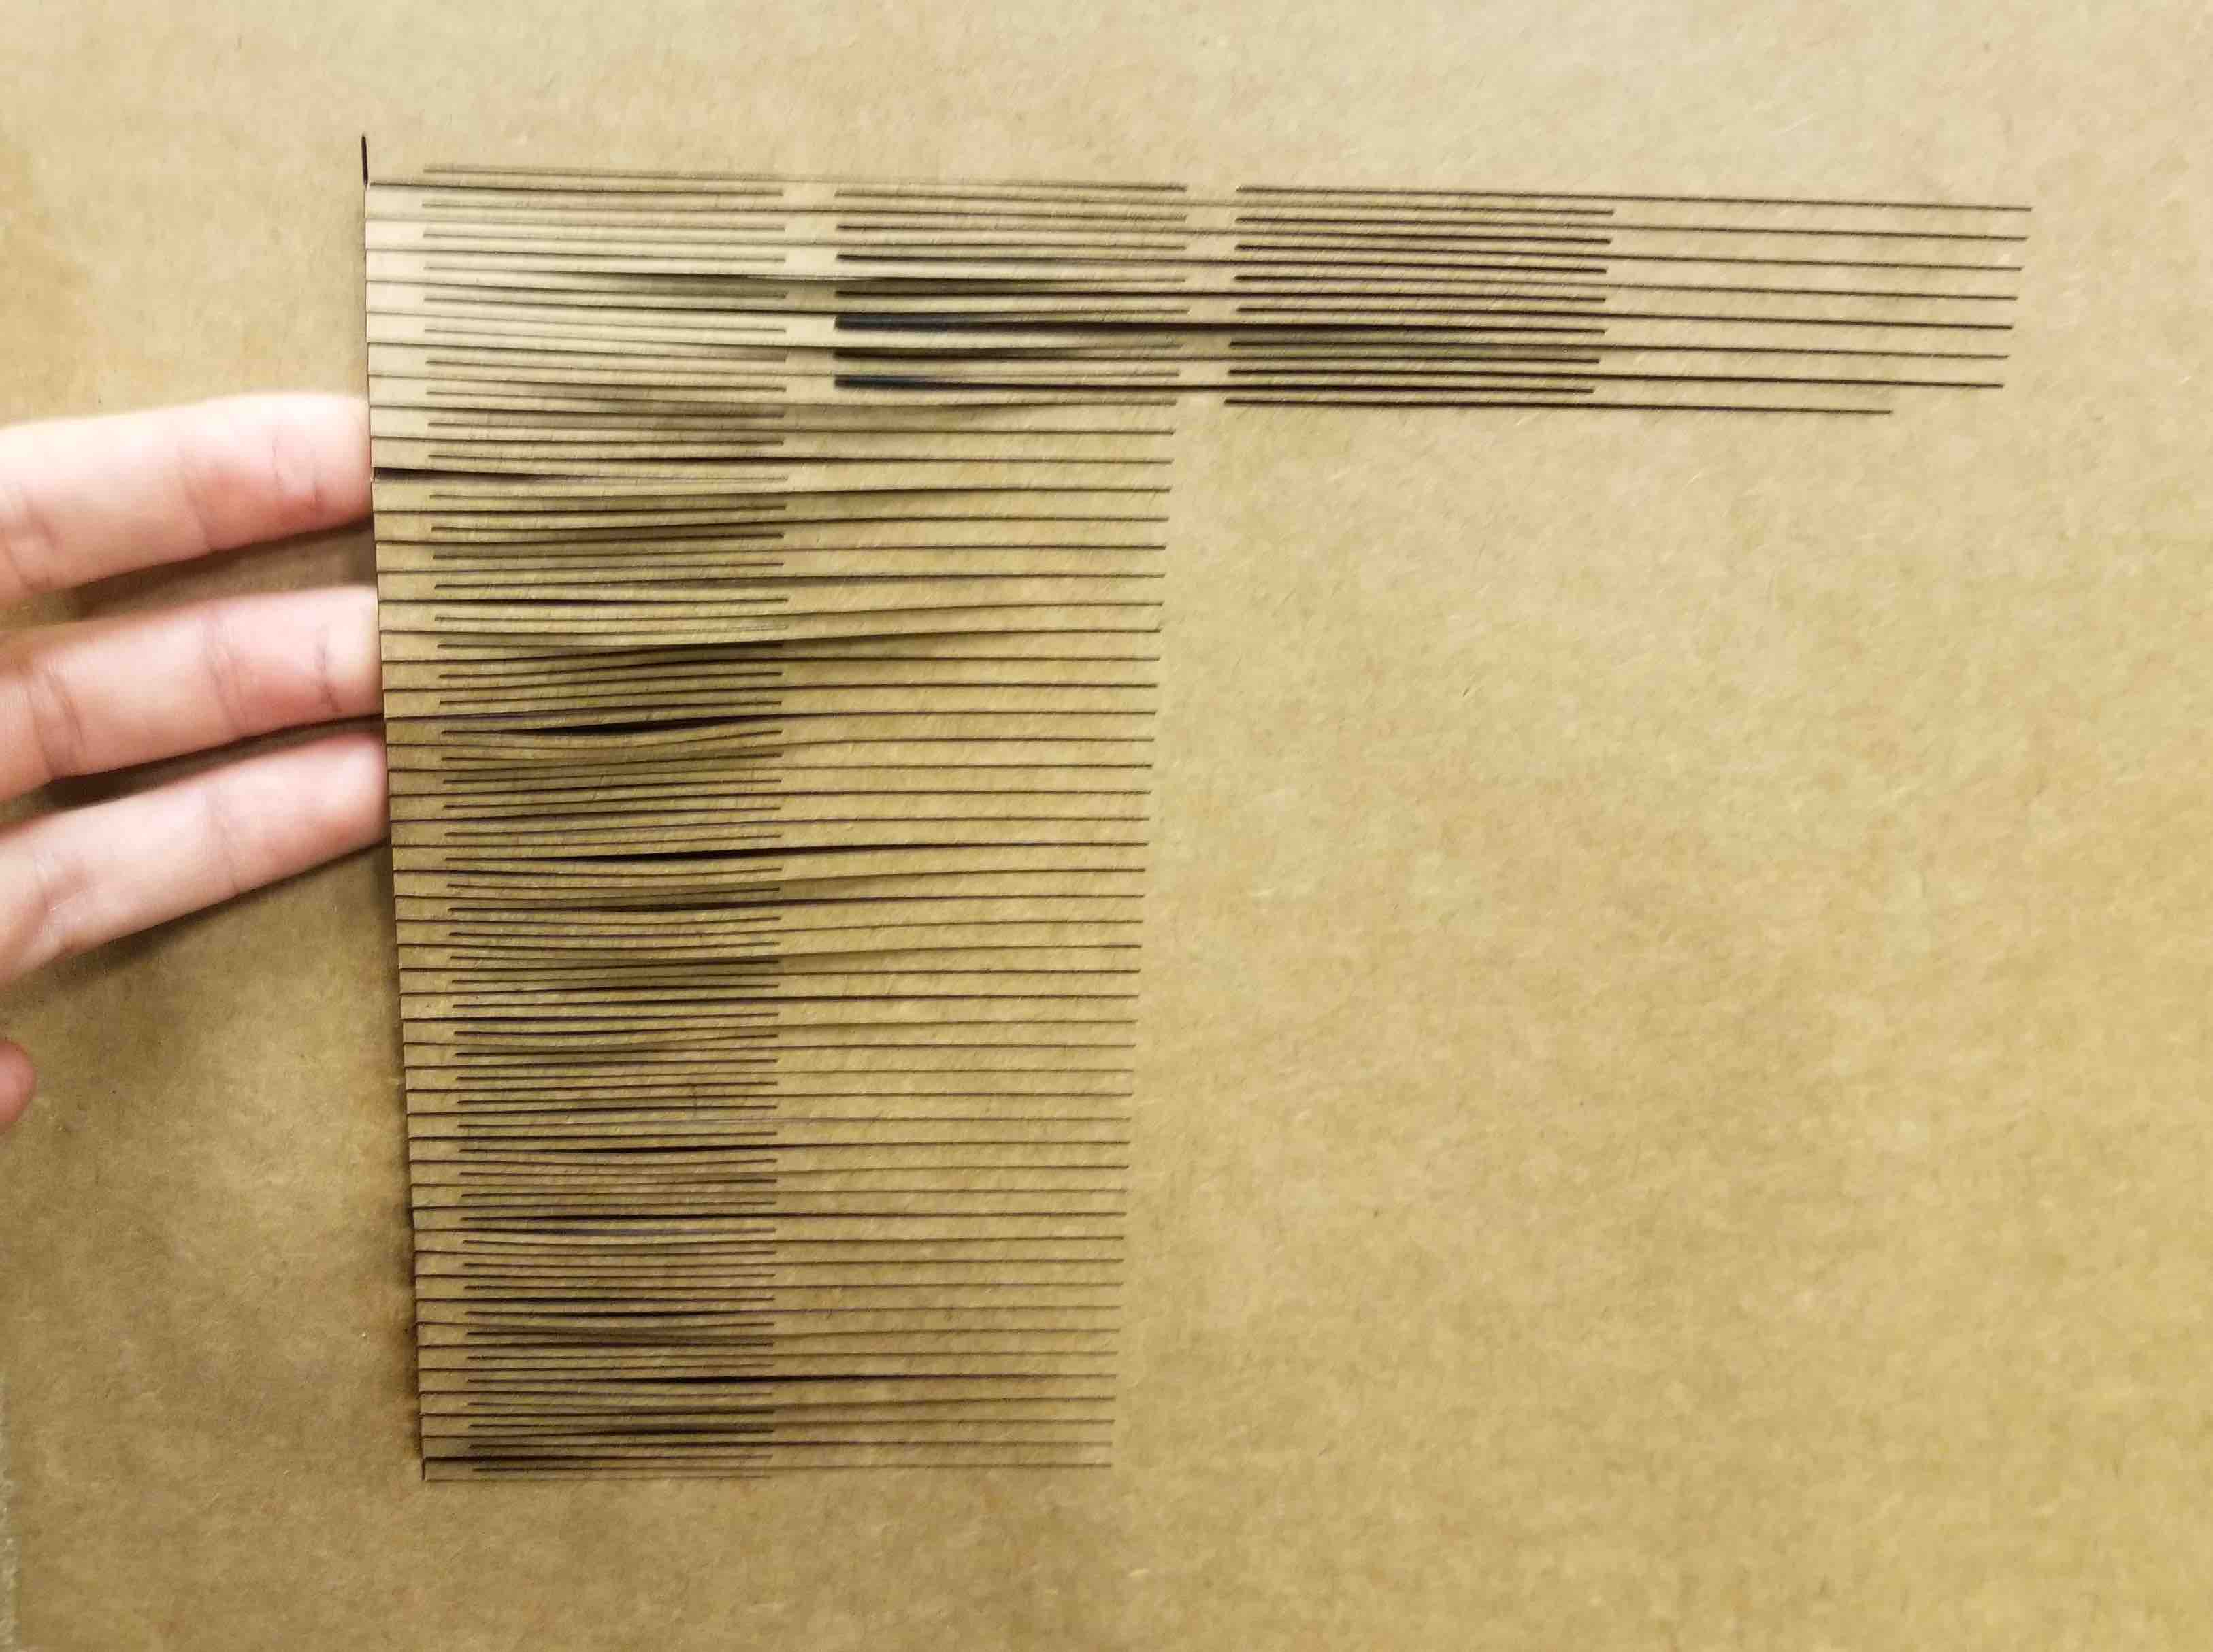
I more than doubled the vertical gap in the hinge spacing and voila! It worked! Here's some pictures of it in action!
Vinyl Cutting: Design and Sketch
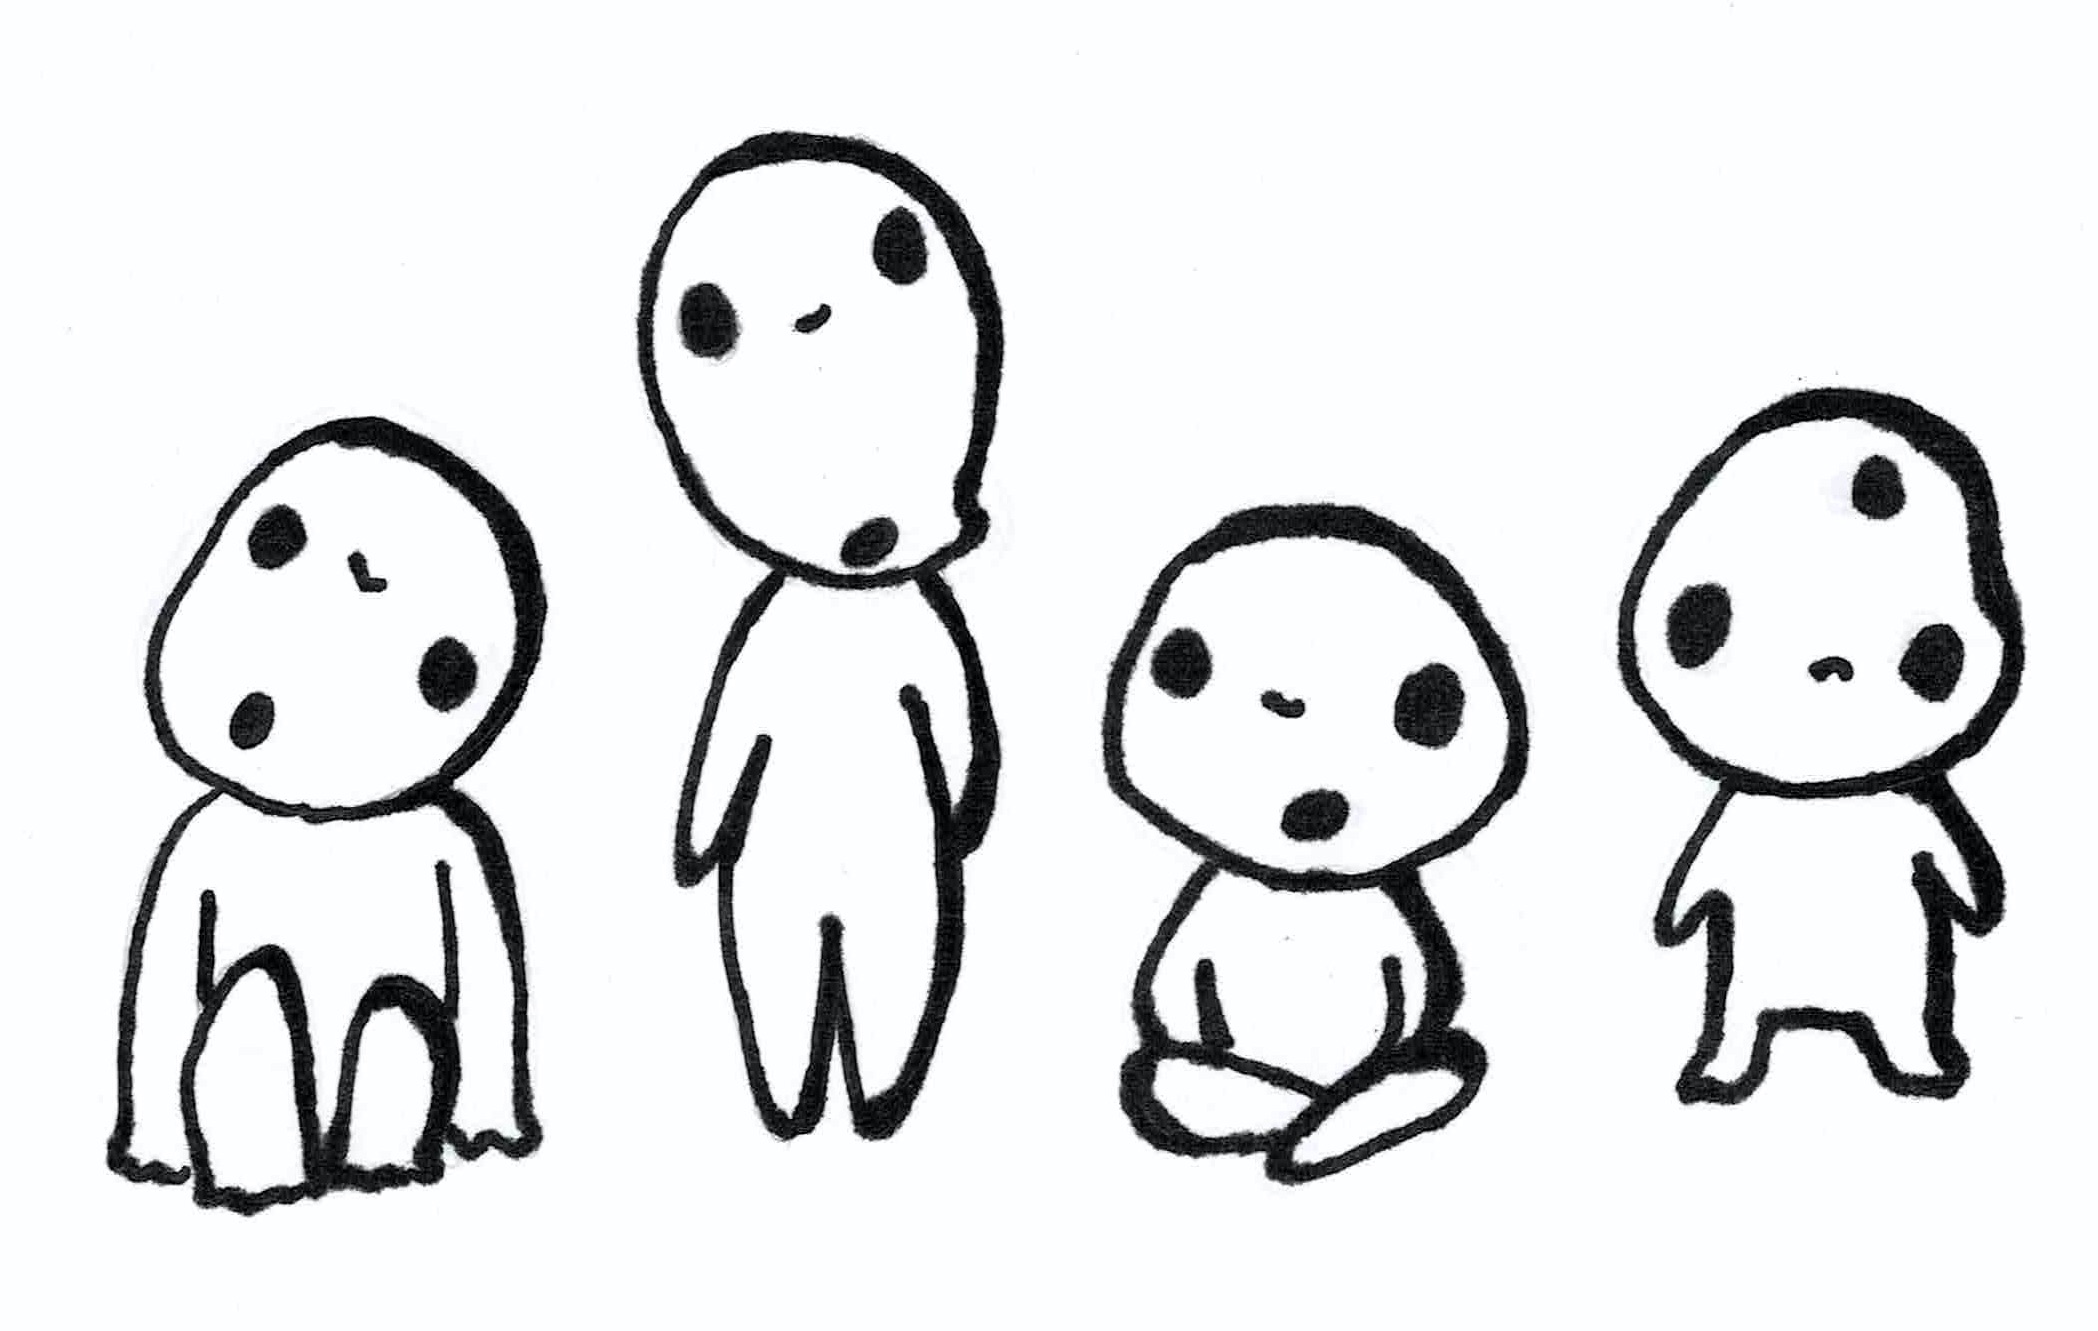
Every year my family makes all of our Christmas presents for one another. I figured the vinyl cutting componenent was a great opportunity to make a present for my sister! Her favourite movie is Princess Mononoke (if you haven't seen it yet, go watch it now! Done? Ok, now keep reading). The Kodama are these super cute spirits that can twist their heads all the way around. I decided to do a sketch of a few of these Kodama to make as iron-on transfers. I'm going to make her a sweater and iron these on for ultra cuteness. Here is my sketch of the Kodama:
Vinyl Cutting: Cutting Pattern
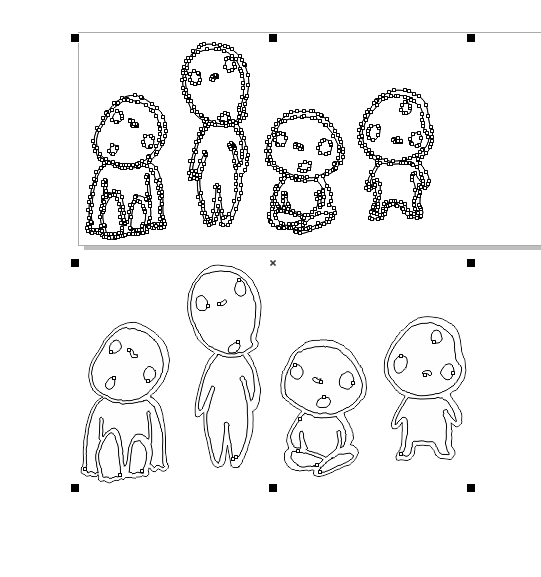
I scanned in my sketch and used Adobe Illustrator to turn this into a vector drawing. This allowed me to smooth out the lines and delete the white background to have only the black line outlines remain. I had some issues getting the acutal vector anchor points showing up, so with some much needed TA help, Corel was used instead to turn this into the right vinyl cutting pattern - the top is from Corel, the bottom from Ai.
Vinyl Cutting: Transfer Station
Printing the pattern onto the iron-on-transfer went incredibly smoothly. Using Corel Draw, with Tom's help, I made sure that there were no 'white spaces' filled in. This meant checking that when I moved a set of lines, like the inside of his body, that that line didn't remain as part of the outline for the infill of the body. Once this was done, I picked a piece of iron-on-transfer paper (there was only a small piece of black). I cut the raw edge to make it nice and straight -- there was a corner cut out of it. I then put it in the cutter, shiny side down. If I had had writing in my design I would have had to make sure that the image was mirrored since the iron-on-transfer paper gets printed on the down-side of the paper. Using the 'Piece' selection on the machine, the size of the paper pops up. I took this size and put it into the Corel drawing and stretched my image to the full size of the page (a little bit of give at the edge). Then... PRINT!
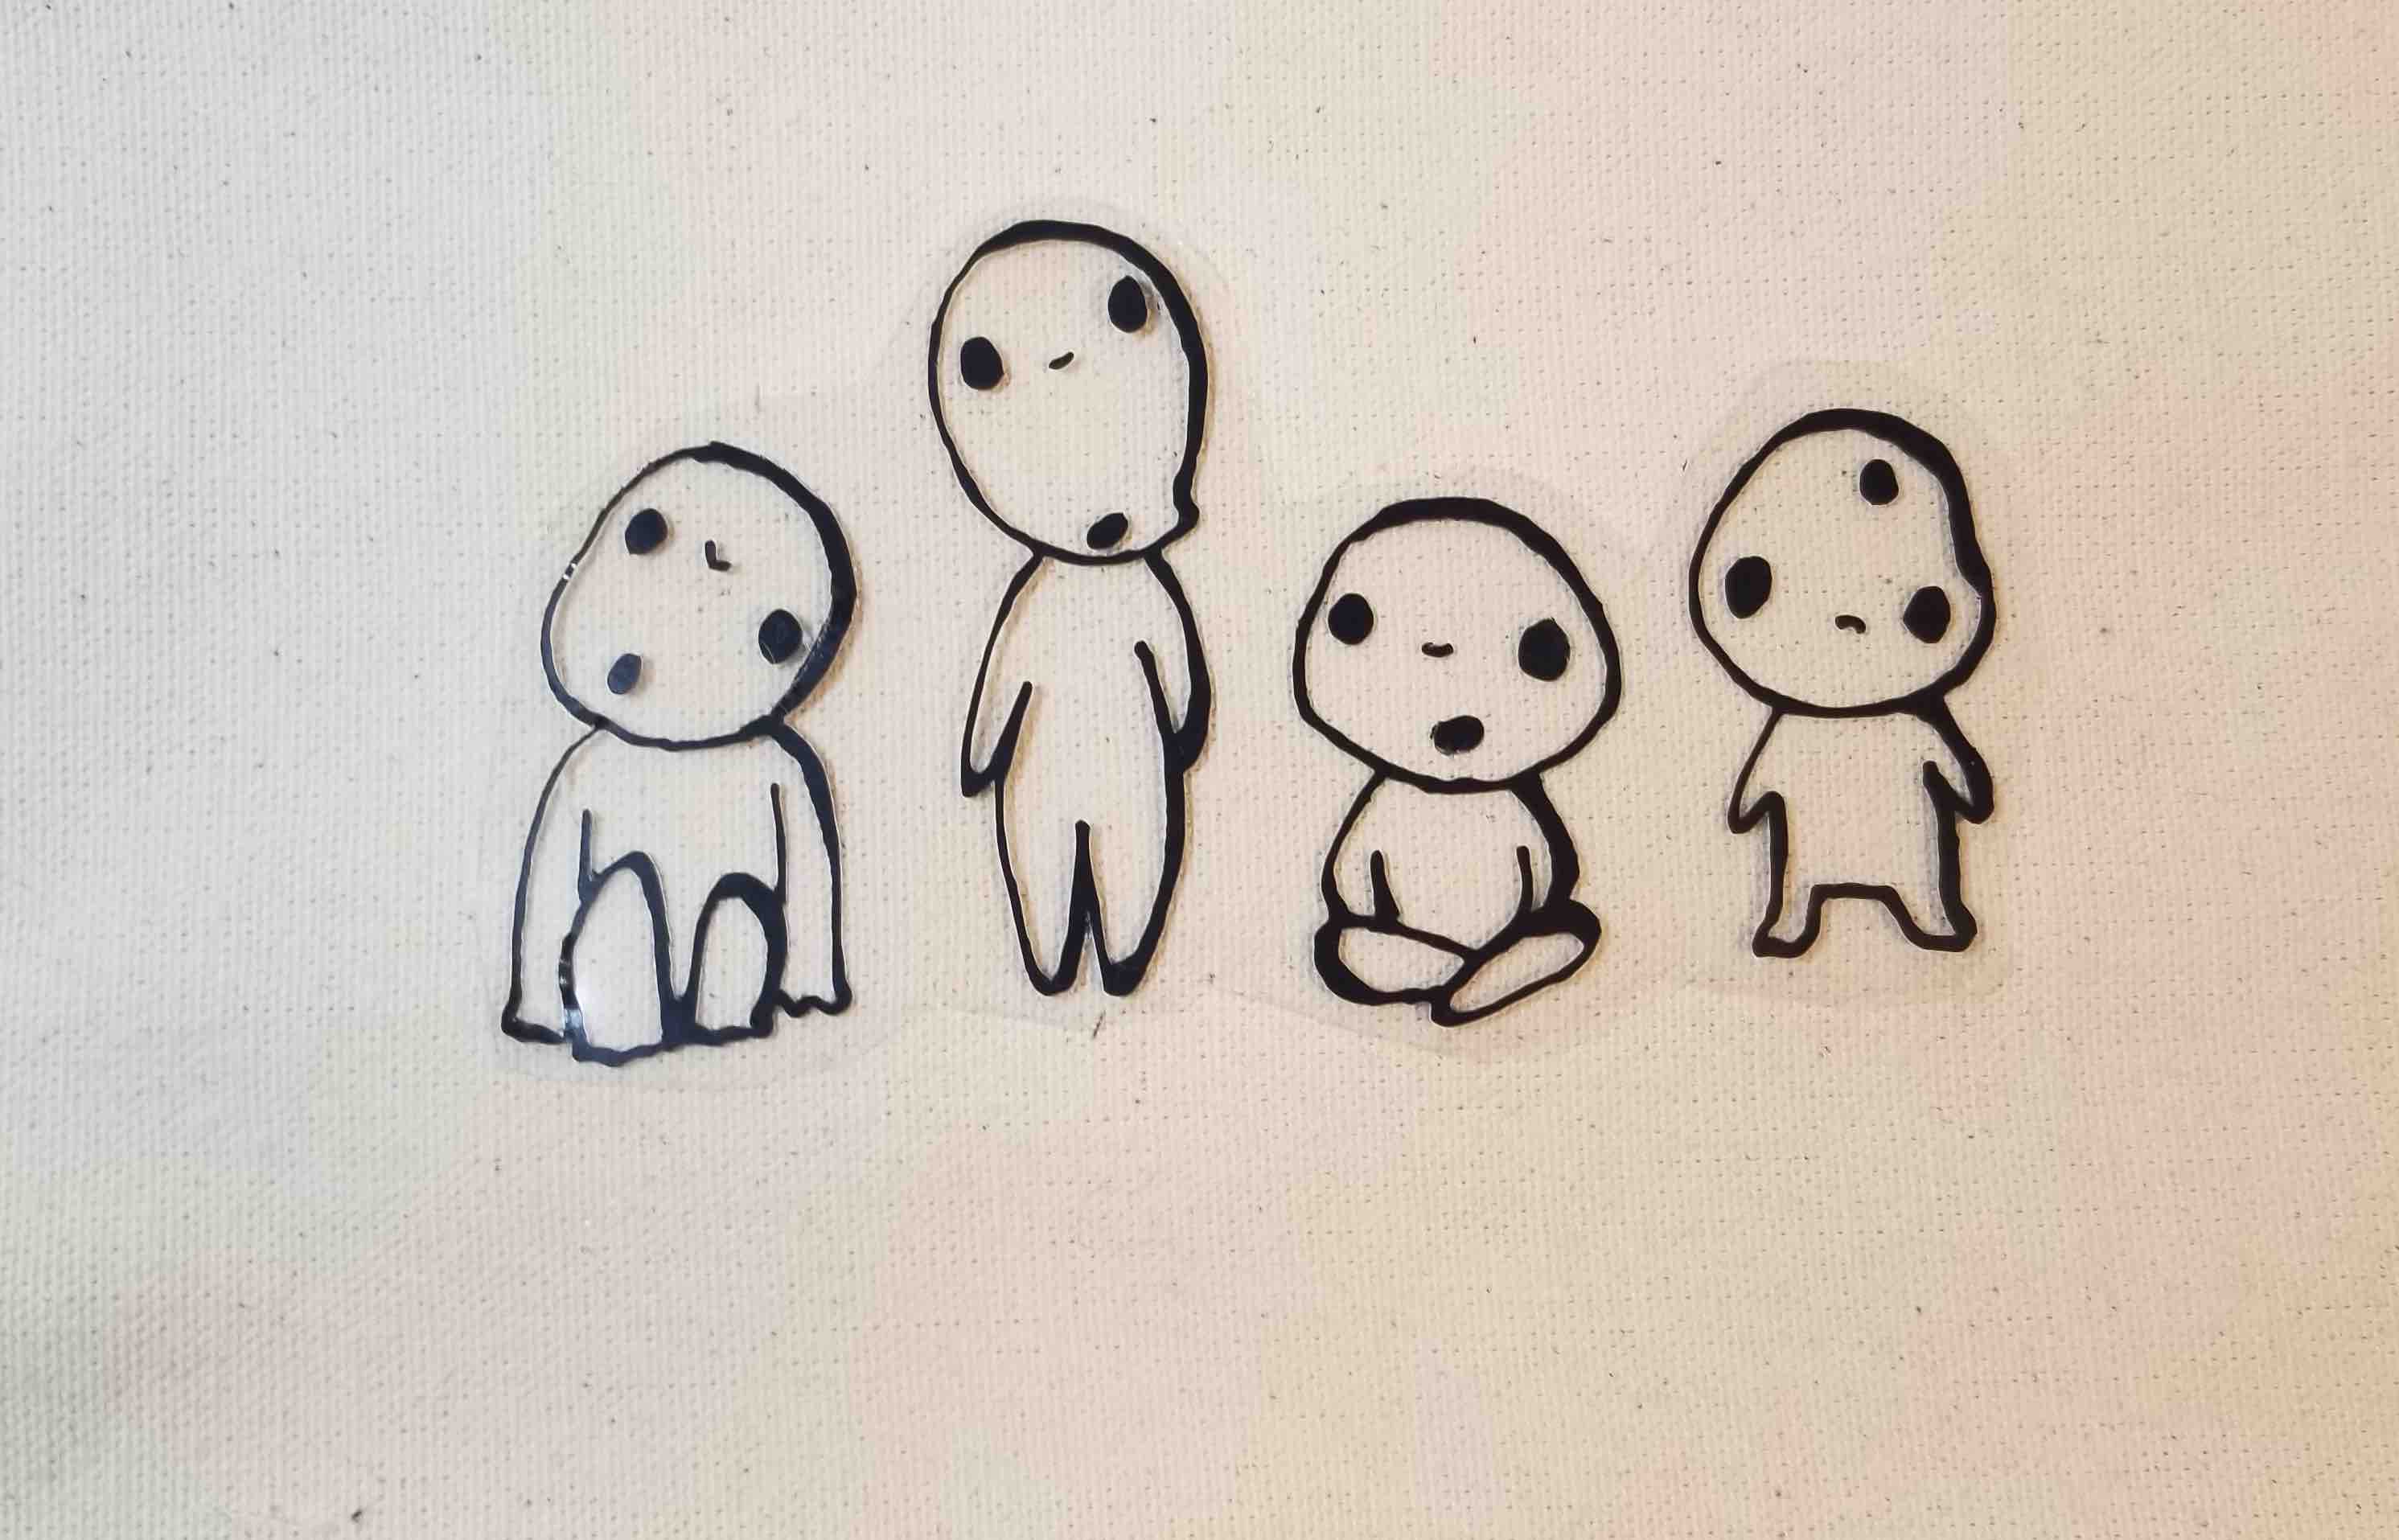
Next up I had to do the weeding. I found it was best to gently pull back the excess pieces and use a small hobby knife to help to cut any of the transfer that didn't quite get cut through. The eyes/mouth were a bit tricky to keep on the sticky paper while taking out the excess, but holding it down with the tip of the knife while gently pulling off the excess seemed to work fine.
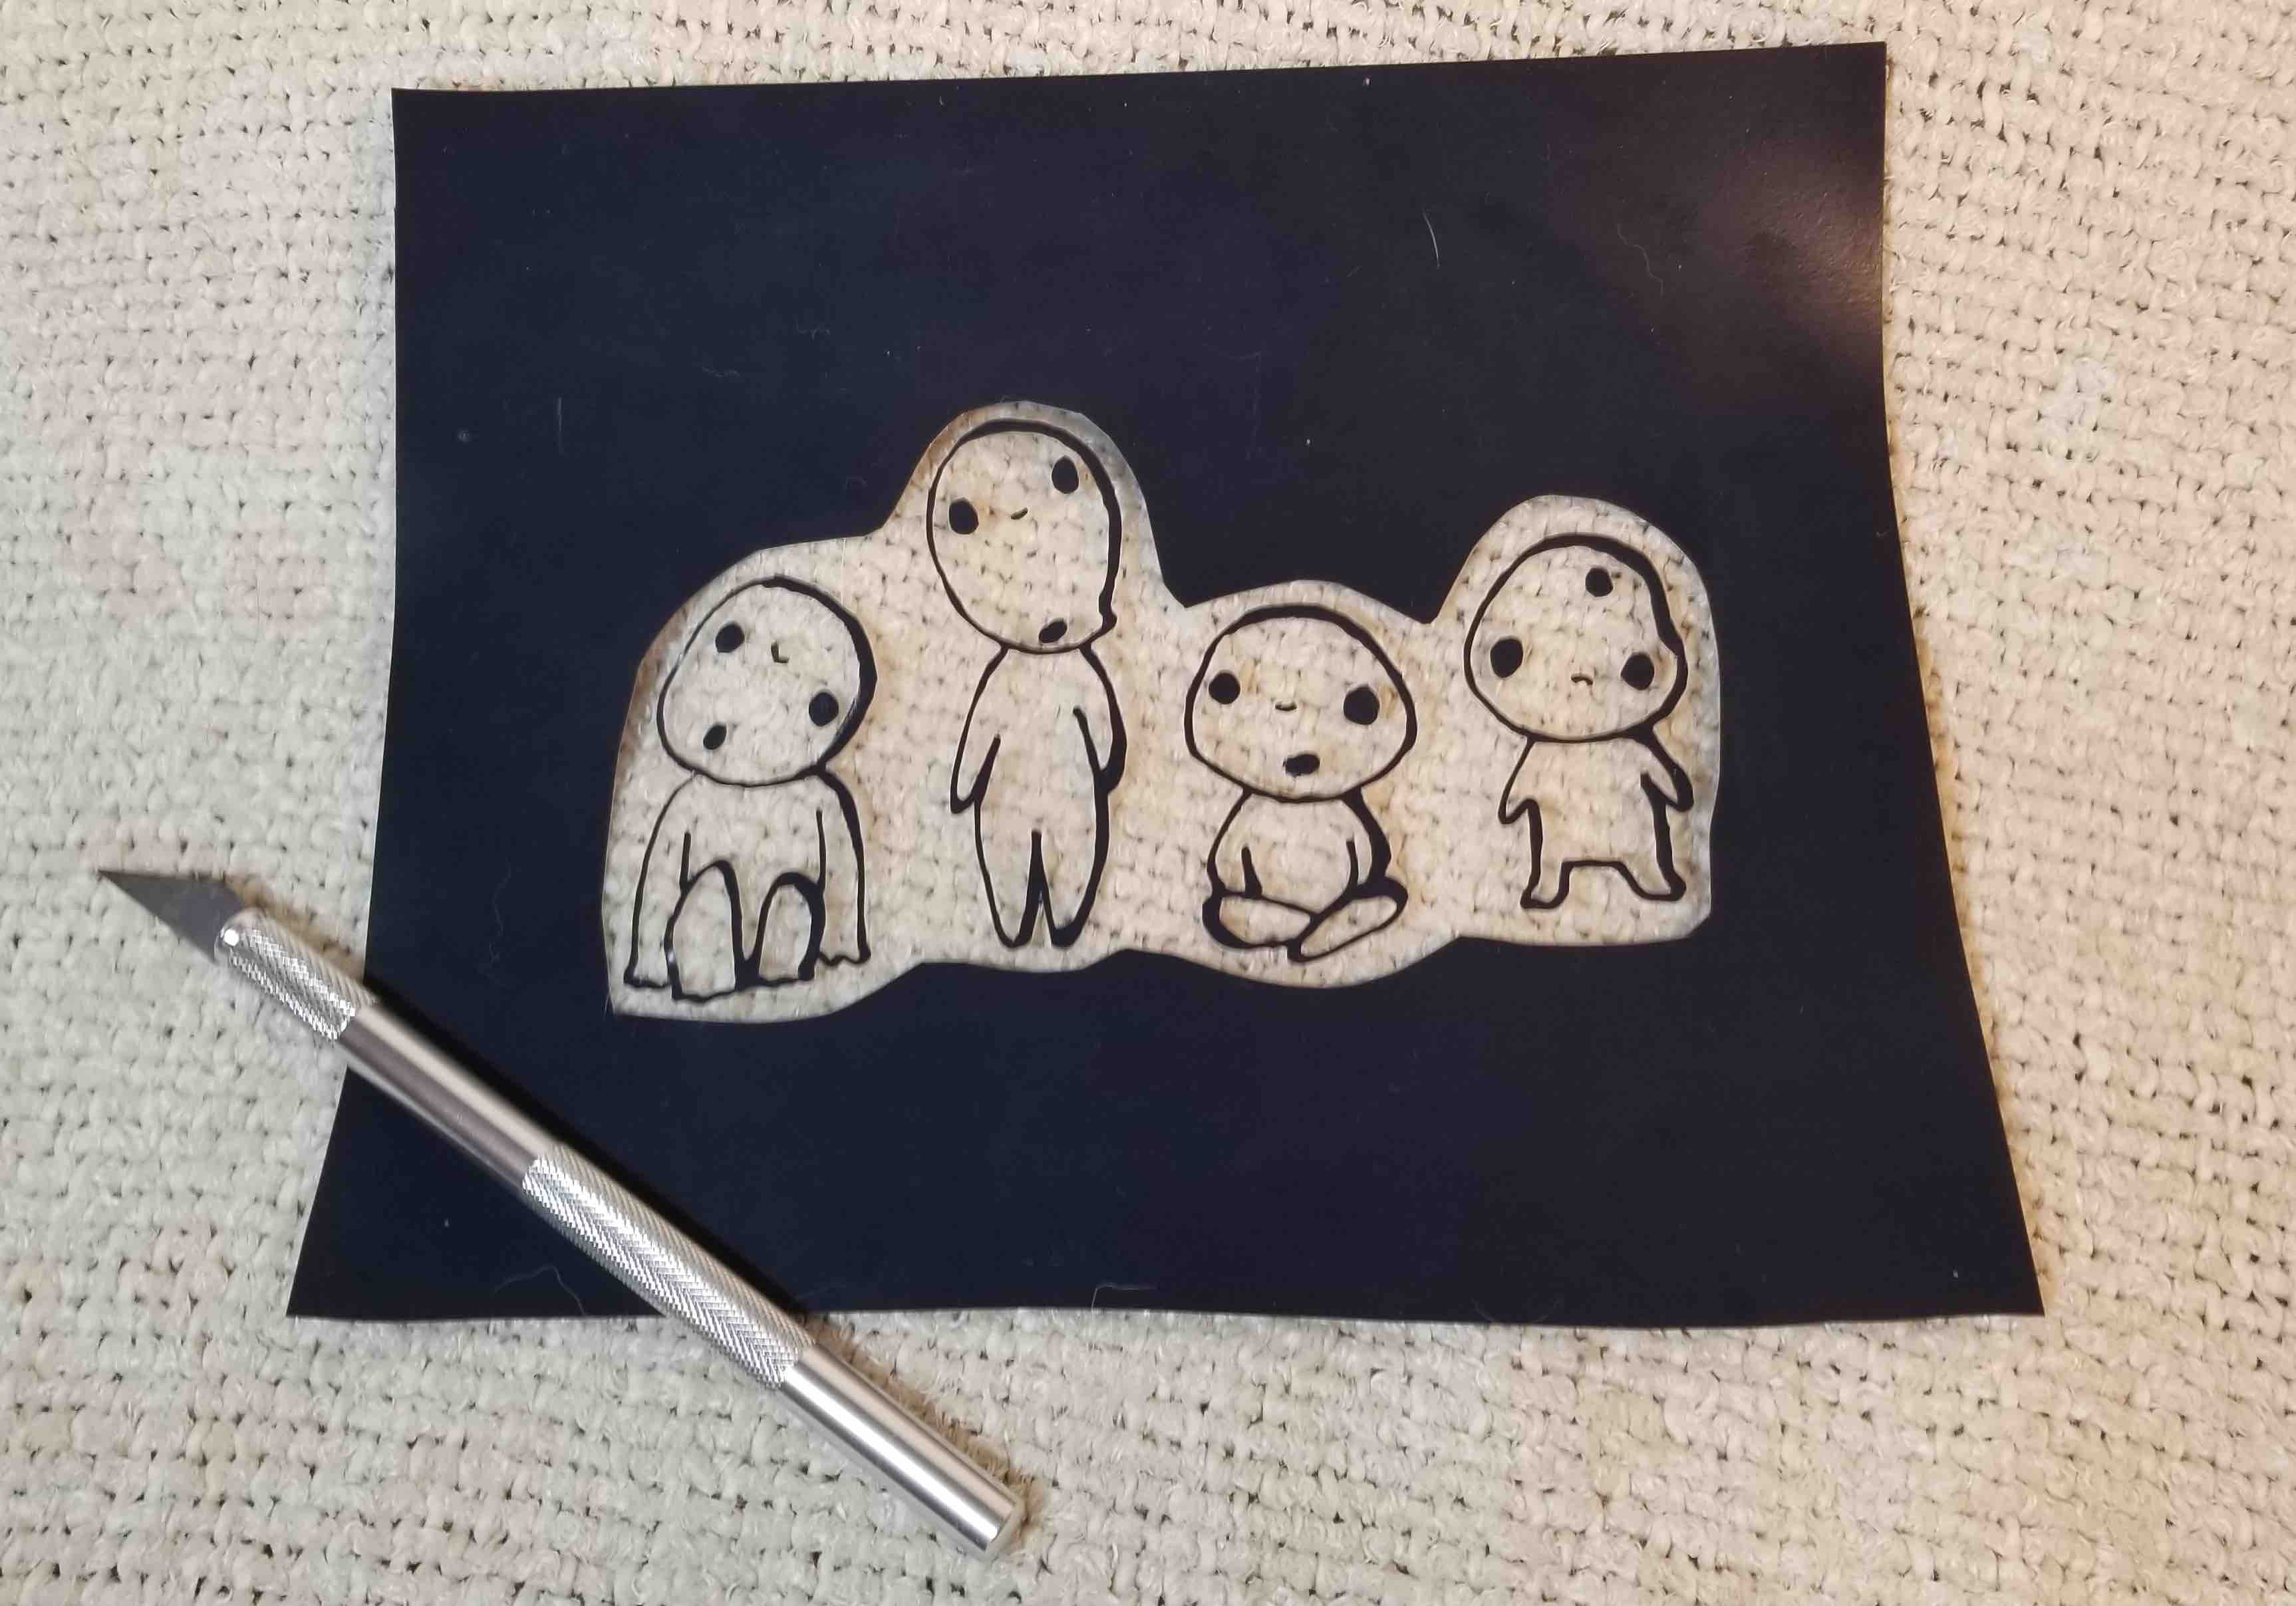
The final step was to cut out a section around the design and weed off the excess there. Now its ready to press onto my fabric!
Source Code