[06 Electronics Design]
This week the goal was to take one of the in-circuit programmers from last week and redesign it ourselves. We also needed to add a component - so where most of the programmers had EITHER a button or an LED, we wanted to have both. We could either use KiCad or Eagle (a Fusion 360 application) to do our design.
Schematic Design
Initially I tried KiCad since I was having trouble downloading Eagle (turns out its already included in Fusion 360 now - no download needed, just open a New Circuit Board design). But in KiCad I couldn't get the libaries to load. I decided that Eagle was the right choice anyway since I'm getting quite familiar with Fuision 360 and this could be convenient for integrating a circuit into some sort of 3D model down the road.
In Eagle I also had some major issues with the libraries. I started by downloading the CBA-maintained Eagle Library but this didn't actually load the right parts (none of the ones we needed for this week were in there). I loaded the Sparkfun and Adafruit libraries as well. Finally, I just created my own library with all the parts we needed. For this I used three library databases:
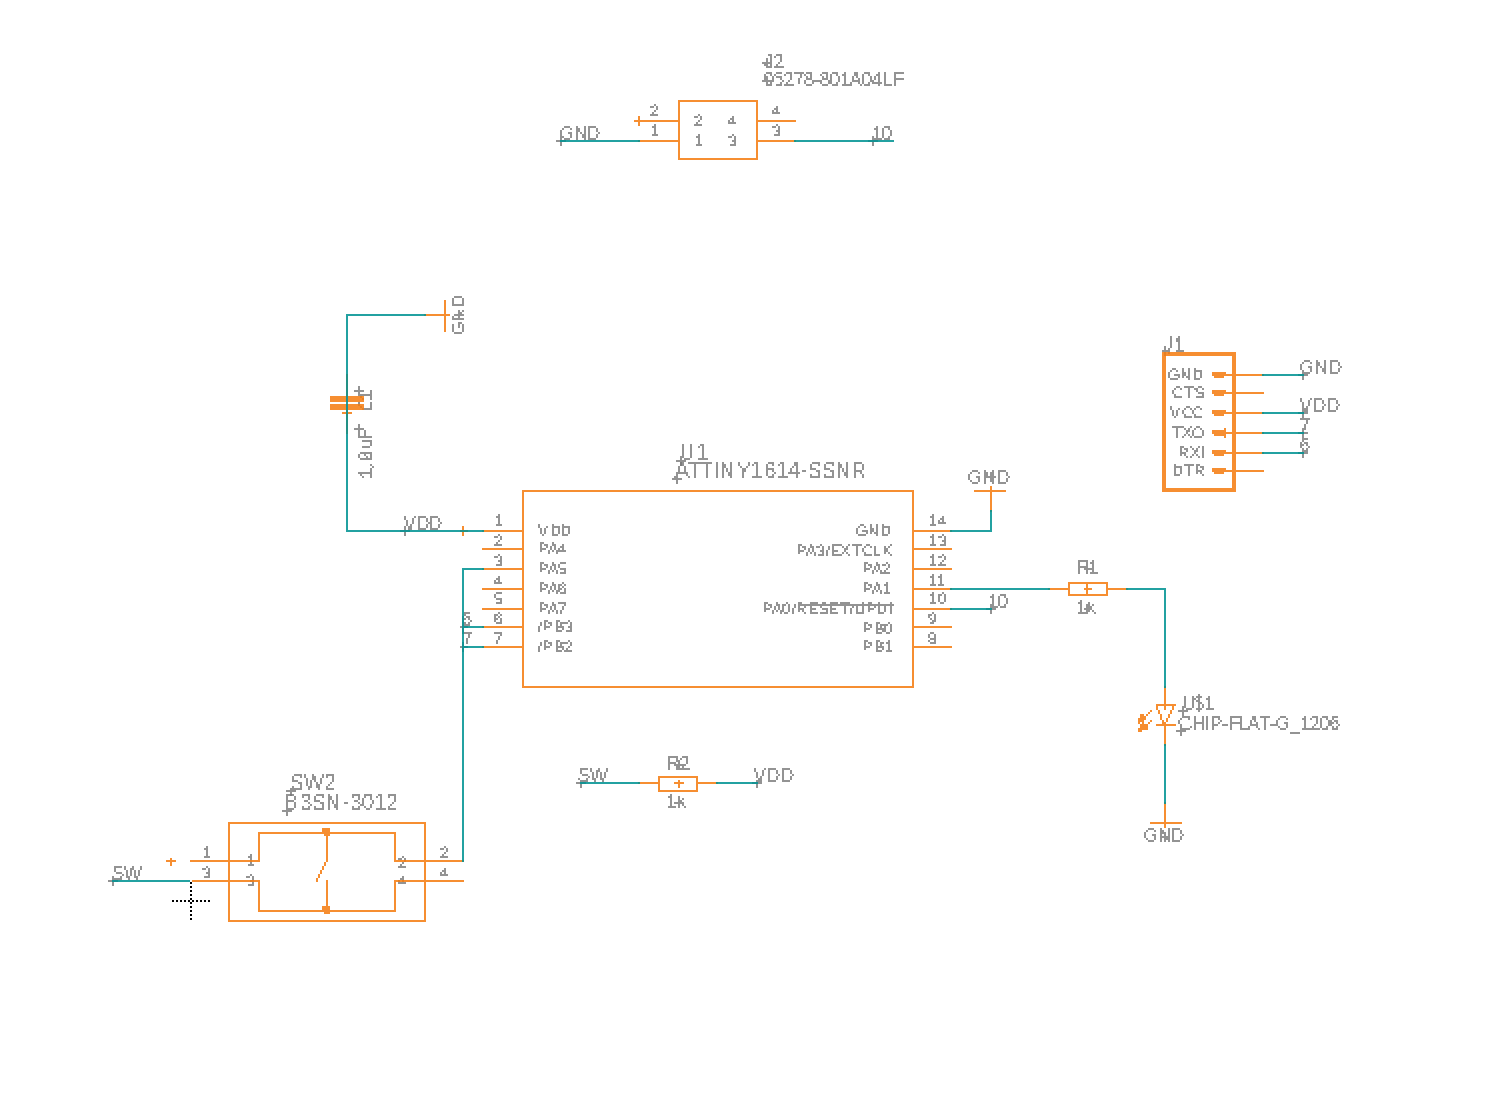
I eventually got all of the parts I needed (although some still don't look quite the same). Next I made the Schematic in Eagle. A tip here that I used extensively was to not actually wire the components together but instead to name the routes. Doing this made it much easier to swap out parts when I found the correct ones from our kits. This part was relatively straight forward, I followed the directions from the recitation. Here's what I came up with:
Board Design
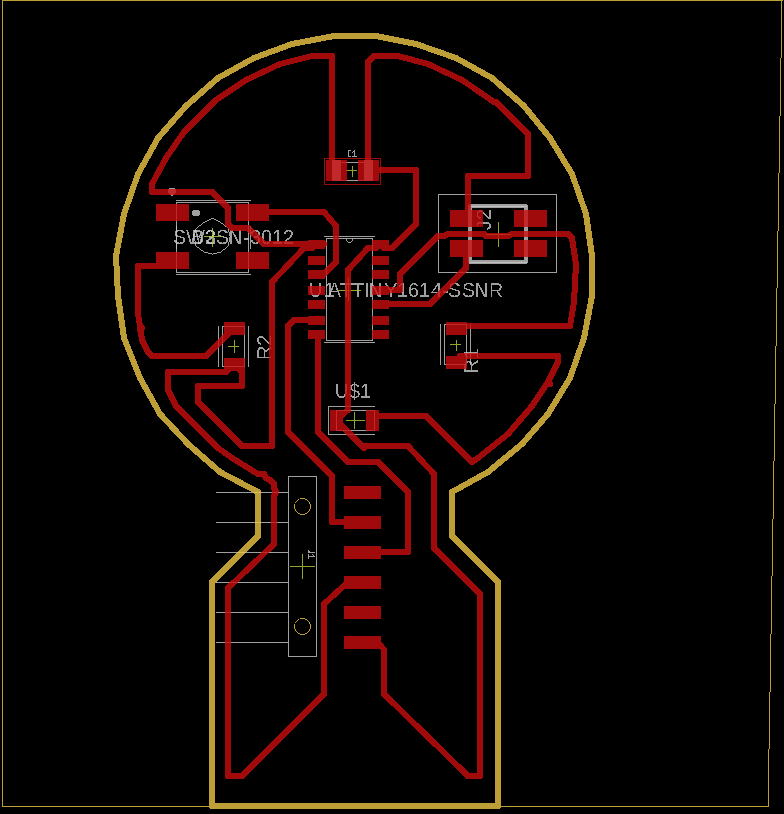
Next up, I opened my design in the board editor. This gave me the lovely rats nest with all of the connections haphazardly placed. This part took a while for me to get down (adding all the traces), but the key for me here was to realize that you can go at a pad from both sides, either from under part or from the outside of the part. This is really important since its a bit of a maze getting your traces to all the right places. Here's my final design:

Next I'd need to export the traces as a black and white png to be able to use mods to make my g-code.
Getting creative
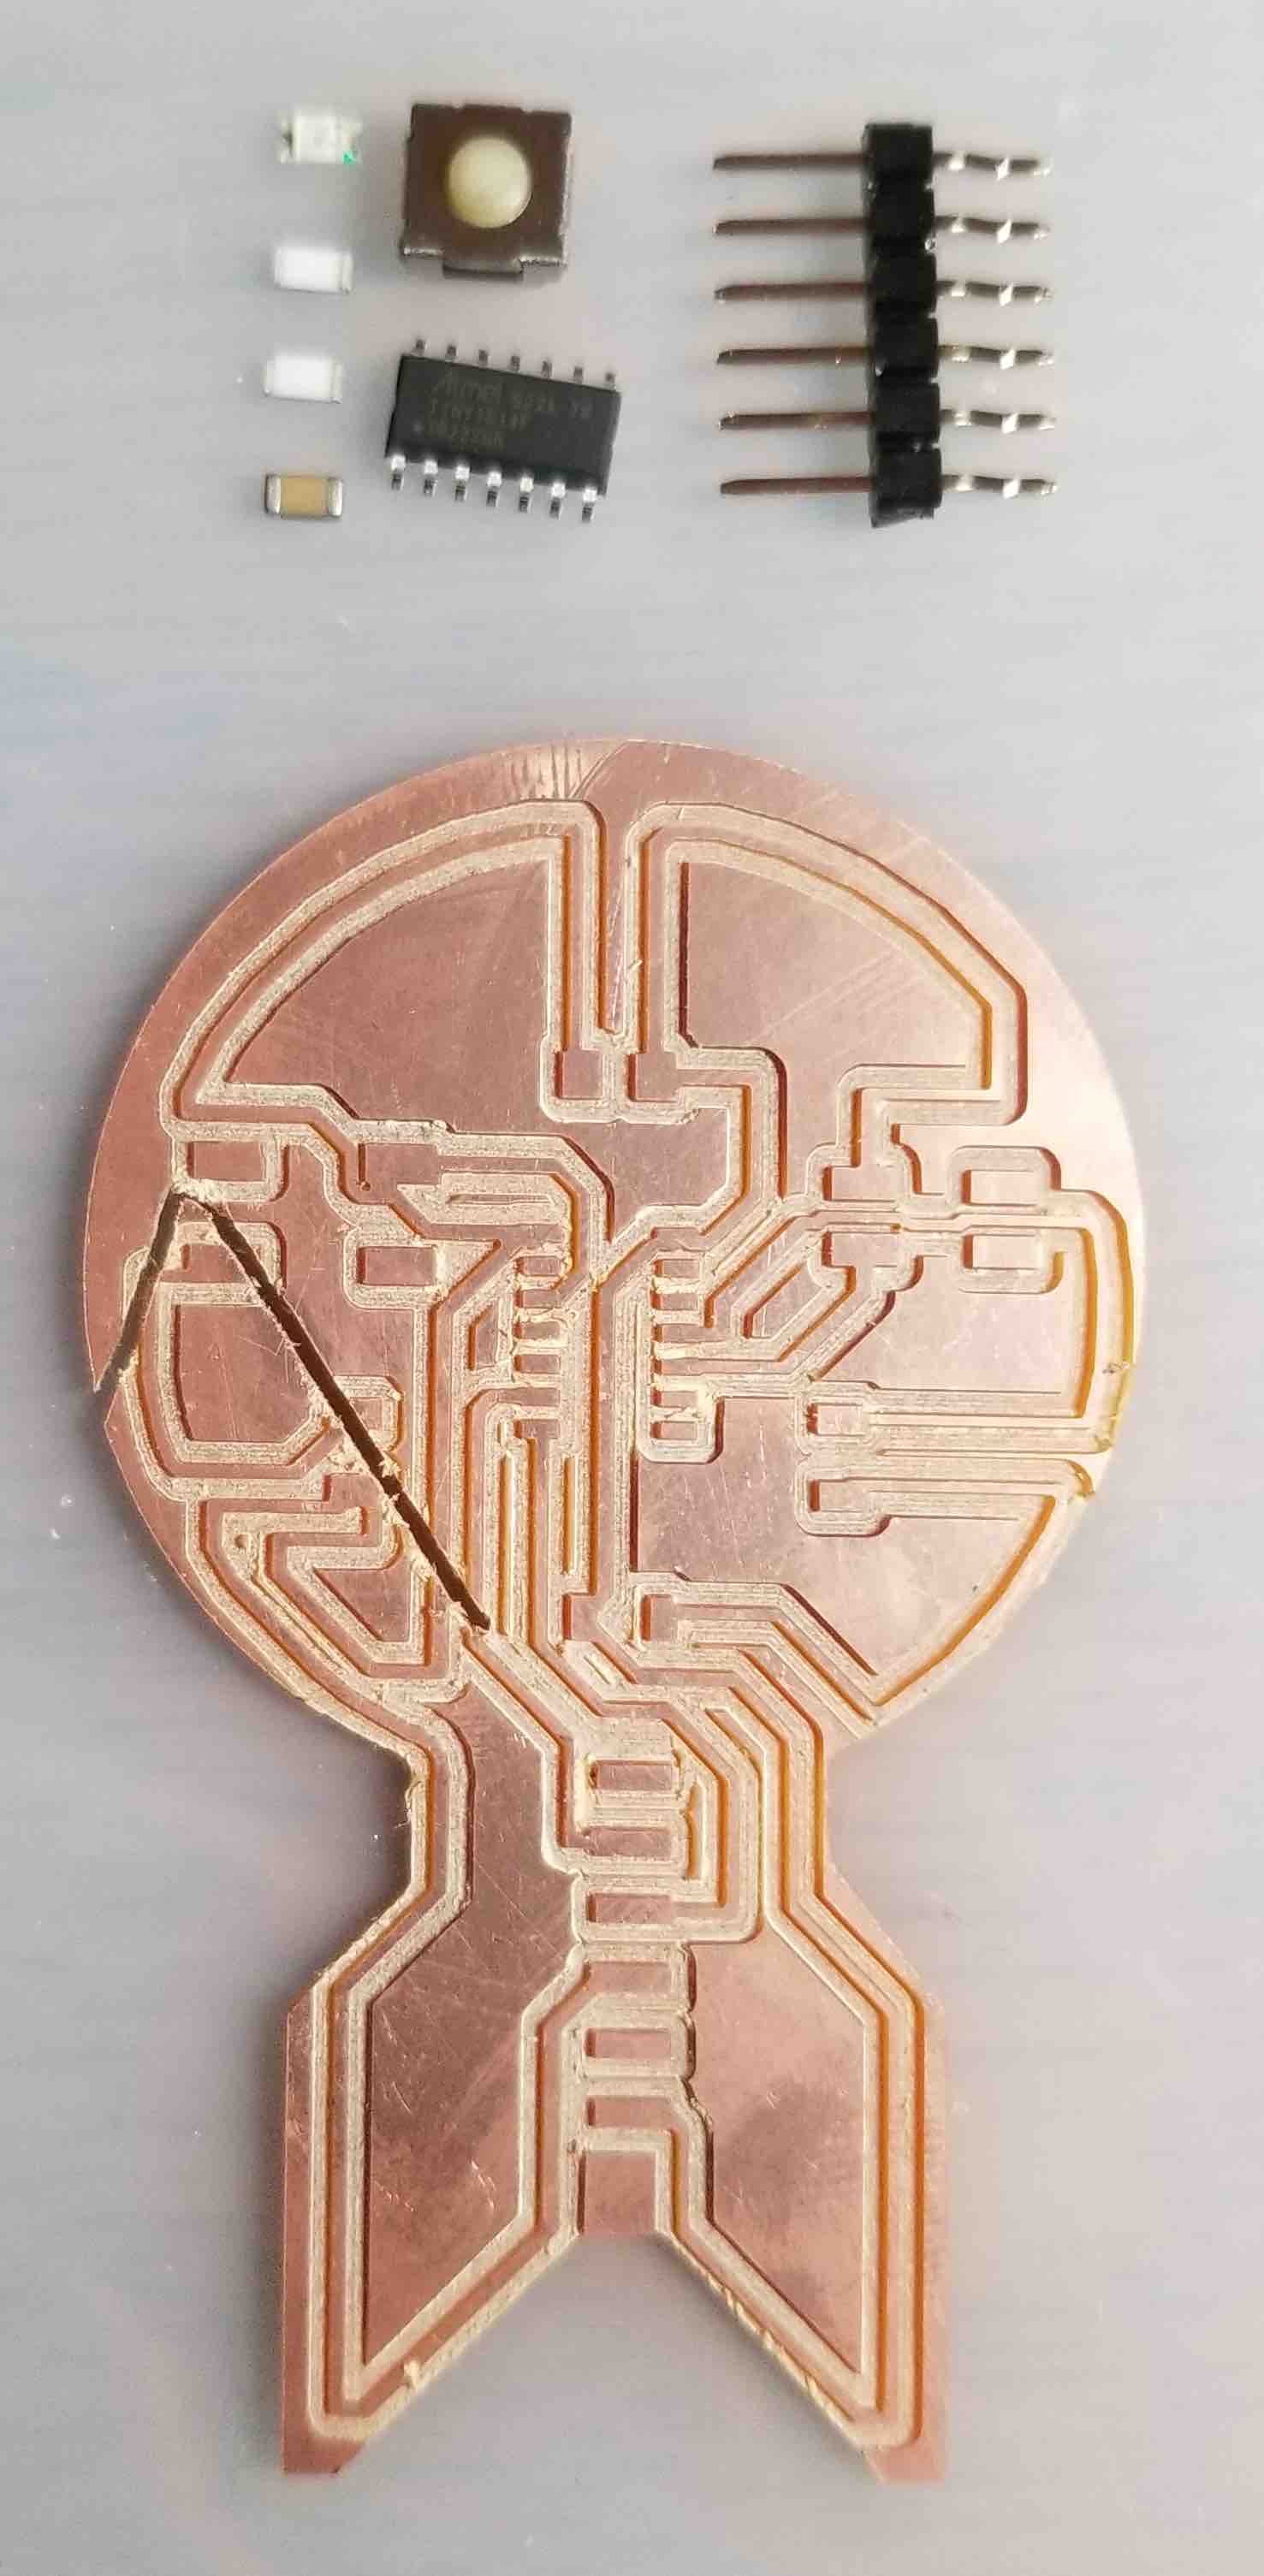
We were warned that the electronics weeks wouldn't feel very creative. But, we were also told that it could be MADE creative, should we so choose. Well, I can't turn down that offer! I took my schematic and made a new board where I used the traces to make a fun shape. My love of all things space --> I made the enterprise (live long and prosper!). Here is my TNG board (yes, I'm team Picard).
Getting to Clank
Ok, NOW it's time for the right format for Clank. For the traces this wasn't too difficult. Key here, you need to be on the independent version of Eagle - if you try to export an image from the integrated Fusion 360 Eagle you won't be able to do it. From Eagle then, I export an image with 1000 dpi, monochrome, with ONLY the top layer showing (key or there will be words and parts in your traces file). For the outline, you should be able to export the Dimension layer only, however, my design was a bit wonky and I couldn't get it to export correctly. Instead, I exported as an SVG and edited it in Inkskape so that all I had was black interior, white exterior. SVGs work in mods just fine, so I left it in this format. Here are my mods files:


In mods I used the same settings as I used last week to create my gcodes (included in source files at the end).
Milling and Stuffing (don't you love that it's called stuffing?)
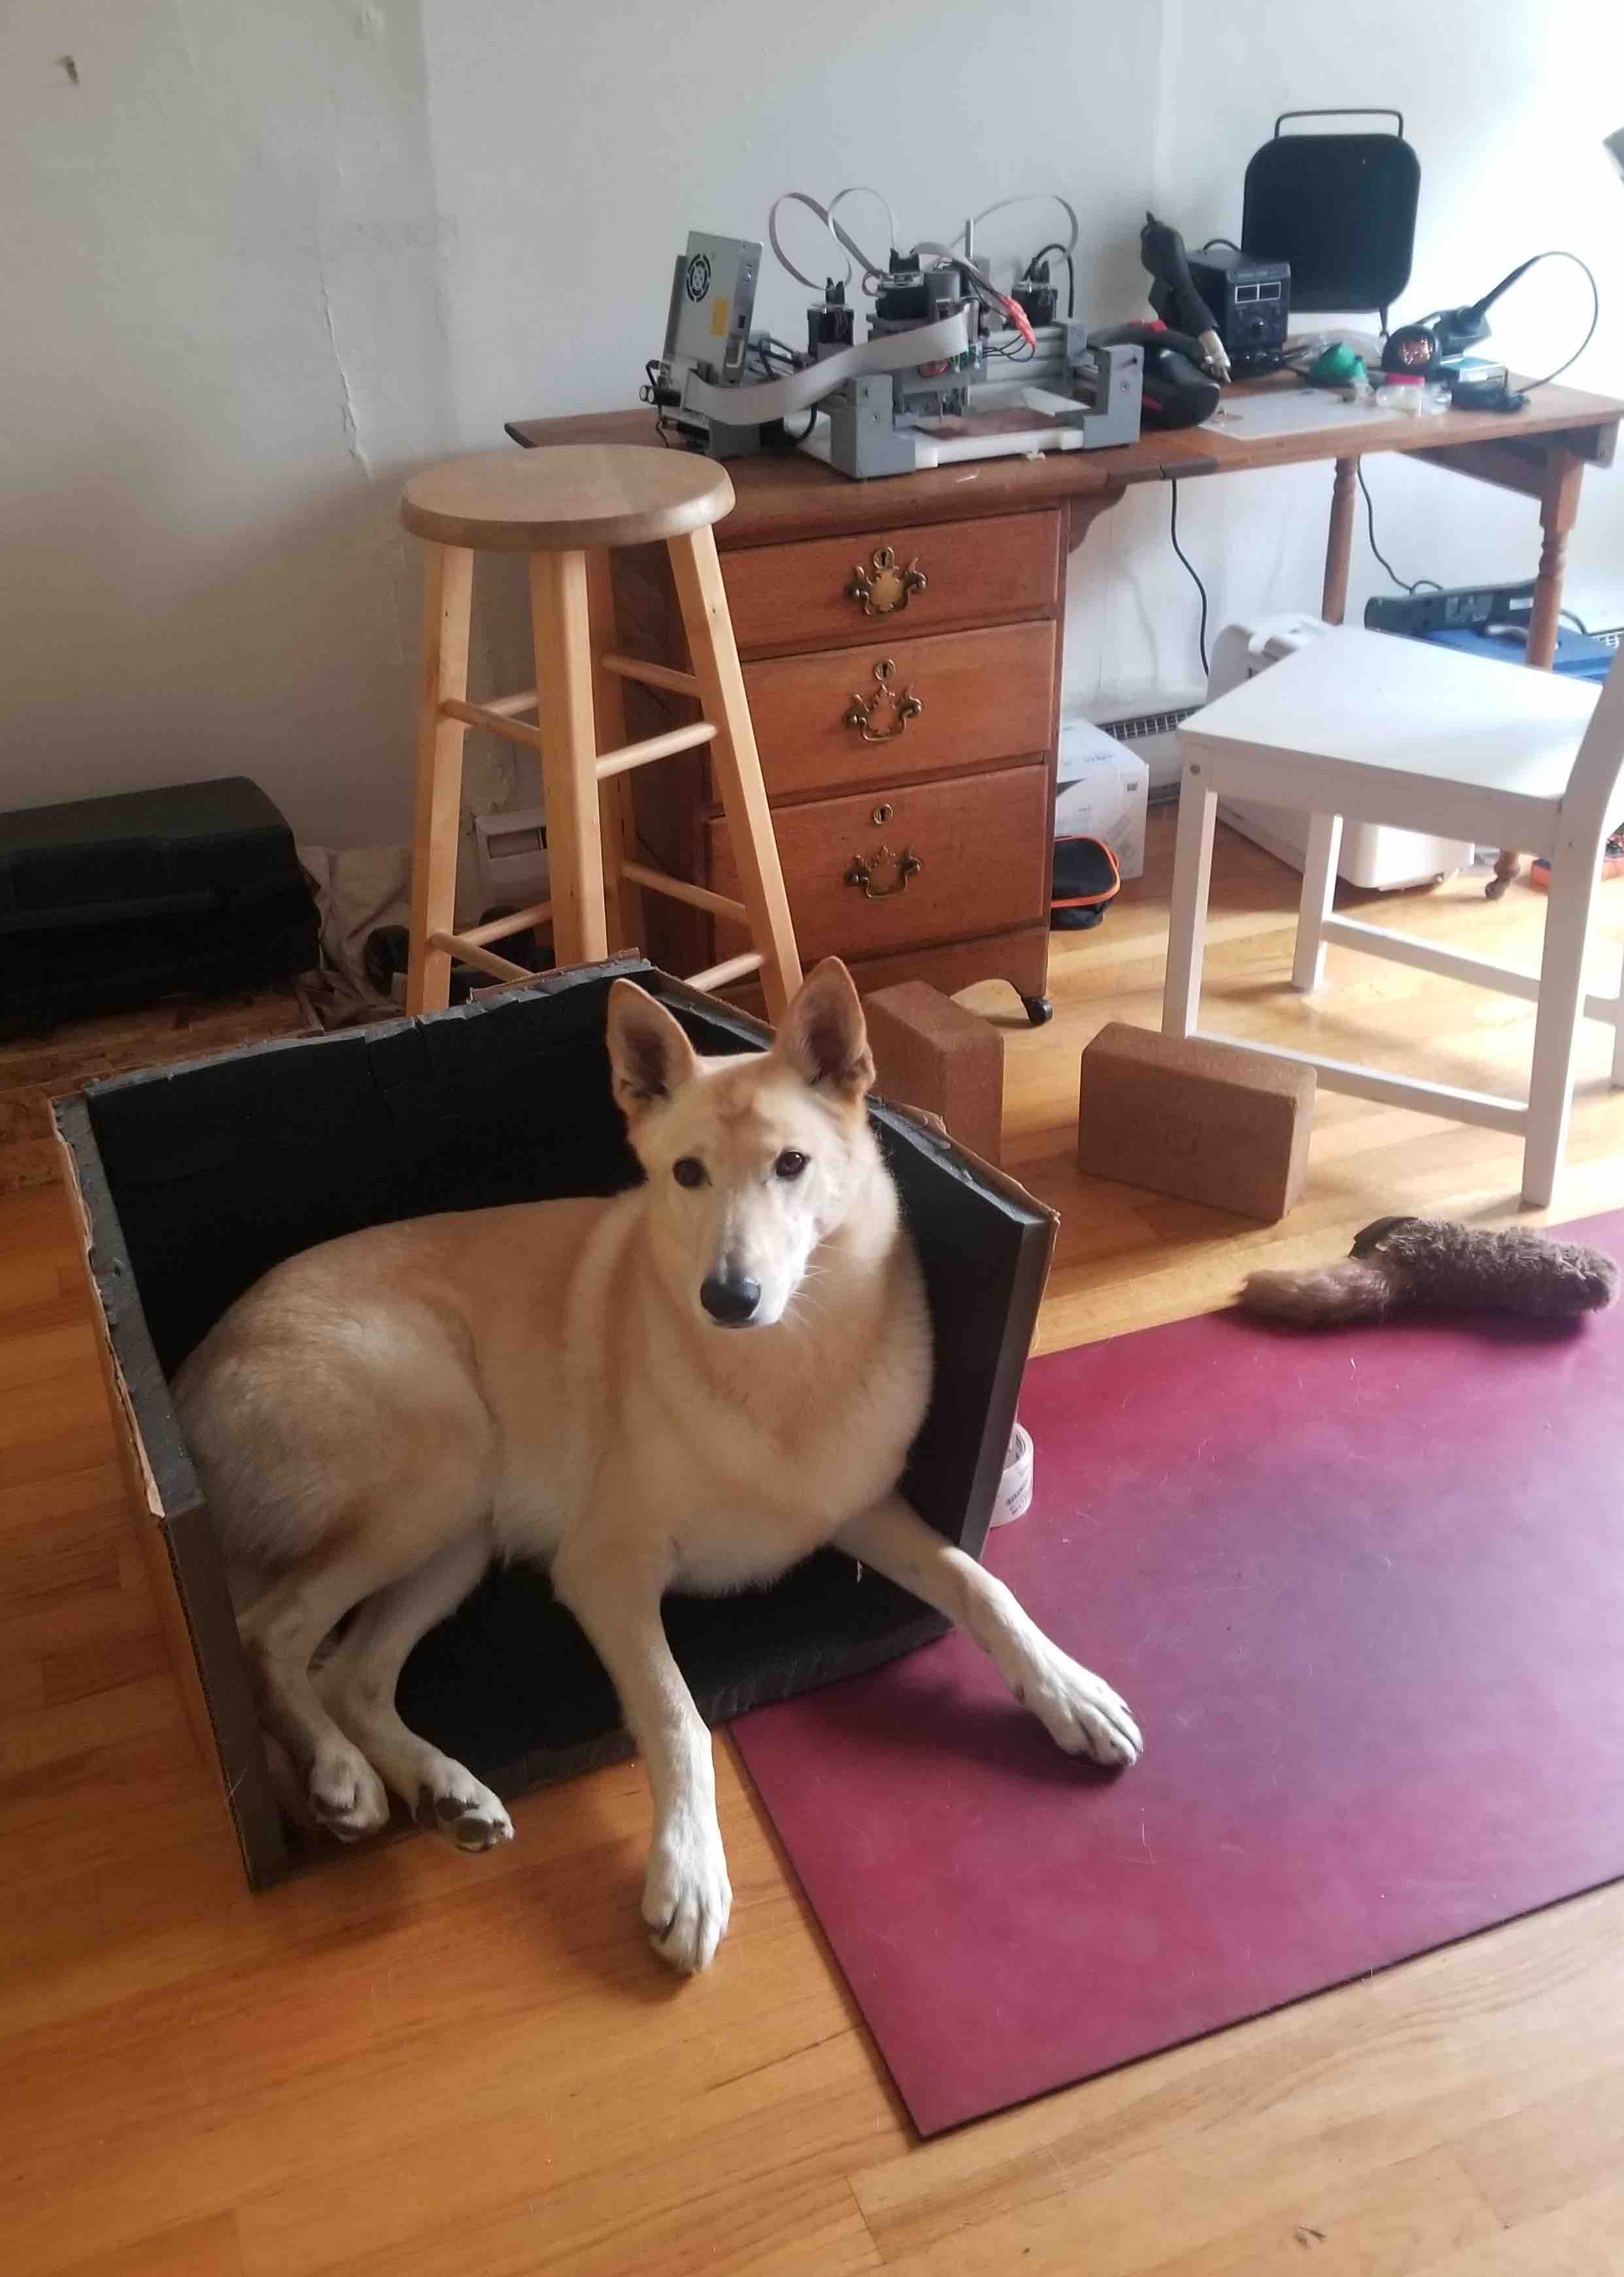
Milling the TNG board was more complicated than I thought it would be. Its a big board (comparatively speaking) so it took about 45 minutes to mill the traces. This was fine except that Clank isn't quiet... my dog was none too pleased. Zach (TA) helped me out by giving me some soundproofing foam to make a cover for Clank, definitely helped. I told Maverick (my dog) that the box was for him... he took this very literally.
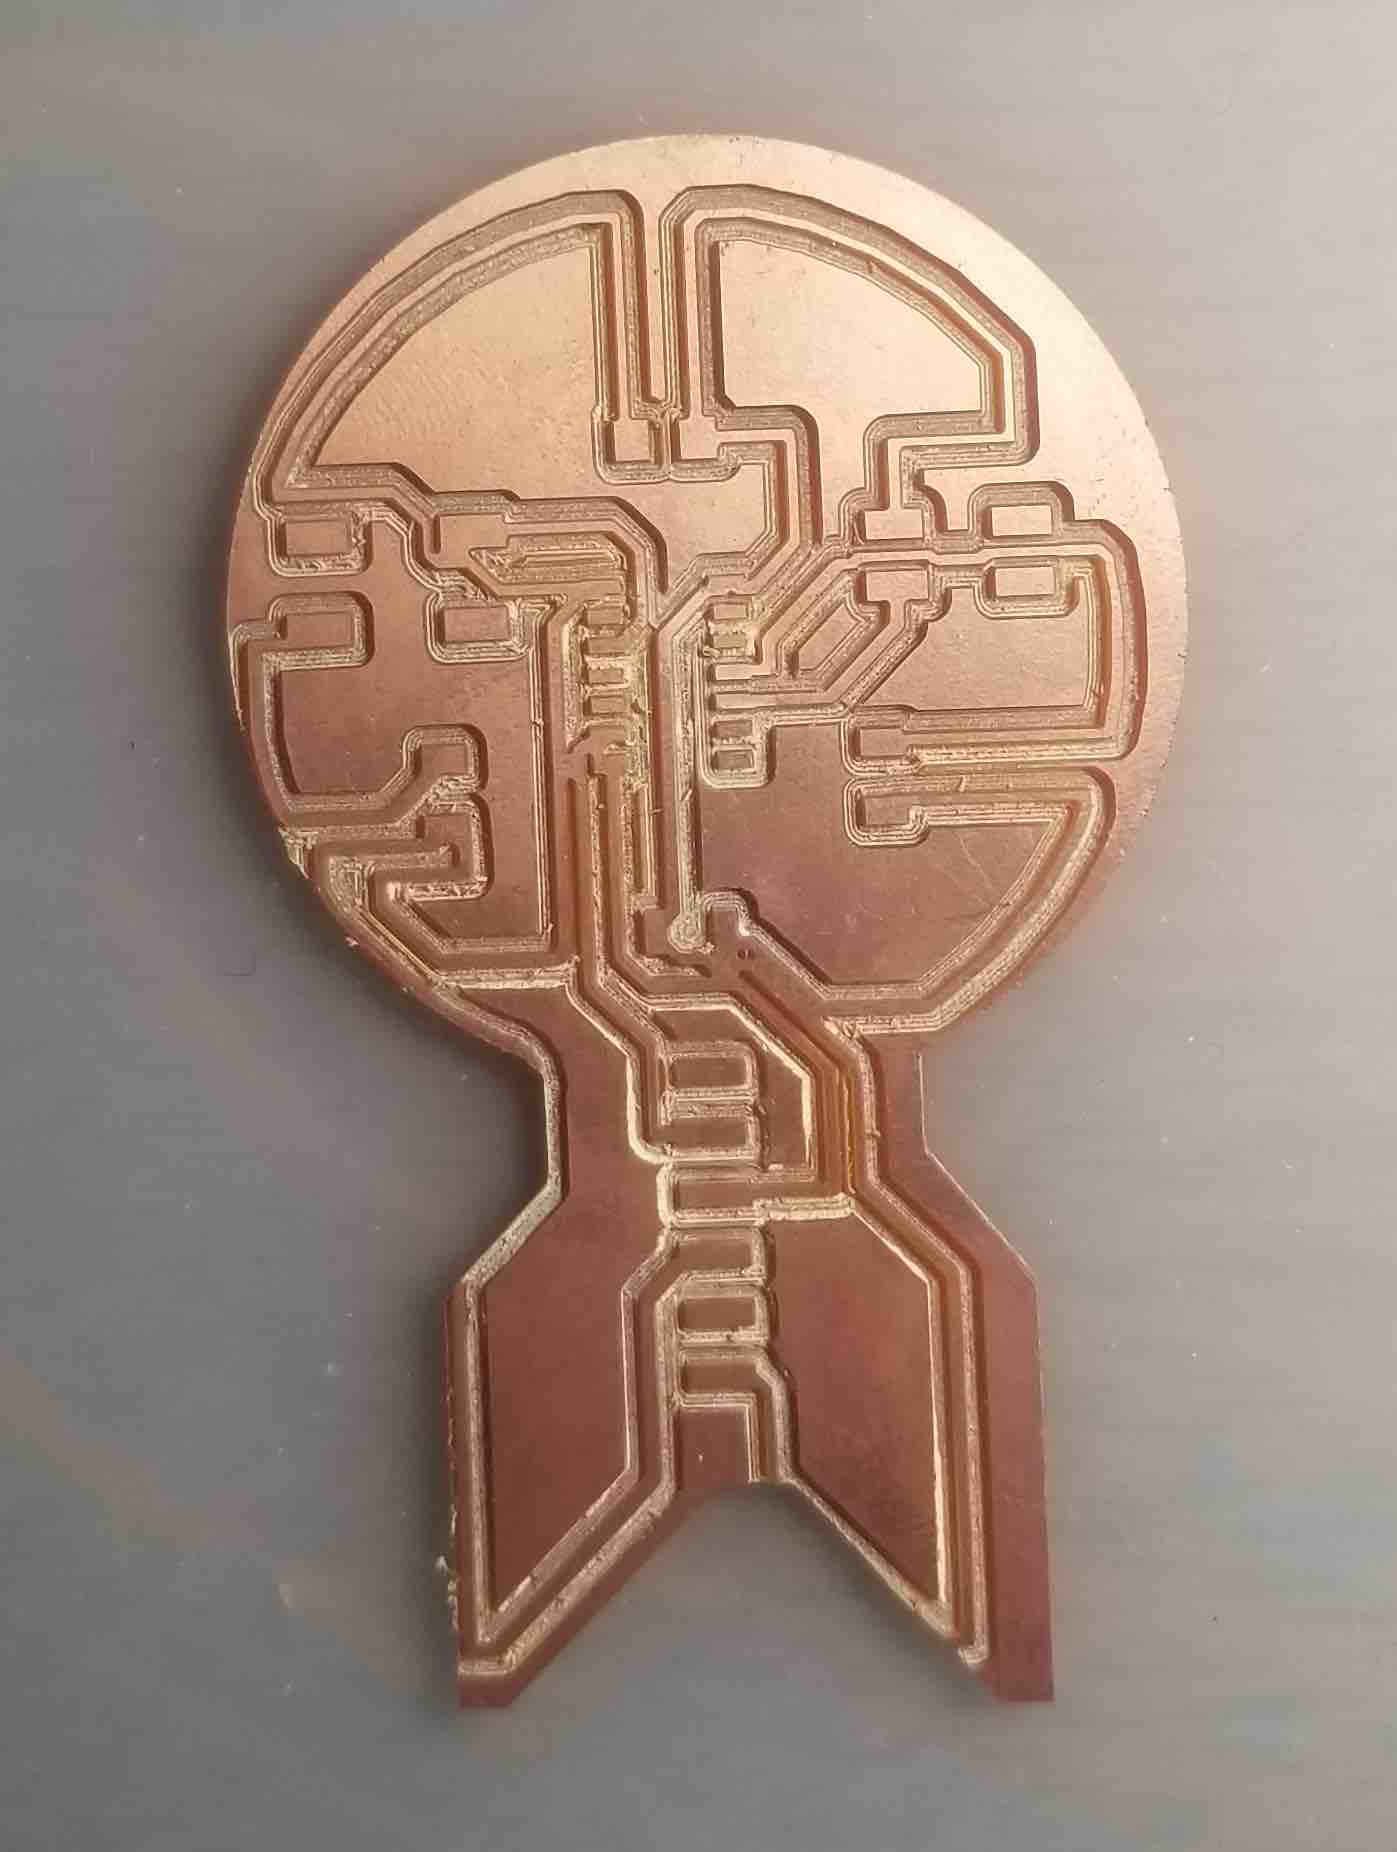
The next challenge was that because I had edited my outline, it wasn't properly lined up anymore. The first board I milled didn't quite work out (notice the edge traces got chopped off!)
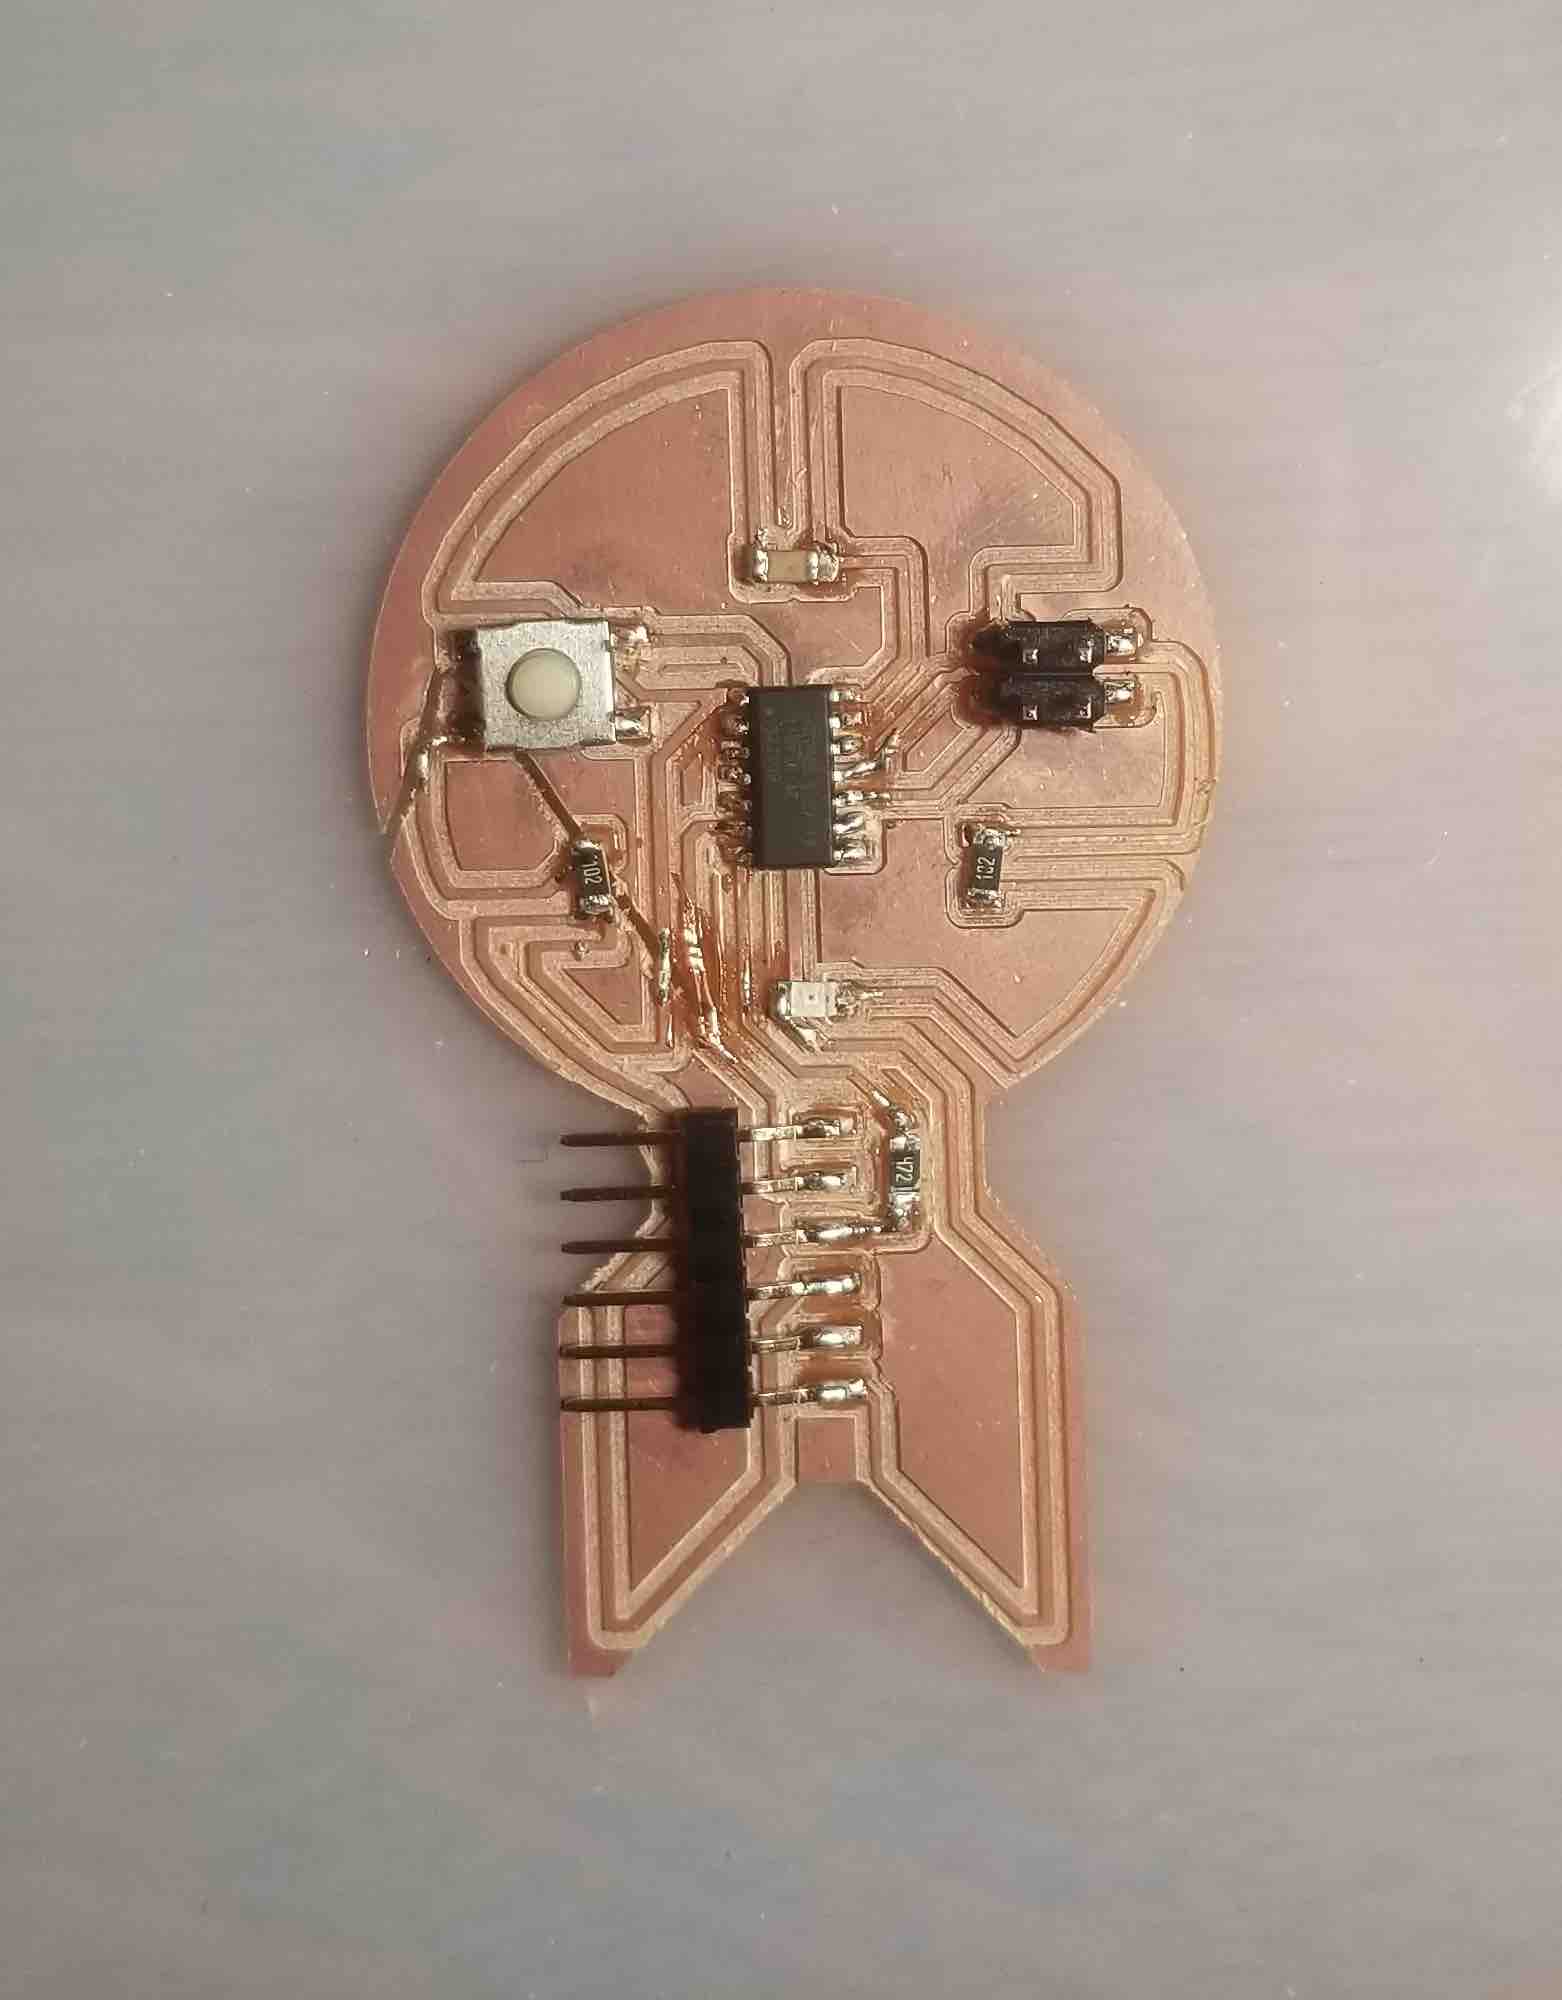
The next one, I forgot to re-zero when I went to mill the outline. No matter, I know how to fix that! I kept the board and fixed this with some solder and some copper tape. Looks a bit funky, but hopefully it will still work (my multimeter says it should be fine). Time to stuff the board
And finally, the stuffed enterprise! Ready to light up next week!
Source code