[03 Make Something BIG]
I was so excited for this week to get here!! Before I even got into the class I had dreams of the things I would make -- a kayak, a canoe, a hydrofoil for a wakeboard! -- I got a bit ahead of myself. With Covid this year is a bit different than previous years. We only have shop access from 9-5 and we need to schedule our time carefully so there aren't too many of us in the shop at the same time. Unfortunately this means we have to be considerably more conservative with what we build. We also need to prepare extremely well. All that being said, that doesn't mean we can't make something really cool! Our priorities this week were 1) to Characterize the ShopBot, ie the big cutting machine, and 2) design, mill and assemble something big.
Ideas abound
As I said, I had many, many ideas of something big I wanted to make. But a key consideration in the design process is what materials we would be using. I knew it would be some sort of plywood-ish material, so my thoughts were:
I decided to go with the last option -- because my niece is the cutest and as seems to be becoming a theme here, Christmas is coming. One caviat to this though is that we're actually going to be using Oriented Strand Board (OSB).
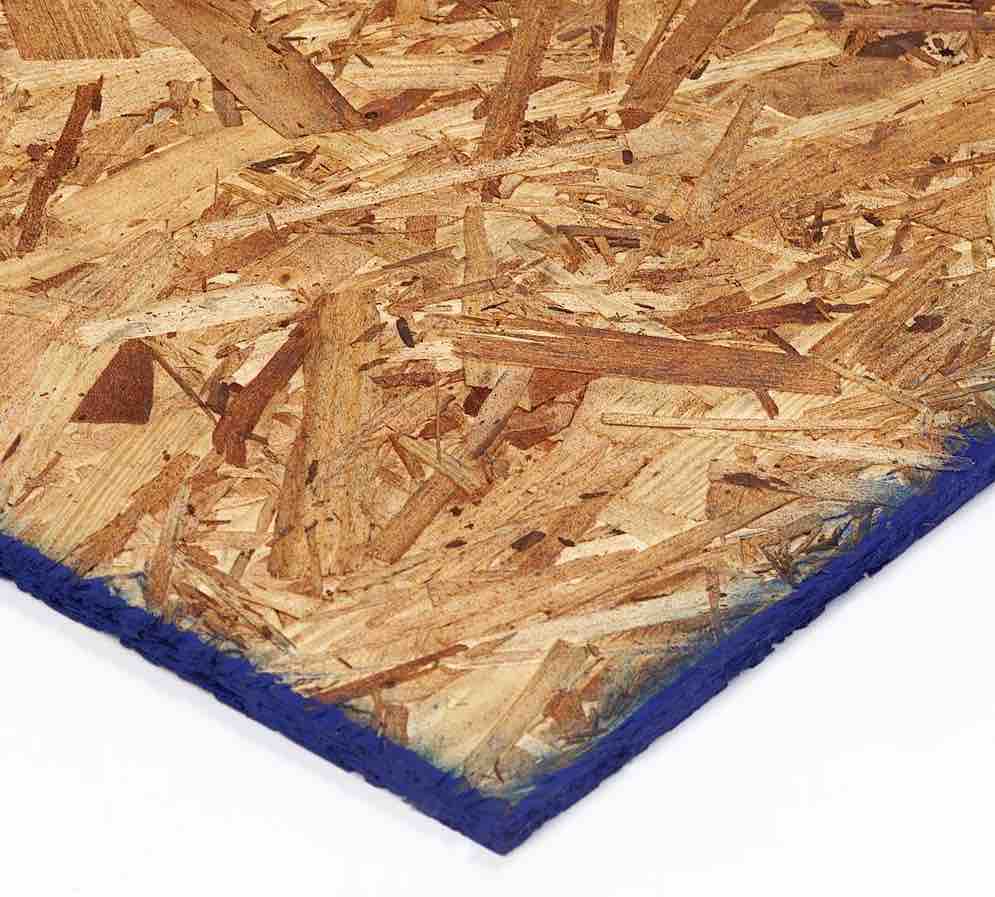
As you can see, it's not particularly kid friendly, sort of looks like a sliver waiting to happen. So the plan is to make the desk out of OSB as a test, then buy a nice piece of plywood to do a final cut.
The Design
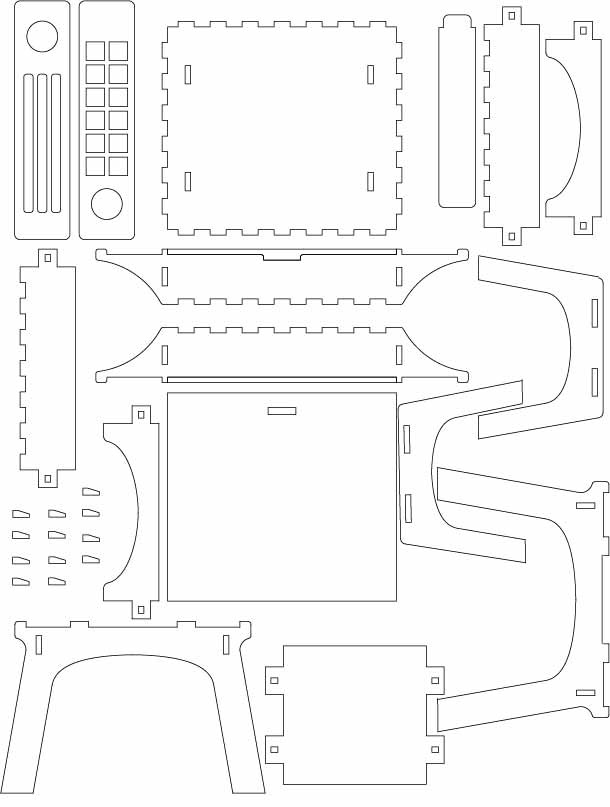
I'm starting to feel very comfortable in Fusion 360 (which is again what I used this week for my design). I'm understanding the criticality of having a good sketch, parameterizing as much as possible, and also building for my material. I know that OSB tends to splinter, so making small delicate finger joints wouldn't be a great idea. I also know that I'm going to need to drive this back to Toronto at some point so I don't want to have to glue and nail this together. As much as possible I want to make this using wood joints. So that is what I designed for. I did end up using some finger joints, but I kept them large and I made sure they were supported by wedge joints somewhere in the design. Wedge joints are great because you can hammer in a wedge of wood to keep everything secure but easily take them apart and reassemble later.
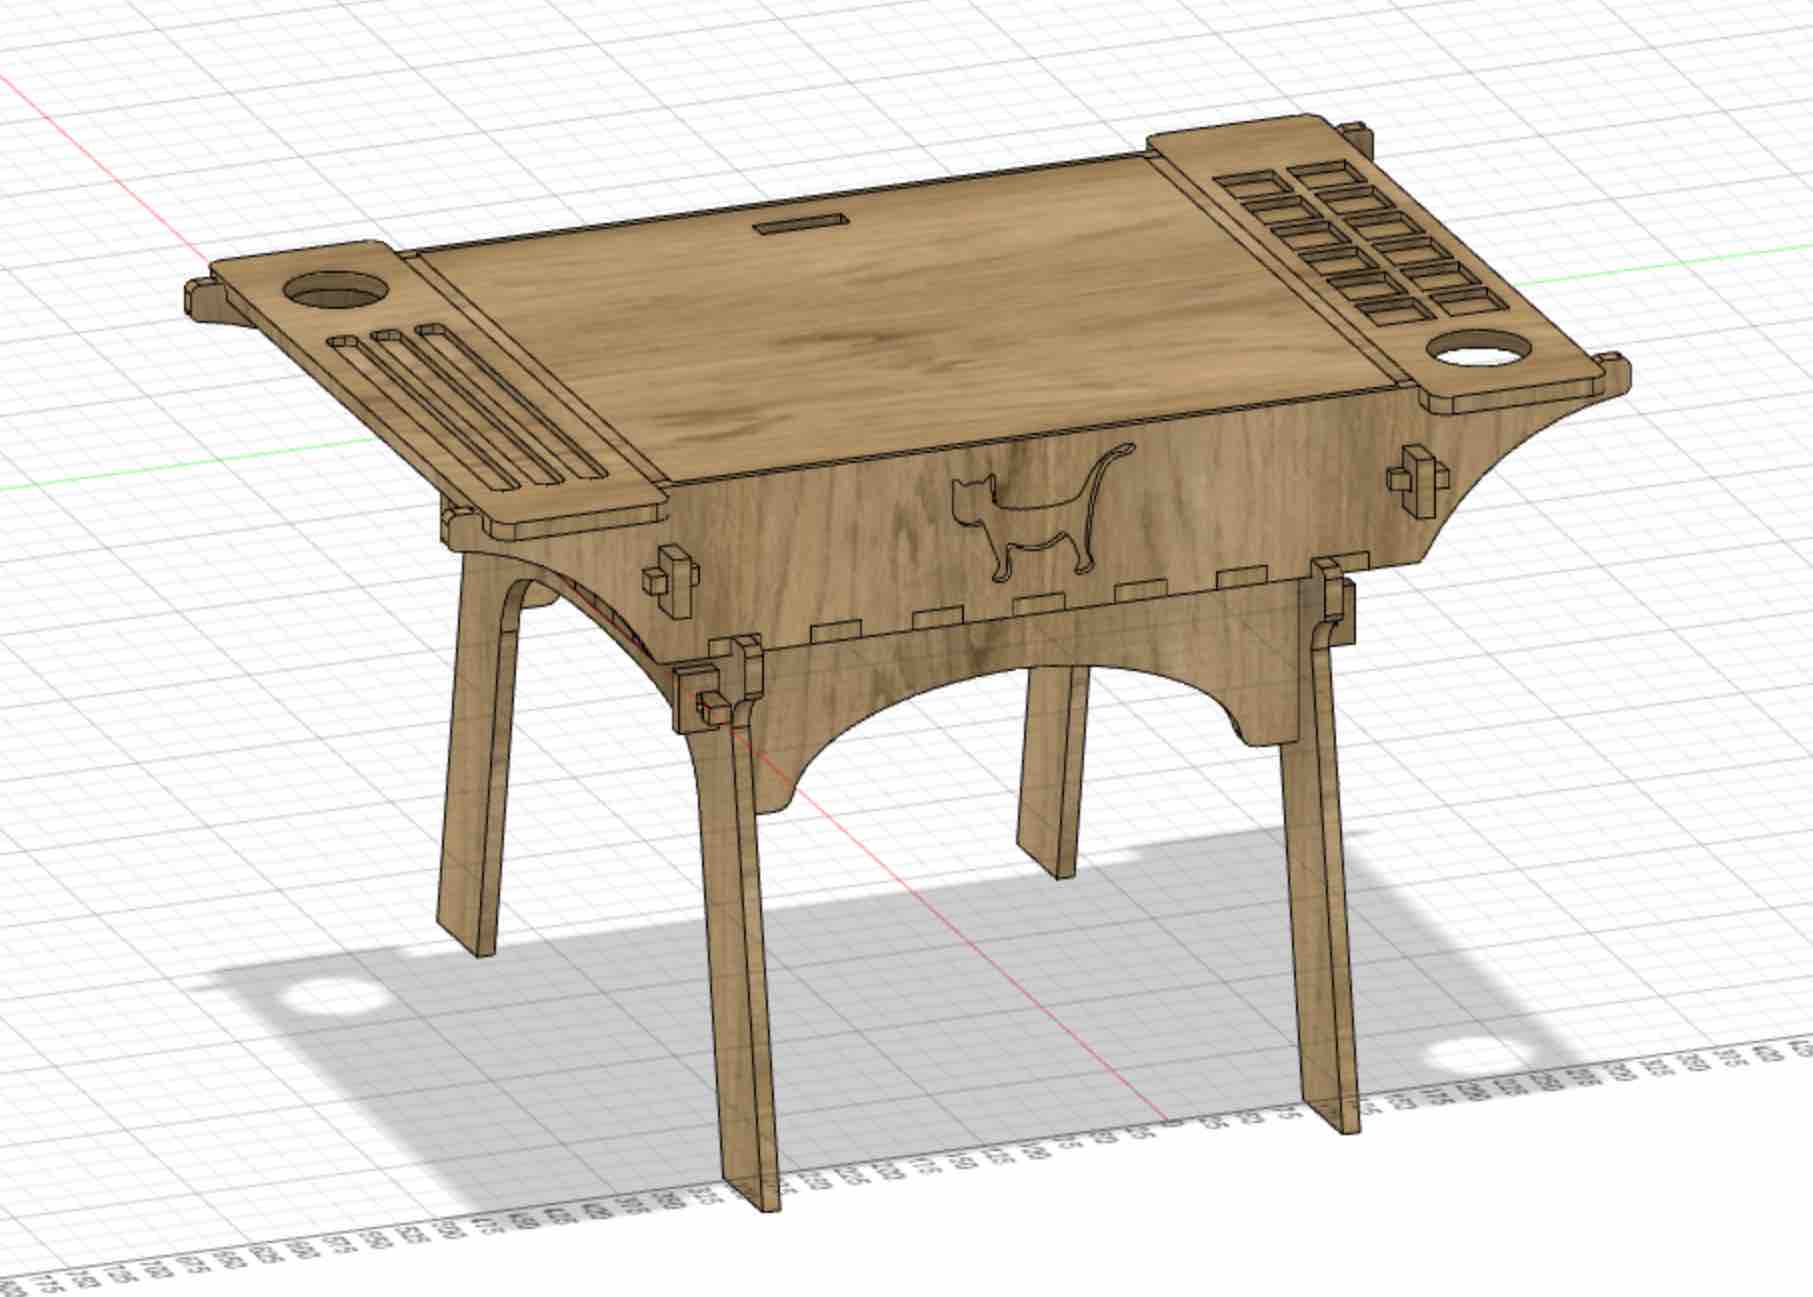
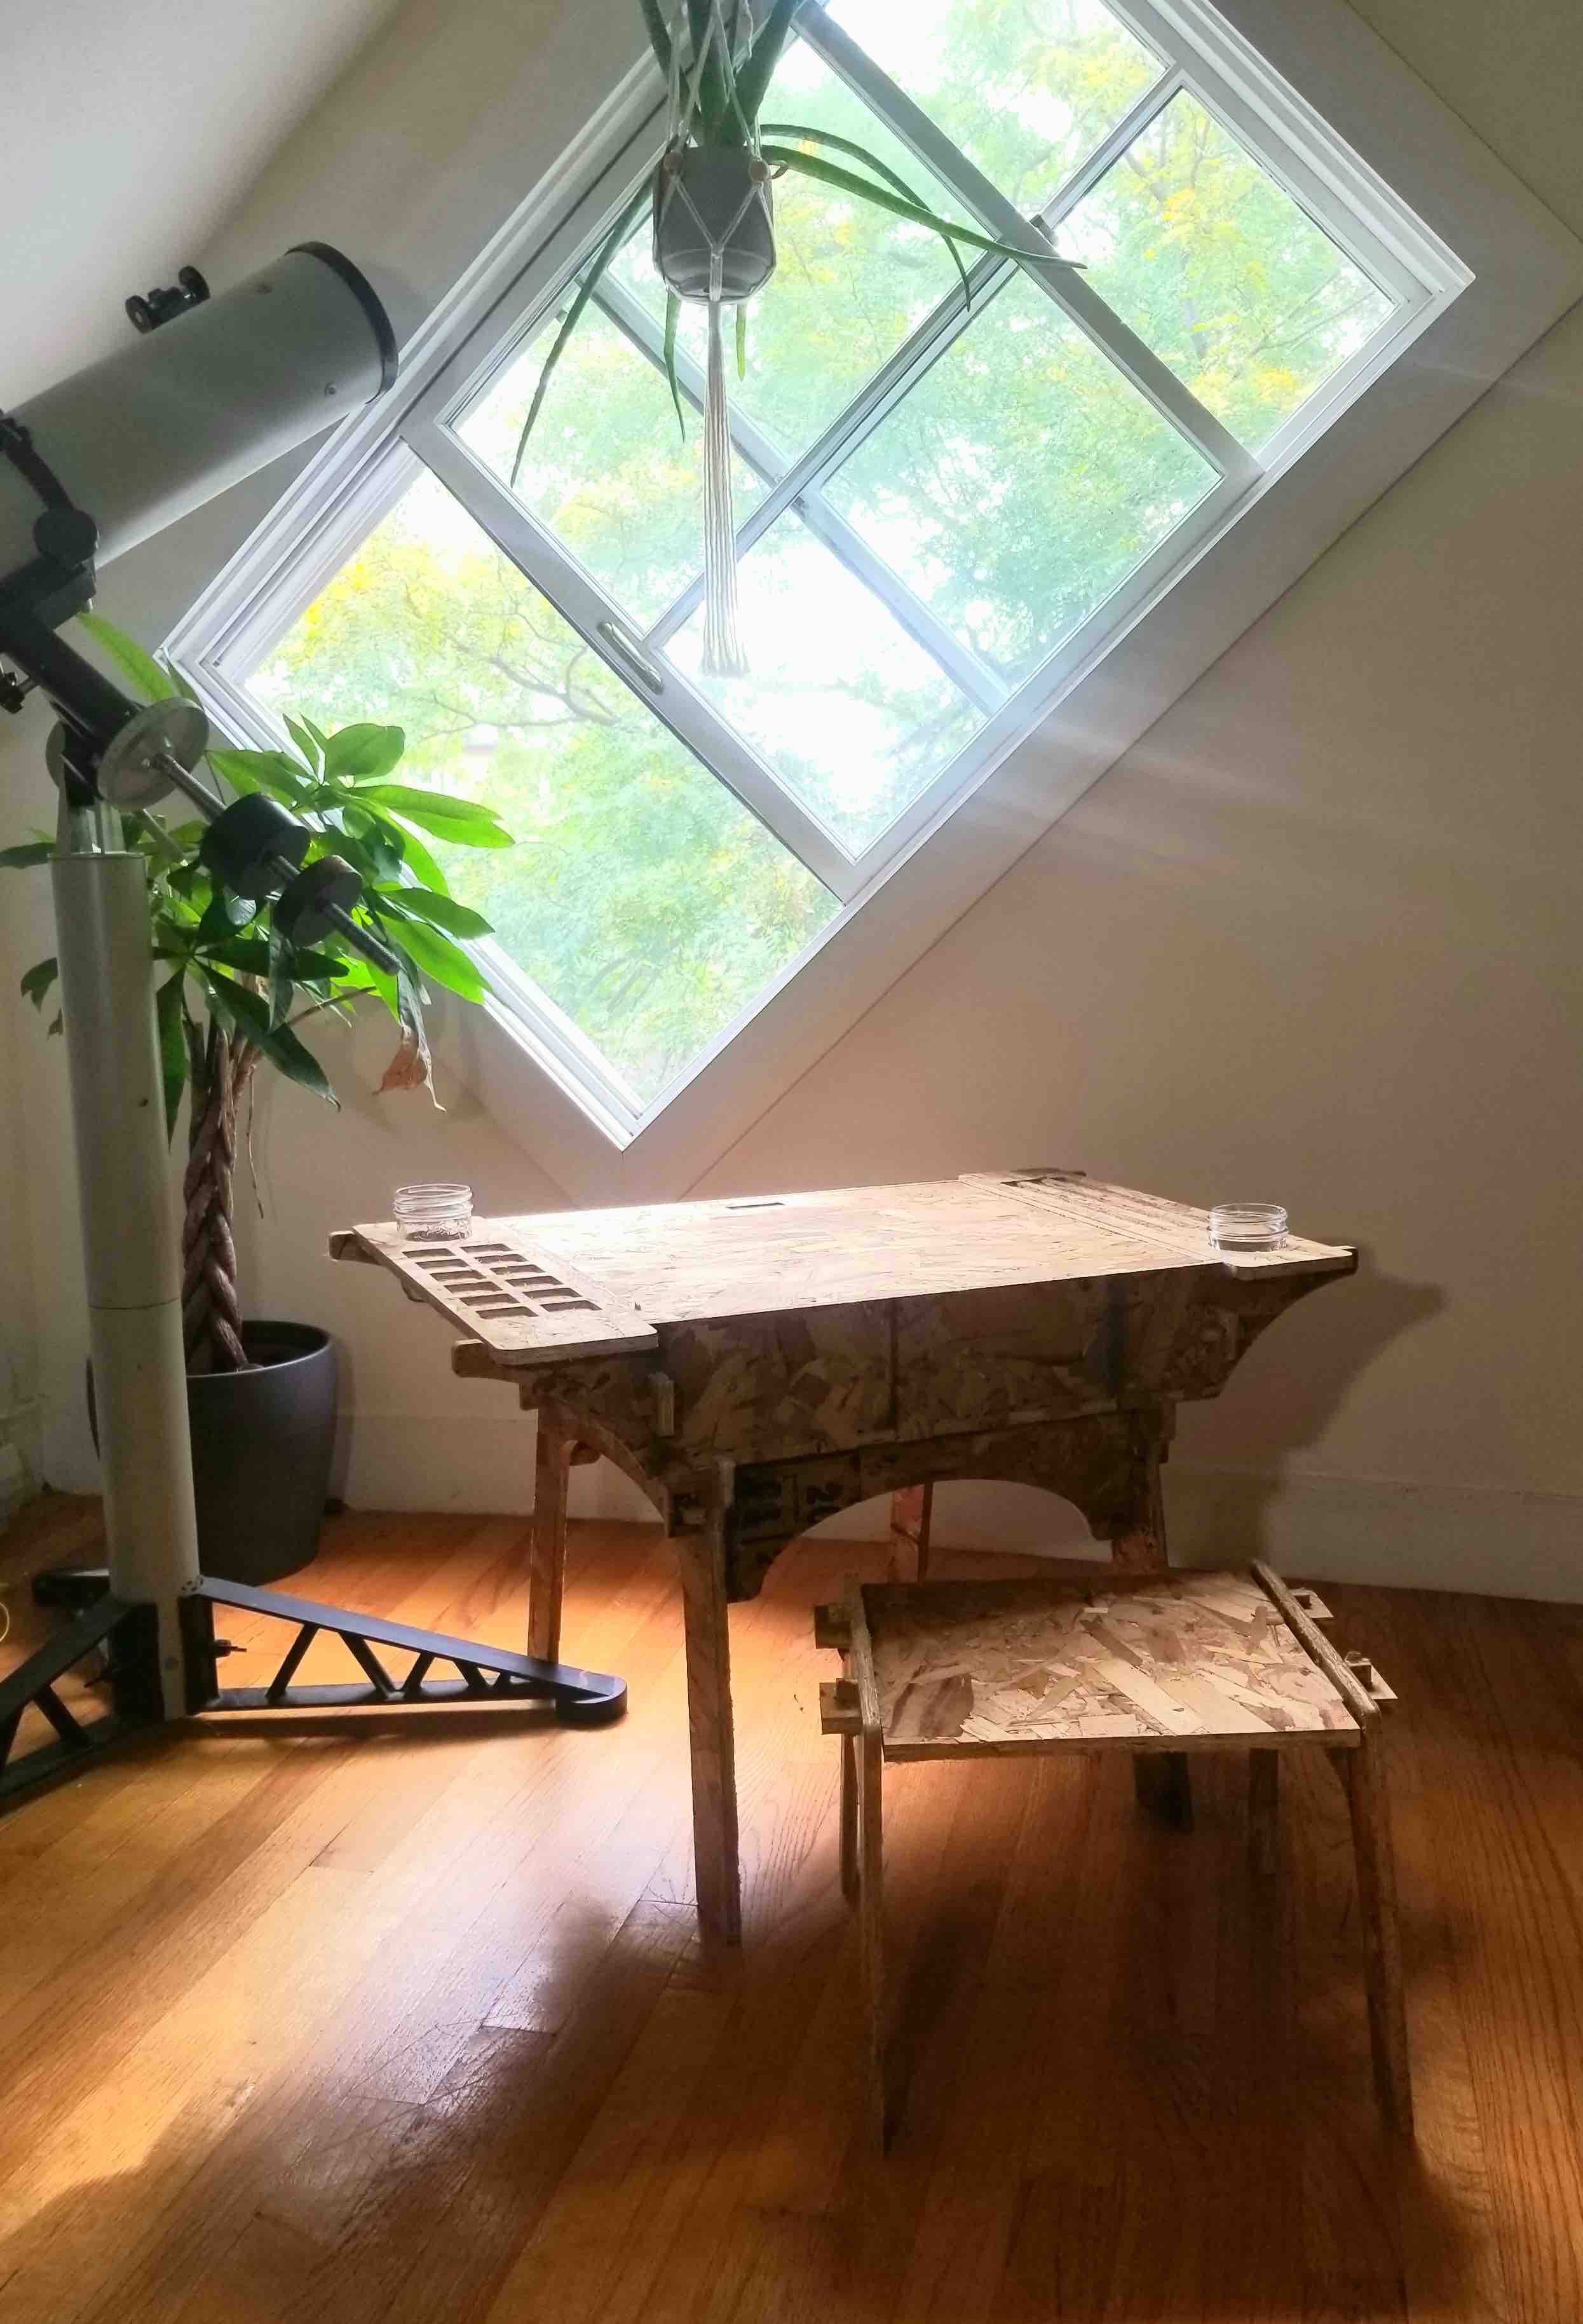
My design has two componenents to it. The first is the desk. This has a nested lid that can be propped up to make an easel for painting, or lies flat for drawing. I added wings to the sides of the desk for paints, brushes, water, etc. The brush and water cup holes I designed around a standard mason jar circumference so that it wouldn't be tricky to find a container to pop in there. The paint and brush slots I made as insets cutting halfway through the board to give grooves for rolling, flowing things. The inset lid for the moment is designed as an inset cut in the frame of the desk top, but we'll see if the OSB can support that! The base of the desk holds up the top using four slot joints (under the desk) and some curved edges. I used wedge joints wherever I could to hold it all together. I also added an inset cat, since currently my niece is cat-obsessed. Here's the desk.
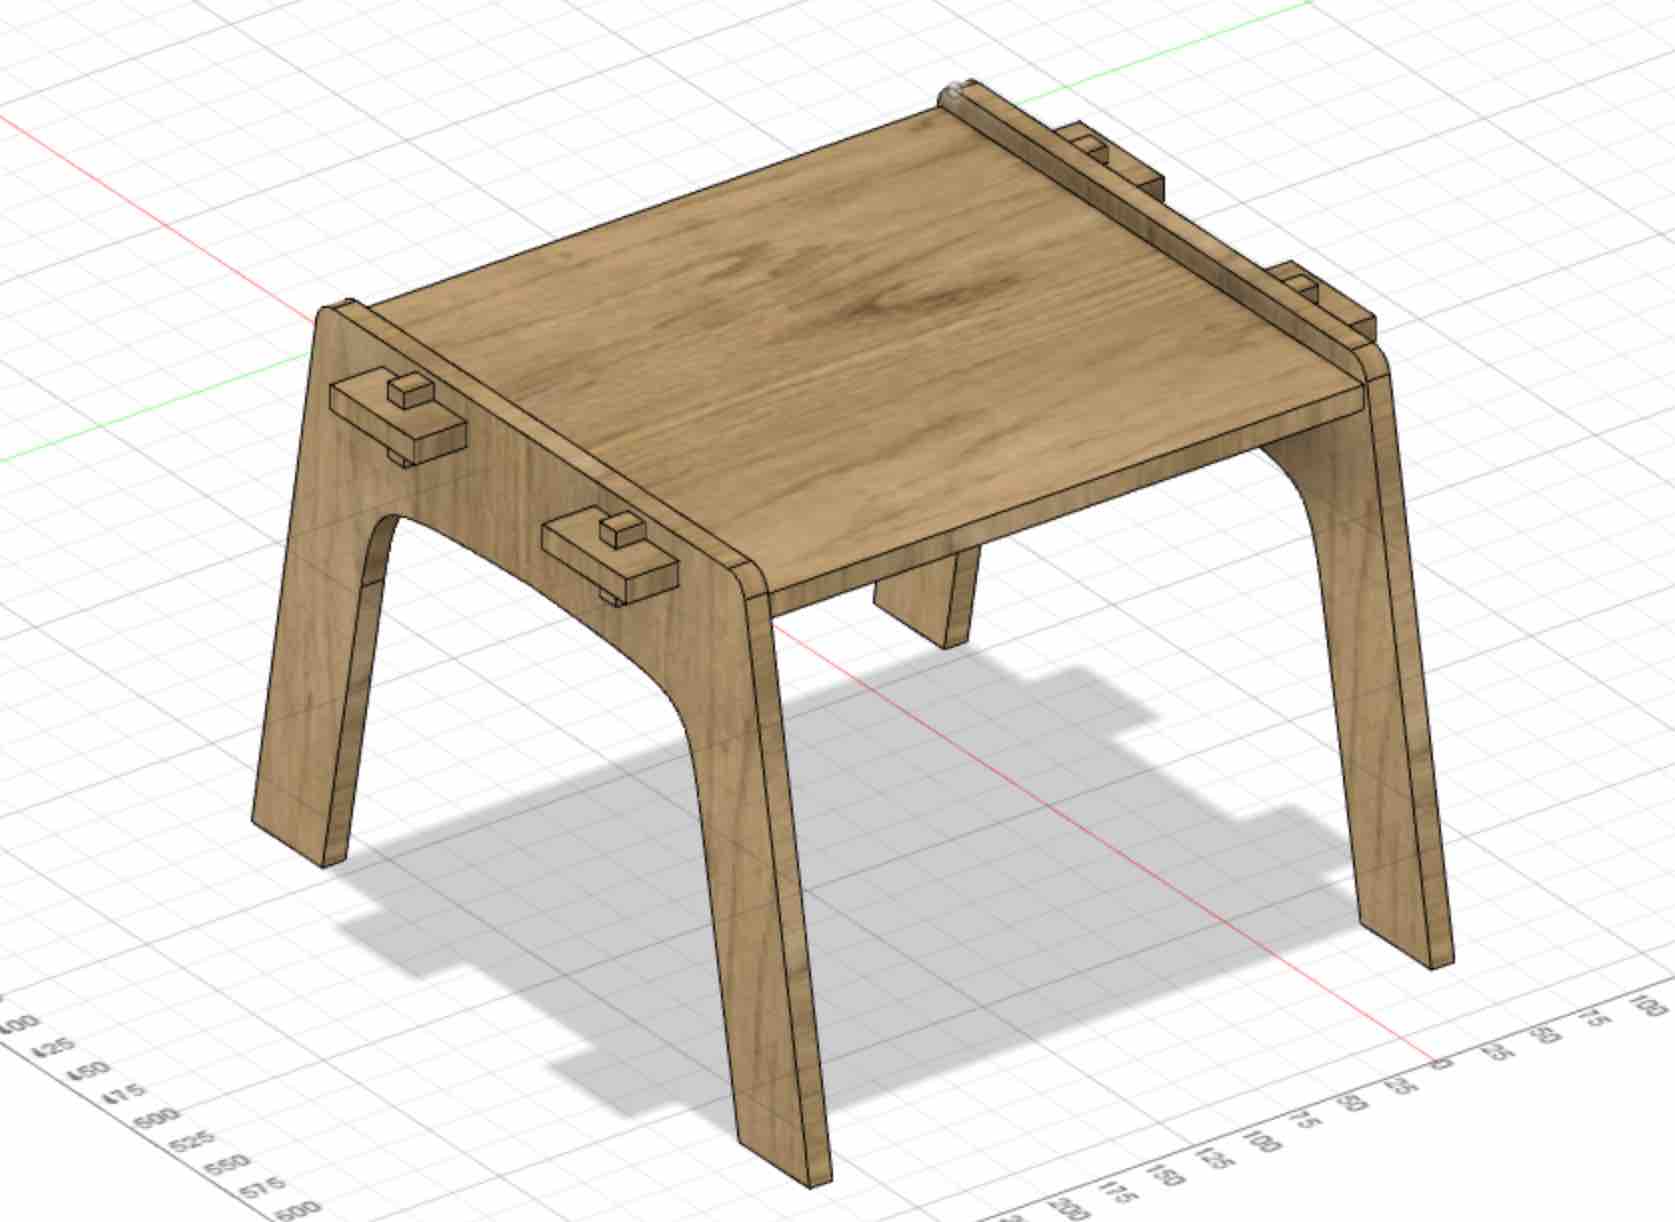
The second component is a stool. Super simple design, again using wedge joints to hold it all together.
The Shopbot
Using the characterizations we'd done for the shopbot, I decided to stick with the 0.47" thickness for my slots and joints. We found that 0.46 was a nice tight fit, but because I have a lot of finger joints that all need to fit together at once, I wanted to go with the next size up -- still a good fit, just a little less snug. We also found that we could go with a smaller tab size to minimize the tearing that we were seeing happening with the larger tabs. I originally saved each part from my design as a separate .dxf file. Unfortunately, V CarvePro (the toolpath planning software) wouldn't import multiple .dxf files into a single project. I saved all of the sketches as a single .dxf file (Merged.dxf) and used this instead. Another point, V CarvePro uses inches, whereas my design was in mm so I was careful to update the settings to reflect this.
The Shopbot
A few tricks and the settings for the path planning:
I partnered up with Justin to get setup and watch the machine while cutting (safety first!). Other than the minor mishap with the wedge loss, the design worked great!

And, for convenience, it all packs up into a tidy little box!
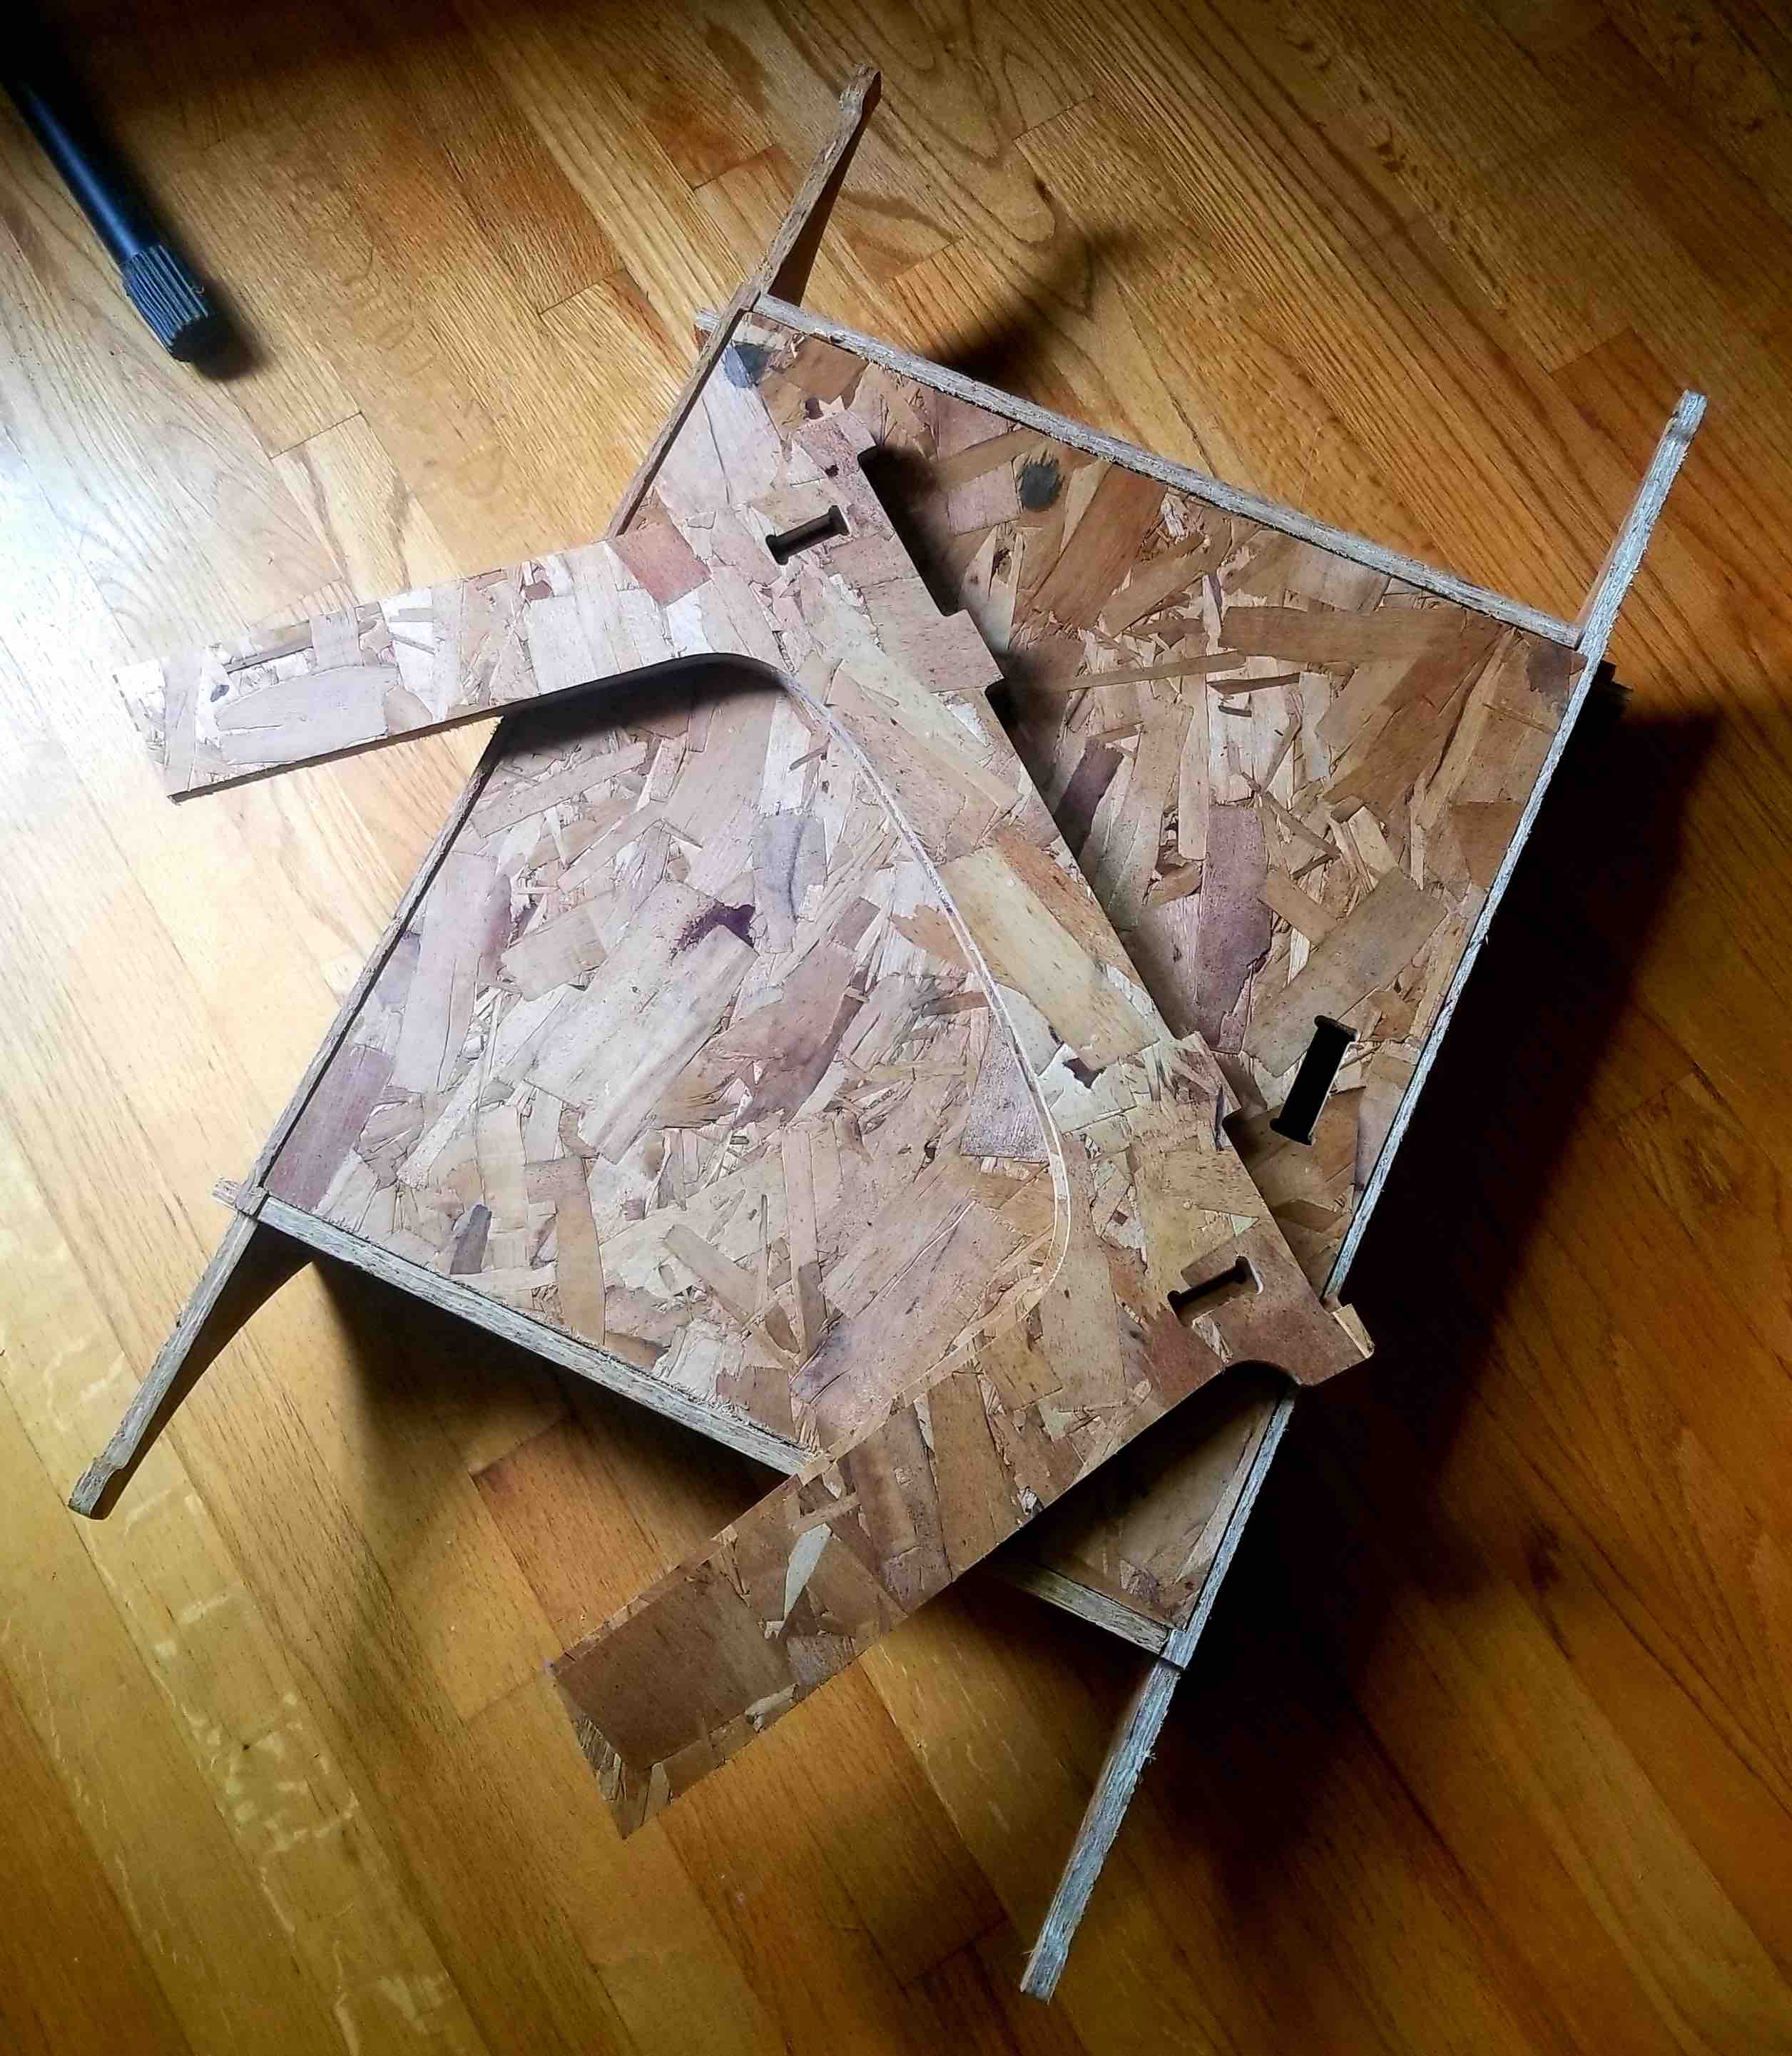
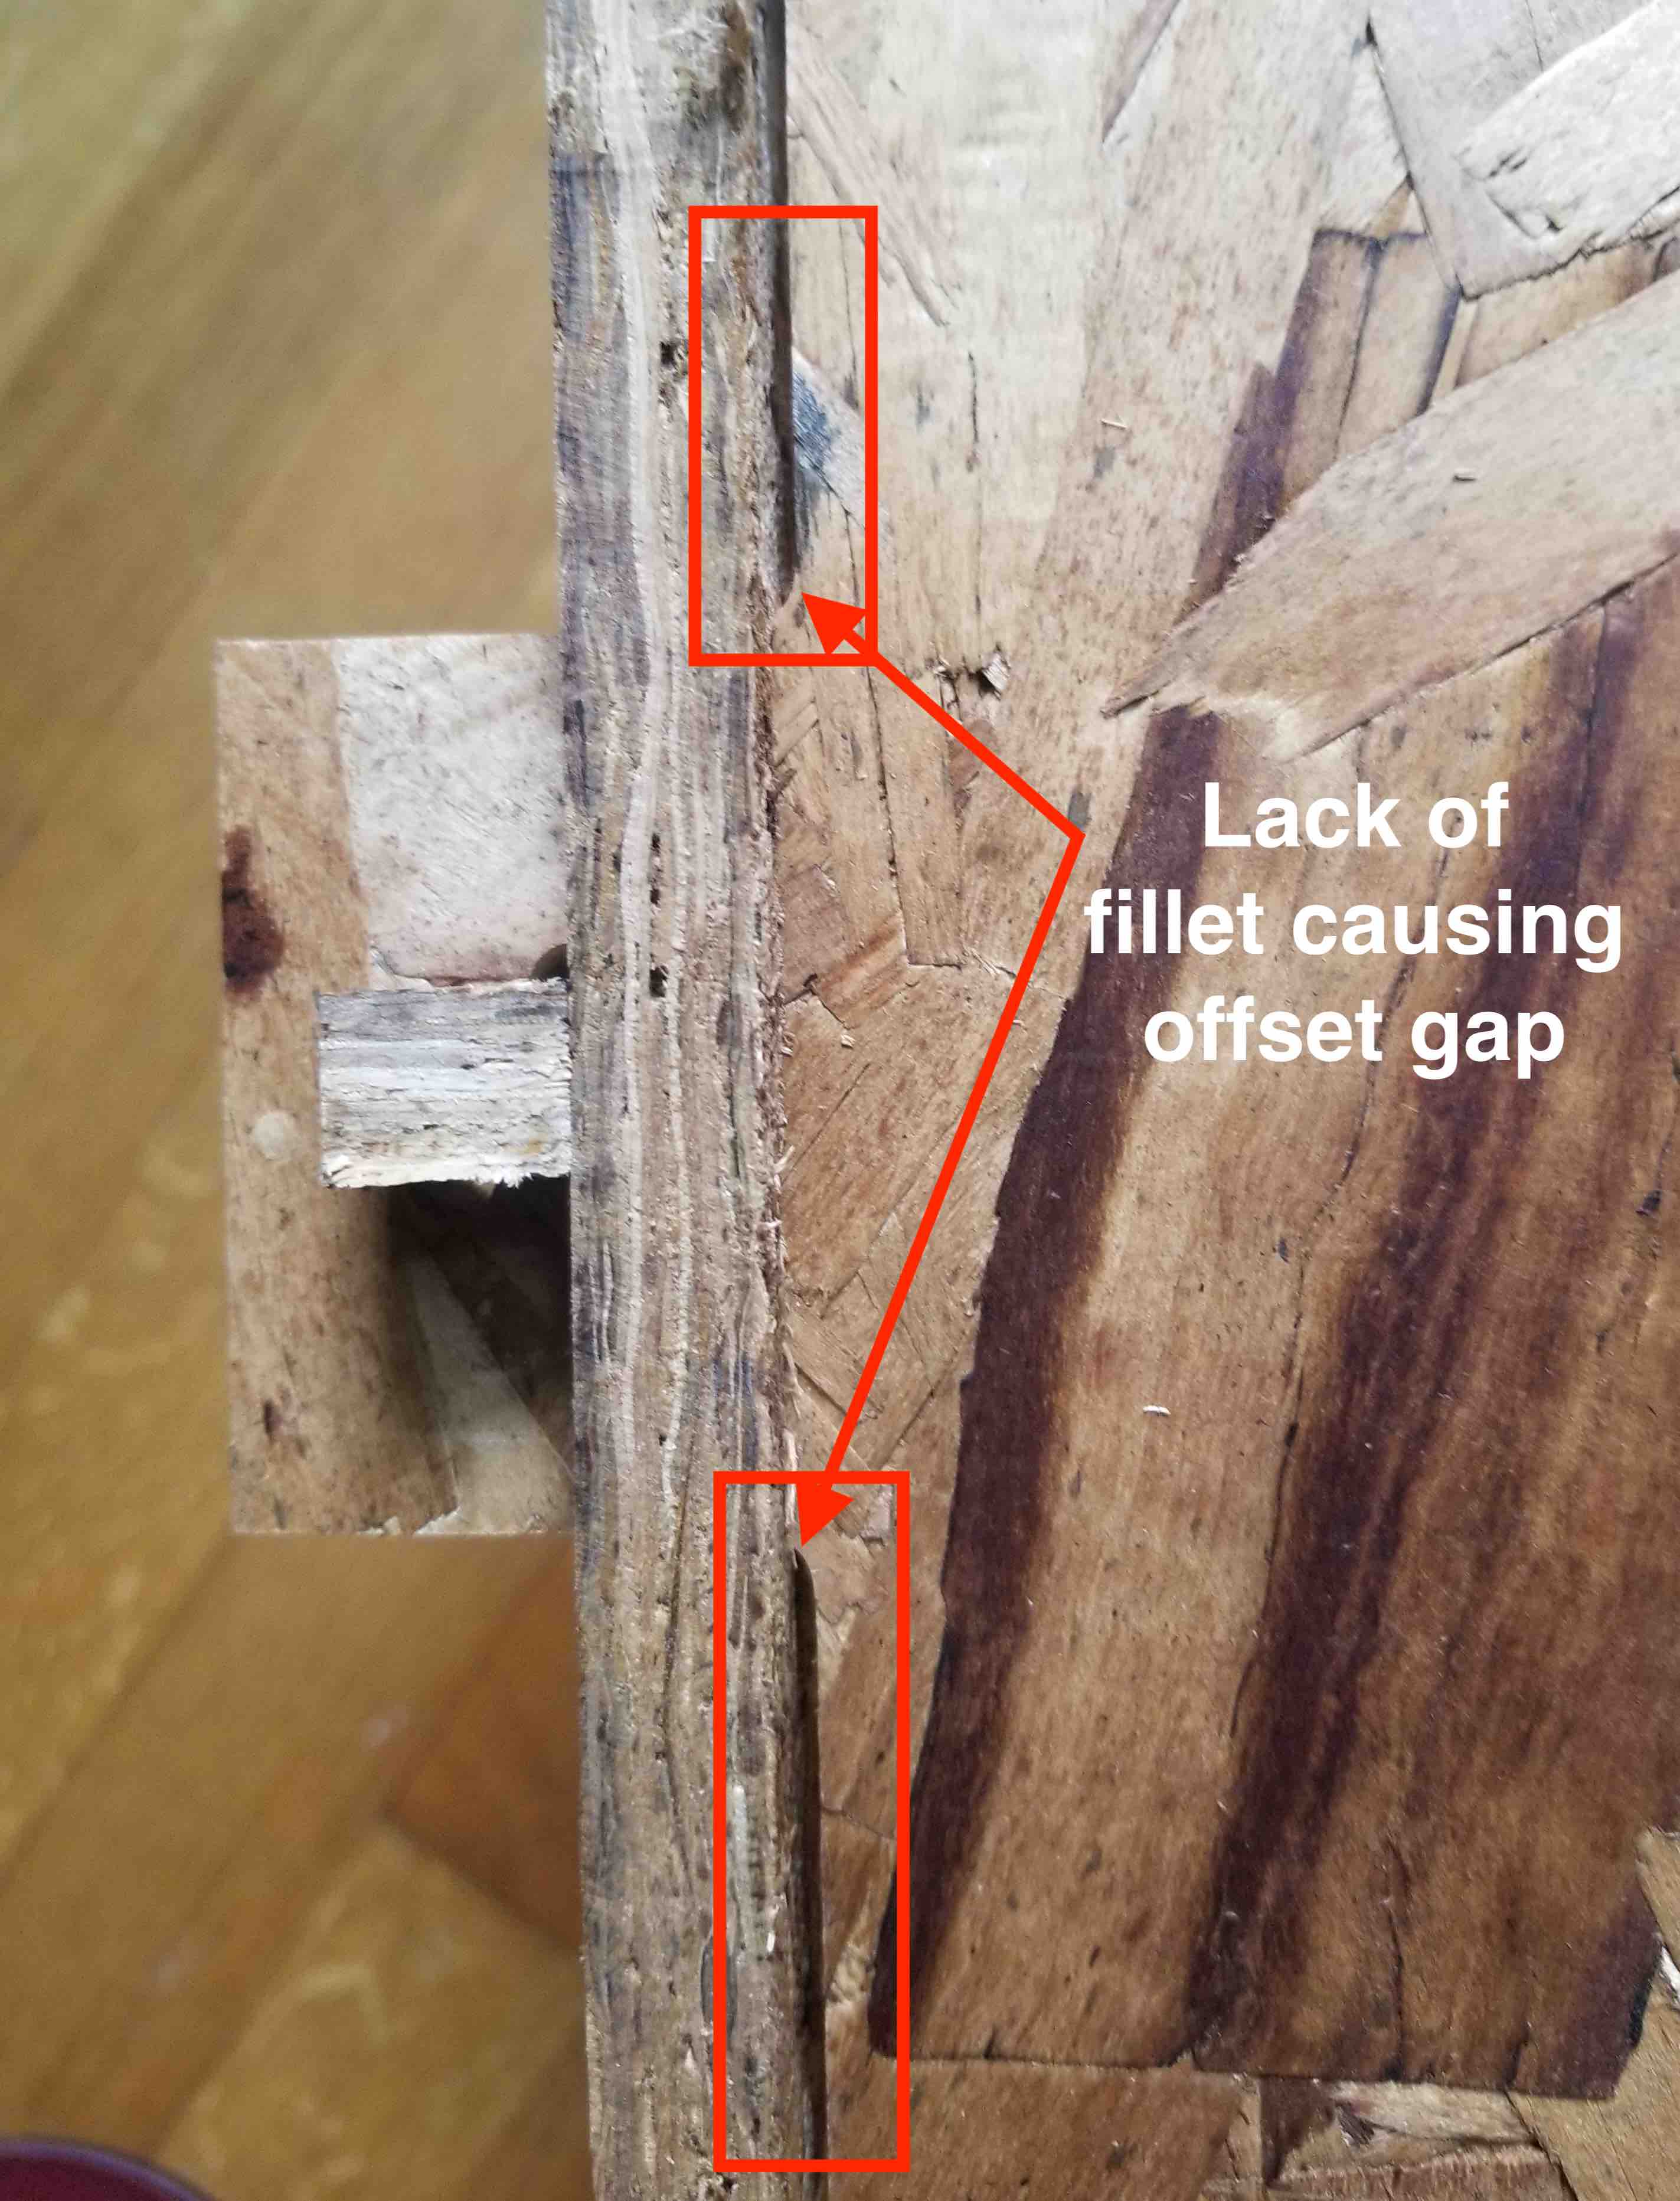
A quick Lessons Learned though. I didn't add fillets on the inside corners of the wedge-joint tabs which caused the pieces to have a gap between them when assembled. This makes the base legs a little bit wobbly even with the sturdiness of the wedge joints.