Goal#
MAKE SOMETHING BIG
Result#
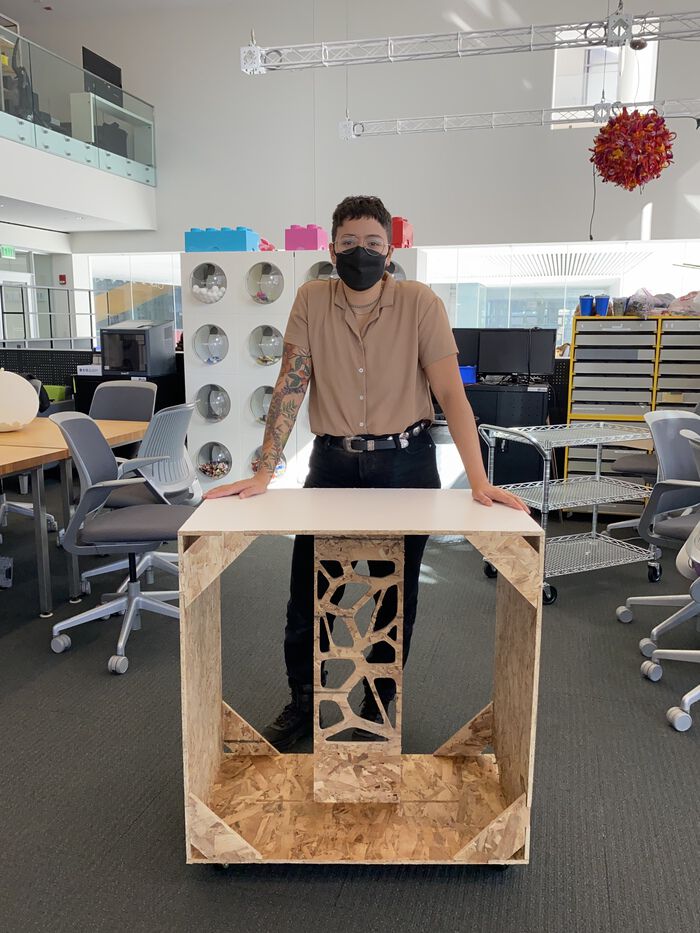
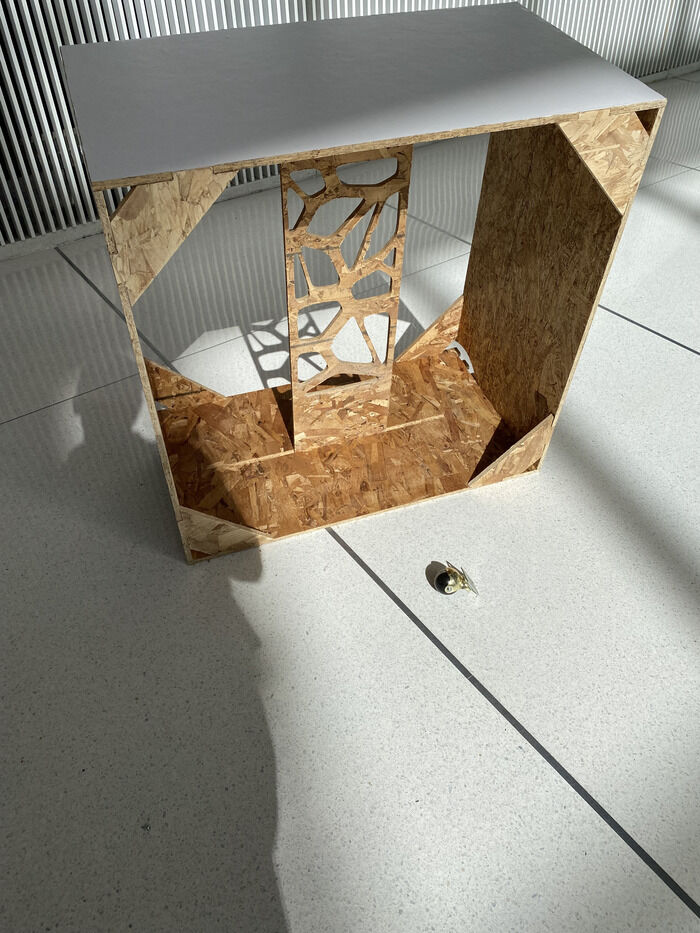
I've been looking forward to this week all semester! I finally get to do something usable for my final project. Since I want to make some kind of interactive + mobile projector table, I decided to make a prototype of that structure. Since we only get 1 sheet of OSB for this week, I made a smaller version of what my final project cart will be like.
I started with shop training with Tom. We went over the critical safety points:
- Always wear protective eyegear
- Always work with a buddy
- Never work when you're tired or distracted
- Never reach into the machine bed while it's running
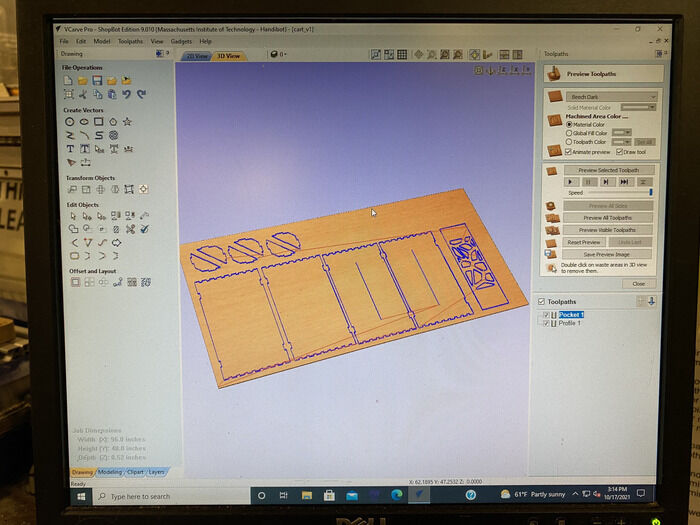
Tom went over using VCarve to make the toolpaths, including some of the settings we should use for OSB. The main thing to change from the defaults was the tool and the tool settings. We went over using a 1/4" downcut tool with these settings:
Spindle: 10,000 rotations/minute Feed: 120 inches/minute Plunge: 60 inches/minute
We talked about using pocket toolpaths for cuts that don't go all the way through, like raster fills, and profile toolpaths for full cuts. We went over adding tabs and found a good setting was 1/2" tabs with 1/5" thickness. It's very important to click Calculate again whenever any setting on the toolpaths are changed. After doing the toolpaths, we export as a .sbp and open the file on the ShopBot software. More detailed instructions can be found here.
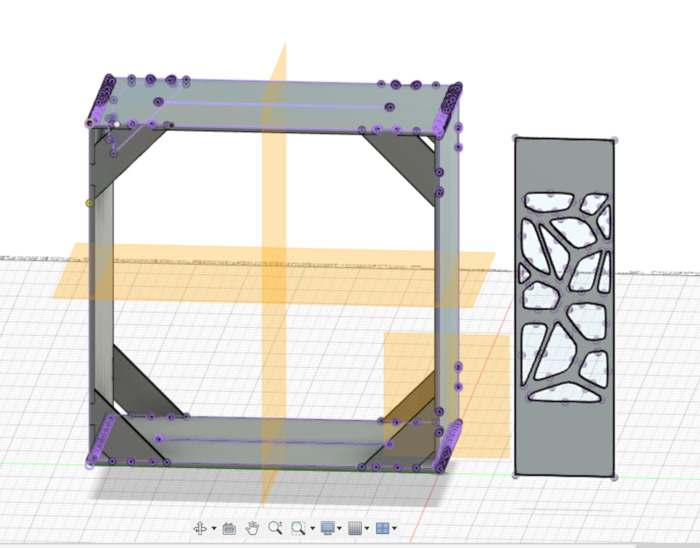
After the training I got to desiging in Fusion 360. Making a basic box was not so hard. Even the finger joints were not bad since I used this Finger Joint Add-in. I got some great advice from Jennifer and Zach when I posted on our session's issue tracker, they inspired me to add cross braces to my design on top of my originally planned center support.
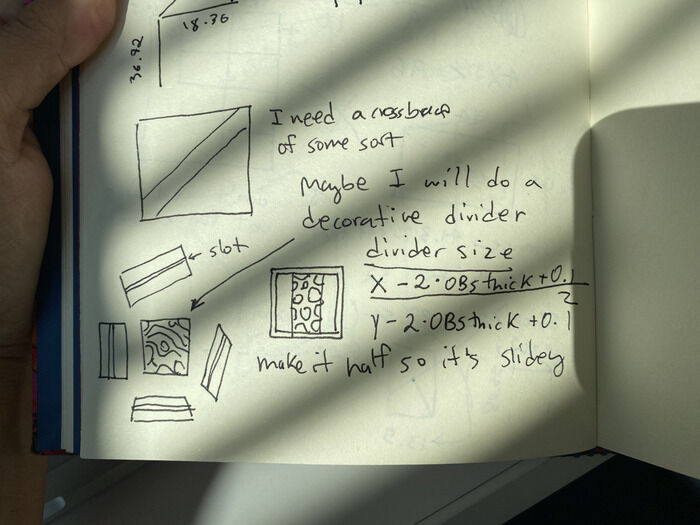
I did struggle with making my cross braces in a way that would work with the Finger Joint Add-in and would create the right projected shape for exporting as a .dxf. Ultimately what I did was:
- Make the rectangular faces of the cross brace that intersect with the edges of the box
- Use the
lofttool to join those faces into a 3D shape - Use the Finger Joint Add-in, selecting the cross plane and its intersecting box pieces as the bodies
- Use the
combinetool to cut out the area of intersection of the corss brace and the box piece. Set the box body as thetargetand the cross brace as thetool, withKeep Toolschecked on.
Because our cutting tool on the ShopBot is round, it can't really cut 90-degree internal corners like the ones in standard finger joints. I also used an add-in for it, the Nifty Dogbone Add-in. Unfortunately this one is paid so I'm on a trial of it.
Then to export, I did:
- Select a unique face of my design (I had a dado slab face, a slab without a dado joint, and the cross-brace shape)
- Create a sketch on that face
- Press
pfor theProjection Tooland select that face - Finish the sketch
- Now I can right click on the projected sketch I just made to
Export as DXF
I signed up for using the ShopBot on Sunday. I showed up with my files and Dave offered to take a look. He caught one of my mistakes, I forgot to add dogbones to the internal corners on my cross braces! After fixing that, I went over to the computer behind the ShopBot to try to speed up my toolpath making since the ShopBot computer was in use. I was able to replicate what Tom did during training to make my toolpaths with no issues.
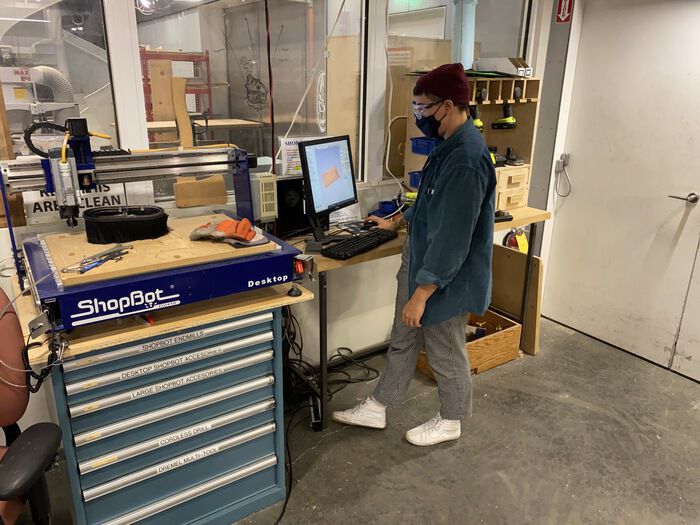
When it was my turn to cut, I tried to import my VCarve file to the ShopBot computer and got a incompatible version error... so much for saving time. But it wasn't a big deal to do the toolpathing again.
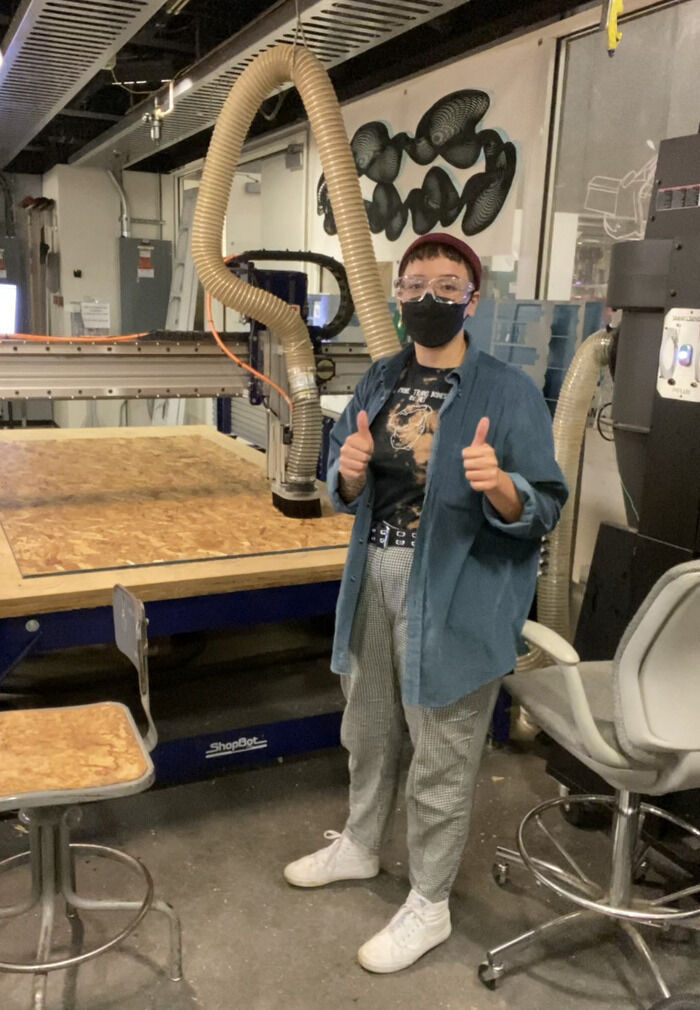
When the machine started cutting, I was sooo excited!
My excitement was short-lived however as I very quickly got a disconnection error.
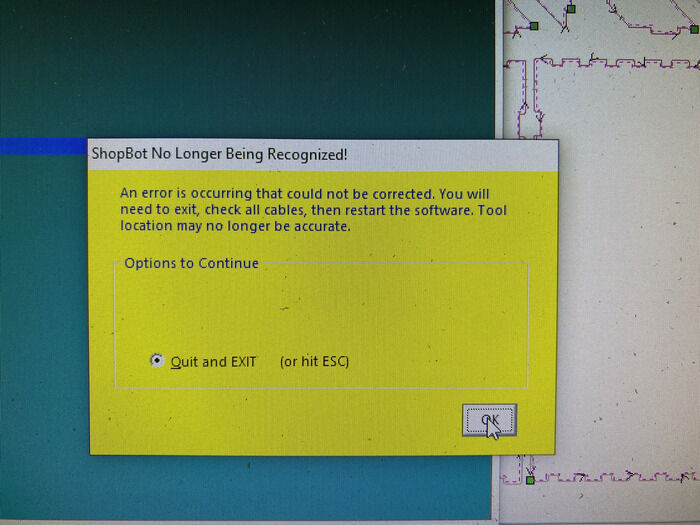
It seems this had happened to some people the day before so Miana showed me some intructions for starting the job from a specific line in the gcode. We had to do this many times though, it was super annoying that the error kept happening. At one point when I started the job from a specific line, the machine seemed to have lost its origin and started cutting through an already cut part. I had to hit the emergency stop button to save my board since we only get 1. This is also when Dave showed up again and suggested that the dust collector might have been what was causing the connection error (due to static interference? or something like that).
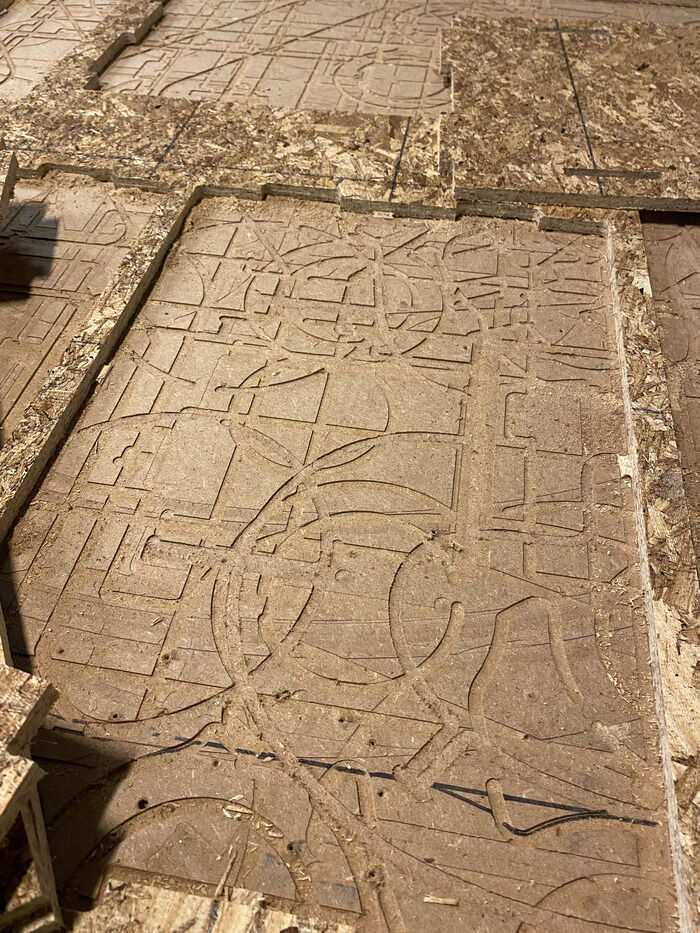
Side note: I became obsessed with the patterns left behind on the spoil board. It's like a history of everyone's projects. I found it so beautiful and intriguing. Justin taught me the word 'palimpset: something reused or altered but still bearing visible traces of its earlier forms'.
I was able to fit my braces and my voronoi element on the spaces that were left on my sheet though, which was good. We ran the job again without the dust collector and everything went great! I just had to find someone else's scrap piece to cut my last panel. It was during this that I realized I had made another mistake: instead of exporting the side panel as my non-dado slab, I exported the non-dado side of the top panel! So my finger joints on all my slabs were the exact same which of course means that they wouldn't slot together. Thankfully, I found a piece of scrap juuuust big enough to cut my two actual side panels. I did place my design just a tad too far into the board and ended up having a hole in the corner but that's ok, I'll call it the hole for the power cable and now the bug is a feature.
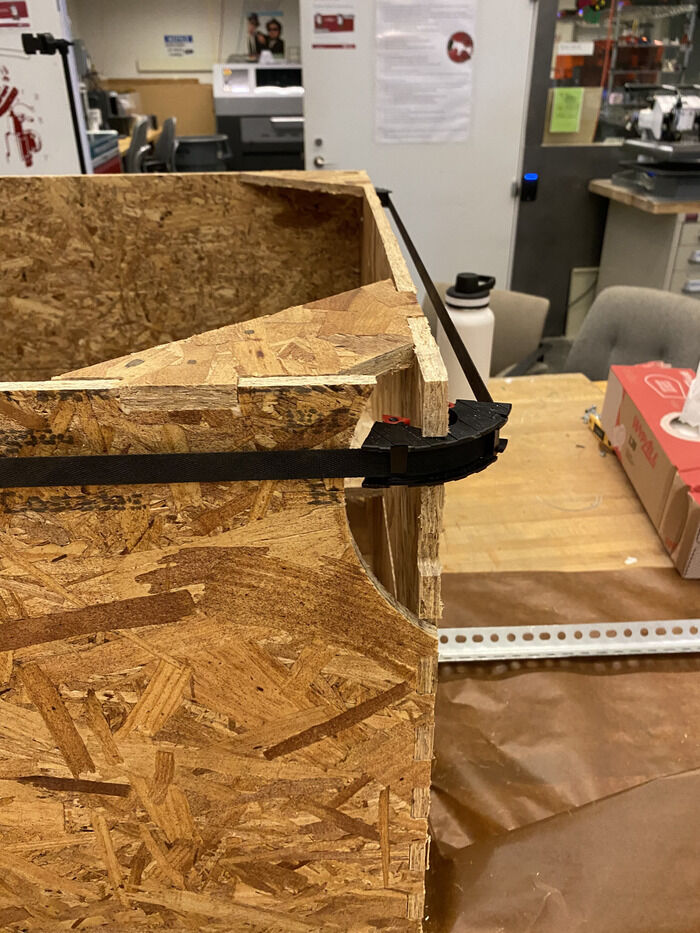
The next day, Monday, I came in to assemble which was pretty straight forward. Use glue and clamp everything down. Alfonso gave me some advice about the voronoi panel in the middle, which was basically to not clamp it because it was buckling and to put some support underneath it.
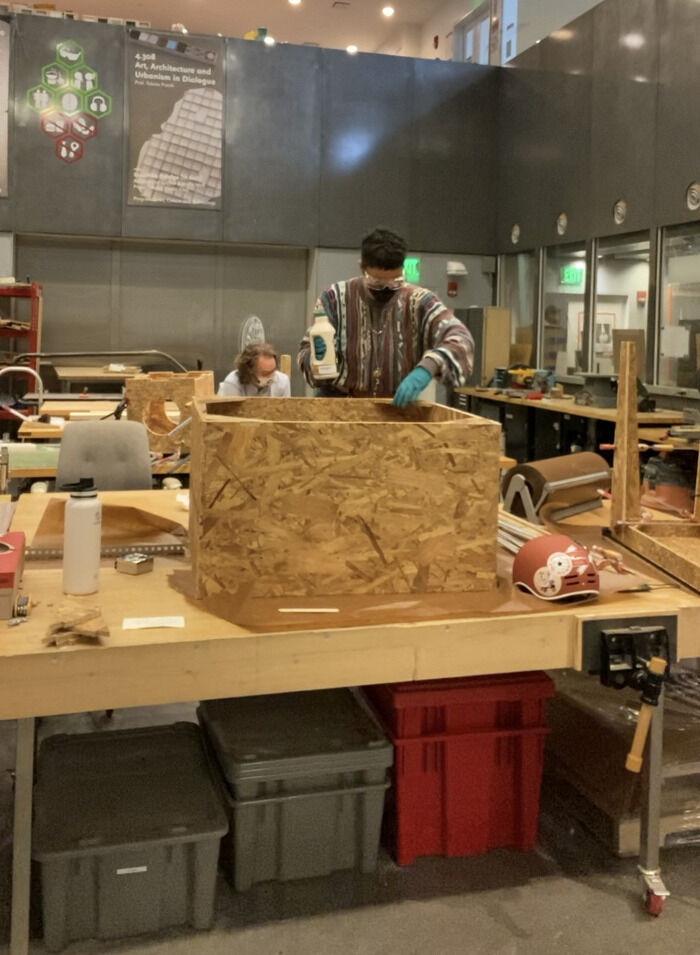
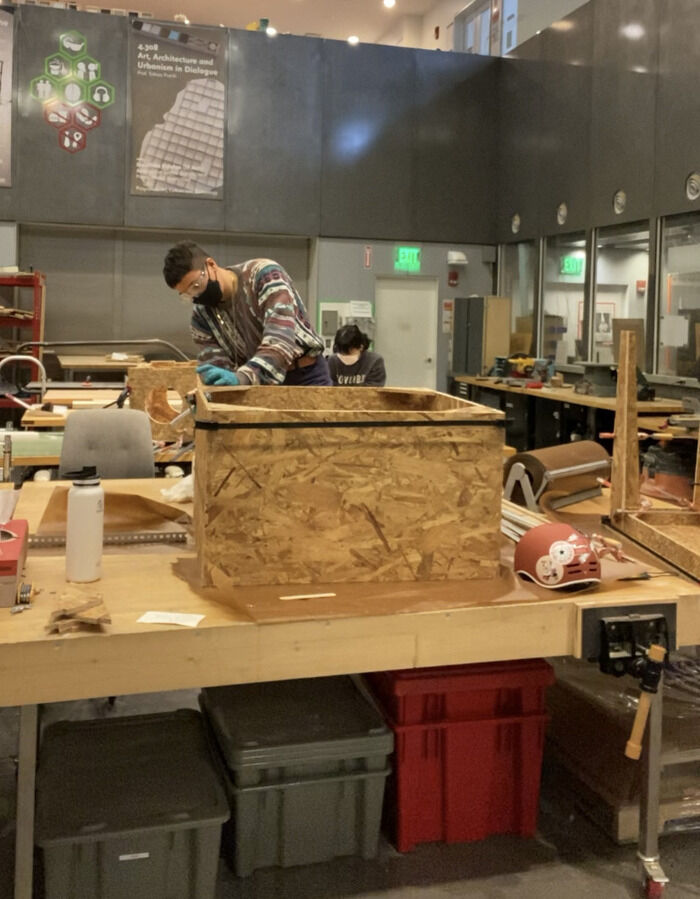

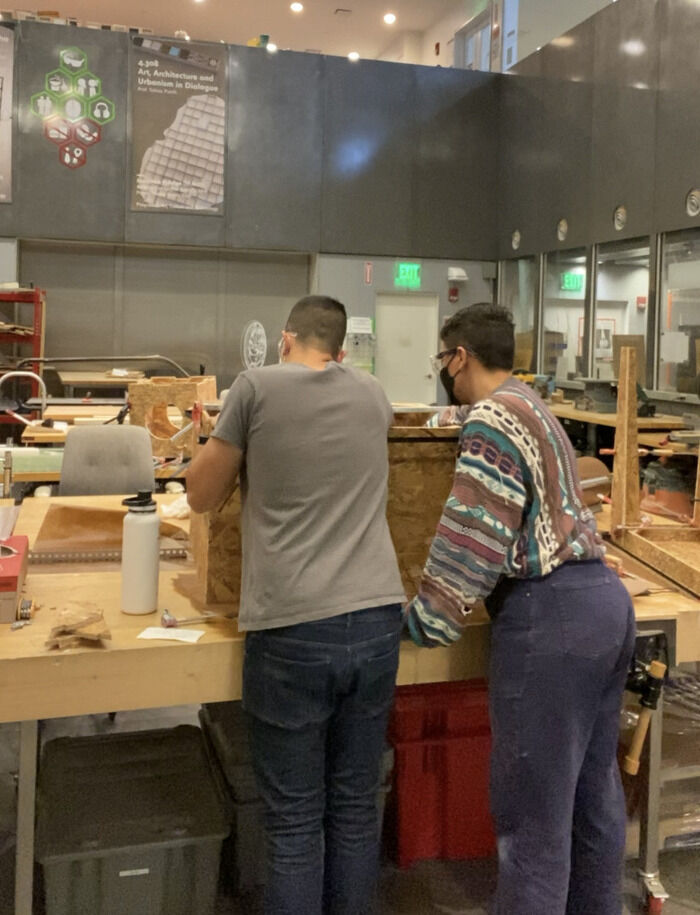

I did clamp both sides even though the pictrues only show one.
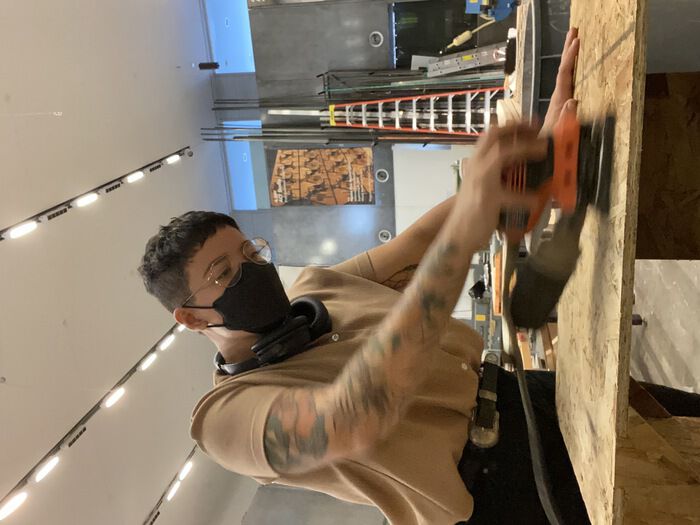
On Tuesday I came in for some finishing touches. First, I sanded the outside of my cart mostly so I could stop getting splinters every time I touched it. I brought my own sander for home because I wasn't feeling comfortable with the shops' nice orbital sanders. That ended up being good because I loaned my sander to Manu and Joanne!
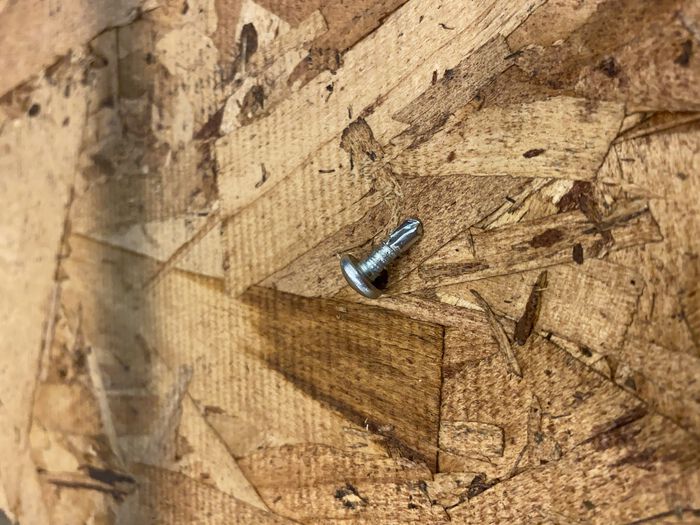
Joanne then helped me apply a piece of white vynil to the top of my cart. I had bought some caster wheels and self-drilling screws the night before so I attached those as well and my cart was done! I figured self-drilling screws would be helpful with something like OSB.
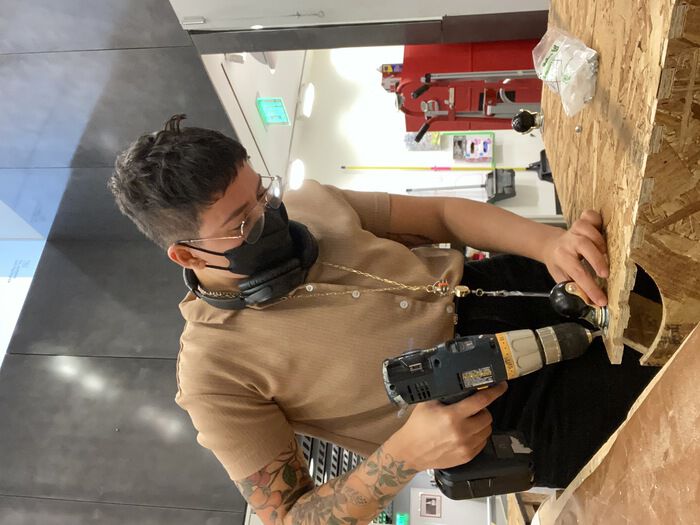
I took two steps out of the CBA shop, went too quicly over an electrical cable, and my wheel went flying off... I guess there's not much in the OSB for the screws to hold on to.
But anyway, I reattached the wheel, brought my cart over to my lab because it has better lighting for photographing, and was just glad to be done!