Computer Controlled Machining
Ideation & Design
The problem
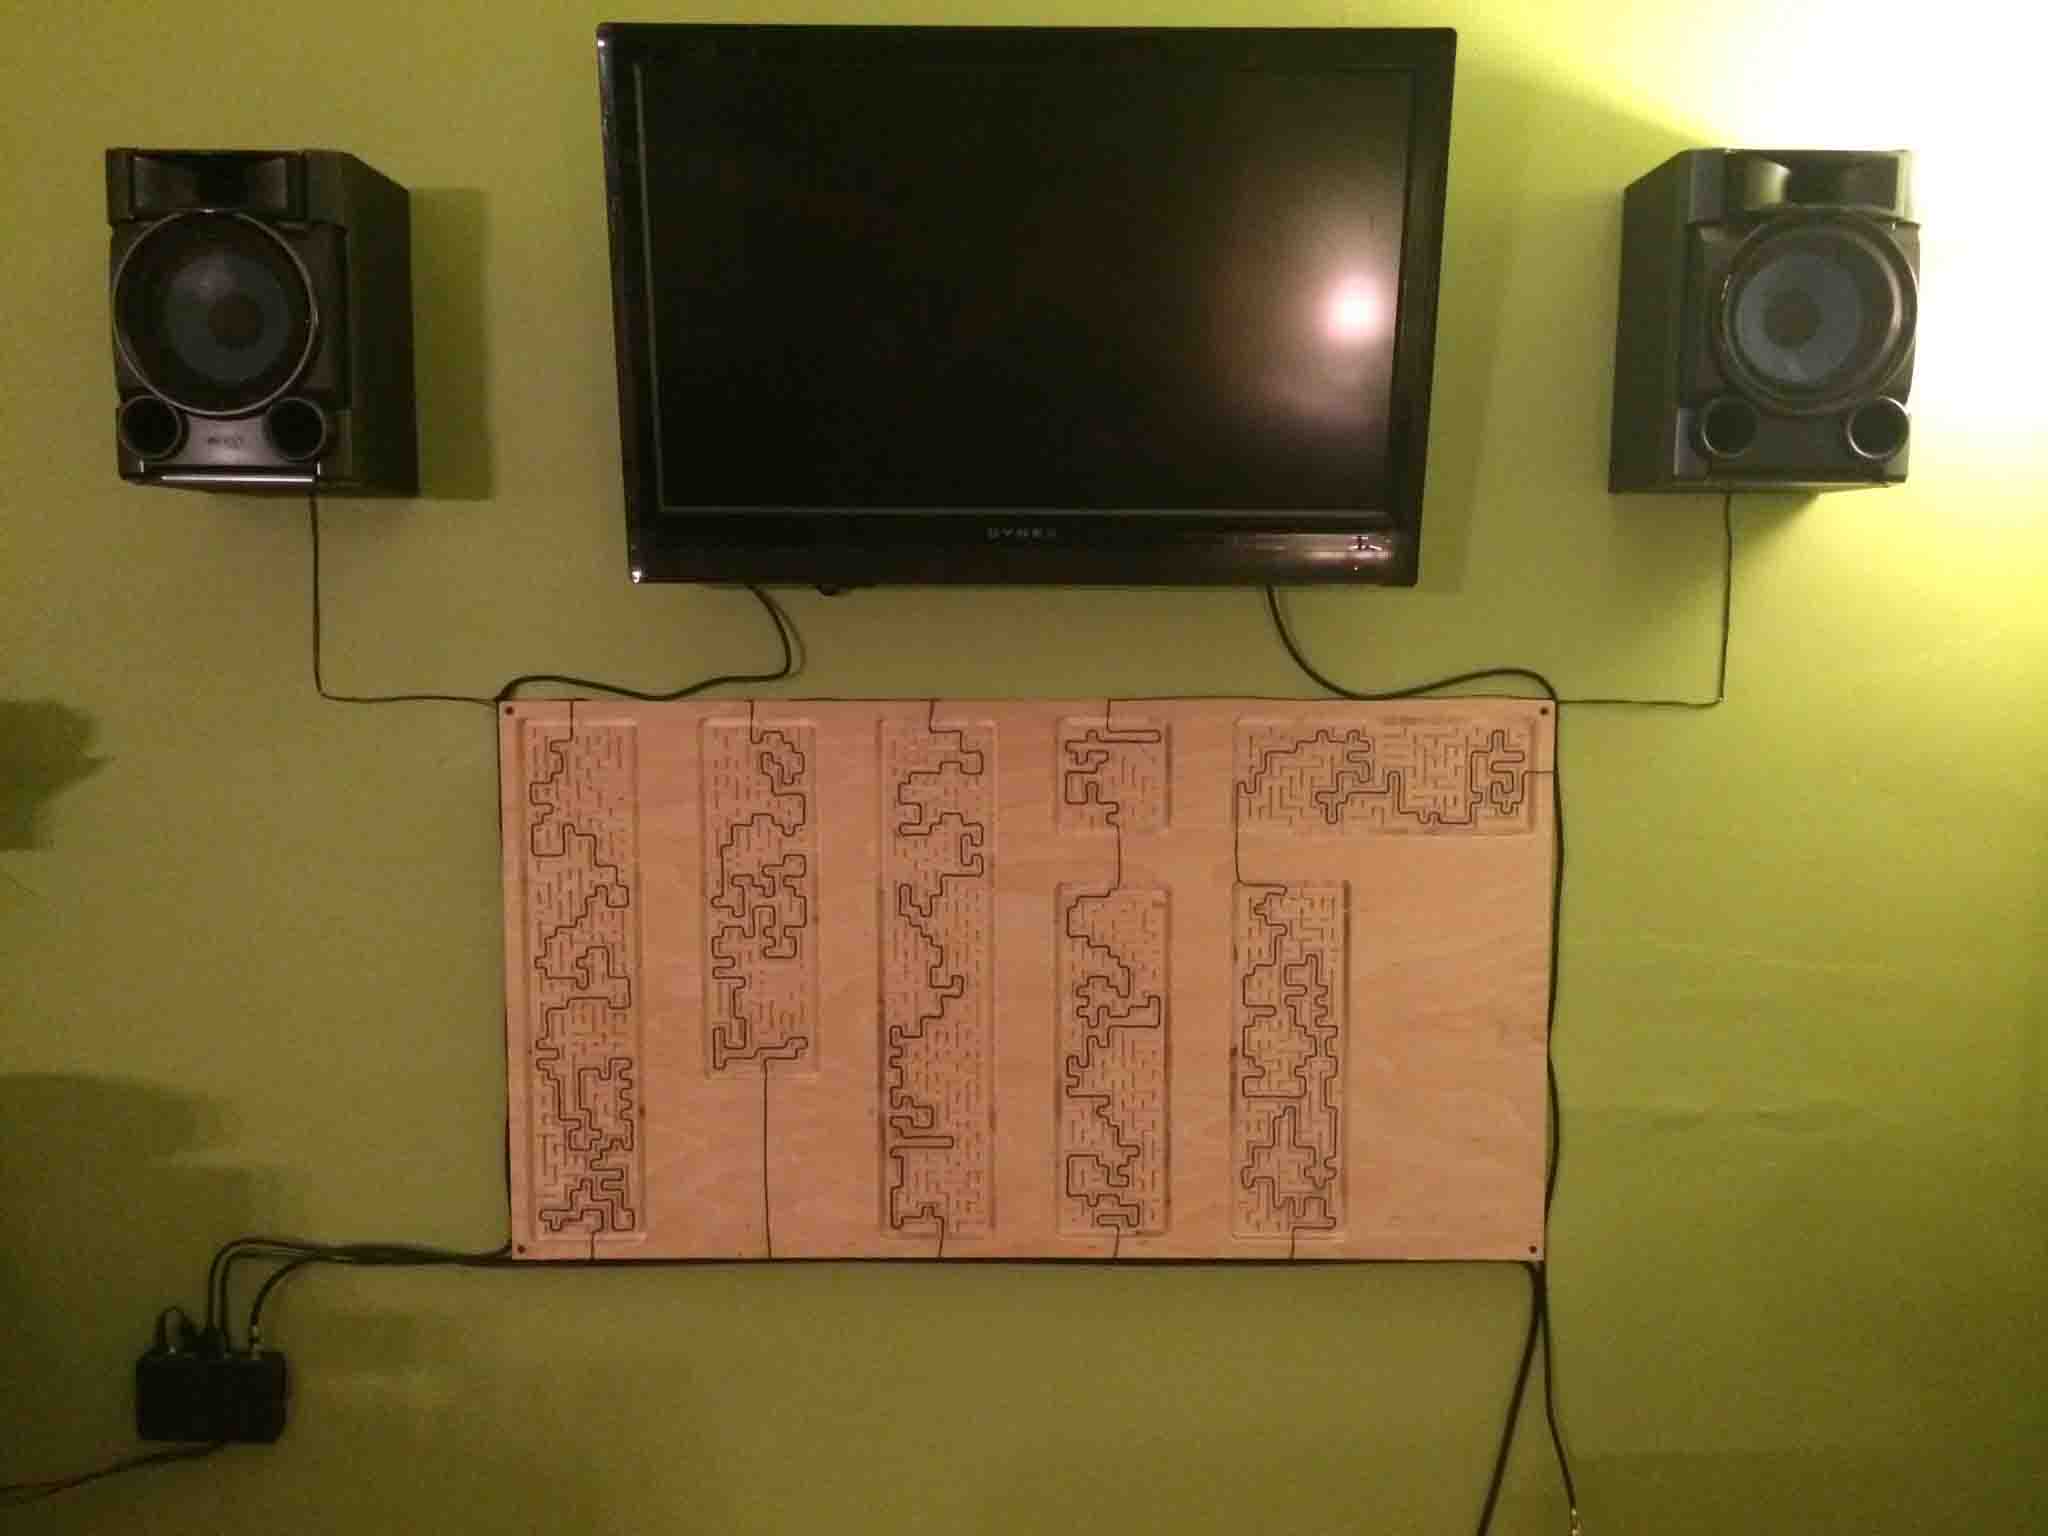
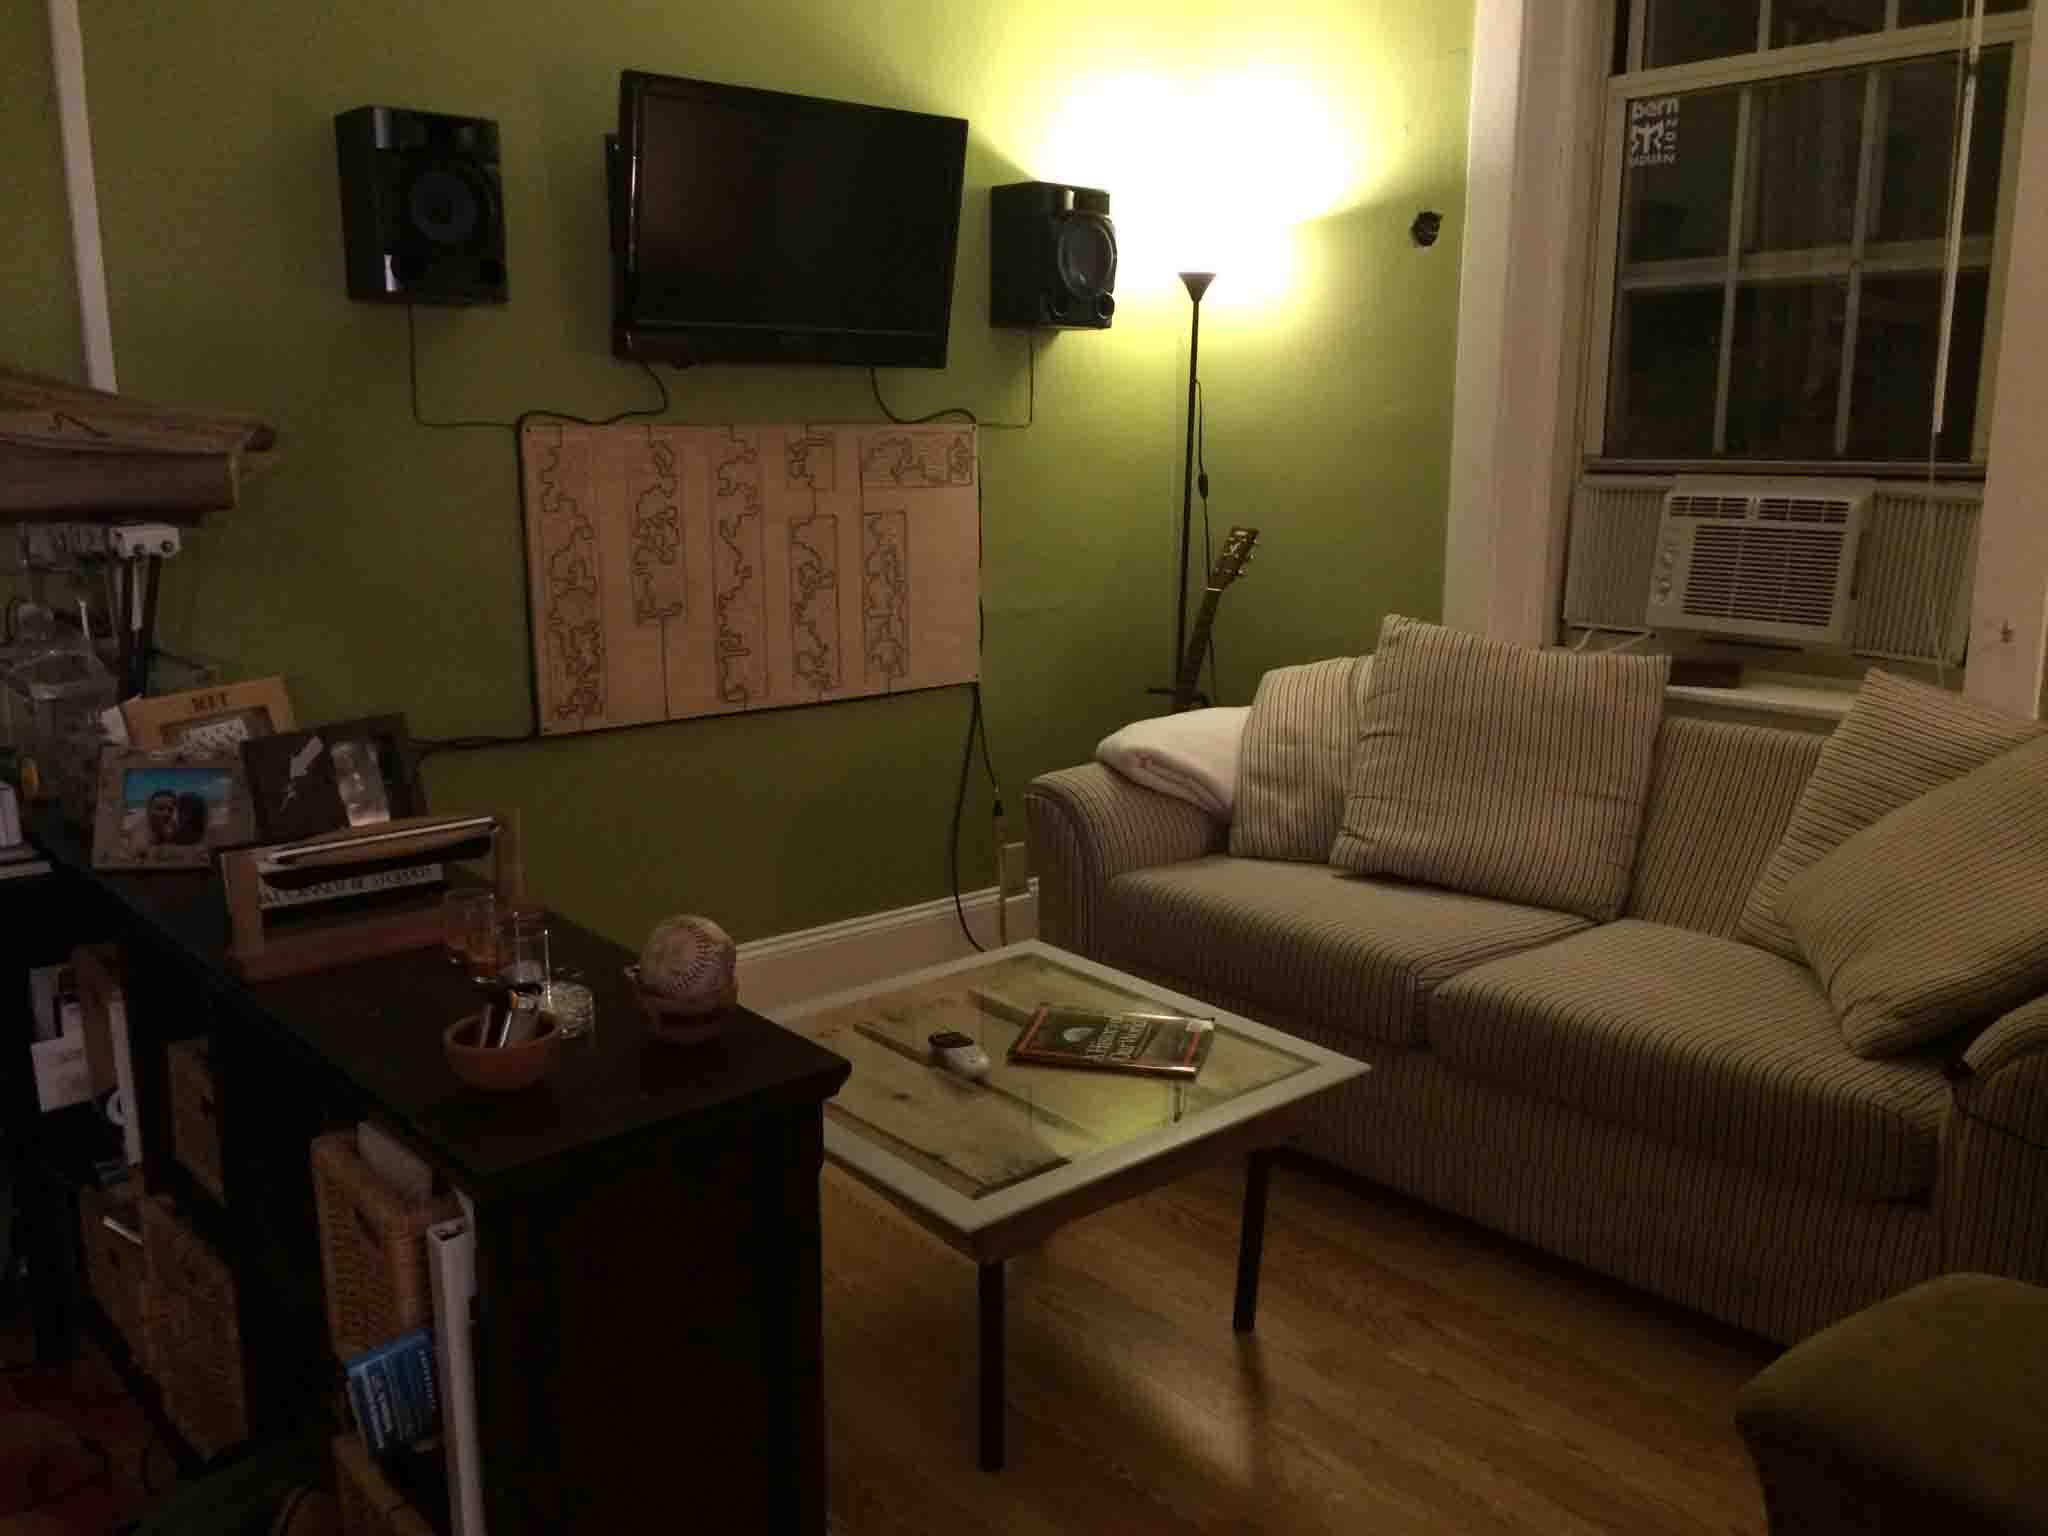
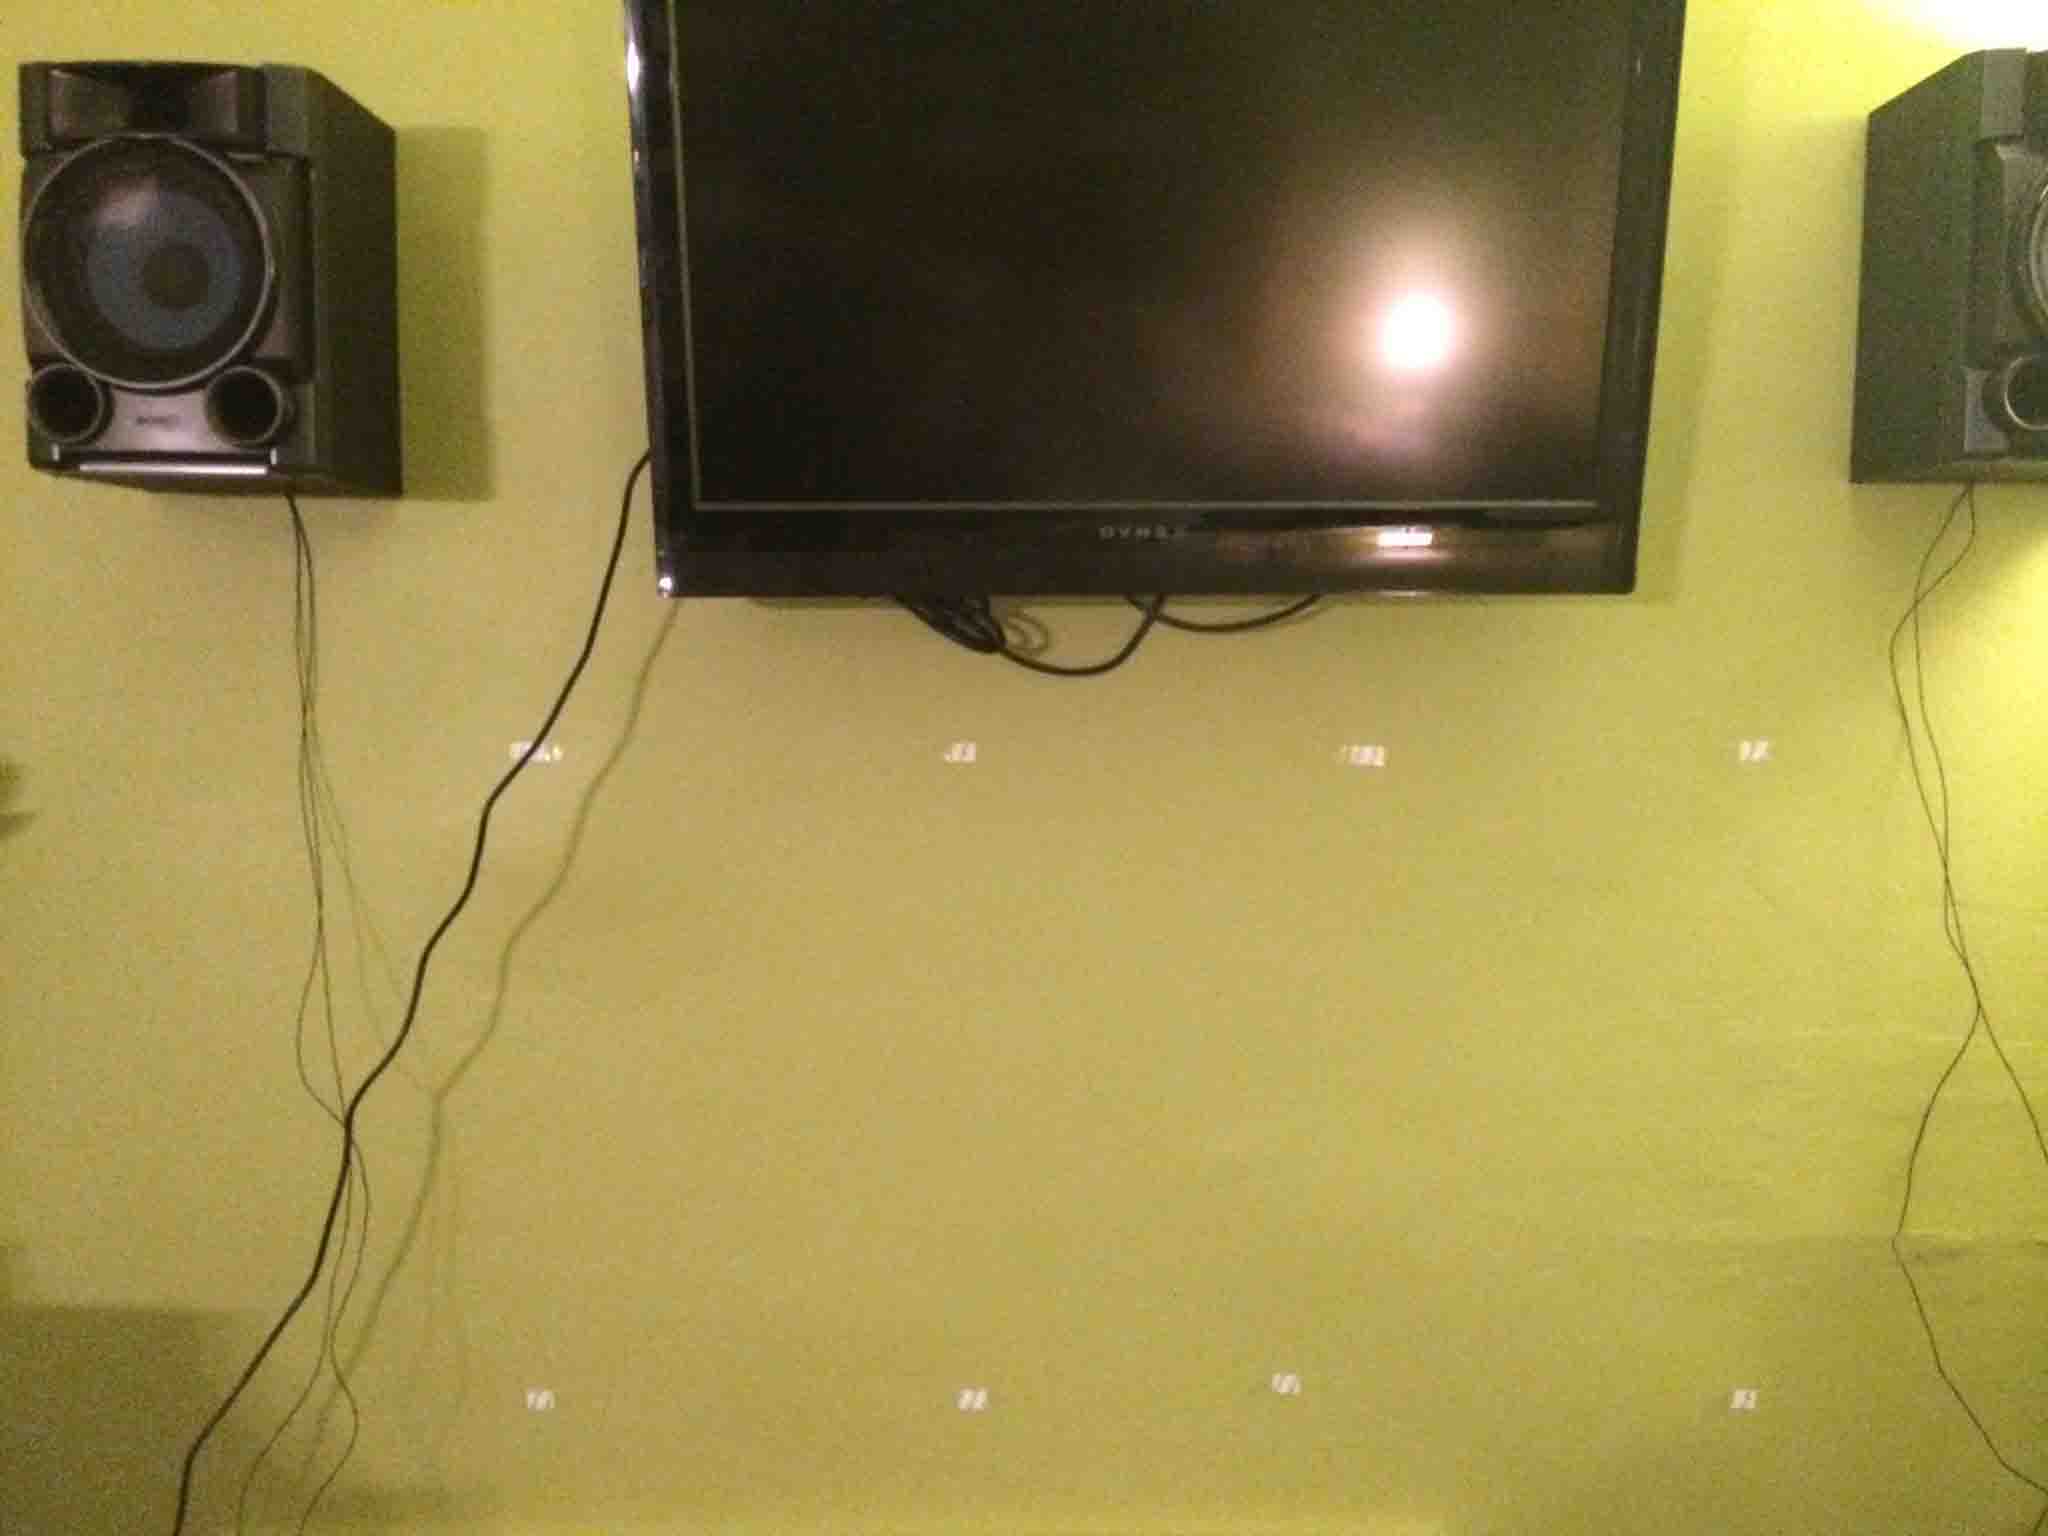
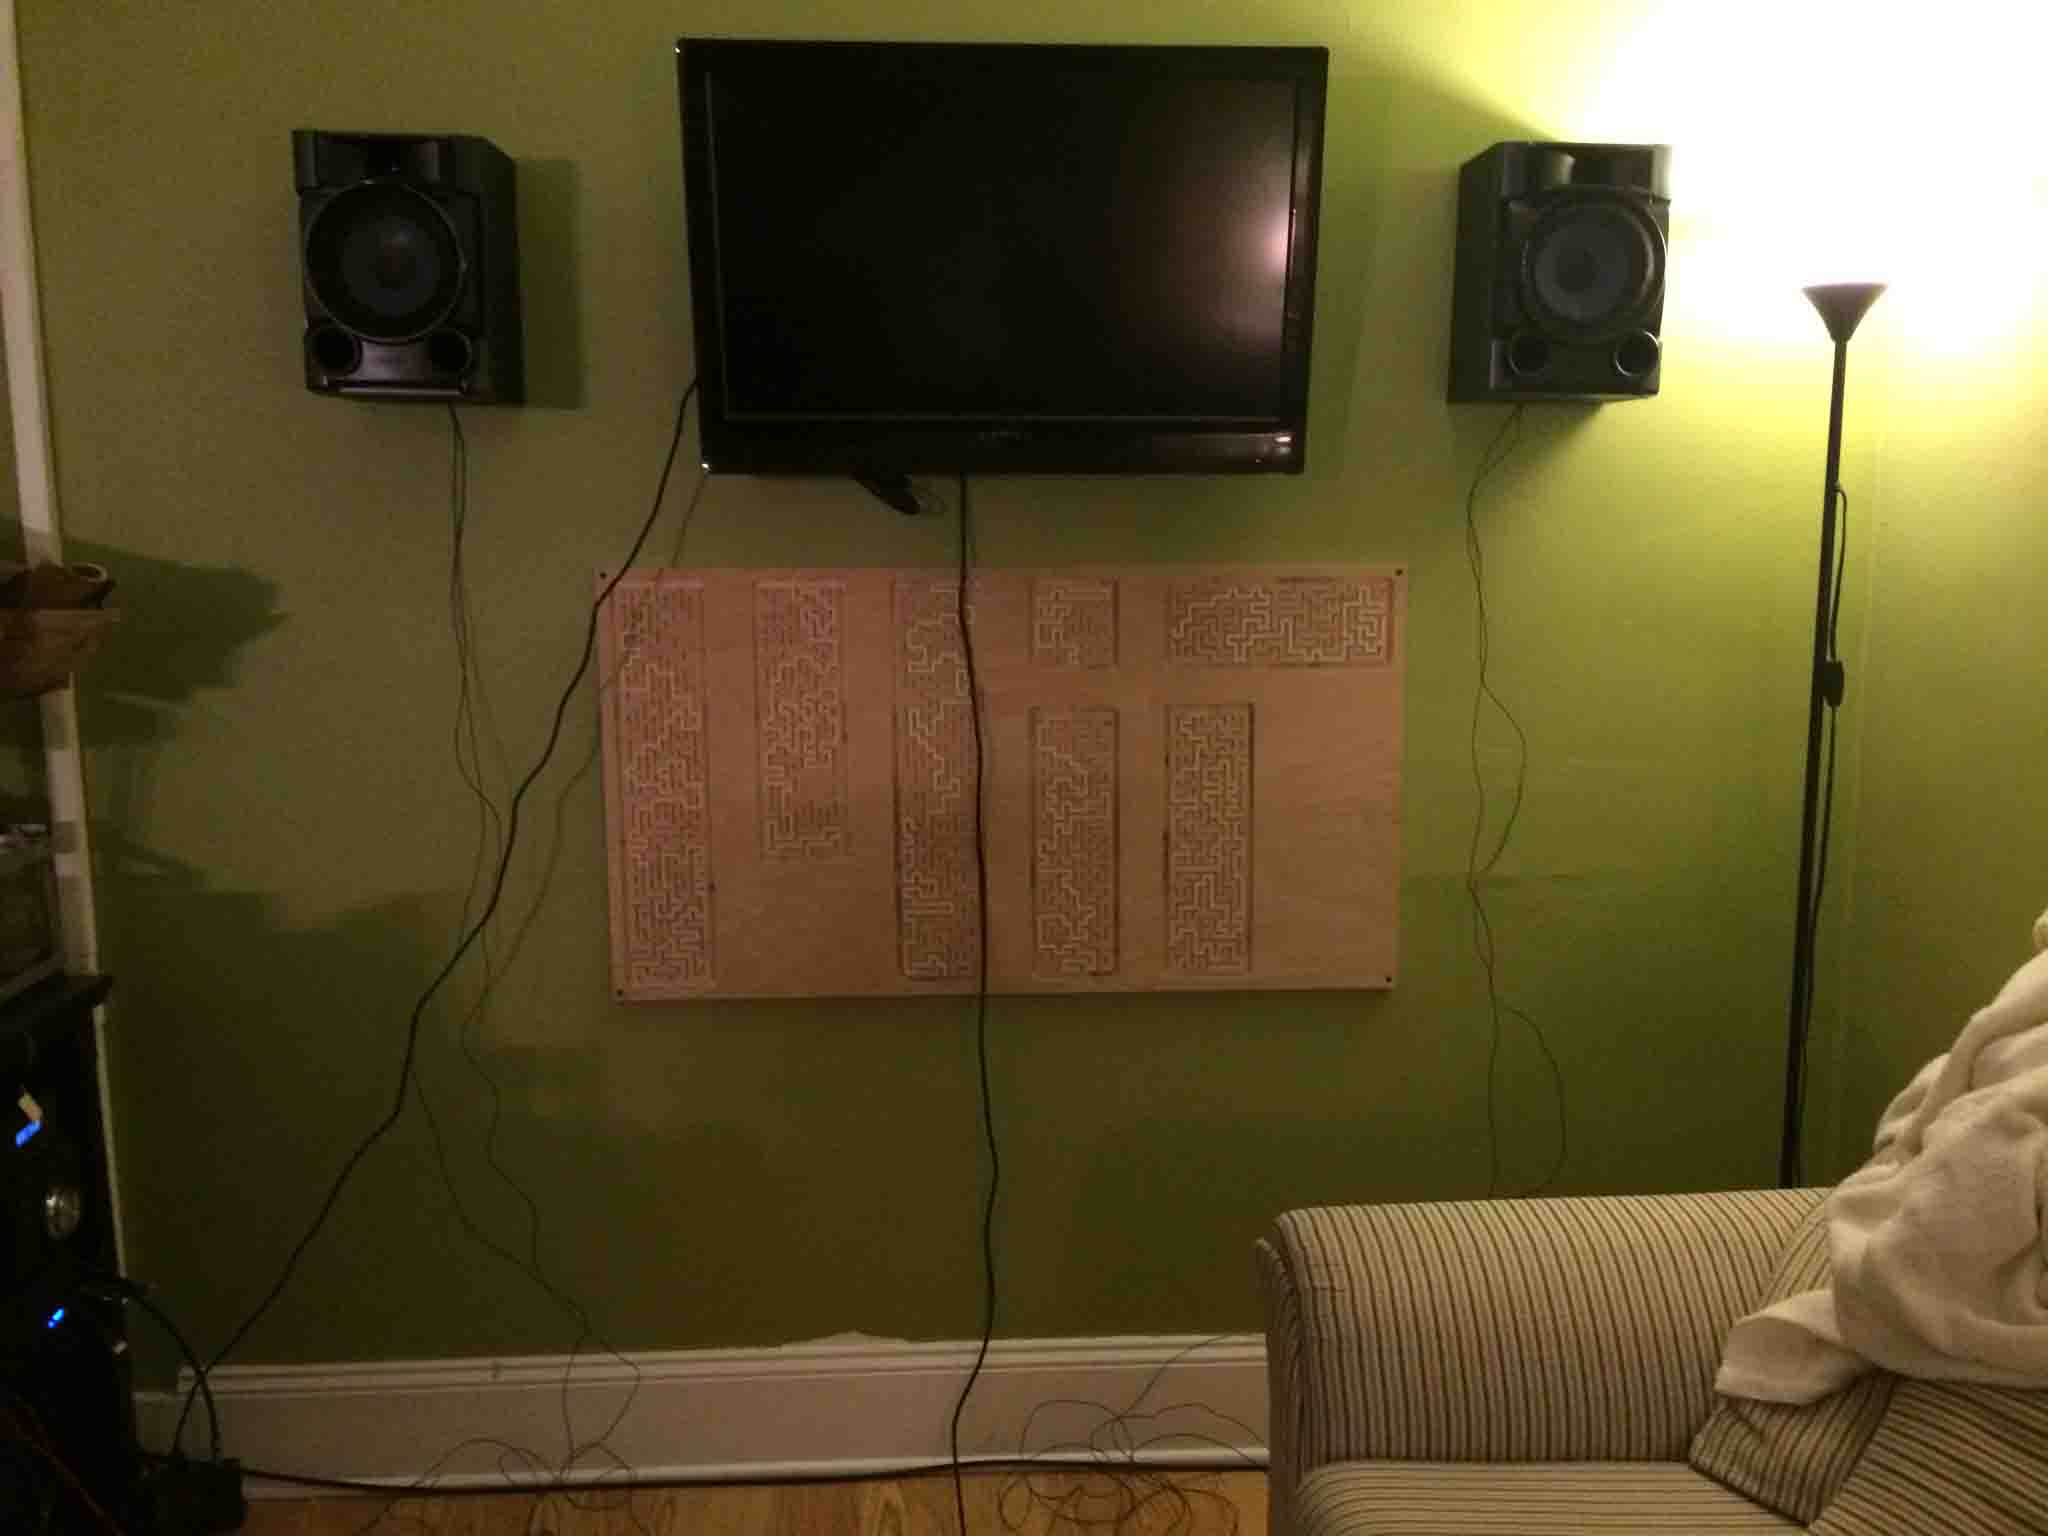
My boyfriend Morris Vanegas and I have a great new living room with a wall-mounted TV, but, as wall mounts tend to be, it left the wires dangling underneath and it looked too messy.
We knew that we wanted to work together this week to put our skills to practical use and make something that could help us disguise the wires as art. We resolved that we wanted to CNC some wood to mount against the wall, and overlay the wires onto that wood to complete the picture underneath. Our first sketches were inspired from some skyline wall art we had seen before.
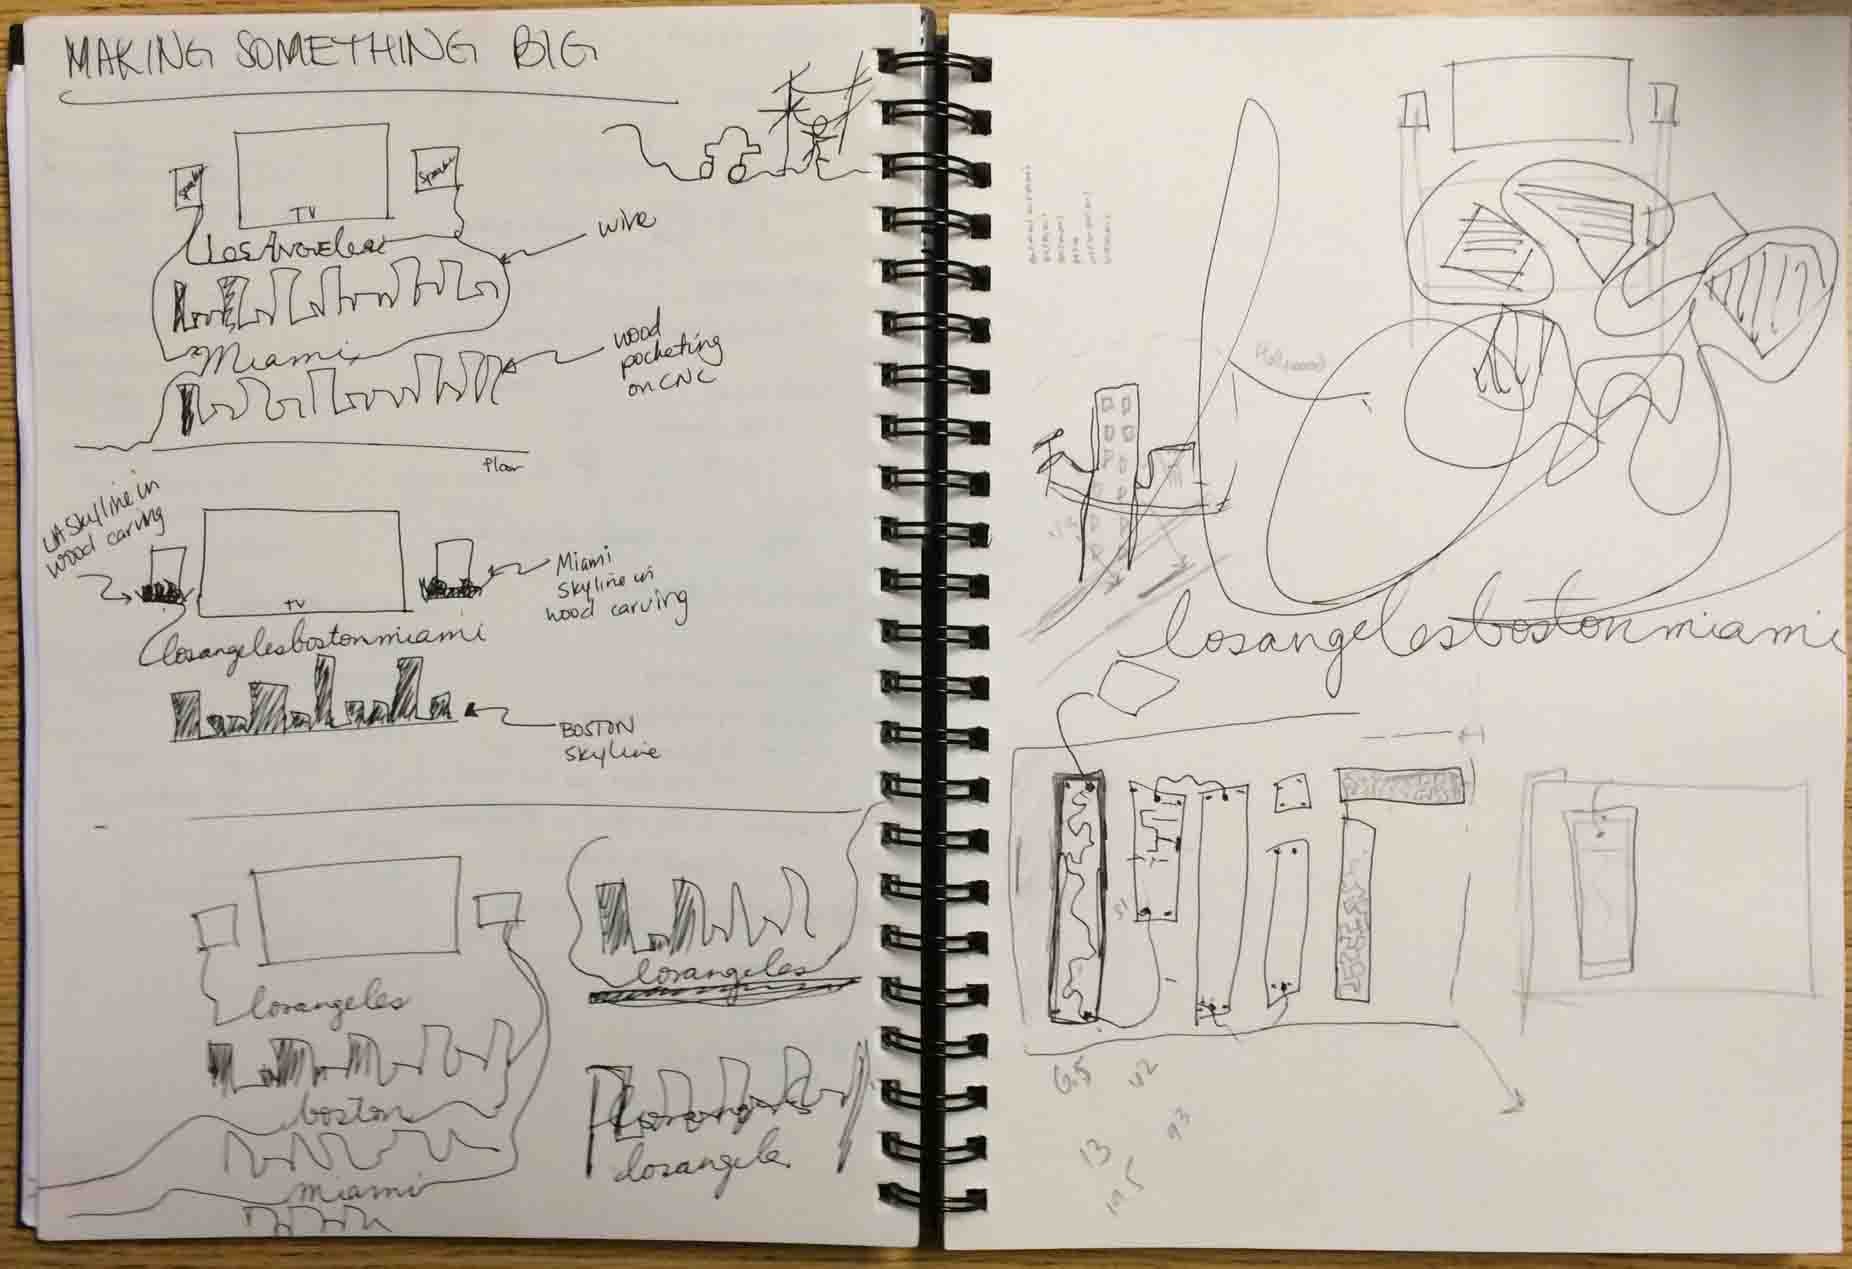
After contemplating what skyline(s) to use (he's from L.A., I'm from Miami, we are from Boston...), we settled on Boston but couldn't find a black and white online image we liked. Realizing the sun was just setting, we quickly ran over the bridge to snap some of our own skyline shots:
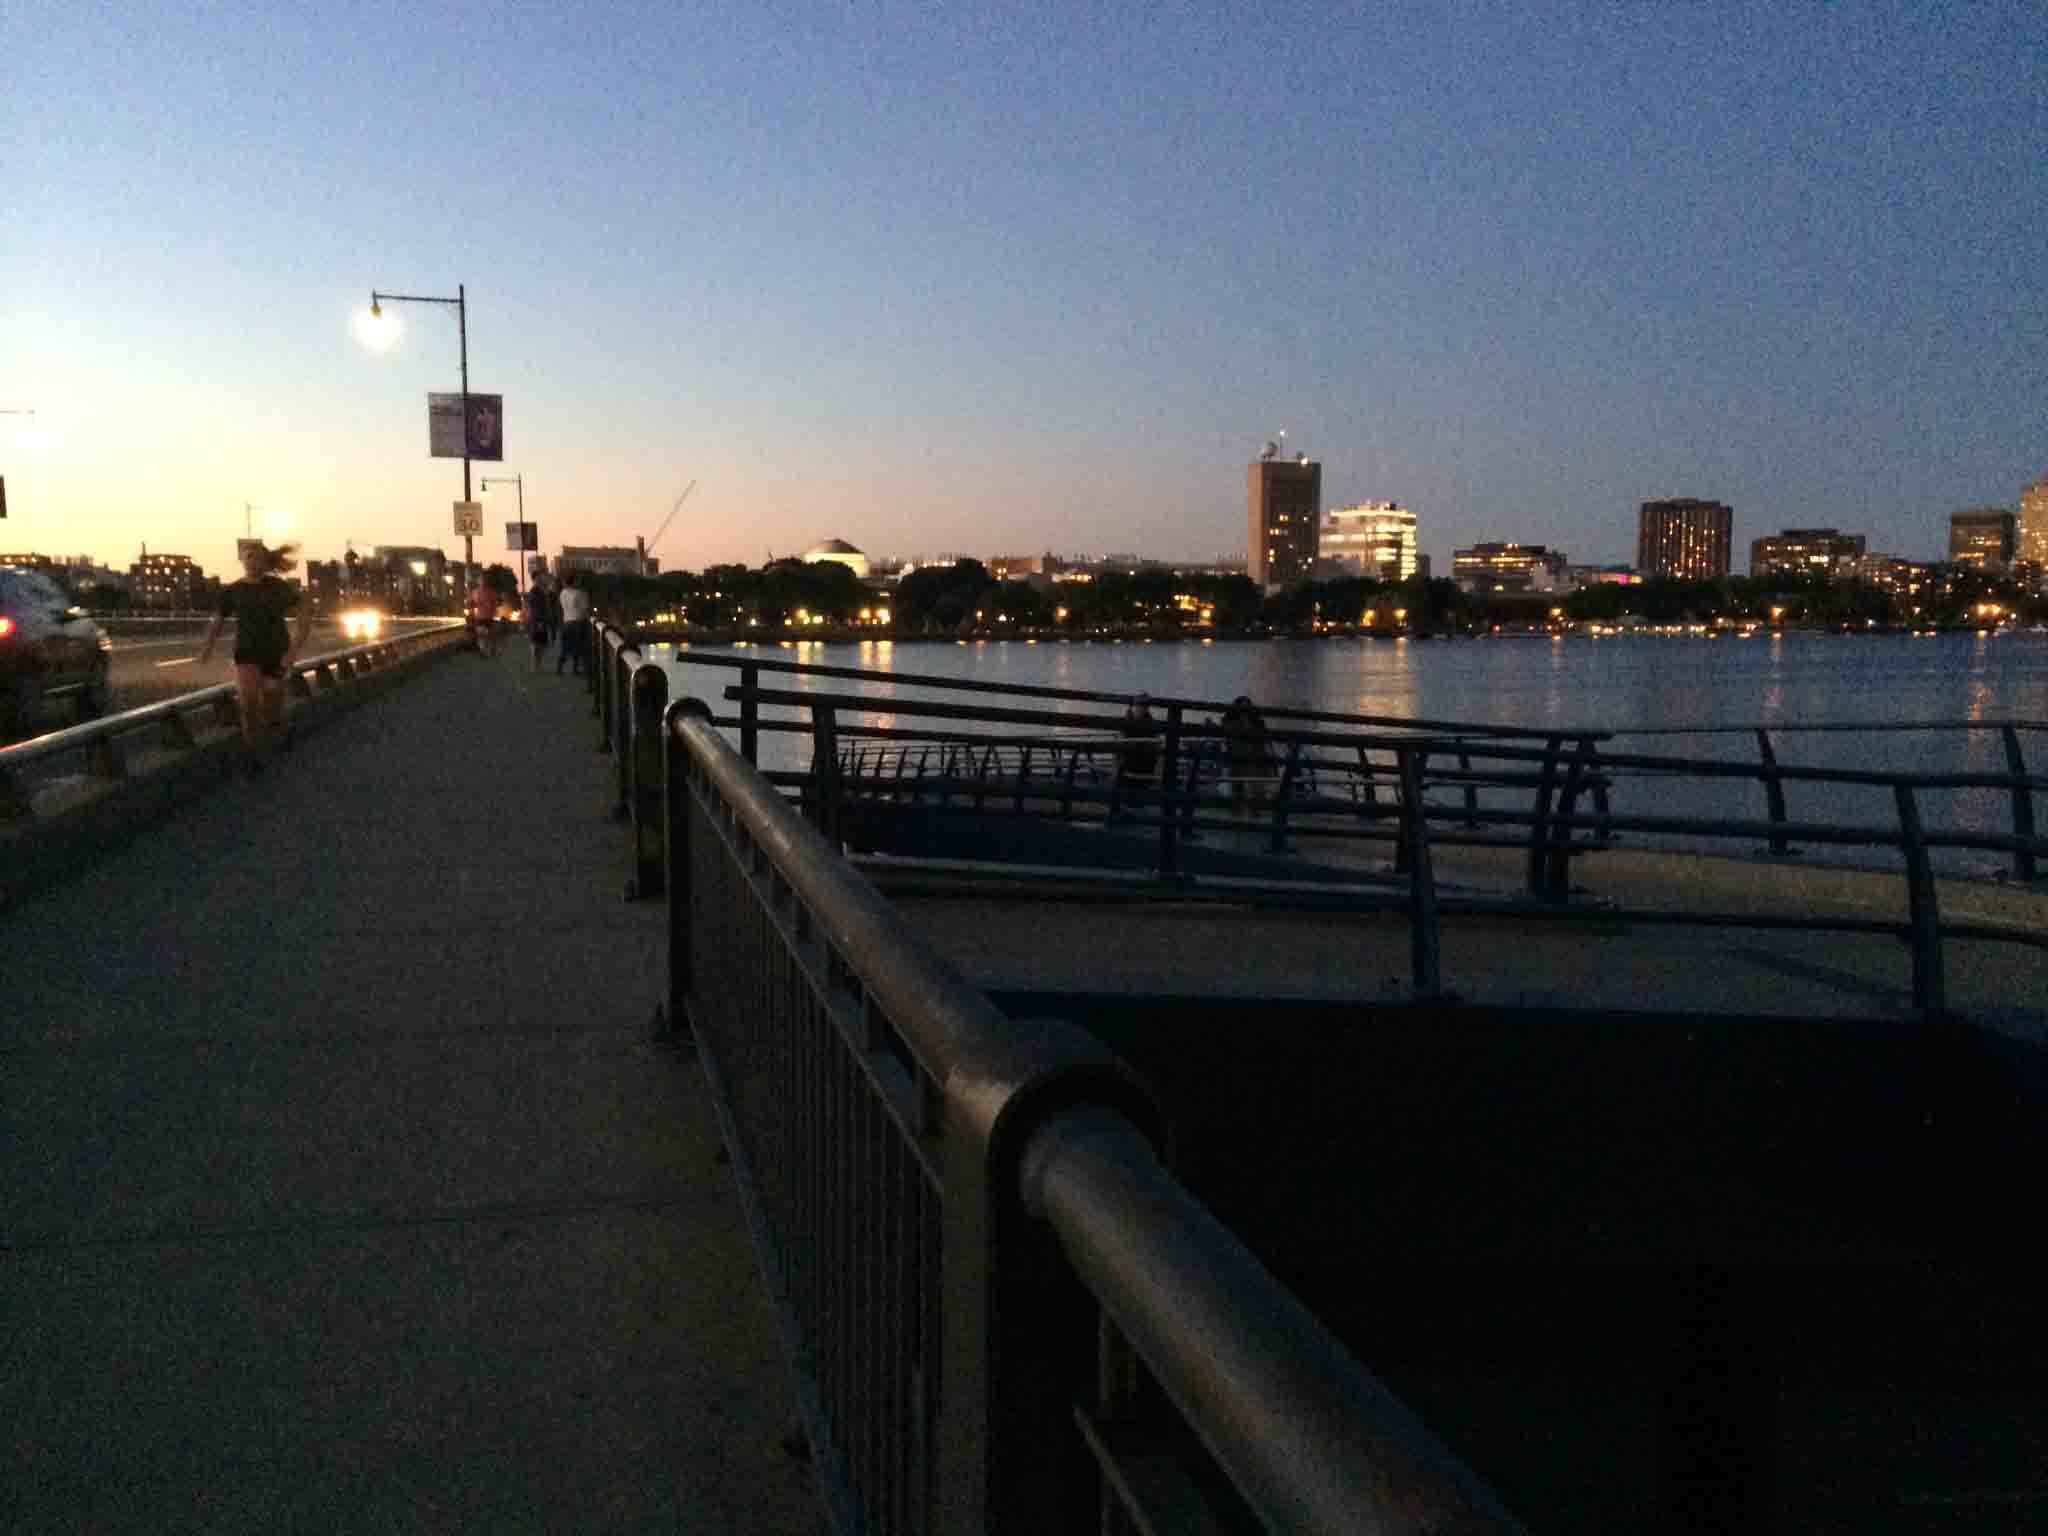
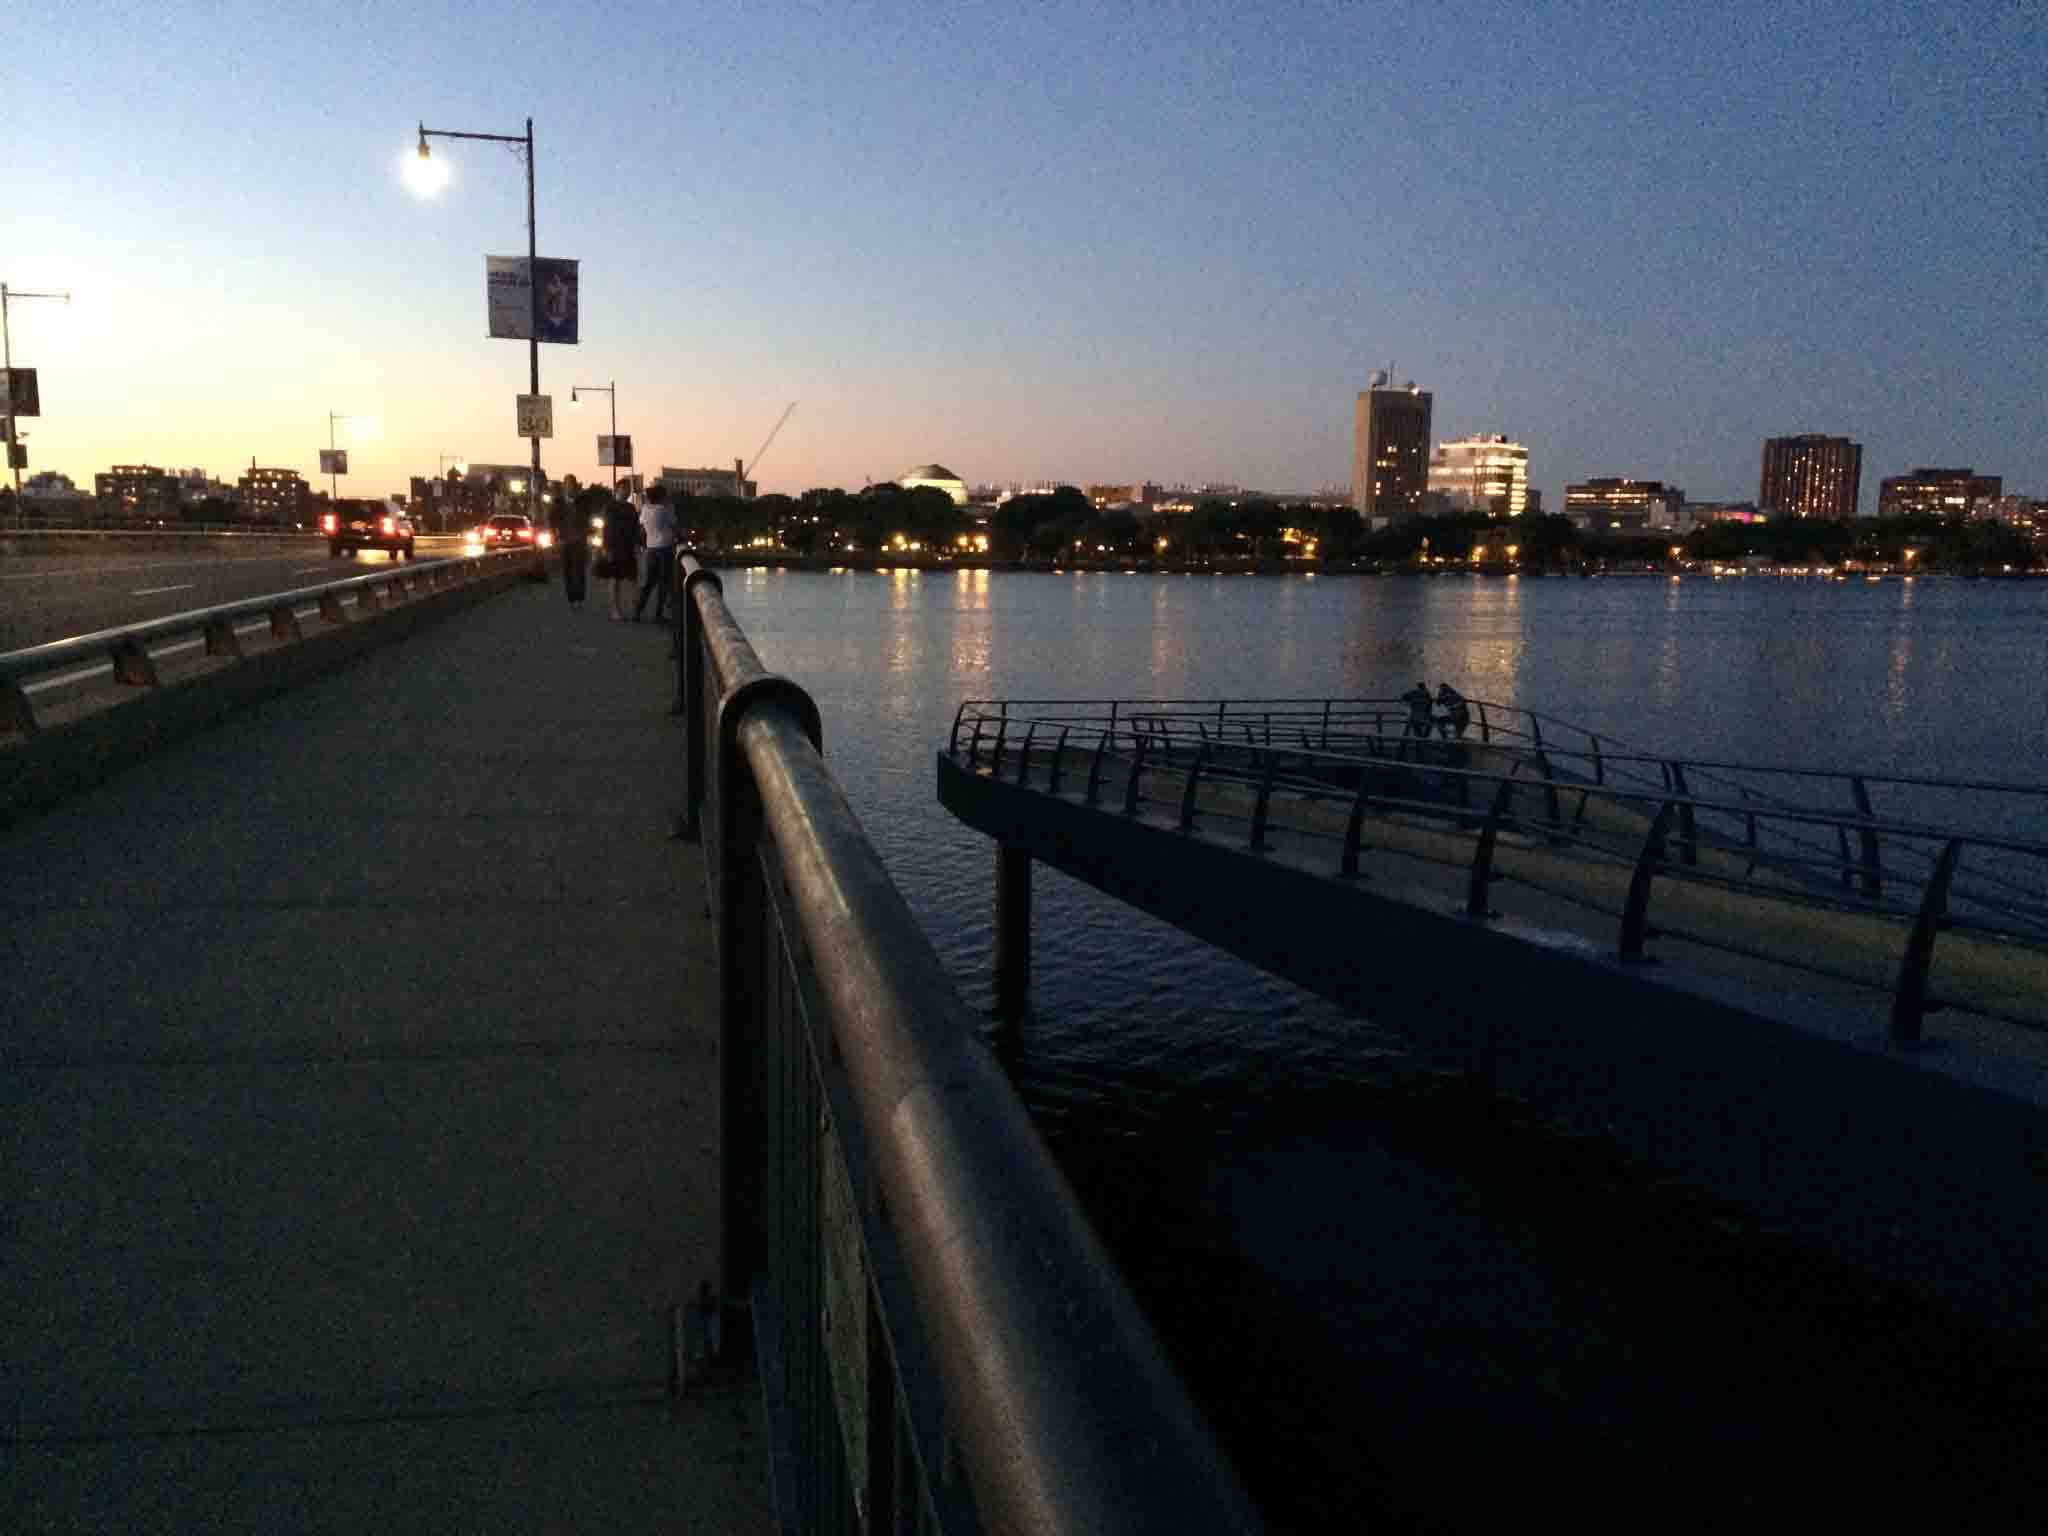
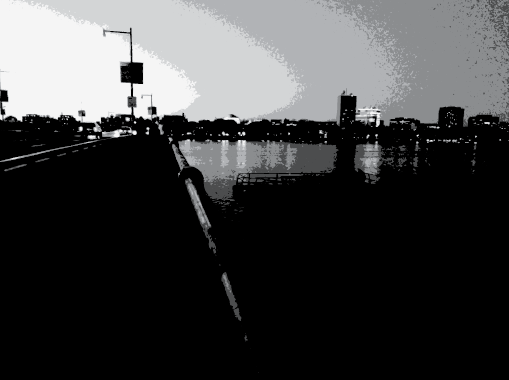
The shots were great, but our Photoshop/Inkscape powers were not up to par. We wanted to combine the skyline of the left picture with the bridge detail of the right picture (for the wires to overlay on top of the wood). First, we tried to Live Trace and Expand the picture so that we could make a black and white image that the CNC machine could raster onto the plywood, but there was not enough contrast in the photo. Second we tried to the Effects -> Pixellate tool with the idea that the wire could trace the blue outlines of each pixel and the CNC could raster each color at a different depth in the wood, but ulitmately were not satisfied.
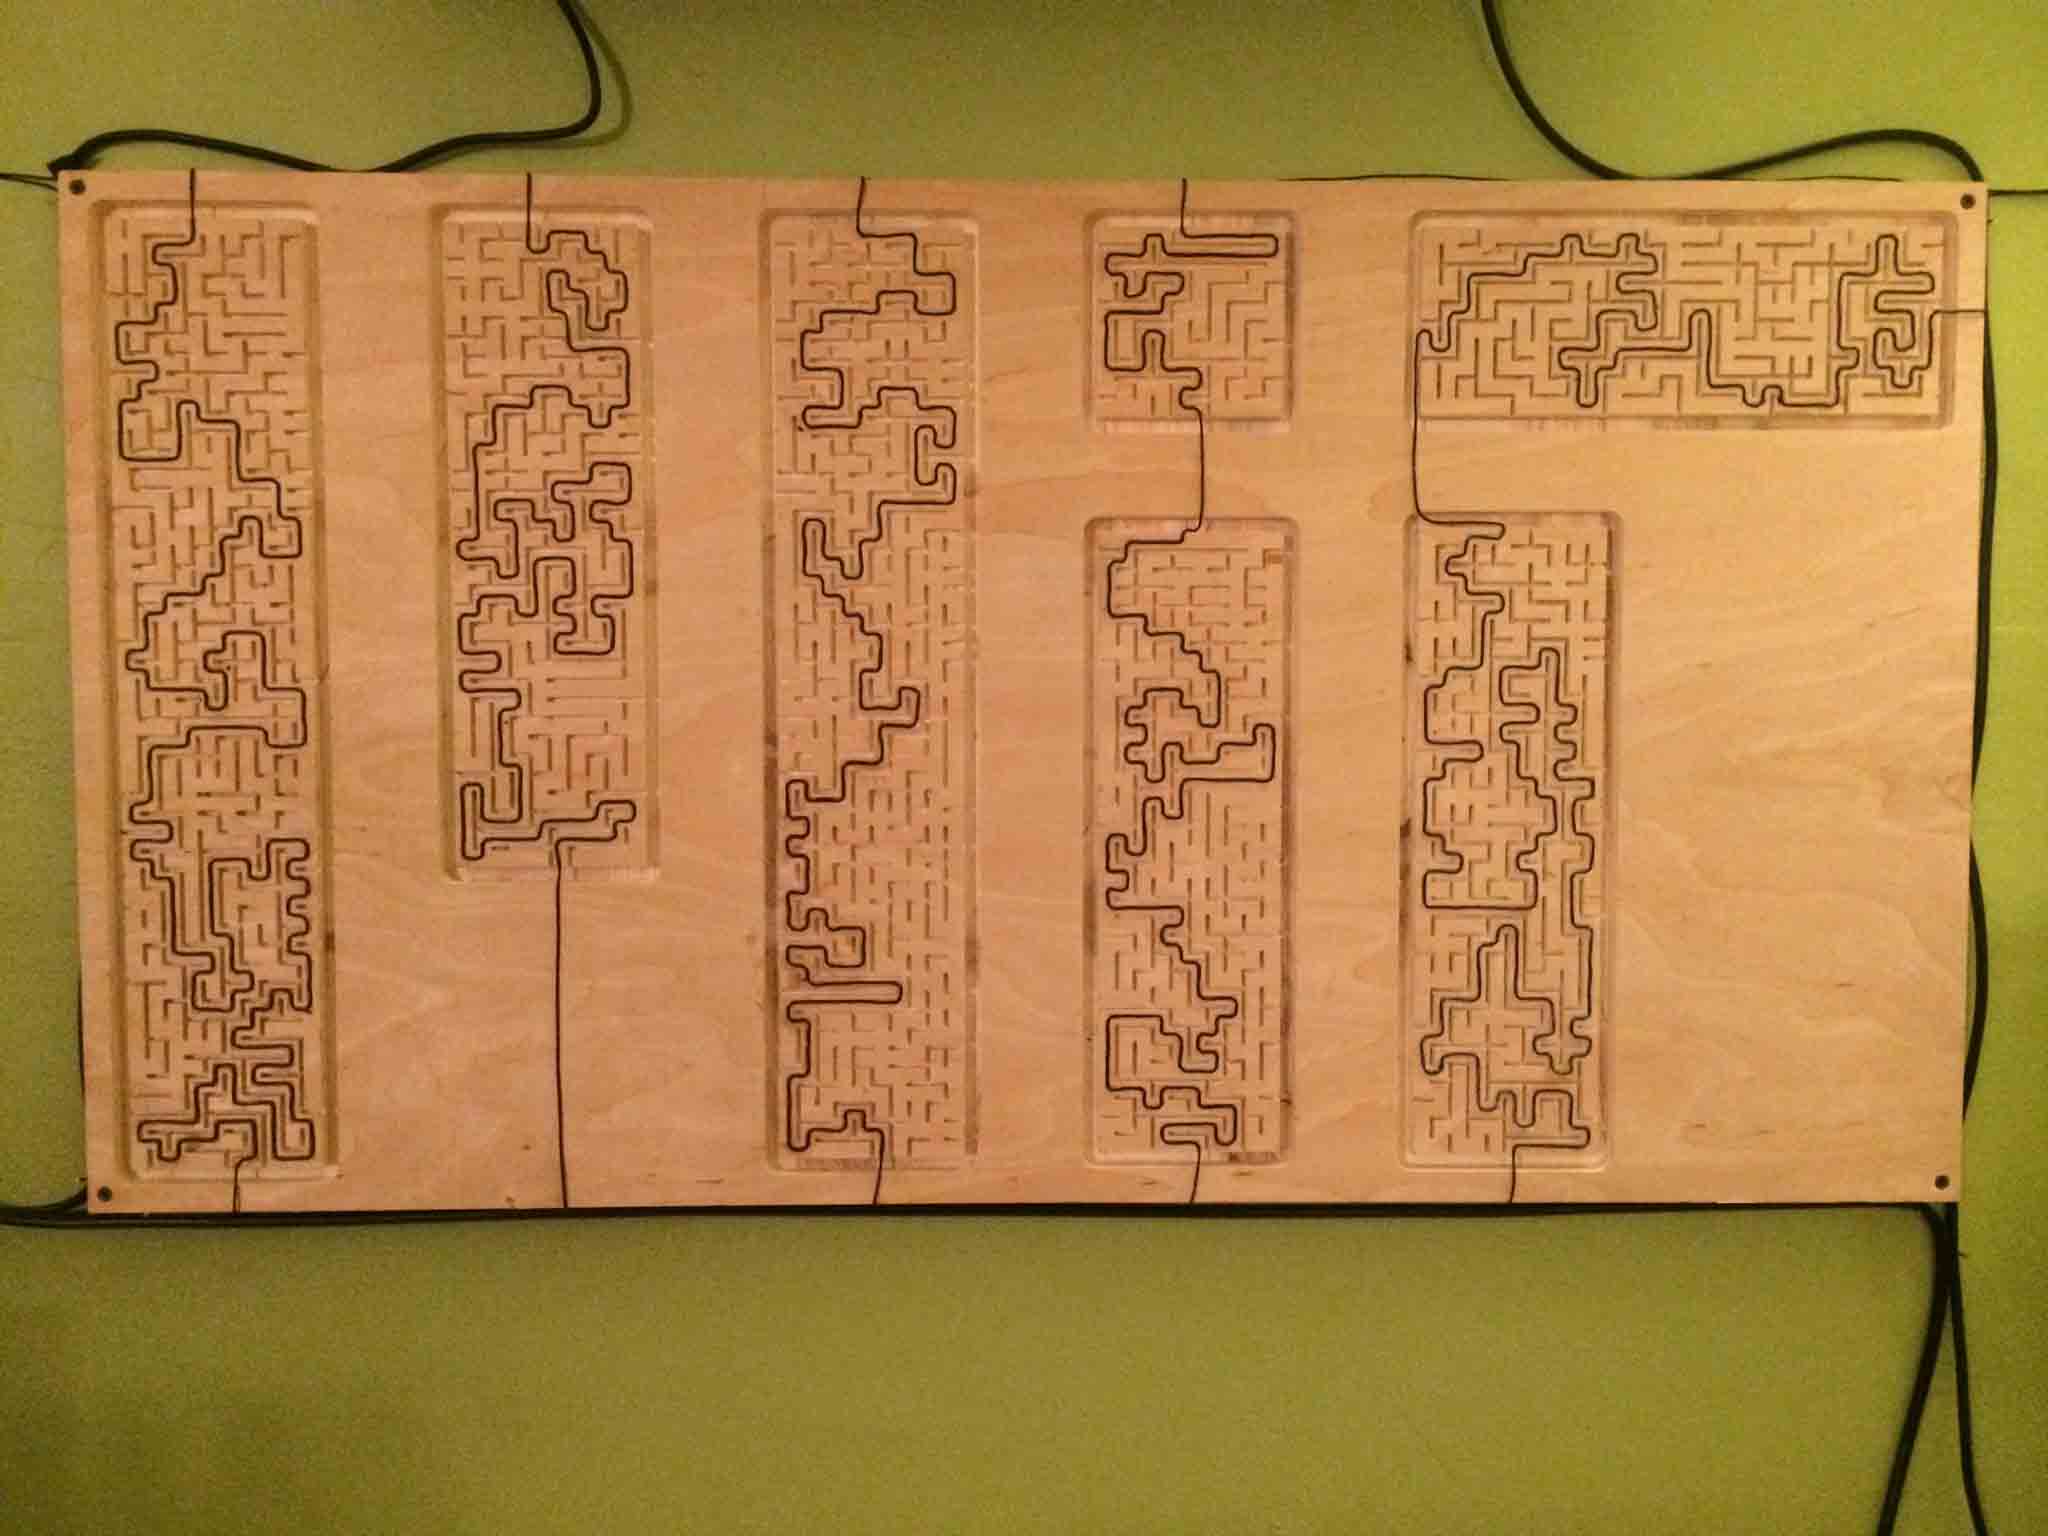
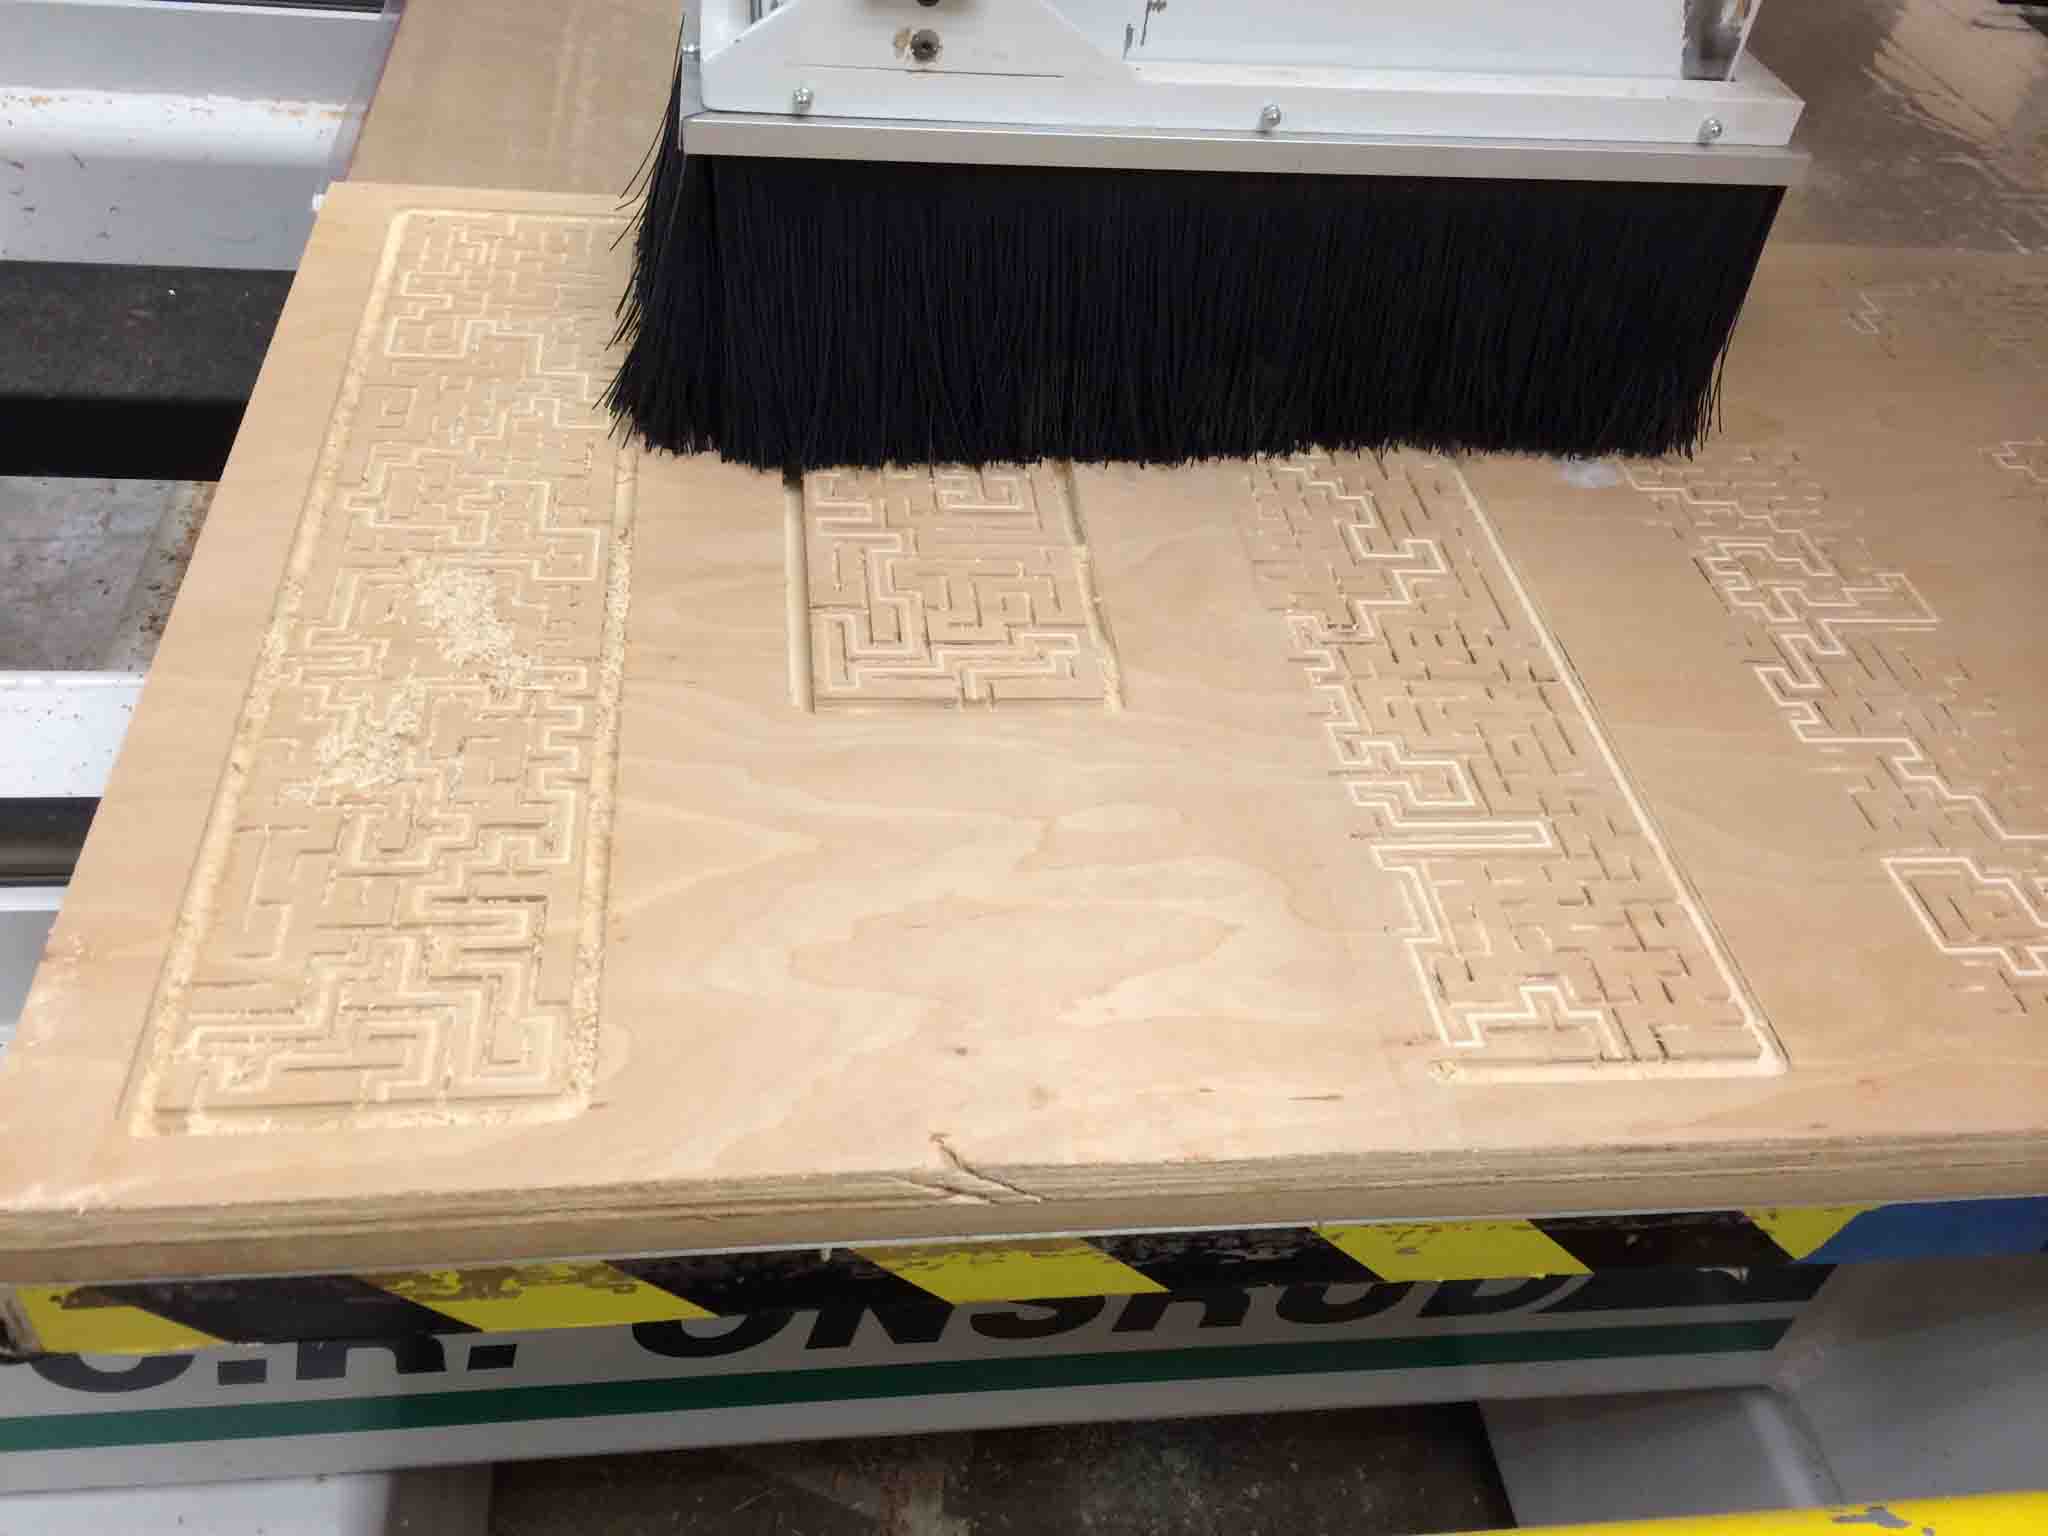
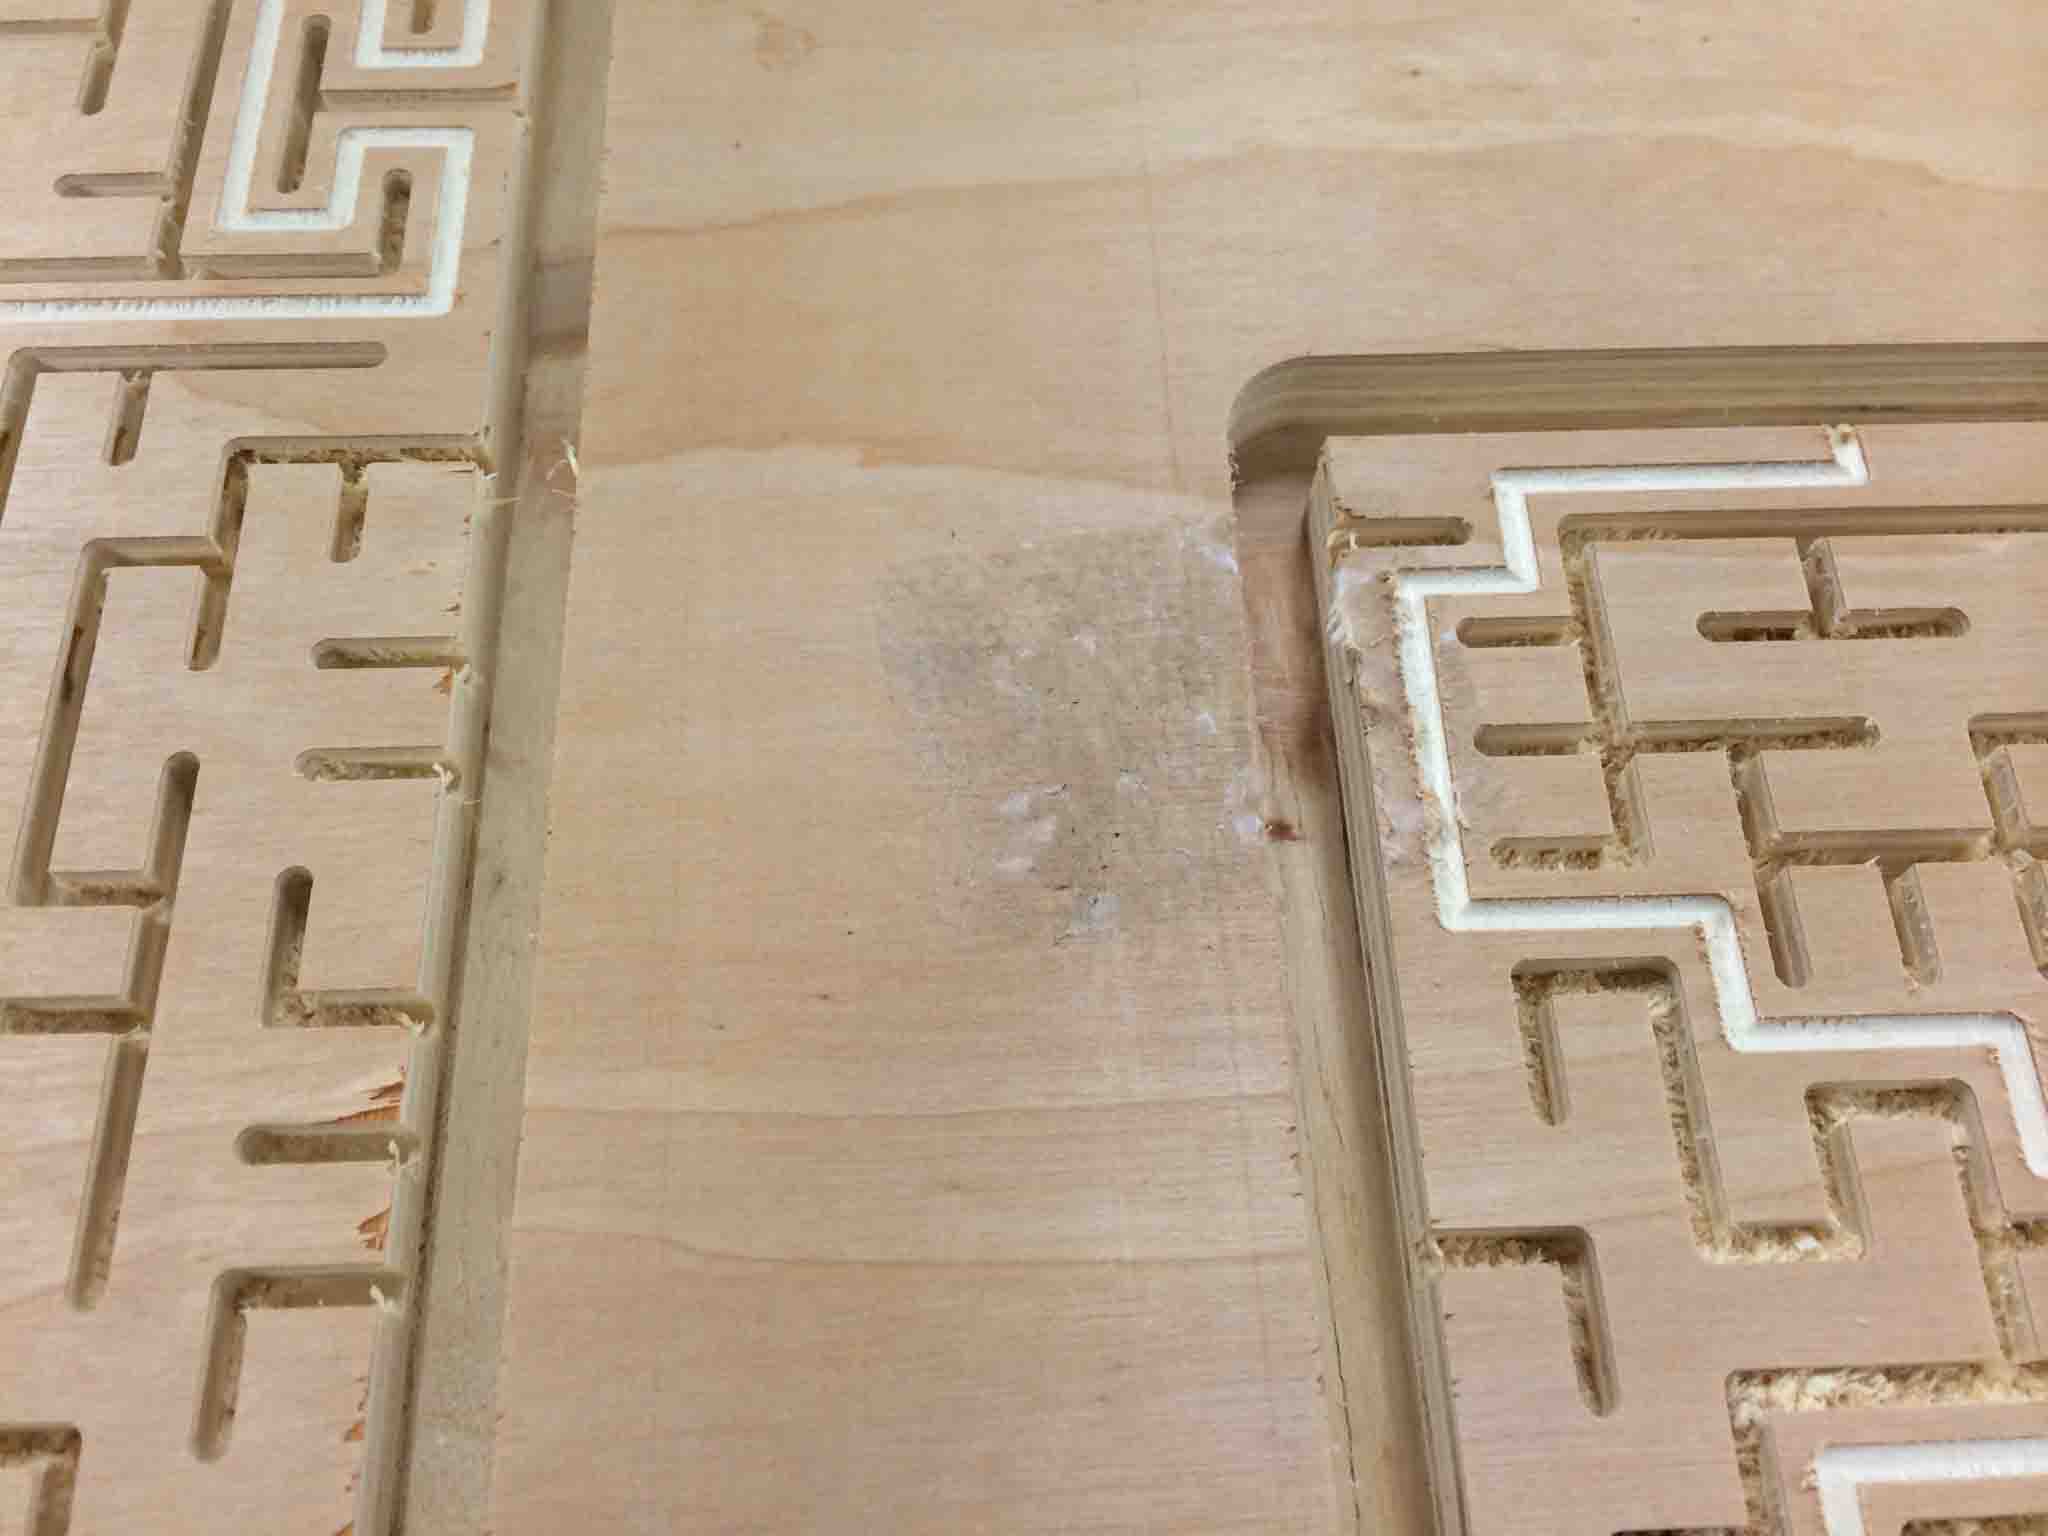
We went back to the drawing board and re-visited on of our original ideas for the wires: using them to make a maze. One thing lead to another and we we got to the concept of the wires running through the maze of MIT, alluding to the electrifying energy of MIT. We could not find an online maze generator that would take our world (MTI) as an input and output the maze, but we did find a maze generator that lets you input how your size and difficulty specs for the maze.. We explored different maze densities below and ultimiatel decided on the third, less dense maze. The red line represents the solution for the maze, which is the path the wire was going to trace.

Toolpath Setup & Machining
We went to HomeDepot for some birch plywood and learned that the 2' x 4' sheet was much cheaper than the 4' x 8'. Since our design was already at 5 feet, we decided to drop a foot more and go with the cheaper slab. (This ended up fitting much nicer with the TV size on the wall.)
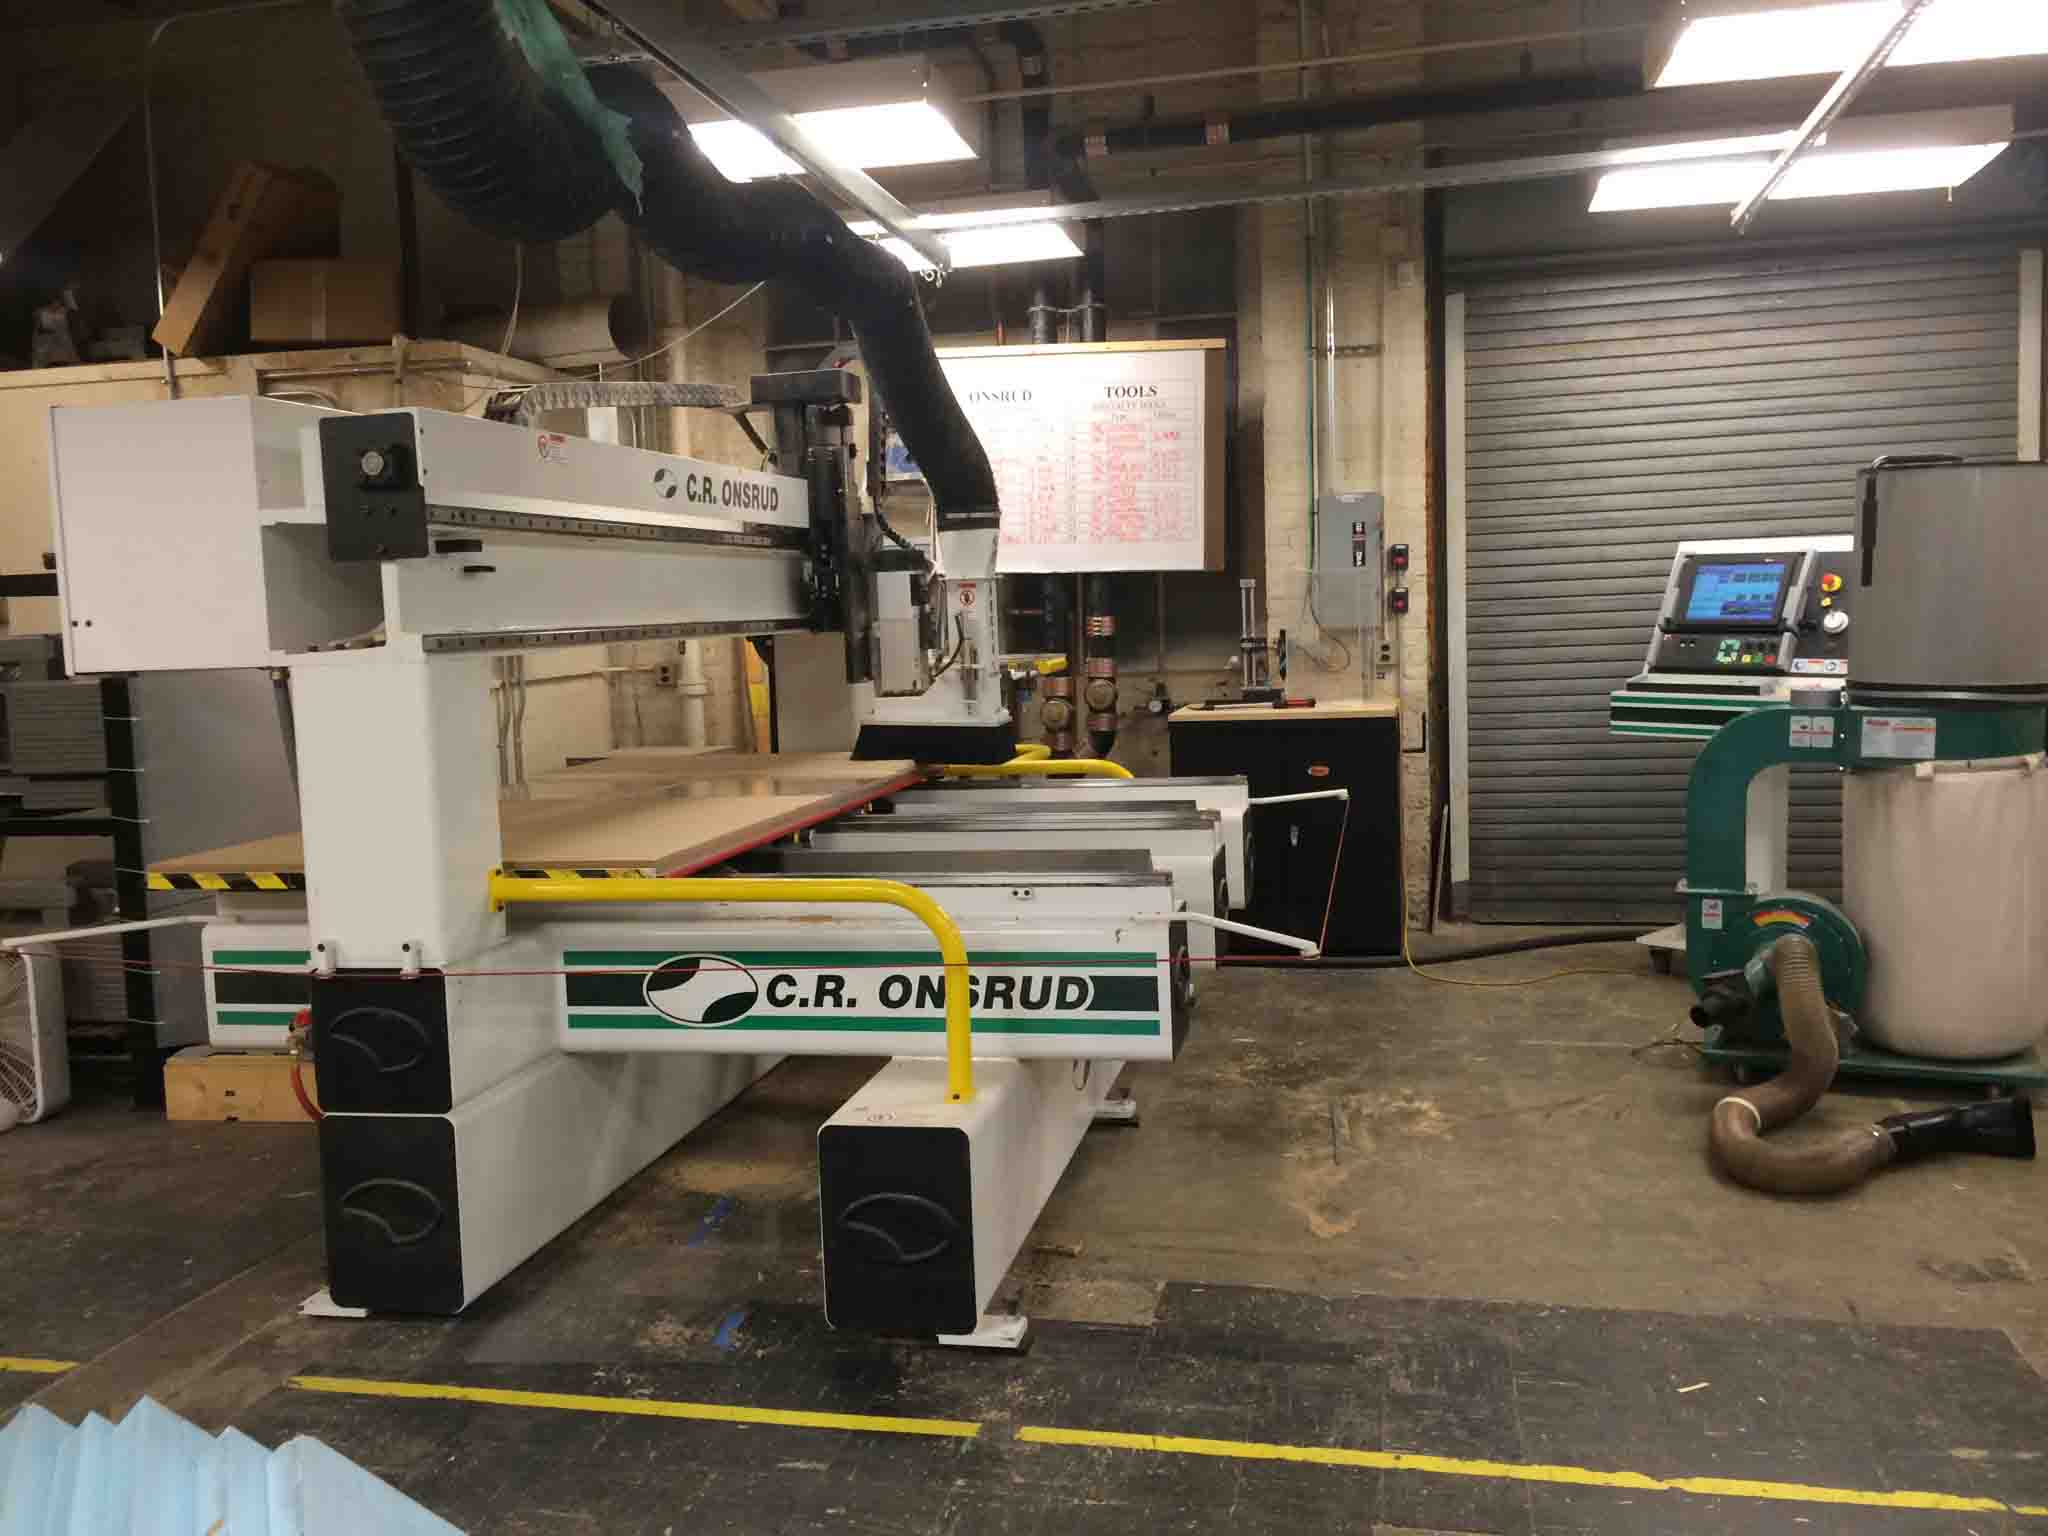
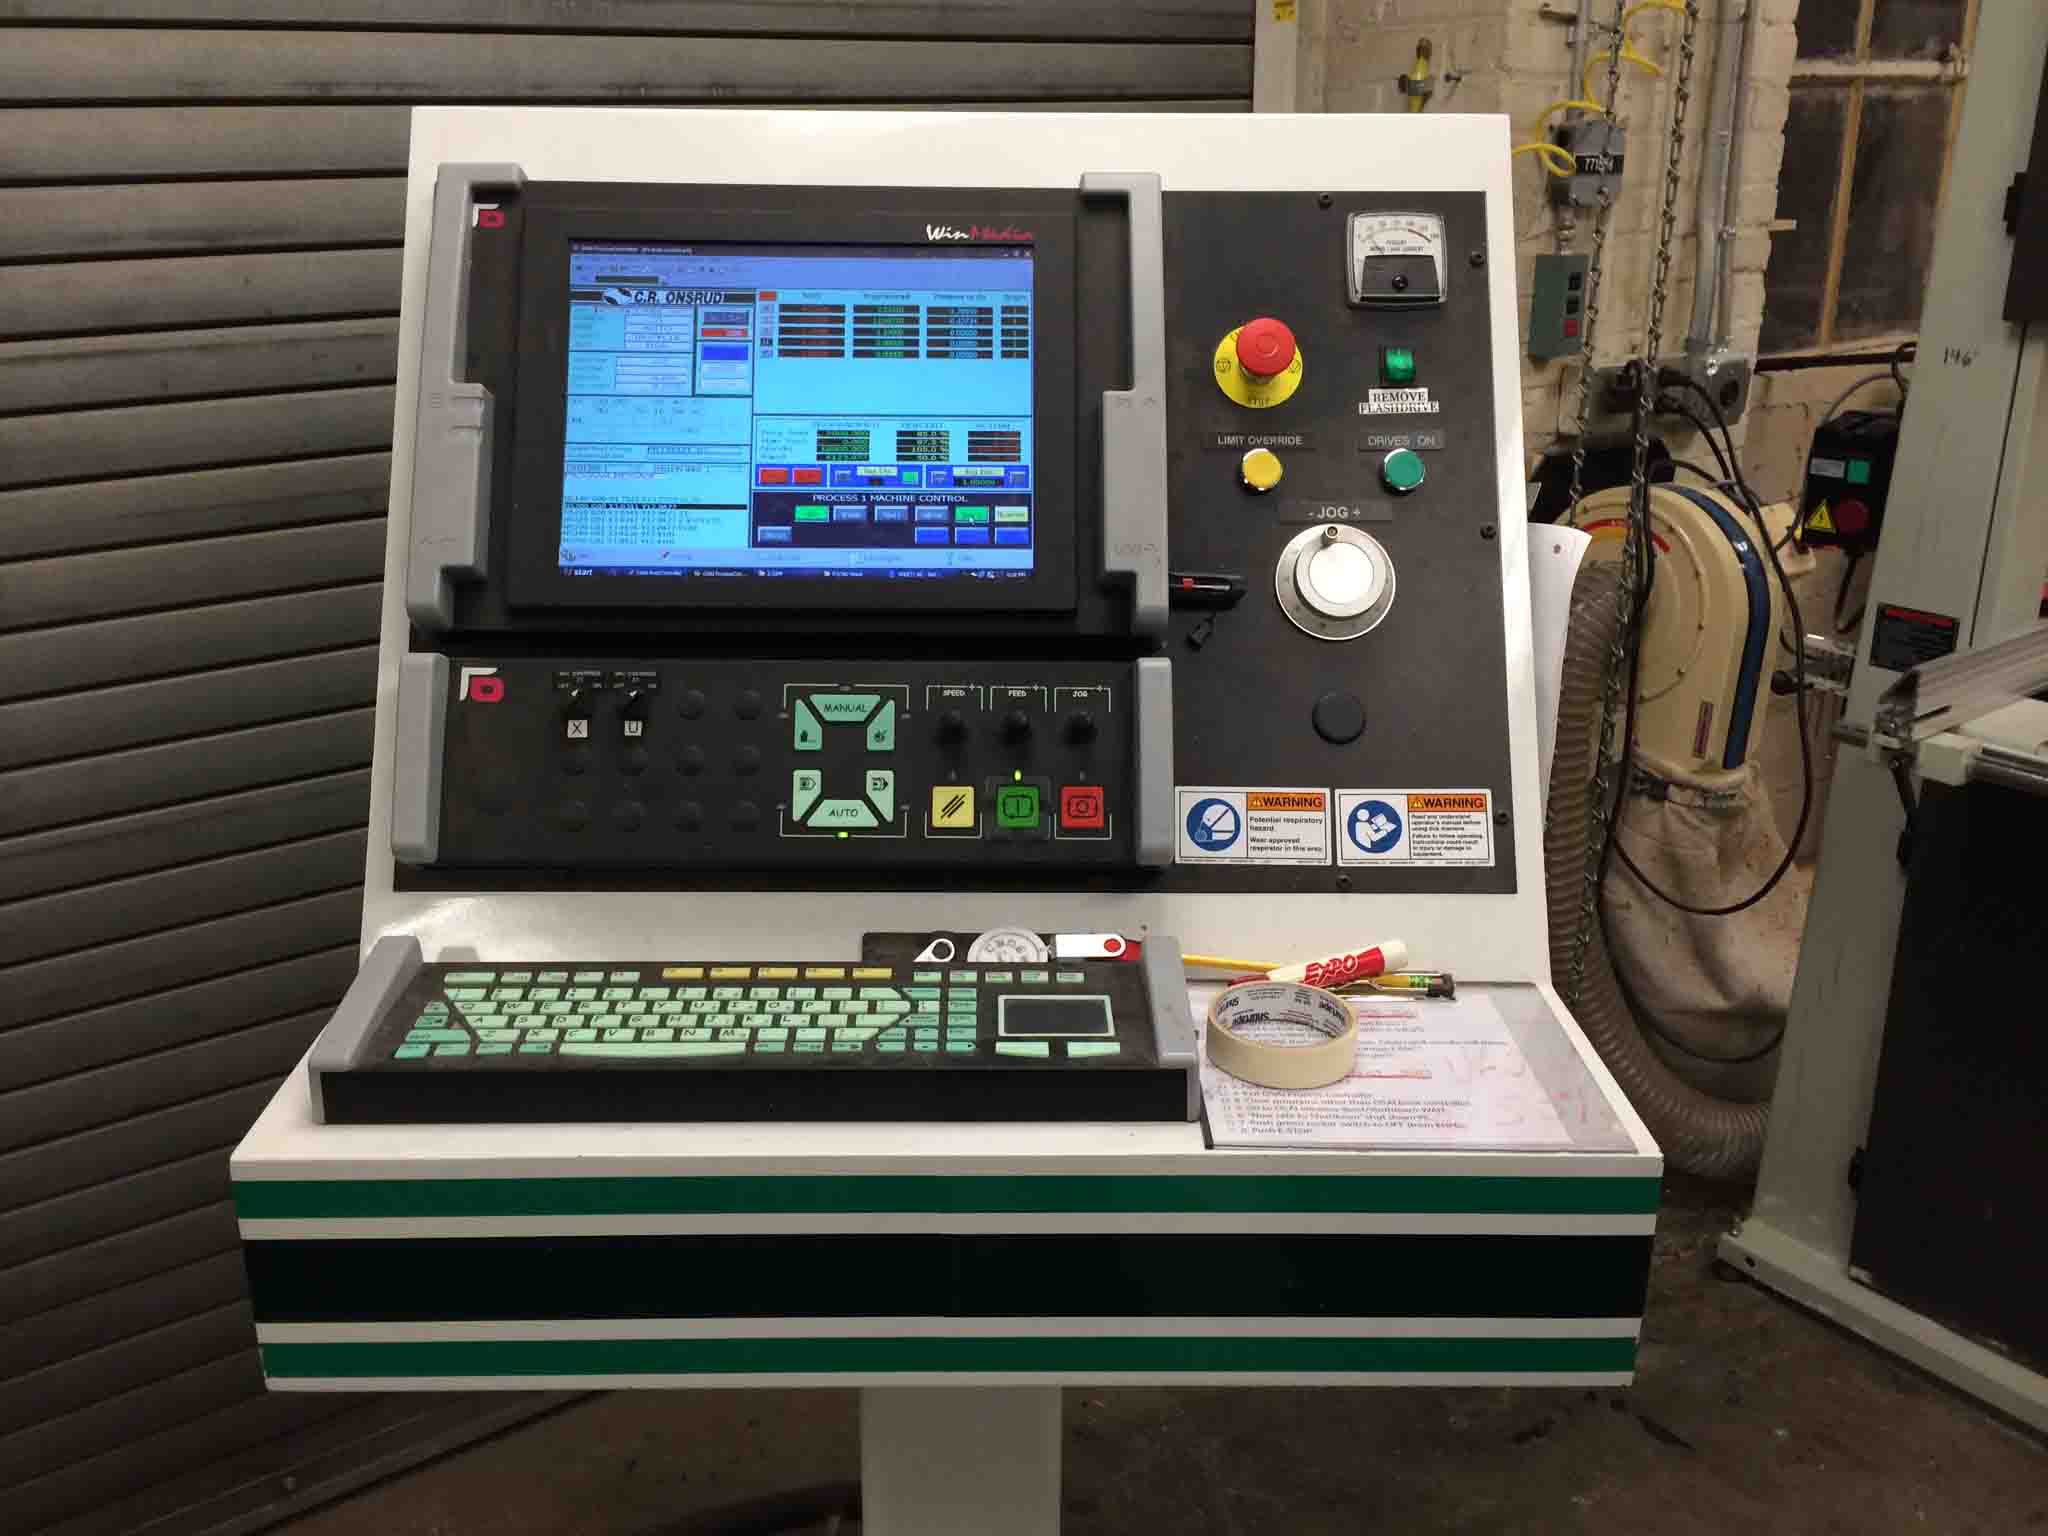
Though I received my CNC training on the ShopBot, the schedule was just too backed up when it came time for my reservation on the machine, so we just went downstairs by Morris's lab where he was trained. I was quickly re-trained to user Rhino to set up layers to import as tool paths in the MasterCAM software (left) and machine on the Onsrud (right).
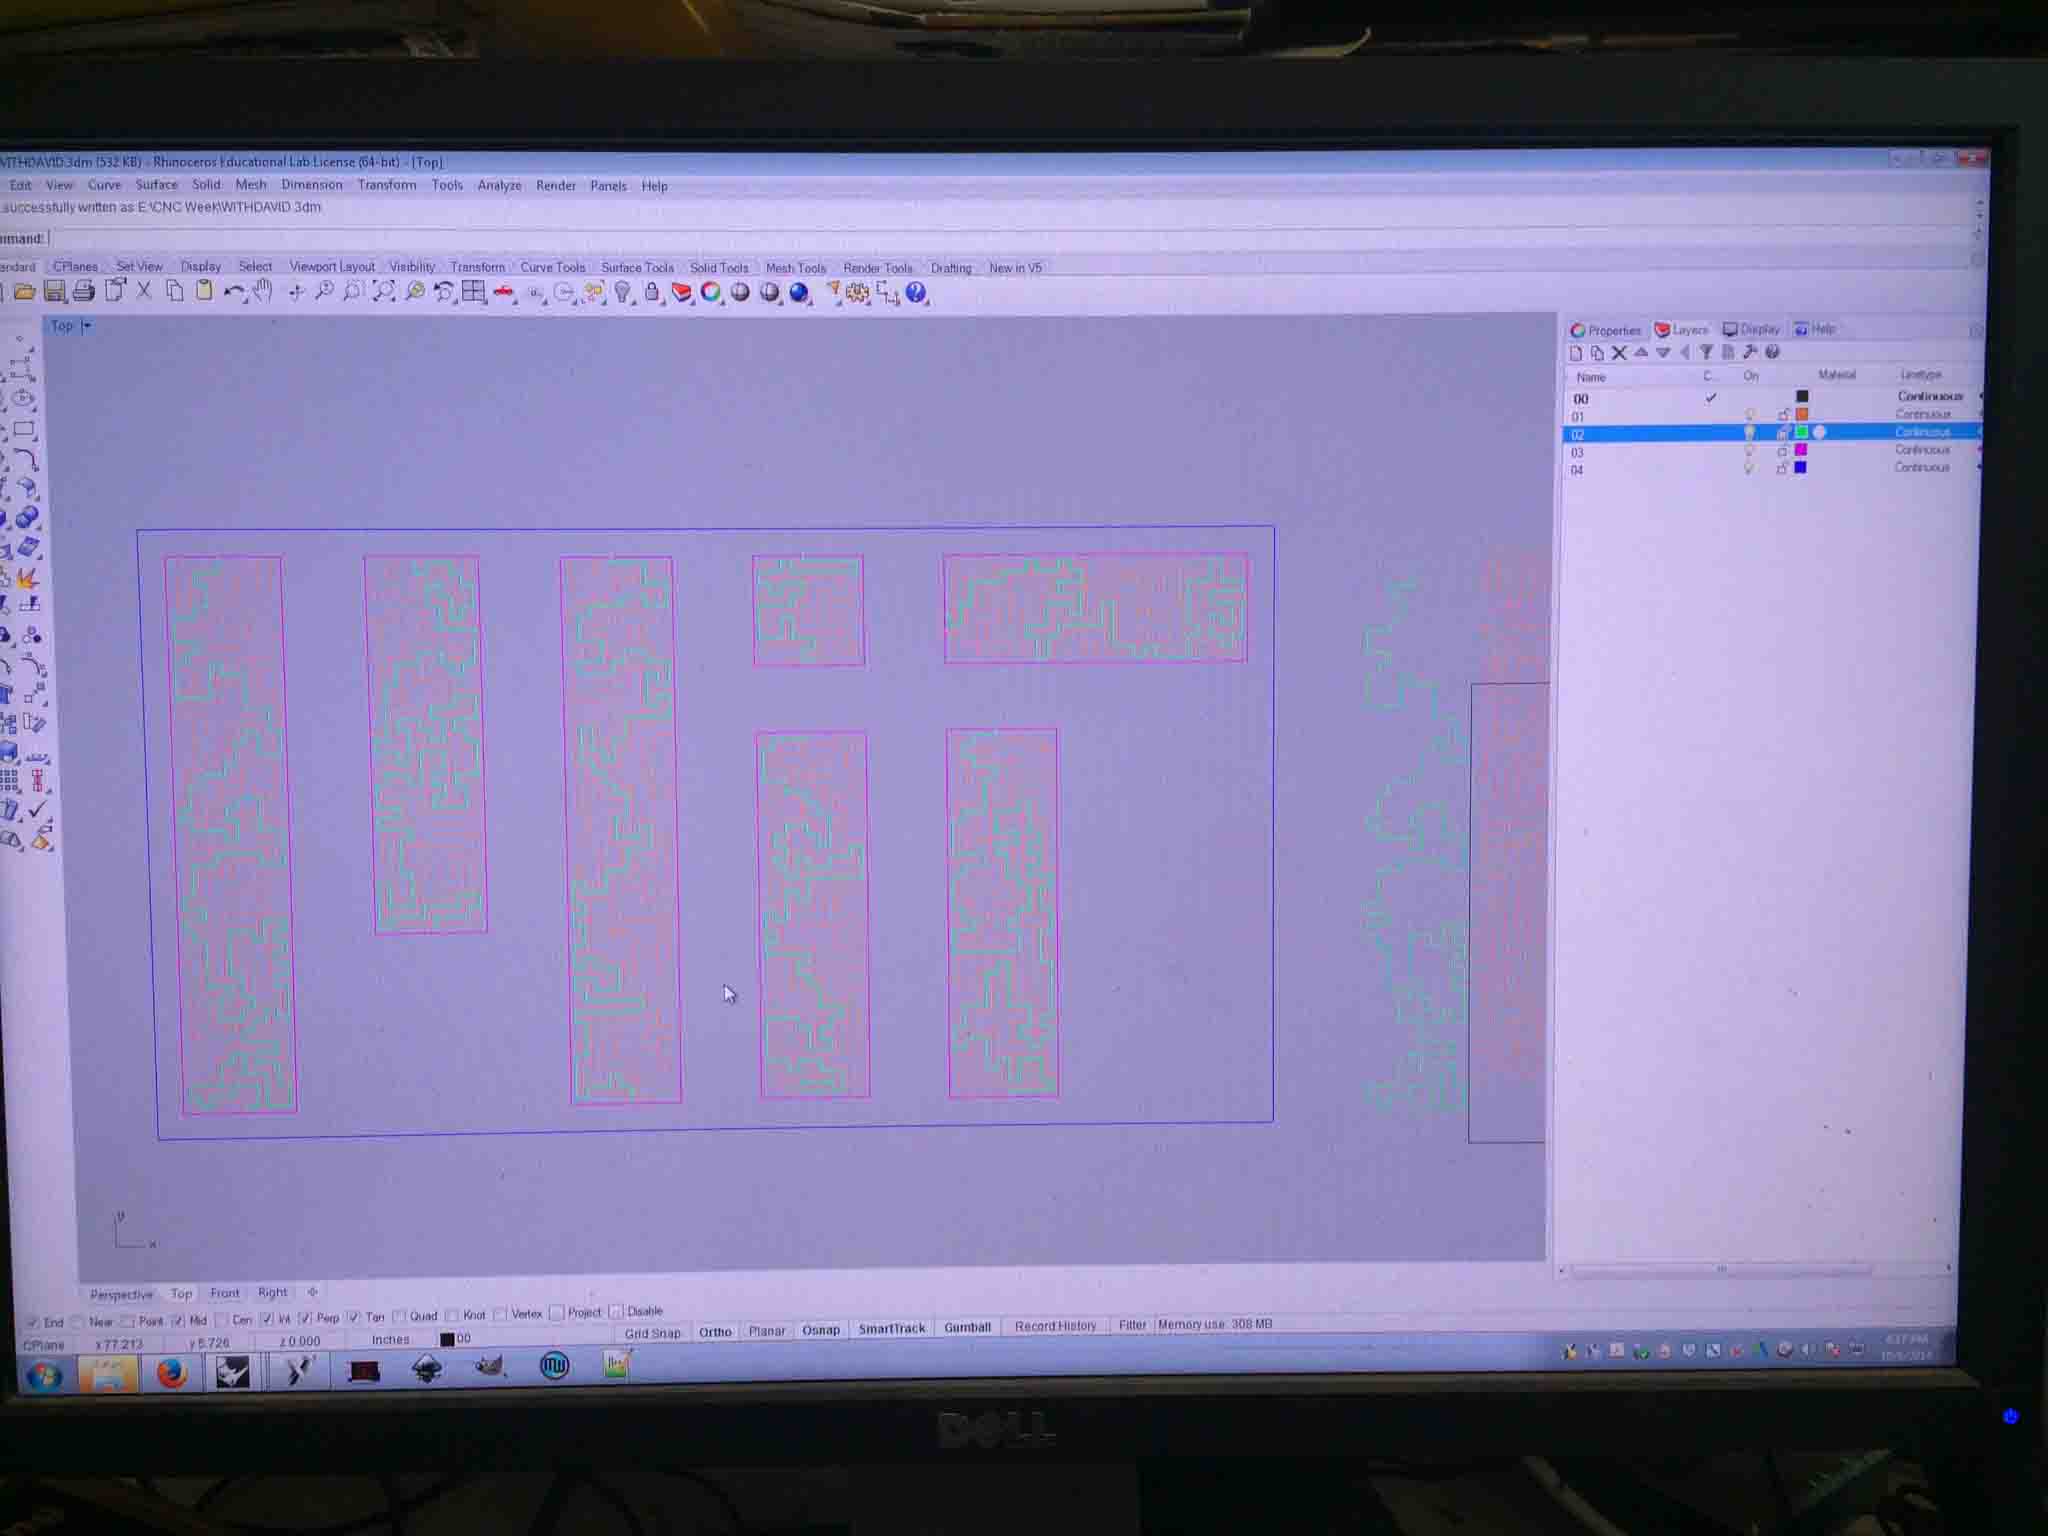
The colors reference the different tools used in our setup (in cutting order):
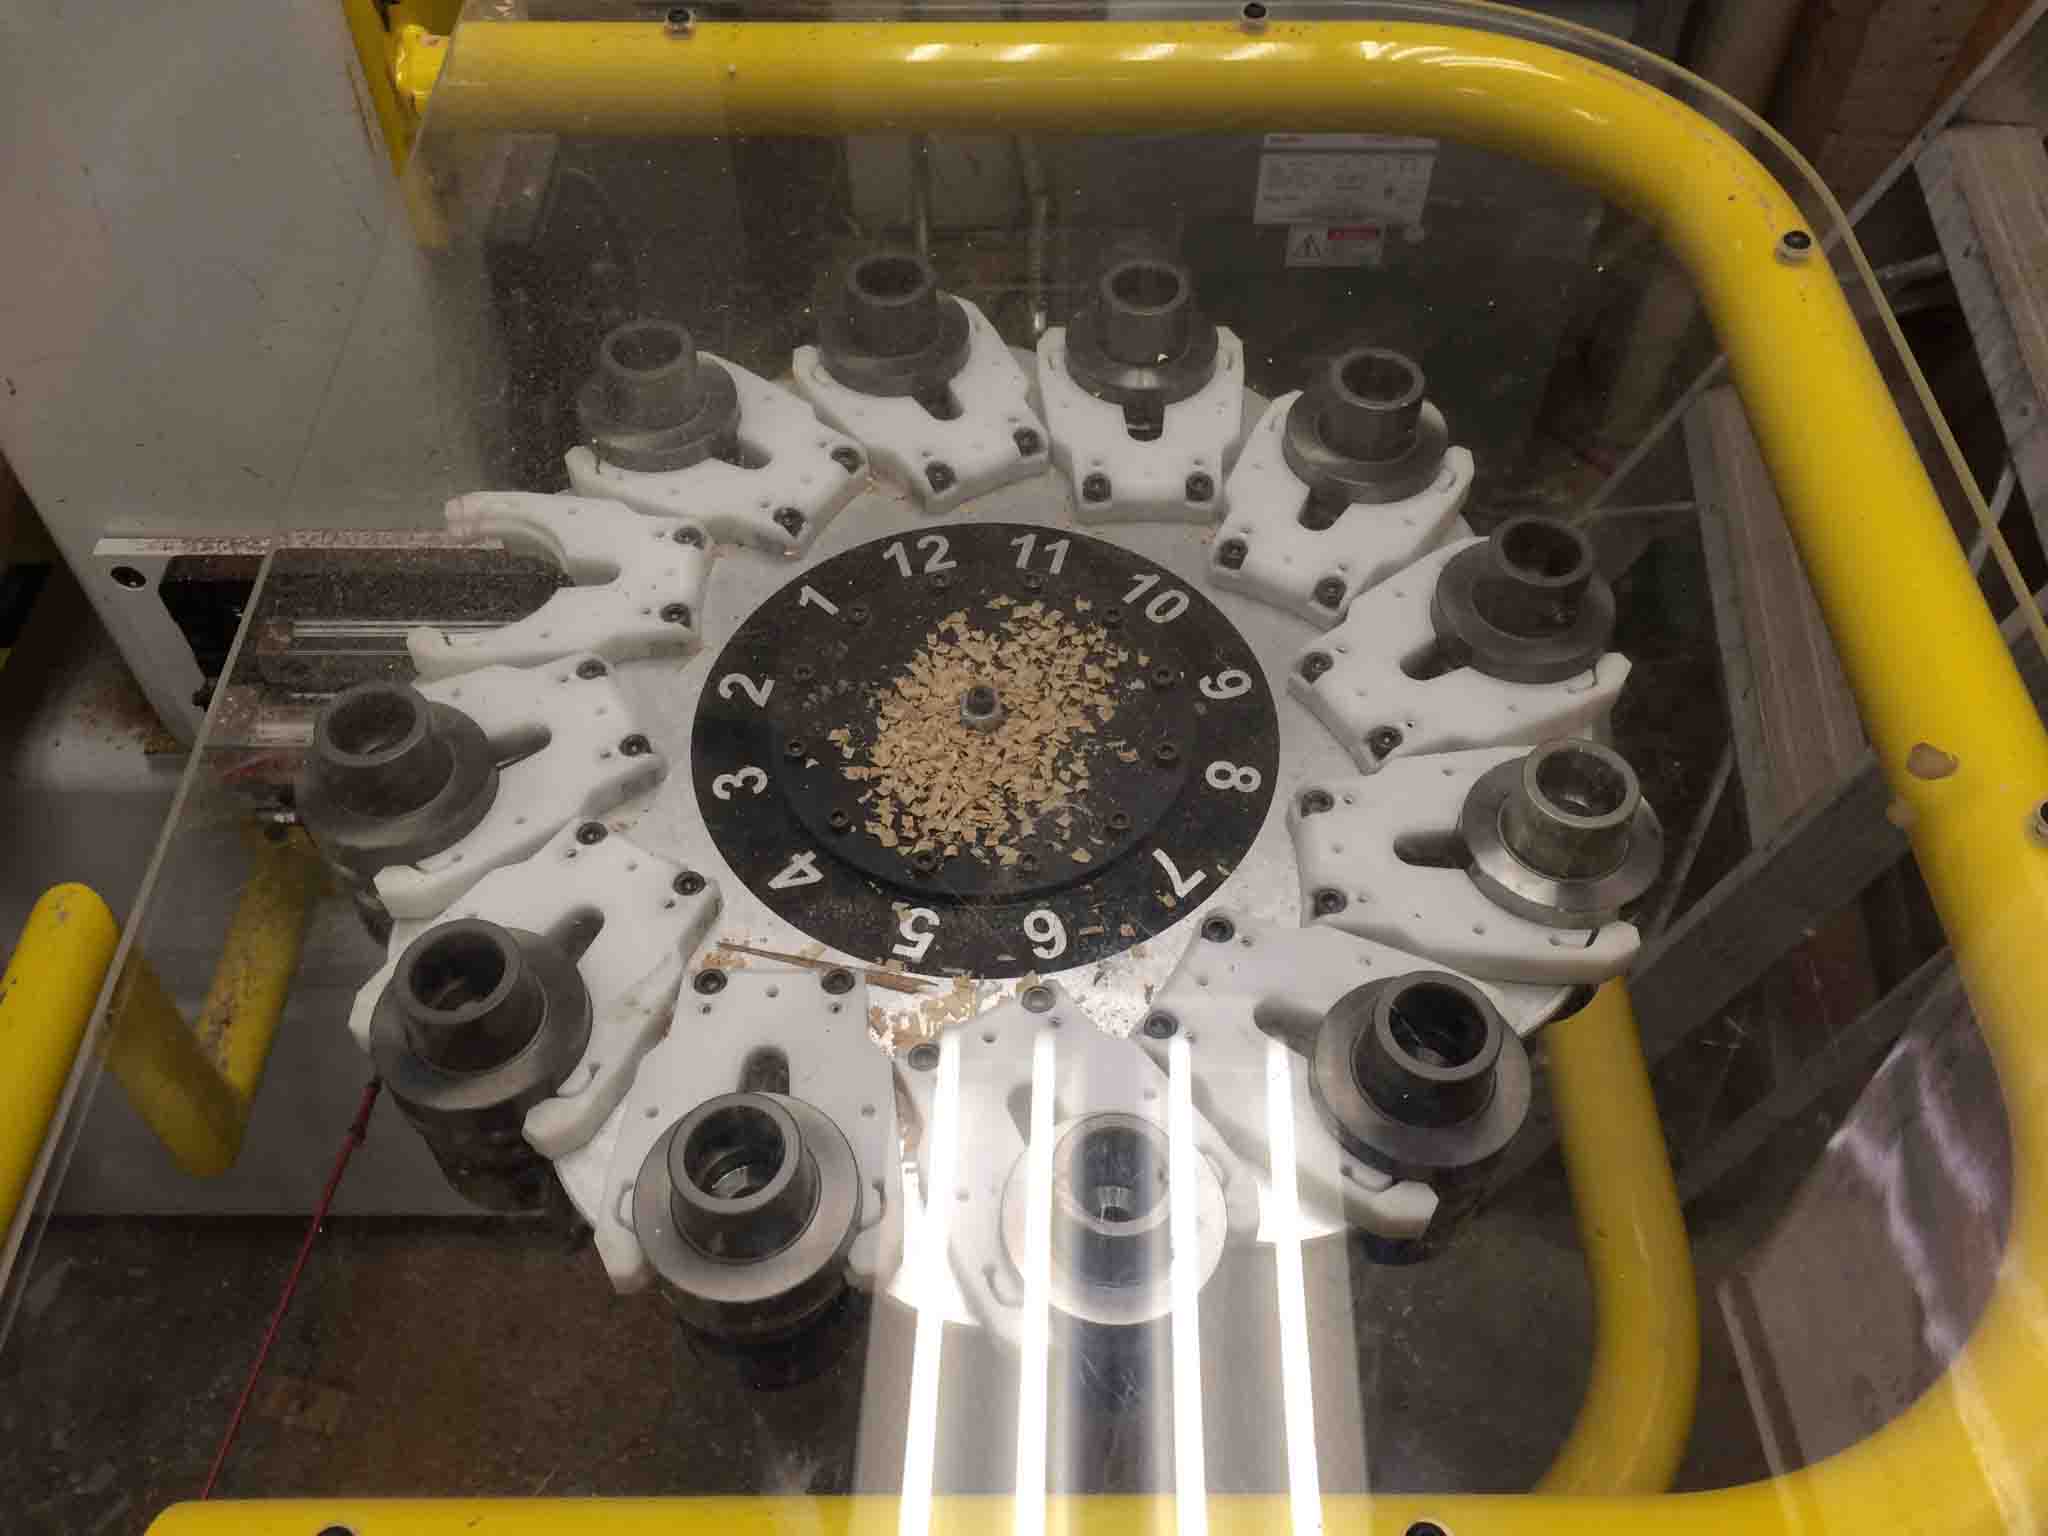
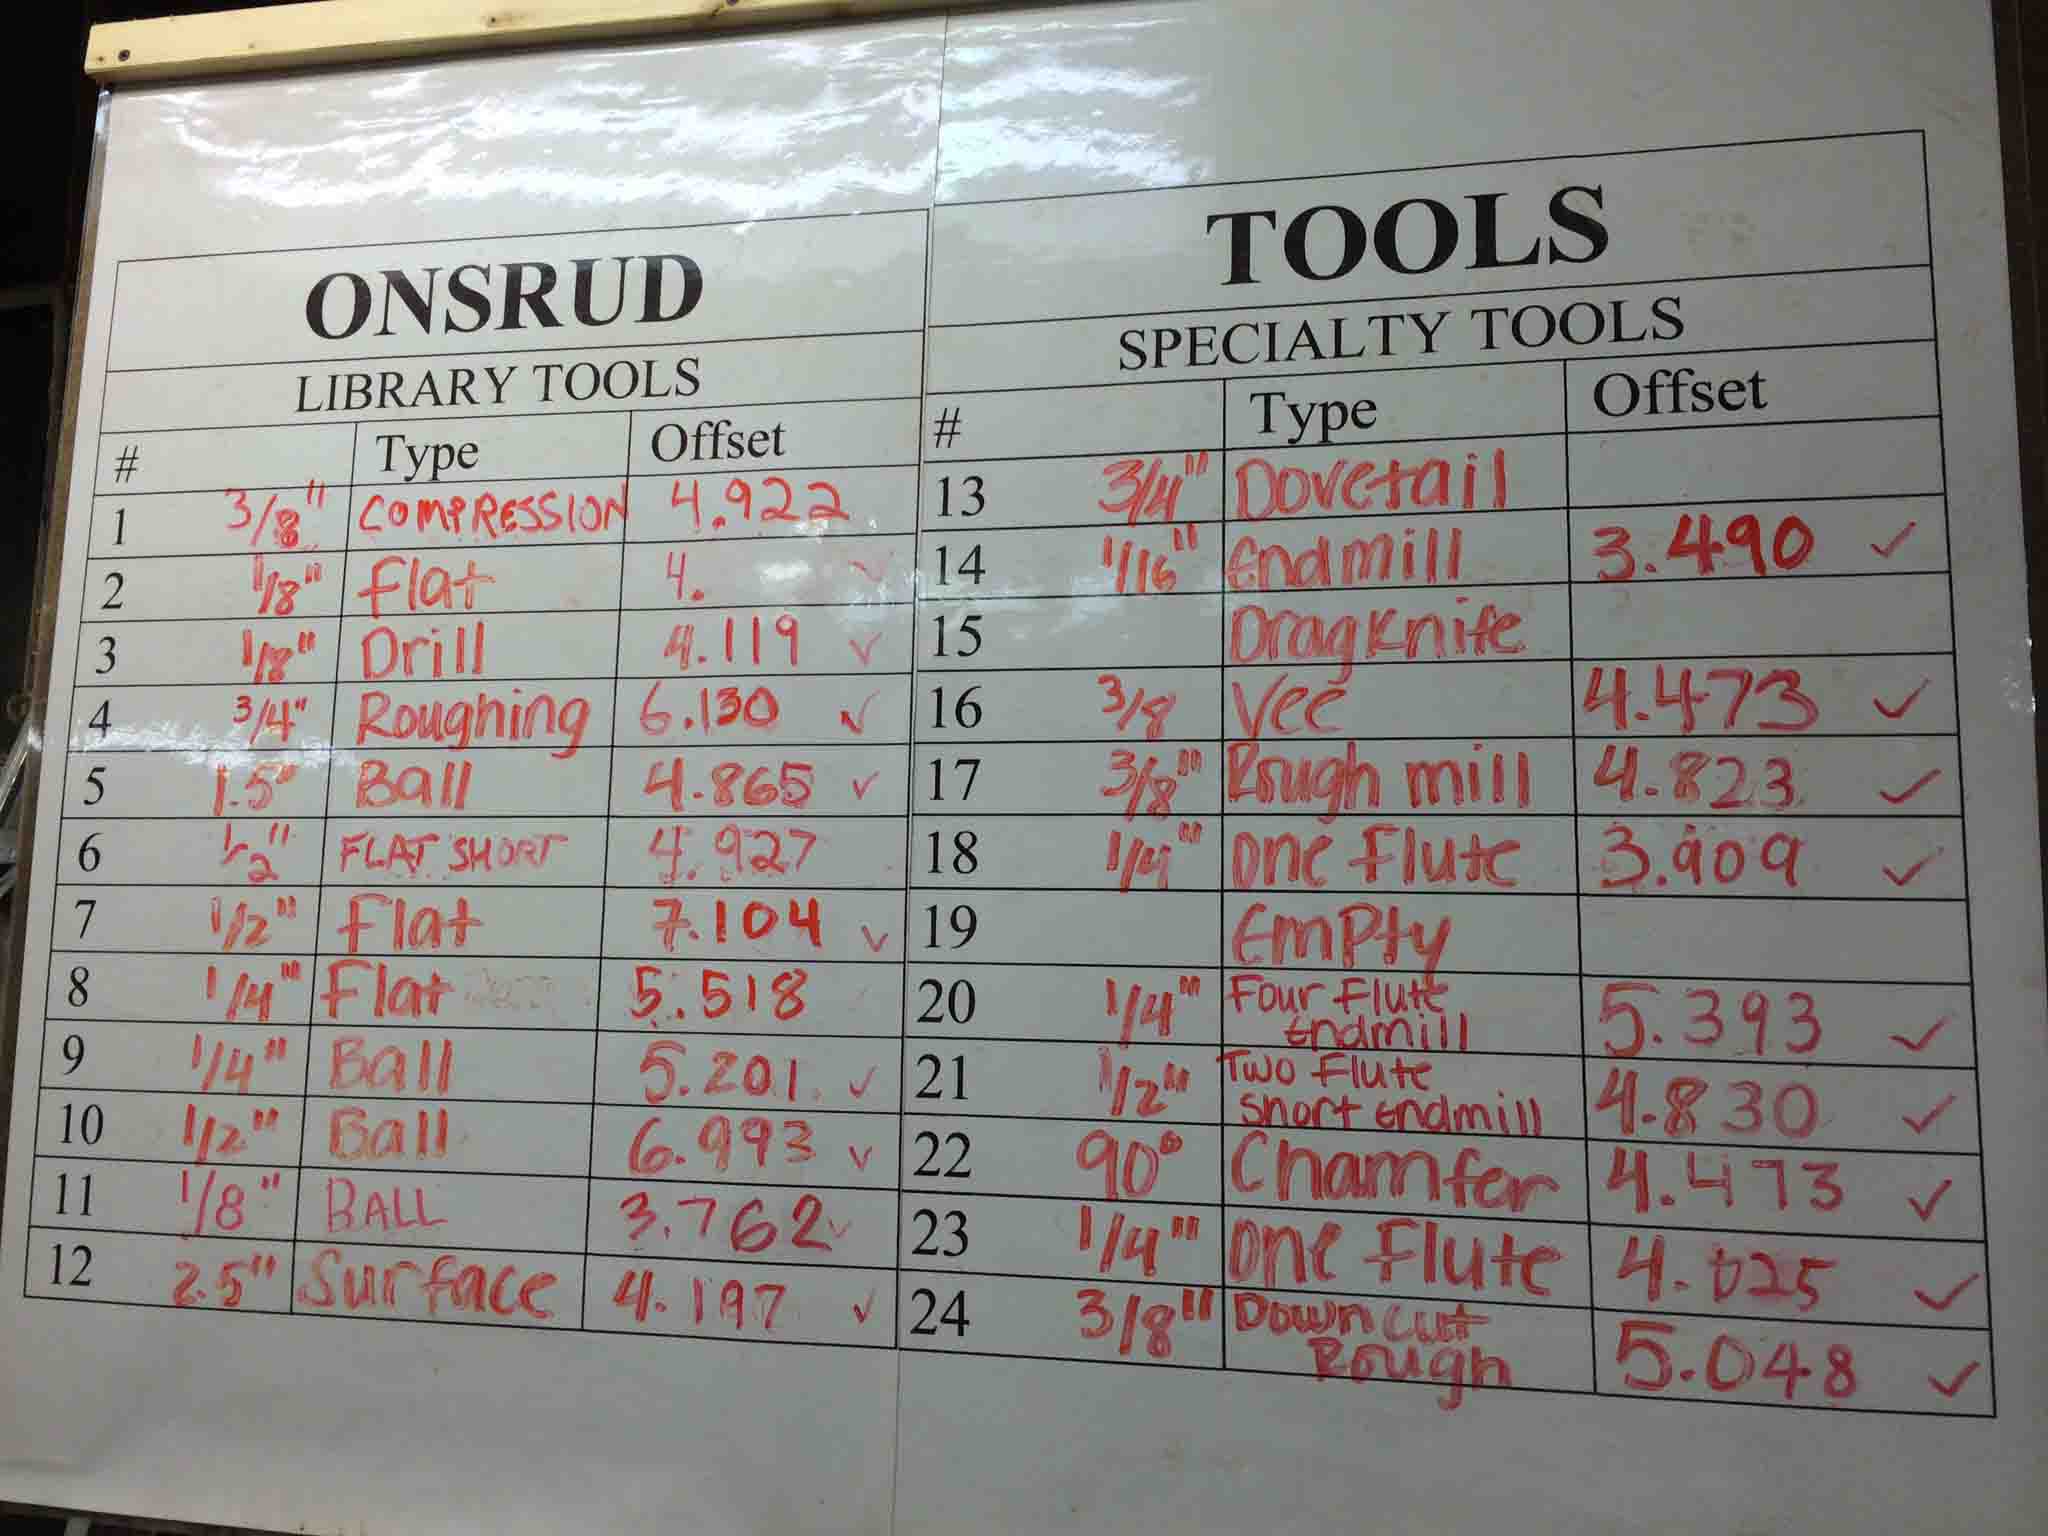
I learned to appreciate the differences between the Shopbot (a ~$20,000 machine) and the Onsrud (a ~$150,000 machine). These included:
- -A 12-tool changer (with great documentation from the shop staff),
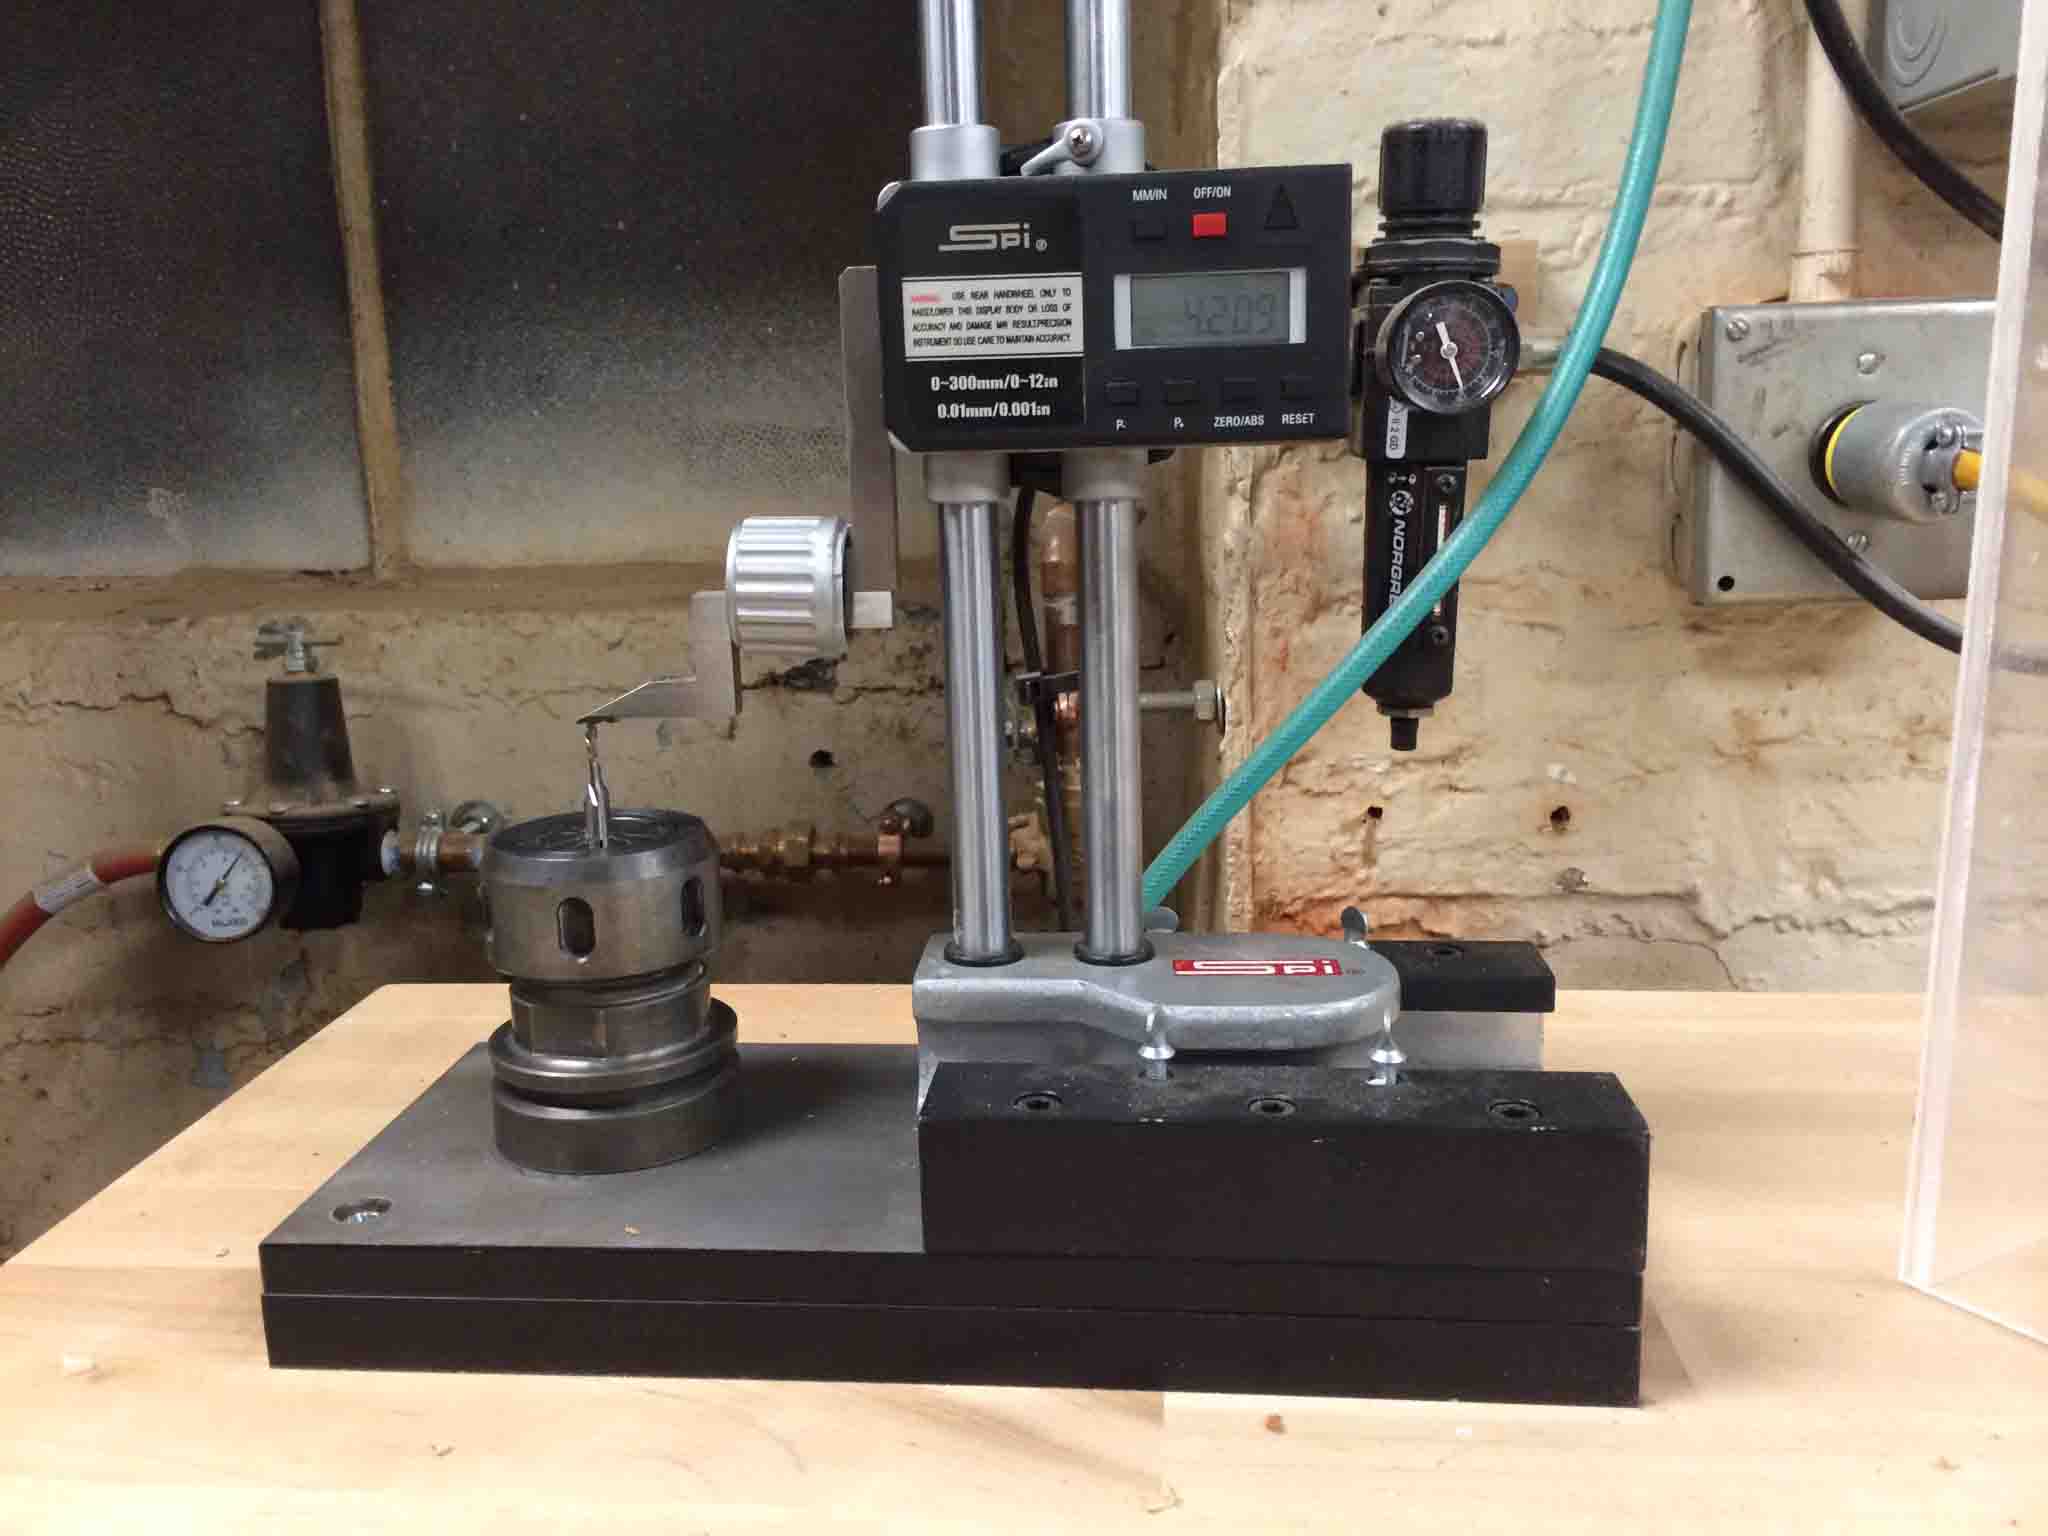
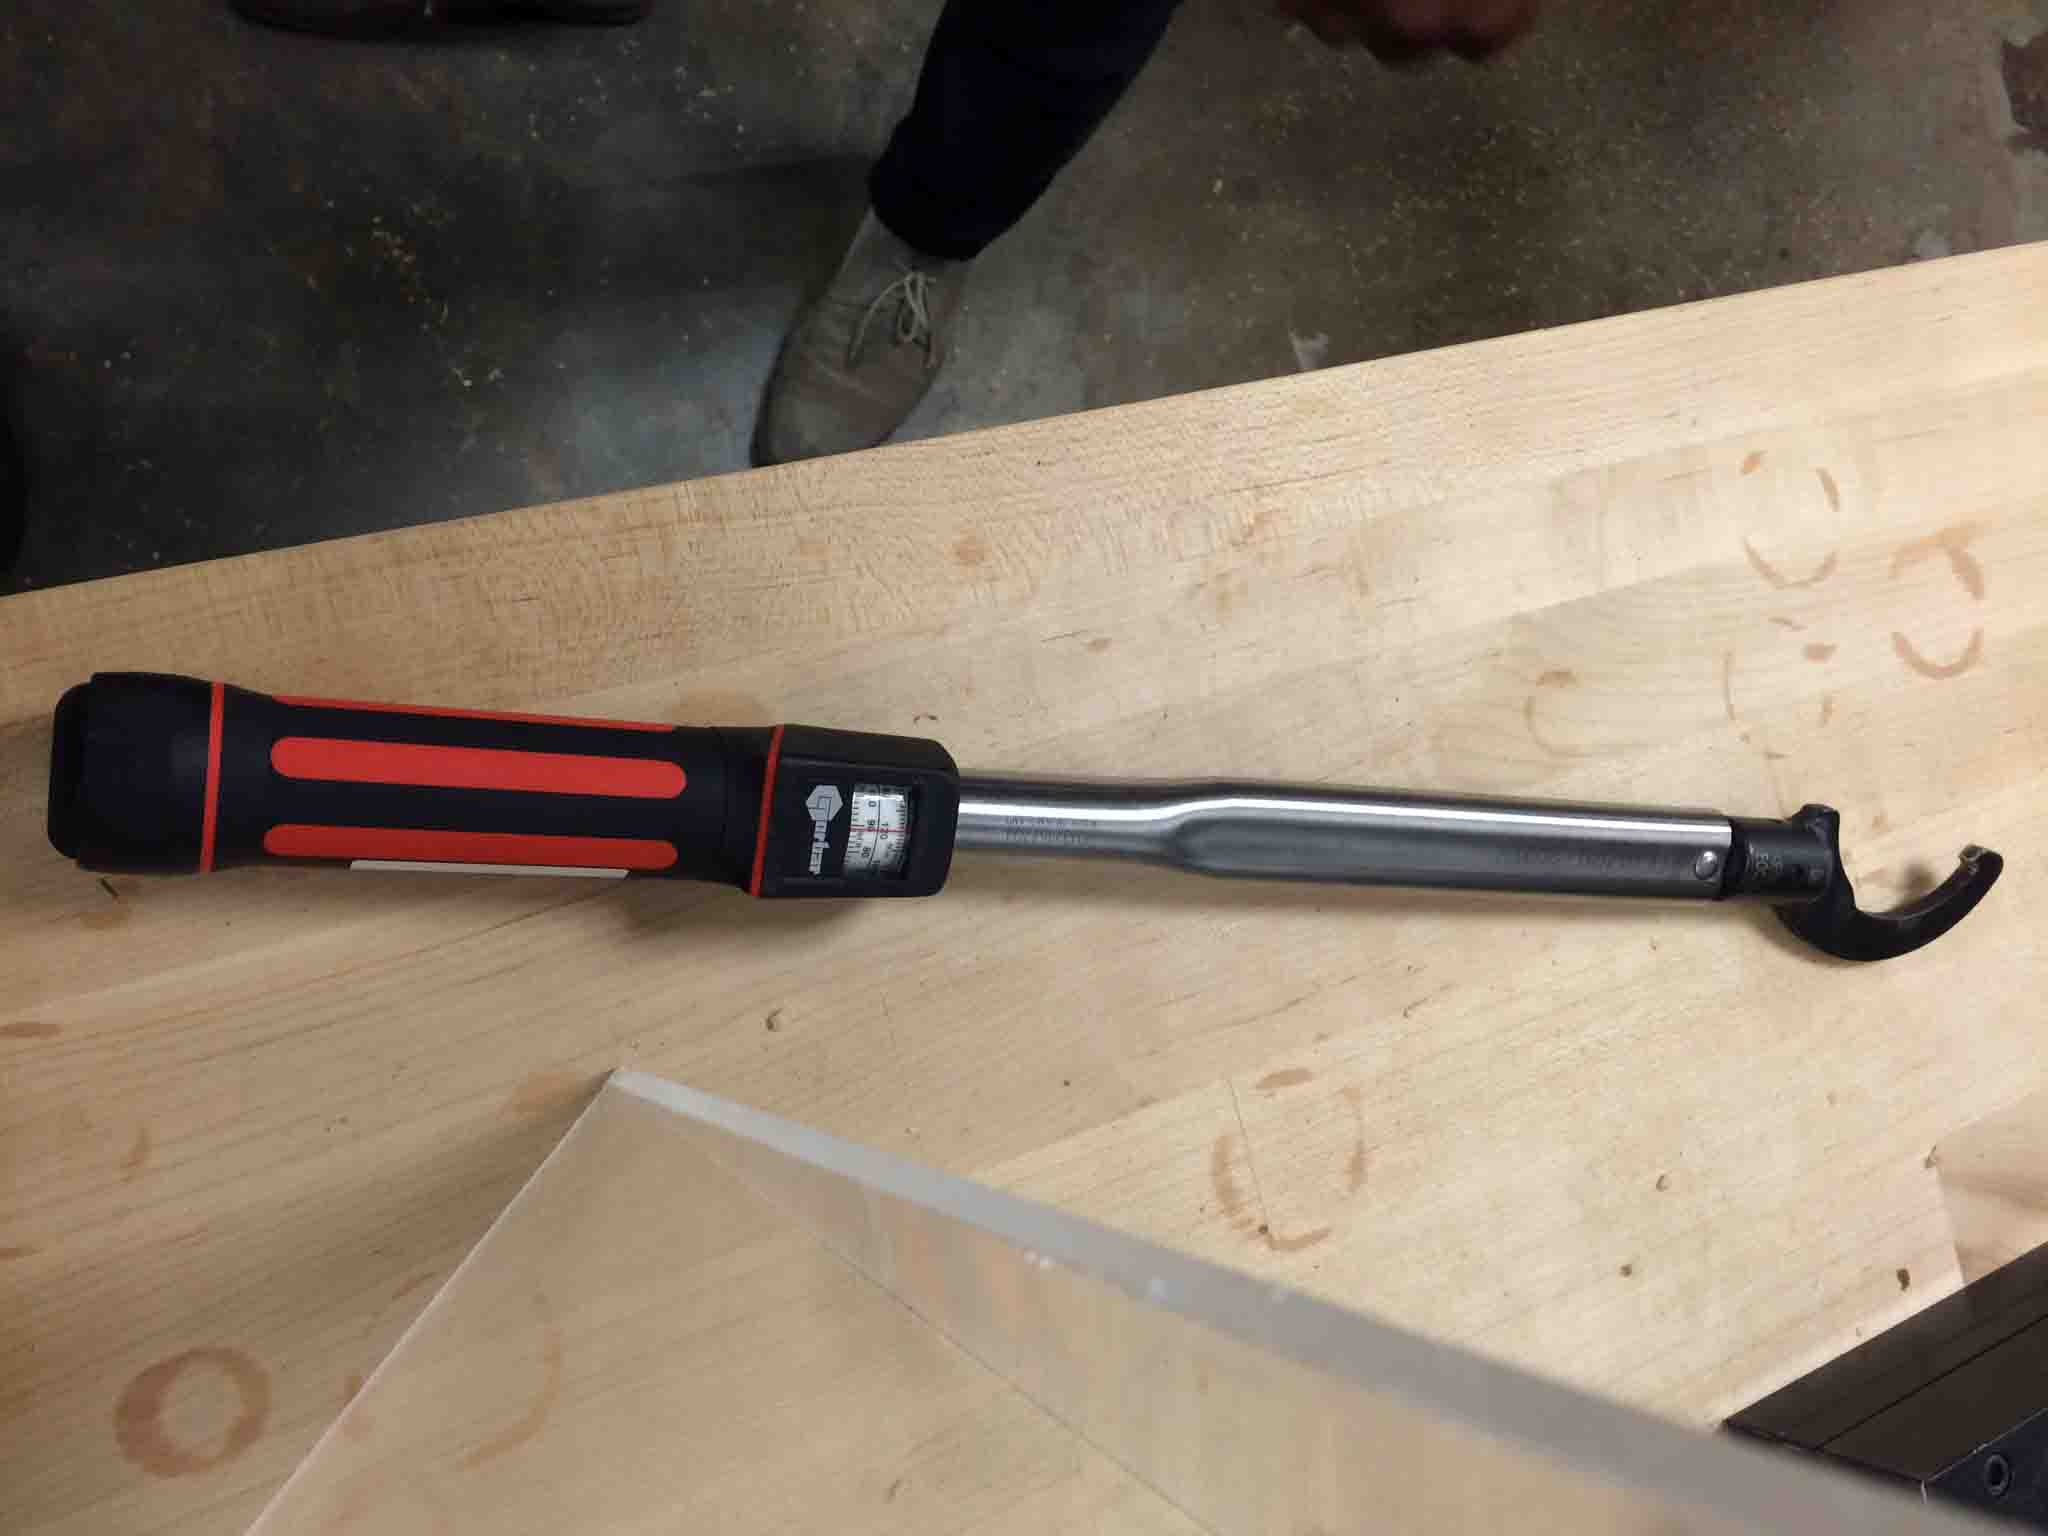
- -A gorgeous benchtop zeroing device for in-between tool changes (complete with a torque wrench to eliminate all guessing of "exactly how much is 90 ft-lbs"),
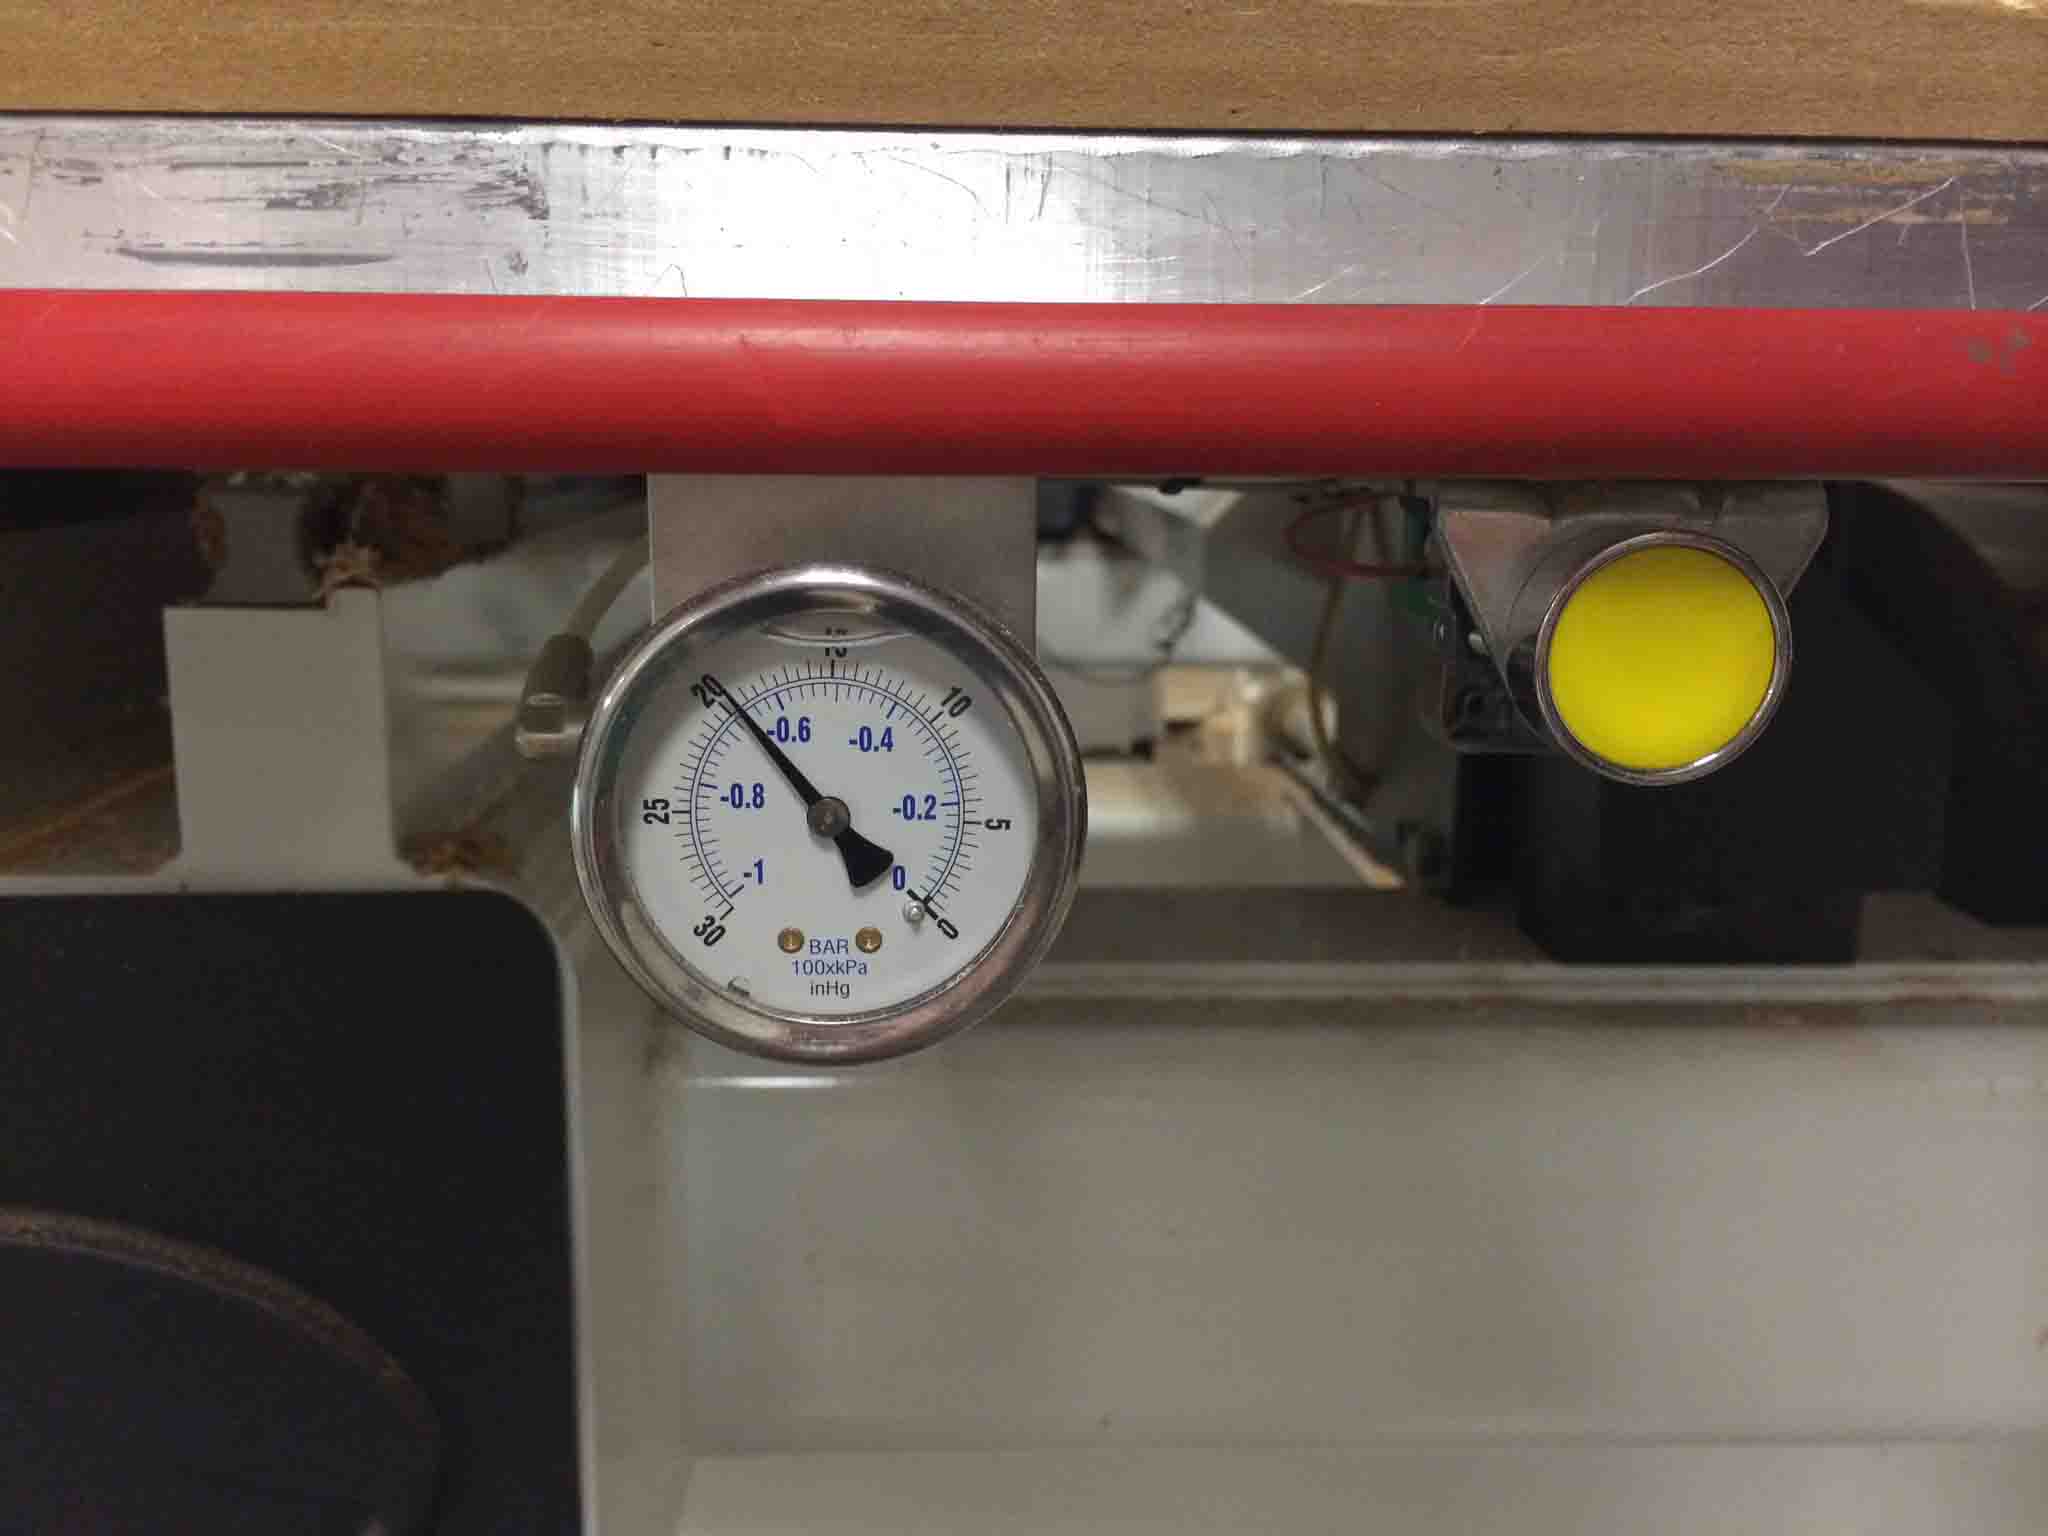
- -And a vacuum-based hold for the piece that eliminates the need to screw into a sacrificial part. Here you can see the barometer reading for the vacuum on the right half of the bed, and our placement of extra plexiglass to assist the suction of the bed.

Post-processing
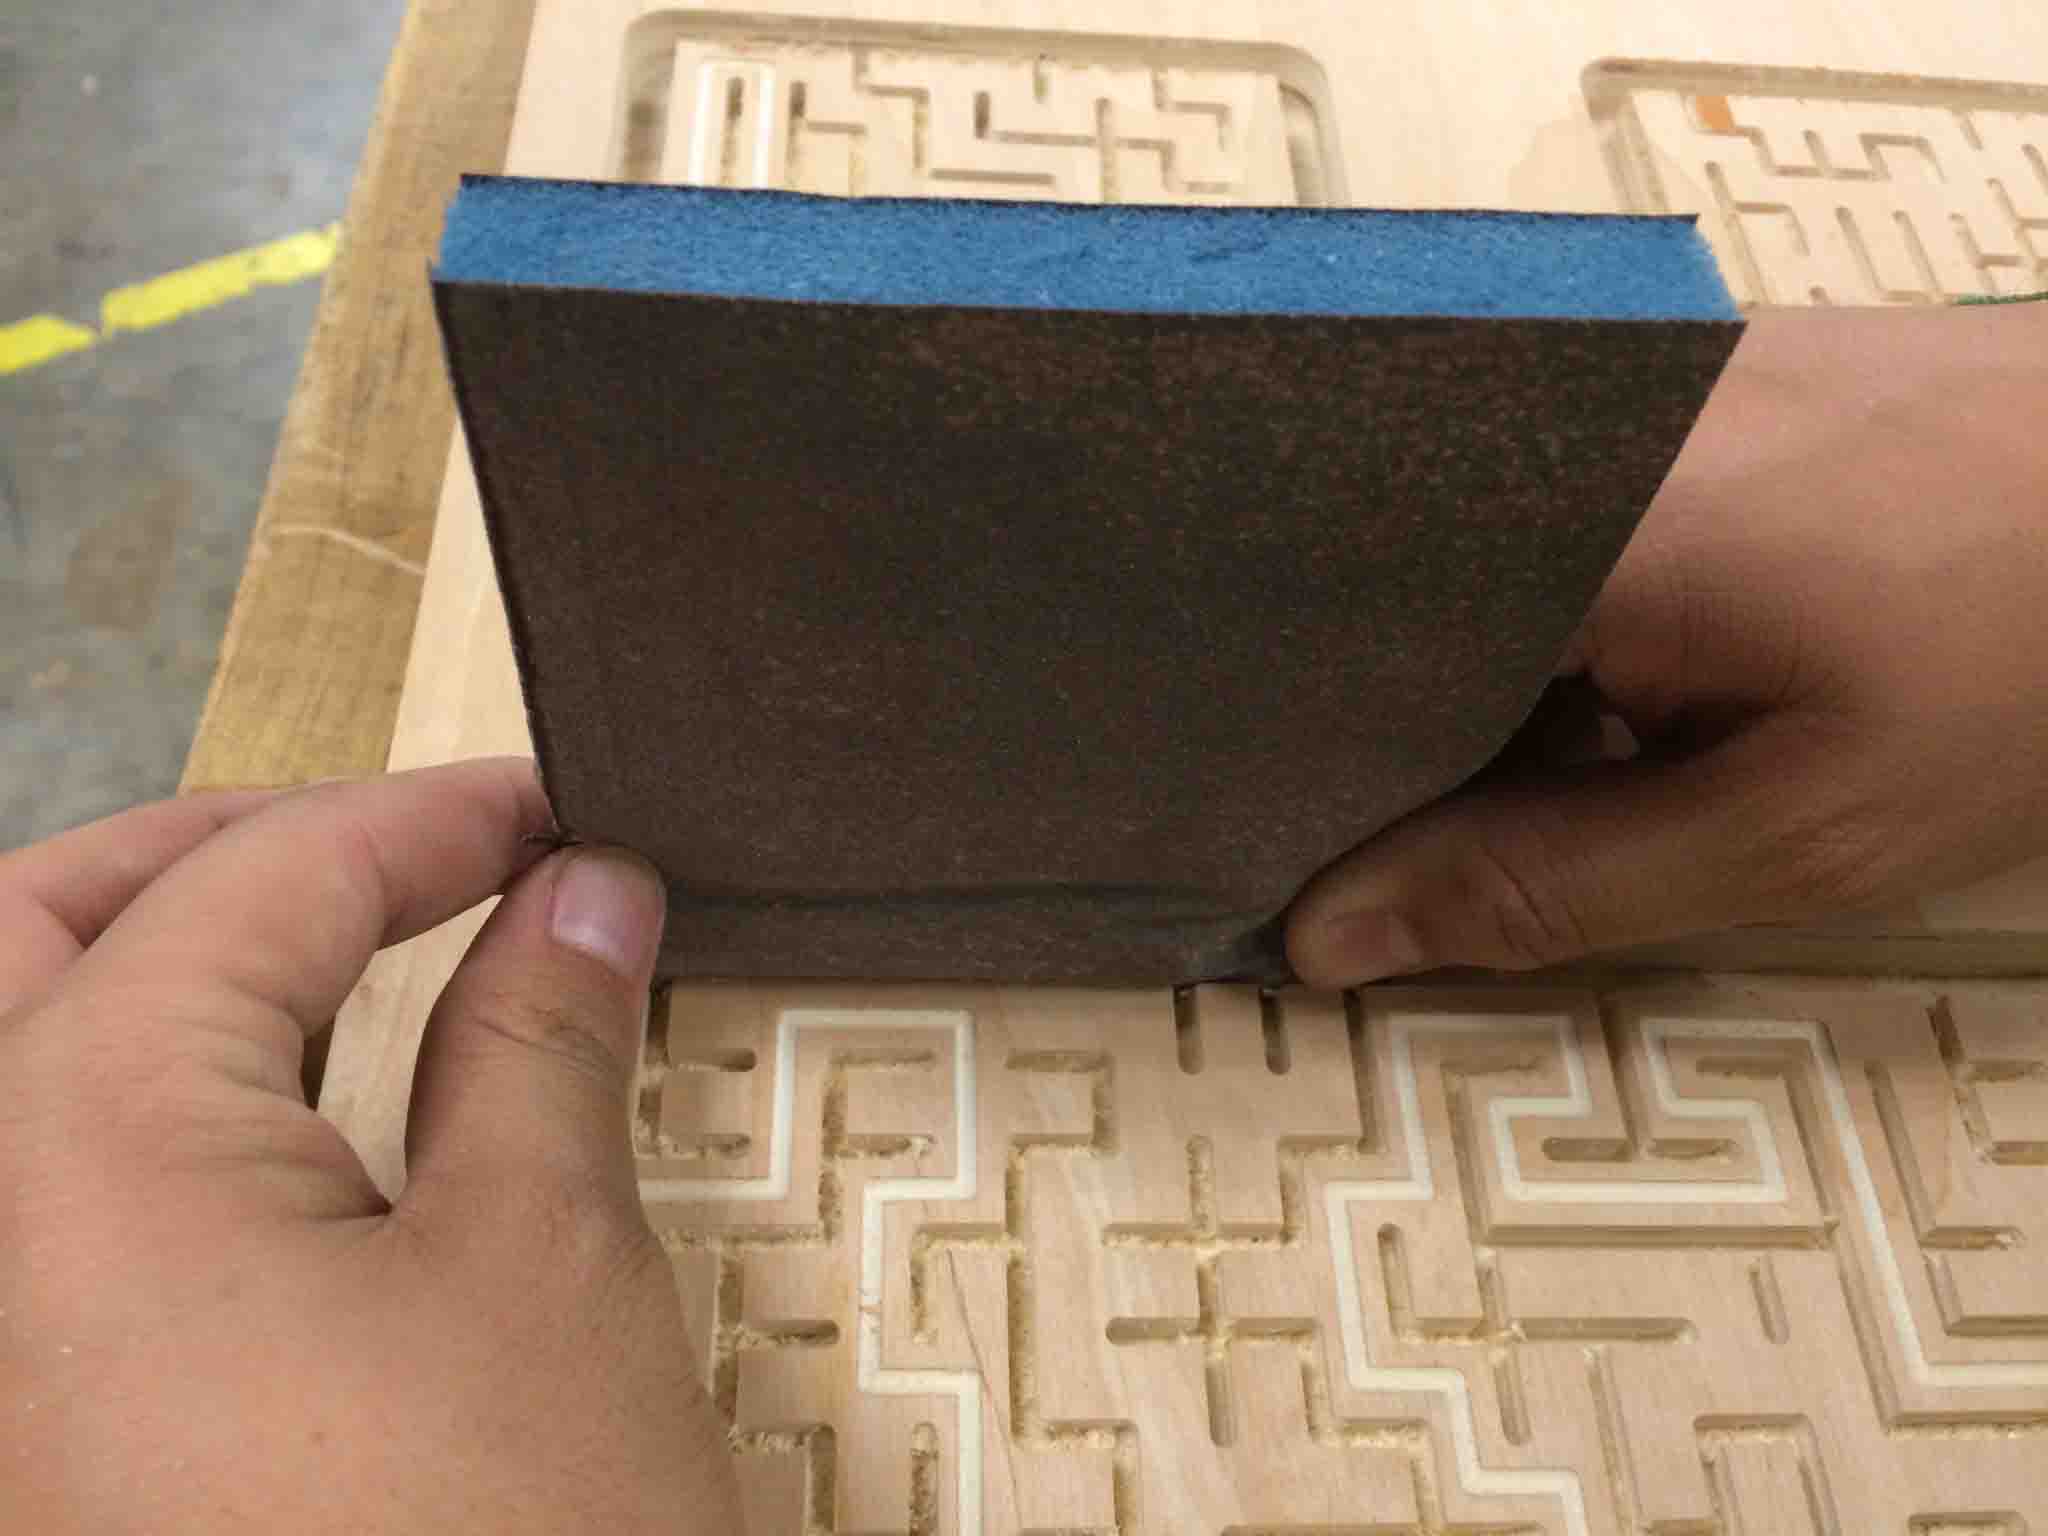
Sanding & Vacuuming
This is basically the clean-up of the part, since the Onsrud vacuum that surrounds the tool inevitably cannot suck up all the wood chips. The tool also left some rough edges around the logo outline. We used a very light sander for this outside edge, used the air gun to loosen up the small chips stuck inside the maze walls, and then the best vacuum the shop to clean it all up. Note to self: Sticker labels suck and are yucky.
Mounting & Gluing
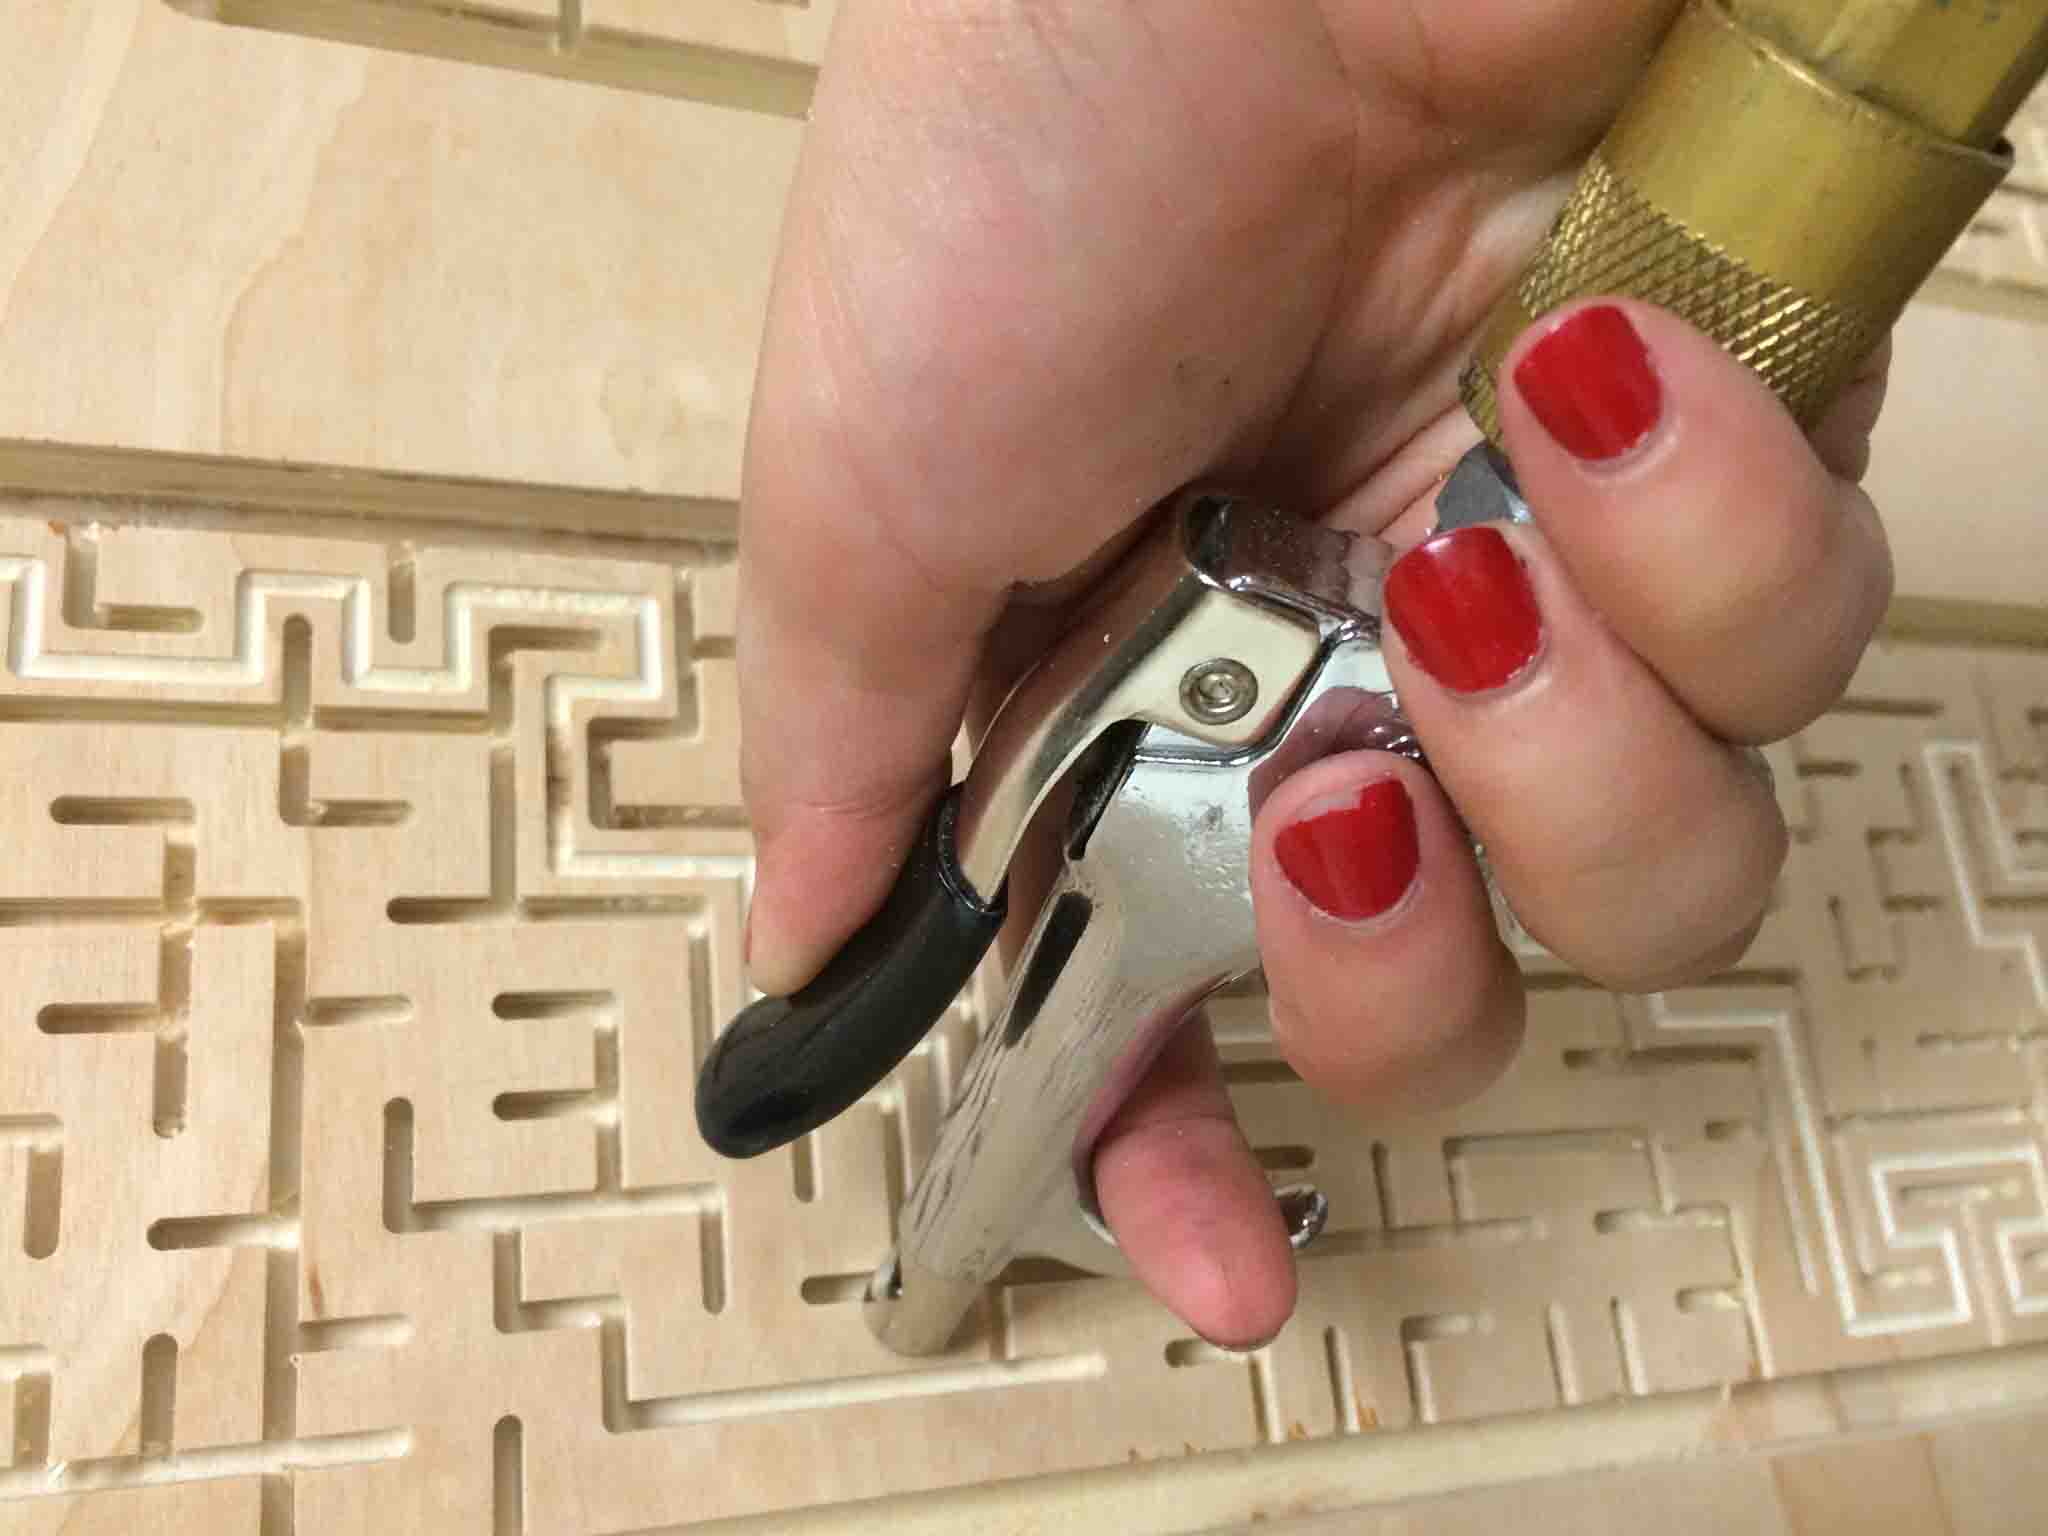
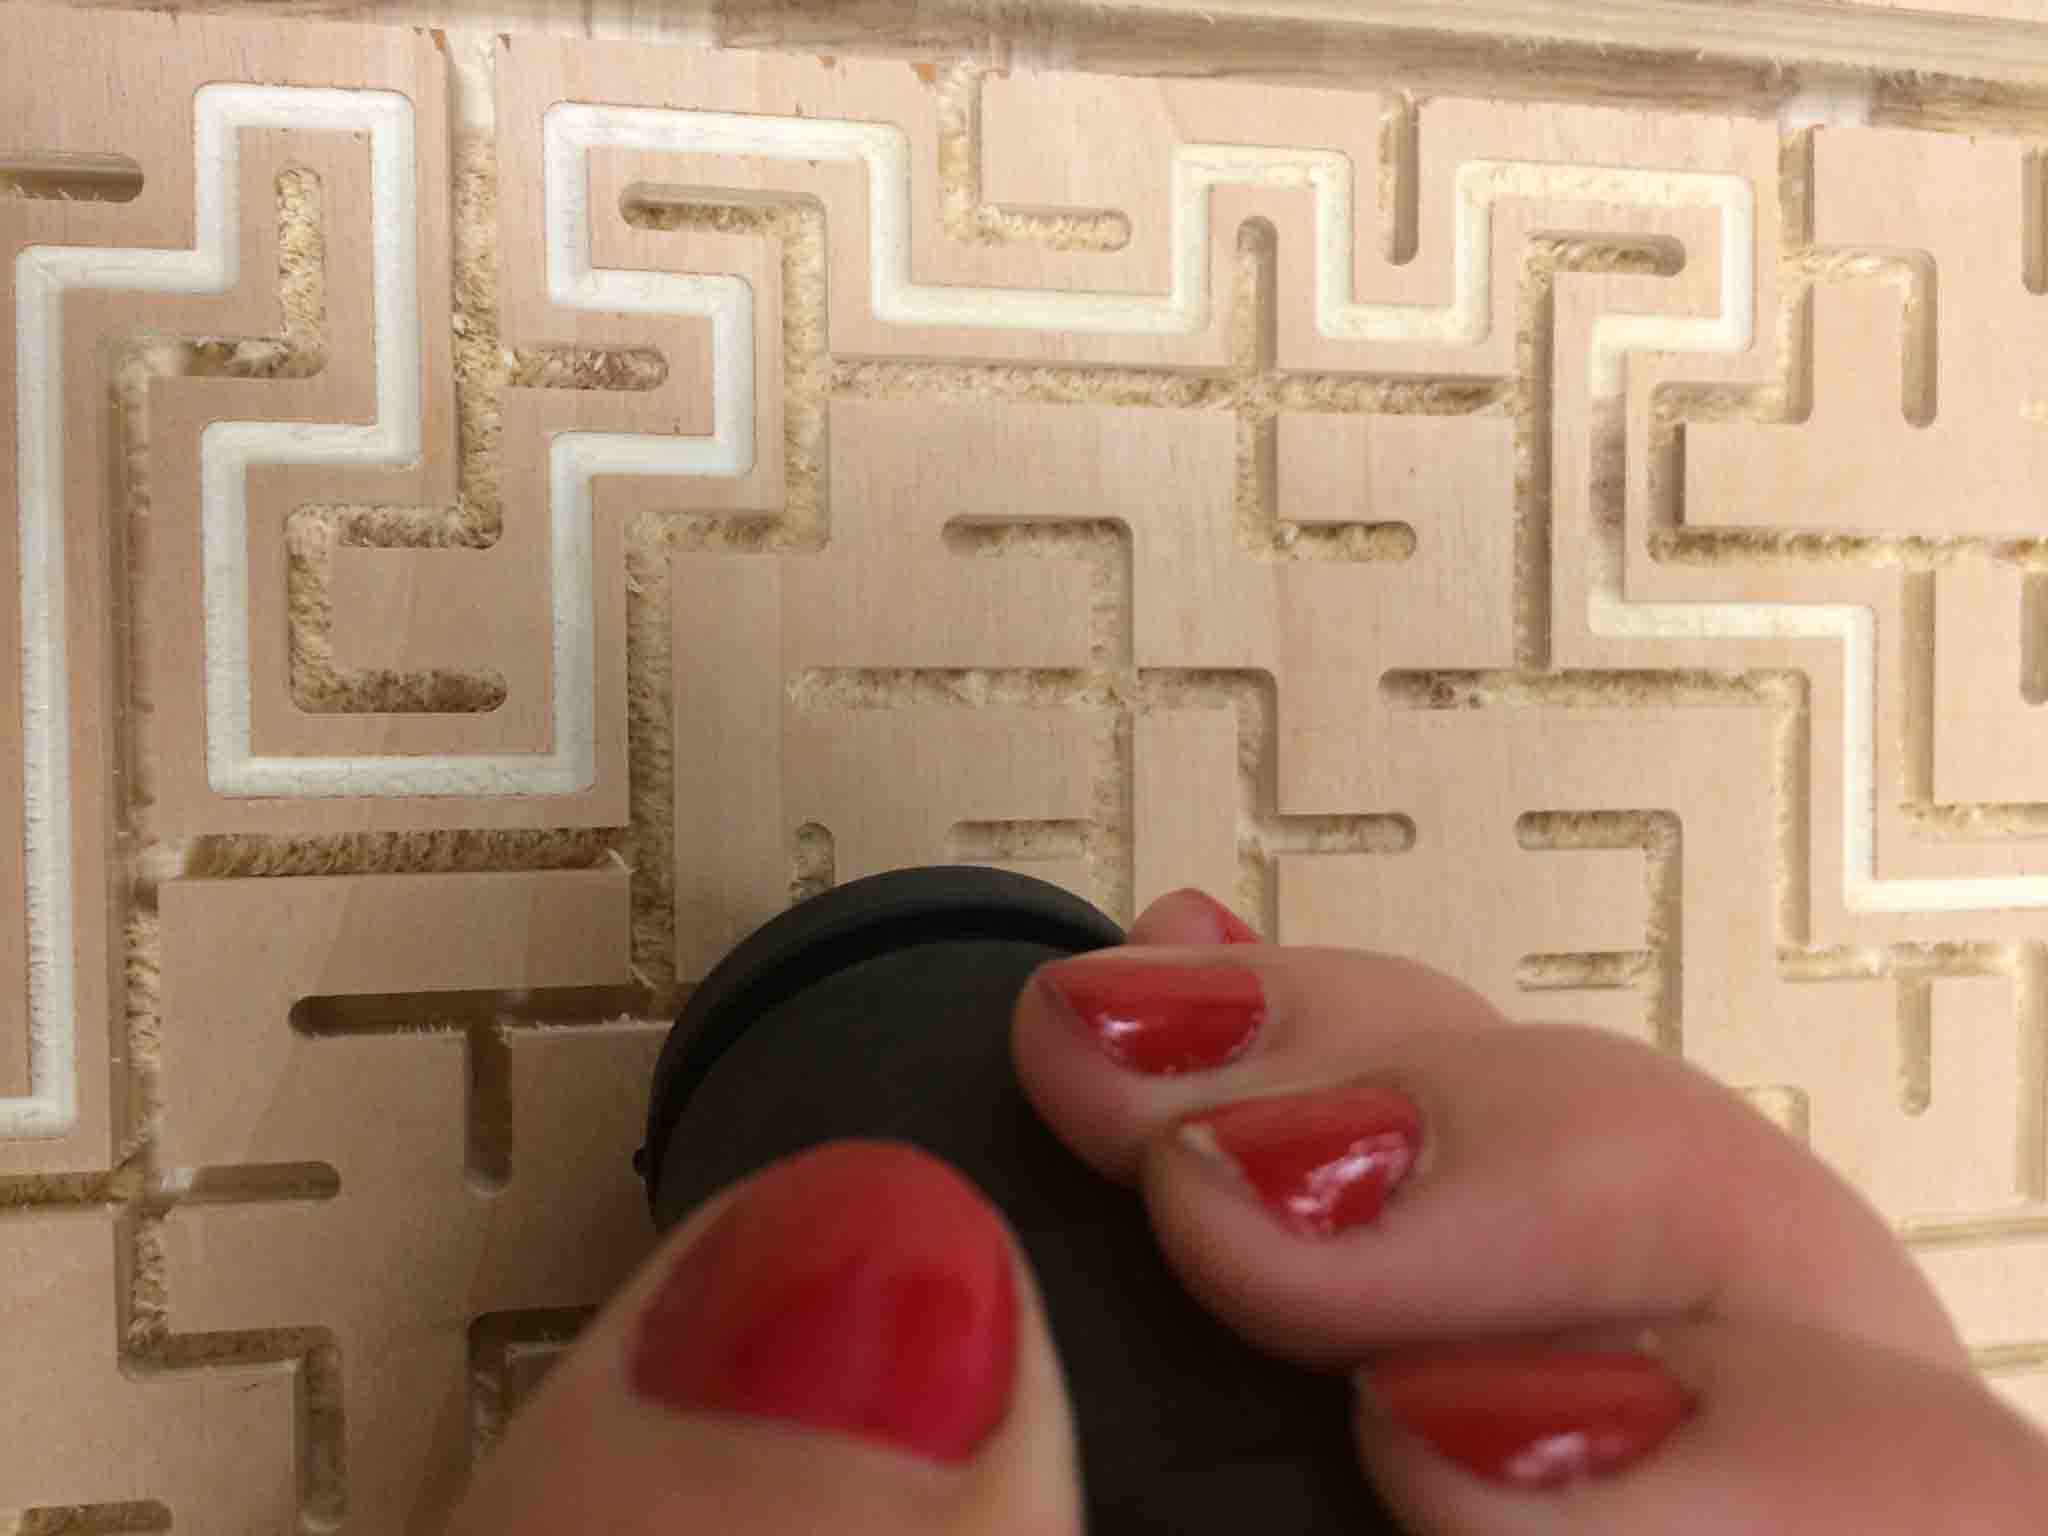
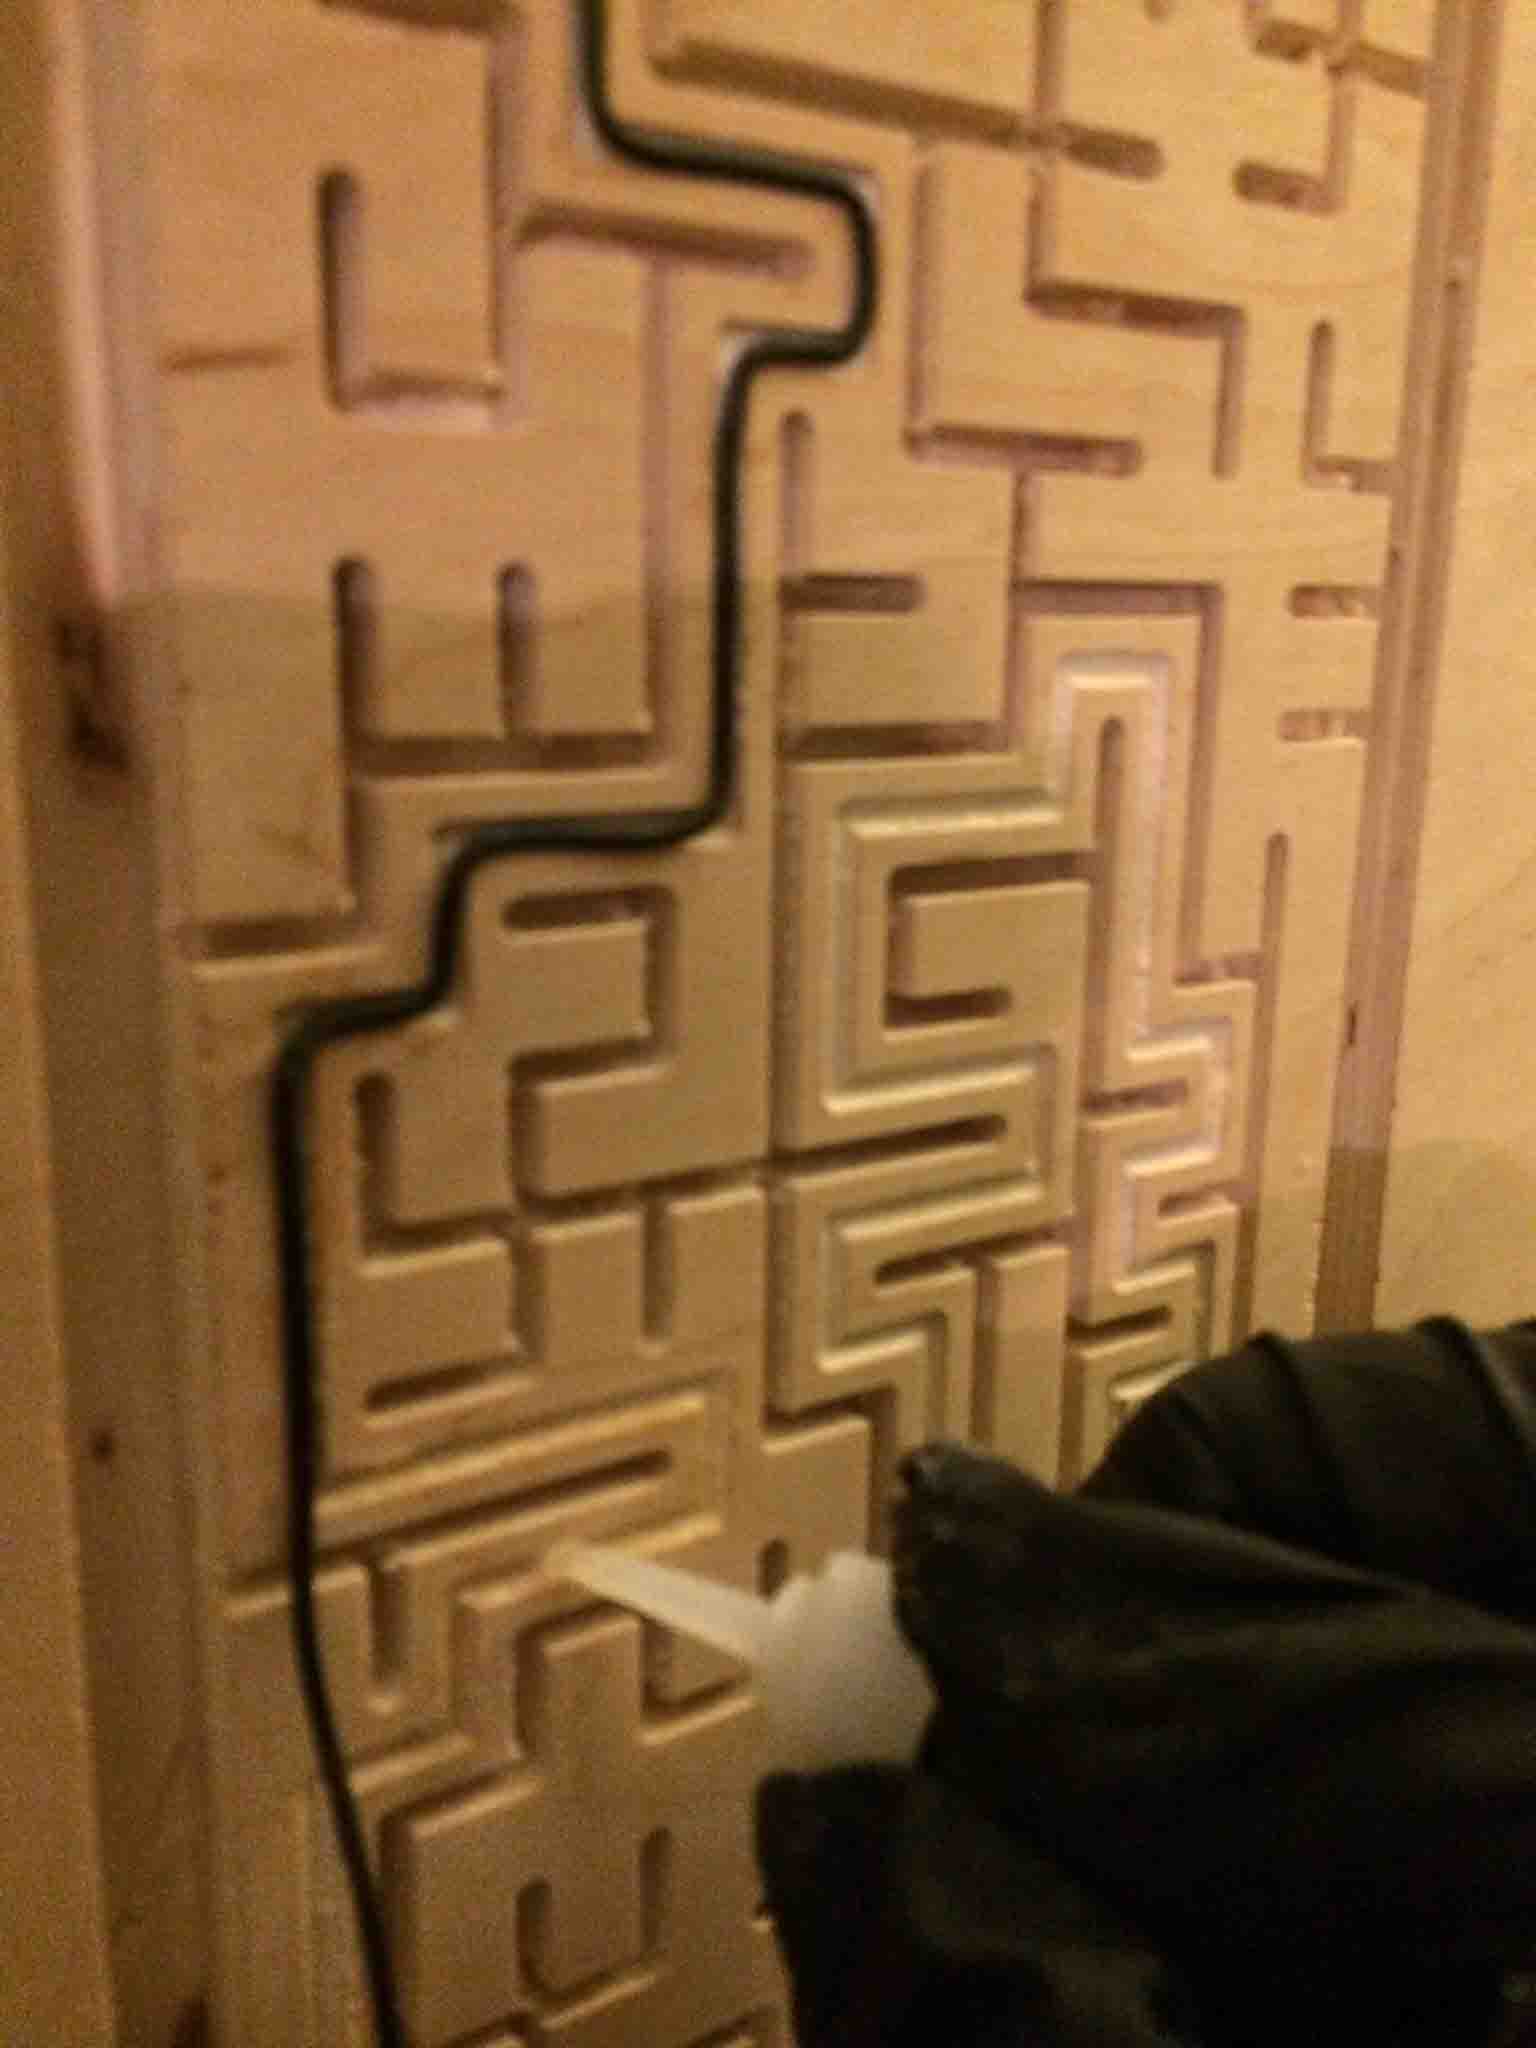
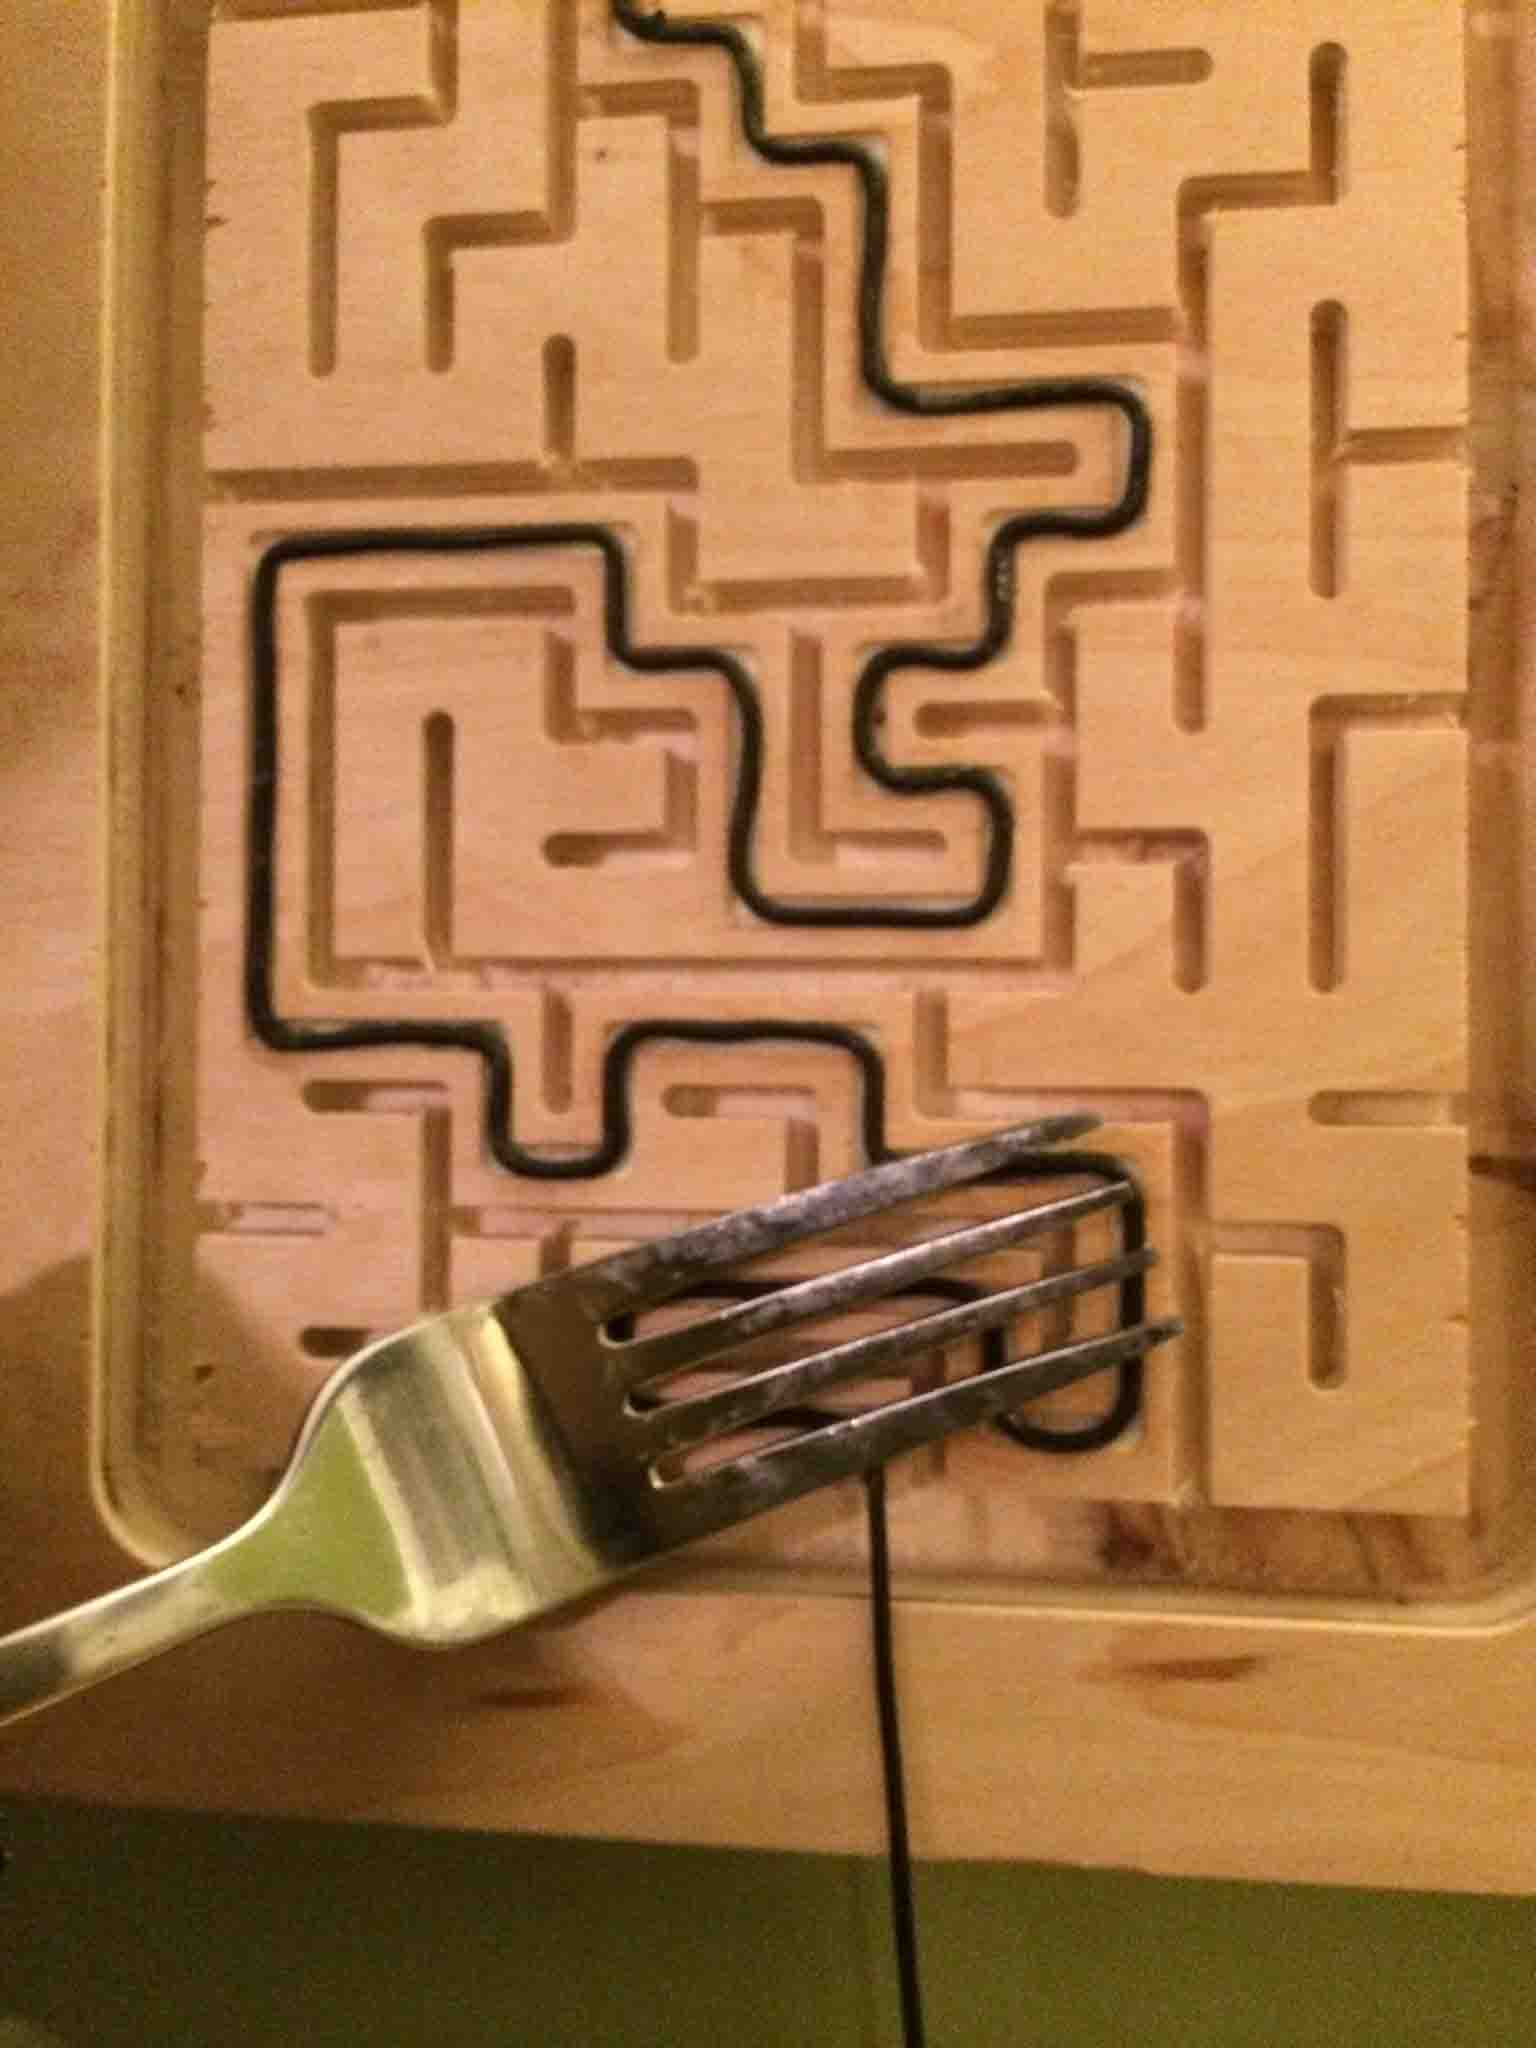
Once home and moutned underneat the TV, we could finally begin to attach the wires. Note this part took much longer than expected at a whopping 10 man-hours.
Best tips accrued: 1) The best crazy glue comes from LaVerde's and comes in a fine, precision tip. This is important for our 22-gauge wire. 2) Forks are incredibley helpful in mediating the tense situation building between the applied glue and your hands. Use these, not your fingers, to apply pressure.
Progress pics for posterity. Definitely one of those projects where standing back is nice to see the big picture.
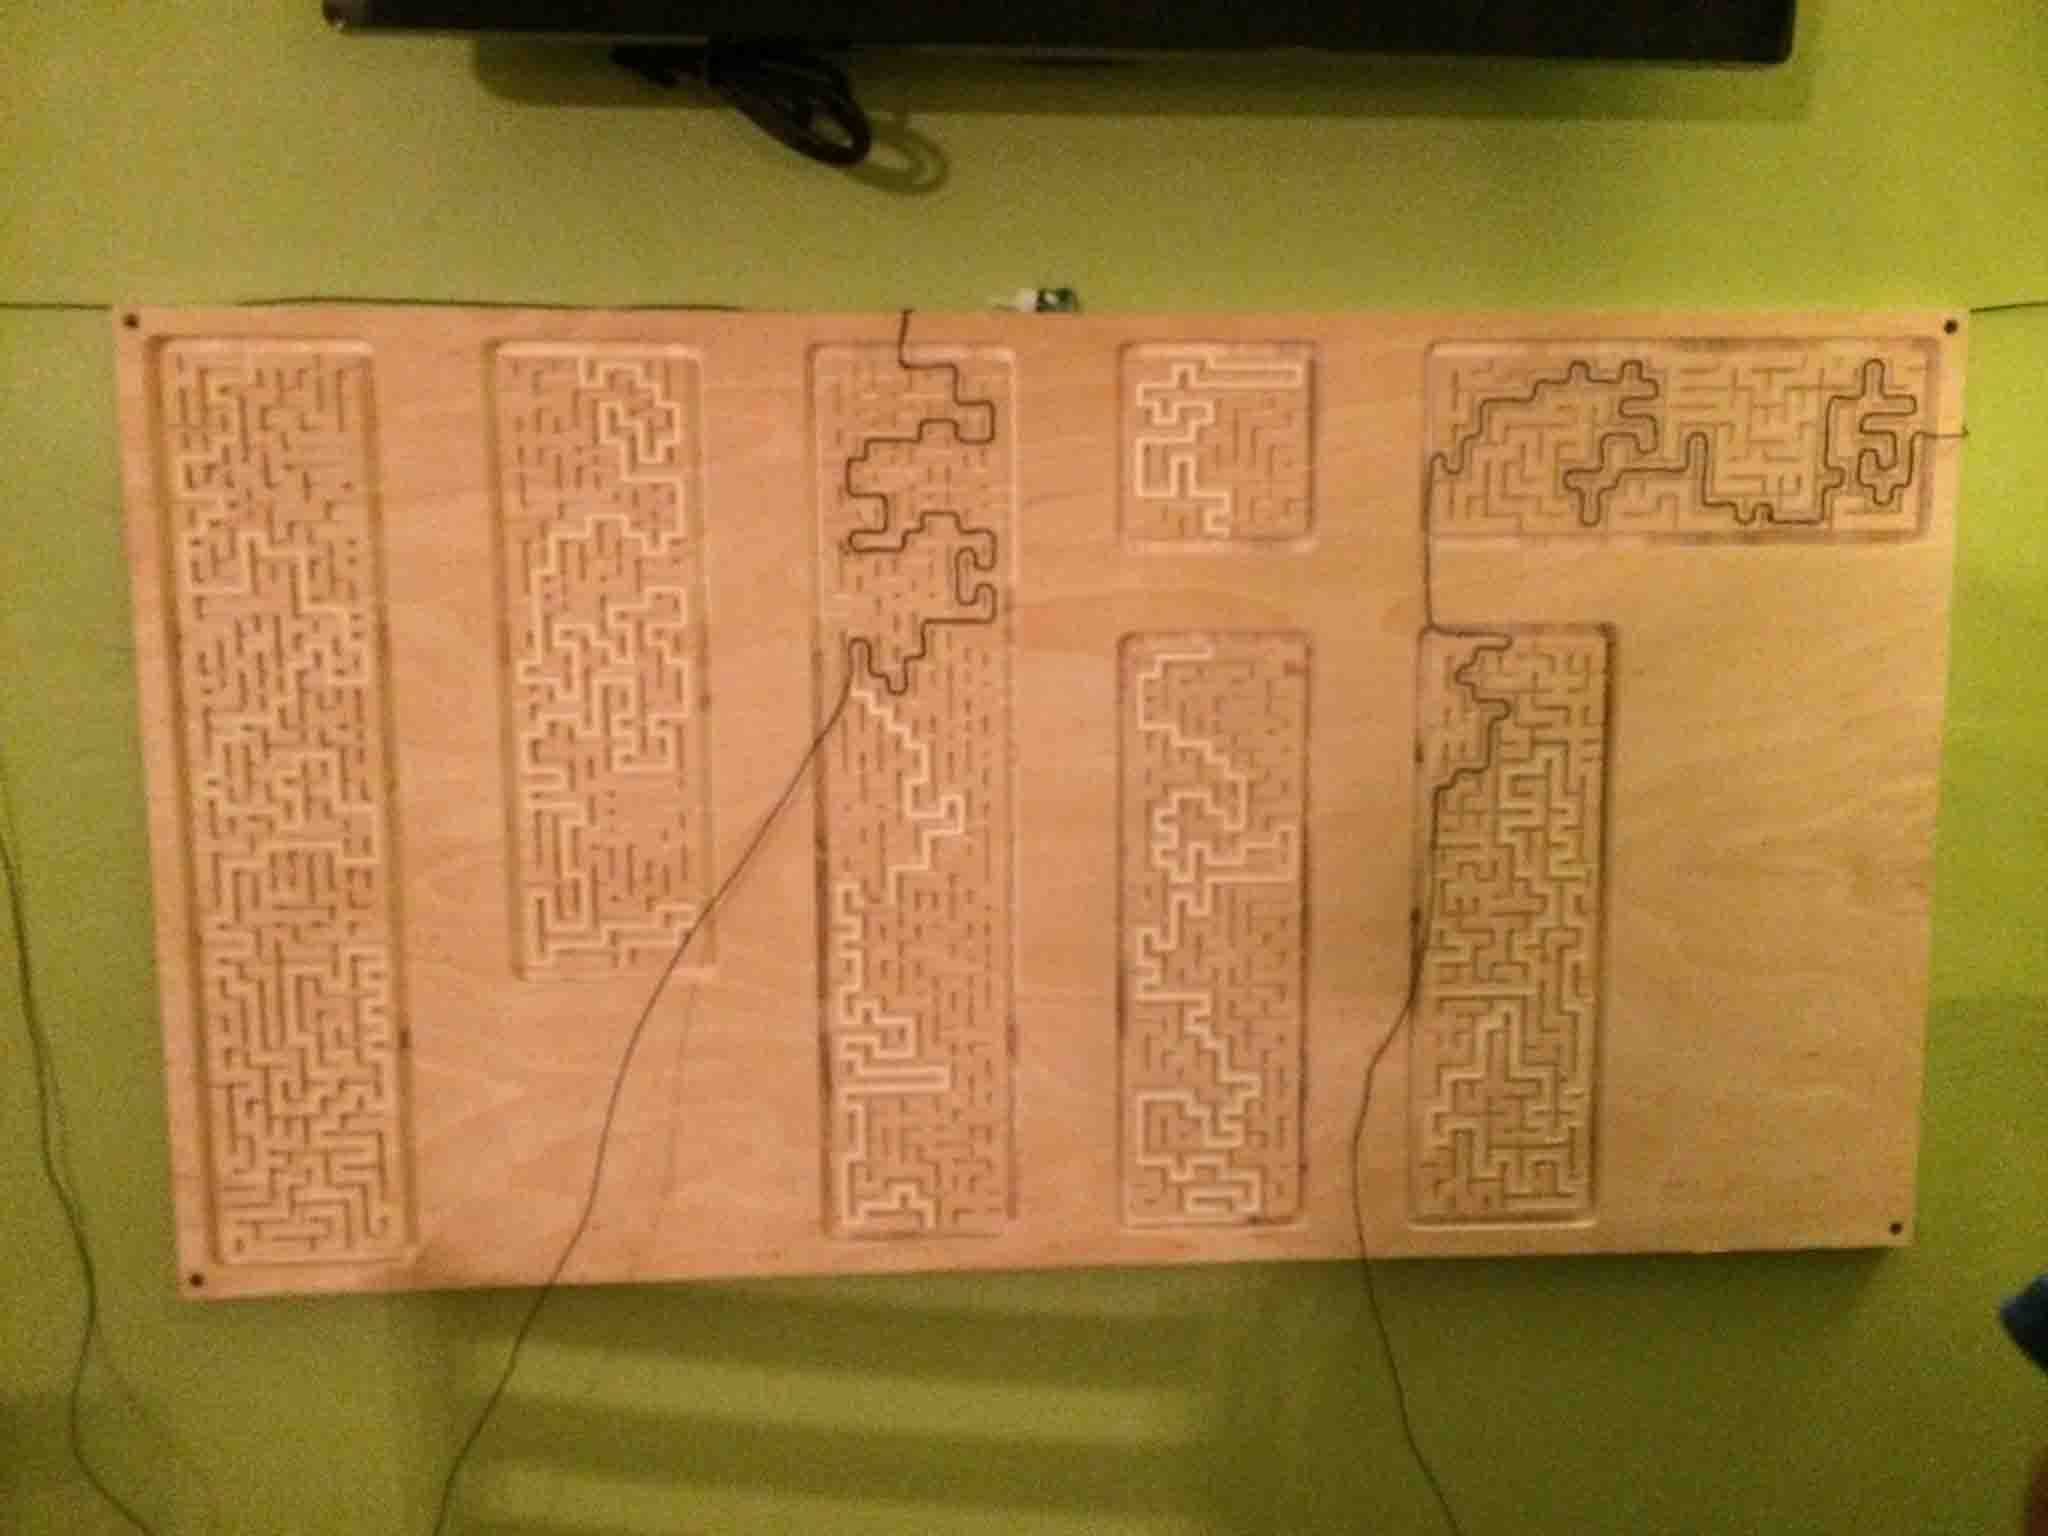
After nailing down the outside wires around our magical "black box"...our final product!