-

- Computer-Aided Design 01
- Parametric Construction 02
- Electronics Production 03
- 3D Printing 04
- Electronics Design 05
- Computer-Controlled Machining 06
- Embedding Programming 07
- Molding + Casting 08
- Output Devices 09
- Machine Design 10
- Input Devices 11
- Interface + App Programming 12
- Networking + Communications 13
- Composites 14
- Final Project 15
HOW TO MAKE (ALMOST) ANYTHING
Lily Gabaree
Machine Design
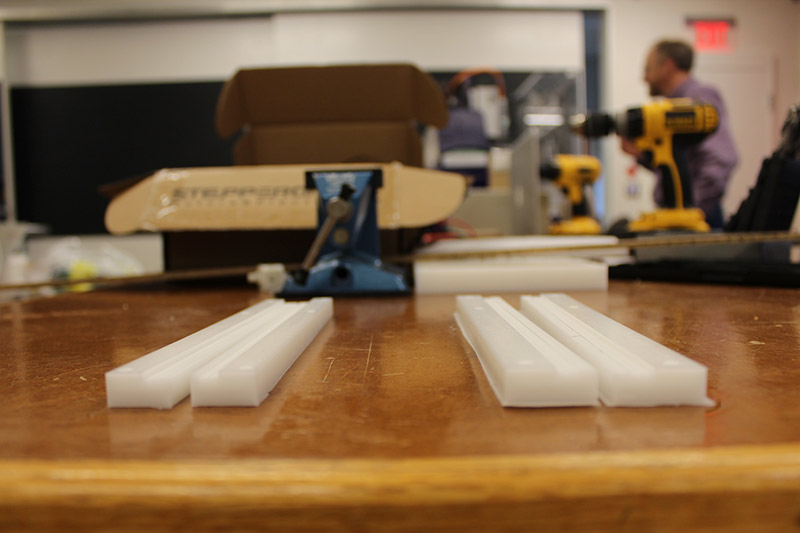
The Harvard section is interested in building a 2-axis CNC, that will "paint" UV-sensitive fabric with light. To divvy up the work, we've formed milling, assembly, and programming teams; I'm on the milling team, so I focused on machining the parts of the CNC.
We are using Rhino to view the files and select vectors to export. We aren’t milling out the clamps like we did with the wax mold; we’re treating these cuts as a series of 2d objects, rather than one 3d object. So, we import 2D vectors into VCarve, and then specify the Z component of different toolpaths within the vector design. For example: for a clamp, the outline was milled as a 2D path, at material thickness (9.92mm); the lower edge was milled at 1.5mm, as a pocket; the middle was milled at 2mm, as a pocket. I drew rectangles around the pockets in order to select the paths, because the outline needed to be a closed vector, and I couldn’t figure out how to make parts of the outline belong to the pocket vectors as well.
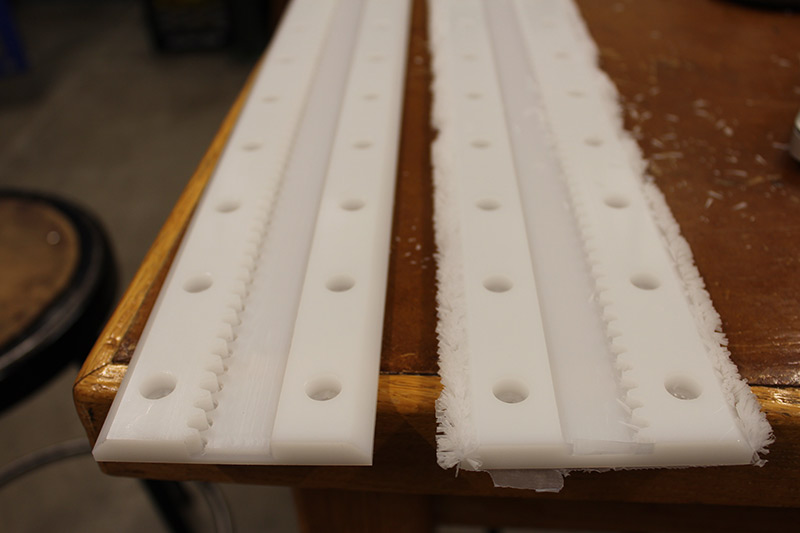
Making these toolpaths was a time-consuming process, and easy to mess up. Kevin, Rob, and I started with milling these two clamps, and the first cut of these two clamps was unsuccessful, because the outline toolpath was milled inside instead of outside the vector (see too-small clamps on the left, compared to correct clamps on the right). But with the second cut, a new problem arose: the cut didn't quite go through the material, either due to variation in the material thickness, the sacrificial layer, or maybe I zero-ed it wrong. For pieces like these, post-processing with a knife was required.
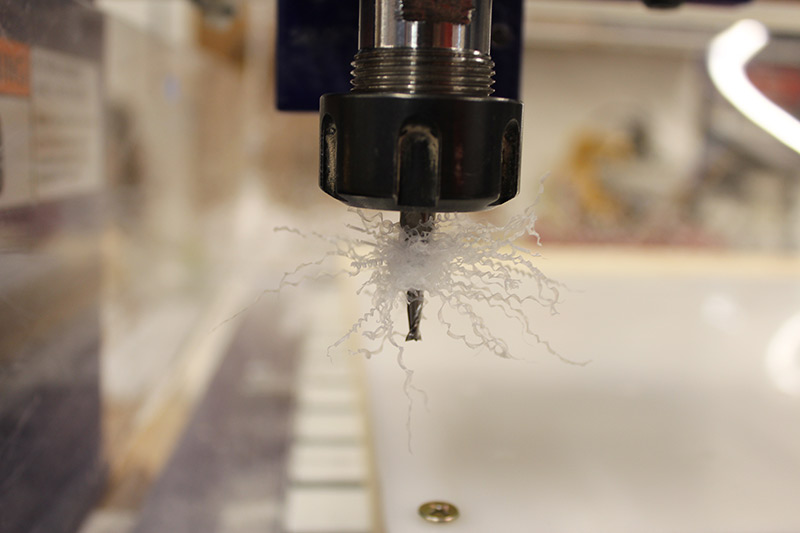
On my second day milling, Rob and I made the parts for a second axis. The first axis had come out pretty well, but the teeth weren't quite cleared out, as they were run with a profile rather than a pocket toolpath, and so I ended up clearing them out with an Exacto knife. The night before, the chosen bit for the rack had broken, so Rob and I were using a different bit with more flutes today.

The second rack tooks ages to mill, because there were 8 different toolpaths - one at a time, because the too-fluted bit is getting gunked up and needs cleaning in between runs, and we’re using four different bits - and it is doing a million runs on the tooth pockets.
Rob and I also worked on making pinions out of Delran, a harder material. The Delran is thicker (19.9mm) and the finished pinions will fit into the teeth of the rail rack. Laying out the toolpath took a long time - it was tricky to measure the distances between points in Rhino, and then we ended up creating circles for the toolpaths of the indicator holes (on the outside of the pinion). We made a larger circle, and created a path between the teeth of the pinion and that larger circle, in order to accommodate the size of the bit.
One of the problems was that the pinion has very fine parts (the teeth), which cannot be cut all the way by an ⅛’’ bit. So we are first doing rough cuts with an ⅛, and then a fine cut with a 1/16”; and then finally the outside is milled with a ¼”, because we need it to be able to go through all the way (and you don’t want a piece with lots of flutes going in too far, it might break).
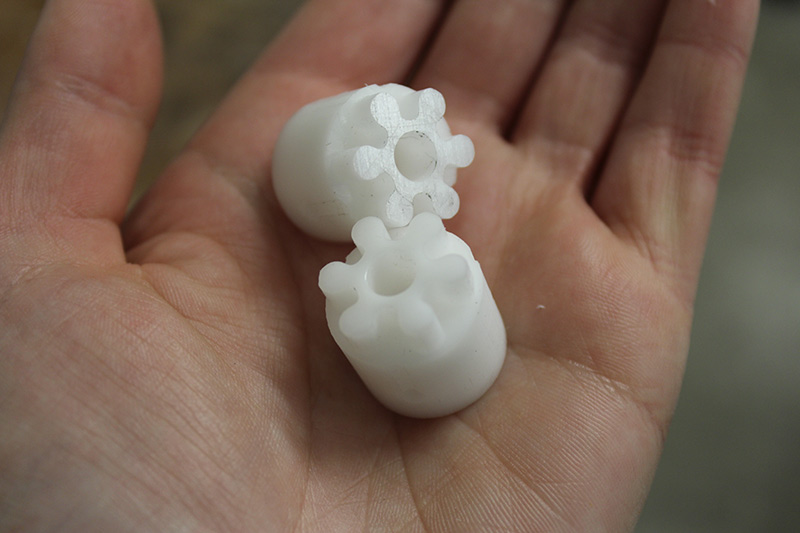
The cuts went well - in three parts (holes and rough cut with ⅛, fine tooth cut with 1/16, then outline with ¼). We cut two pinions, as we will have two axis. The pinion fits beautifully in the teeth of the rack.
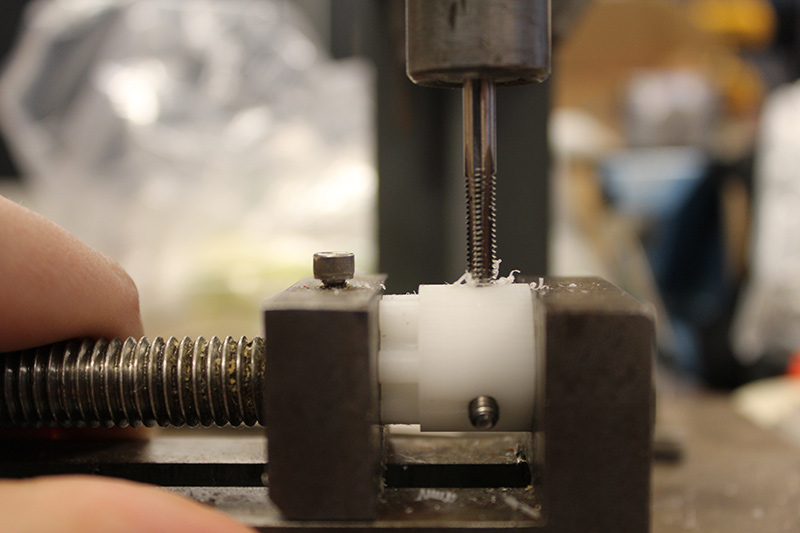
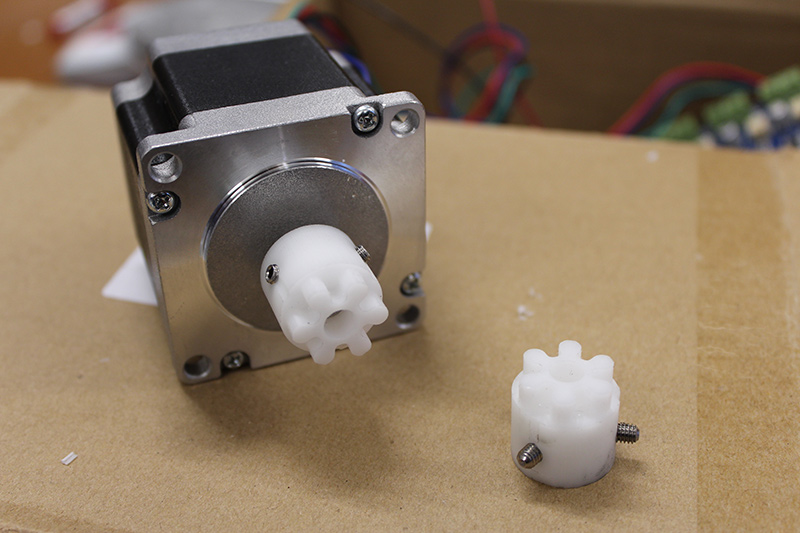
After milling, the pinions required manual tooling; first, I drilled holes into the sides with the drill press, and then I created threads within the holes with a tapper, so the 4x8 set screws can twist into the pinion. Finally, a 1/4" reamer on the drill press ensures the central holes will fit the stepper motor arm.
Now the pinions fit onto the arms of the stepper motors! I handed off the pieces to the assembly team. Here's a video of some of the milling, and of the pinion moving down the teeth of the rail rack.
And here's the final product! See the Harvard section machine page for full collective documentation, and videos of the CNC in action.
