Sketching
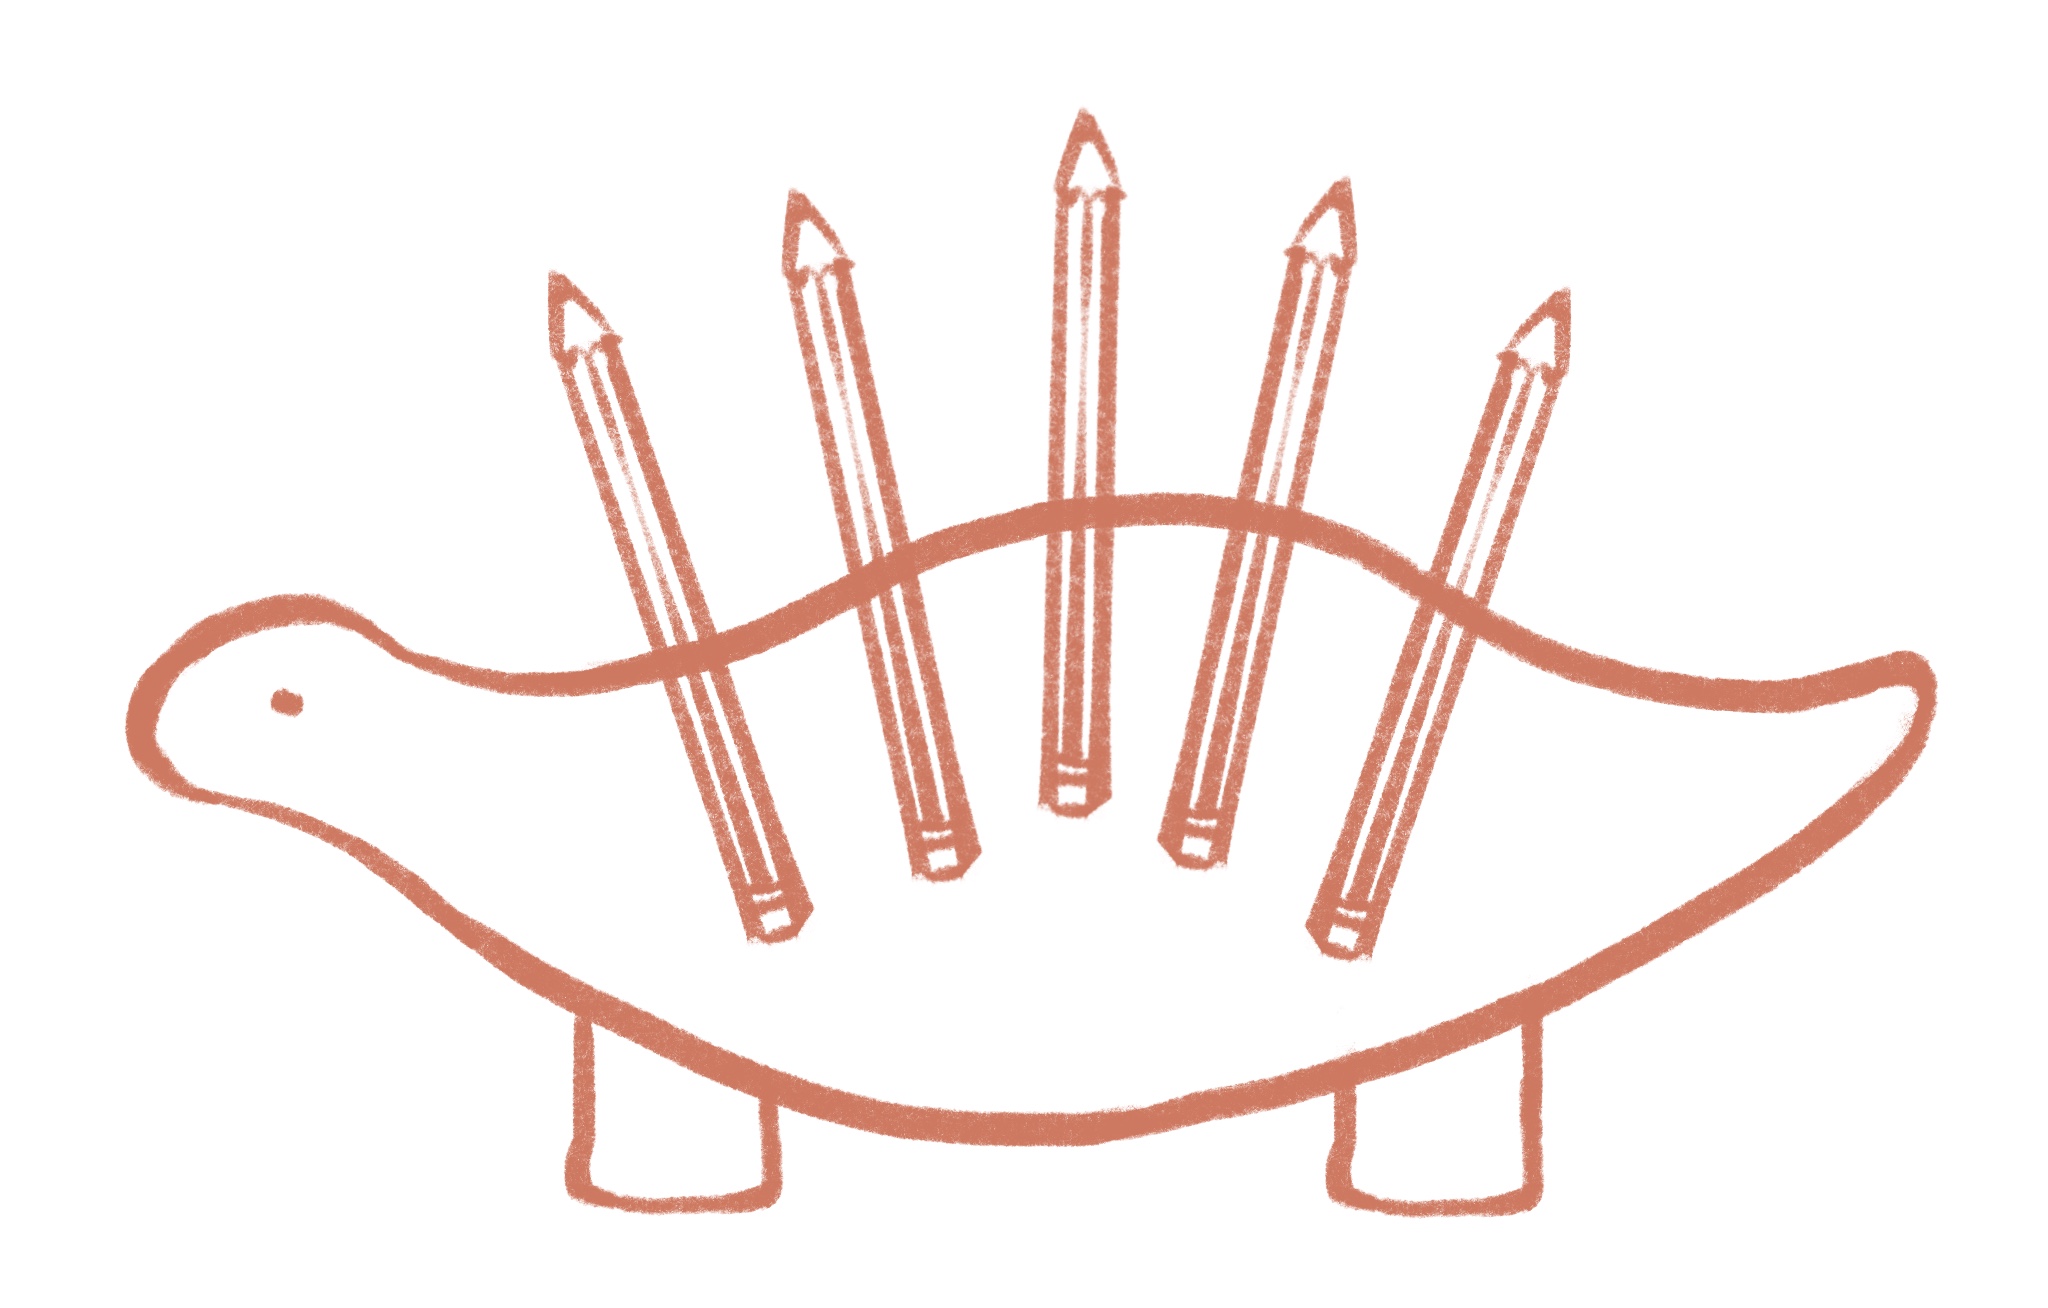
My goal for this week is to cast a little dinosaur! My original design was a stegosaurus pencil holder, where the pencils are the spikes. I wound up going with a plain dinosaur since the molds would be too tiny to serve as actual pencil holders. Here's the sketch I made on my iPad in Procreate.
CADing from sketch
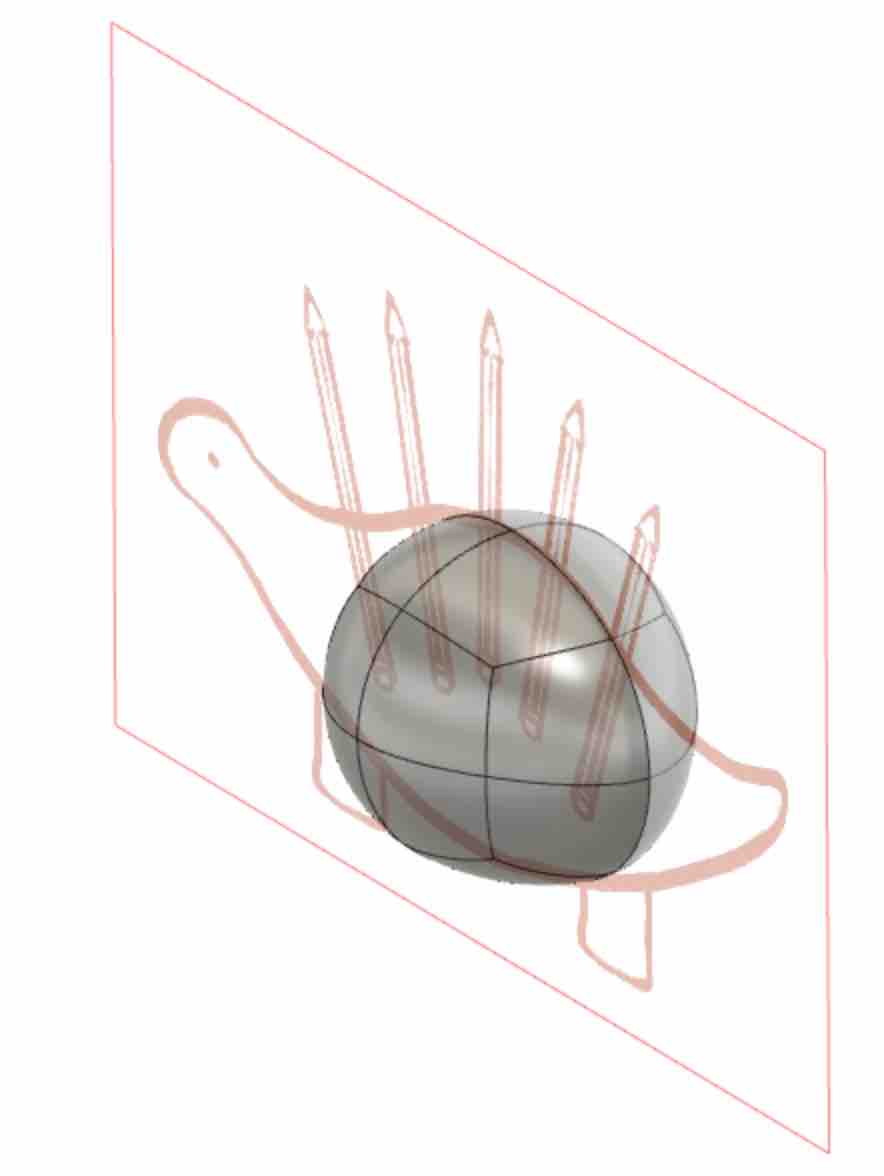
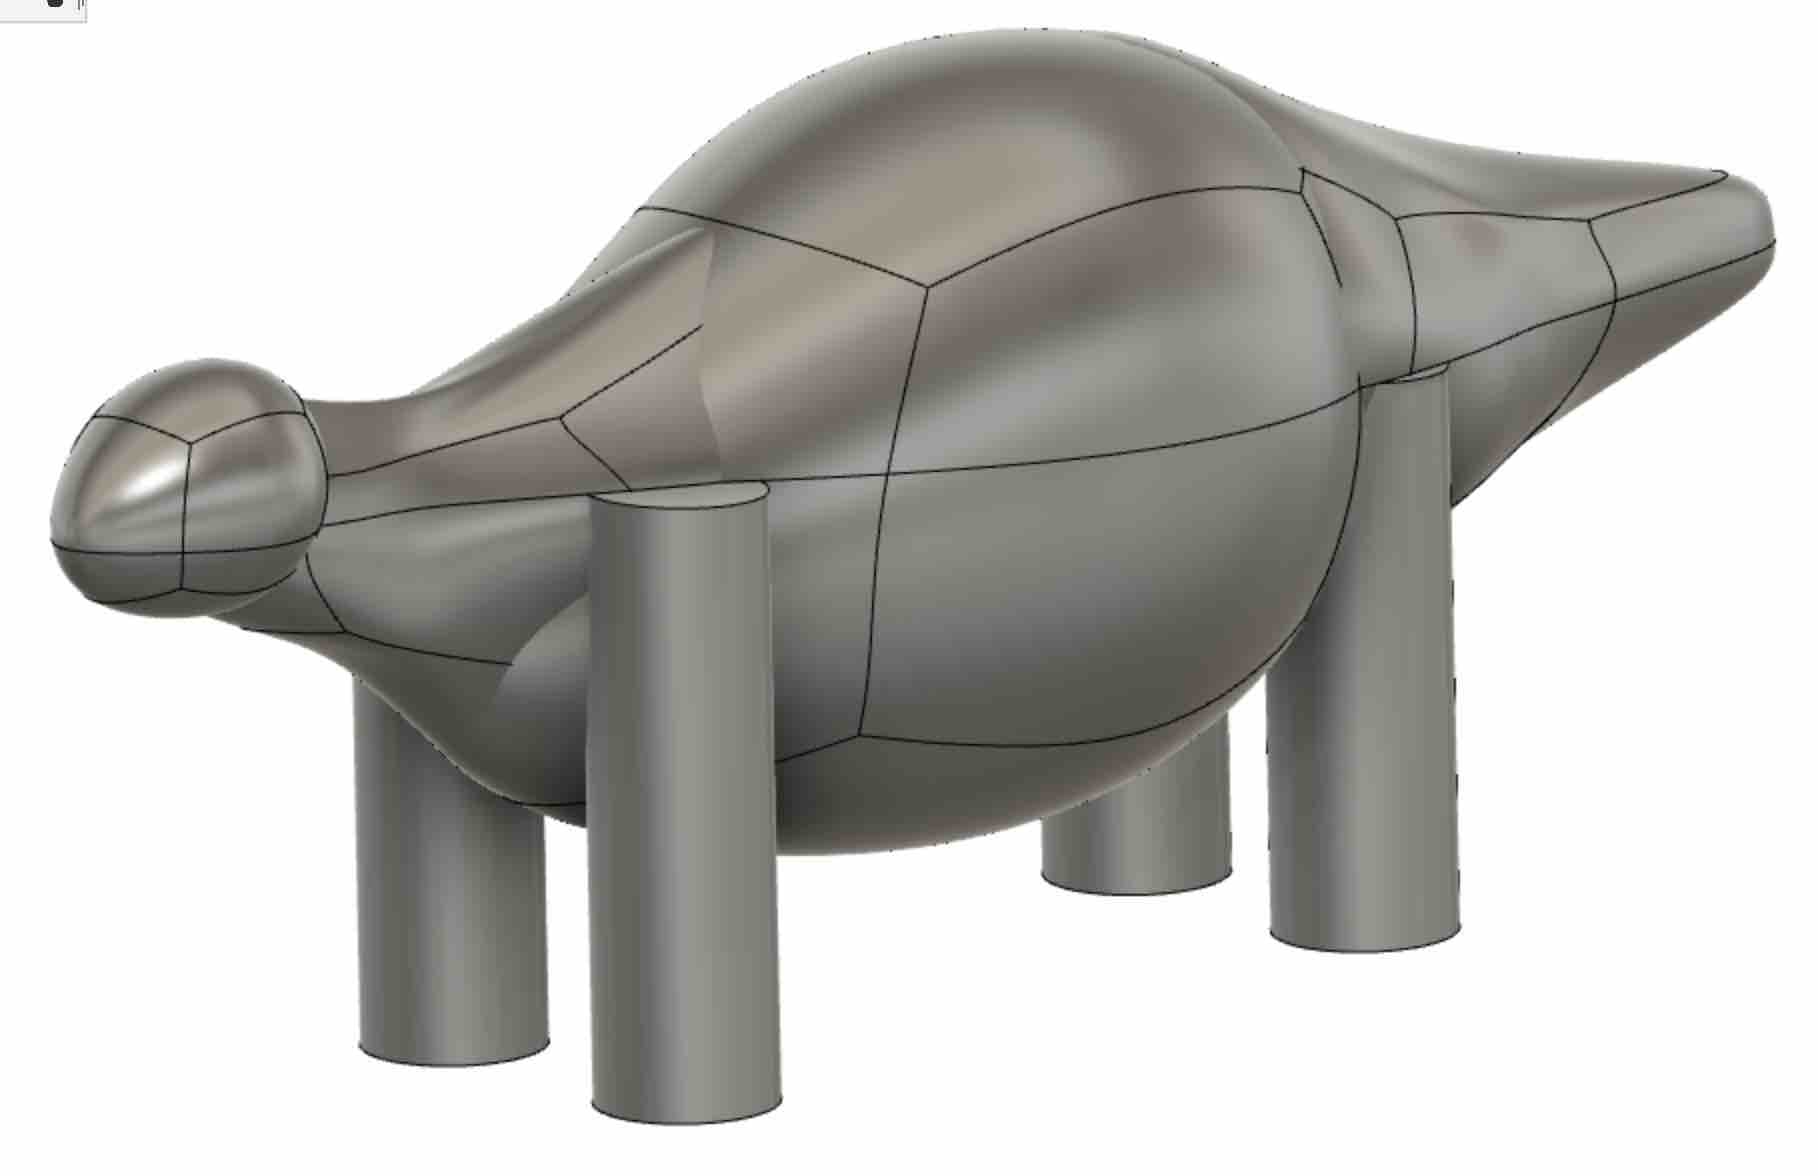
I imported the sketch into Fusion and used the Form tools to sculpt the dinosaur's body. I built off of the Form skills I'd learned in the 3D printing week (week4); in hindsight, my bird design that week would have looked a lot better if I'd referenced a sketch.
Here he is
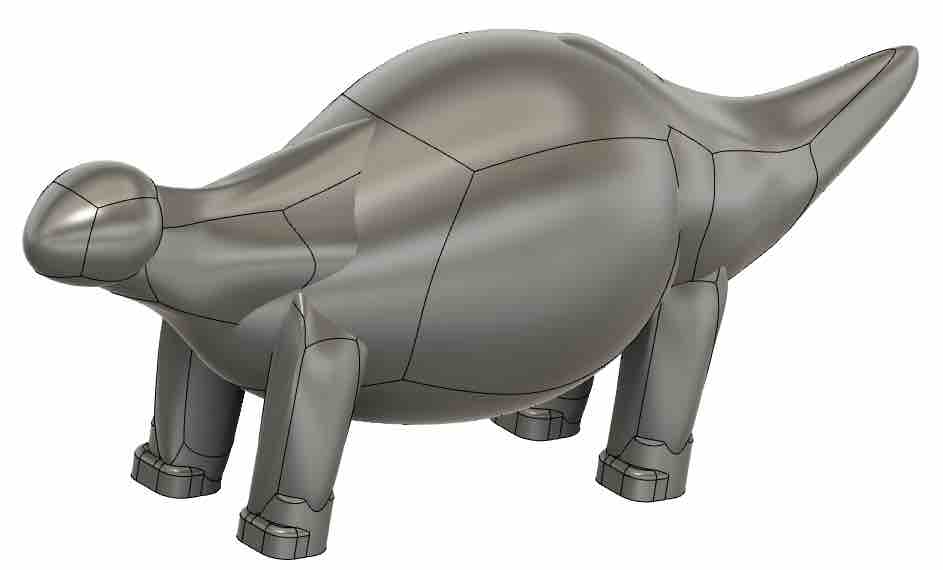
It was a little tedious to push and pull the dino's body into shape, but
also more effective than I'd anticipated; it really does match my initial design. I used multiple
forms for each body part, so he's not exactly smooth; next time, I would try creating the design all from
one form.
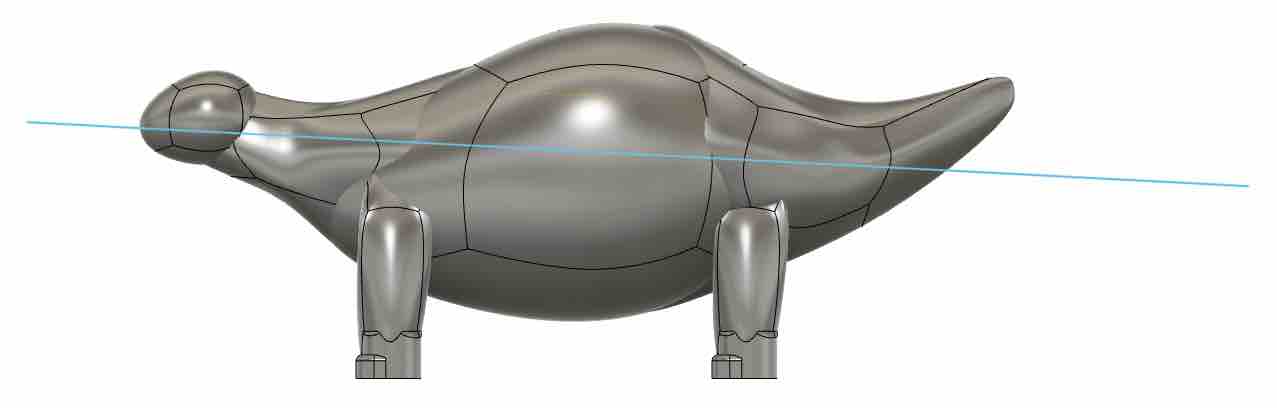
I made an offset plane at an angle of 3 degrees, then used that to slice the dino into top and bottom. I
made sure the plane carved the dino at its widest points to reduce overhang. You can
see I still have areas (the toes and the tail) that wouldn't make sense to mill due to overhang.
Due to the tail overhang, I was originally planning to have the space beneath the tail just be solid wax, then carve out the tail shape later. To make things simpler, I aligned the tail with the cutting plane. I also made the legs just big cylinders to carve later.
Dino in Rhino
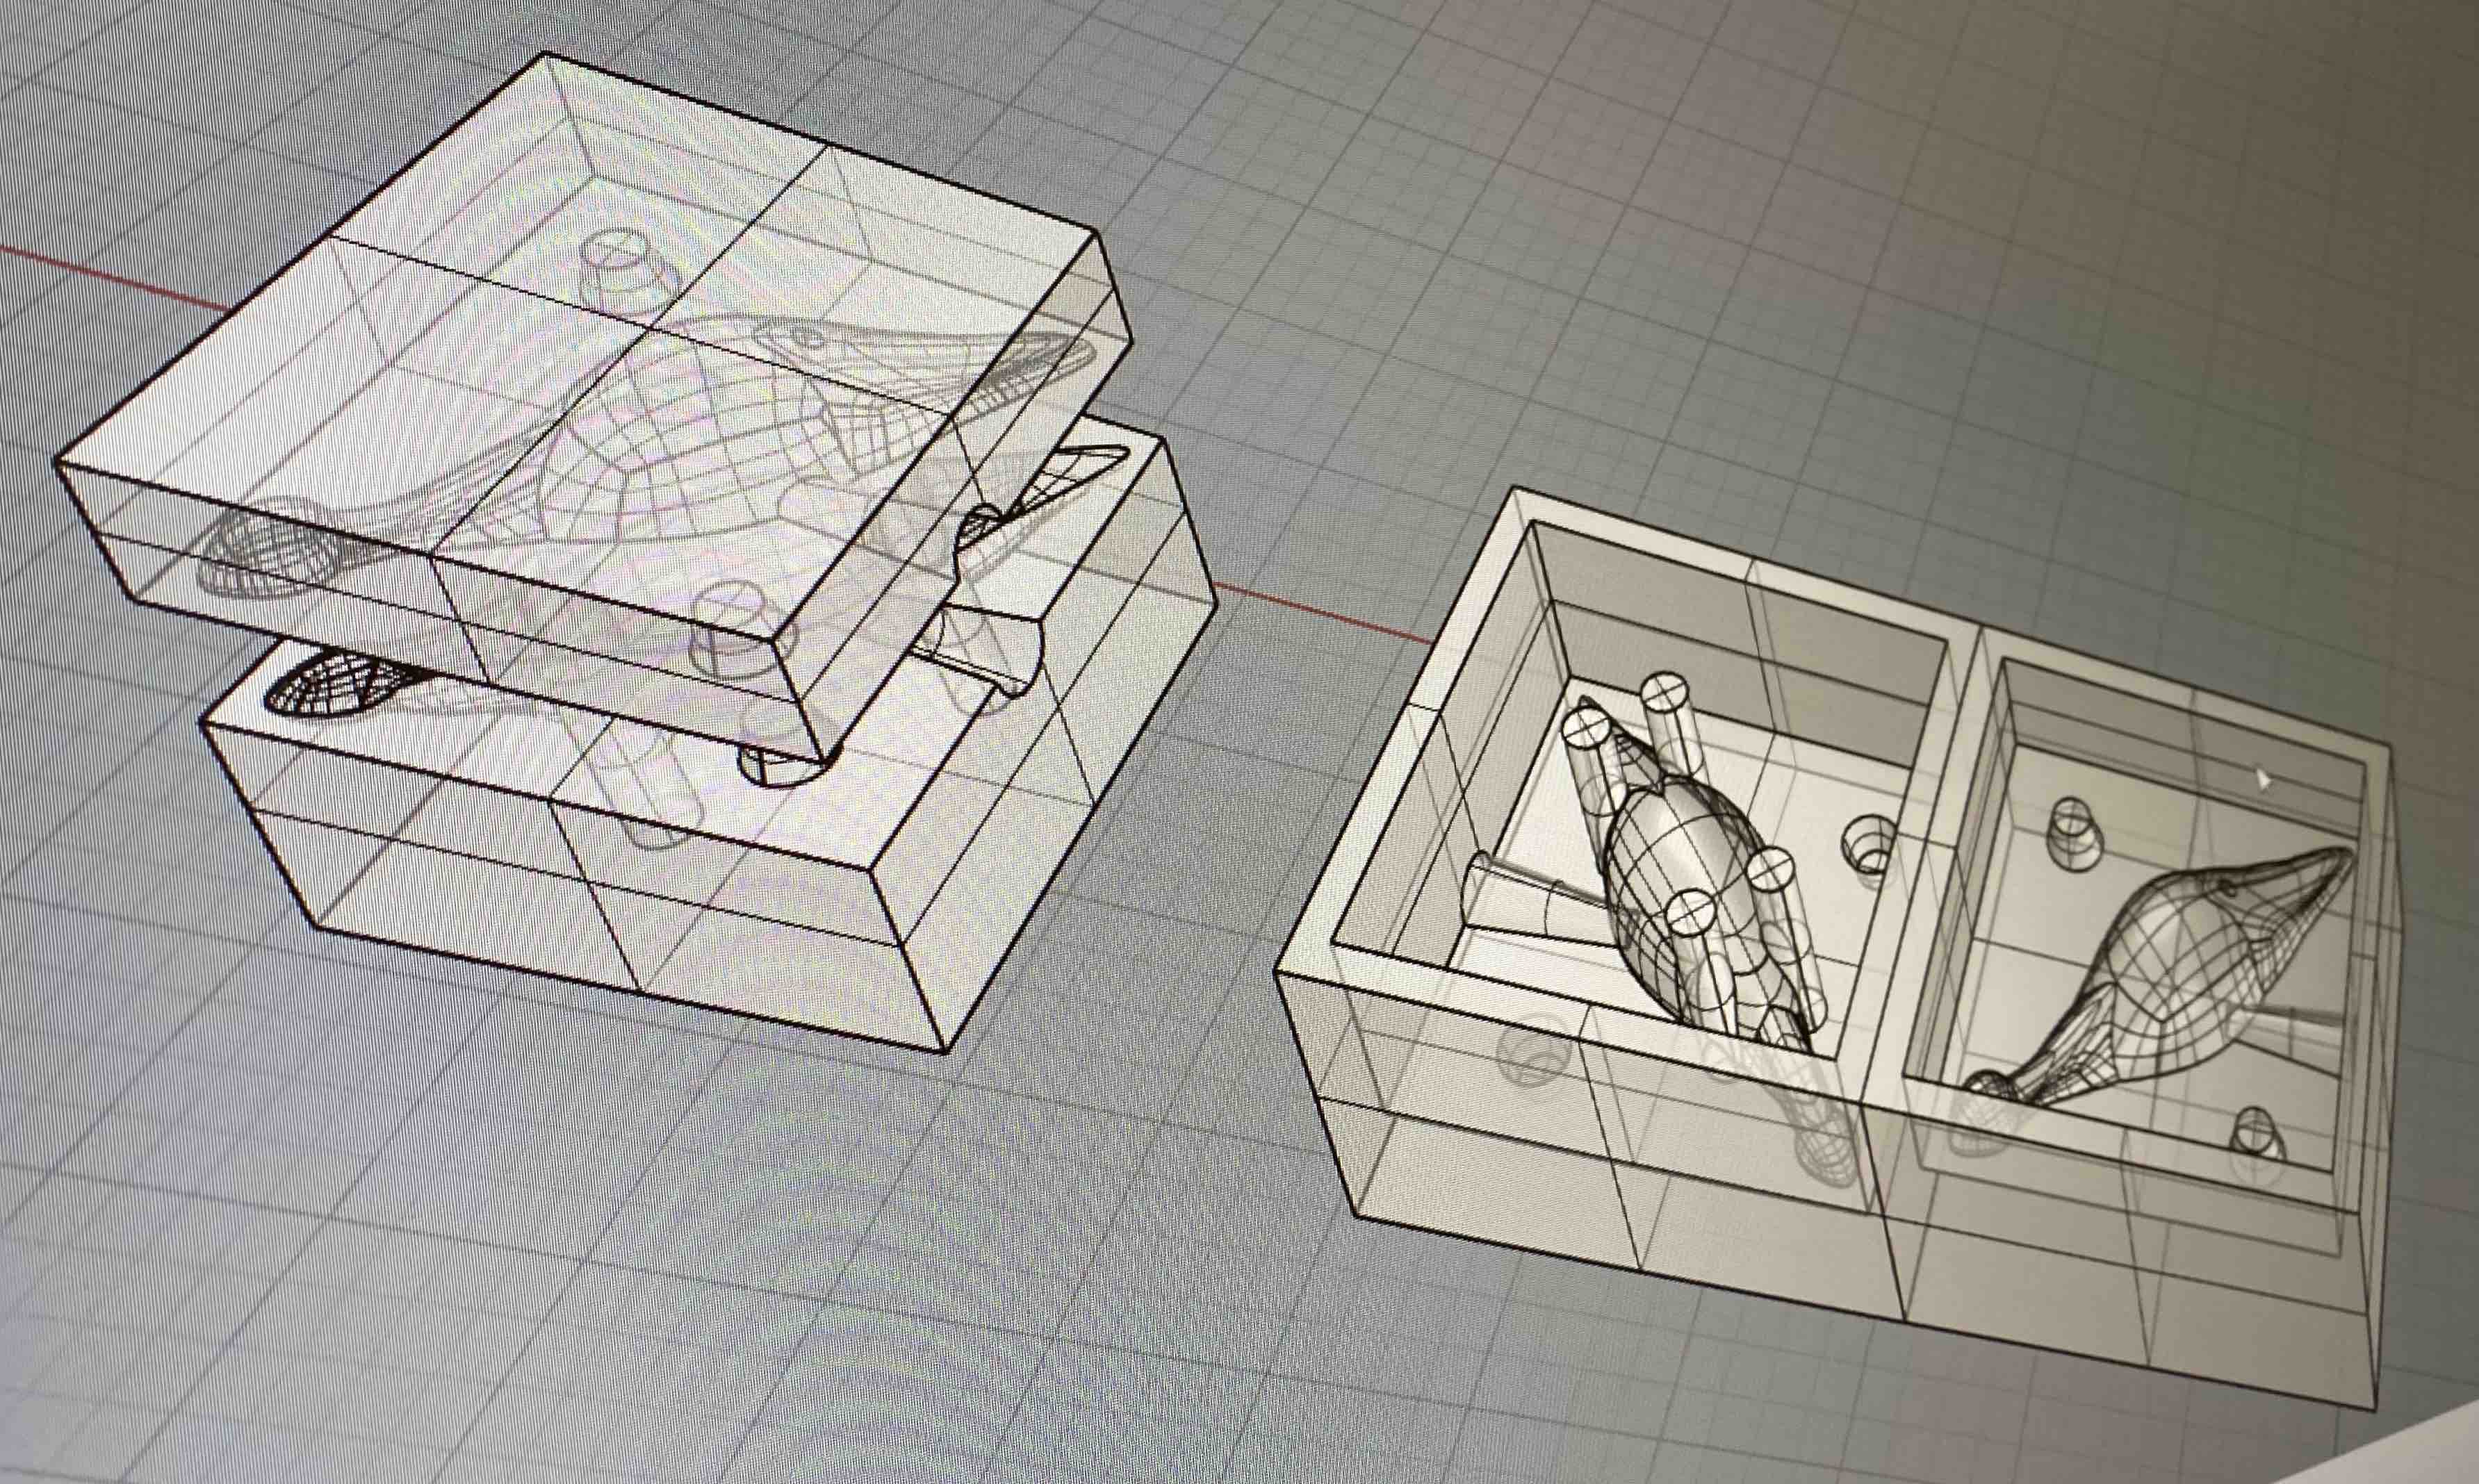
I wasn't confident in placing my dino in the mold CAD on my own, so I got help from Zain. We imported my
file to Rhinoceros, and Zain used bounding boxes and a bunch of other funky commands to ensure both halves of
the dino mold would align. He also added alignment pegs and a sprue.
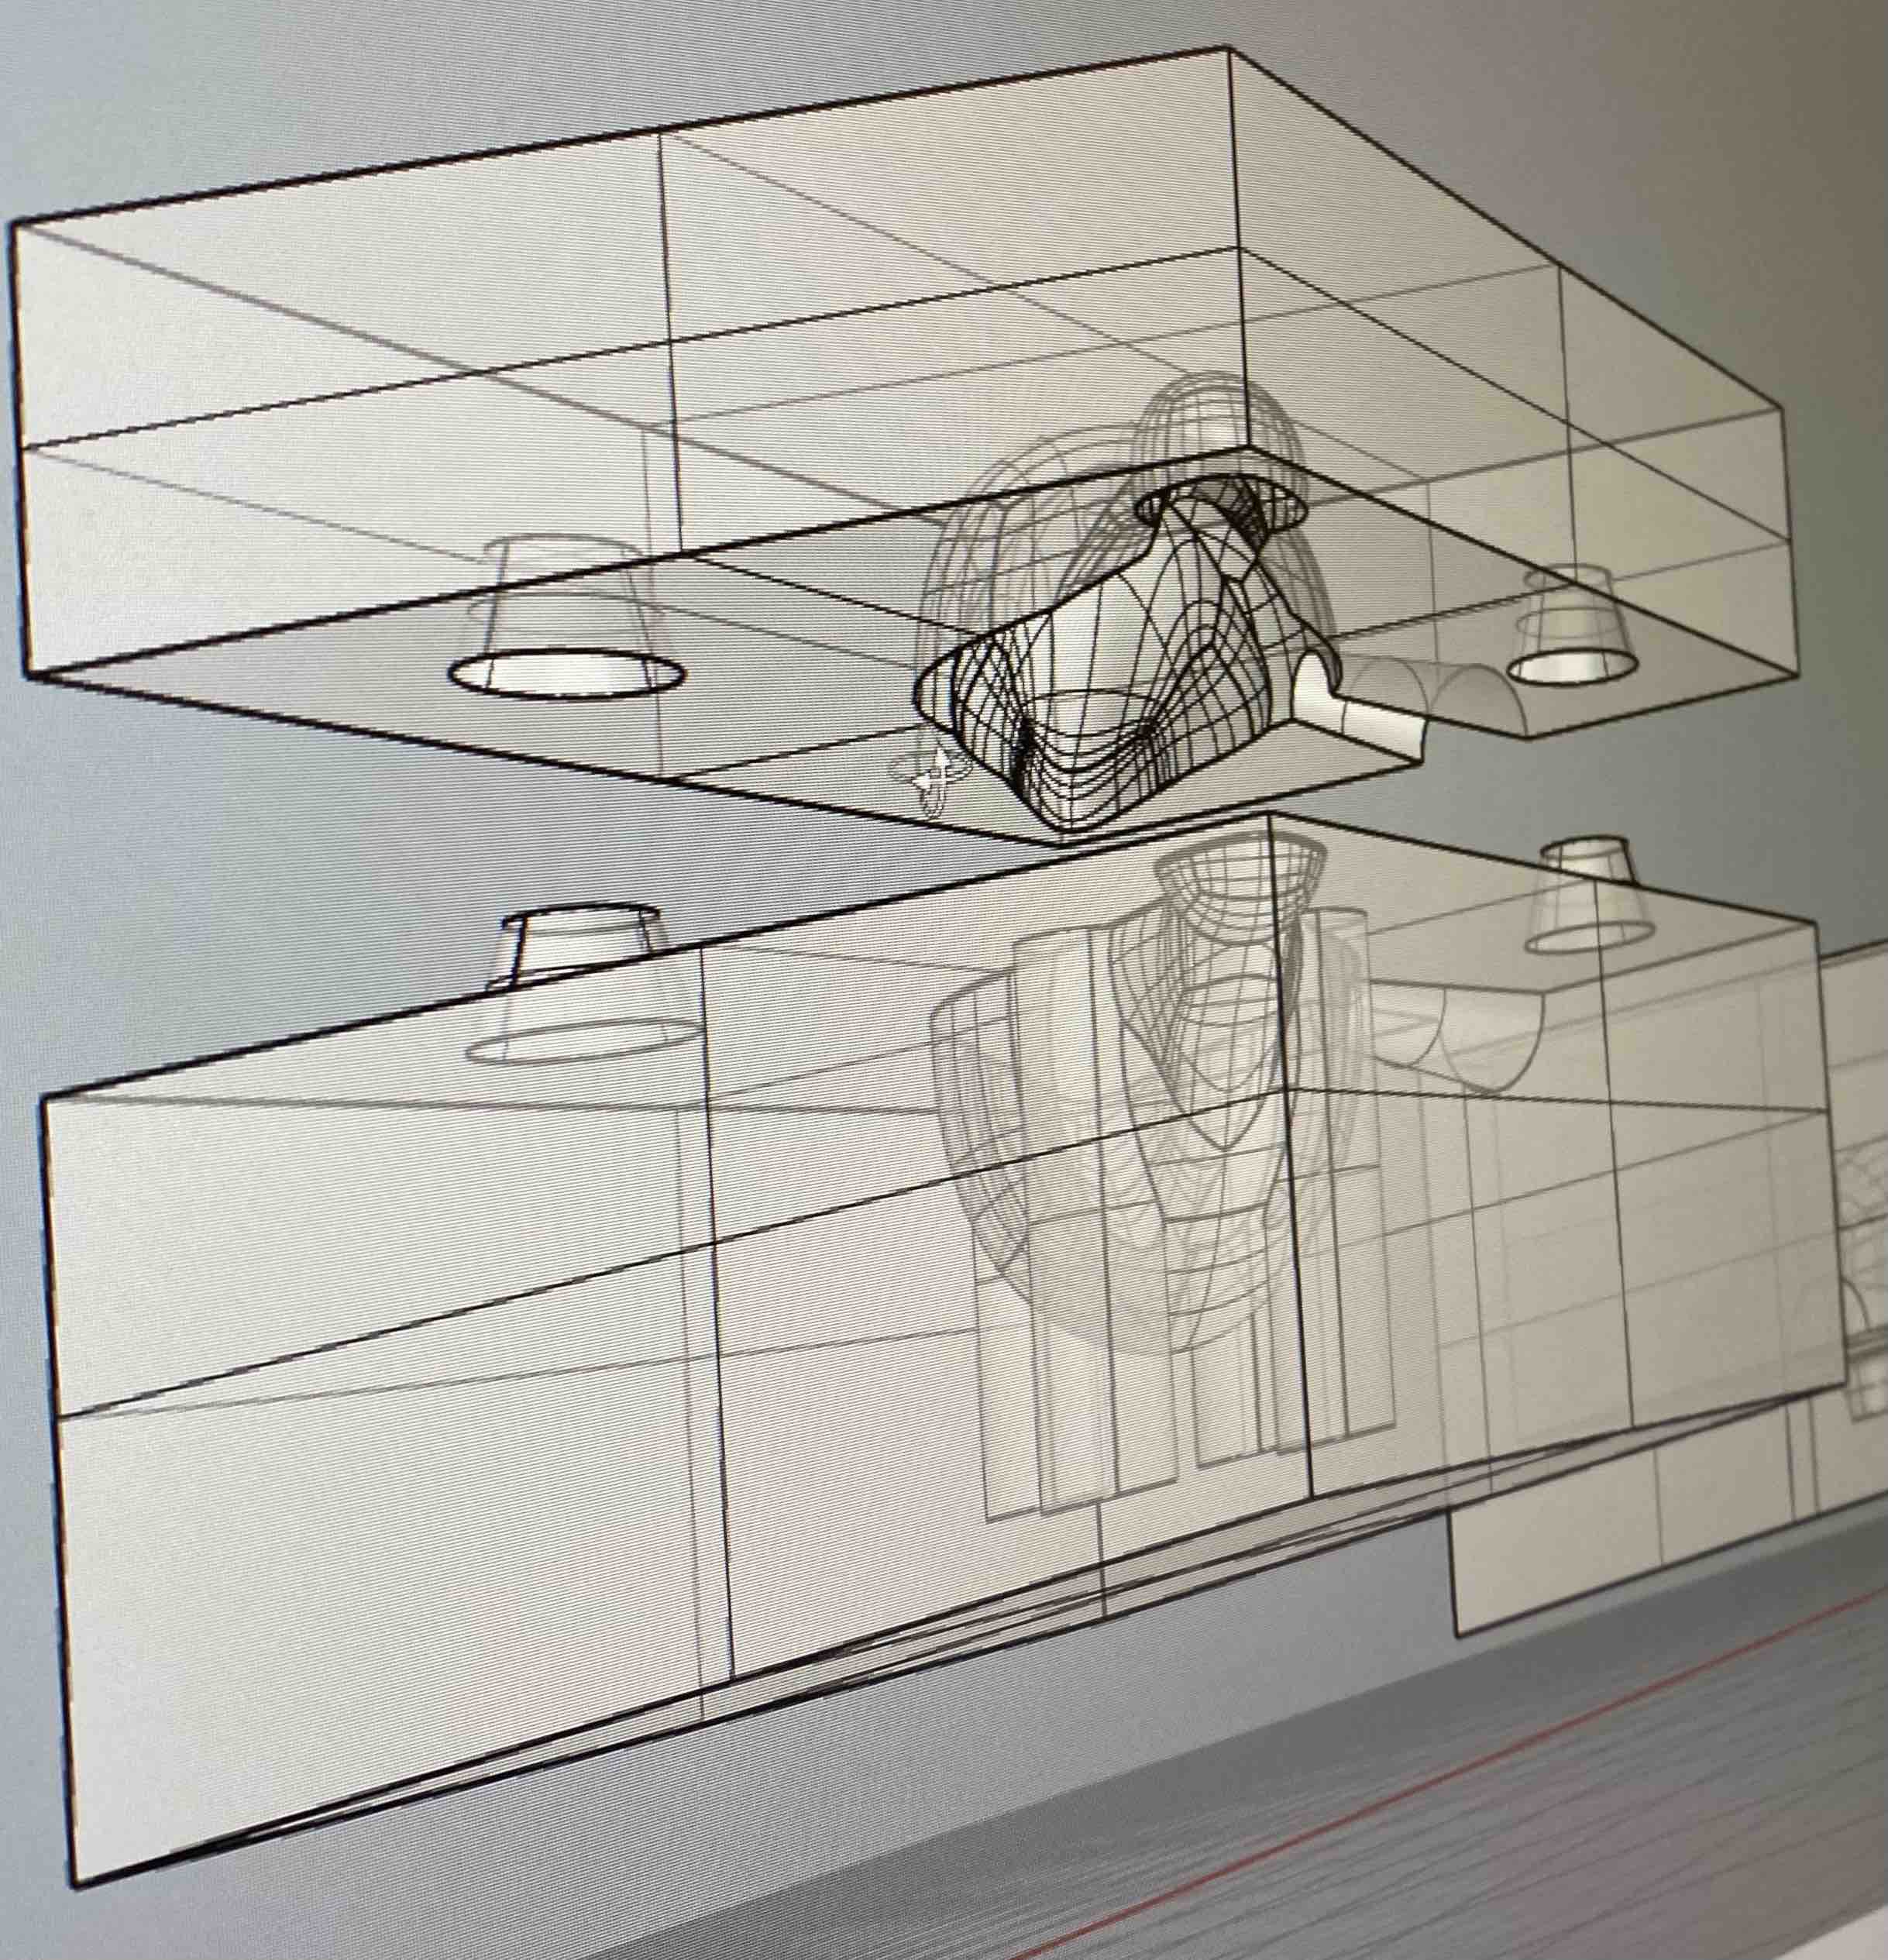
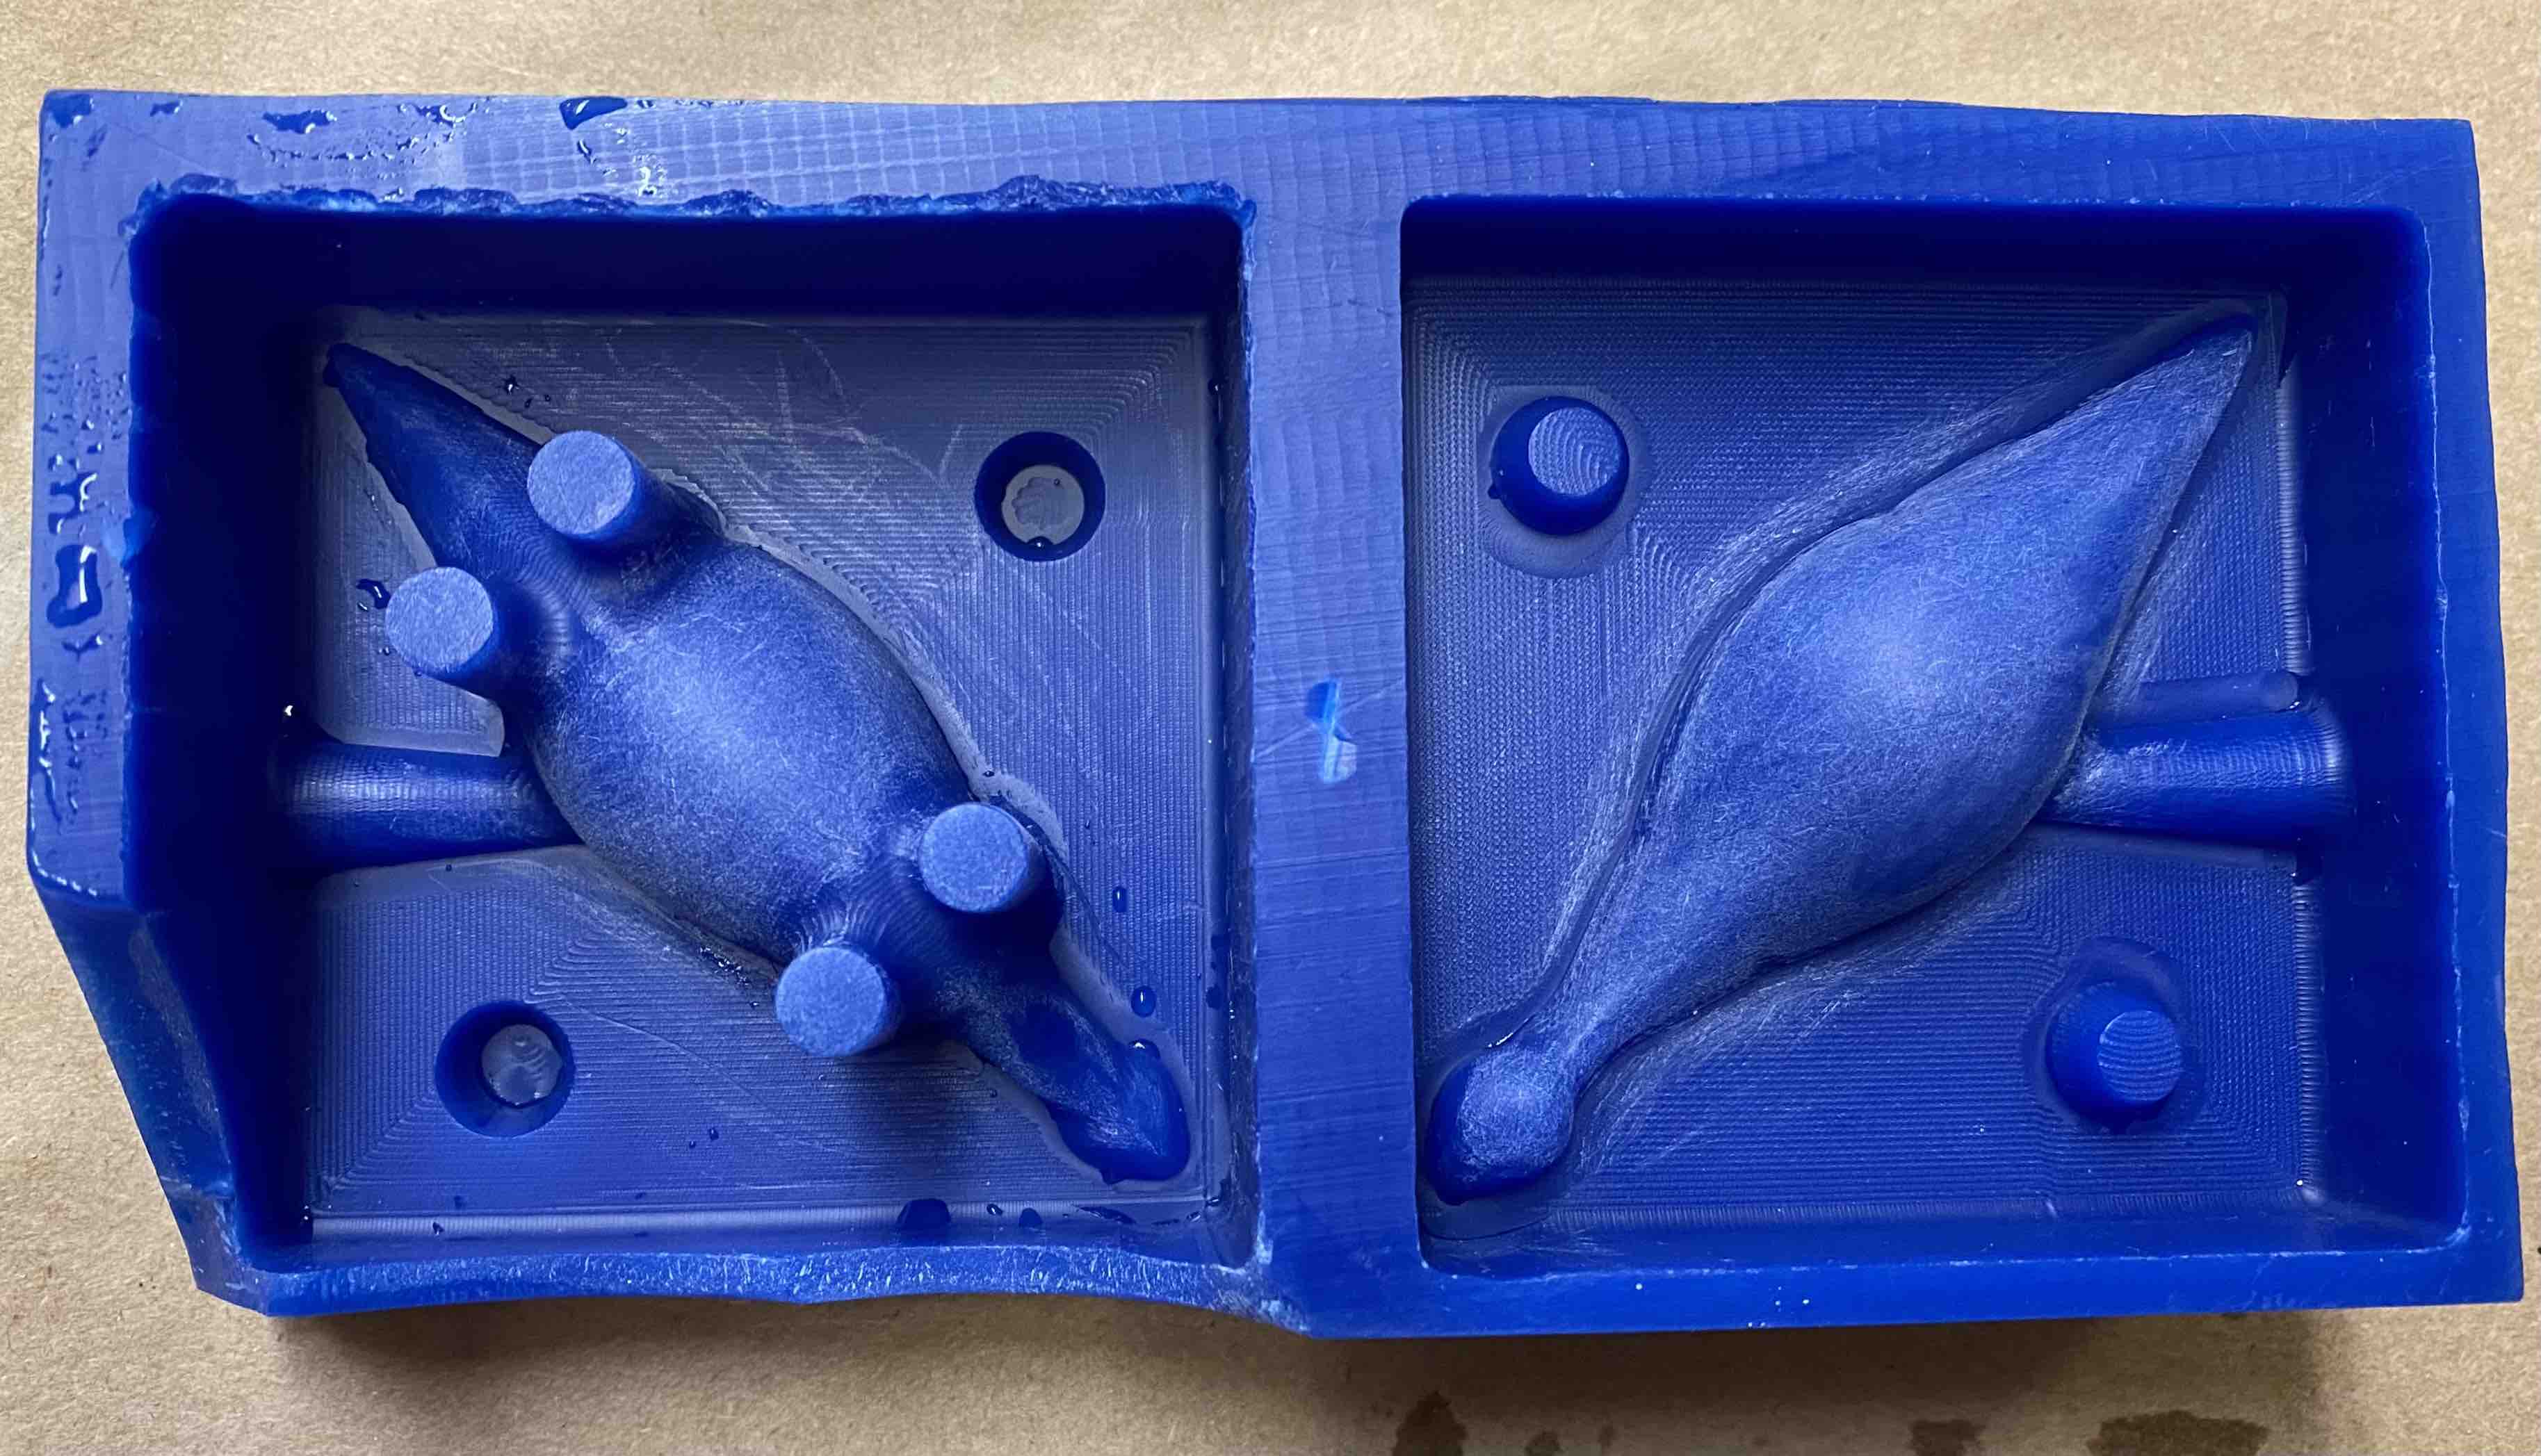
Here's a closer view of how the two oomoo molds would fit together.
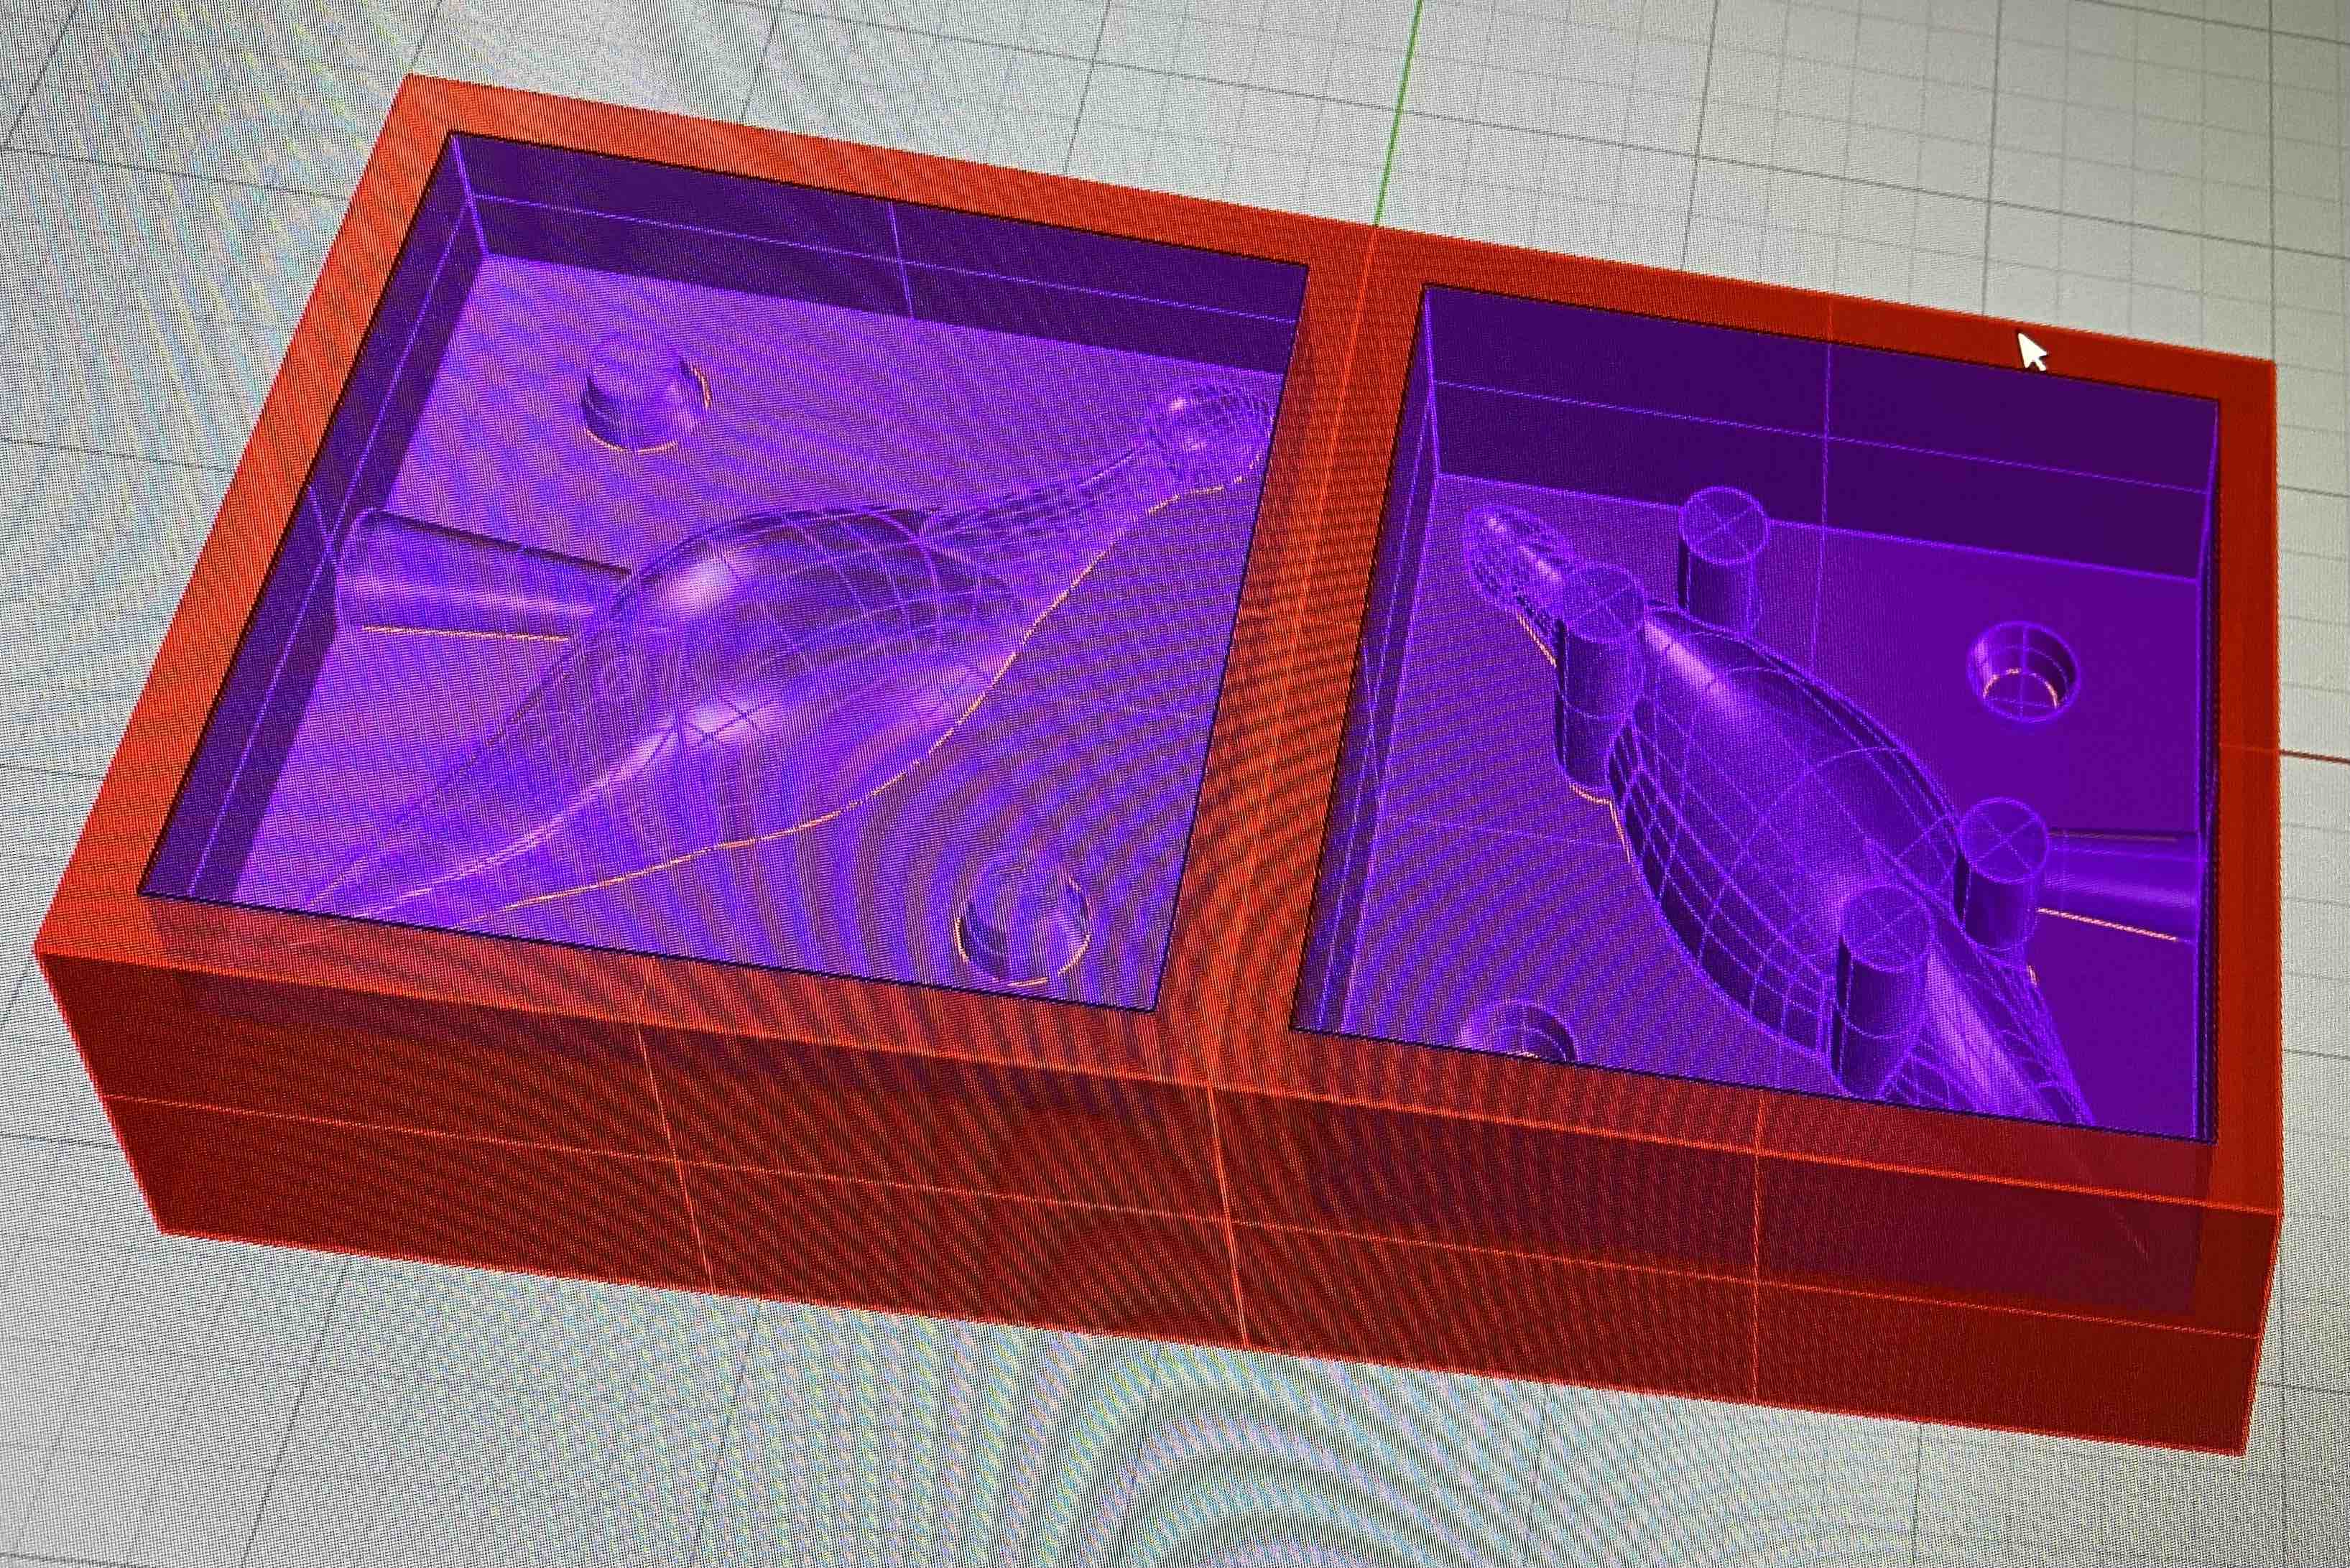
Zain also placed different sections of the mold in different layers to distinguish the top surface from what would be cut.
CAM

Here's the start of our toolpathing work.
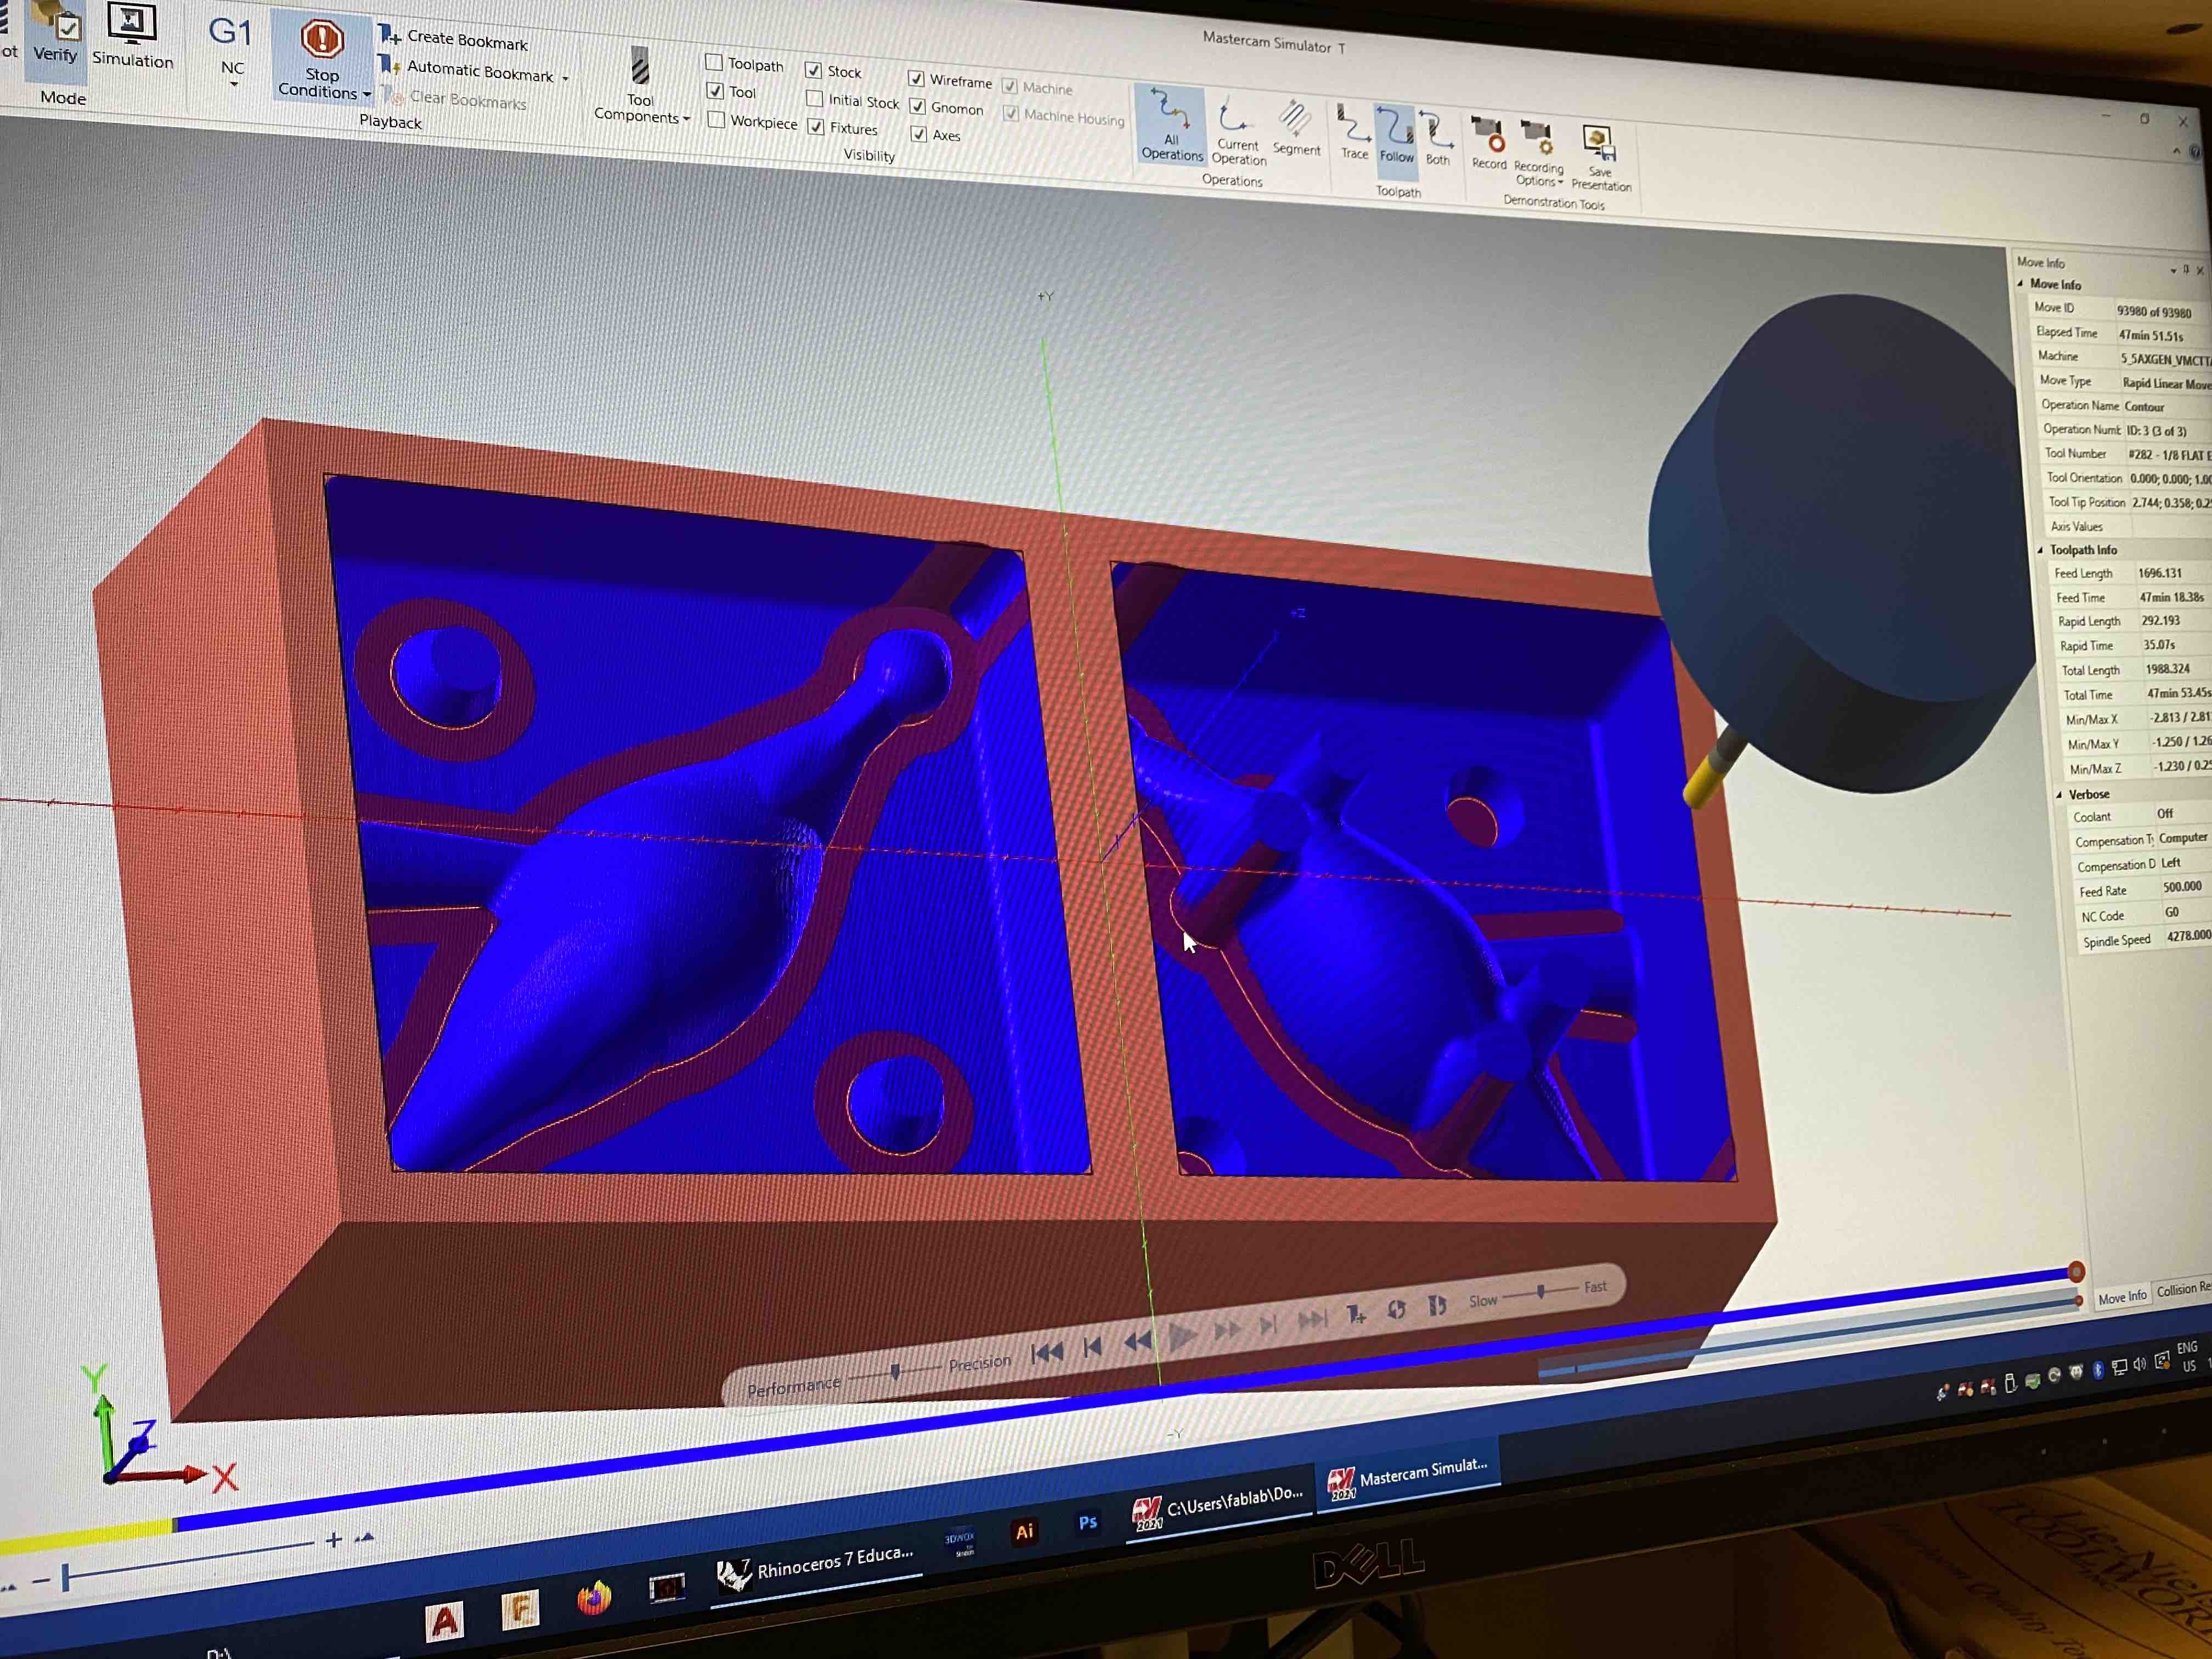
Here's a snapshot of the contour pass preview. This pass is with a flat endmill to remove the fillet at the base of the dino.
Milling
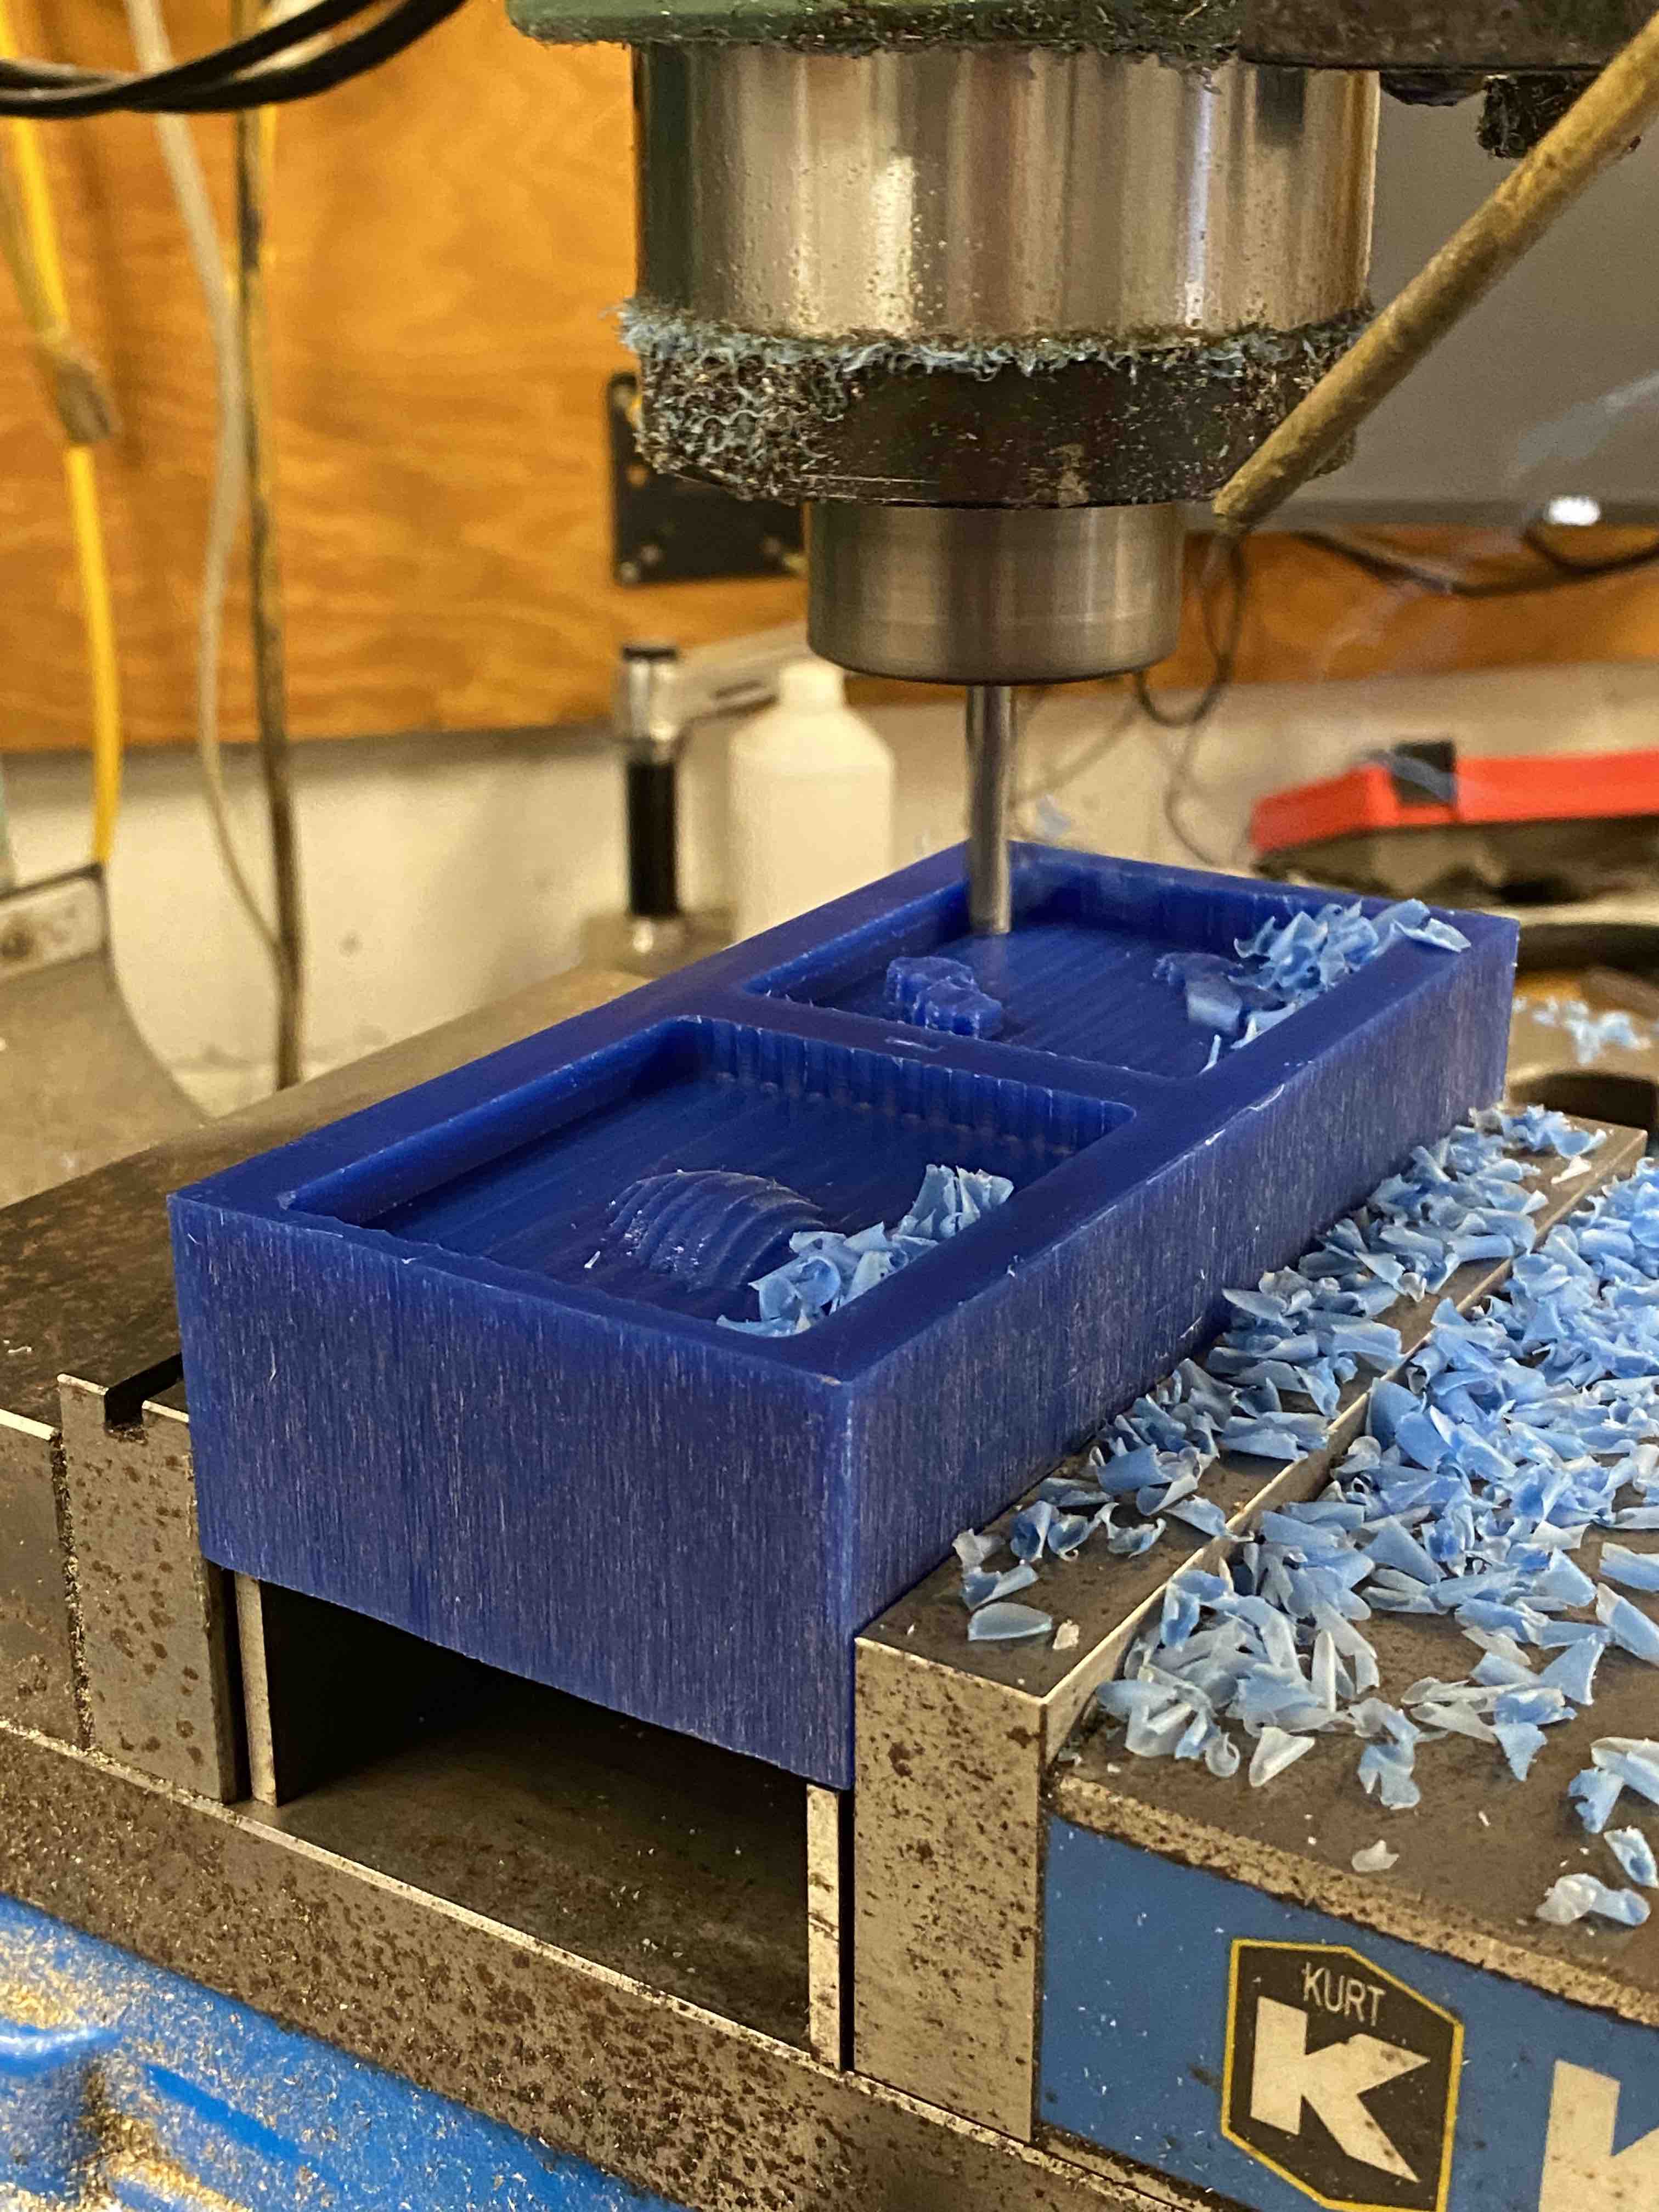
Here's the surface rough in action with a 1/4" flat endmill.
Here's the result of that pass! I love the wax shavings -- they make me think of the
chocolate shavings used to decorate cakes.
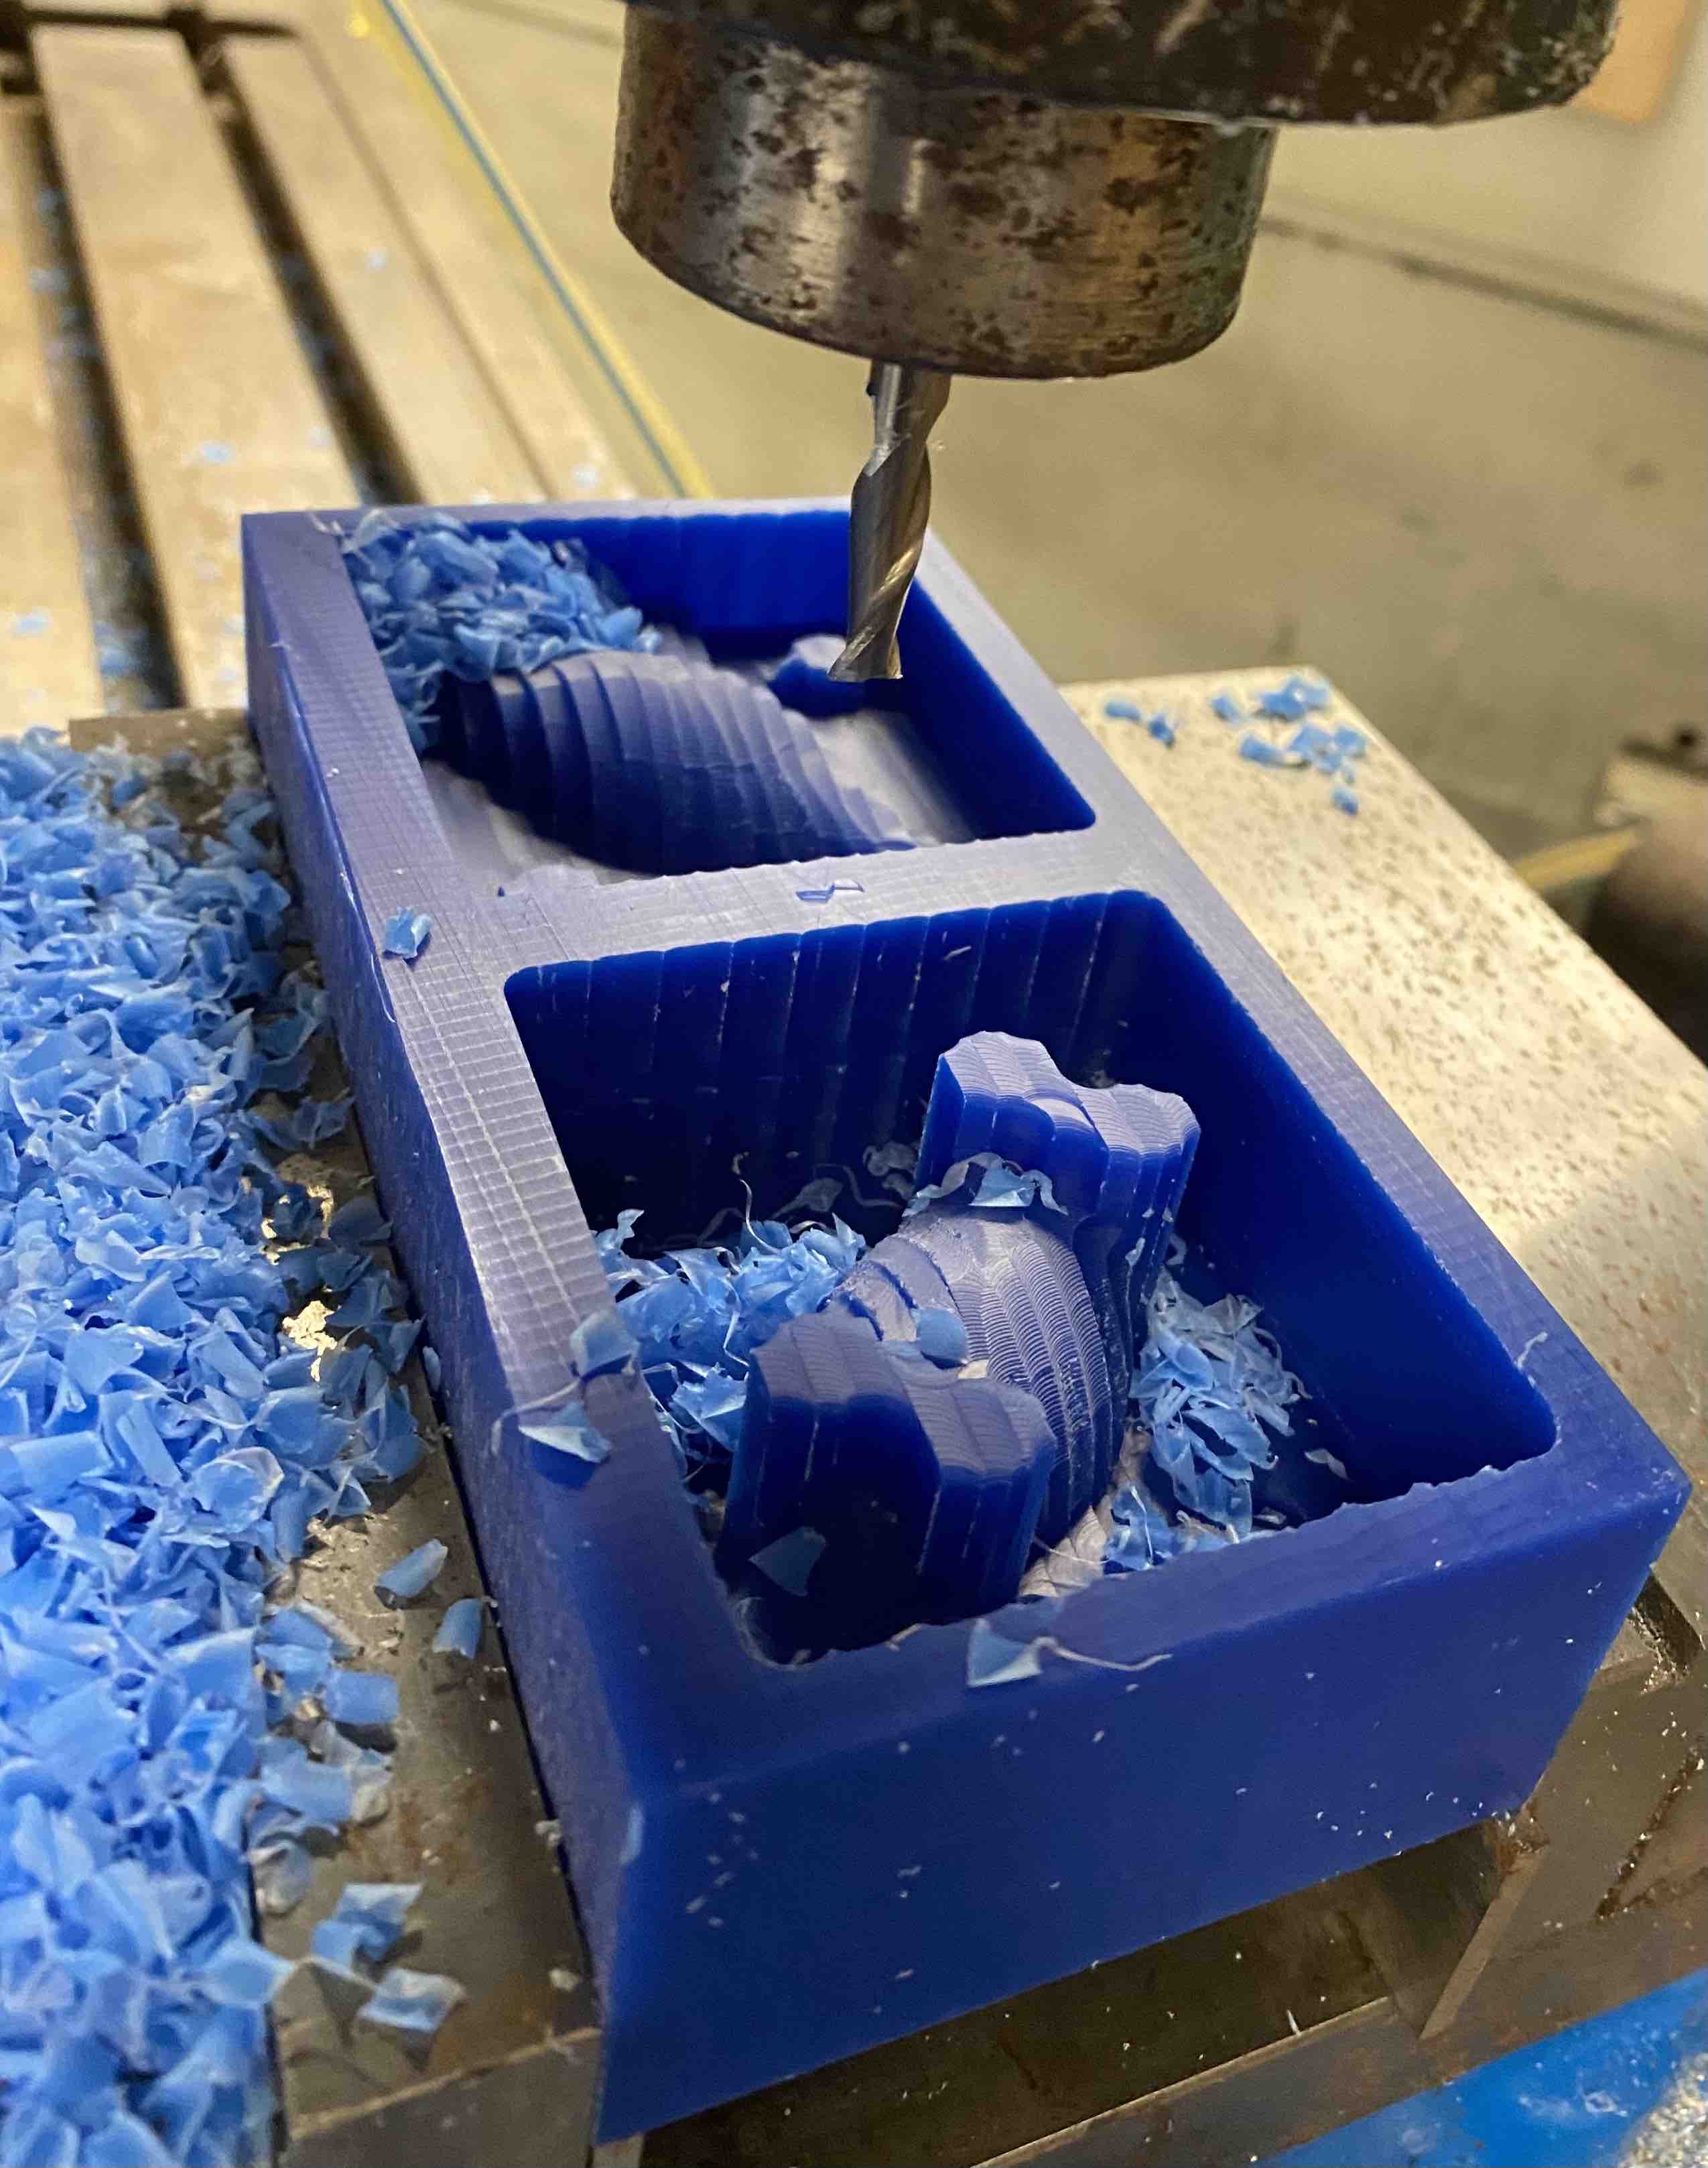
Next was the scallop surface finish in action with a 1/8" ball endmill. Because the walls of the mold
exceeded the cutting length of tool (distance from tip to shank), the shaft contacted the walls and created a moment.
Luckily, the endmill was much stiffer than the wax, so the wax broke instead of our tool.
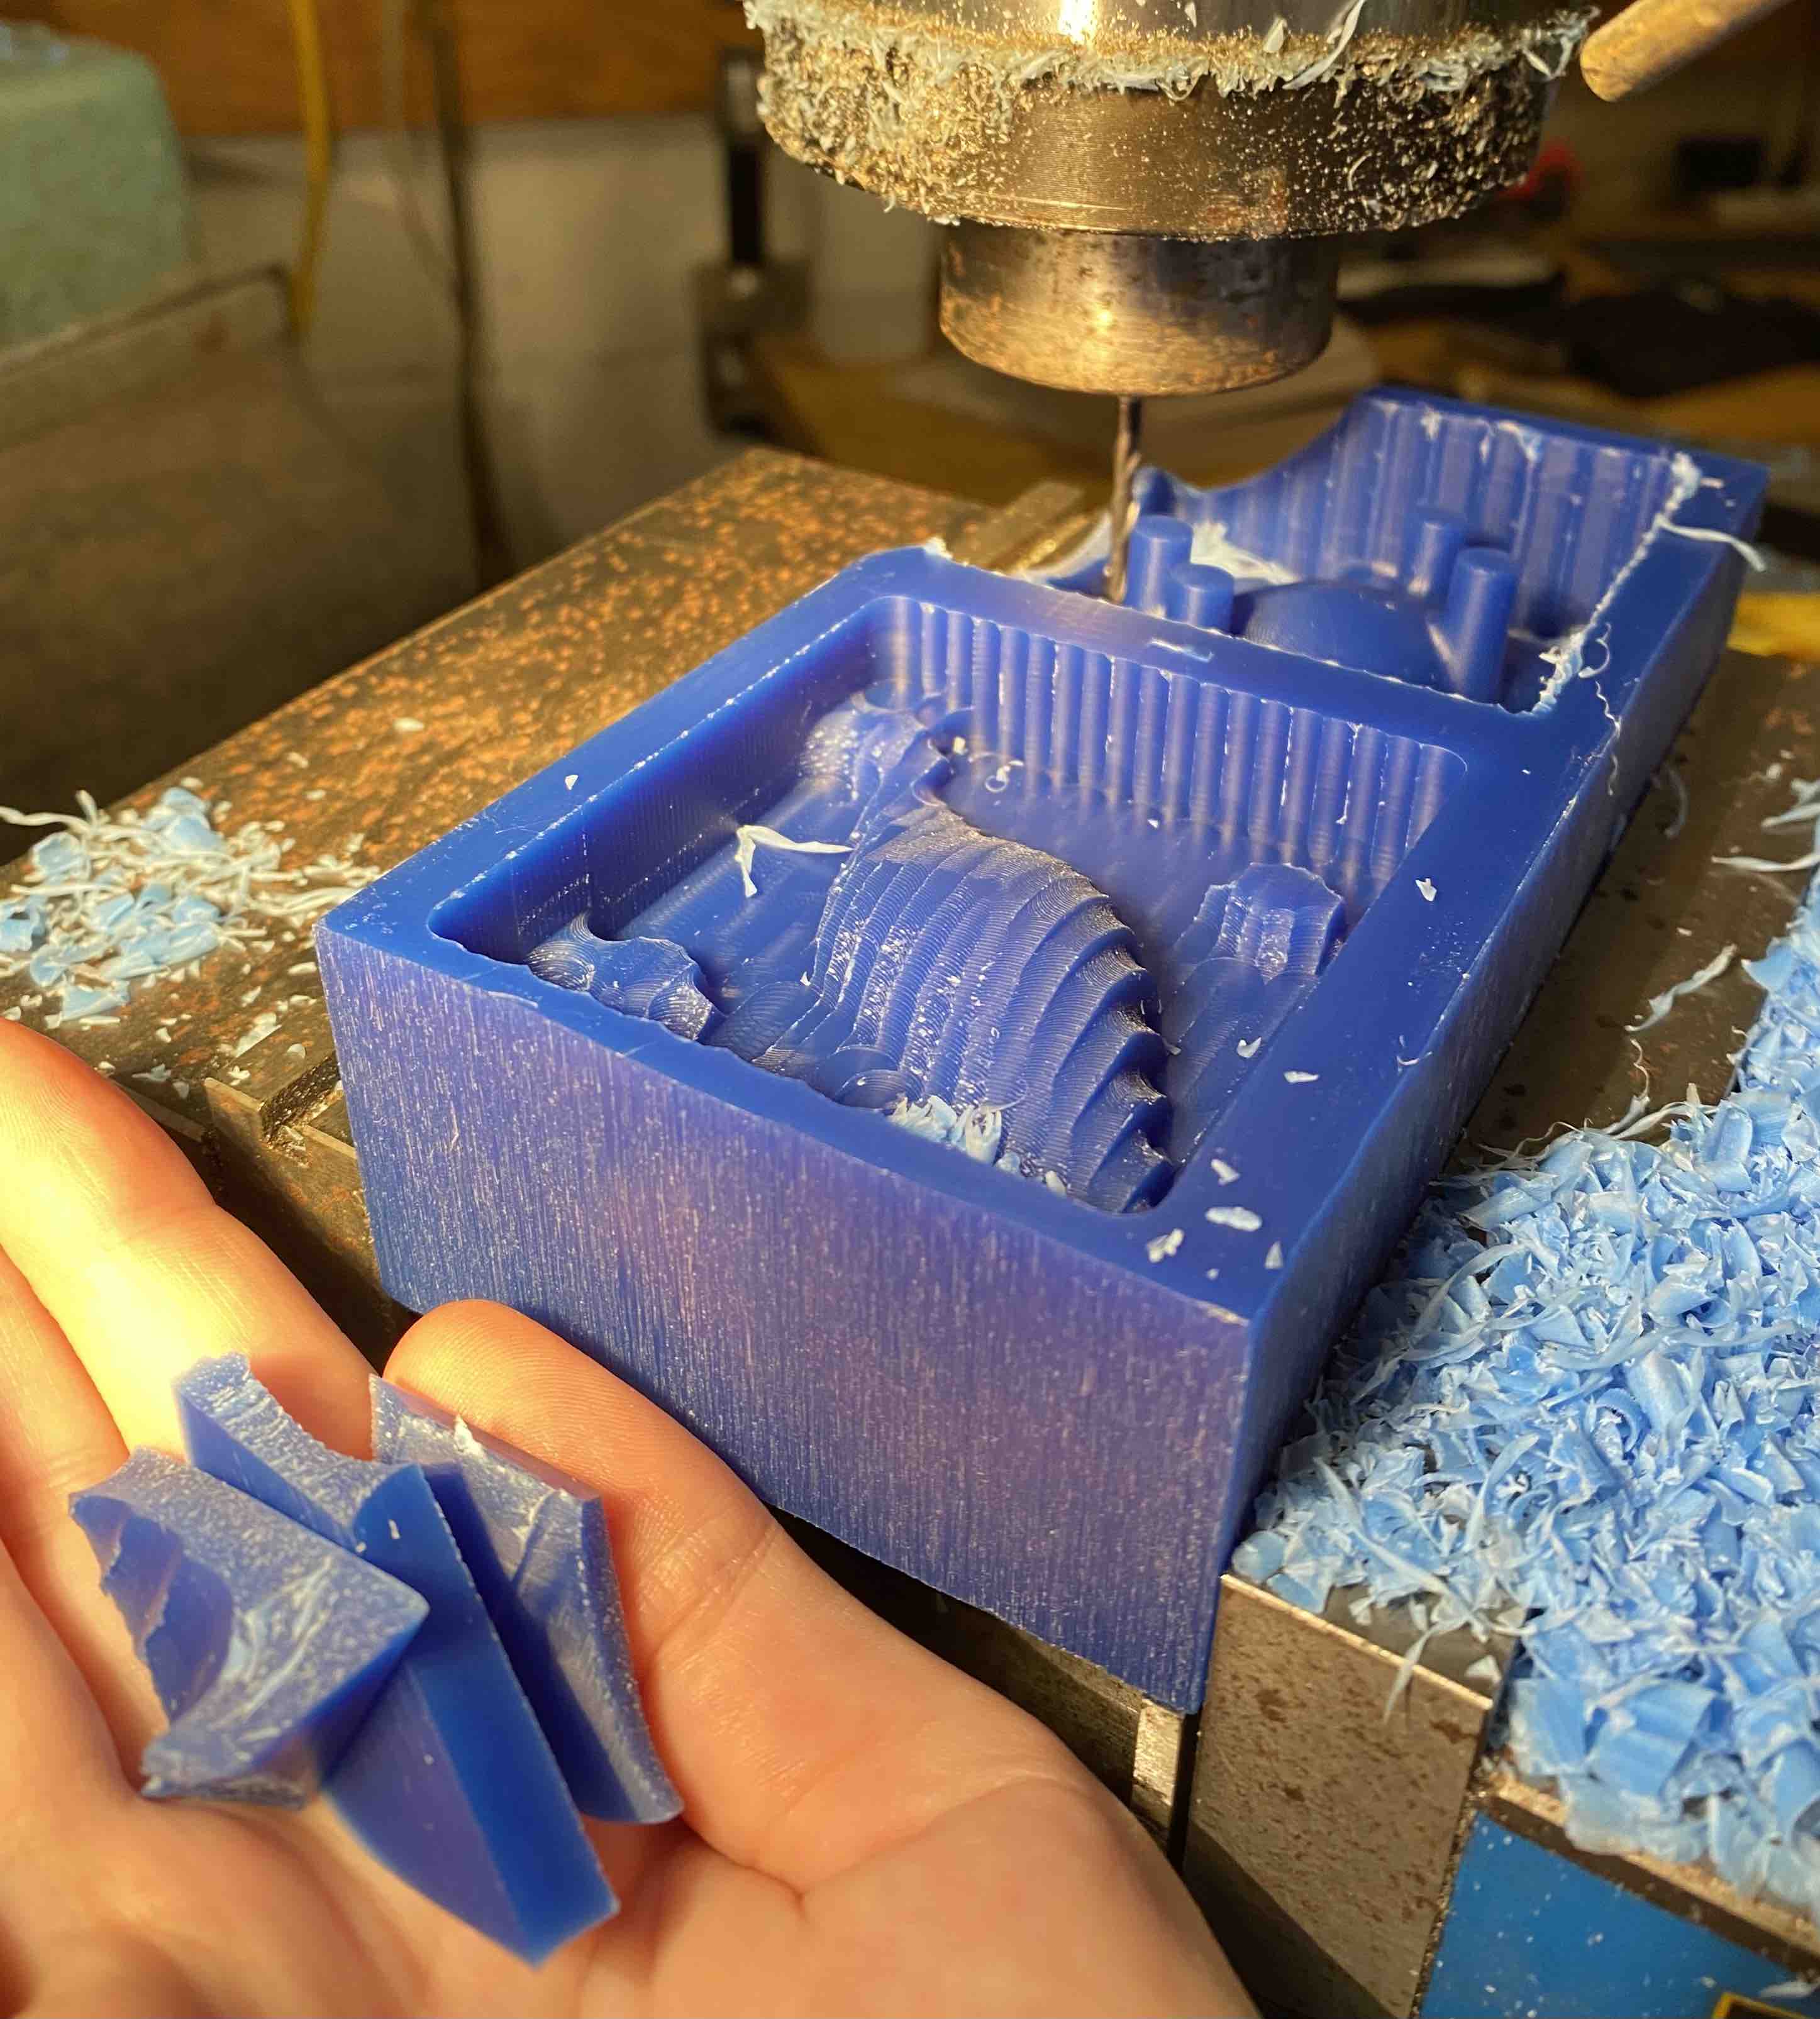
Finishing the mold
After the contour pass with a 1/8" flat endmill, I sanded down the dino's surface to remove the bumpy
geometry and make him s m o o t h. I also used a wax carving tool shaped like an arrowhead to carve out material
where the legs meet the body to create rounded instead of cylindrical shoulders for the dino.
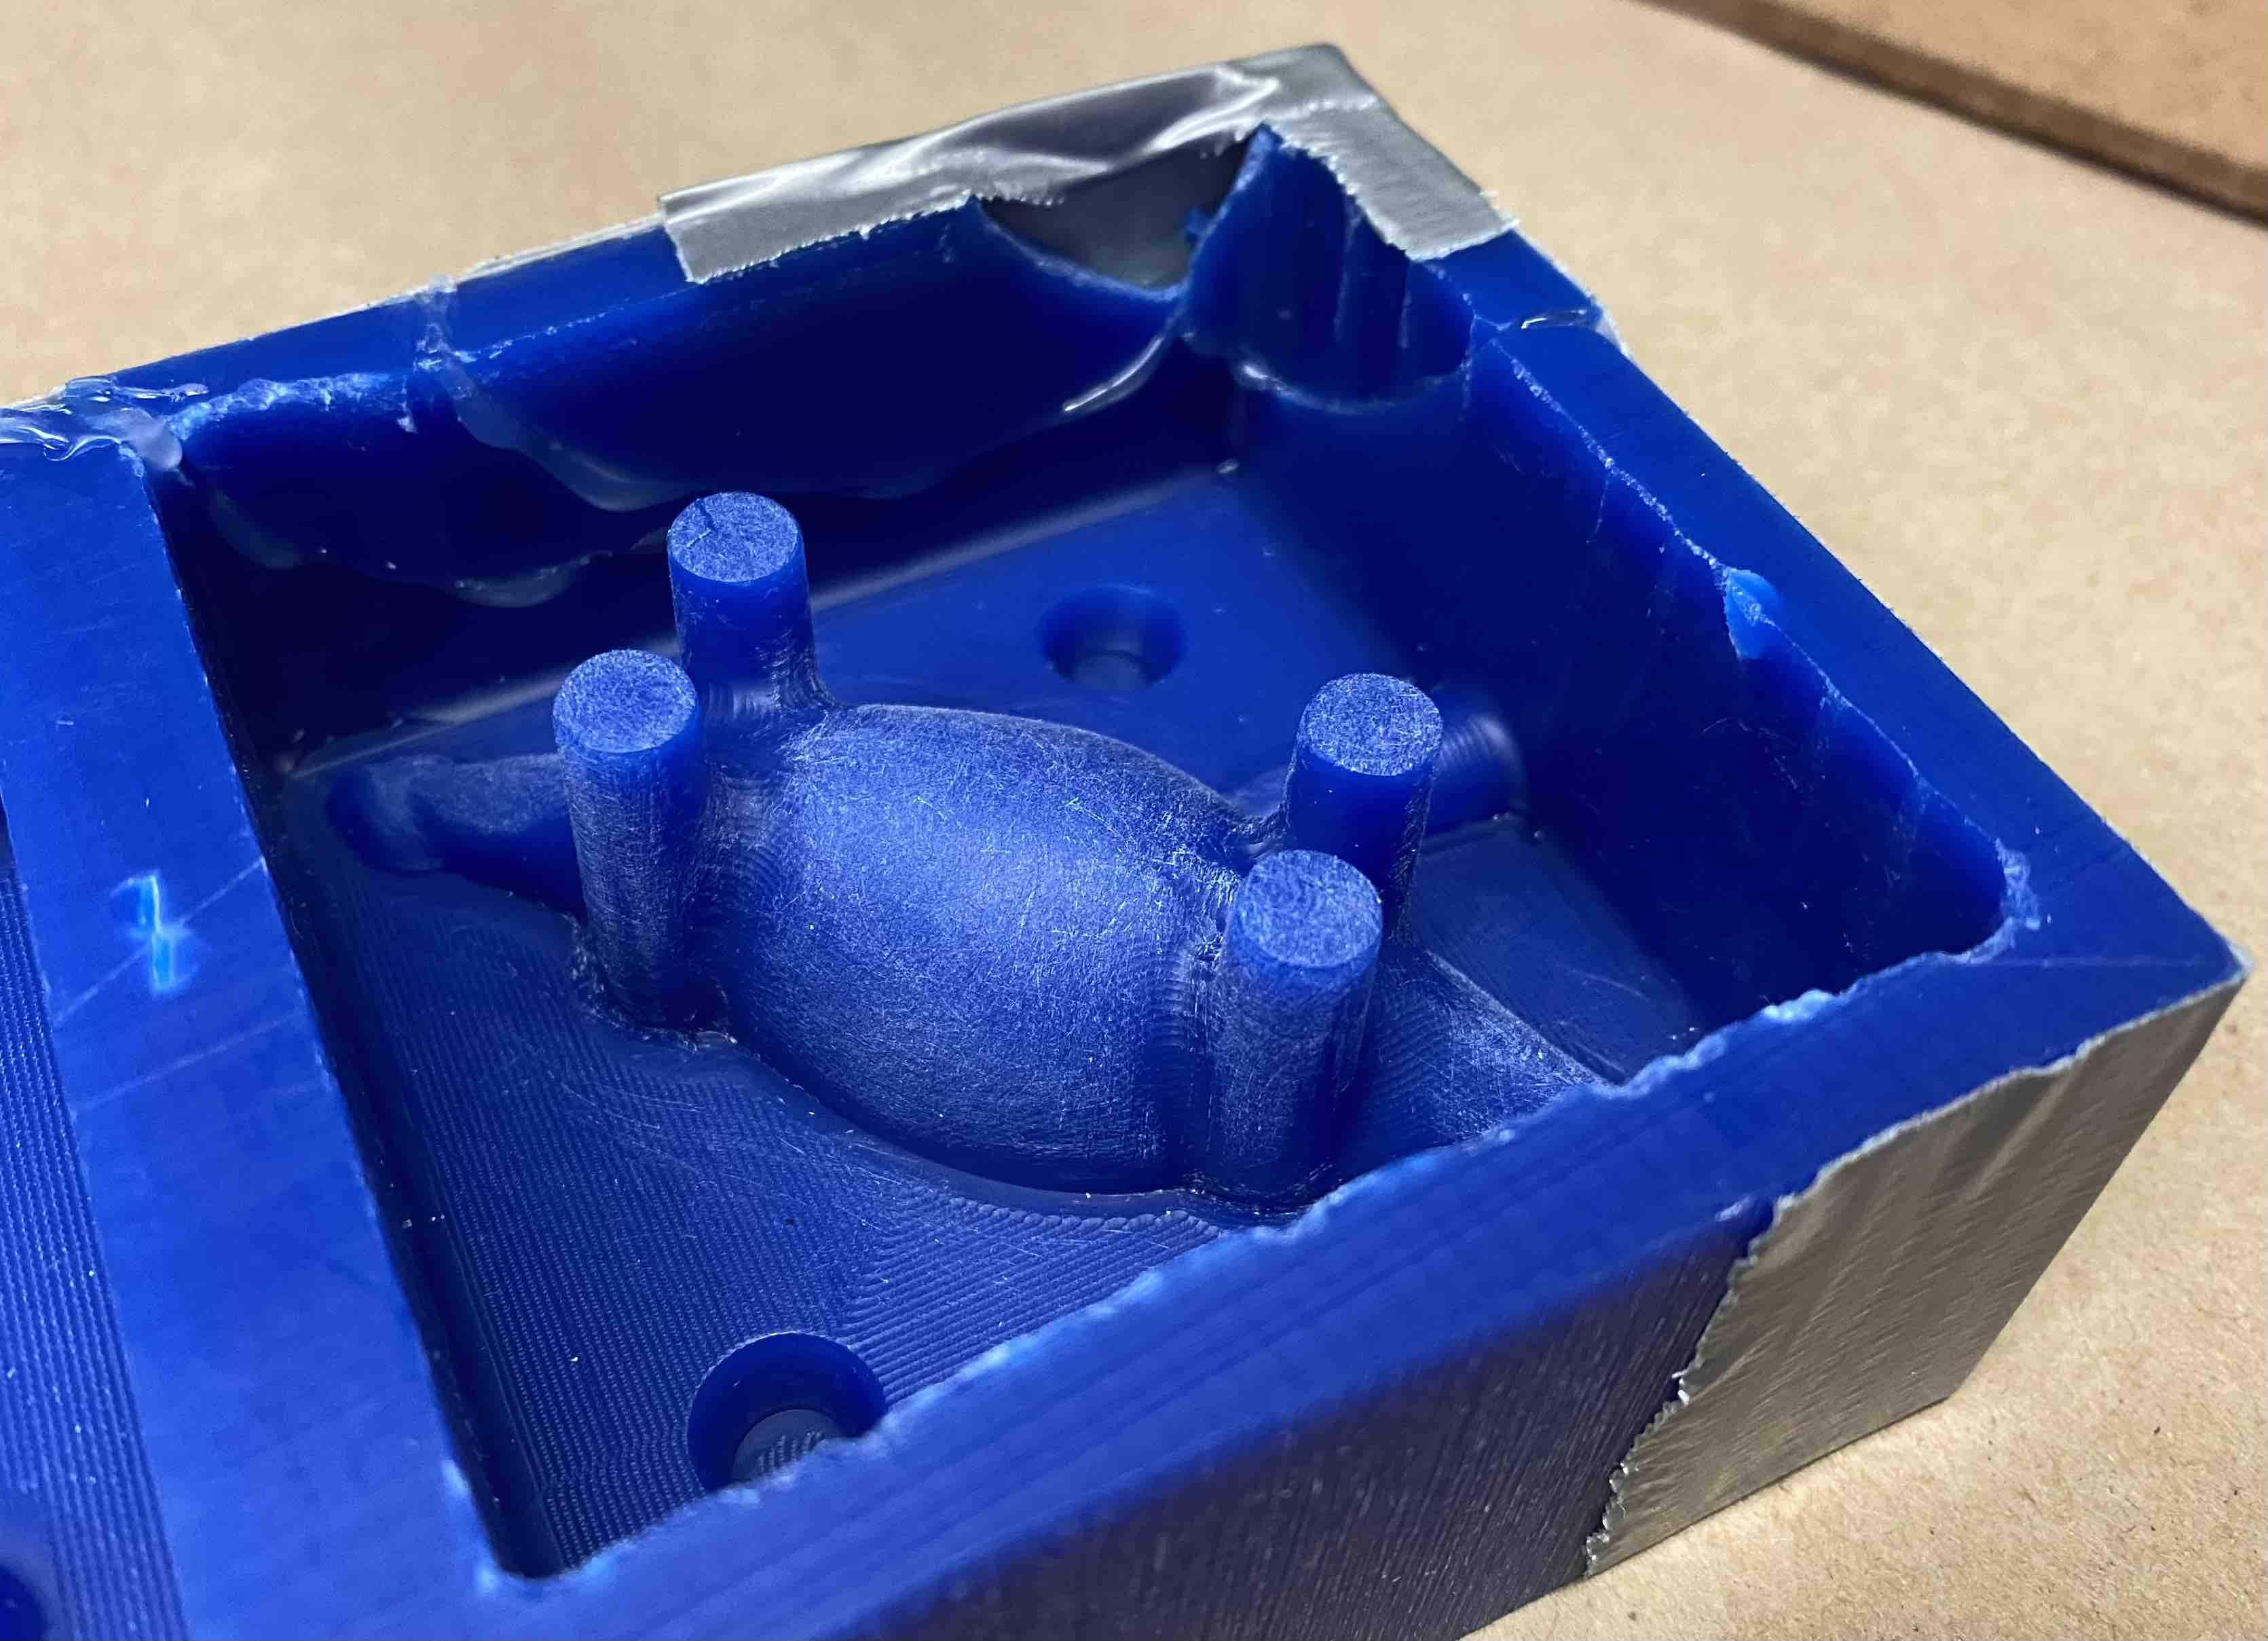

I hot glued the salvaged broken pieces back onto the mold, then applied duct tape for extra security.
Oomoo
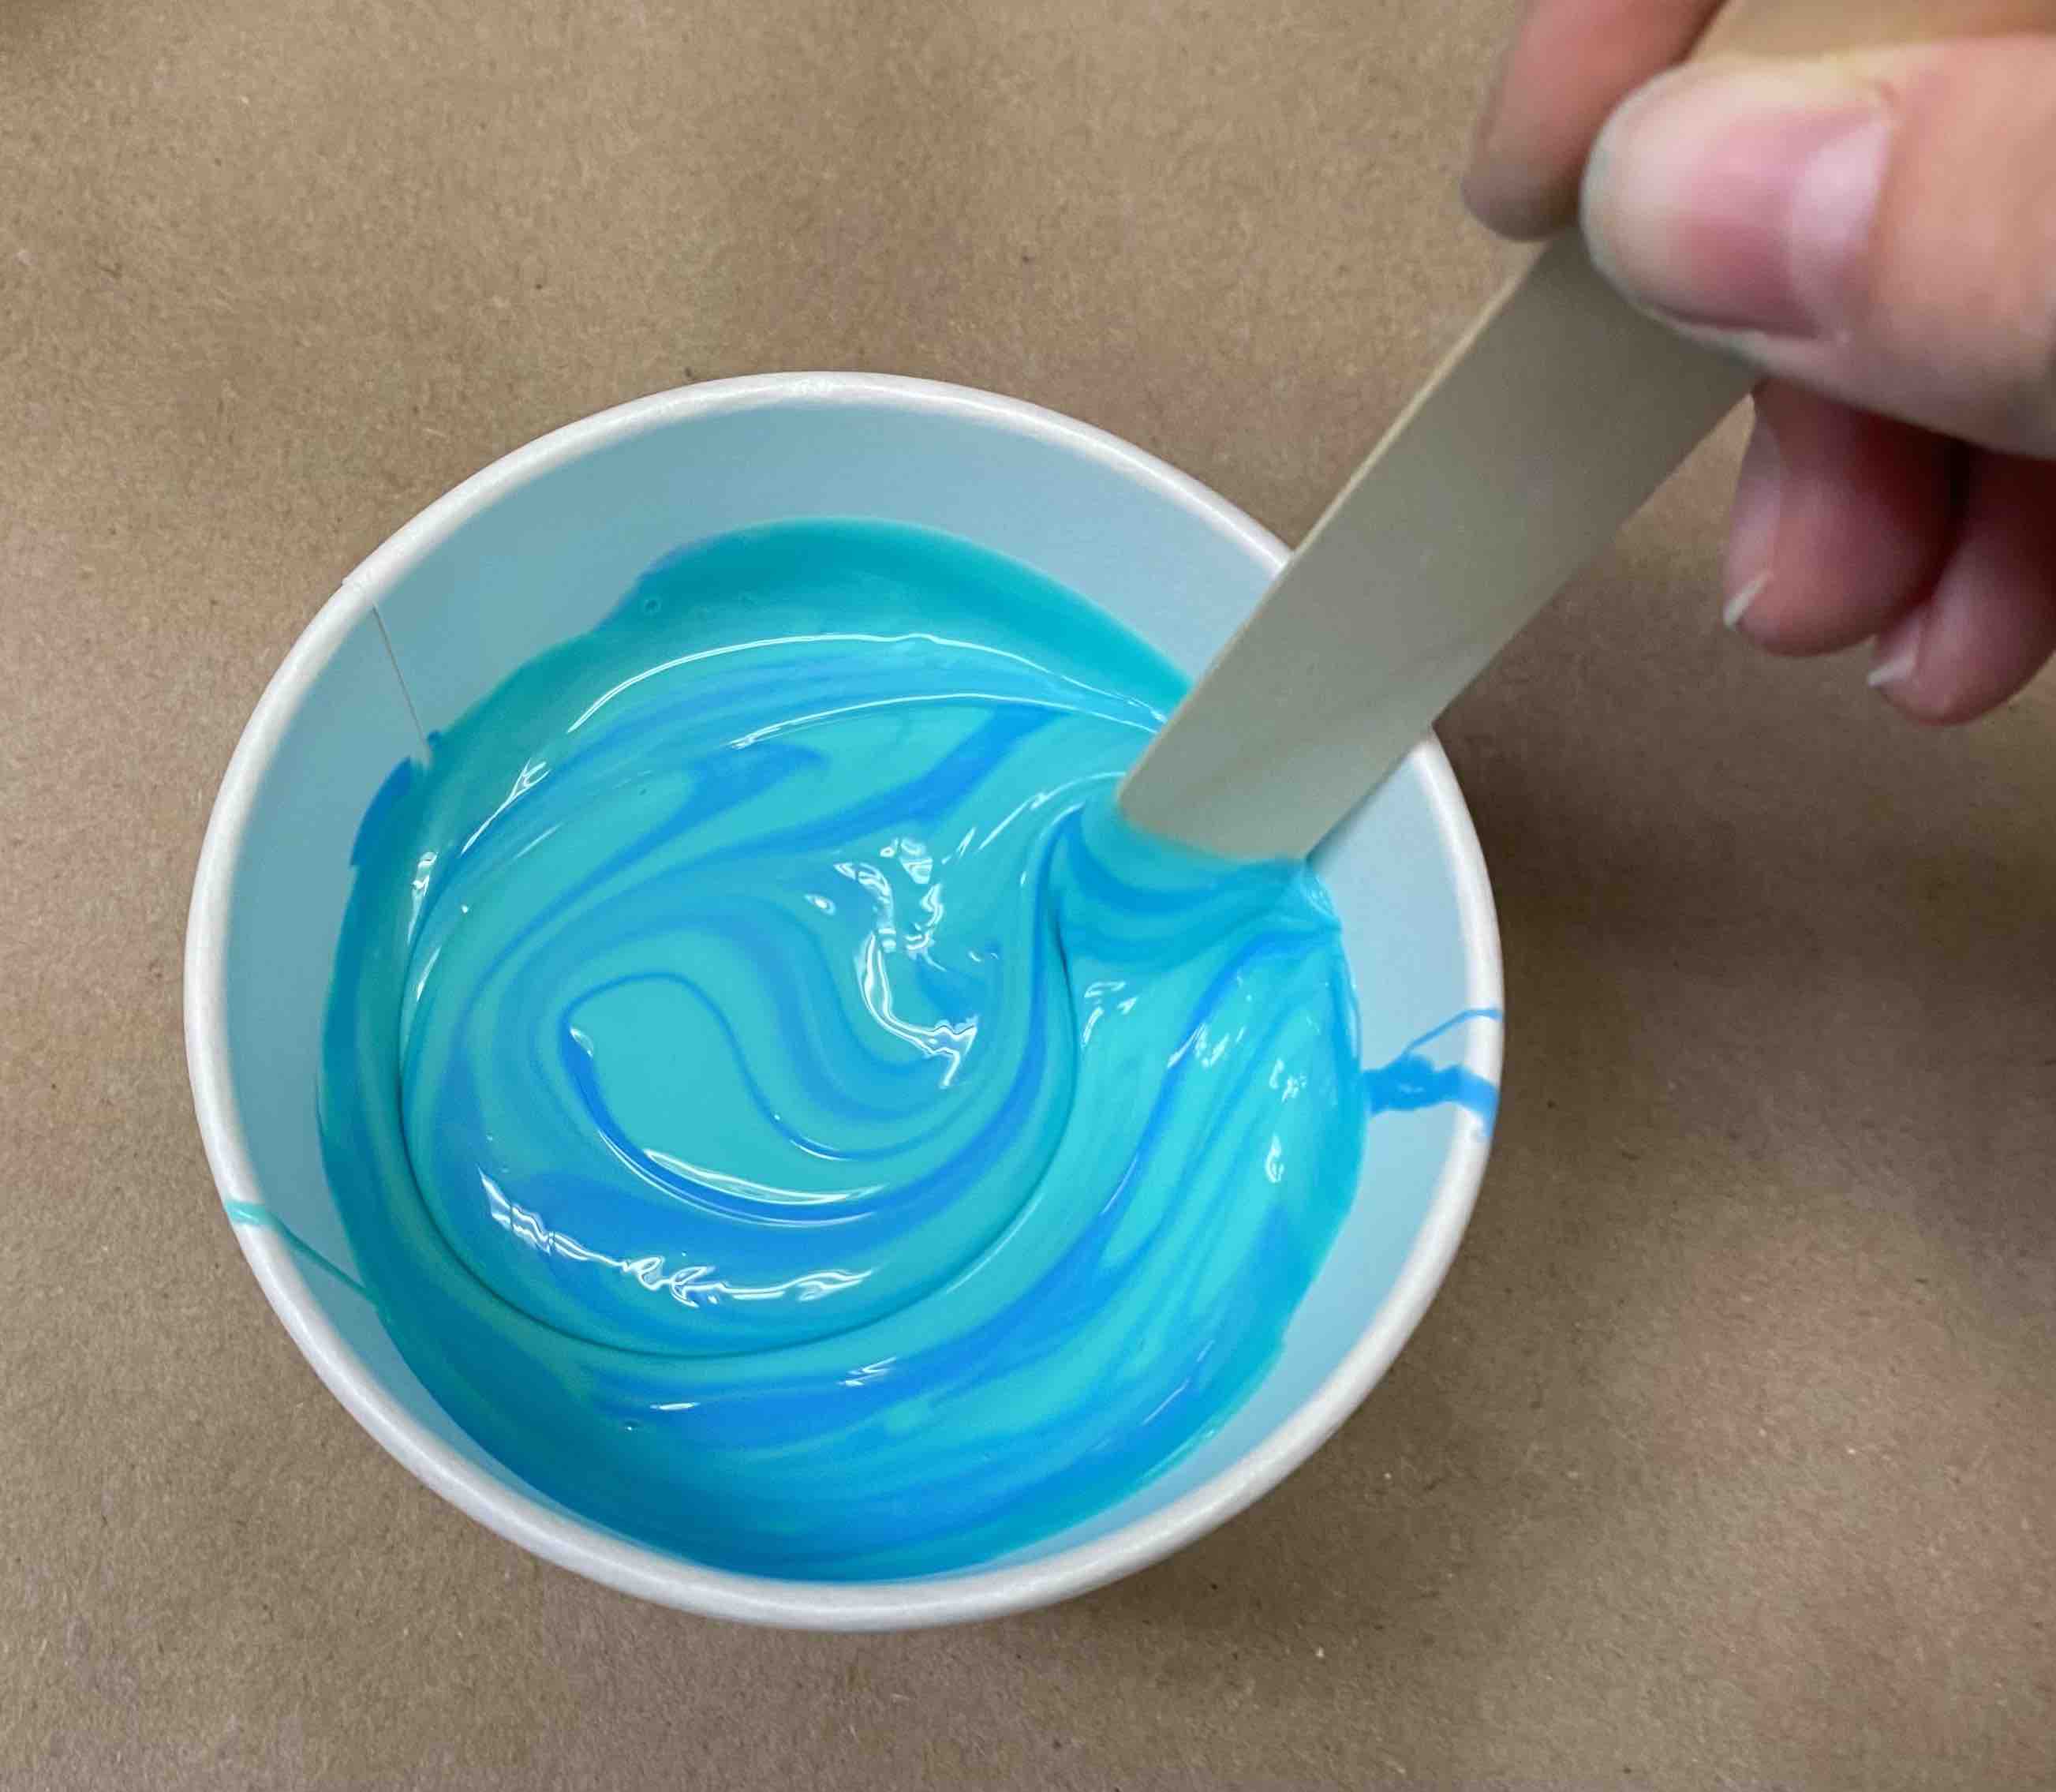
My next task was to make new molds out of the wax mold. Here's a snapshot of mixing oomoo -- I looked back through
past years of the class for tips on oomoo; I learned that to avoid bubbles, you should mix slowly and without shearing the mixture. I tried to
keep the bottom of the popsicle stick on the bottom of the cup and to run the edge along the sides to scrape off unmixed material.
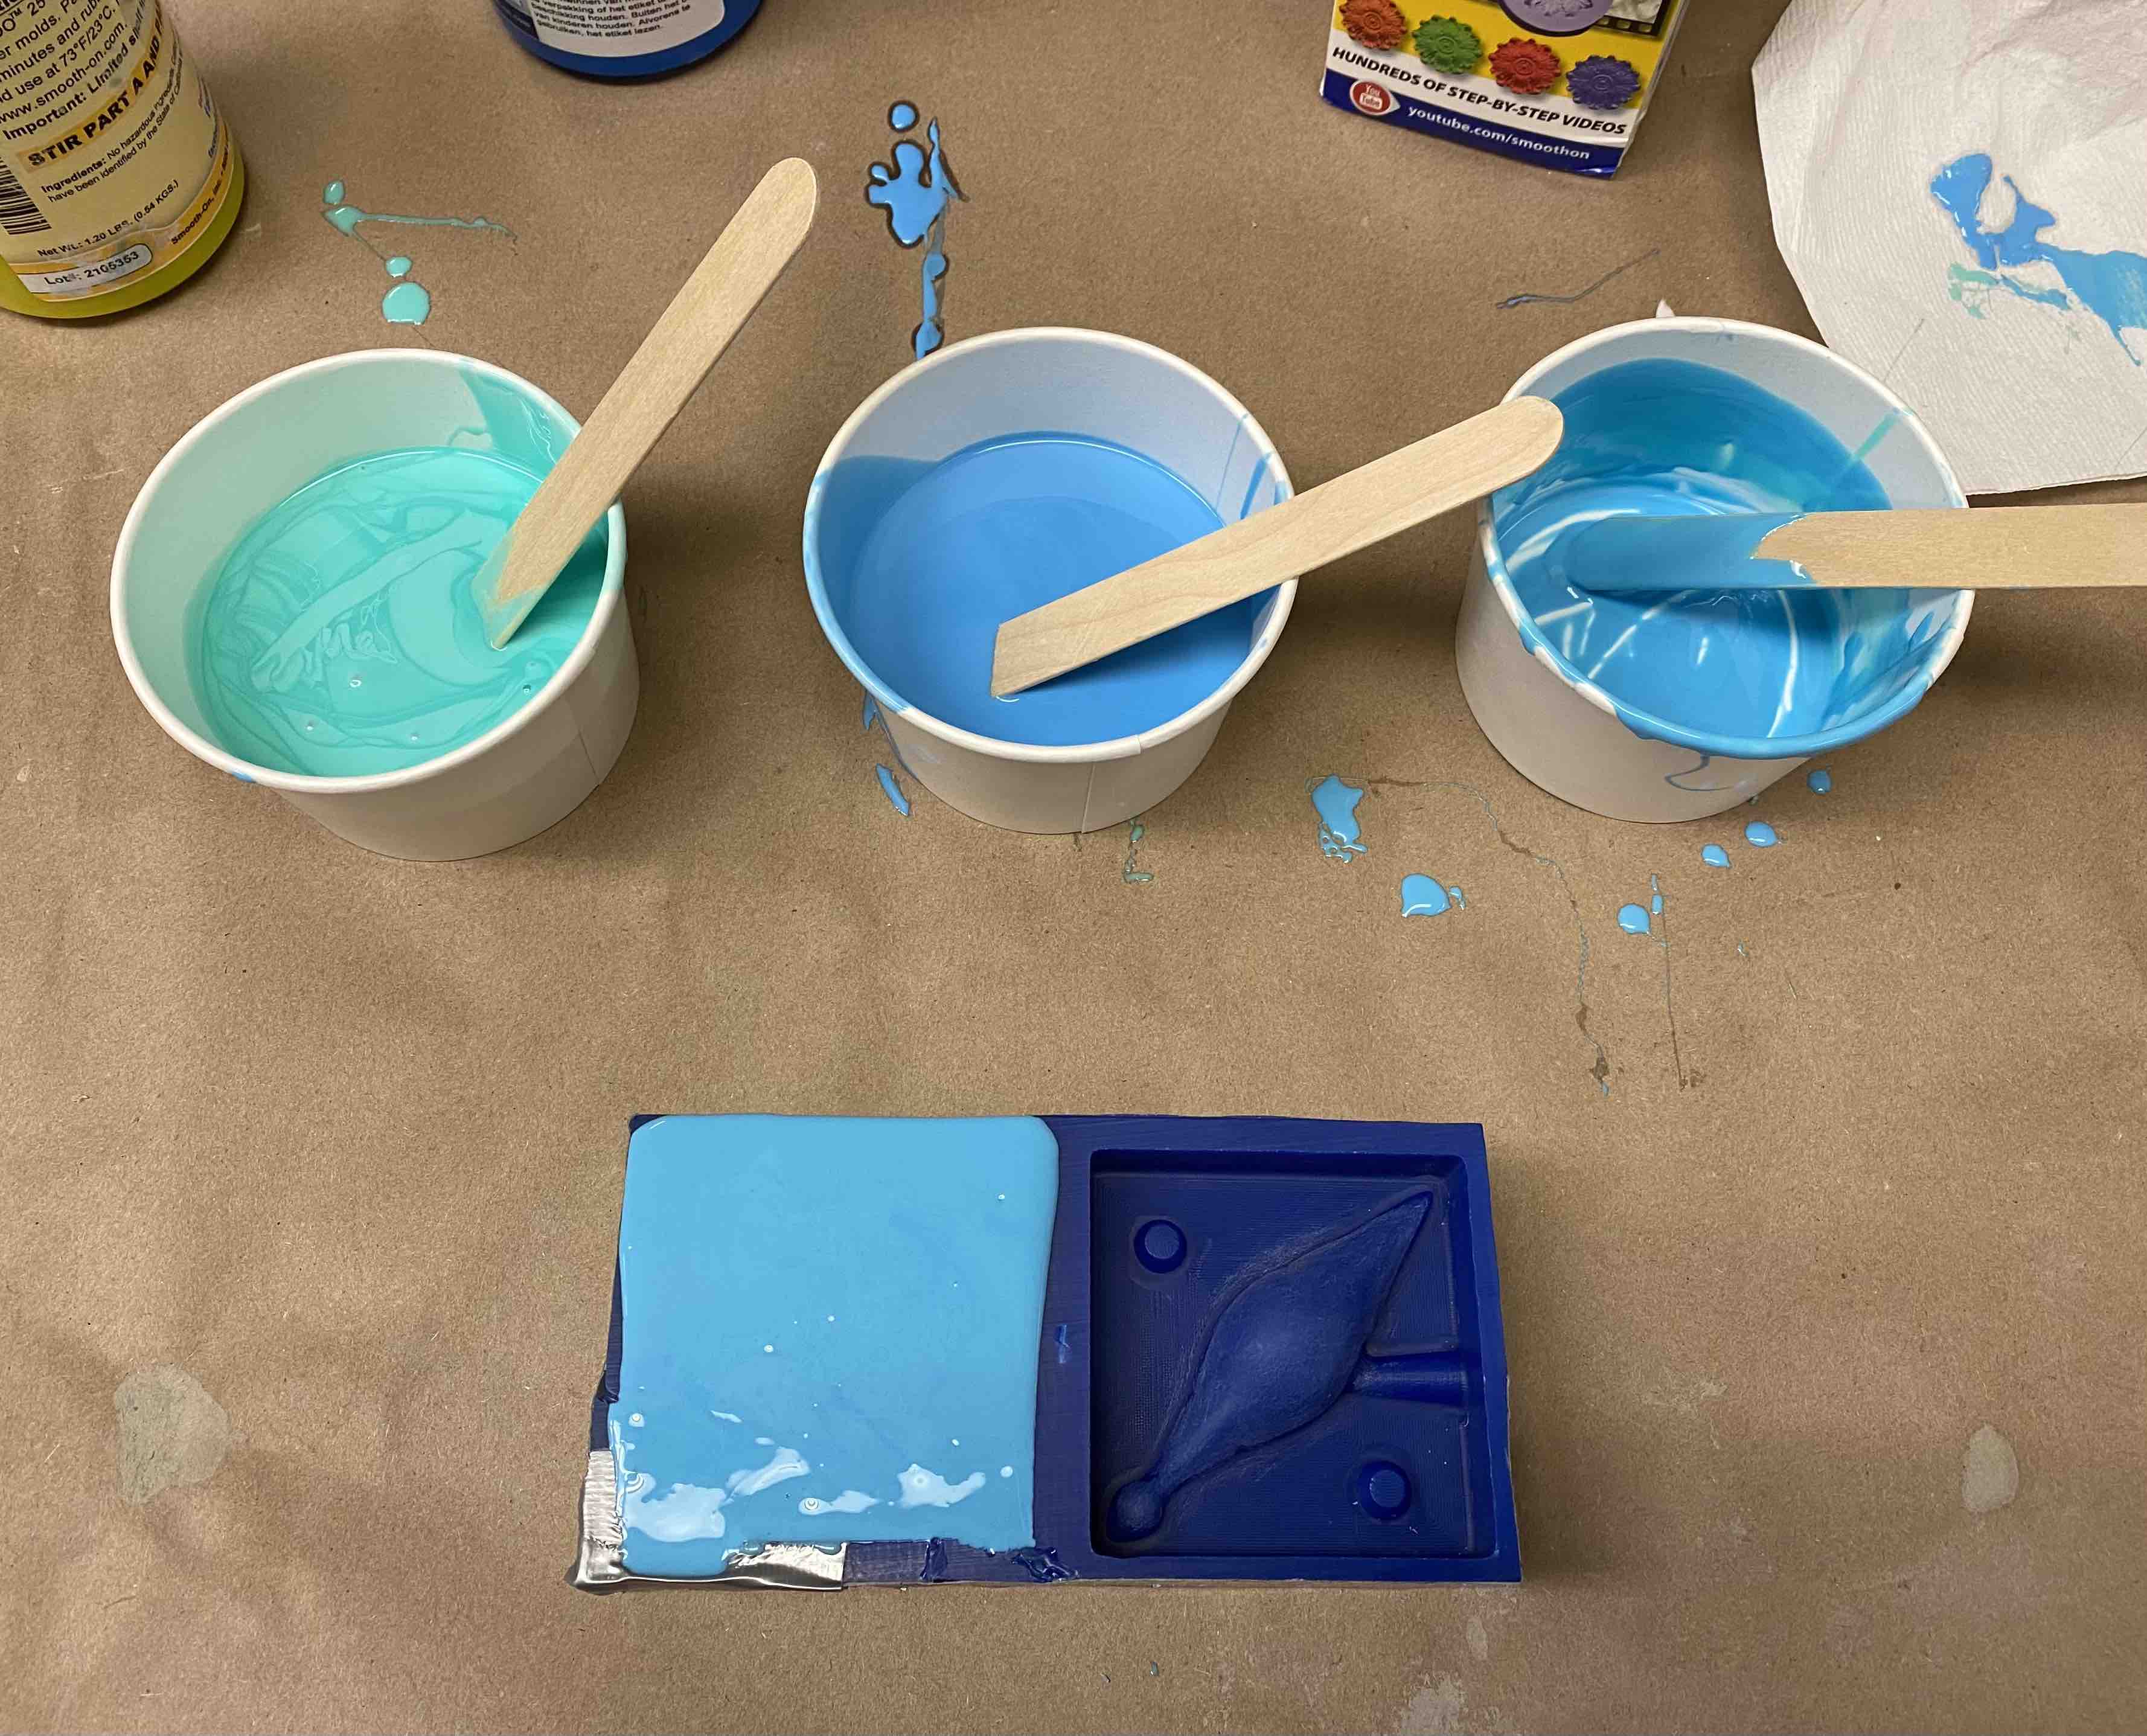
I have three cups: one for part A of the mixture, one for part B, and one for mixing both together. The oomoo kit advised mixing each part
separately before combining the two together.
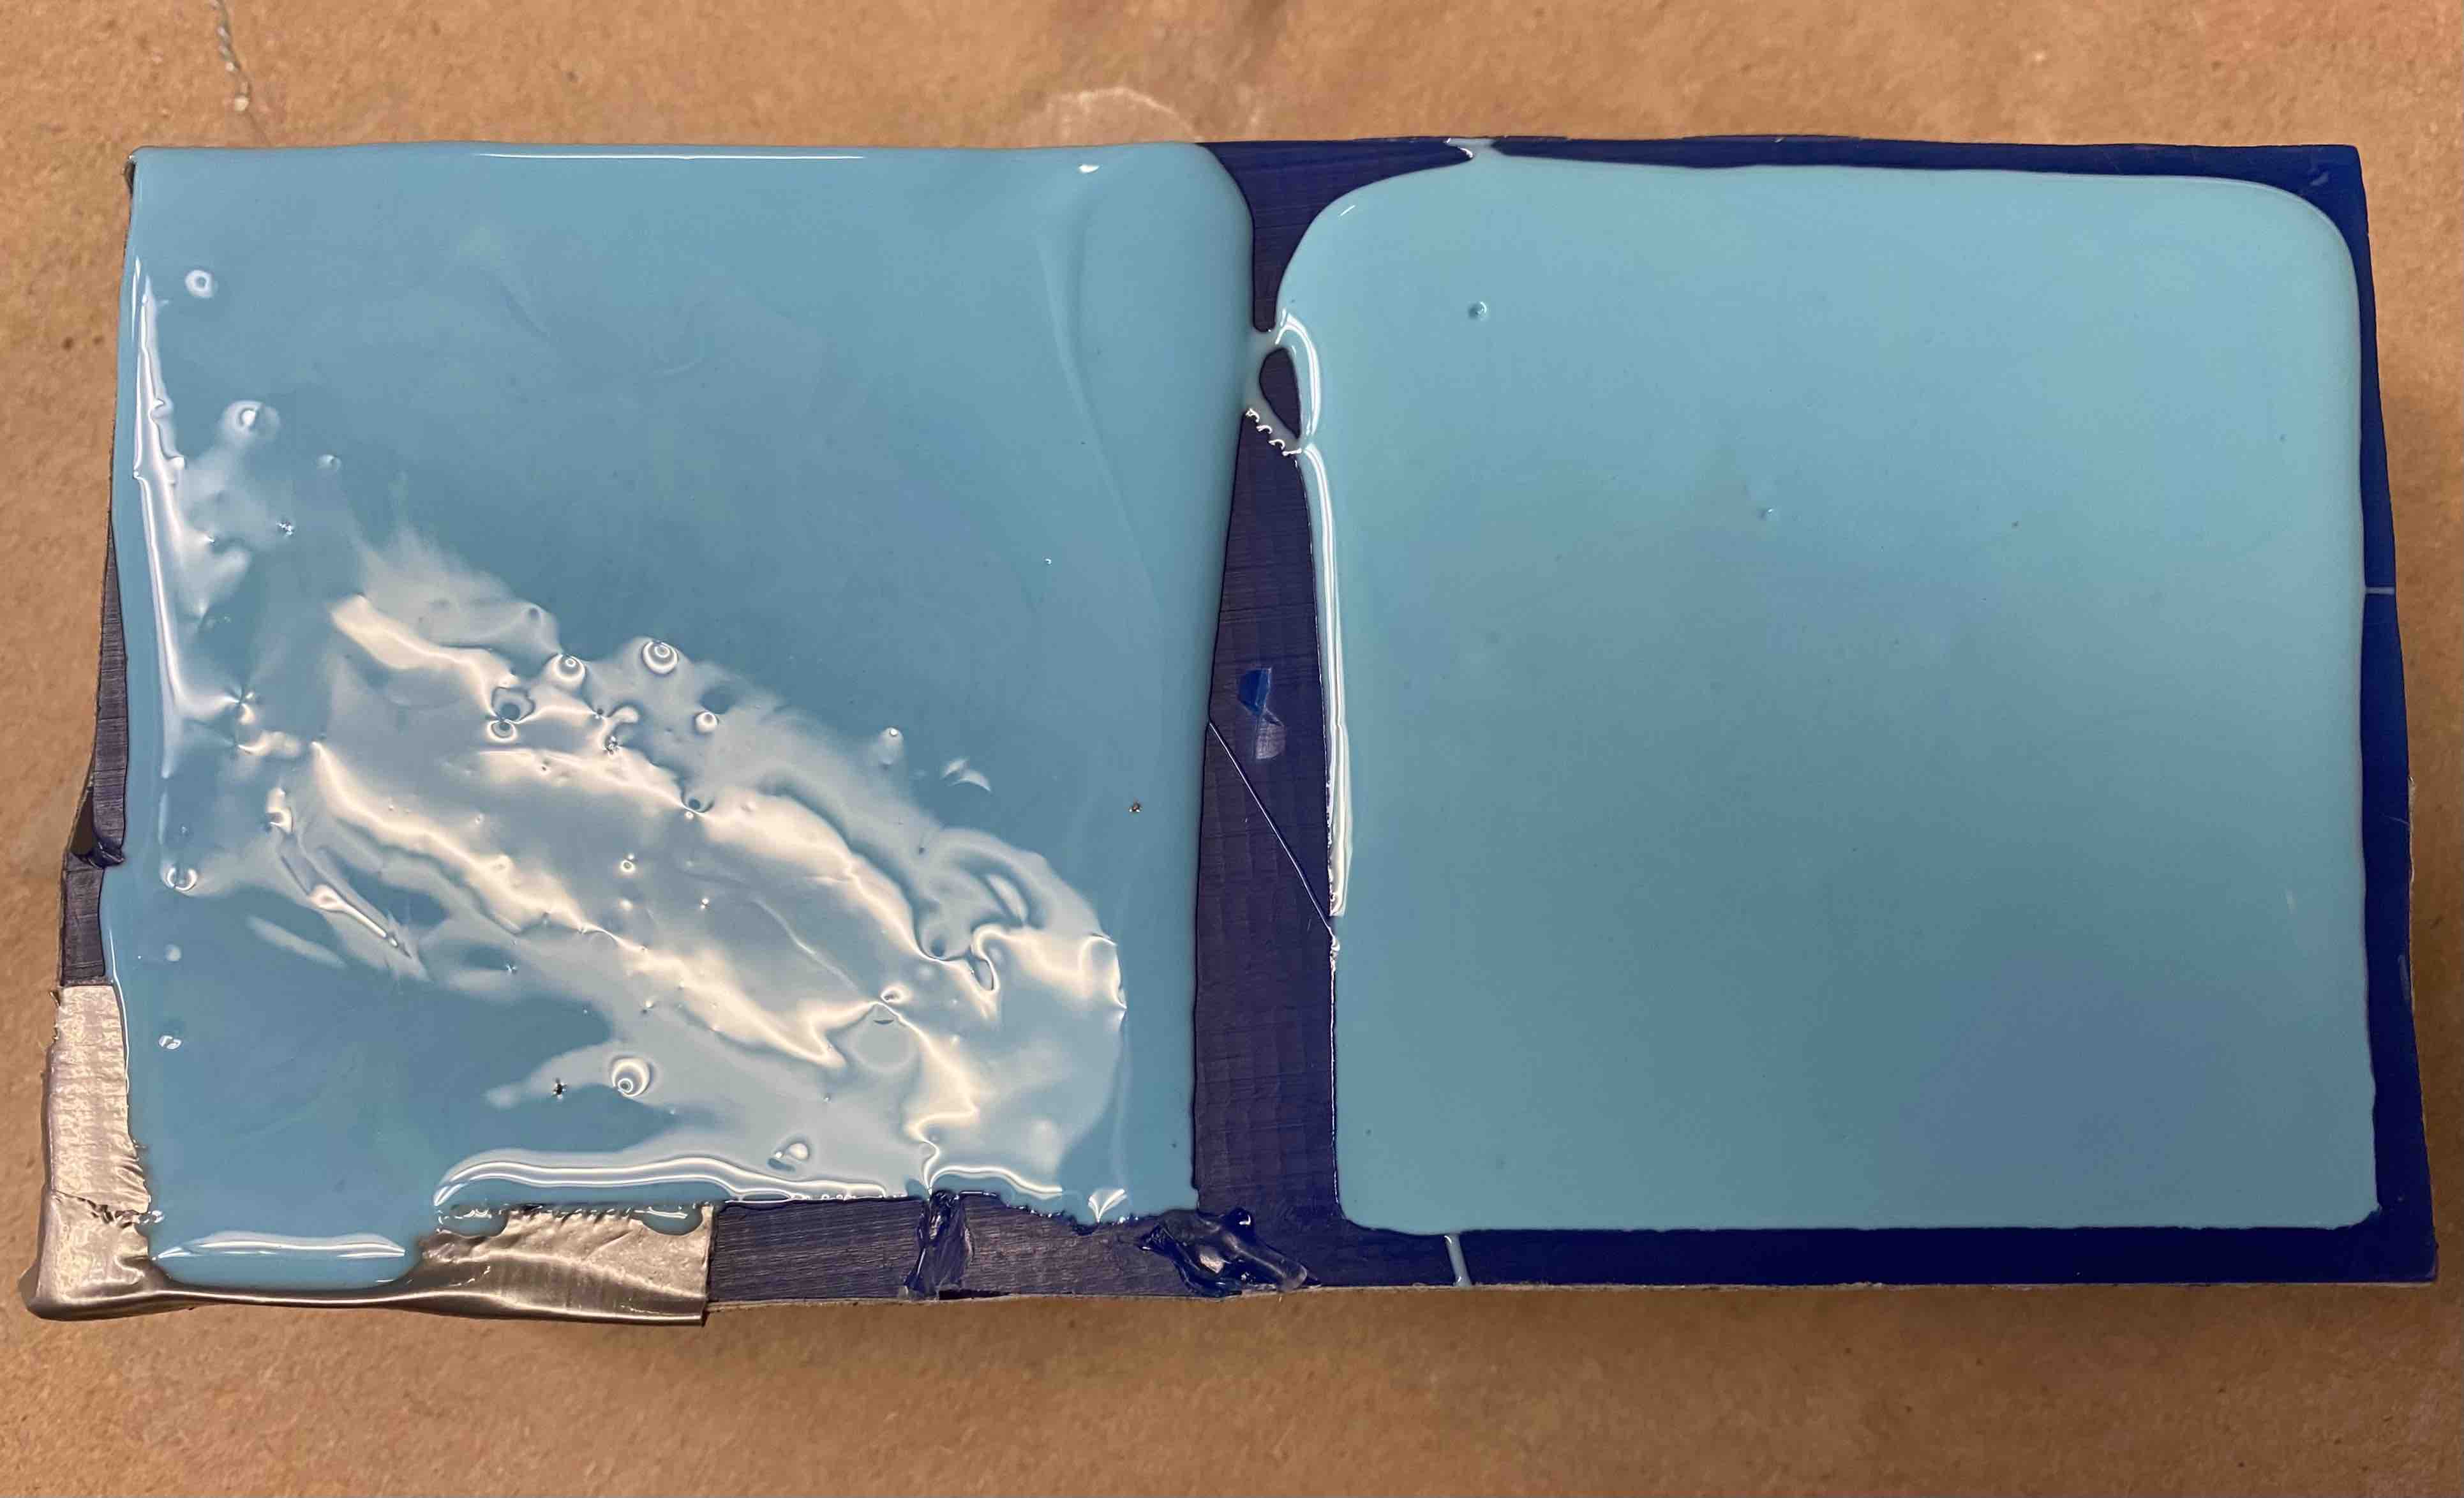
I poured the finished mixture into the wax mold slowly to avoid bubbles. I also aimed my pour
over the lowest points of the mold to let the material rise around all the nooks and crannies. After pouring, I tapped (more like gently slammed) the
mold onto the table to help any bubbles rise; then I used the point of my wax carving tool to pop all the bubbles on the surface.
Casting

And here are the finished molds! I was really worried about bubbles, but luckily the molds came out smooth.
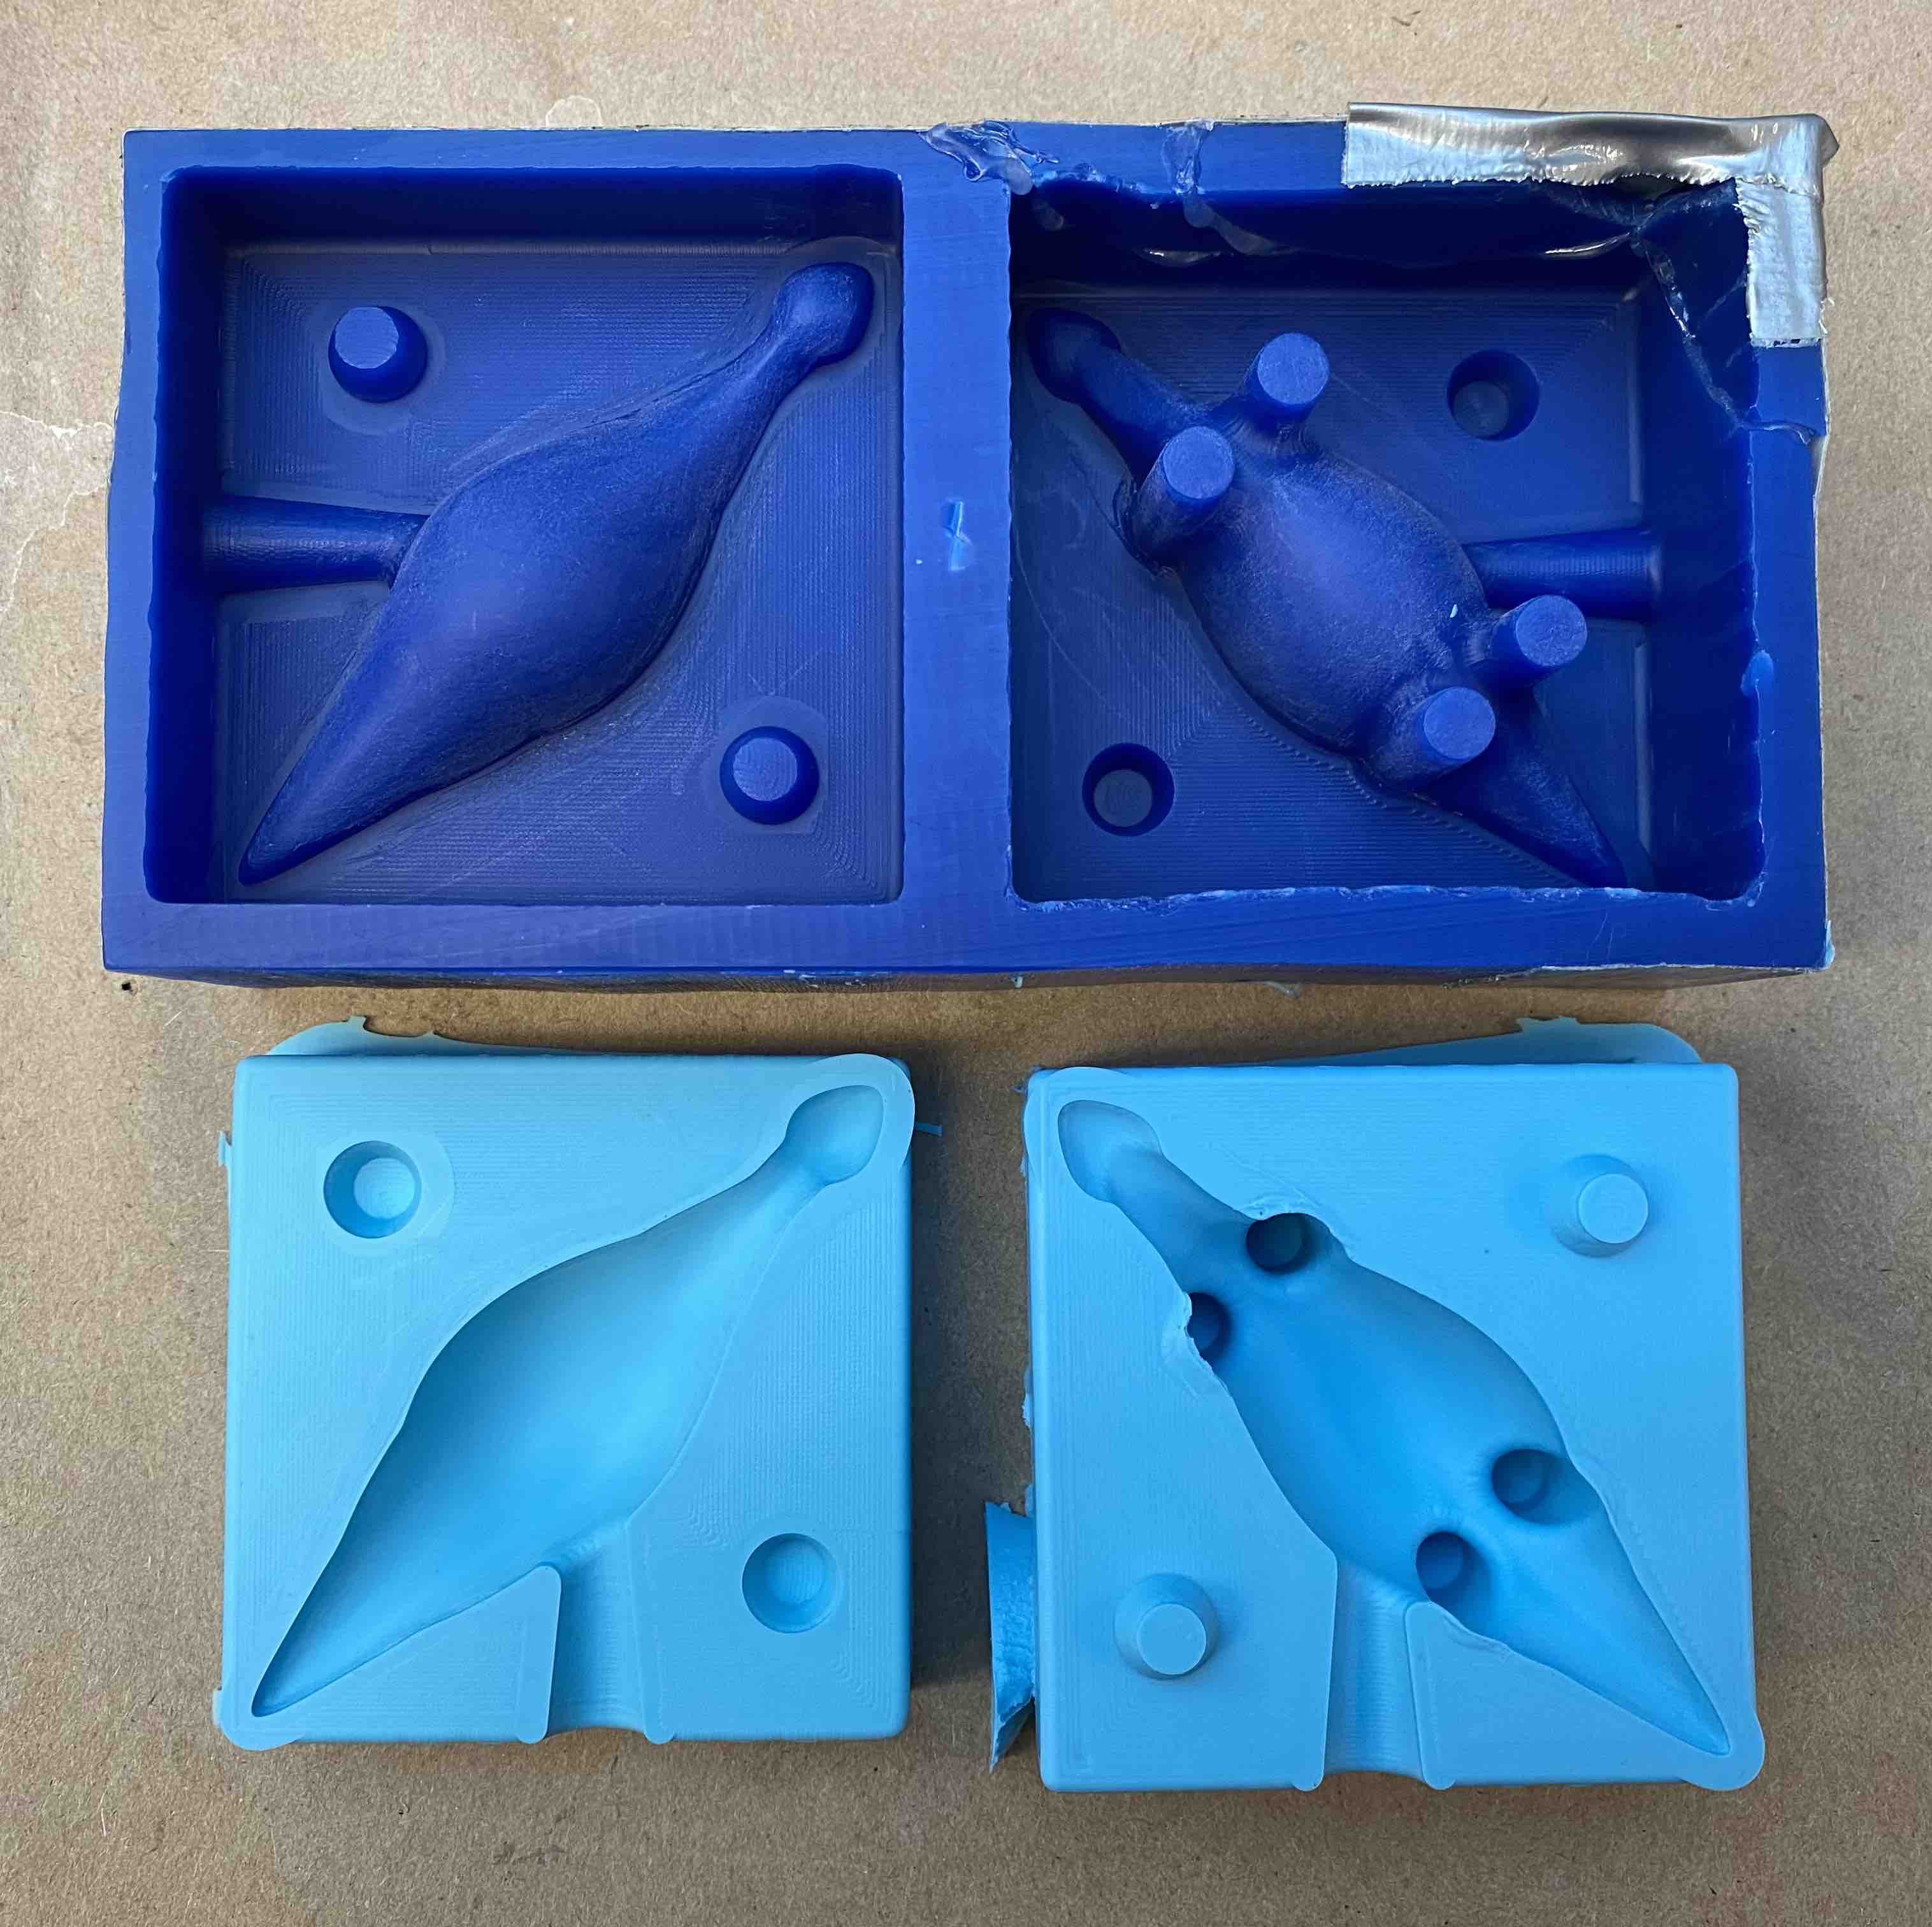
Here's a comparison pic of the positive wax mold and negative oomoo molds.
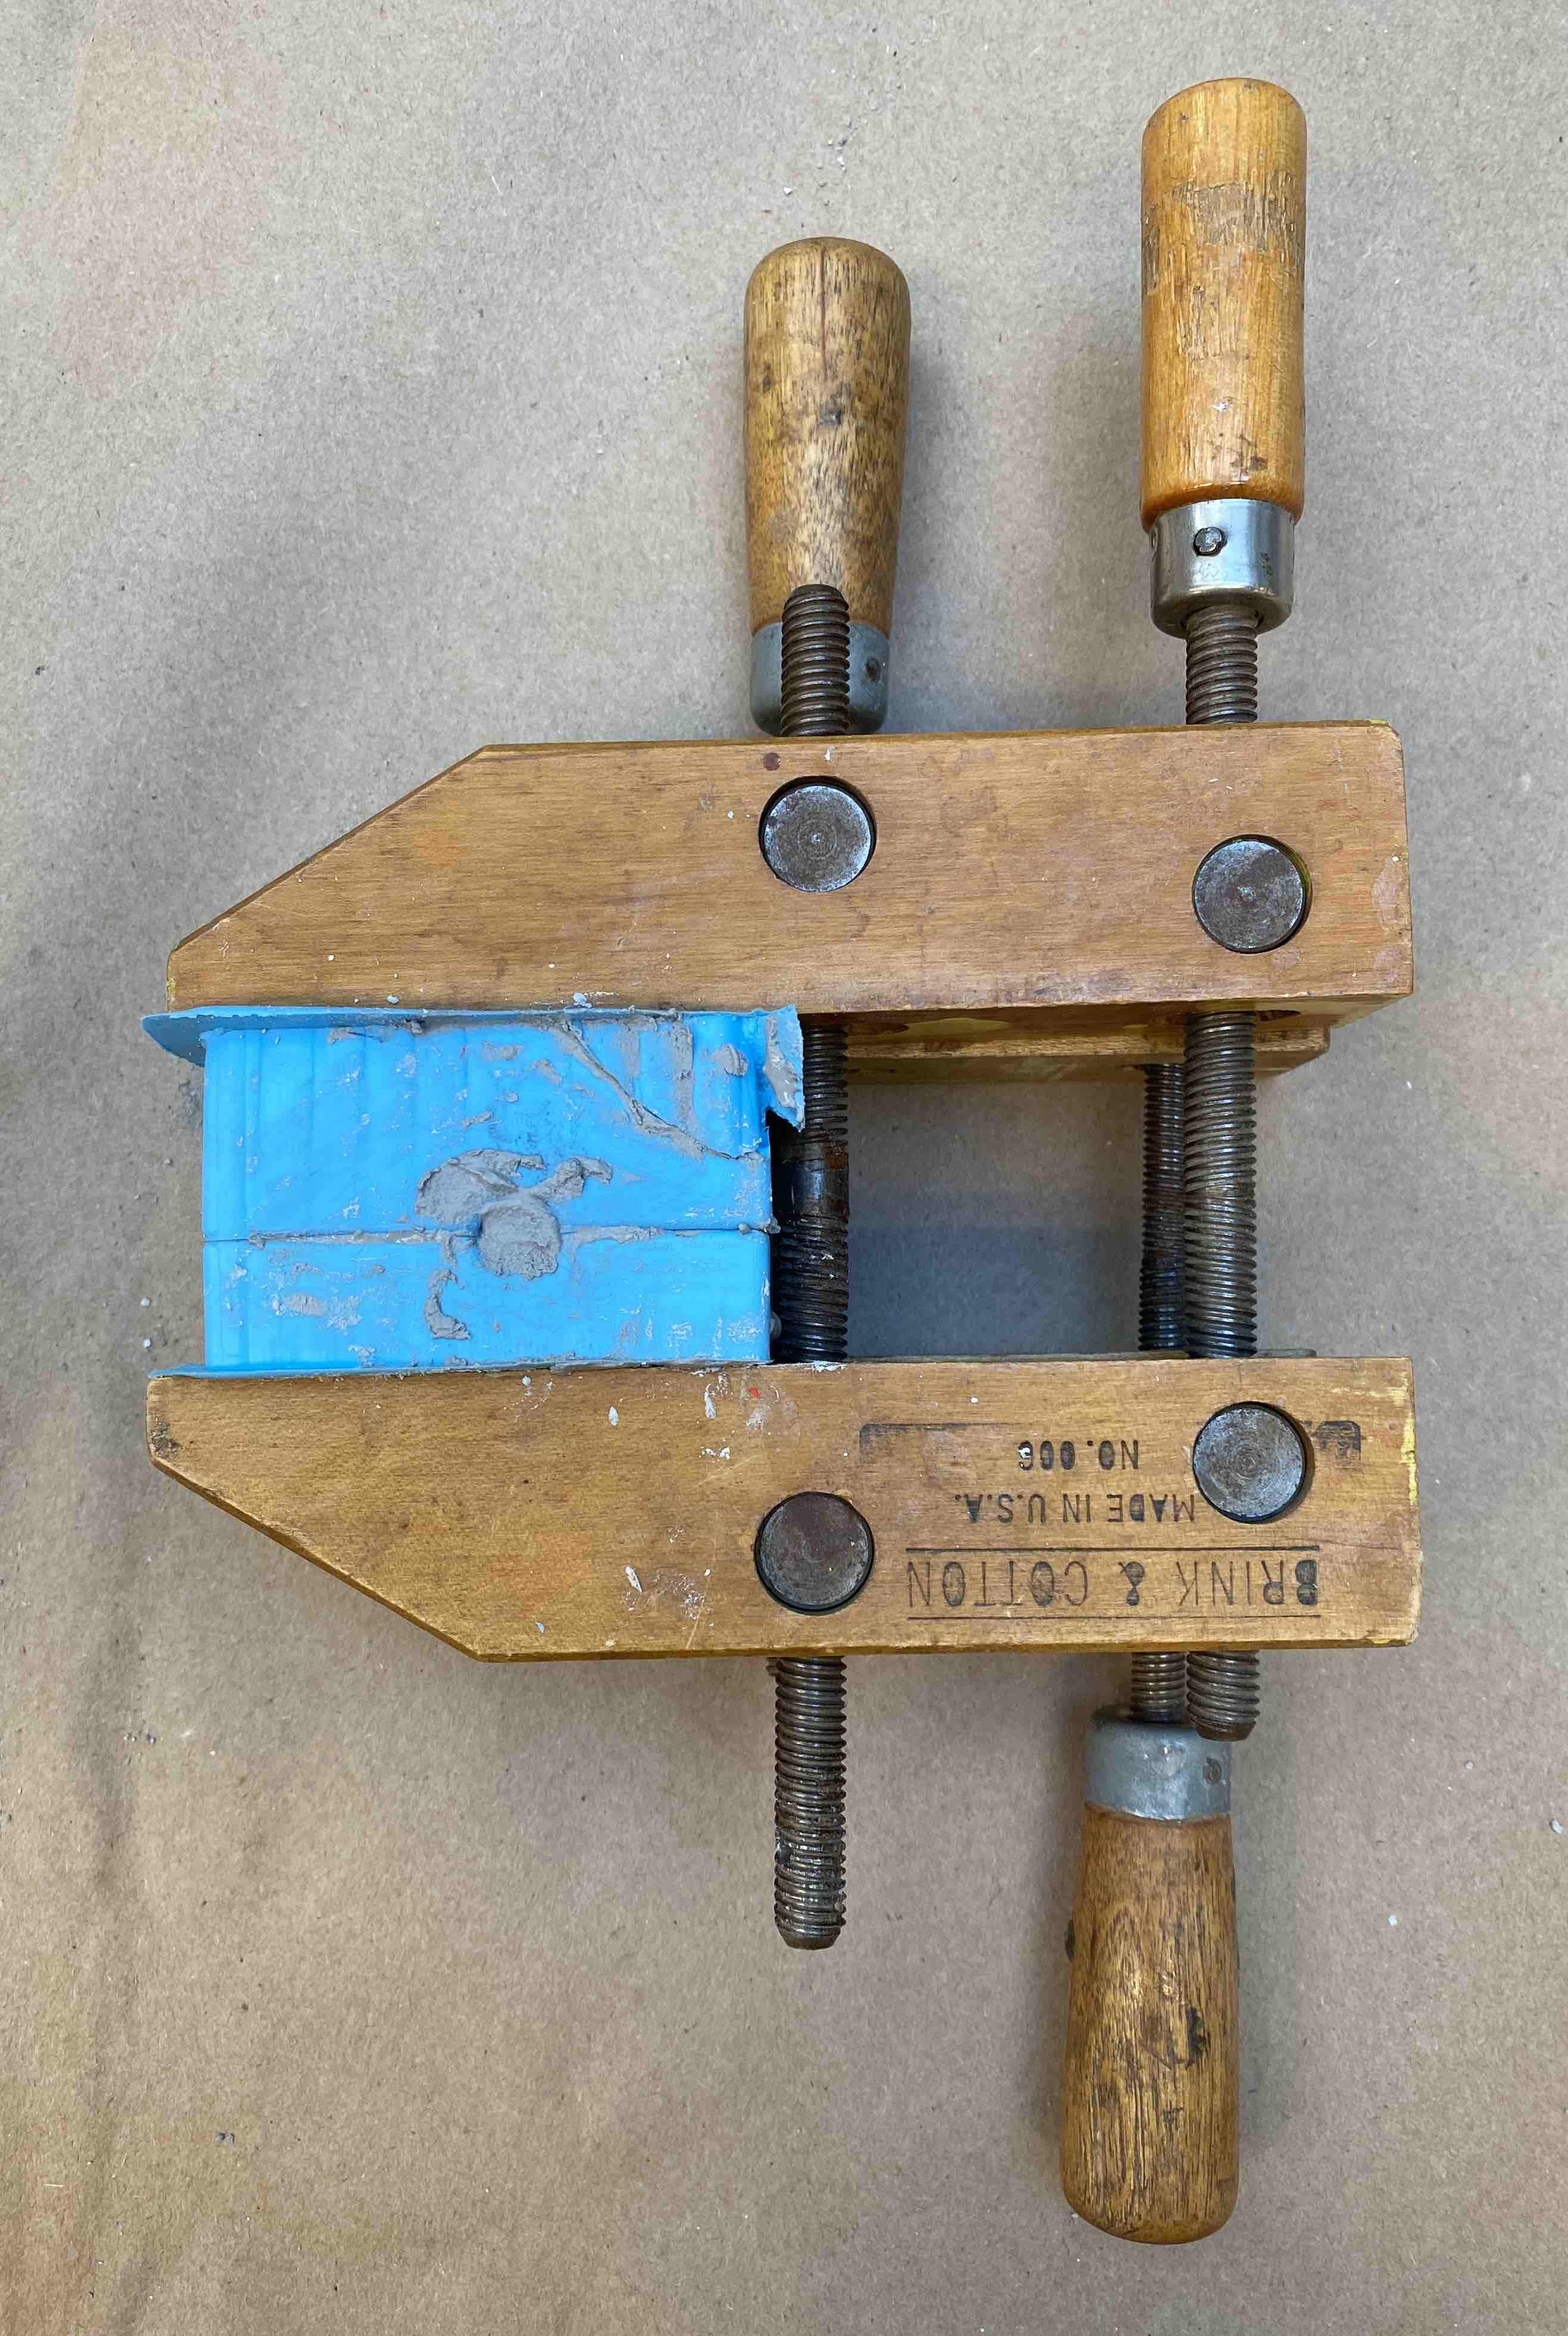
To make my first dino, I mixed up some Rockite -- courtesy of Kim -- and poured it into the molds. At this point, I
realized I should have included another sprue for air to escape, as it was tough to shove the mixture down just one sprue; the
material wouldn't fall down because the air still needed to escape, so I had to loosen the clamps to induce a gap between the molds. Then, I just
needed to have patience as I slapped material into the sprue and waited for it to sink into the mold.
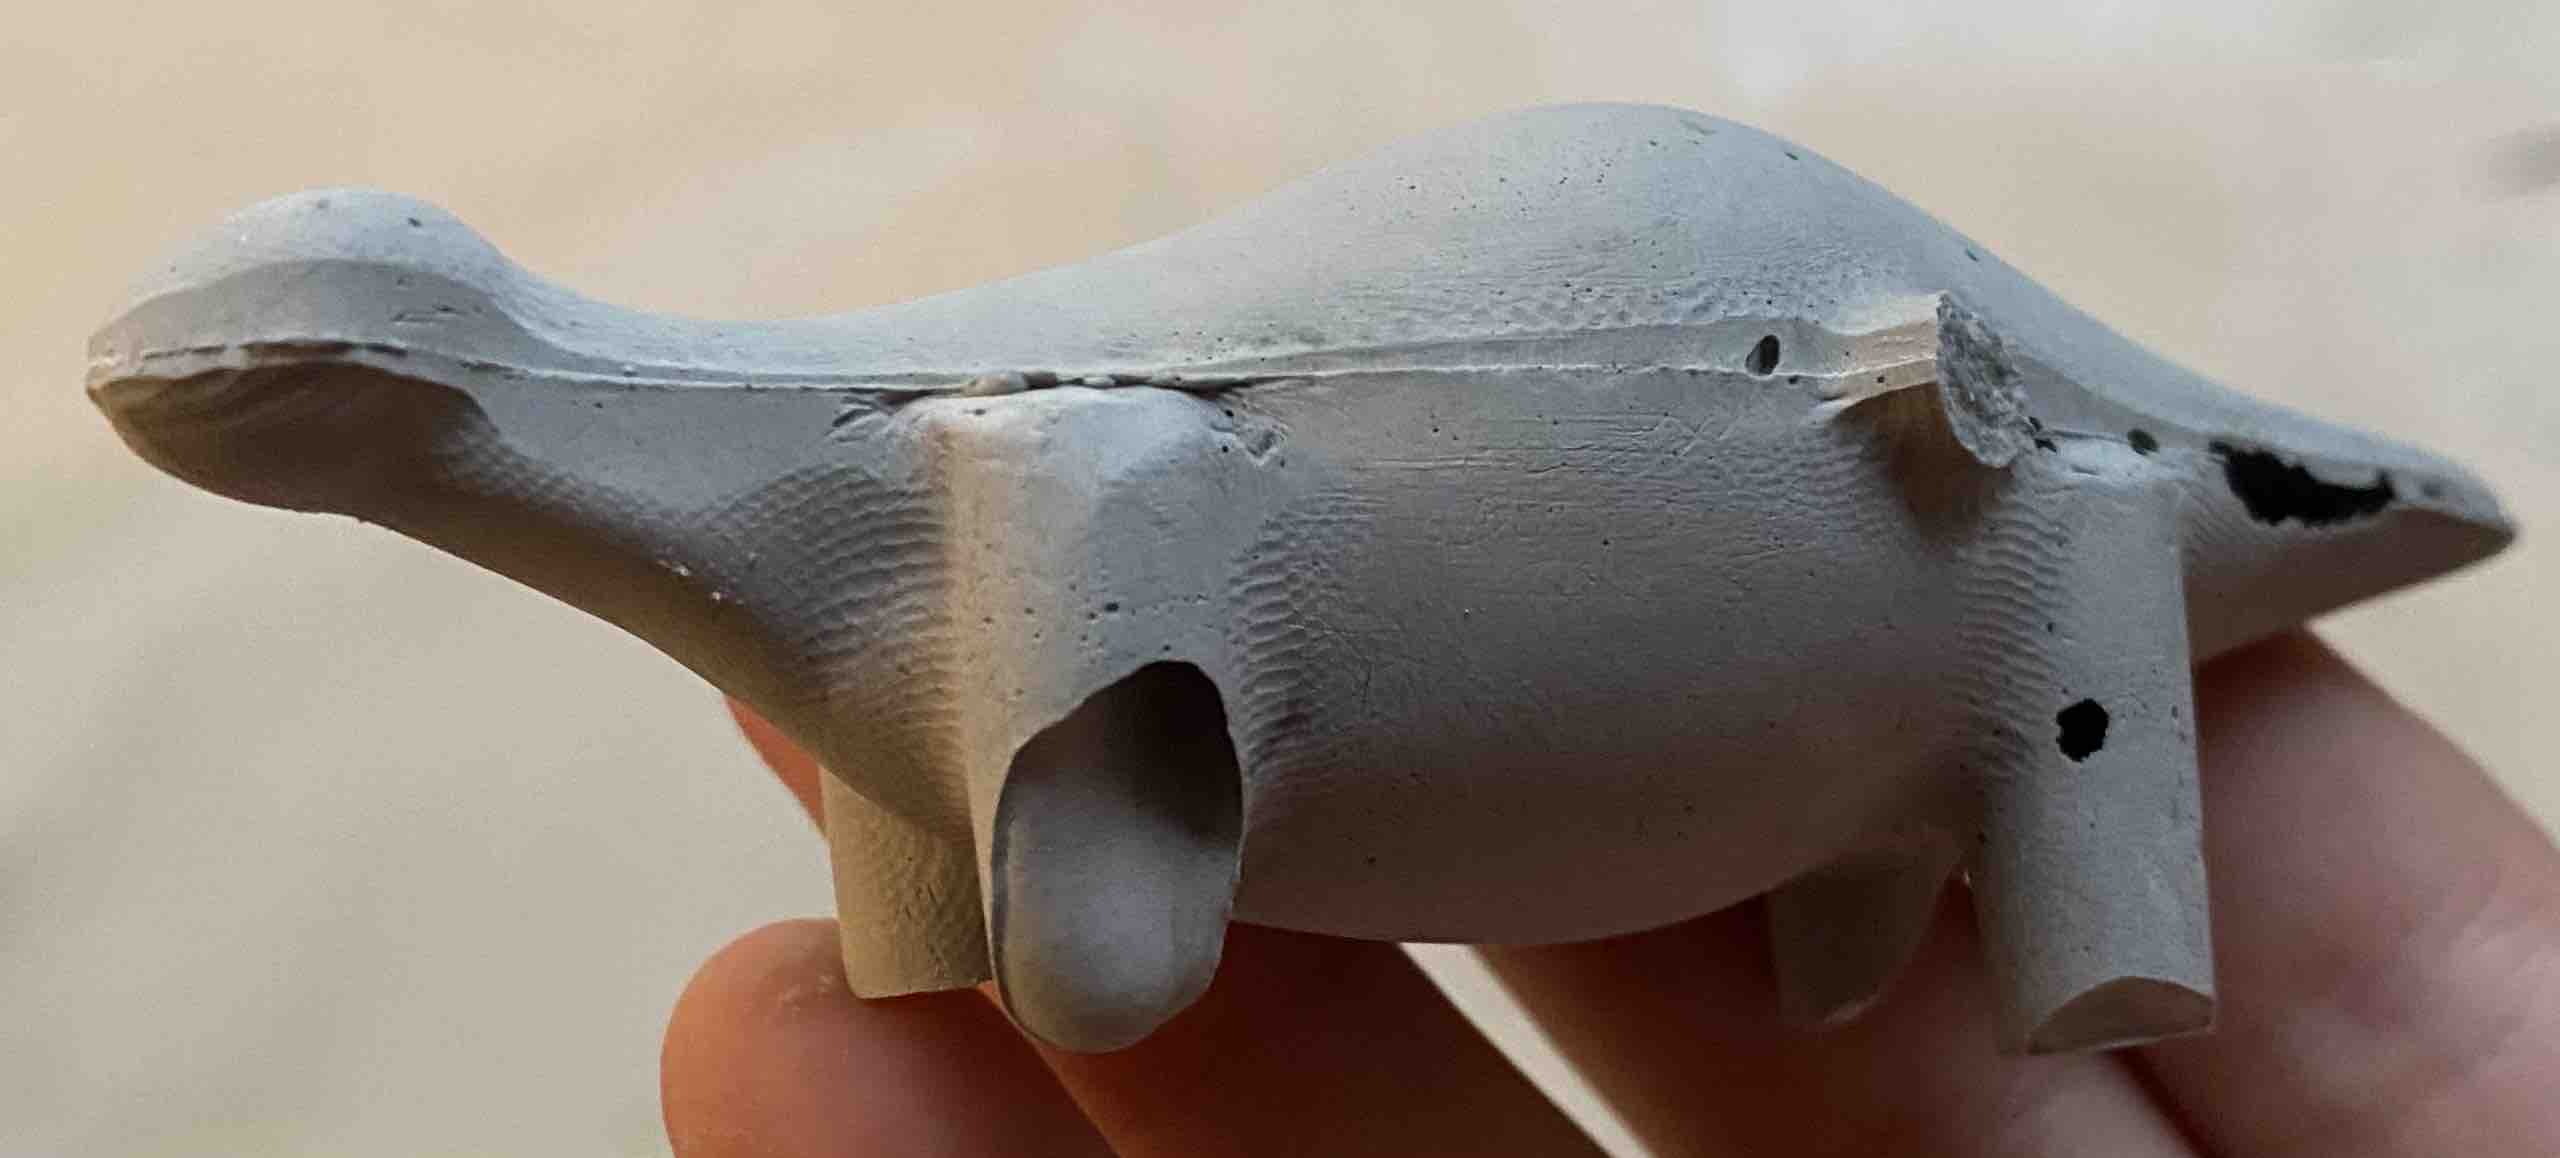
Here's my first dino -- the material didn't go into his legs and tail completely. Next time, I would use a vertical sprue to ensure
the material sinks down all the way.
My dino army grows
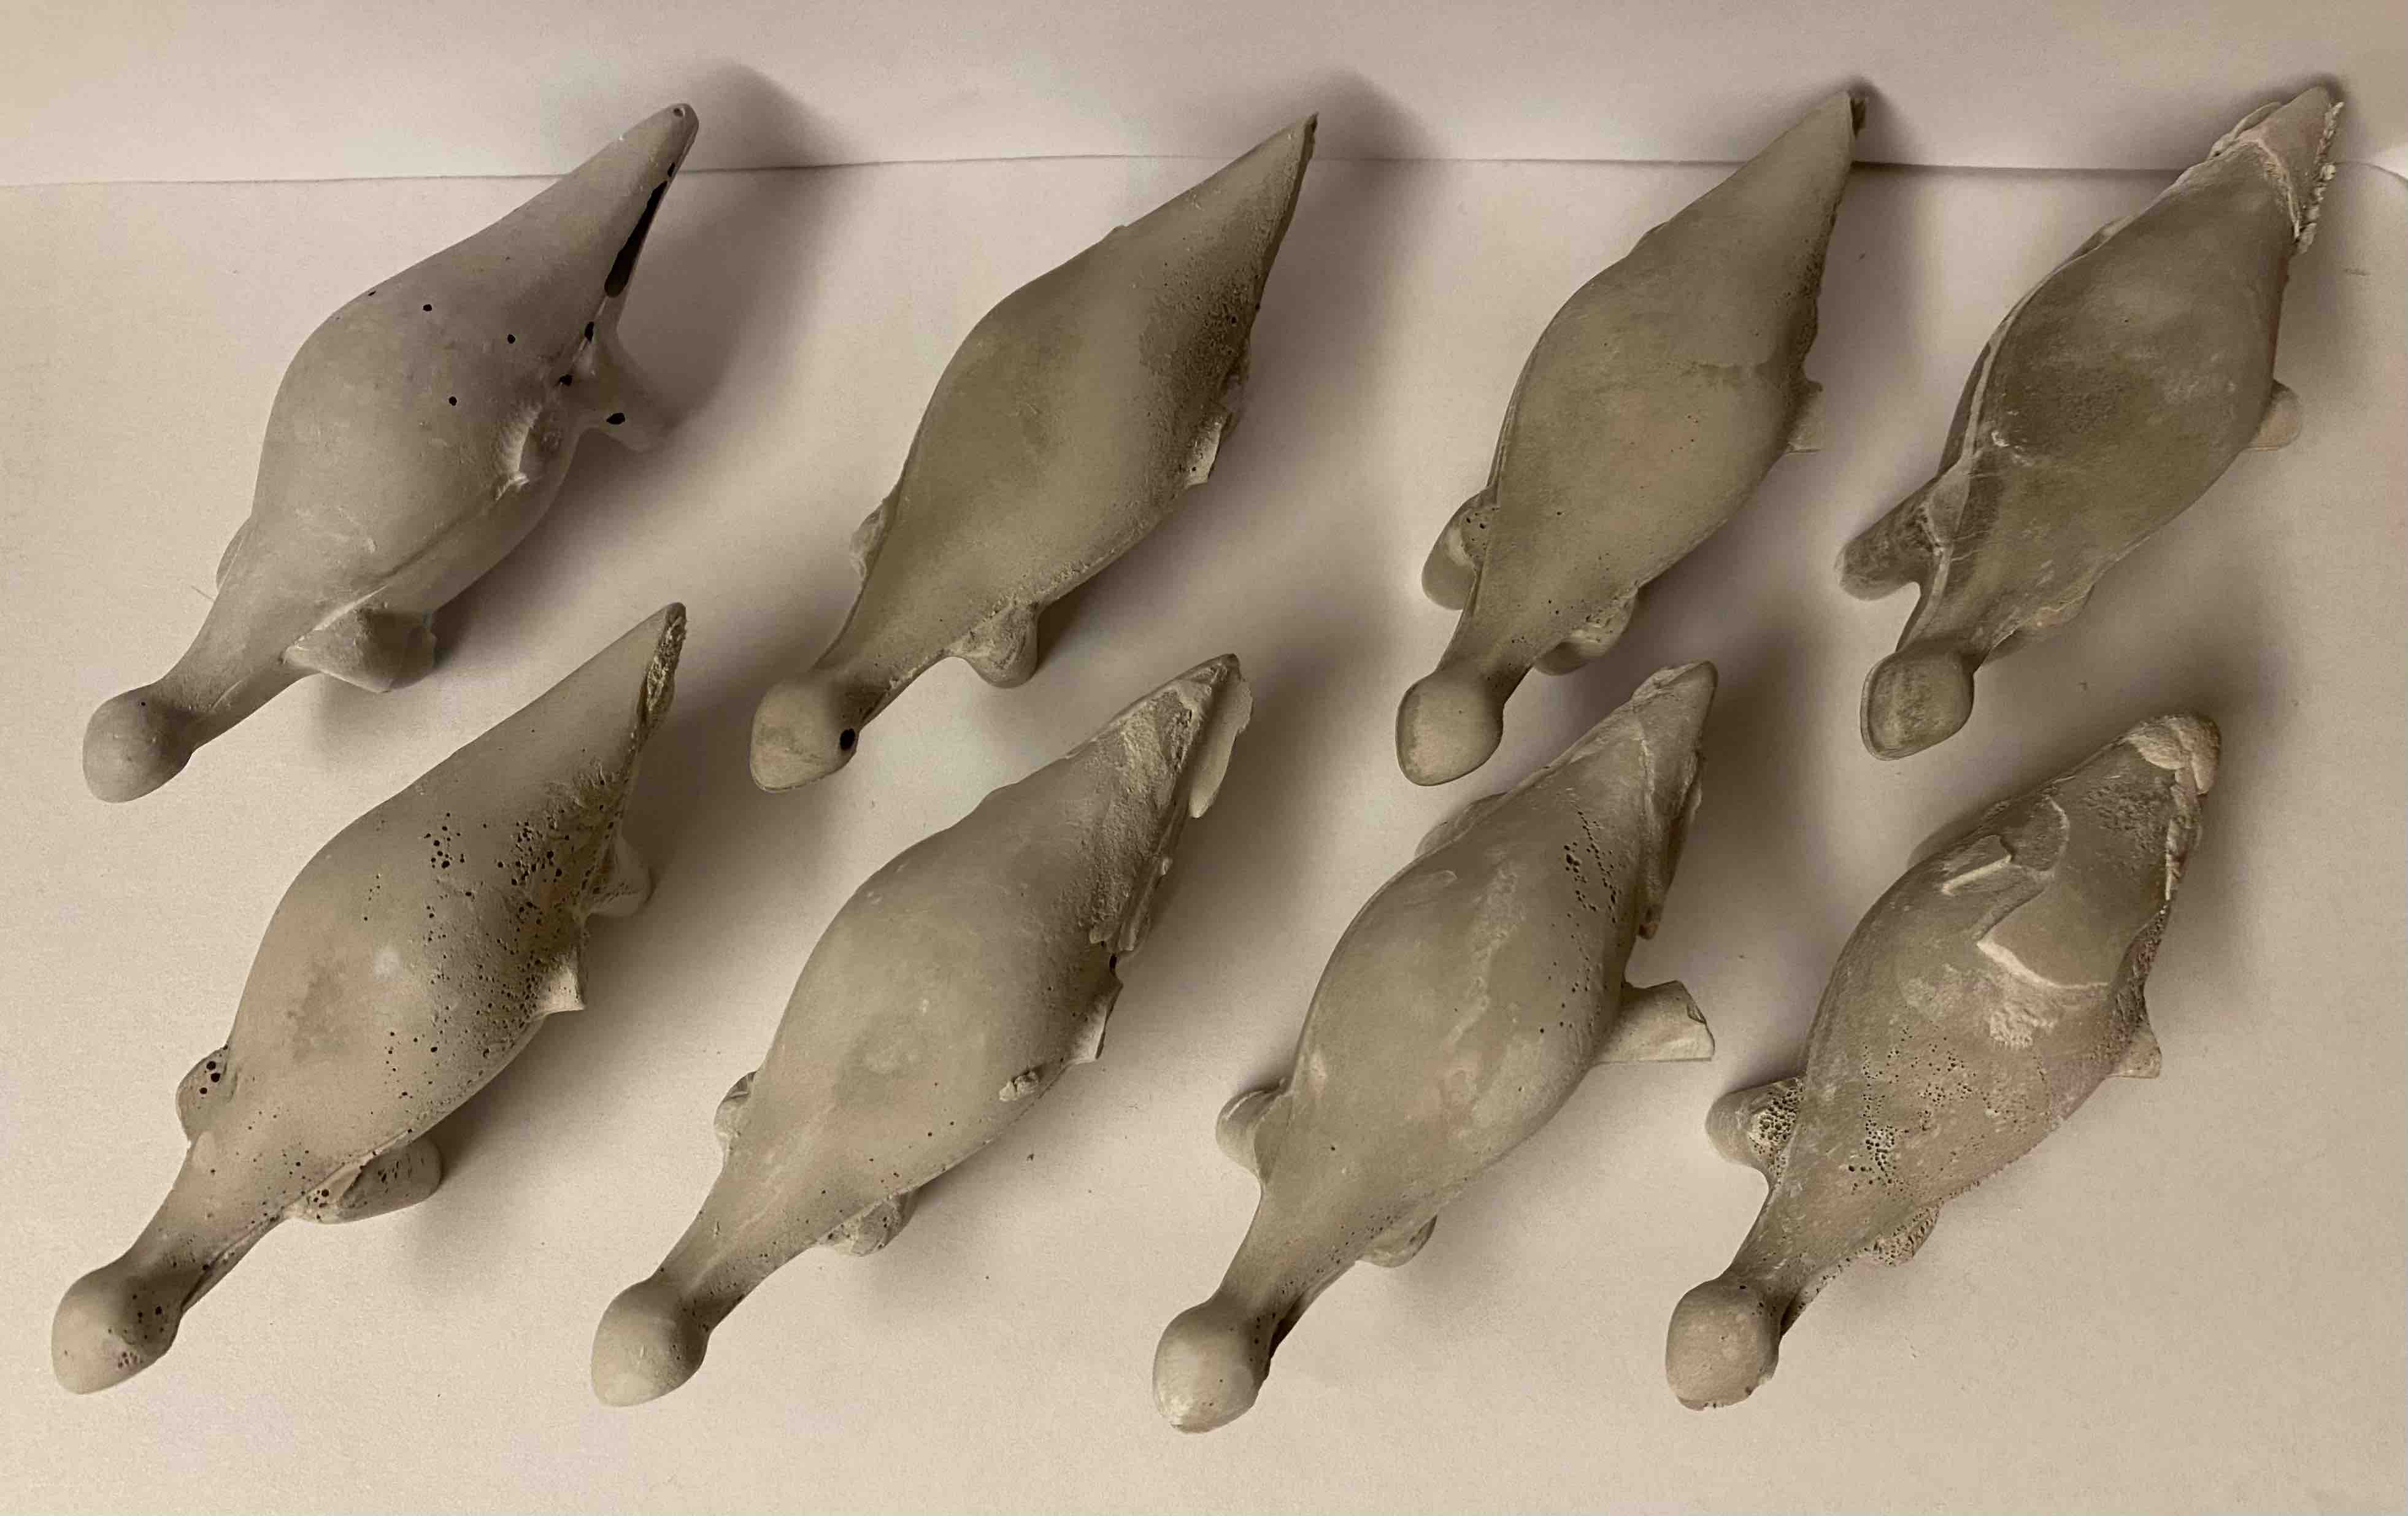
I made another set of oomoo molds and have been casting many many dinos with hydrostone. To help the material get into all the crevices, I start by
filling the bottom mold (leg mold) and using a stick to push material into the legs, head, and tail. Then I add the top mold, clamp the bottom
part of both molds, and pour material down the sprue. Then I shake/rotate the molds to help the material get into the tail. Despite all this prep, the
dinos still don't turn out perfect; here you can see I've slapped material onto the dinos to make up for missing tails or legs. I plan to sand all these
bad boys to make them look less chunky, and then I'll paint them fun colors.
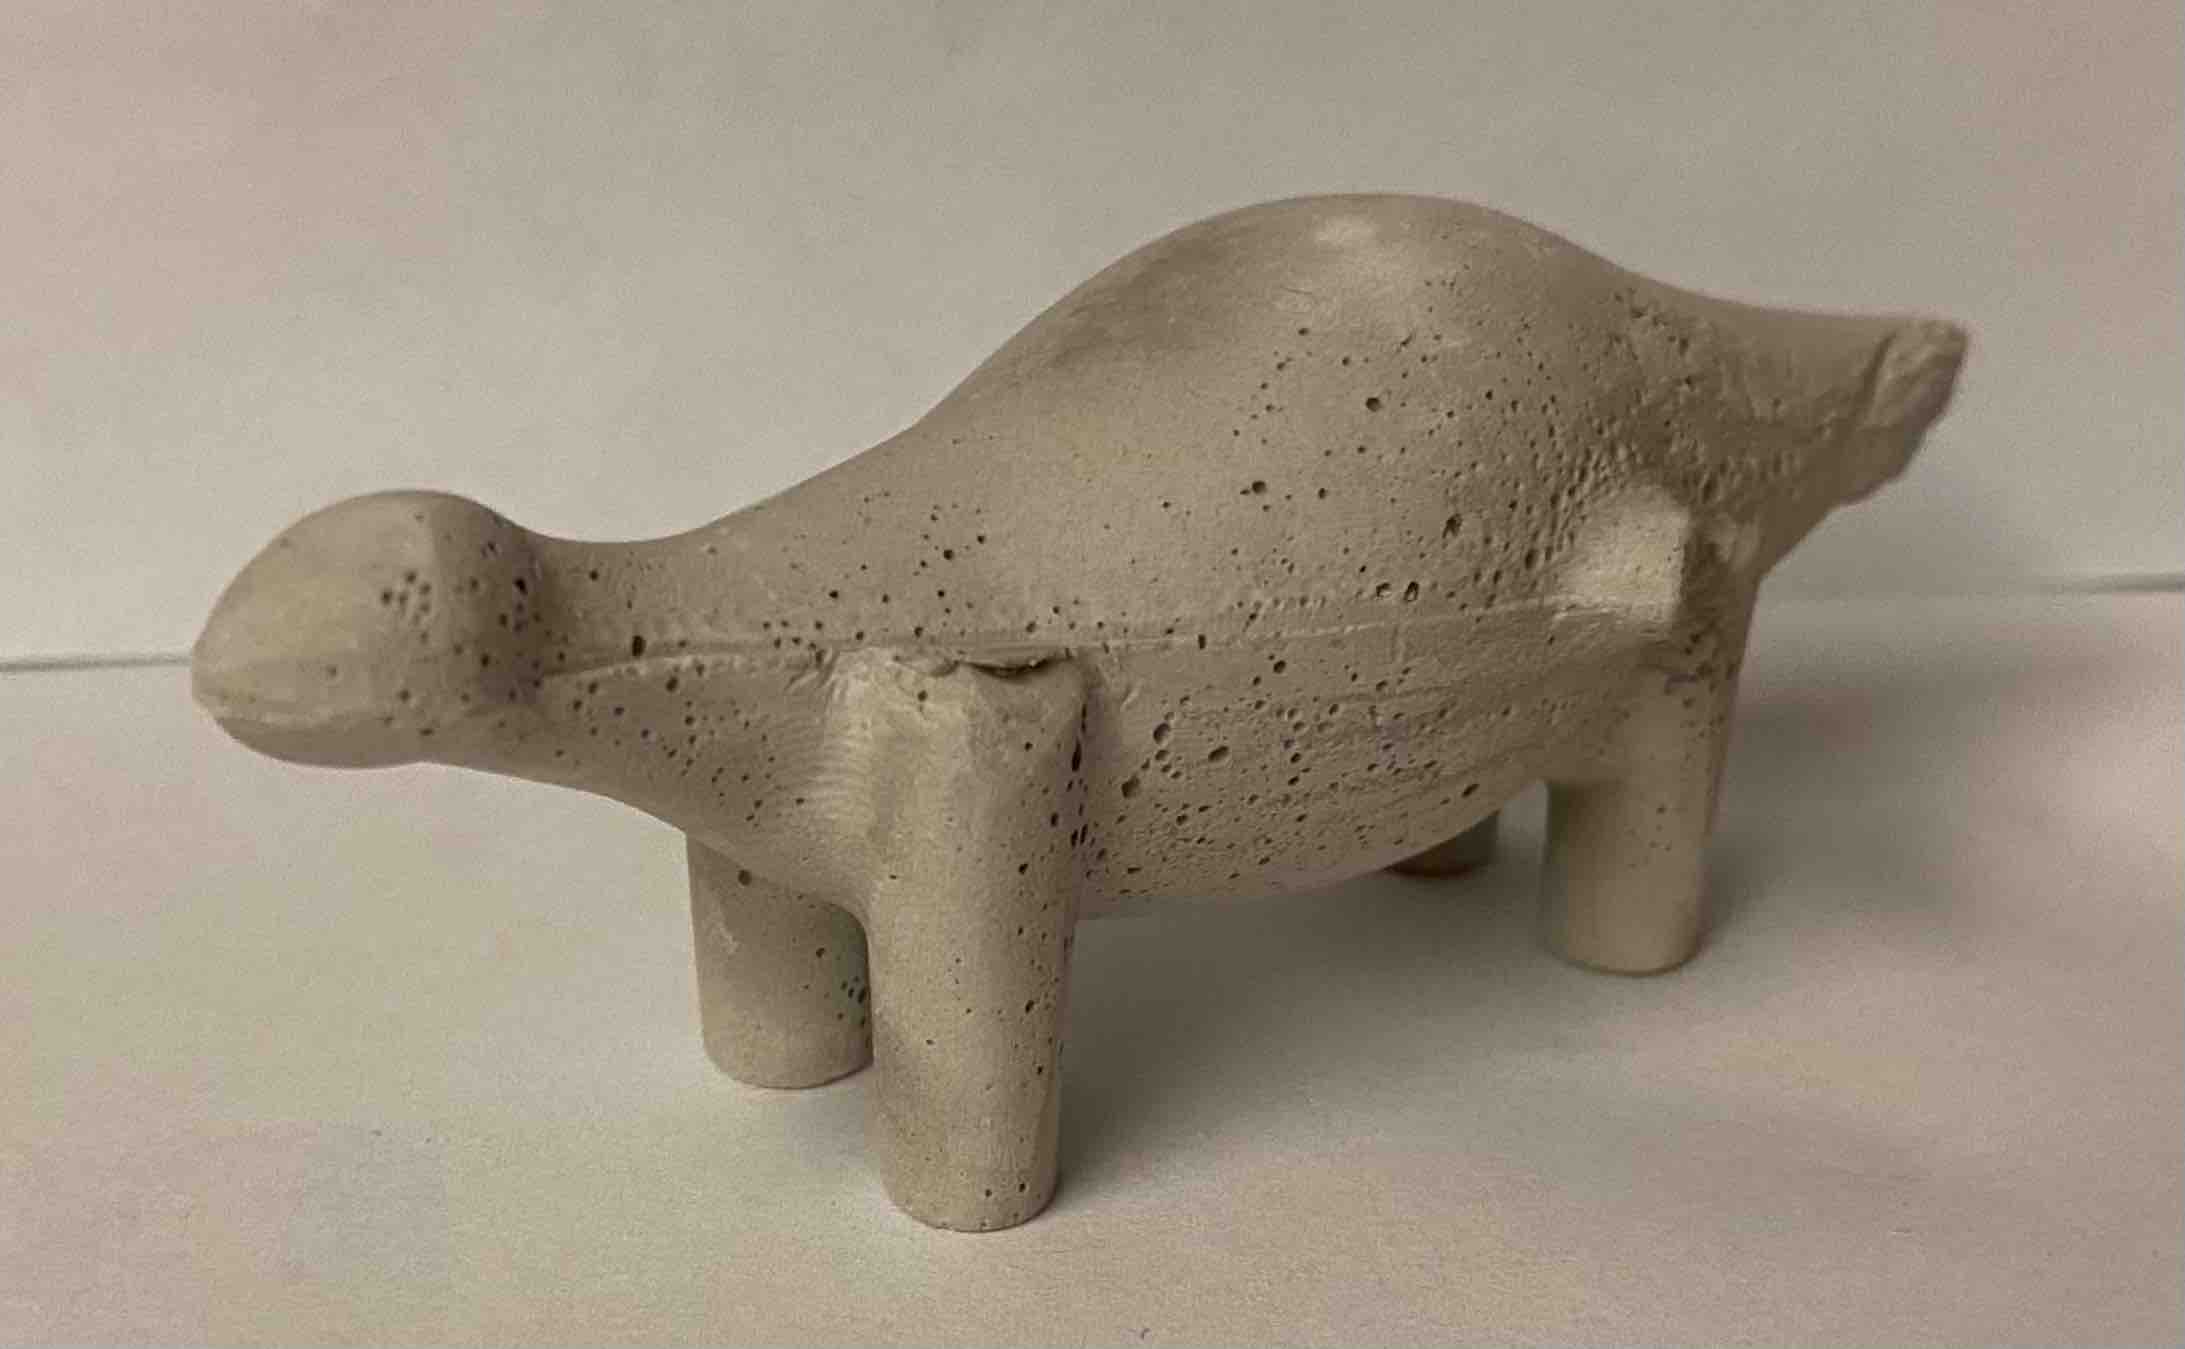
Here's an up-close shot so you can see what the dinos look like when the casting turns out good.