Computer-Aided Design
Model of a potential final project
01 Final Project Model
//
Brainstorm & Sketch
For the final project, I wanted to make a peice of table top furniture. The overall styles I wanted to achieve are clean, simple, and functional. That is why I came cross designing a modern jewelry box with automatic drawers and a password. This can help the users prevent their necklaces and other jewelrys tangle. I also wanted to add lights and a keyboard on the box so that it also becomes a decoration in the room.
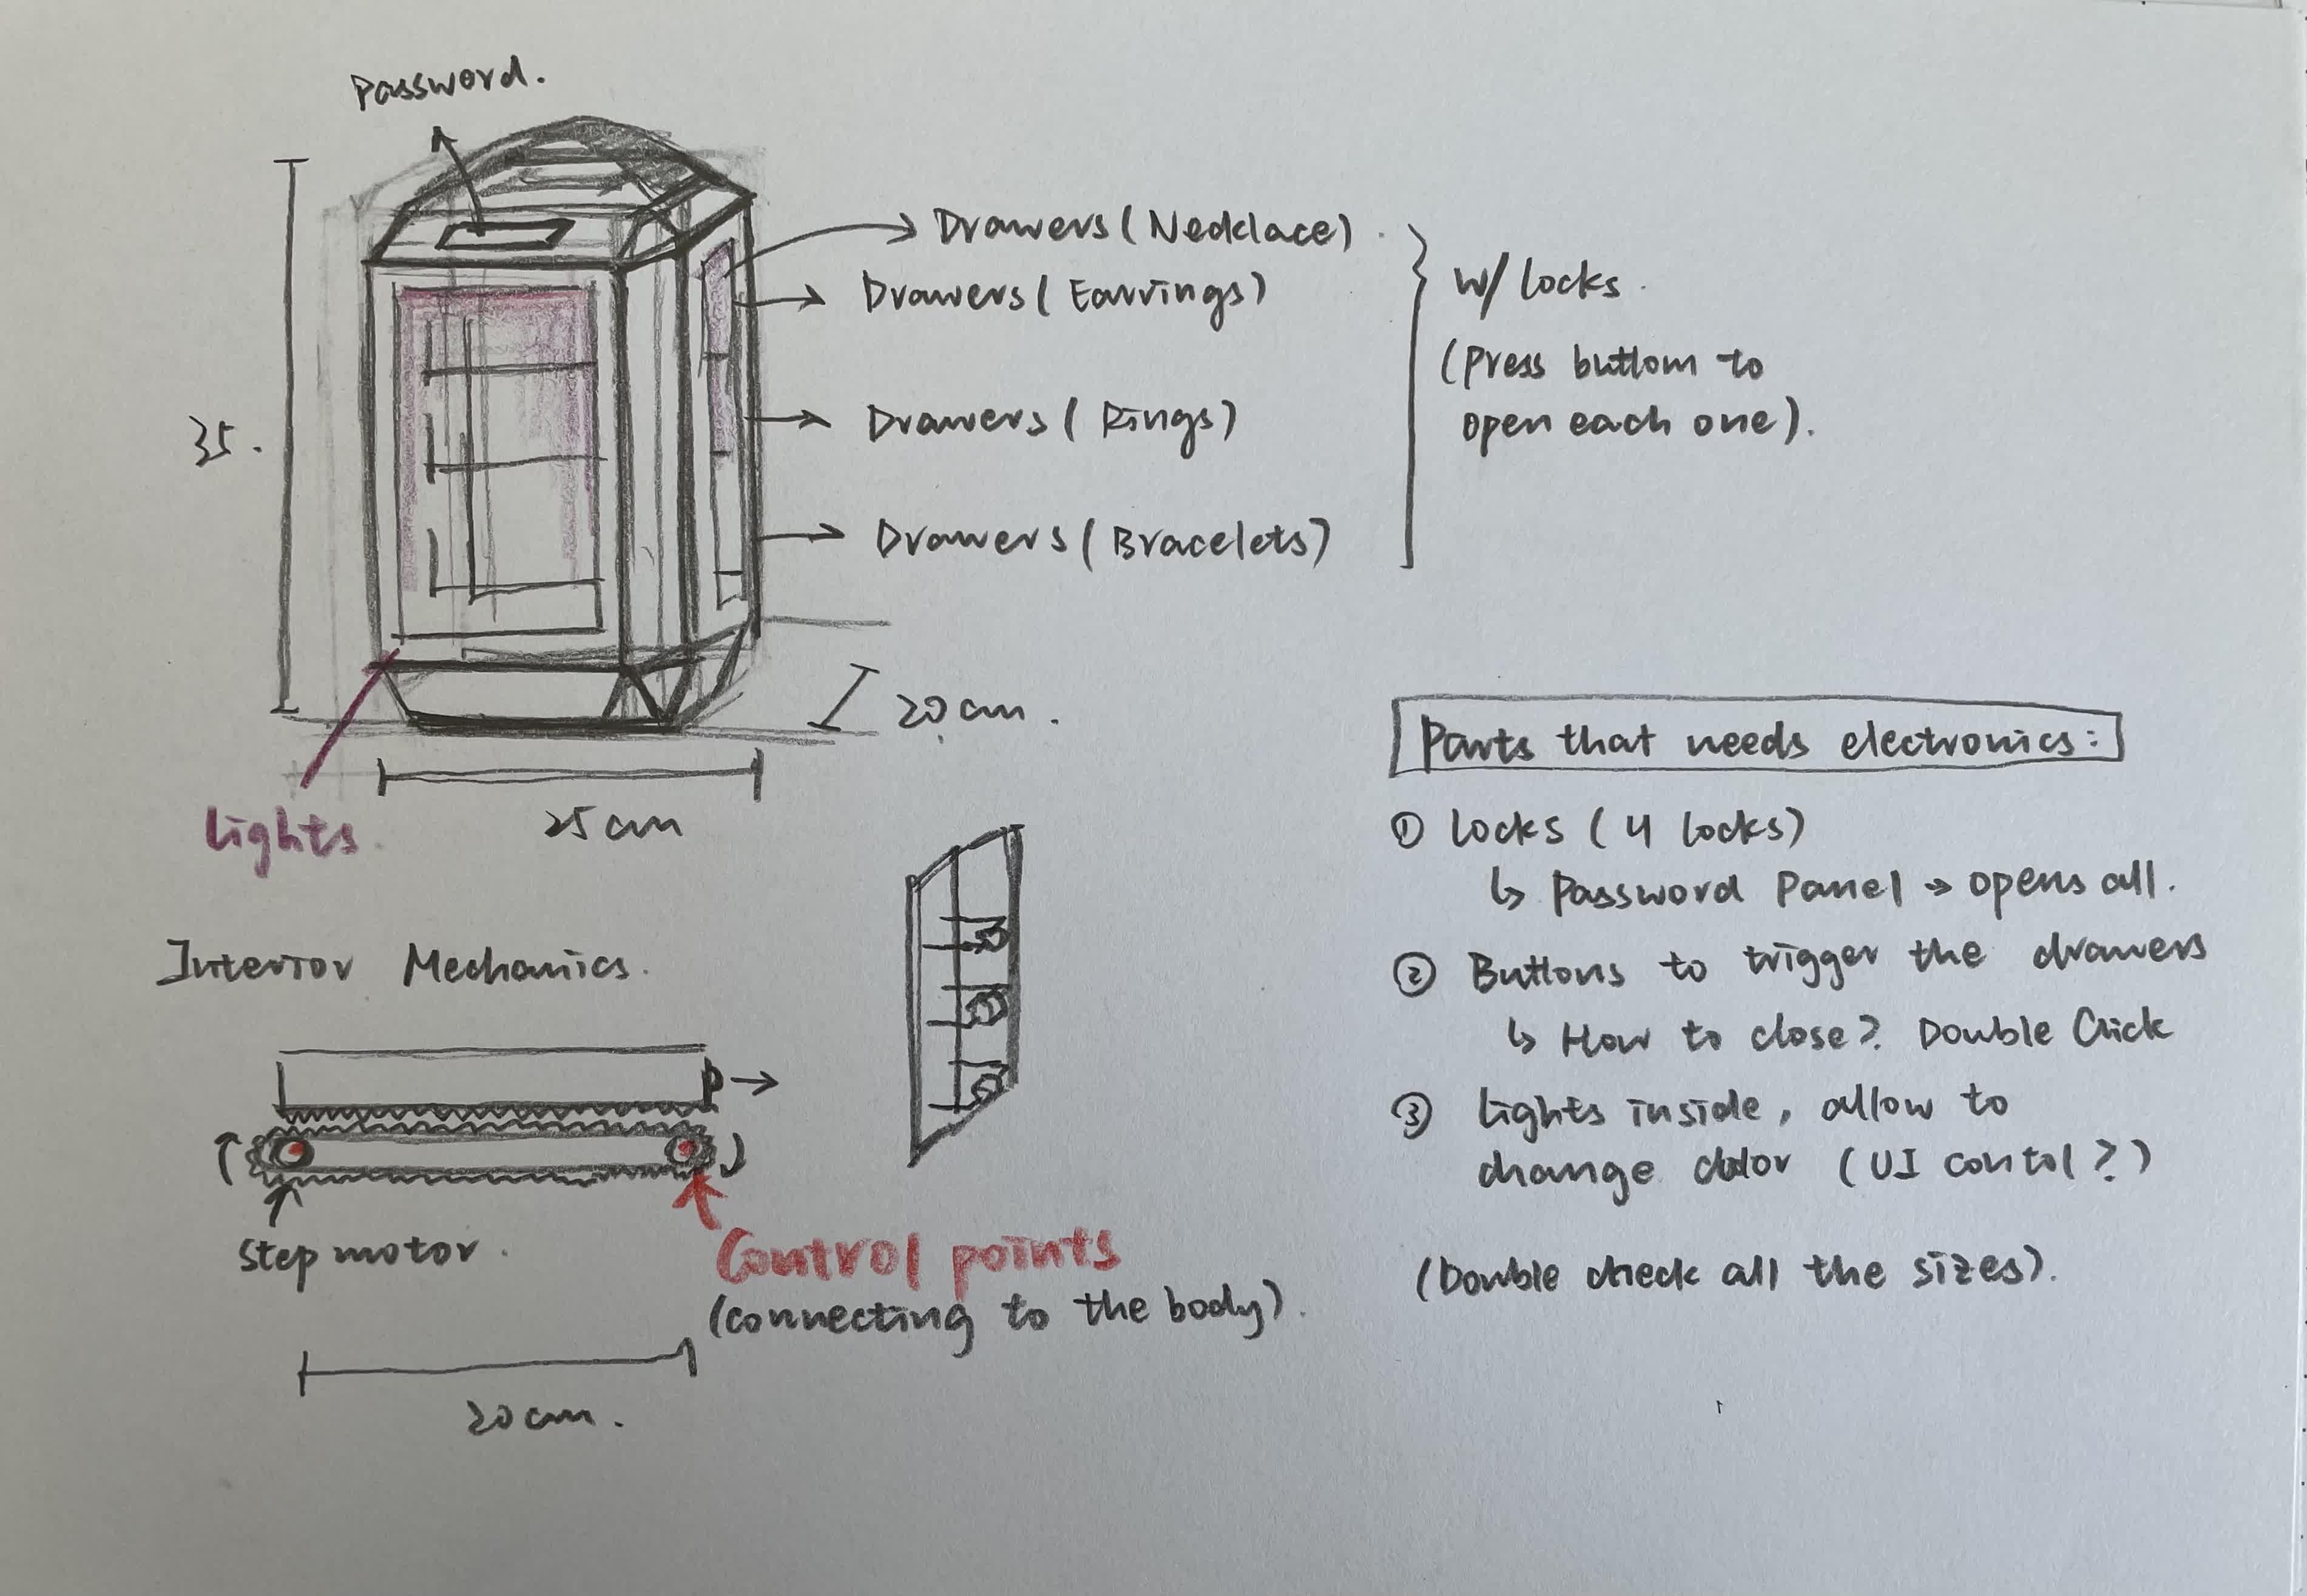
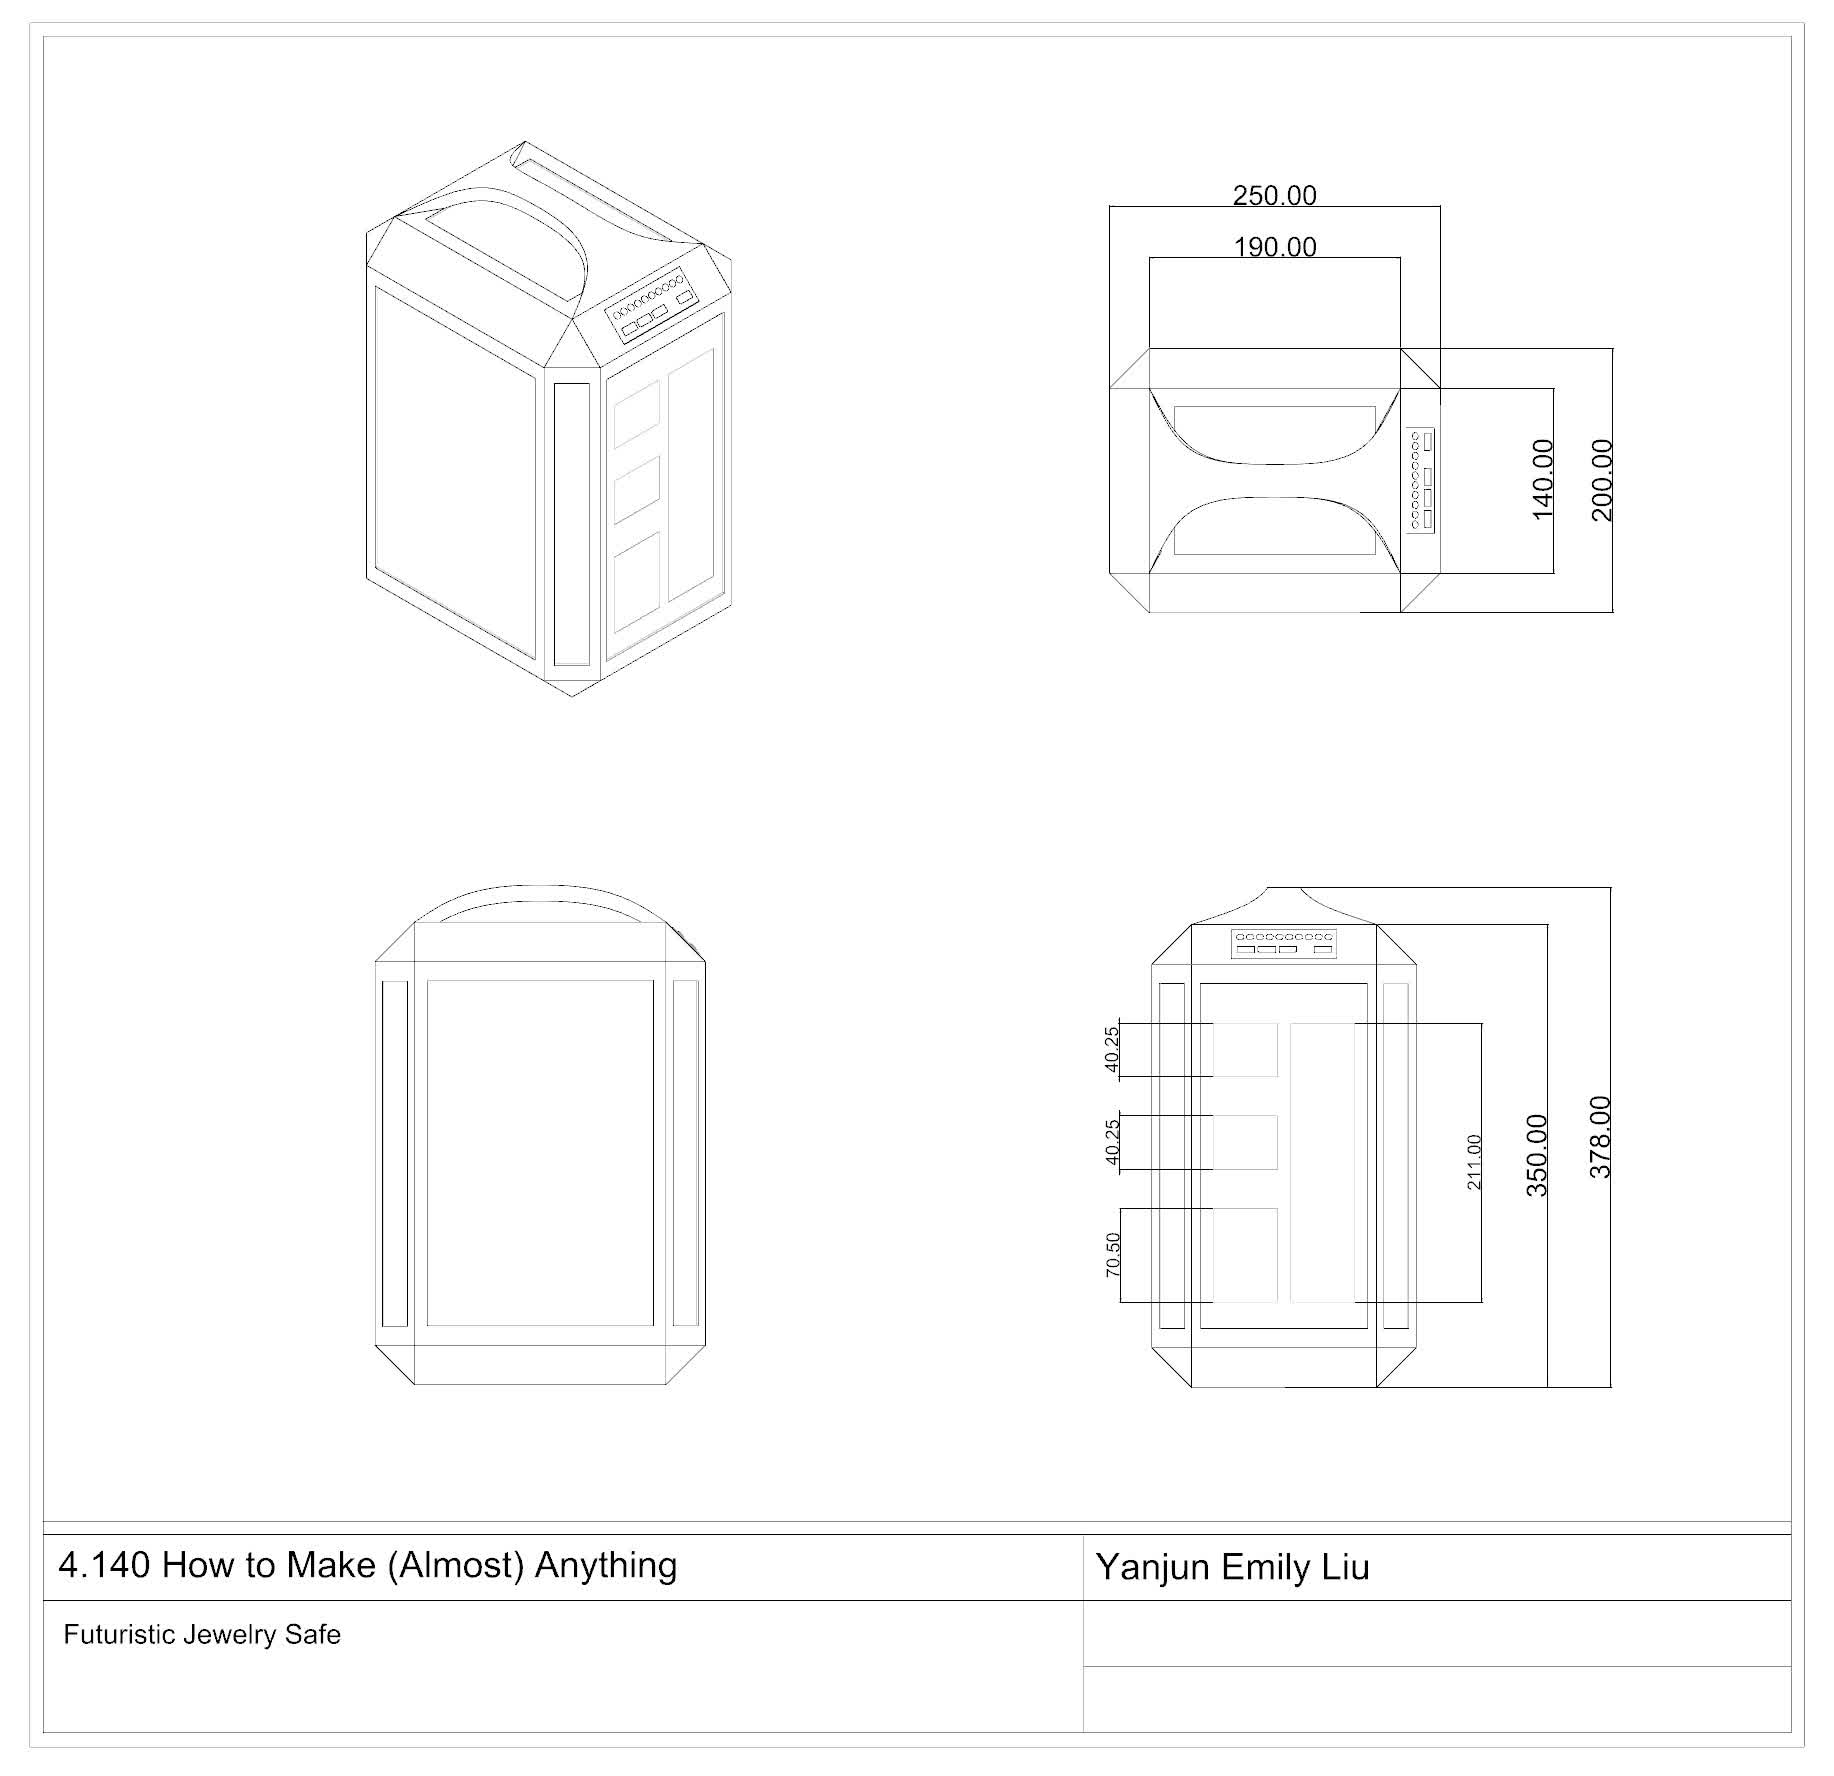
The box is shaped in a rectangular form, and there are clear materials around almost all sides to reveal the interior structure. There will be 4 drawers in total, each one is designed to hold different kinds of jewelrys. The size of the box is about 35cm by 25cm by 20cm.
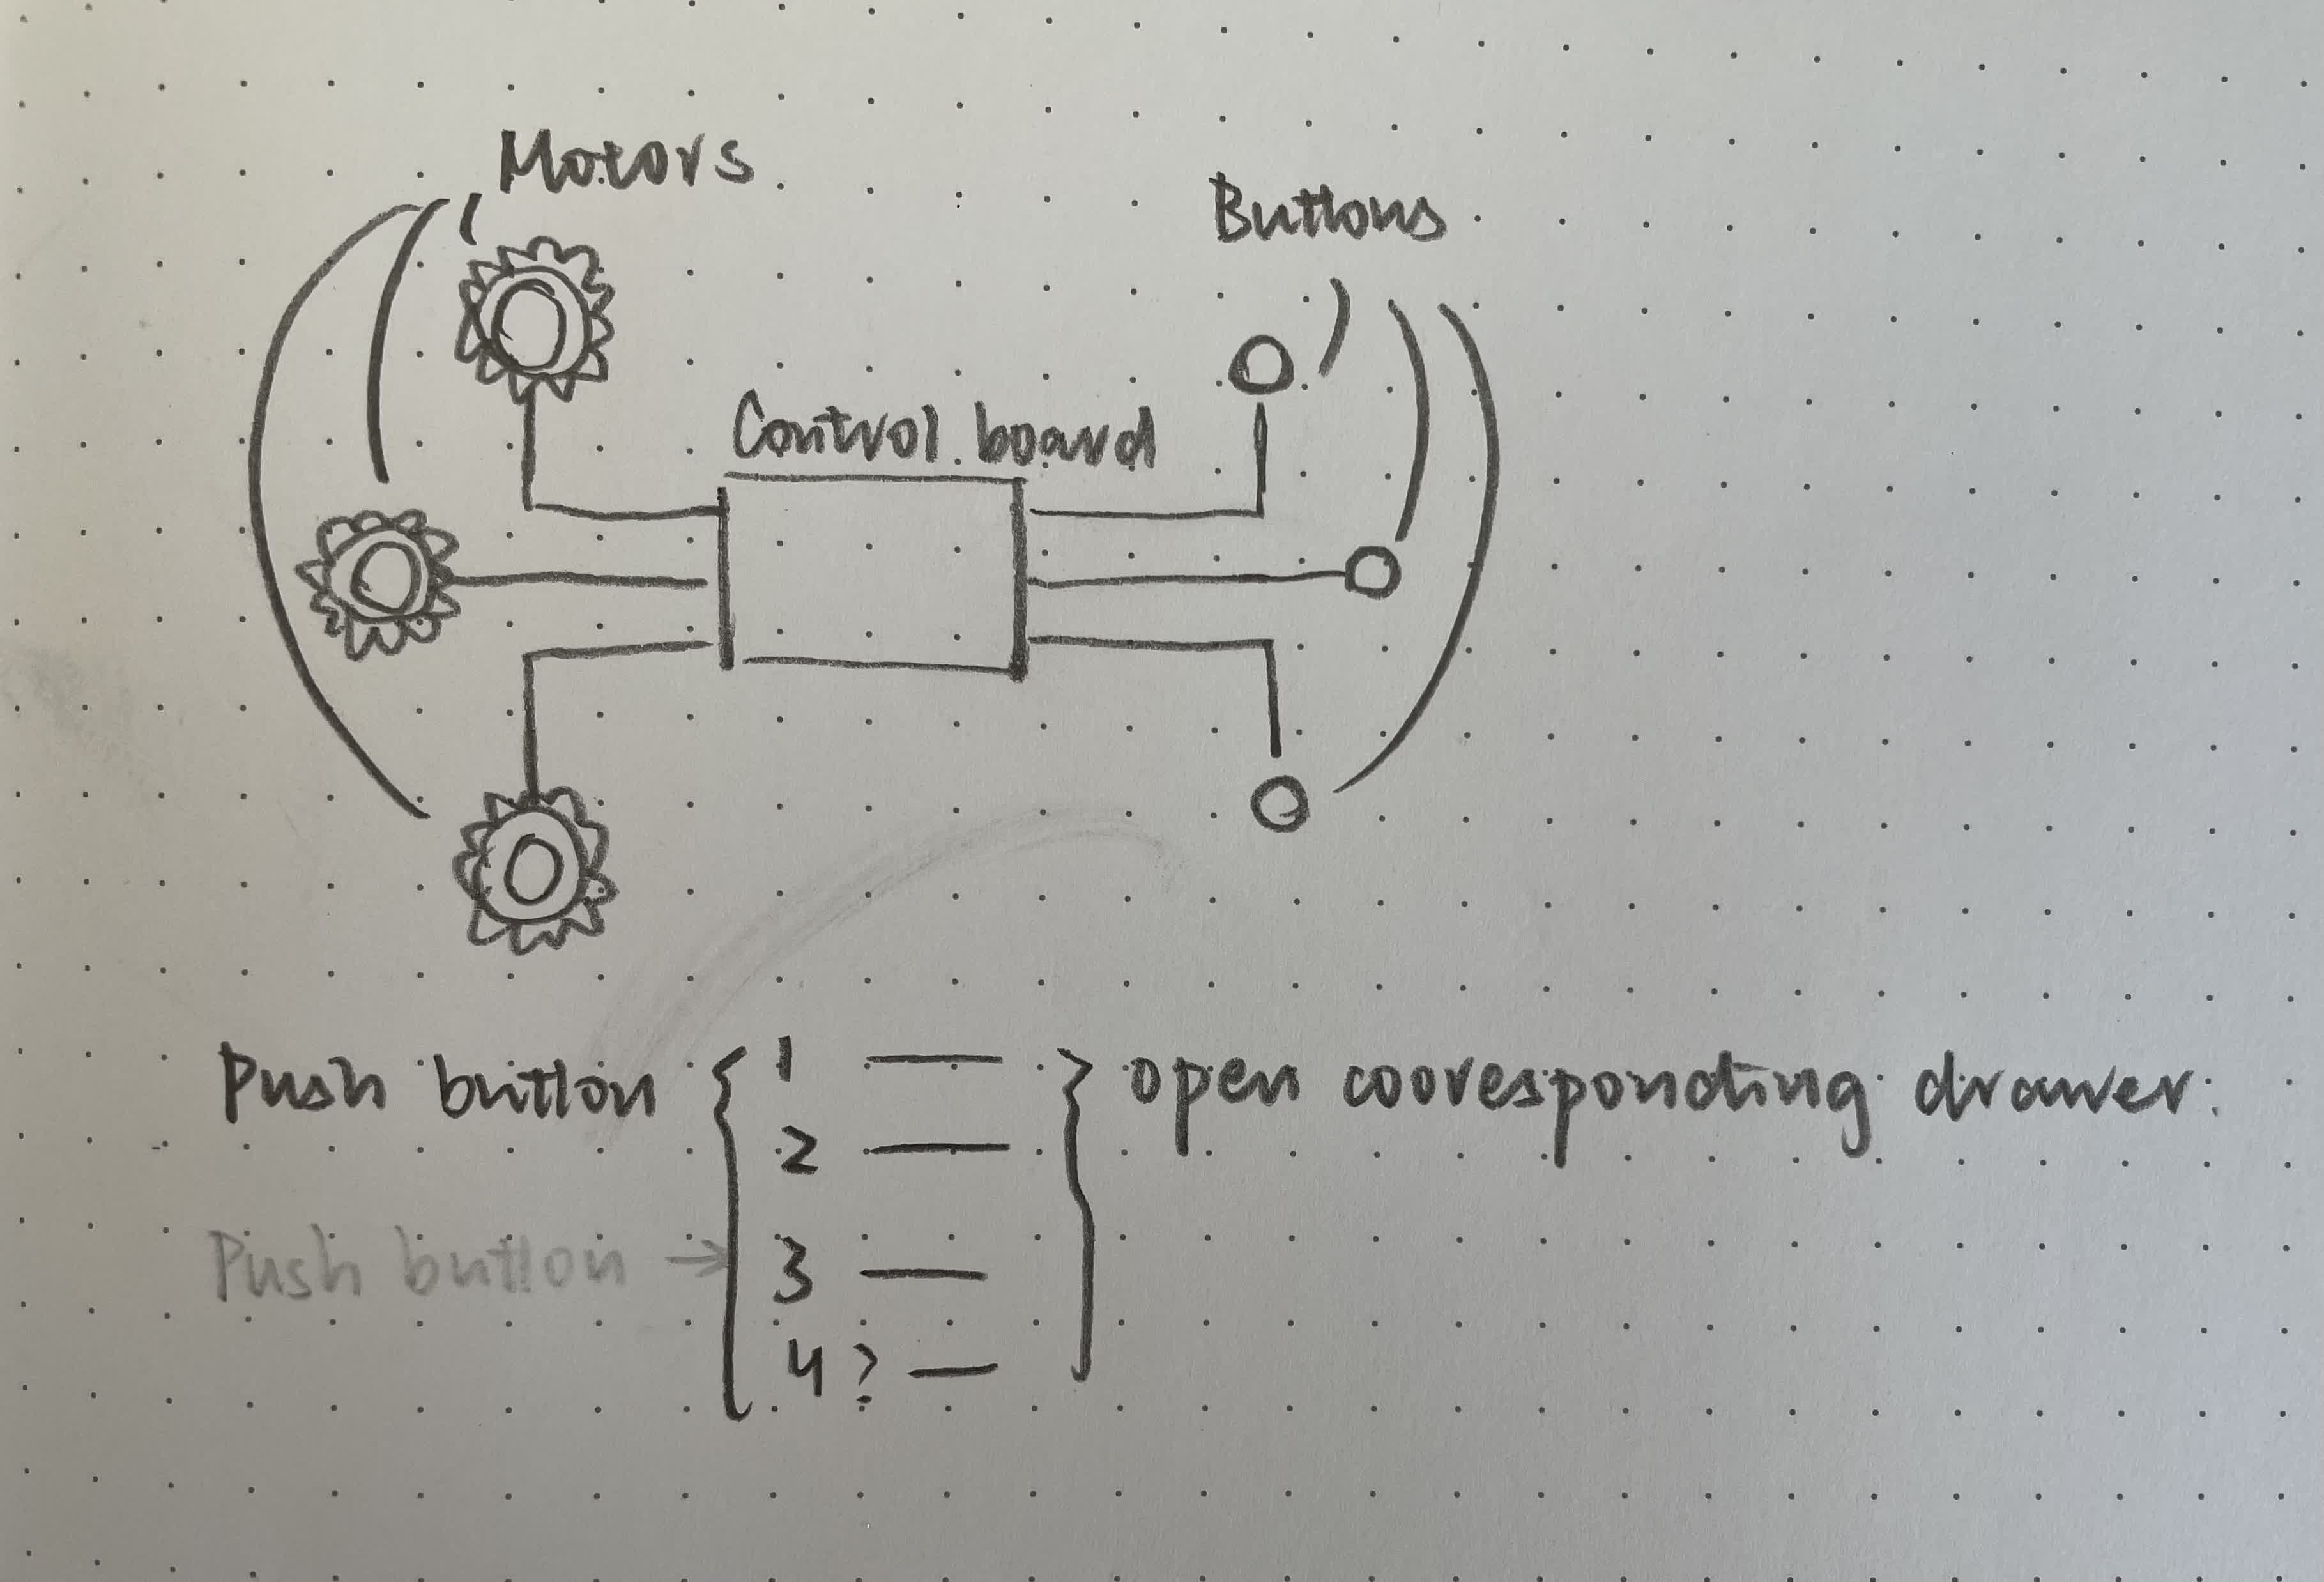
The process of using the product is to push the button that is corresponding to each drawer, and then the drawer will slide out controlled by a motor. The user will also have to input the correct password in order for the motor to turn. There is also a button to control the lighting inside.
//
Model Process
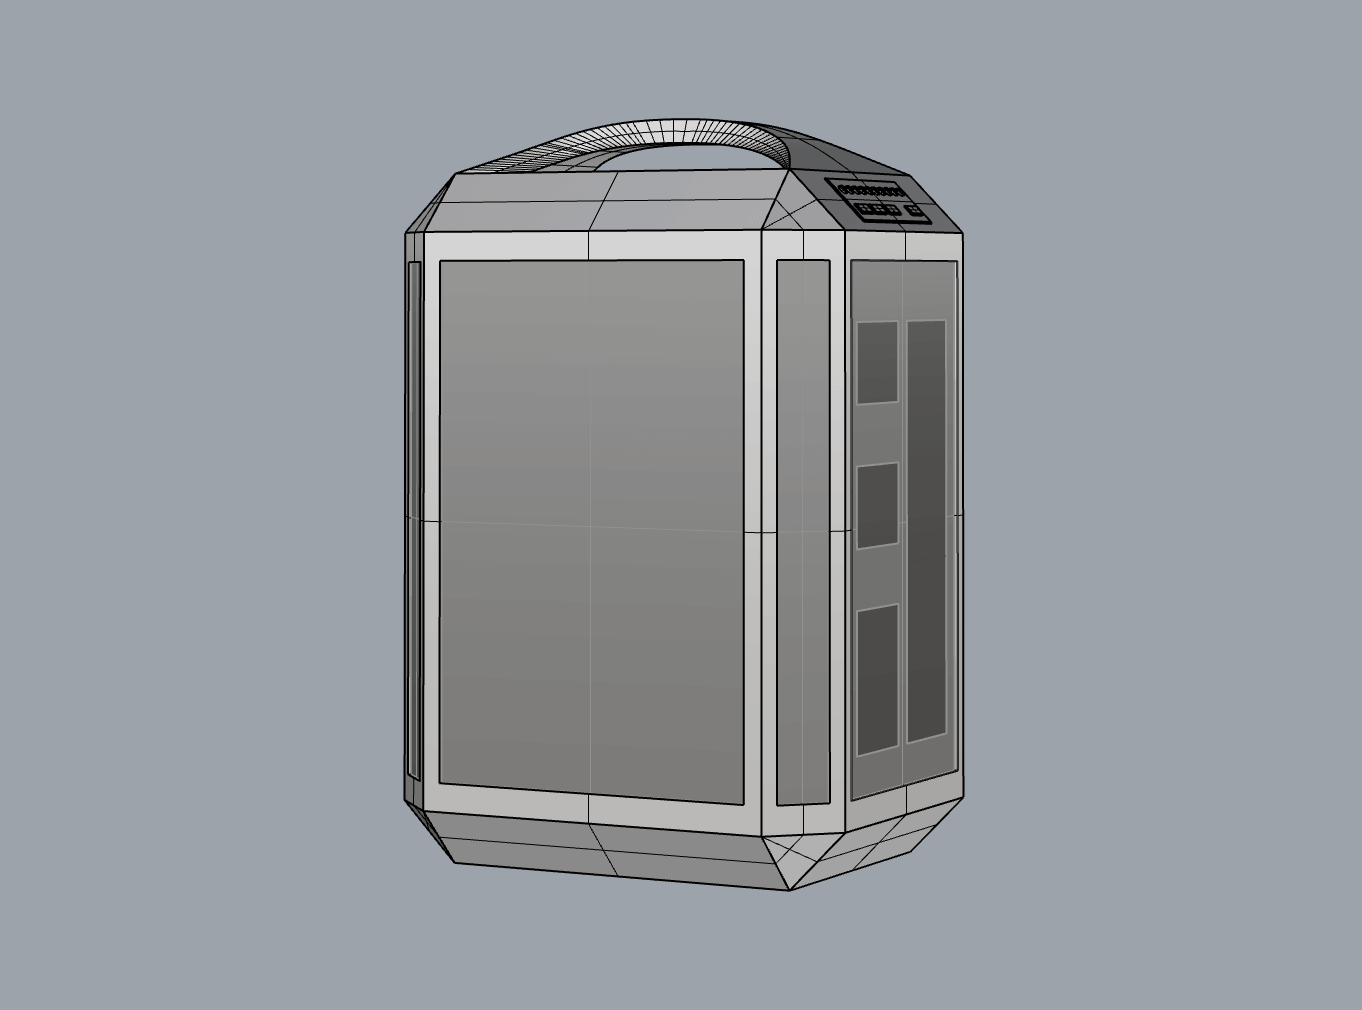
I used Rhino for the CAD model, and I started out by modeling the outer shell with a clear panel on each side.
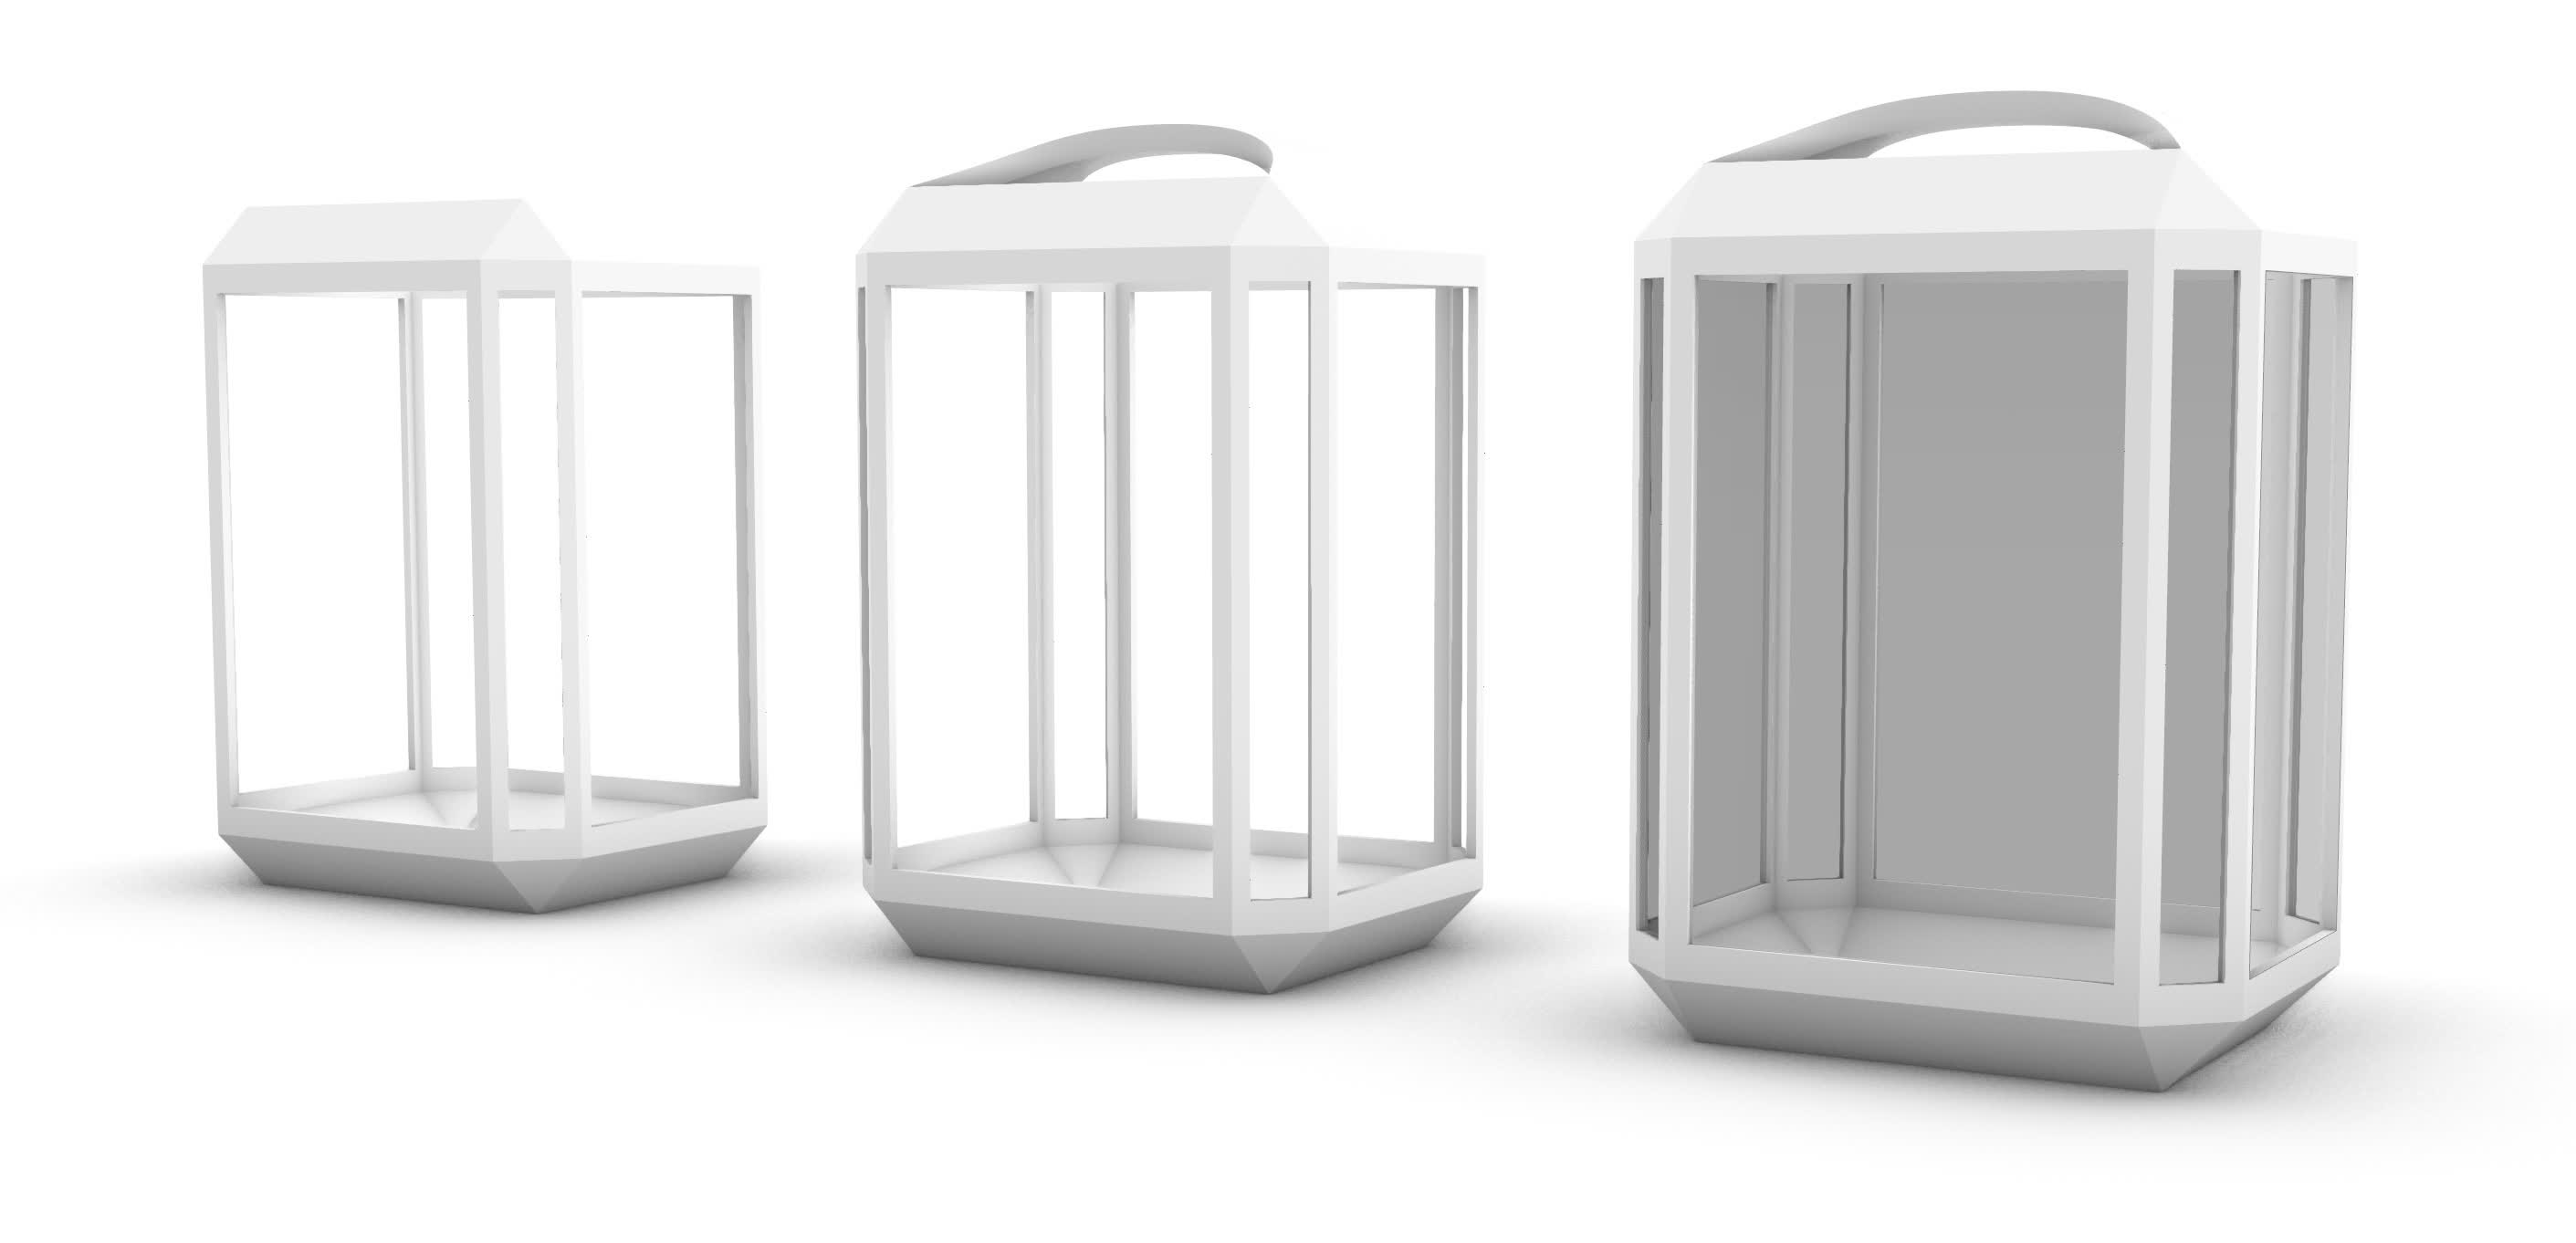
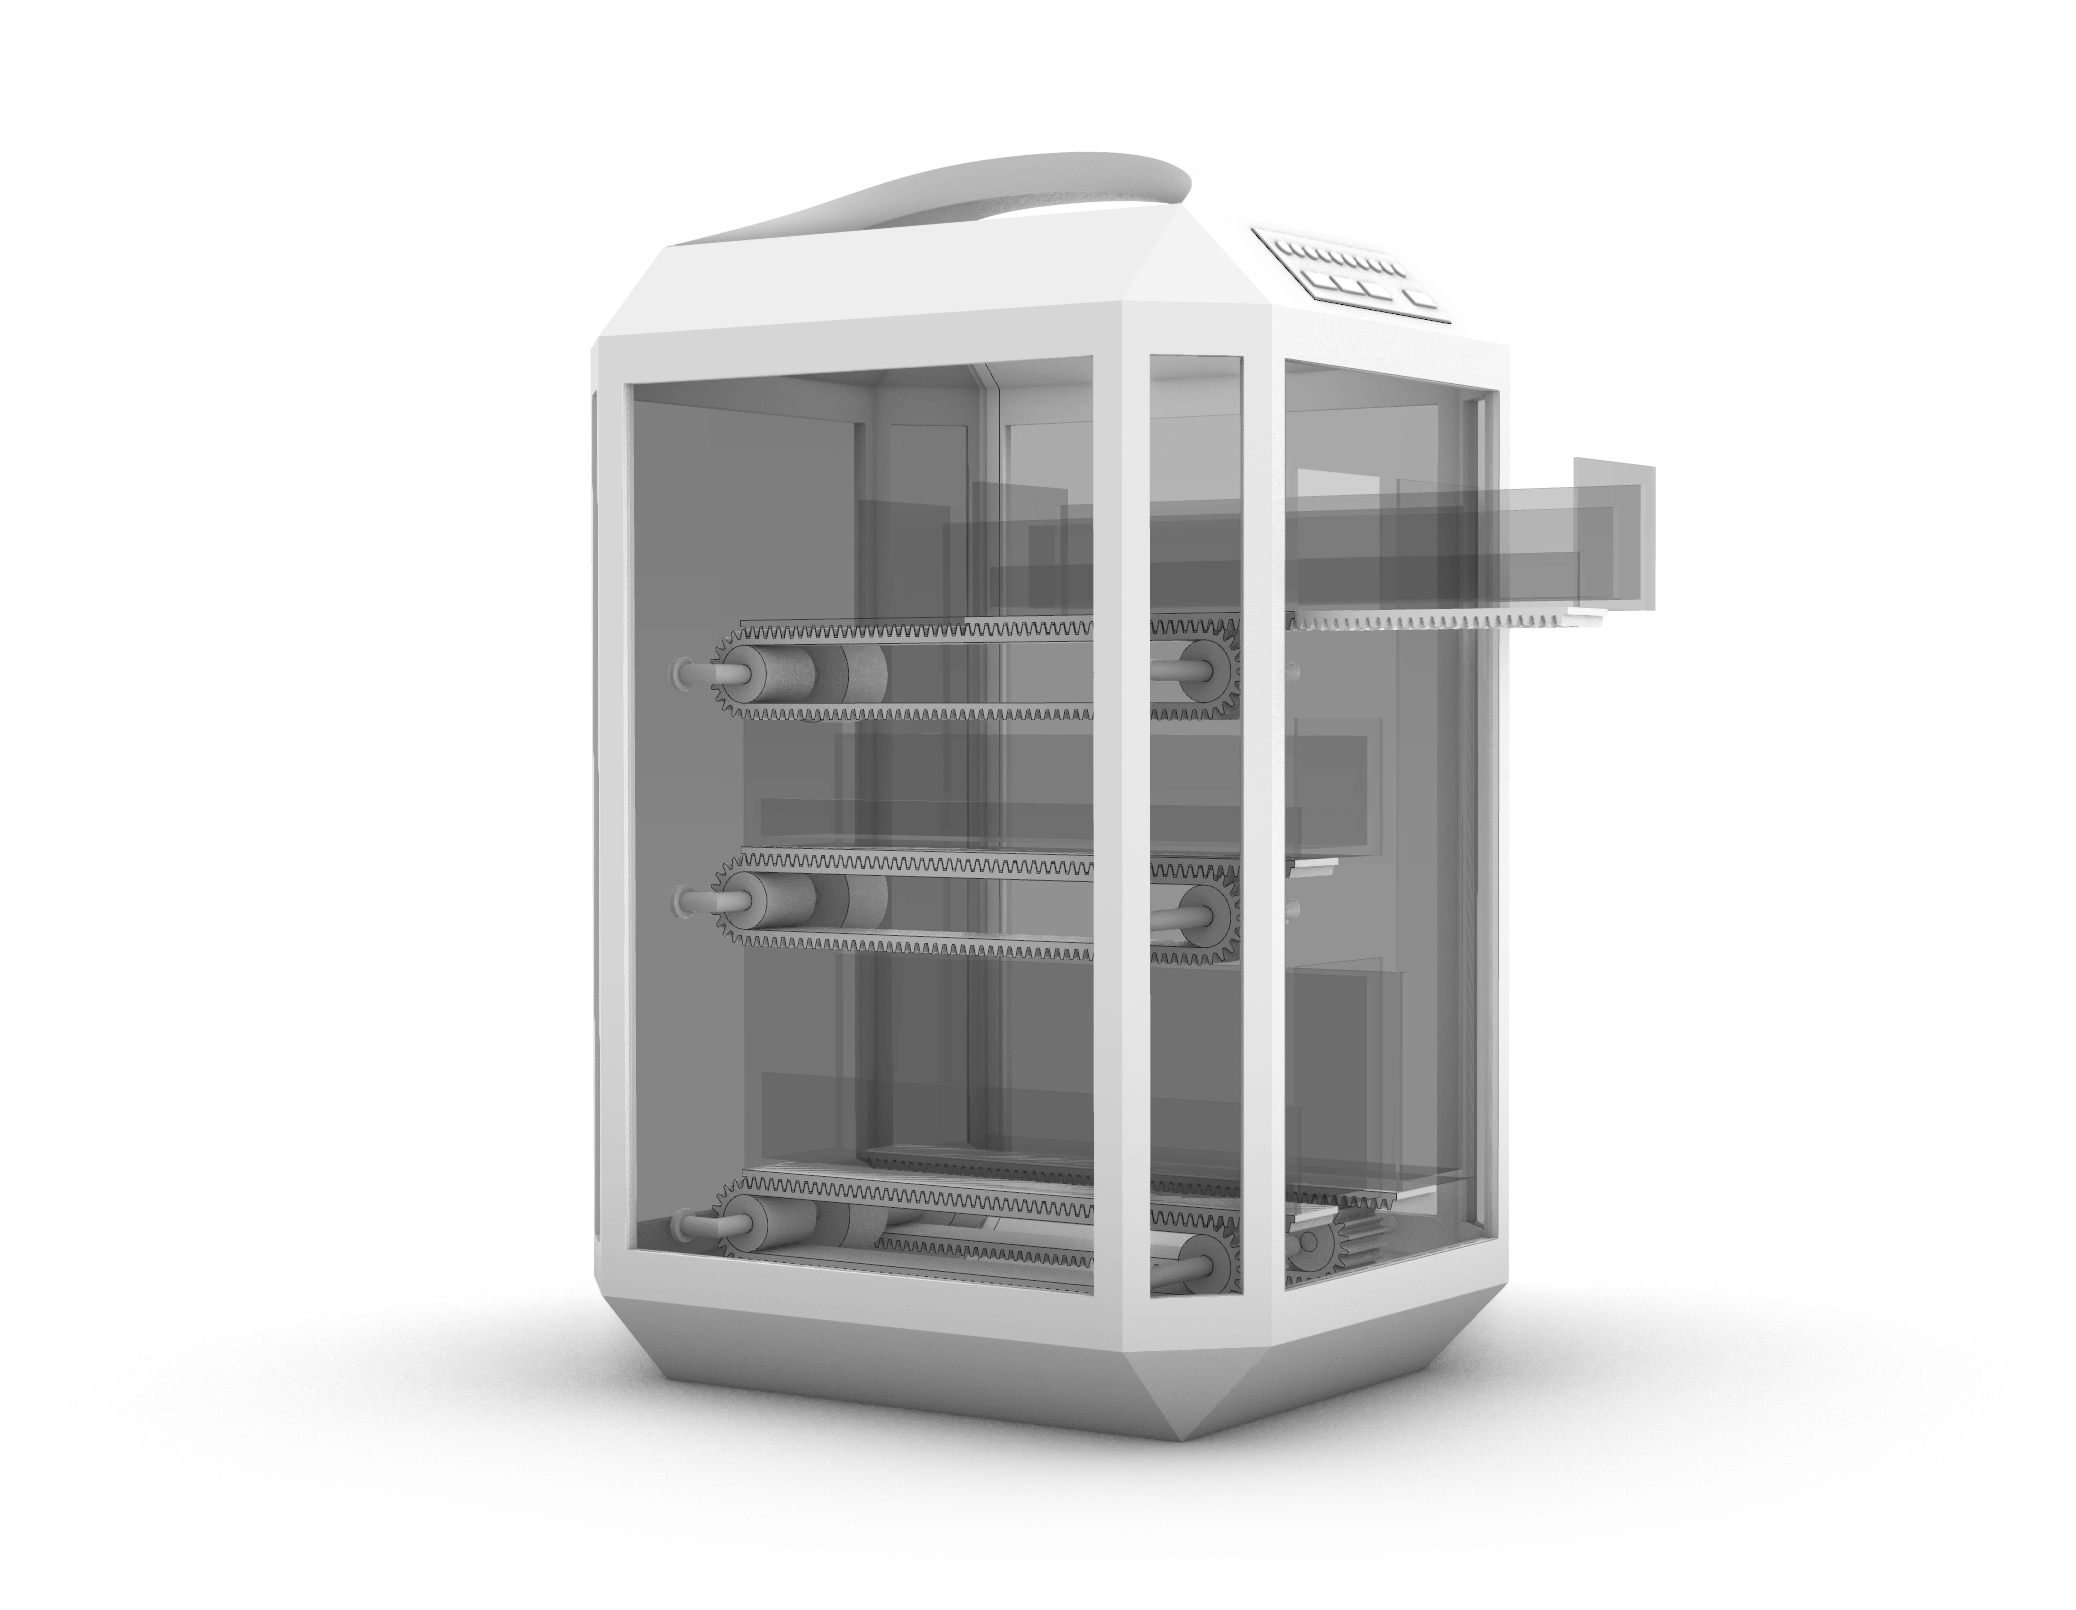
I added a handle on top of the box for convinence, and tested different color for the transparent material. I ended up with a white skeleton + grey transparent pastic panels.
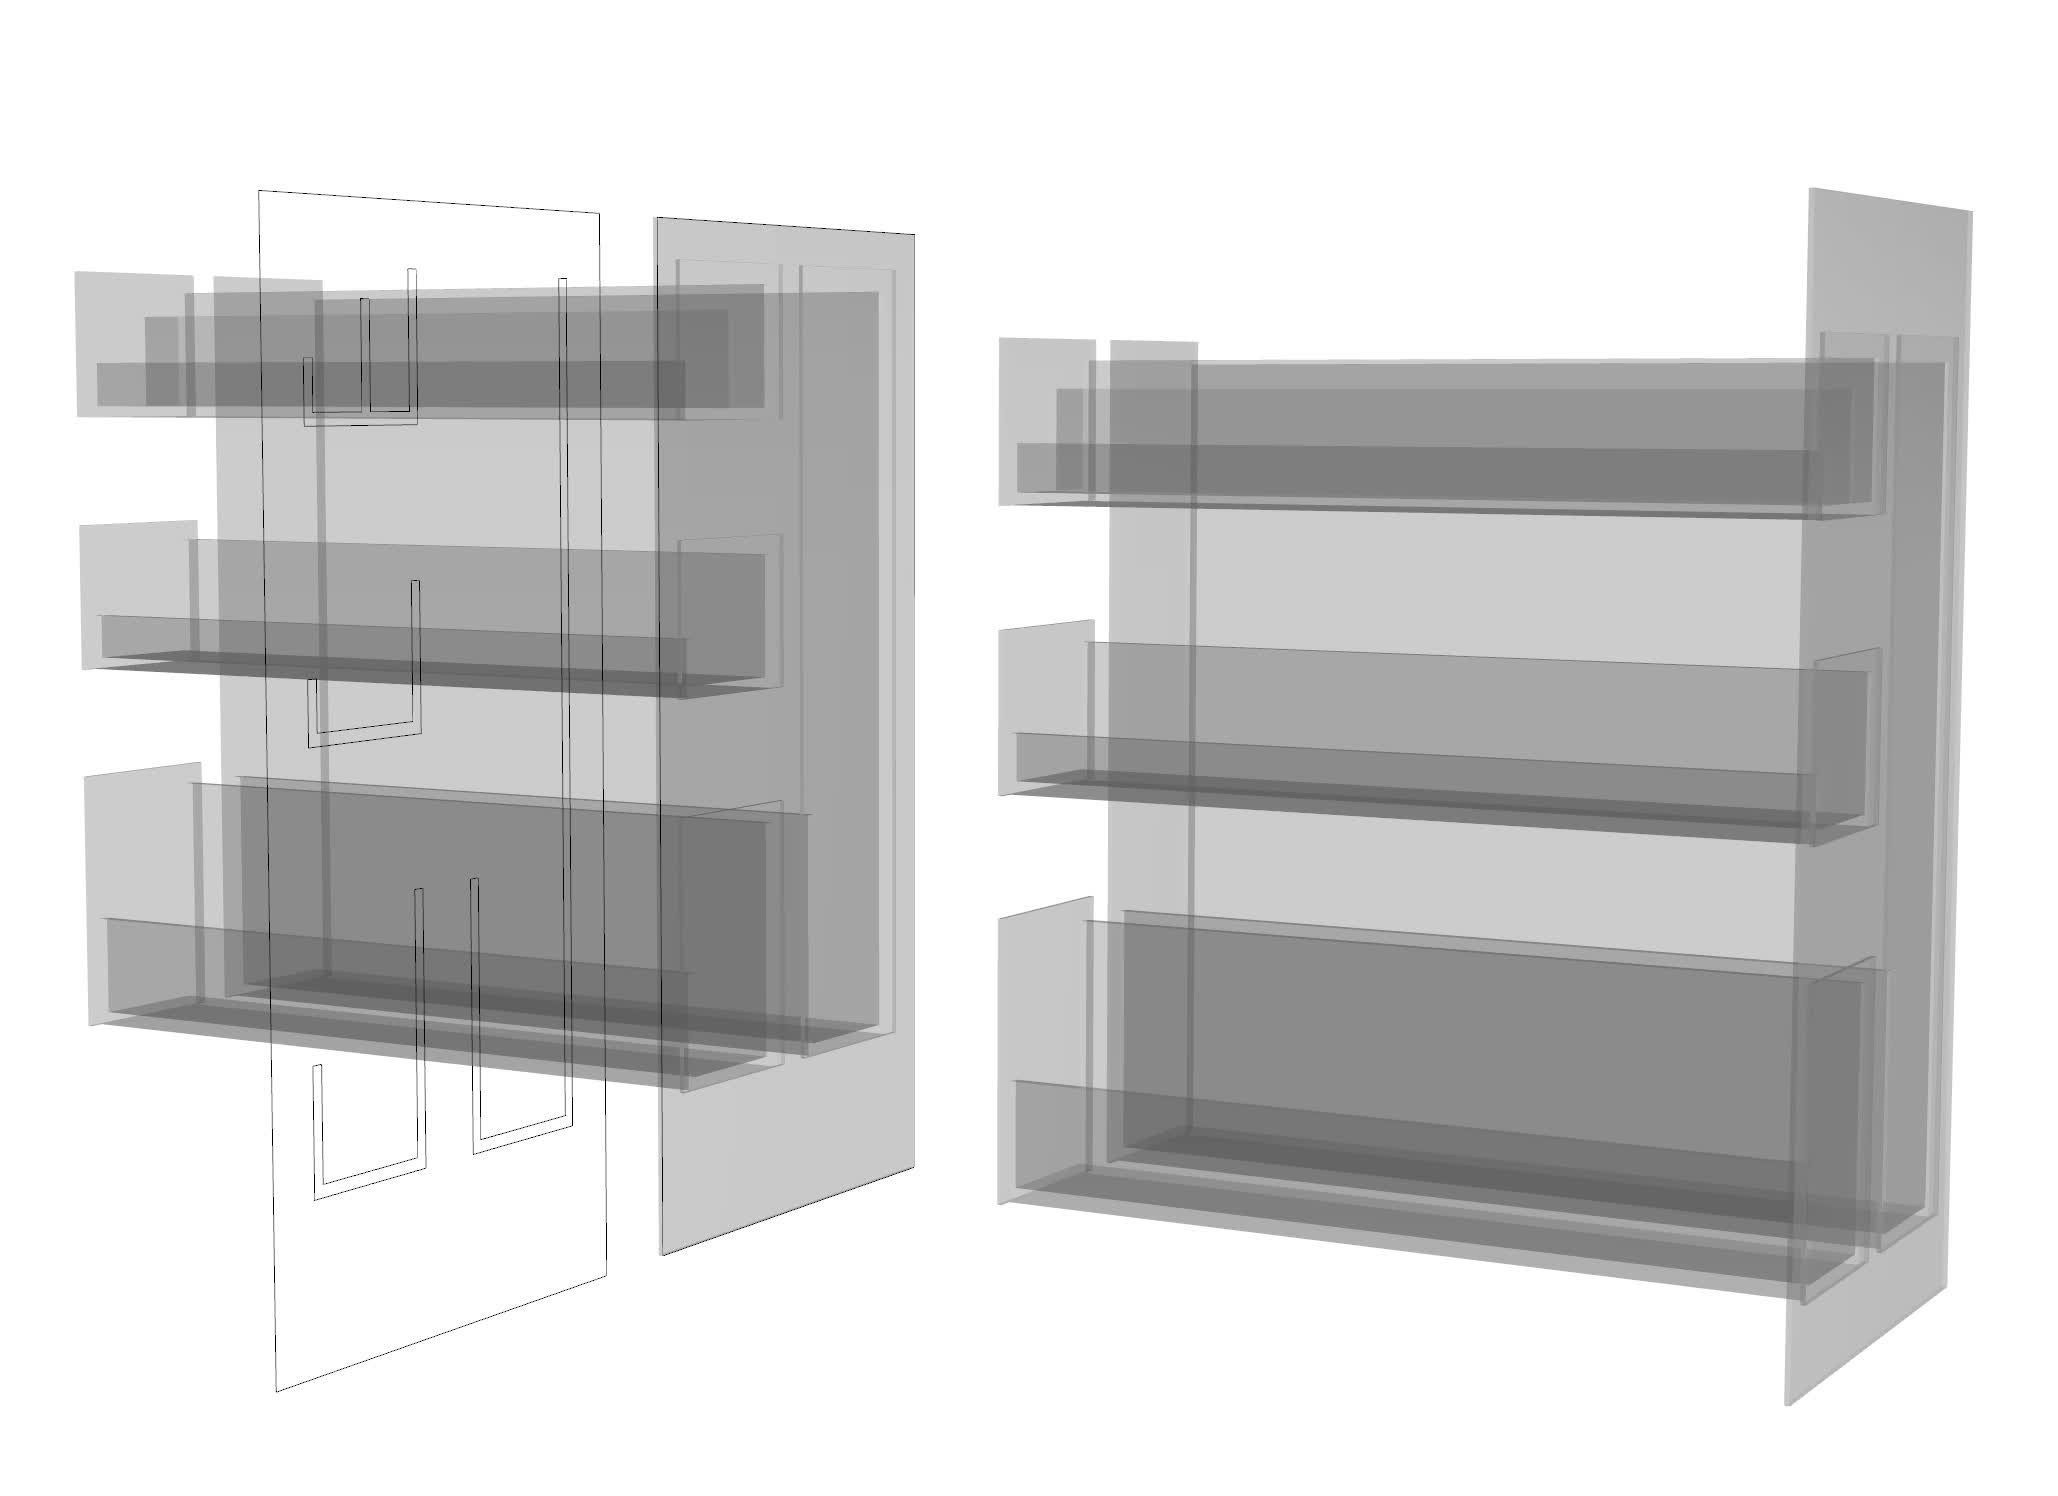
I then modeled the drawers that will come out on the right side. Three drawers in the front are used to store rings, earrings, and bracelets, and the drawer behind is used to store necklace. The way I modeled the drawer is that I first drew a section line drawing of the drawers and then extruded them out to the desired length.
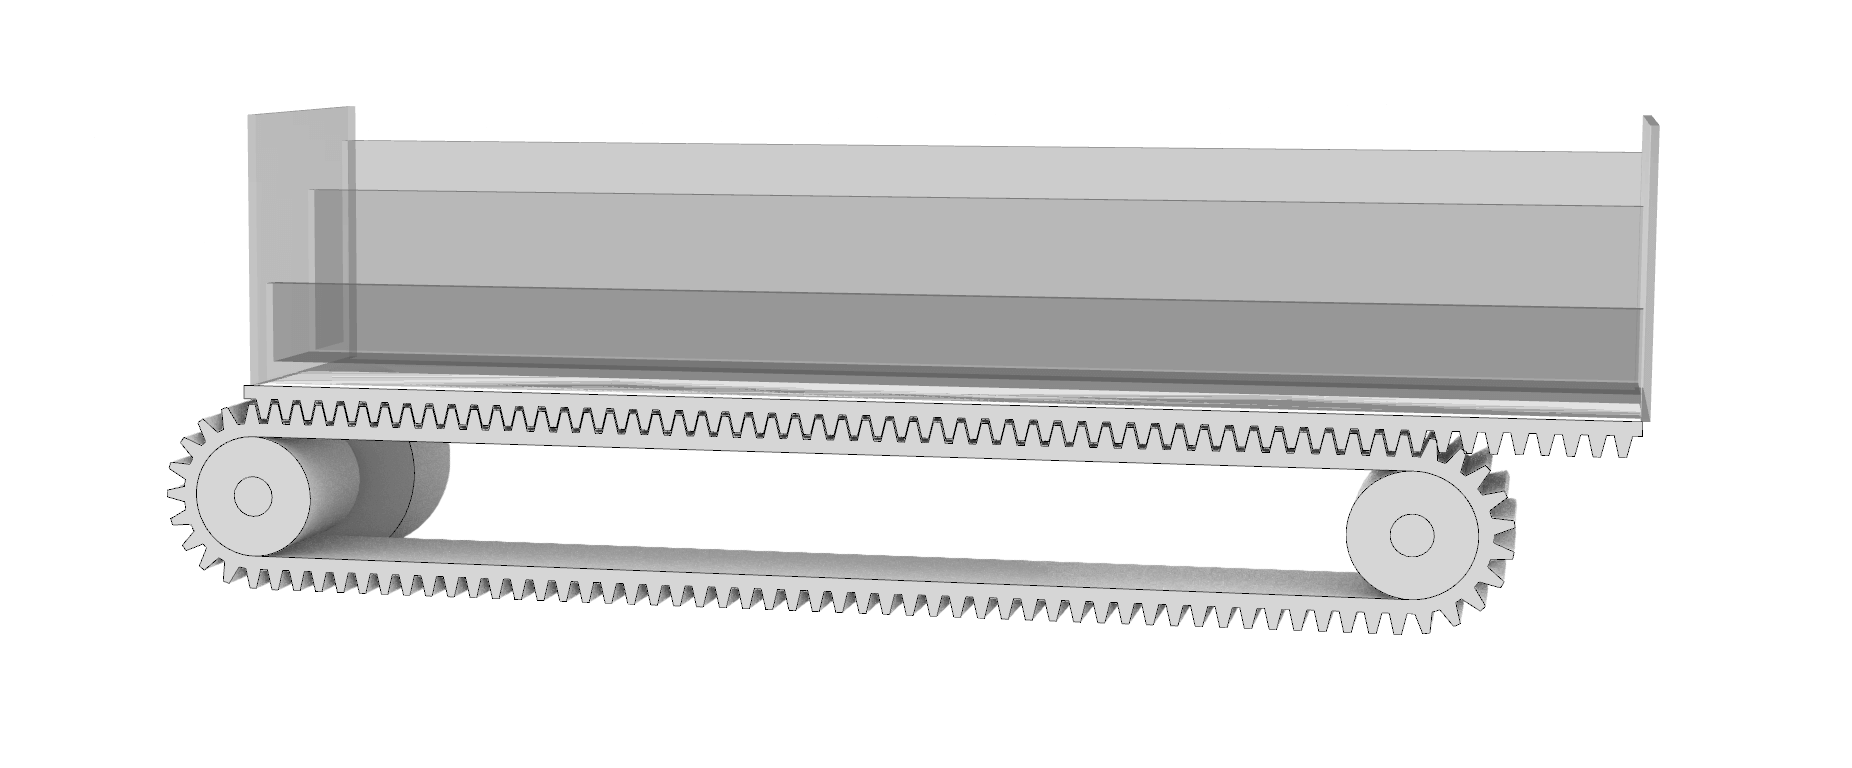
I also tried to model the mechanical part of the model. The motor is connected to a gear that rotates the conveyor belt, which slides the gear panel that is glued to the buttom of the drawer. However, I don't have the parts yet, so the size of the mechanical part are not accurate. I will adjust the spaces between the drawers when I get the accurate measurements of the motors.
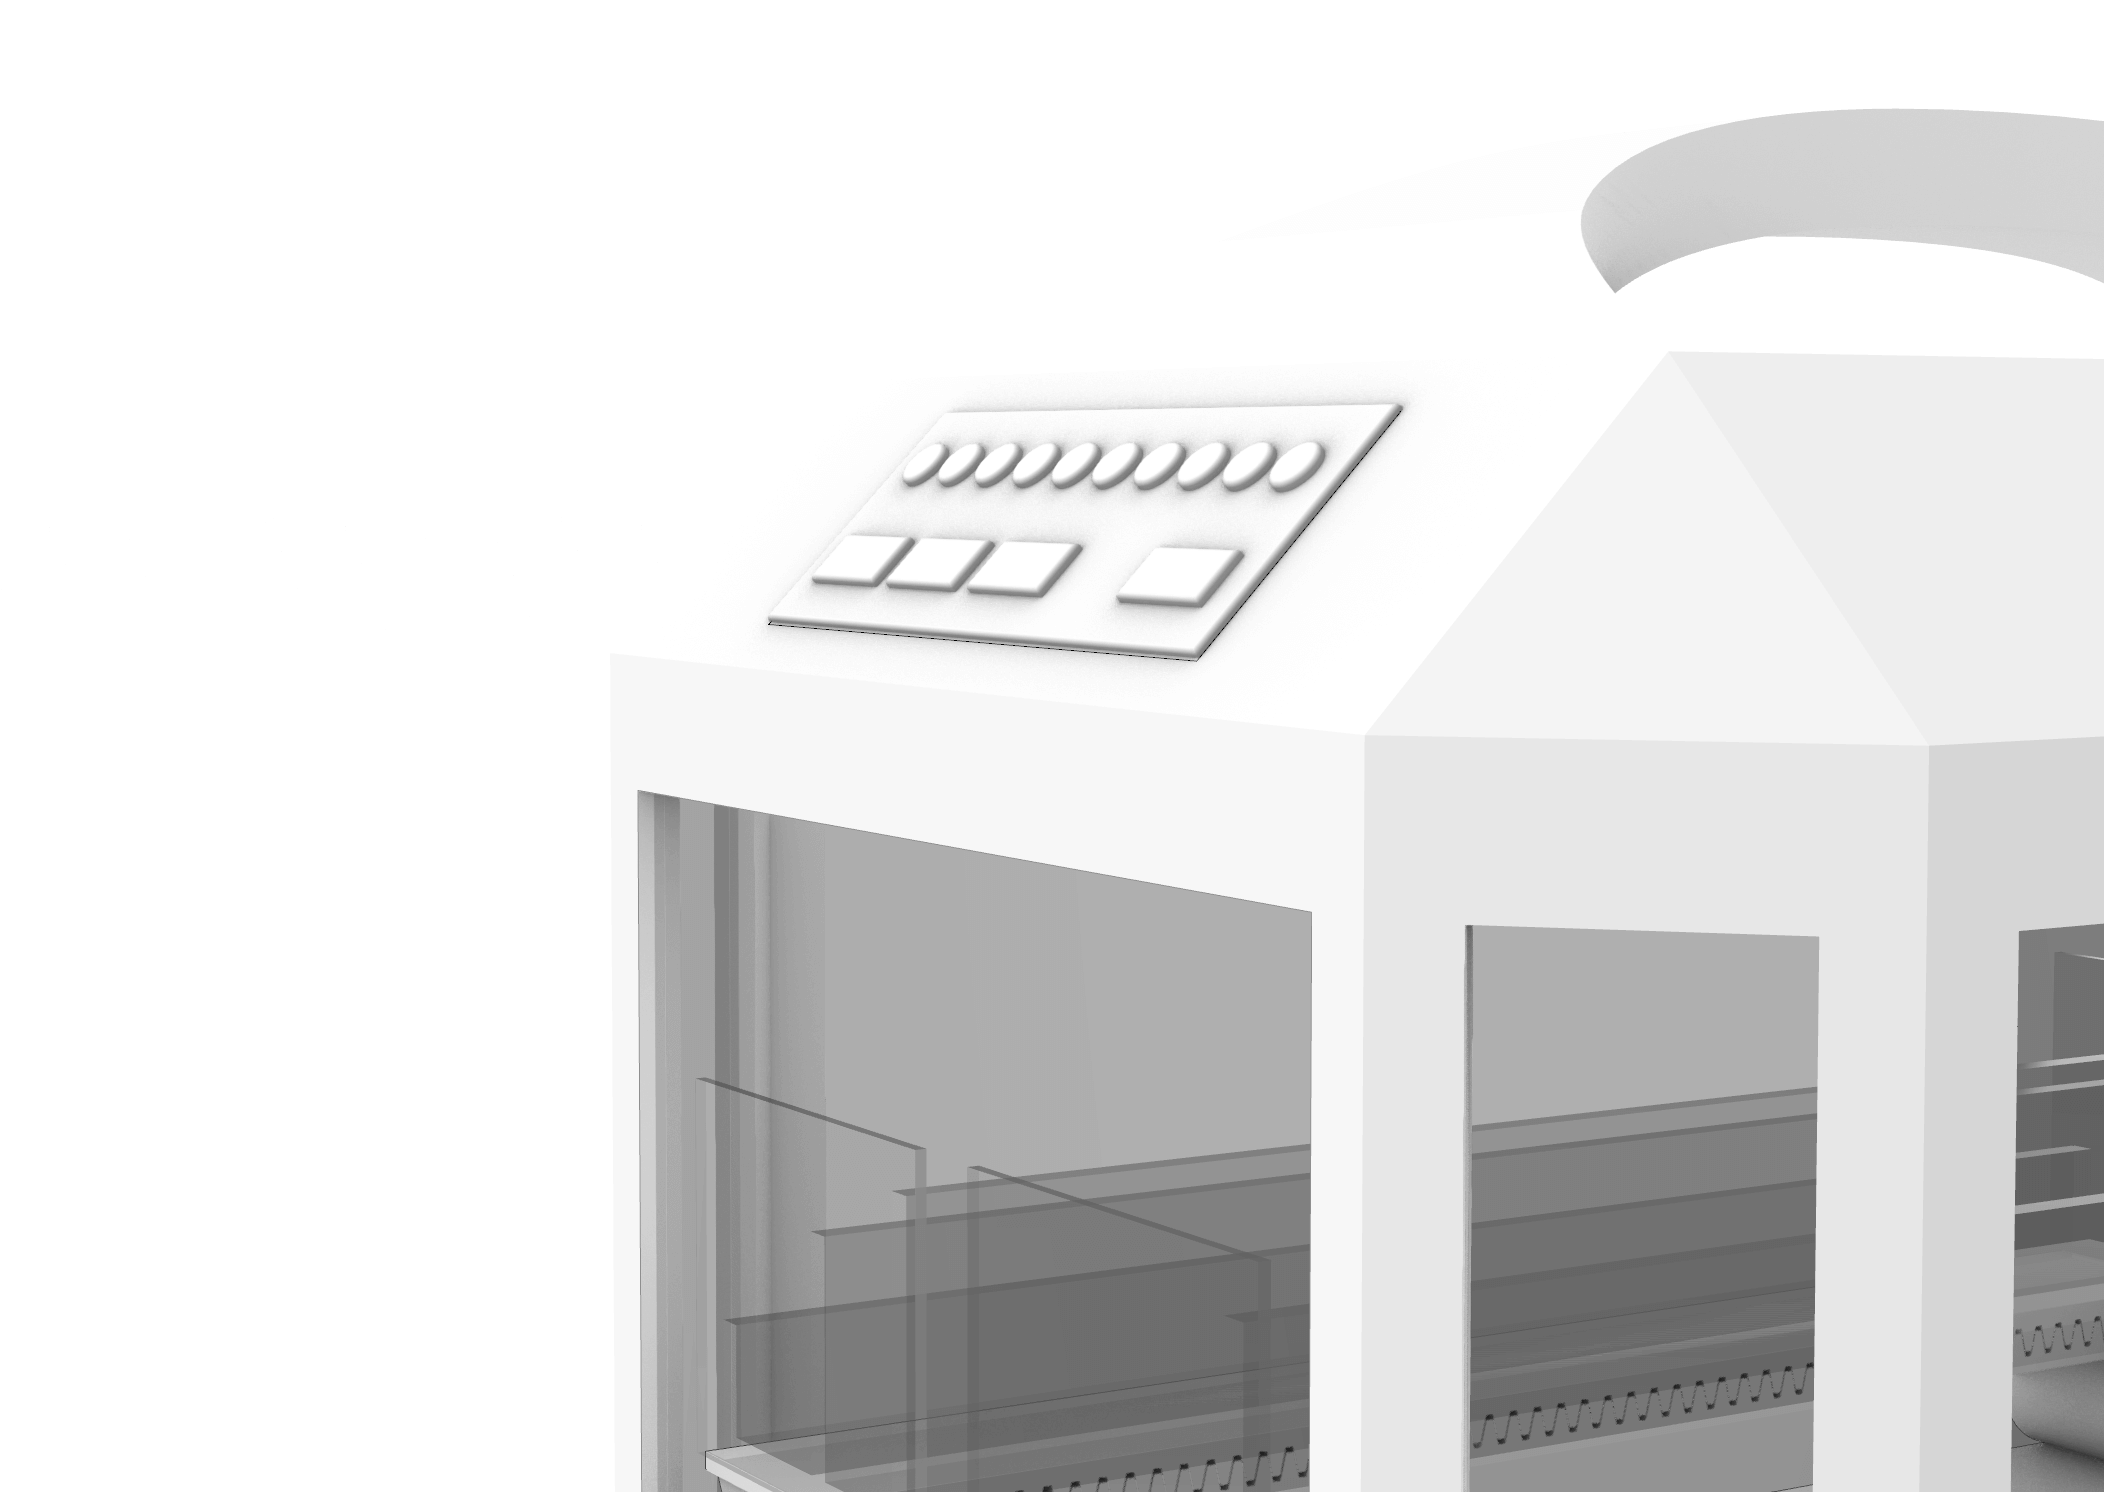
The panel with small buttons will be installed on the upper right side. The top row is designed to input the passwords, and the buttom row is used to open the drawers.
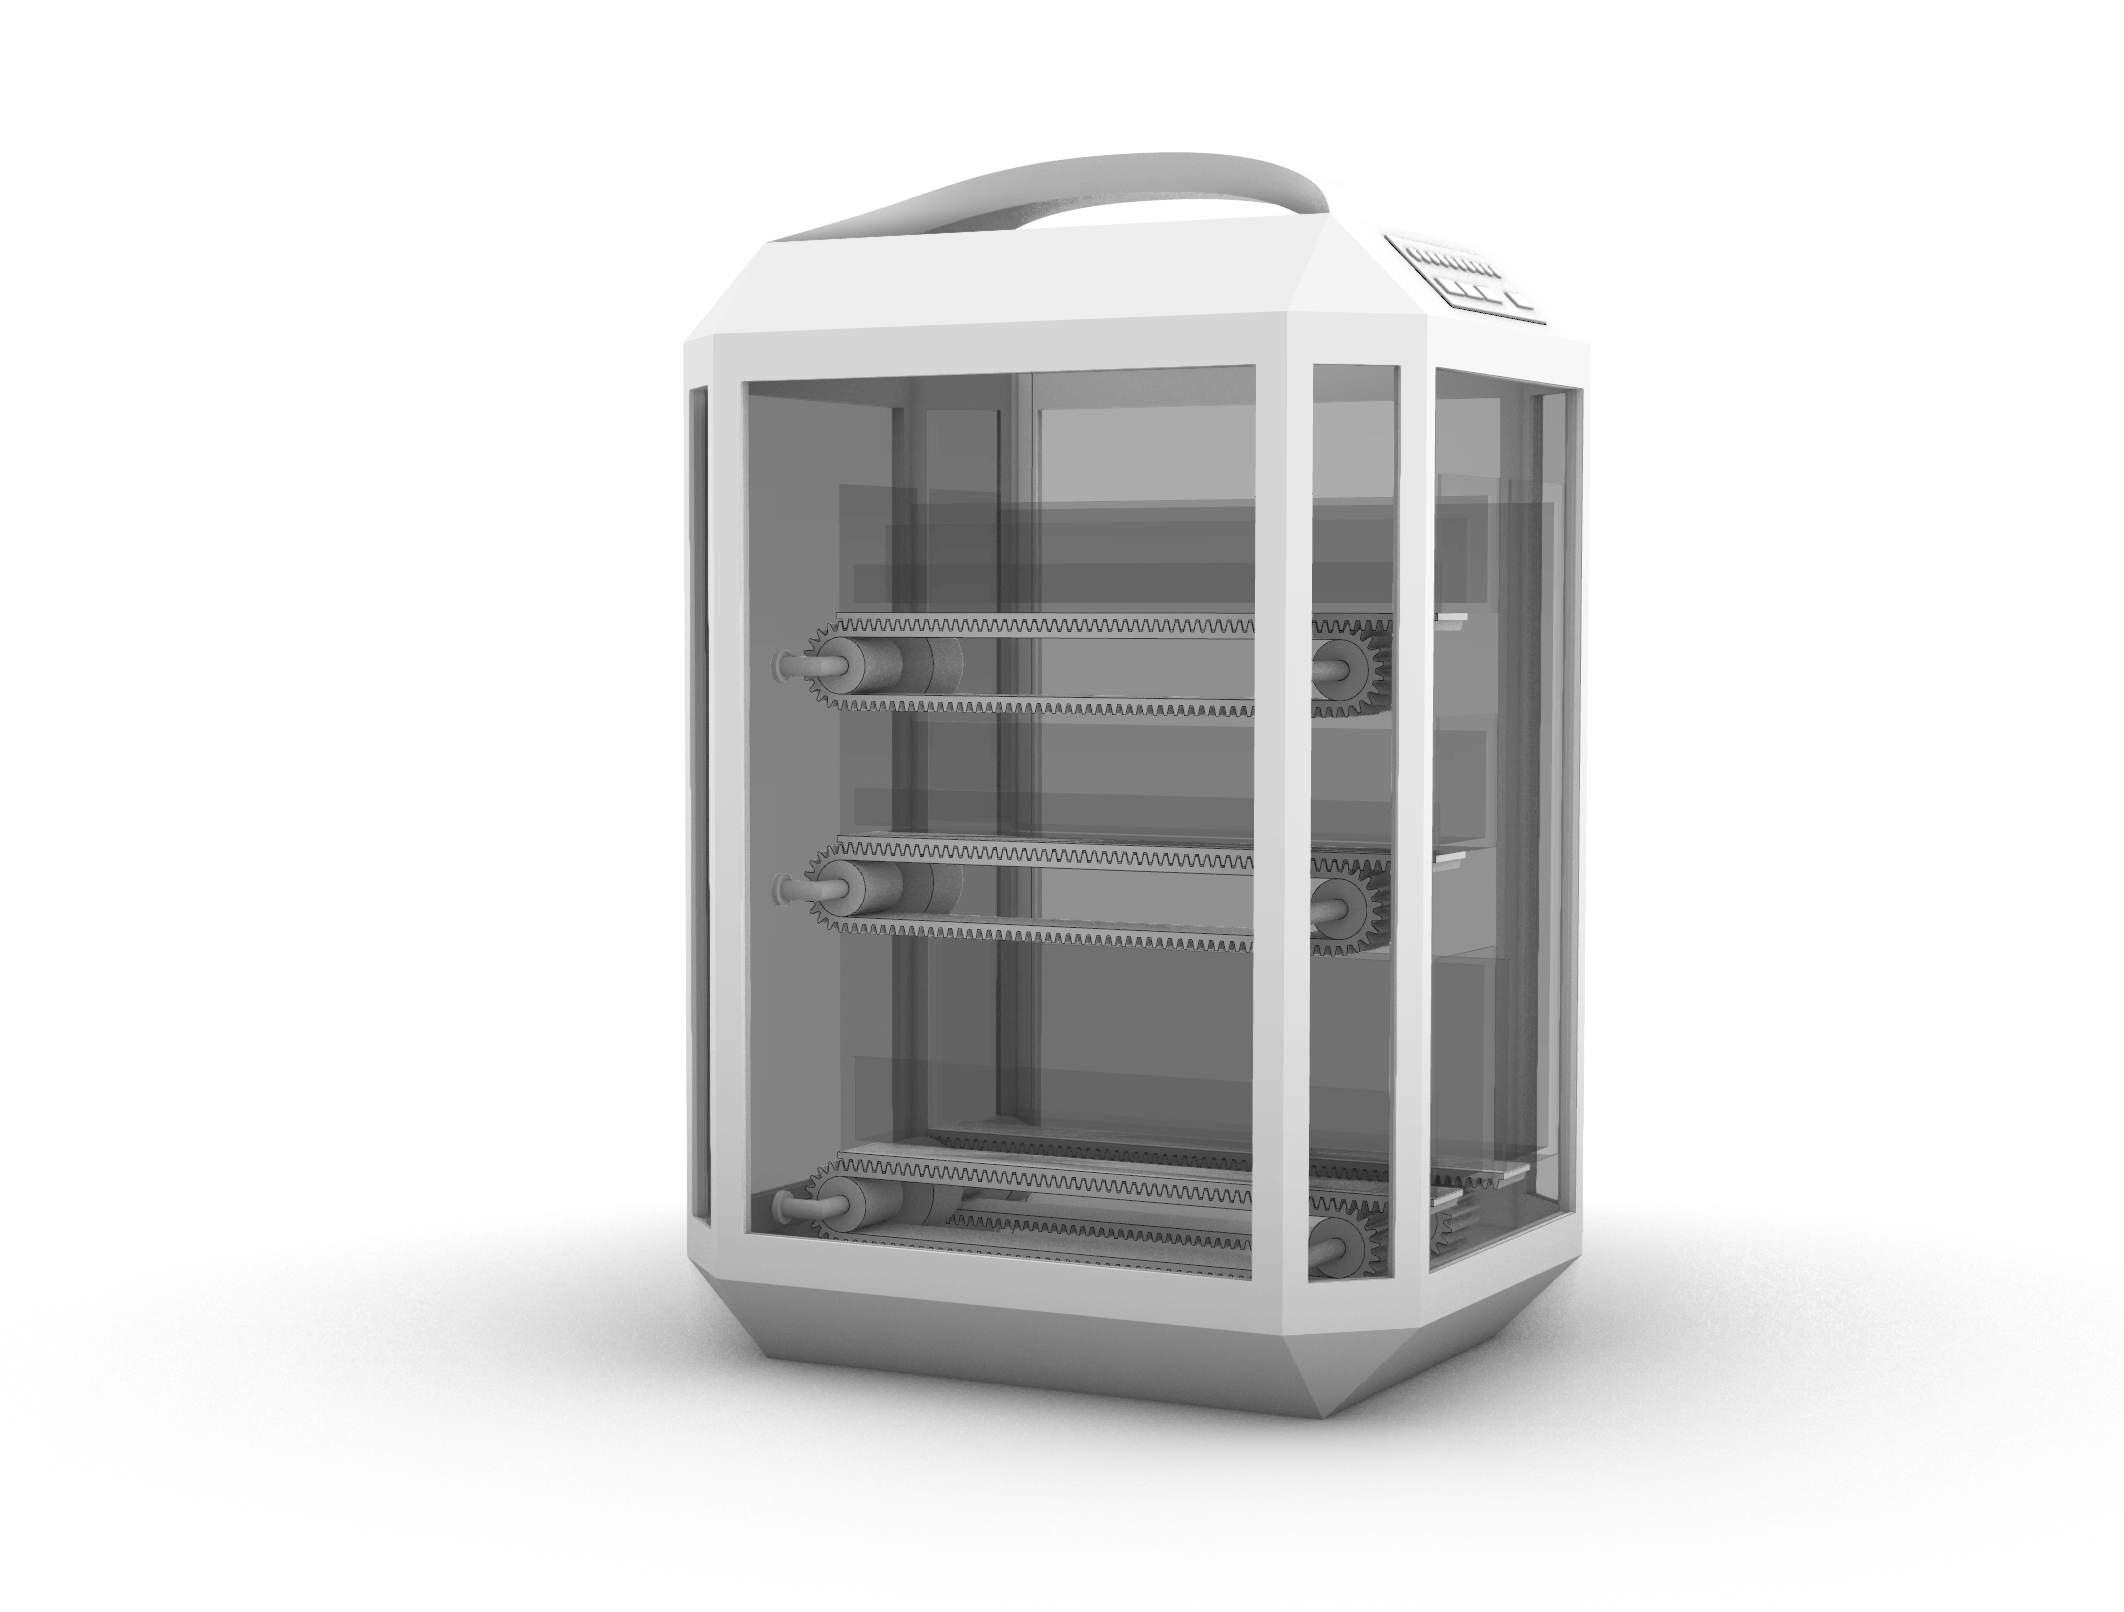
Here is the final project model with the rendered version.
02 Conclusion of the Week
//
Gained skills
Rhino CAD modeling, basic product design
Thoughts and lessons learned
The brainstorming part is always the hardest to start with. A good process of starting a project is to define the need, or define a problem, and then go into details and find the solution. Also, since we don't have the specific parts we needed yet, some of the measurement in my model is not accurate. This will be adjusted later to fit the parts.