Embedded Programming
Understand how microcontrollers work and how to program them
01 Group Assignment
//
Compare the performance and development workflows for other architectures
Our group compared the development workflows between von Neumann and Harvard architecture. Here are some of the obeservations:


Basically, the biggest difference between the Harvard architecture and von Neumann architecture is that they have different memory systems. In addition, the uses for these architectures are different. Von Neumann are more commonly used in desktops, performance computers and workstations. On the other hand, harvard architecture is more often seen in microcontrollers and DSPs. The AVRs and ARMs micro-contollers used in our class are mostly using the harvard architecture.
Image source: VIVADIFFERENCES
02 Individual Assignment
//
Read the datasheet for D11C micro-contoller
I started reading the datasheet in week 4 to get a basic understanding of what a D11c micro-controller does. When I re-read it for this week, I feel like I have a better understanding of what the datasheet is explaining about.
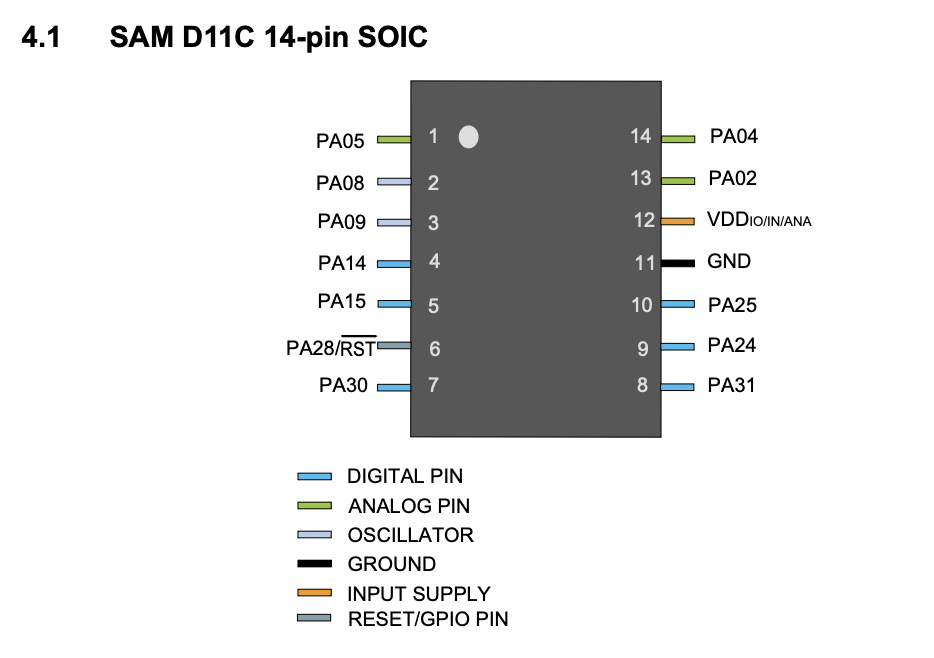
This is the pinout diagram for D11C, and it also has the pins for ground, power, and reset. For my D11C echo board from week 4, I connected the LED and button to analog pins. I was worried that if I needed to change any of the coding. Anthony told me that all of the analog pins on microcontrollers can be treated as digital pins. This is something that was not writtin on the data sheet and I am glad I learned it!
//
Program the board and make it to do something
I used the echo board from week 4 and decided to program it to blink and lit when I press the button. I am using arduino to program the board. Before starting the programming process, I need to load a bootloader on the board first.
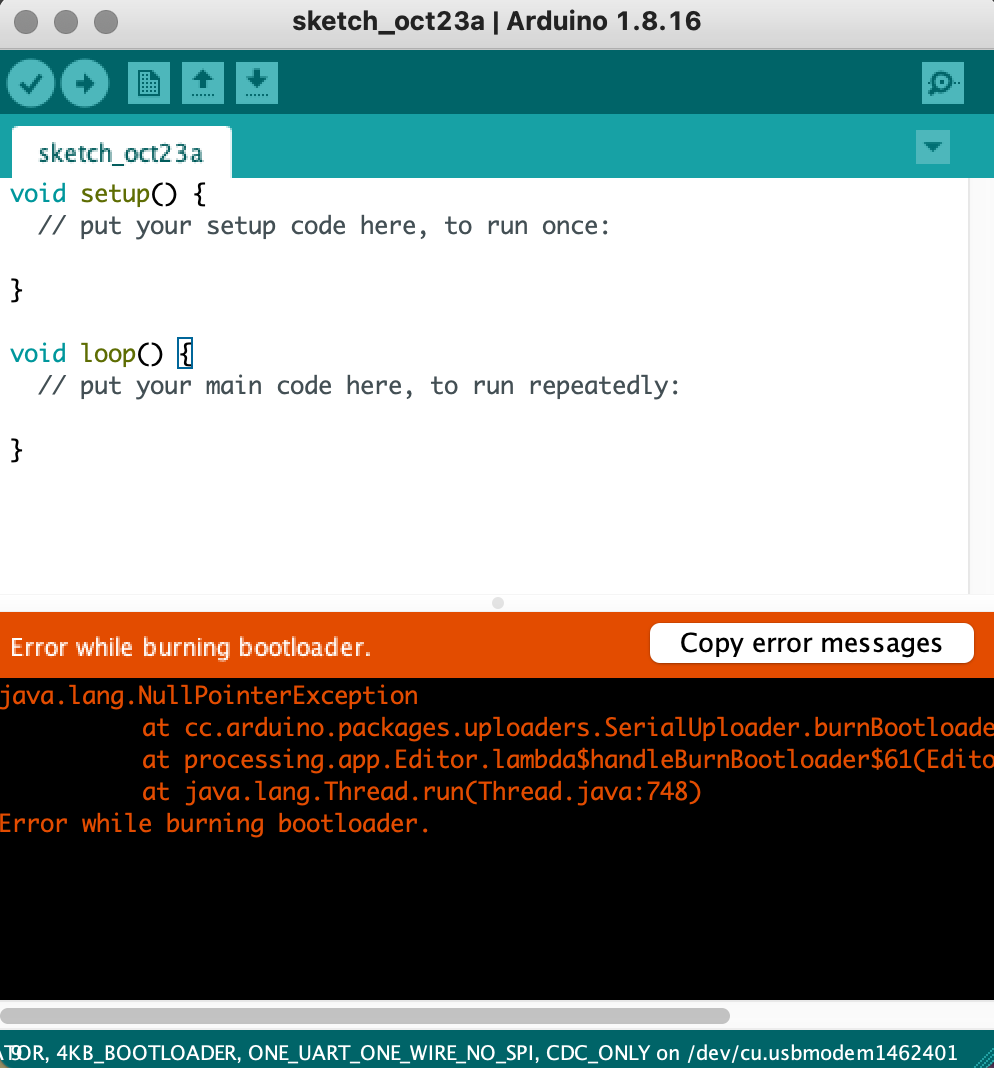
Anthony showed me a very easy way to load bootloader on a microcontrollers. Bascially all we need was connect the echo board to computer and the programmer, and click burn bootloader on arduino and it should work. It didn't work on my computer and I guess that was because I didn't install a D11C arduino bootloader package. I will try to figure that and the edbg bootloader ways later this week.
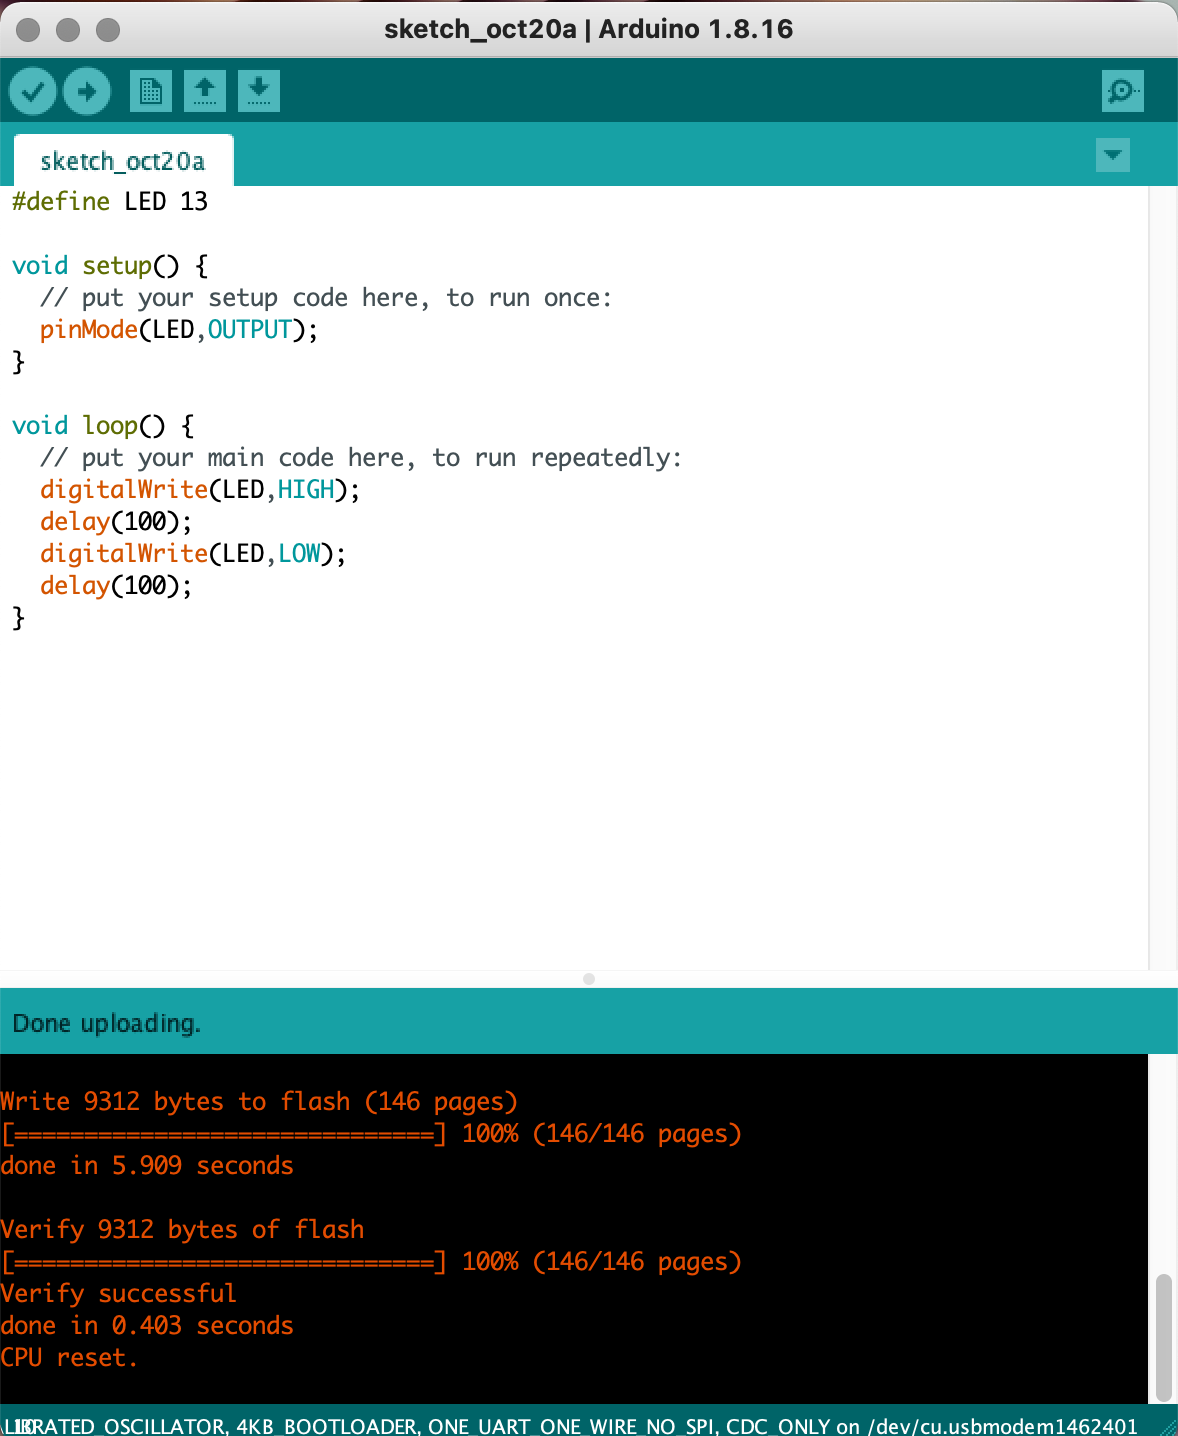
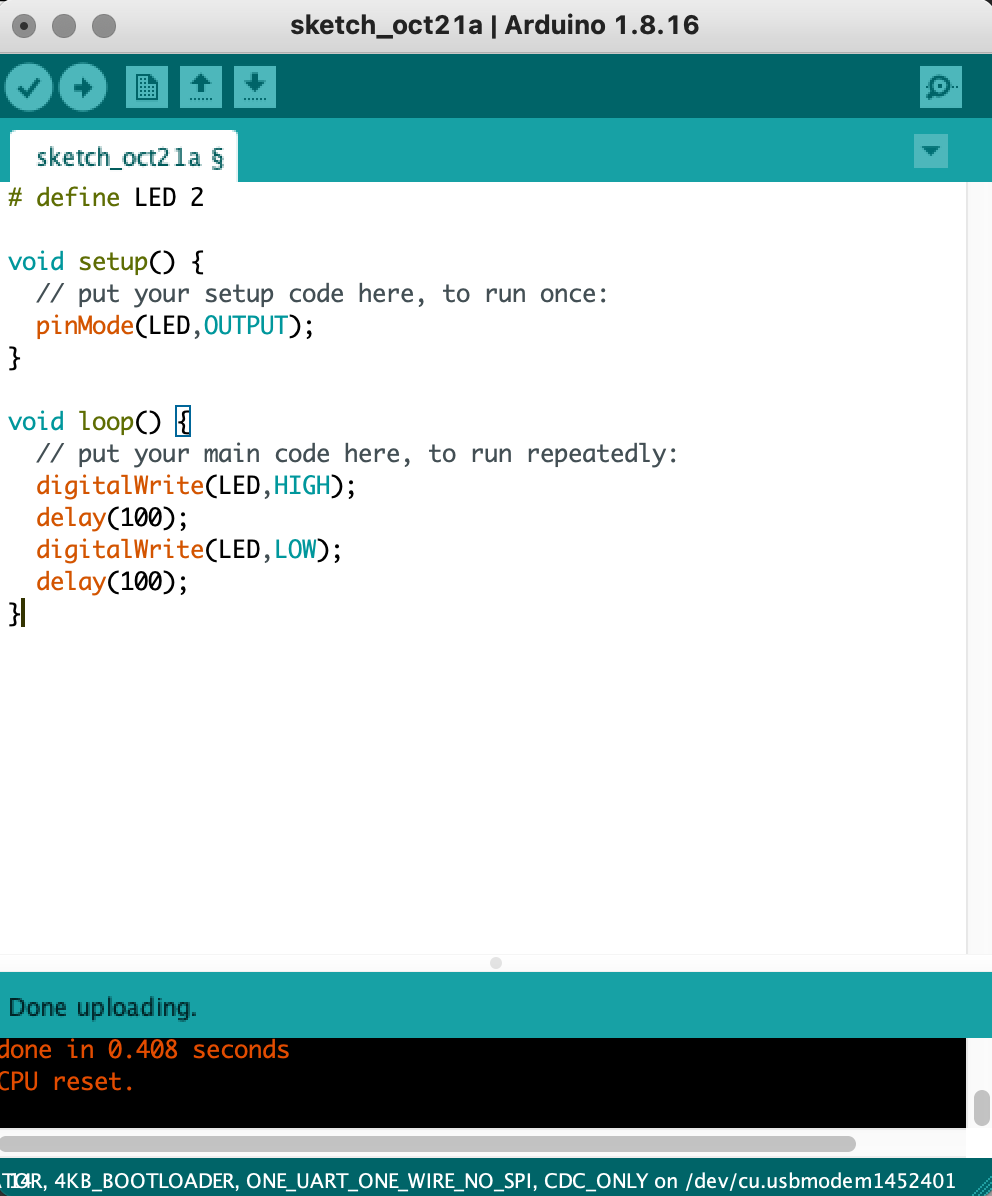
The first problem I encountered when making the blink board was getting the correct pin number onto arduino program. On the datasheet, there are two numbers for each of the ports and I was confused which one to use. Turns out we should use the number behind PA instead of using the numbers labeling the legs.
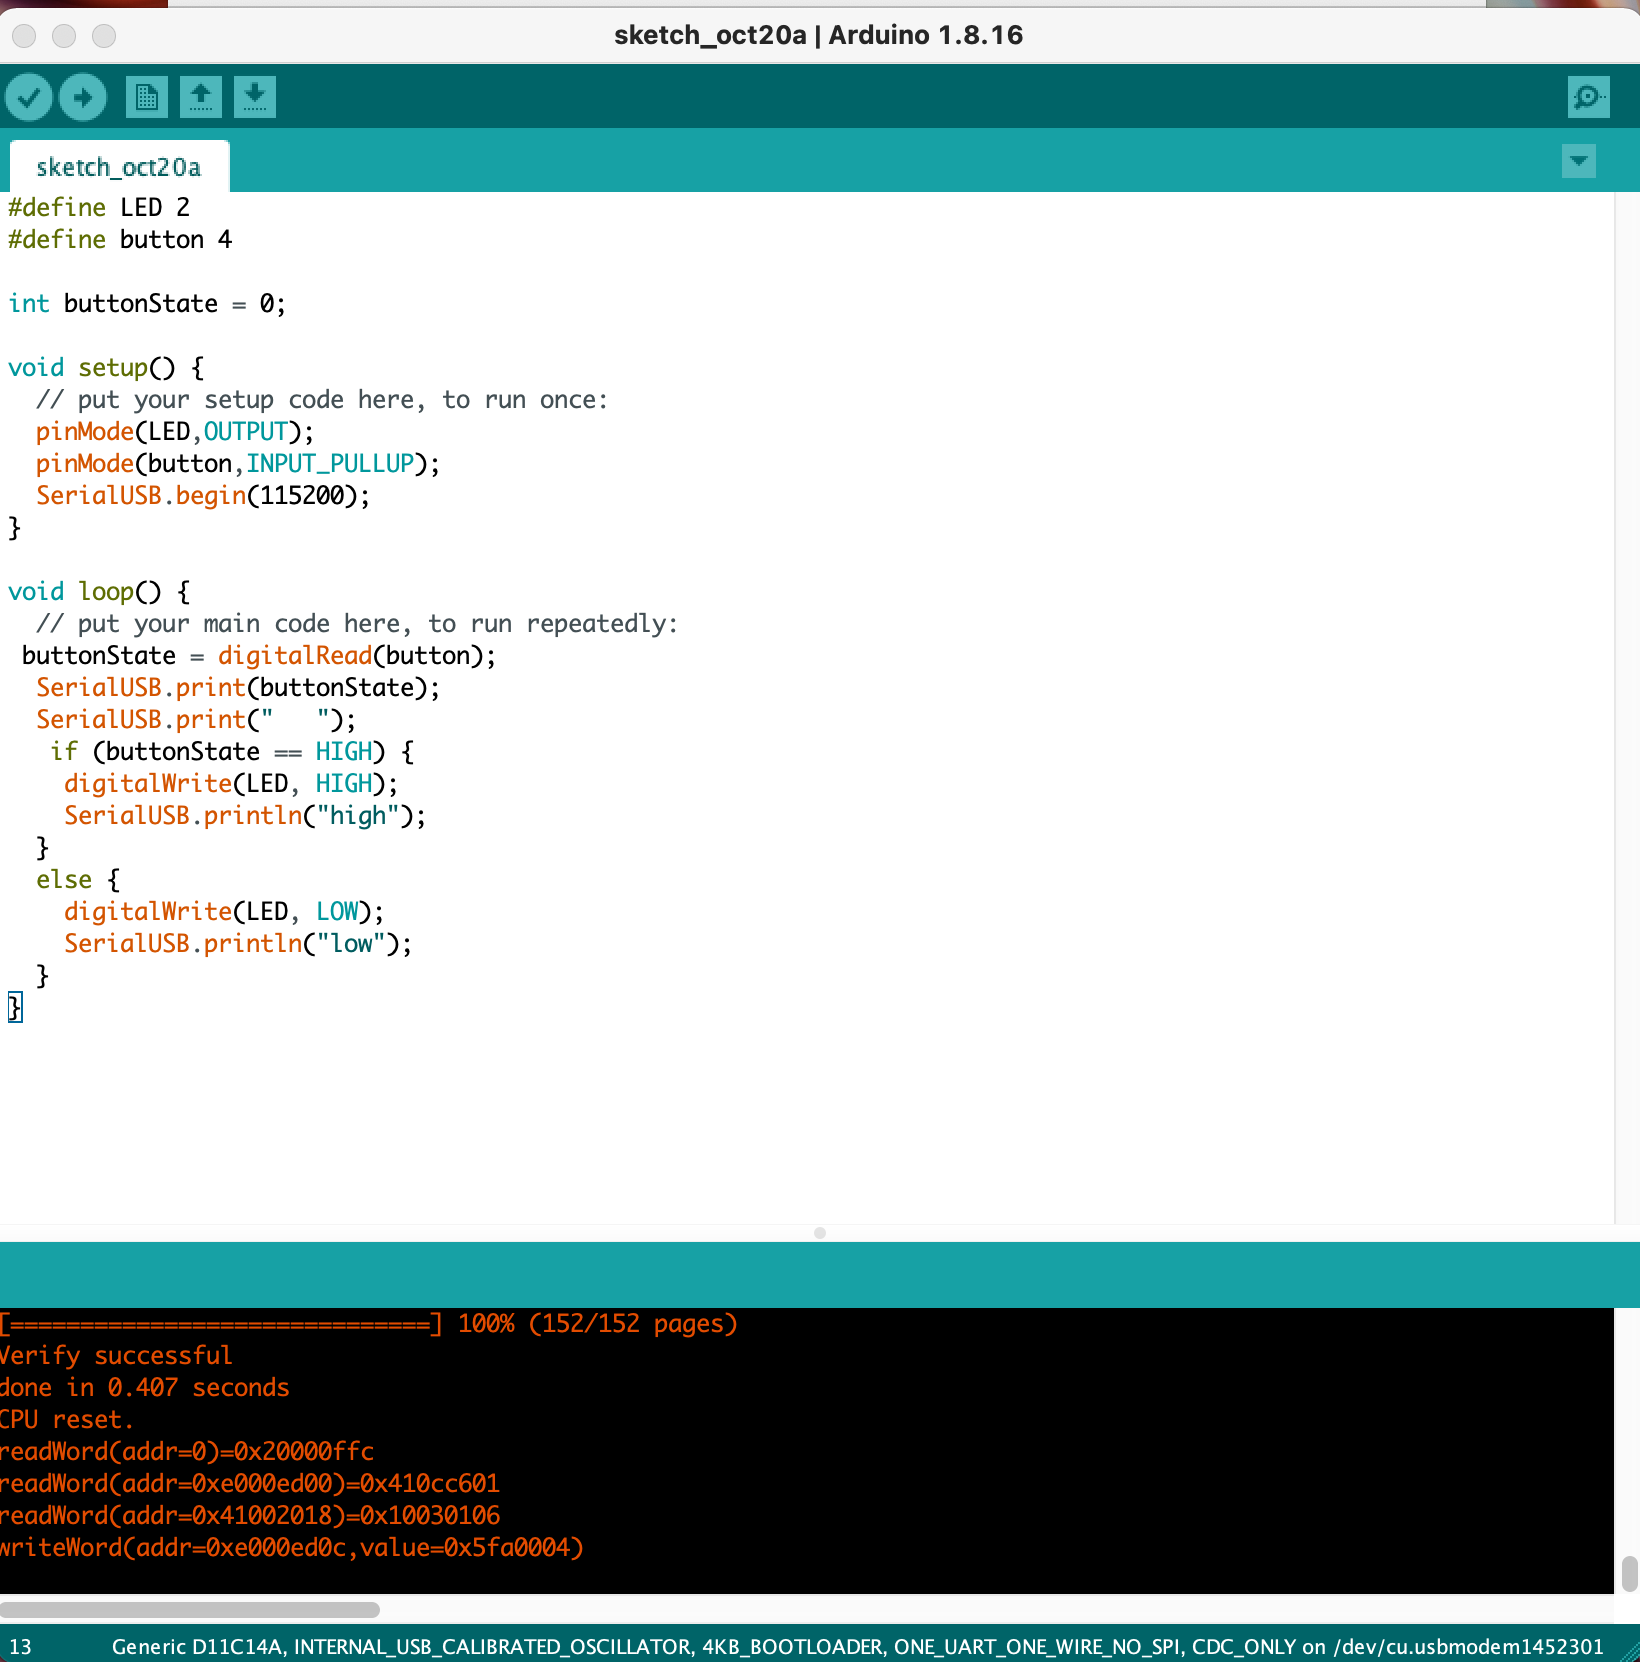
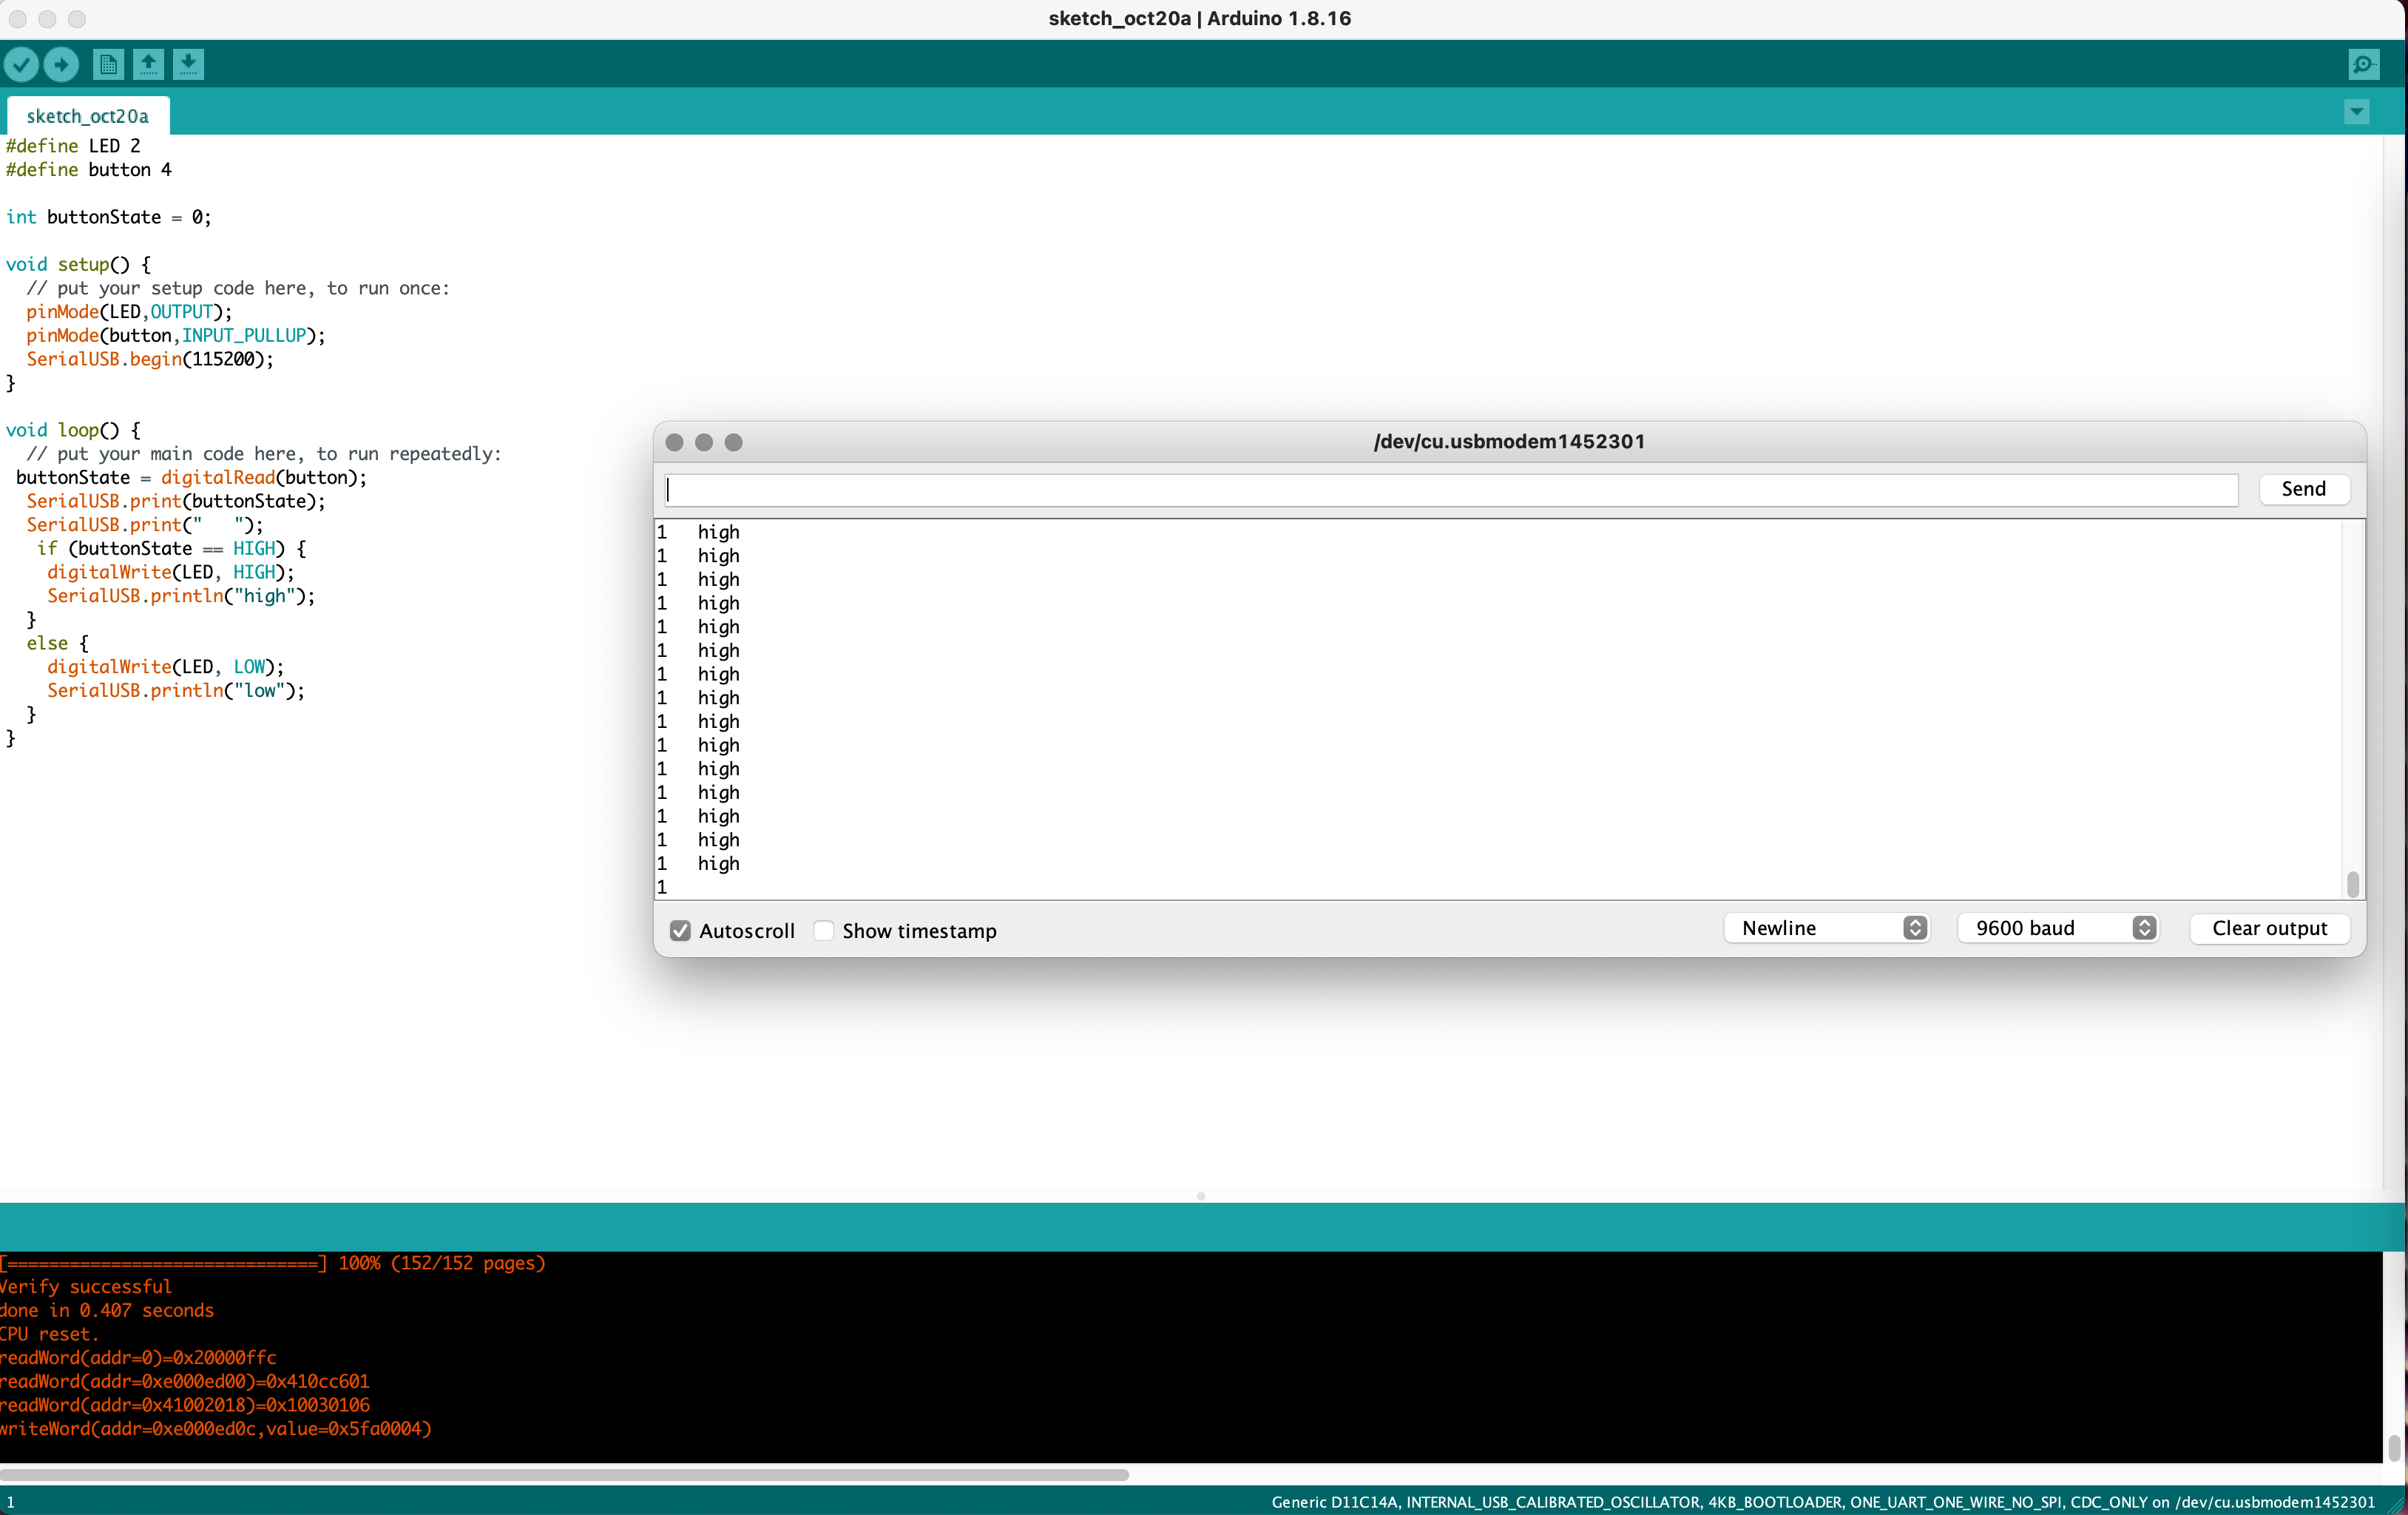
The second problem I encountered when making the button pressed board is that I accidentally put a "==" instead of a "=" in the loop for statement "buttonState = digitalRead(button)", making the initial statement changed into a comparing statement. This made my button always on low status, which is not write. Anthony helped me A LOT and we even tried to re-solder a microcontroller on there. Another thing I learned was that microcontrollers do have pull up resisters in them, which means we can actually turn them on by adding "_PULLUP" in the pinMode section, which is also super helpful.
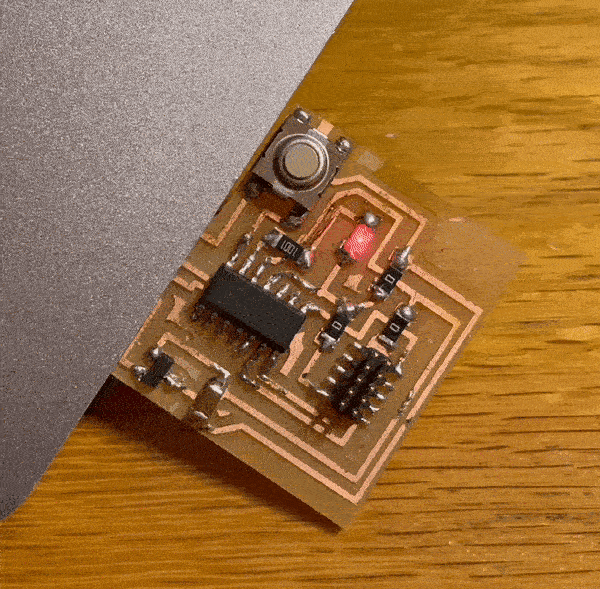
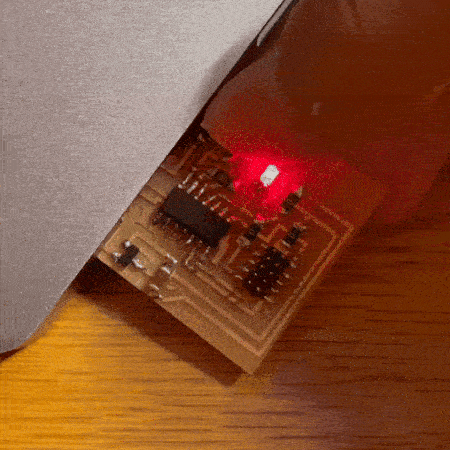
These are how they turned out! I am so glad it worked. Now that I got a sense of how arduino works, I can start exploring more functions and maybe try to build a new board with different outputs!
03 Conclusion of the Week
//
Gained skills
Datasheet, Bootloader, basic Arduino Programming
Thoughts and lessons learned
Before the week started, I thought this week is going to be a tough week since I only have a little experience with arduino. However, it turned out really fun and amusing! I feel more confortable dealing with microcontrollers and linking different inputs and outputs to different ports.
I learned a lot of lessons this week, and here are a few that I think would be beneficial to know before the programming process:
1. Try to understand a good debugging process before start programming, that is, know how to eliminate and check where the problem is. This is always a good habit to get into.
2. Make sure to understand what you write down in arduino! The second mistake I made this week was because I wasn't carefully checking and reading the purpose of each line.