3D Scanning and Printing
Explore the power of 3D printing & scanning
01 Group Assignment
//
Characterize the design rules for 3D printers
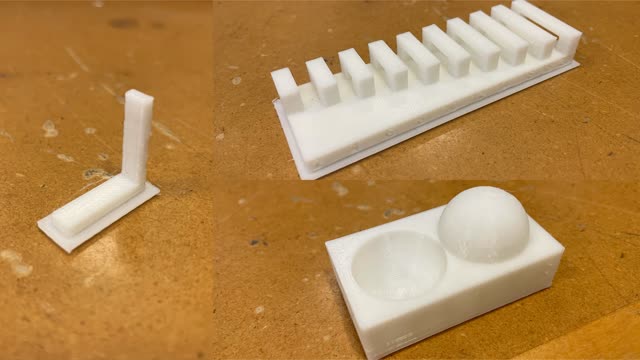
We started with one test piece (wall thickness) to learn how to set up everything. We loaded the stl file in the 3DWOX software, and saved the file as G-code. One important thing to keep in mind is that there are two kinds of printers in our shop (old and new Sindoh printer), so we have to save the G-Code file with the correponding printer setting in order for the machines to read the file (DP200-for old ones, 3DWOX 1-for new ones).
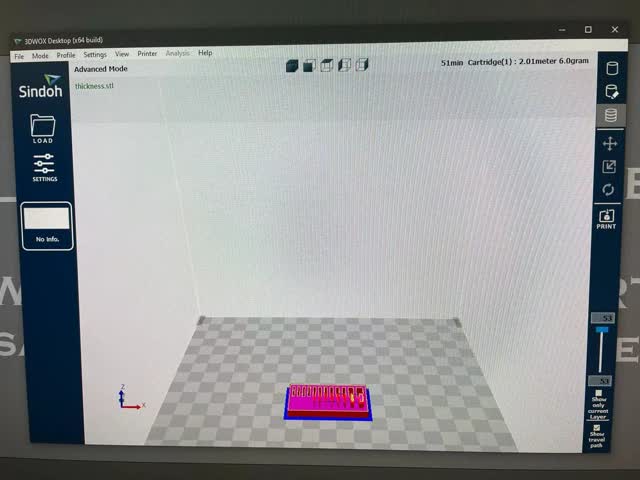
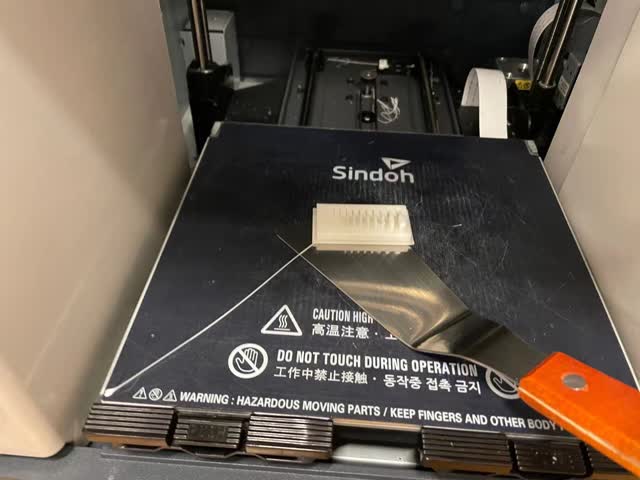
After loading the file in sindoh 3DWOX, we sliced it and checked the estimated time on the top right corner. For this 50mm*24mm*10mm peice, it is going to take 51 min to finish. When it is completed, we used a spade to take the piece out. It was super satisfying when tearing off the raft.
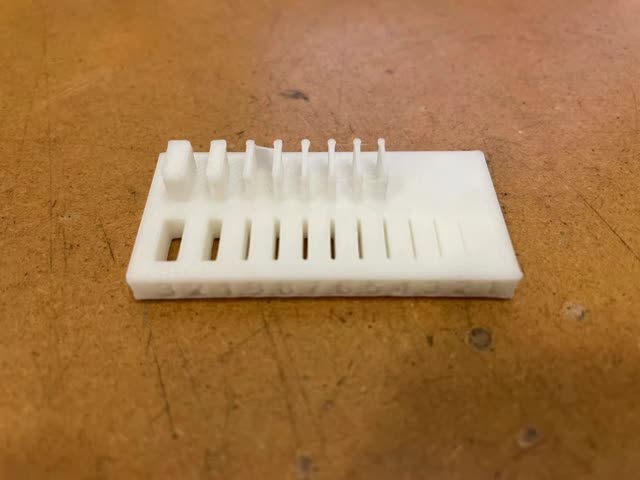
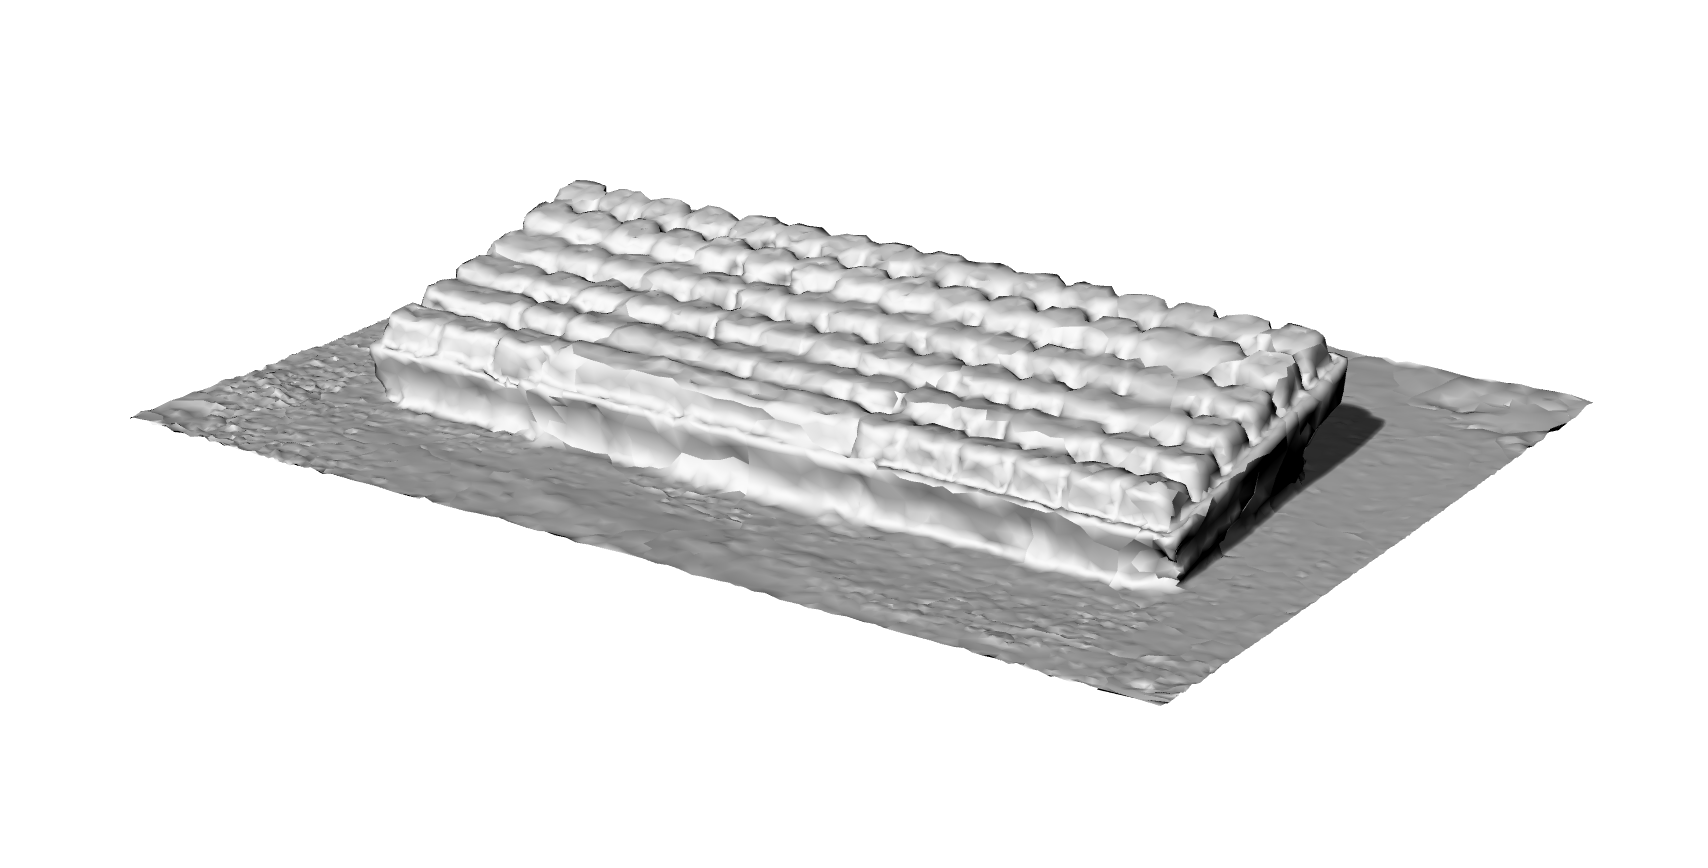
The result we see is that the printer can't print out walls that are <= .4mm.
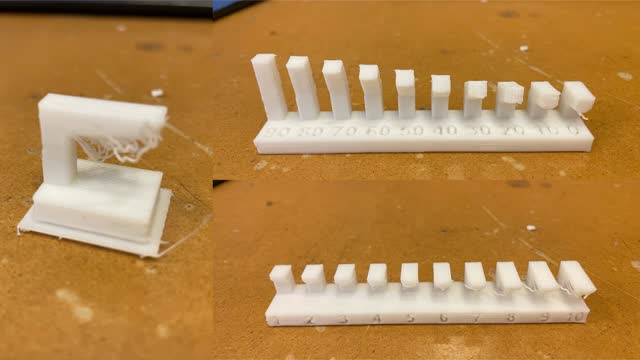
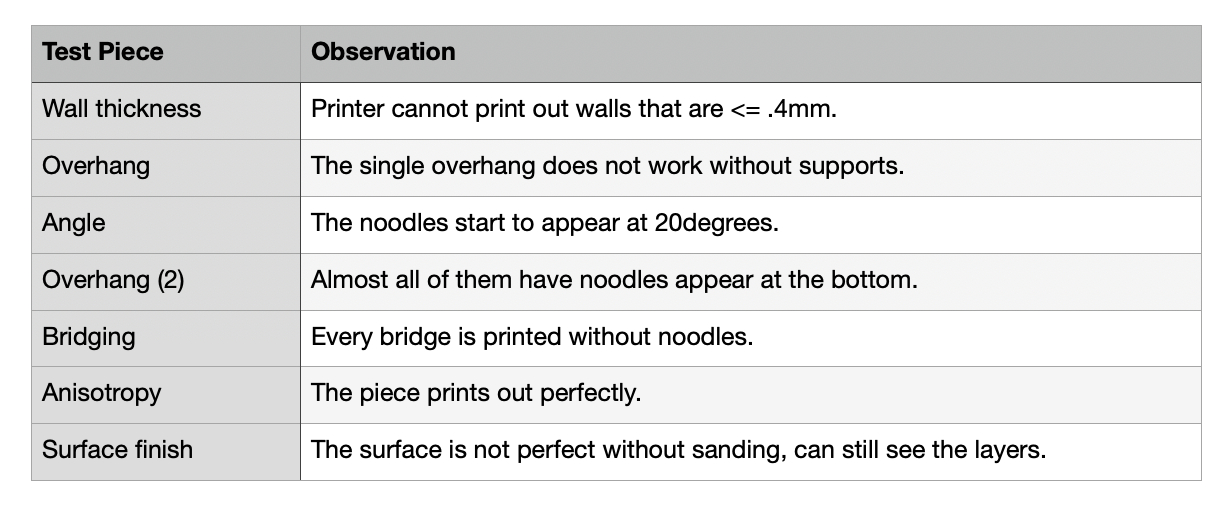
Our section also did some of the other test peices. Here are some results and observations:
02 Individual Assignment
//
Design a 3D object that cannot be made subtractively and print it
For this assignment, I decided to make two interlocking cubes. I modeled it out in rhino.
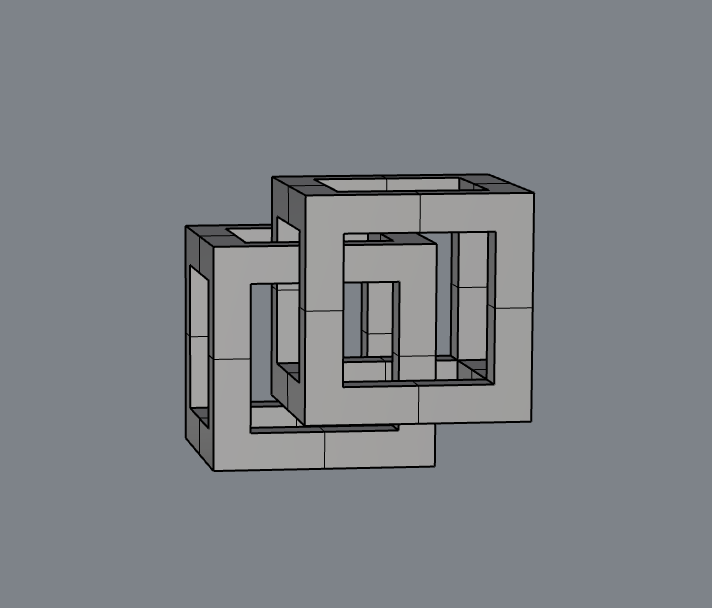
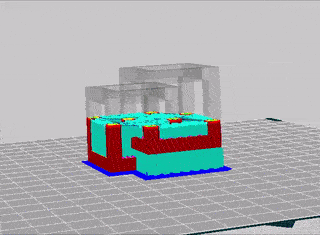
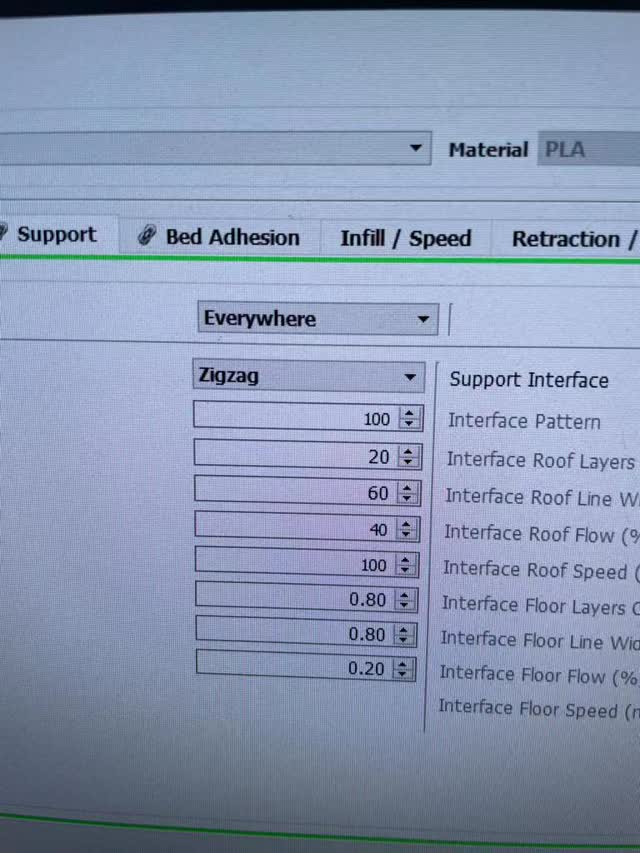
There are a few important setting to keep in mind when setting this up in 3DWOX. First, I need to add supports for my floating cube. I did zig zag for all the places that needed supports. Also, checking the scale of the model is very important. Since we are not making a big print job this week, I scaled my model down for 20% just to make the entire process faster. It is very convinent that 3DXOW has scaling as a feature.
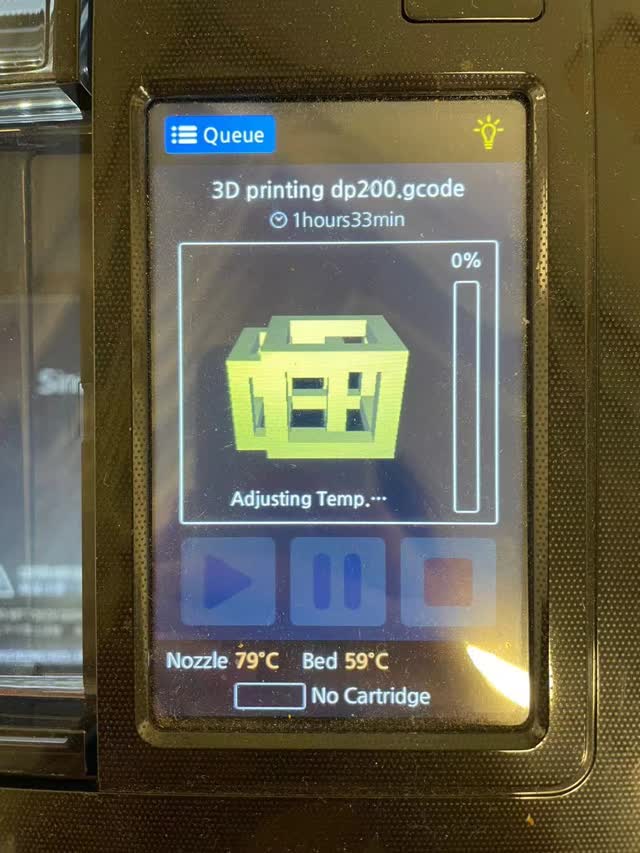
After set up everything, I saved the file in G-code format and just plugged my USB into the printer. The process of setting up the print job on 3D printer is very easy. I followed the instructions on archshop website. After sitting there and watched the printer prints the first two layers, I left and came back after 2 hours.
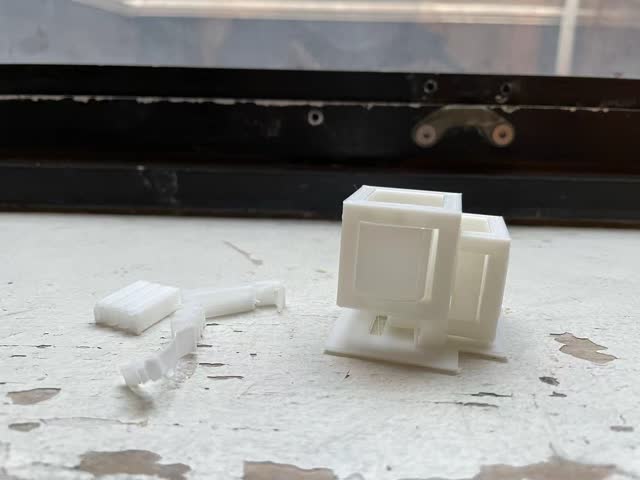
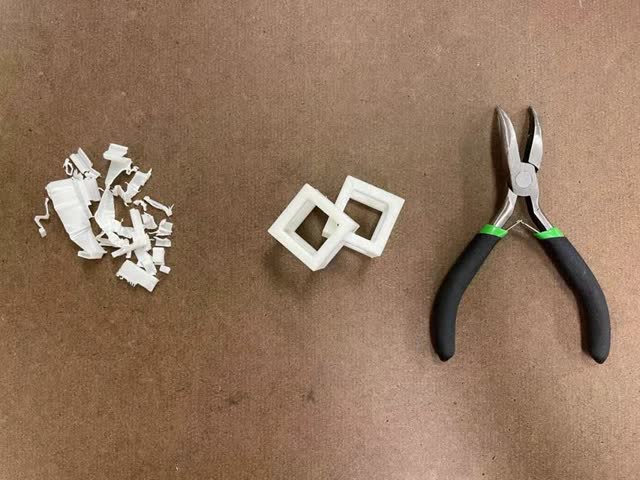
The cubes came out perfectly! I tried to remove the supports by hands but it gets very hard to take some of the corner peices out. Instead, I just used a pliers to pull the supports out.
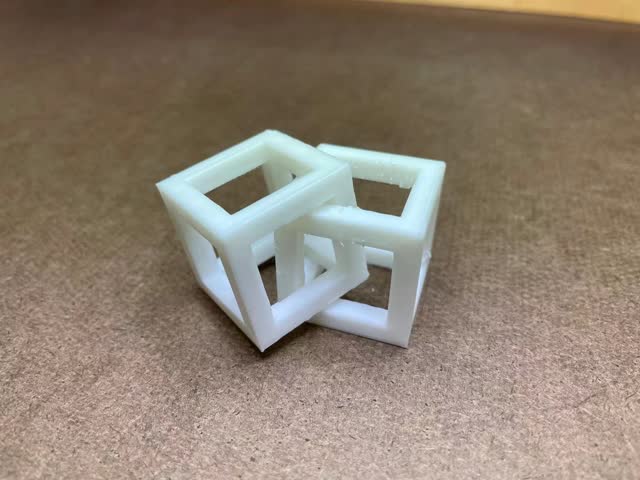
The final result!
//
3D scan something
I downloaded 2 phone app scanners (Qlone and Polycam) and tested each of them. Polycam's scanning result came out way better. I used it to scan my keyboard and it can capture most of the details.
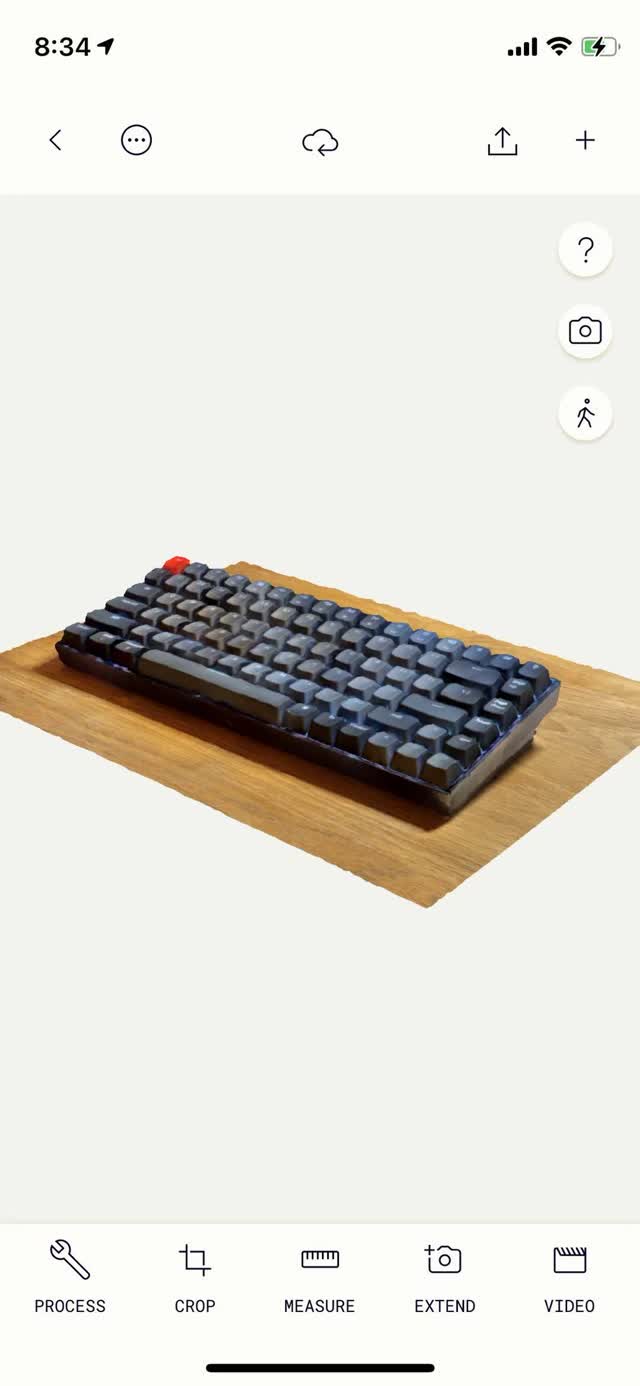
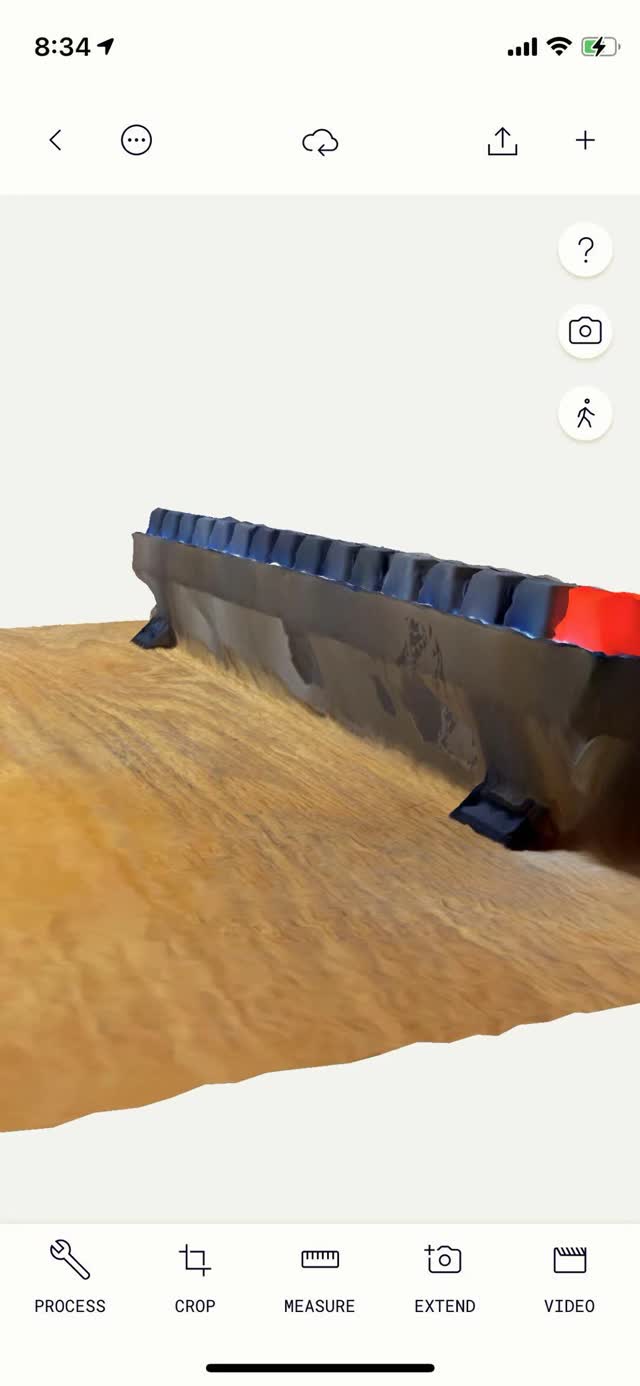
Since polycam is also a scanner based on image positioning, it is crucial to take as much pictures in all angles. The mistake I made is that I didn't take good pictures of the back of my keyboard. That is why from the right image the back side is not very accurate.
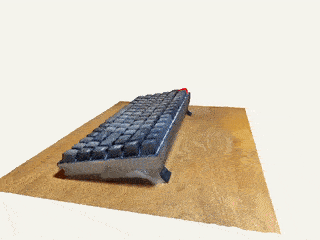
Here is a turntable video of my scanned object using Polycam!
This is how it looks like in Rhino. Many of the edges are not perfect, but I think it is detailed enough for a phone app scanner.
03 Conclusion of the Week
//
Gained skills
Sindoh PLA 3D printing and Polycam 3D Scanning
Thoughts and lessons learned
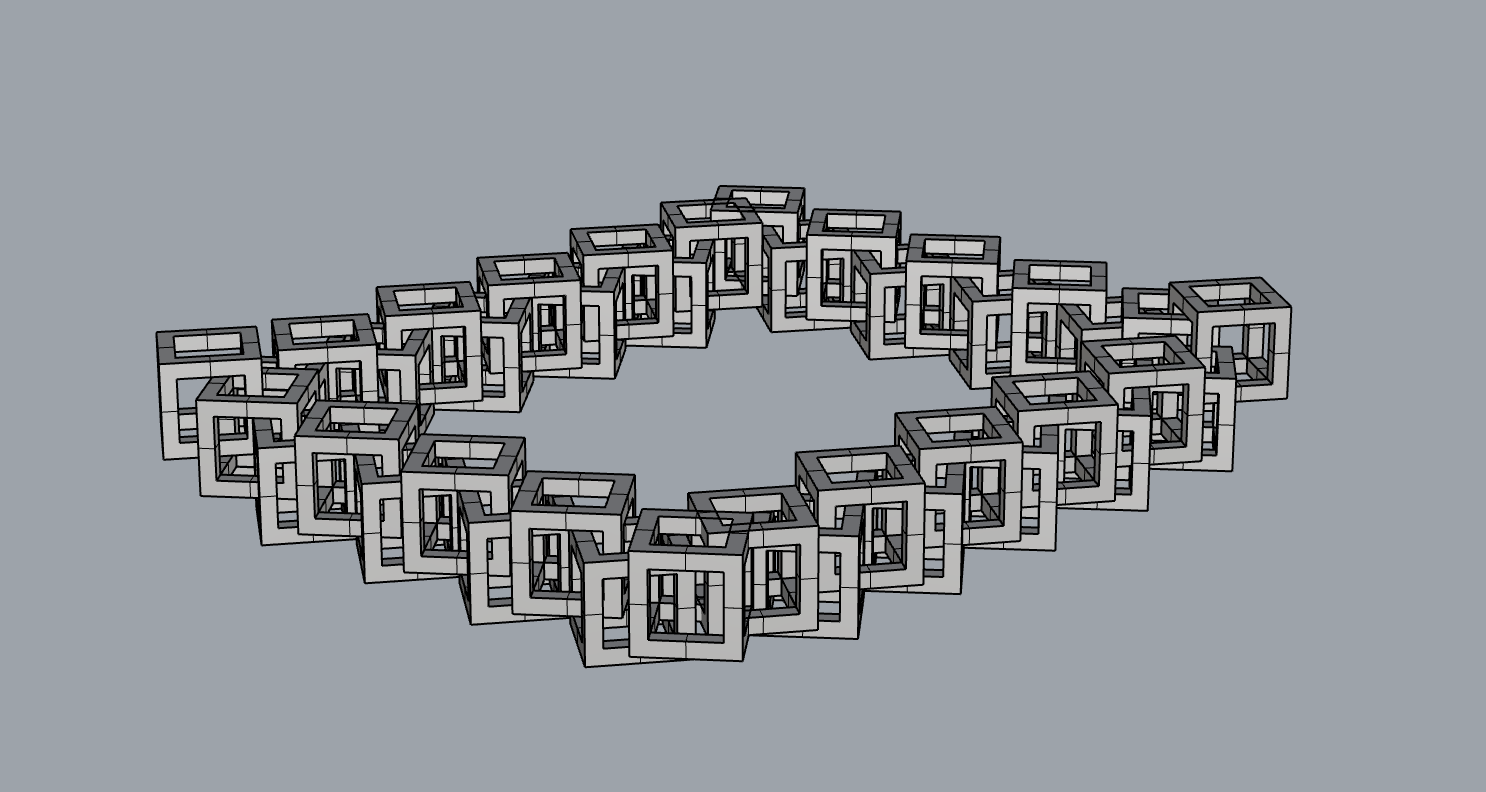
Overall, everything went pretty smooth this week. Several things to keep in mind: 1.Make sure the model is in scale and the tolerance are all correct; 2. Make sure to add supports to parts where needed; 3. Keep an eye on the print job at the beginning to make sure things are going well. One interesting thought that came up to me as I was designing the 3D object this week is that I can create a chain of cubes that becomes a necklace or a bracelet. I haven't got a chance to print it, but I modeled it out in Rhino, and hopefully after this week I can go start the print job.
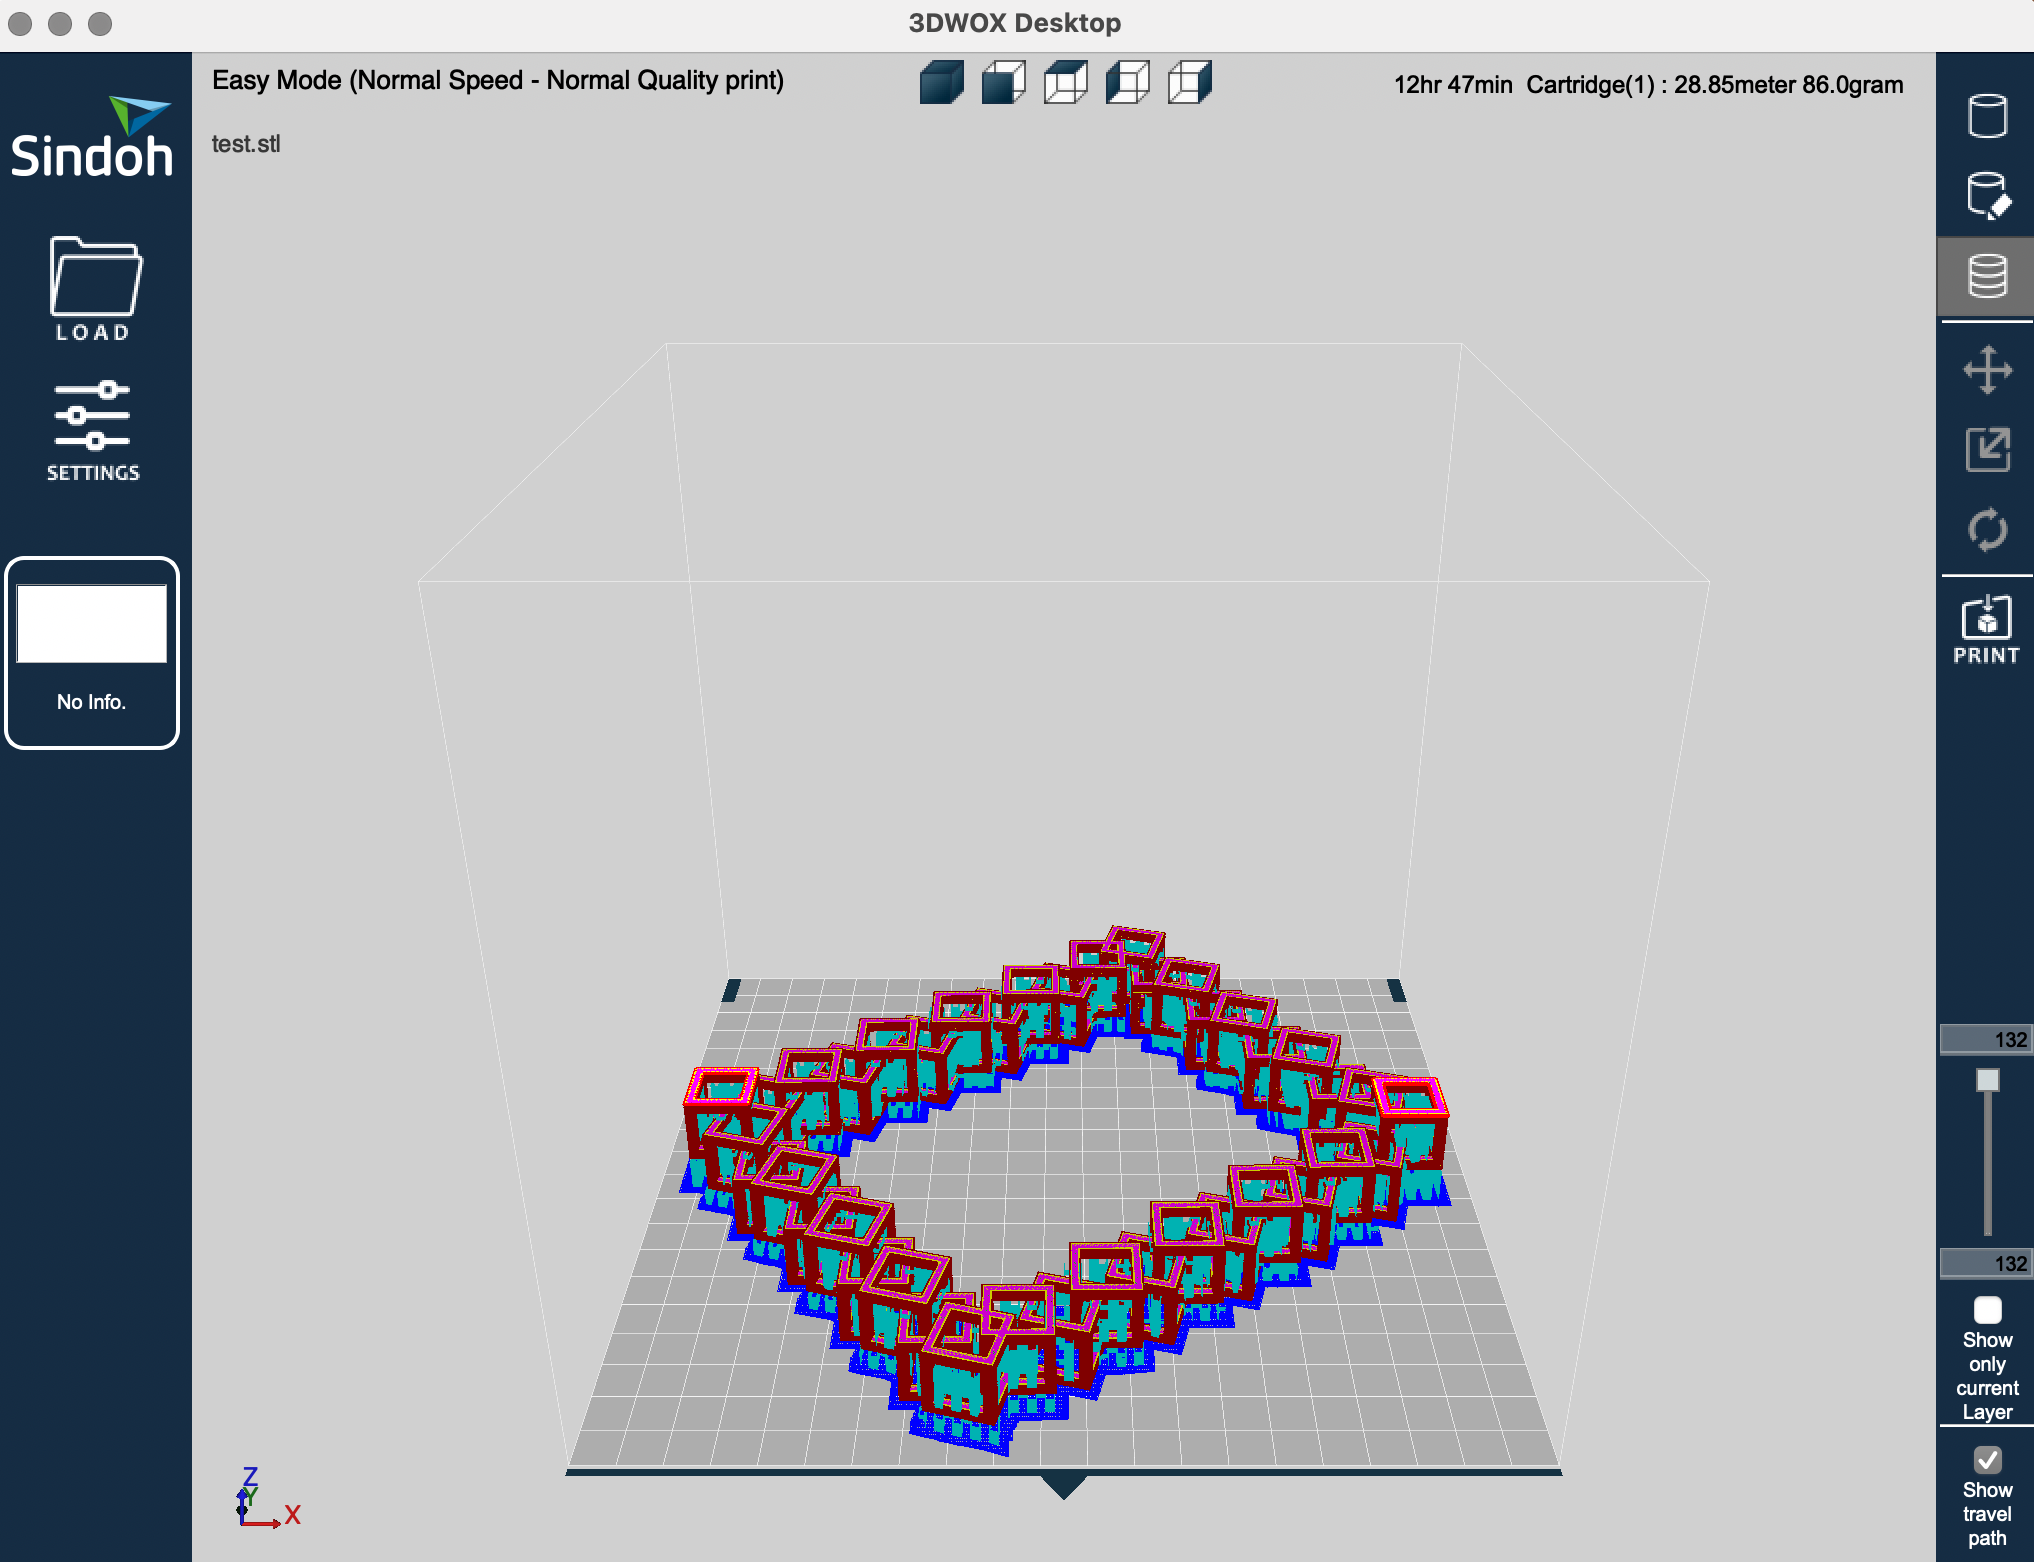
It is a 13 hour print job! 😪😪