Project 12: Networking and Communications
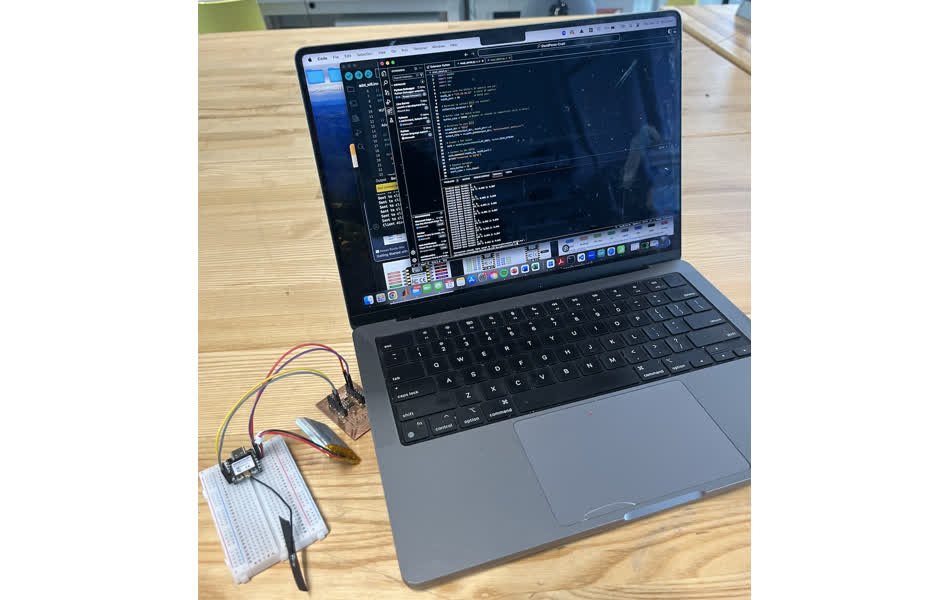
This week was all about networking and communications. I used Xiao ESP 32c3 wifi functionality. My goal was to be able to make my ADXL343 sensing module wireless with wifi and battery power.

My Project
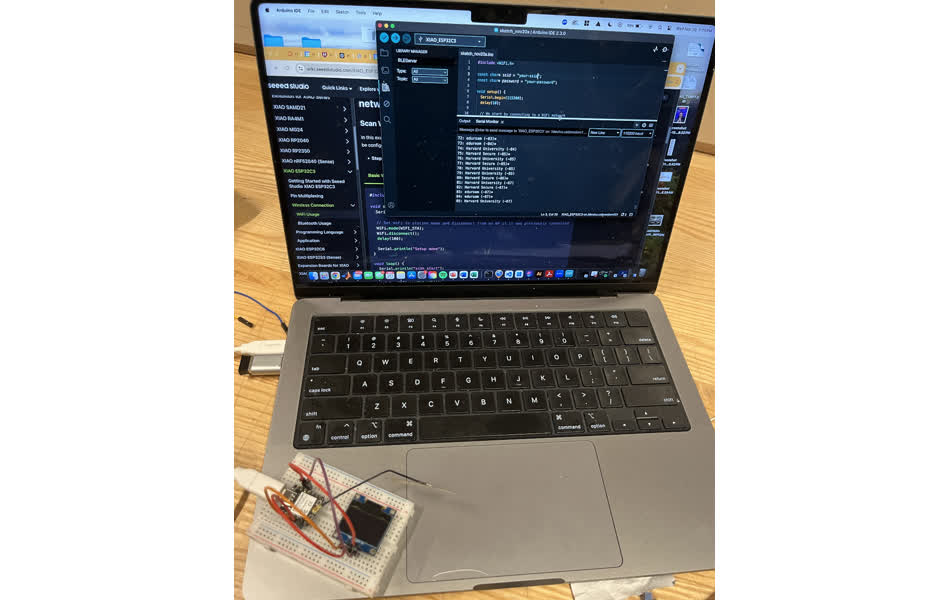
I started by studying Xiao ESP 32c3 wifi funtcionality at https://wiki.seeedstudio.com/XIAO_ESP32C3_WiFi_Usage/. I connected the wifi antenna to the Xiao.
I then used the wifi scanning code to identify available networks.
                                        #include "WiFi.h"

                                        void setup() {
                                          Serial.begin(115200);

                                          // Set WiFi to station mode and disconnect from an AP if it was previously connected
                                          WiFi.mode(WIFI_STA);
                                          WiFi.disconnect();
                                          delay(100);

                                          Serial.println("Setup done");
                                        }

                                        void loop() {
                                          Serial.println("scan start");

                                          // WiFi.scanNetworks will return the number of networks found
                                          int n = WiFi.scanNetworks();
                                          Serial.println("scan done");
                                          if (n == 0) {
                                            Serial.println("no networks found");
                                          } else {
                                            Serial.print(n);
                                            Serial.println(" networks found");
                                            for (int i = 0; i < n; ++i) {
                                              // Print SSID and RSSI for each network found
                                              Serial.print(i + 1);
                                              Serial.print(": ");
                                              Serial.print(WiFi.SSID(i));
                                              Serial.print(" (");
                                              Serial.print(WiFi.RSSI(i));
                                              Serial.print(")");
                                              Serial.println((WiFi.encryptionType(i) == WIFI_AUTH_OPEN) ? " " : "*");
                                              delay(10);
                                            }
                                          }
                                          Serial.println("");

                                          // Wait a bit before scanning again
                                          delay(5000);
                                        }
This revealed a long list of available networks.
Next, I tried connecting to the wifi with the following code
                                            #include

                                                const char* ssid = "your-ssid";
                                                const char* password = "your-password";

                                                void setup() {
                                                  Serial.begin(115200);
                                                  delay(10);

                                                  // We start by connecting to a WiFi network
                                                  Serial.println();
                                                  Serial.println();
                                                  Serial.print("Connecting to ");
                                                  Serial.println(ssid);

                                                  WiFi.begin(ssid, password);

                                                  while (WiFi.status() != WL_CONNECTED) {
                                                    delay(500);
                                                    Serial.print(".");
                                                  }

                                                  Serial.println("");
                                                  Serial.println("WiFi connected");
                                                  Serial.println("IP address: ");
                                                  Serial.println(WiFi.localIP());
                                                }
                                                void loop() {}
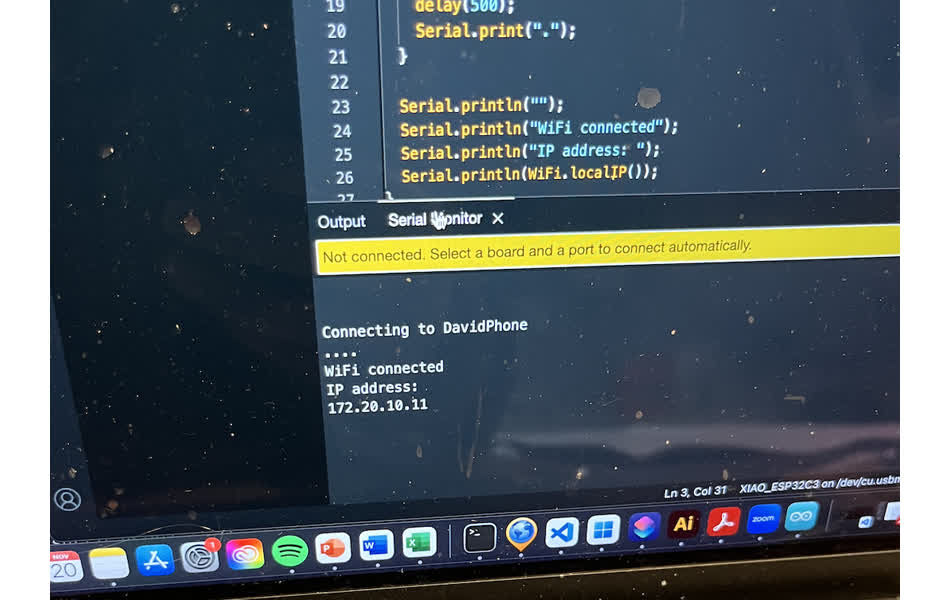
Instead, I tried to connect to my hotspot, "David's Brick"
For some reason, this didn't work. I asked Leo, and he suggested removing any special chacaters, like the apostropge and space. I renamed my hotspot "DavidPhone" and retried. This worked.
Programming was pretty challenging to figure out initially, but essentially, I connect to the Xiao as usual with my usb-c cable. I then program the microcontroller with the following script.
                            #include

                                const char* ssid = "DavidPhone"; // Replace with your Wi-Fi SSID
                                const char* password = "dpchotspot"; // Replace with your Wi-Fi password

                                WiFiServer server(80); // Wi-Fi server on port 80

                                unsigned long startMillis = 0;
                                unsigned long recordingDuration = 0;

                                void setup() {
                                  Serial.begin(115200); // High baud rate for serial monitor
                                  analogReadResolution(12); // Set ADC resolution to 12 bits

                                  Serial.println("Connecting to Wi-Fi...");
                                  WiFi.begin(ssid, password);

                                  while (WiFi.status() != WL_CONNECTED) {
                                    delay(500);
                                    Serial.print(".");
                                  }

                                  Serial.println("\nWi-Fi connected!");
                                  Serial.print("IP Address: ");
                                  Serial.println(WiFi.localIP());

                                  server.begin(); // Start the server
                                }

                                void loop() {
                                  WiFiClient client = server.available(); // Check for a new client

                                  if (client) {
                                    Serial.println("Client connected!");
                                    client.println("Enter duration in seconds to start recording:");

                                    while (client.connected()) {
                                      if (client.available() > 0) {
                                        String input = client.readStringUntil('\n');
                                        input.trim();

                                        if (input.toInt() > 0) {
                                          recordingDuration = input.toInt() * 1000; // Convert seconds to milliseconds
                                          startMillis = millis();
                                          client.println("Starting data recording...");
                                          Serial.println("Recording started for " + String(recordingDuration / 1000) + " seconds.");

                                          // Prepare buffer for batch data transmission
                                          const int bufferSize = 512; // Define buffer size
                                          char buffer[bufferSize];
                                          int bufferIndex = 0;

                                          // Record and batch send data
                                          while (millis() - startMillis < recordingDuration) {
                                            unsigned long currentTime = micros(); // Timestamp in microseconds
                                            int sensorValue = analogRead(A2);    // Read analog value

                                            // Format data and add to buffer
                                            bufferIndex += snprintf(buffer + bufferIndex, sizeof(buffer) - bufferIndex, "%lu,%d\n", currentTime, sensorValue);

                                            // Check if buffer is nearly full
                                            if (bufferIndex >= bufferSize - 50) {
                                              client.write(buffer, bufferIndex); // Send buffer to client
                                              bufferIndex = 0;                  // Reset buffer index
                                            }
                                          }

                                          // Send any remaining data in buffer
                                          if (bufferIndex > 0) {
                                            client.write(buffer, bufferIndex);
                                          }

                                          client.println("Recording complete.");
                                          Serial.println("Recording complete.");
                                          recordingDuration = 0; // Reset recording duration
                                        }
                                      }
                                    }

                                    client.stop(); // Close connection
                                    Serial.println("Client disconnected.");
                                  }
                                }
This python script communicates with my Xiao and facilitates wifi control to run the functionality of the arduino script that most recently programmed the ESP32.
 import socket
                            import time
                            import csv
                            import os

                            # Replace with the ESP32's IP address and port
                            esp32_ip = "172.20.10.12"  # ESP32 IP address
                            esp32_port = 80            # ESP32 port

                            # Duration to collect data (in seconds)
                            collection_duration = 10

                            # Buffer size for batch writes
                            buffer_size = 50000  # Number of records to temporarily store in memory

                            # Directory to save data
                            output_dir = "data"
                            os.makedirs(output_dir, exist_ok=True)
                            output_file = os.path.join(output_dir, "accelerometer_data2.csv")

                            # Create a TCP socket
                            sock = socket.socket(socket.AF_INET, socket.SOCK_STREAM)

                            # Connect to the ESP32
                            sock.connect((esp32_ip, esp32_port))
                            print("Connected to ESP32")

                            # Prepare variables
                            data_buffer = []
                            start_time = time.time()

                            # Open the CSV file in write mode
                            with open(output_file, "w", newline="") as csvfile:
                                csvwriter = csv.writer(csvfile)
                                # Write the header row
                                csvwriter.writerow(["Timestamp (s)", "X (m/s^2)", "Y (m/s^2)", "Z (m/s^2)"])

                                try:
                                    while time.time() - start_time < collection_duration:
                                        # Receive data from ESP32
                                        data = sock.recv(1024).decode("utf-8")
                                        if not data:
                                            break

                                        # Process received data
                                        lines = data.strip().split("\n")
                                        for line in lines:
                                            try:
                                                # Example format: "X: 1.234 Y: 2.345 Z: 3.456"
                                                parts = line.split()
                                                x = float(parts[1])  # Extract X value
                                                y = float(parts[3])  # Extract Y value
                                                z = float(parts[5])  # Extract Z value
                                                timestamp = time.time() - start_time
                                                # Append to buffer
                                                data_buffer.append([timestamp, x, y, z])
                                            except (IndexError, ValueError):
                                                print(f"Invalid data format: {line}")

                                        # Write buffer to file when it reaches the buffer size
                                        if len(data_buffer) >= buffer_size:
                                            csvwriter.writerows(data_buffer)
                                            data_buffer.clear()
                                except Exception as e:
                                    print(f"\nError: {e}")
                                finally:
                                    # Write any remaining data in the buffer to the file
                                    if data_buffer:
                                        csvwriter.writerows(data_buffer)
                                    sock.close()
                                    print(f"\nConnection closed. Data saved to '{output_file}'.")
Here's what it looks like Heres's all my files for this week Week 12 Files/a>