Project 4: 3D Printing and Scanning
This week was all about using 3D printing and scanning technology. We also learned about AI capabilities and how to utilize them responsibly for this course. I tried some AI CAD generating software and quickly gave up. I designed the group project which was a printer evaluation tool, in solidworks. I then printed a few small designs that I made in solidworks, and made a few 3D scans as well.
Let's Start with the Group Project
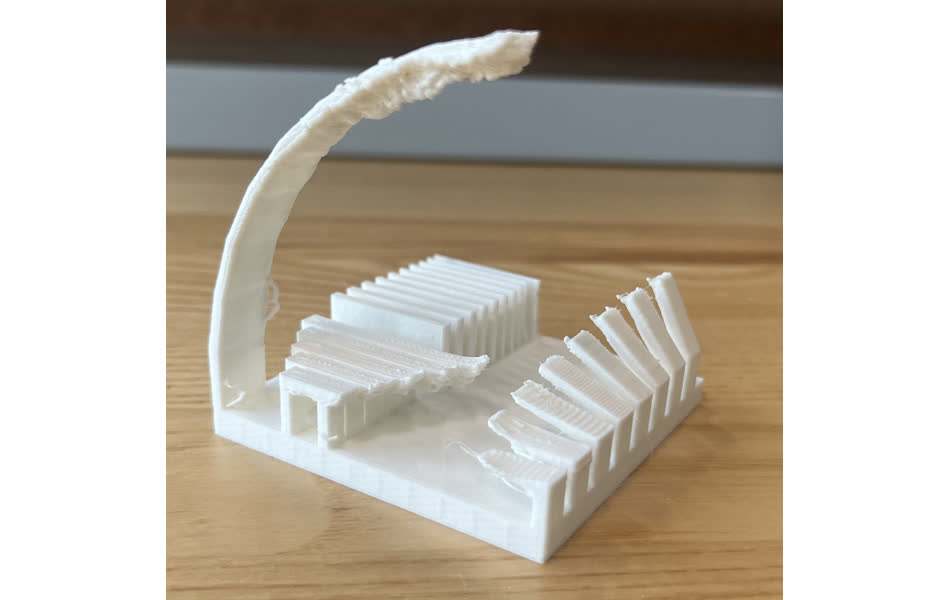
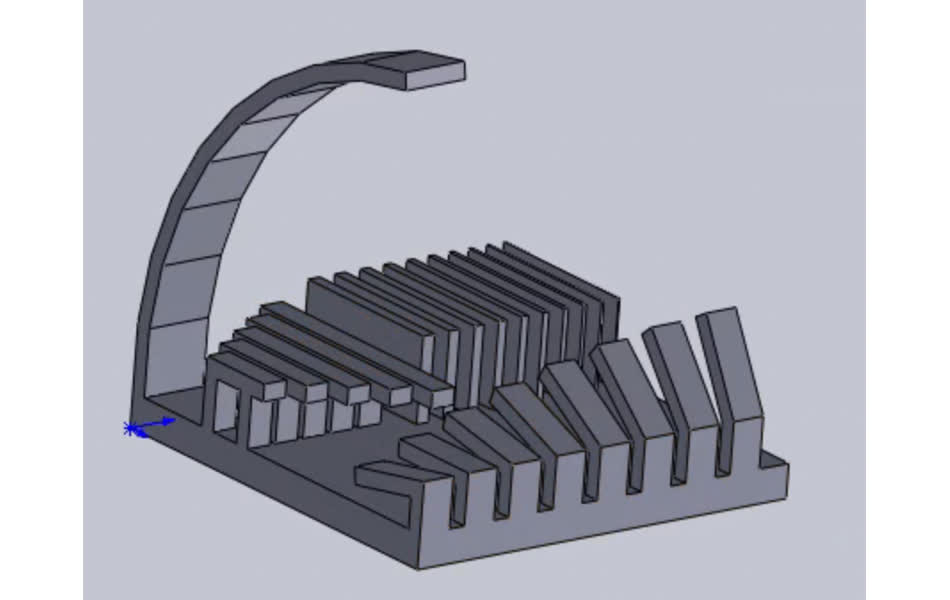
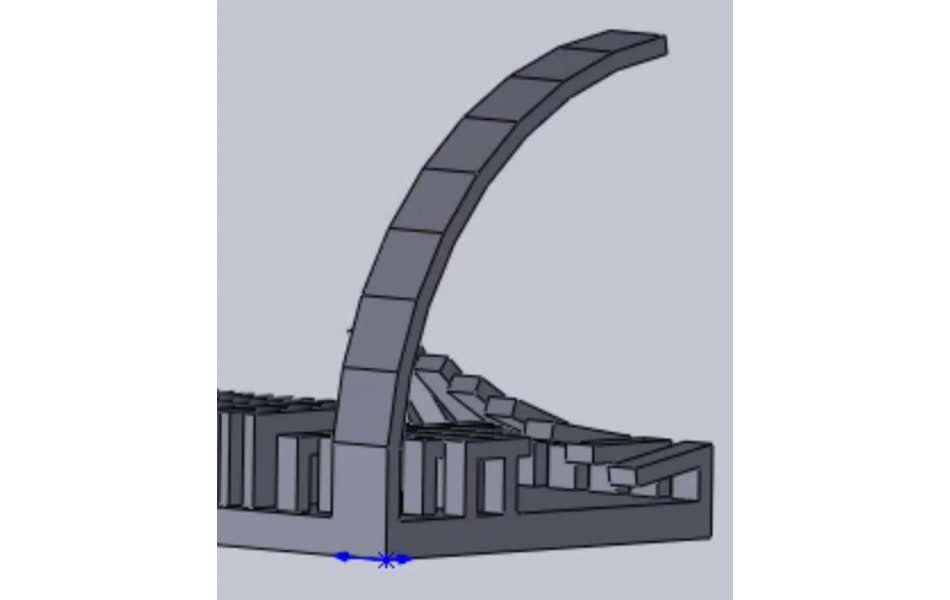
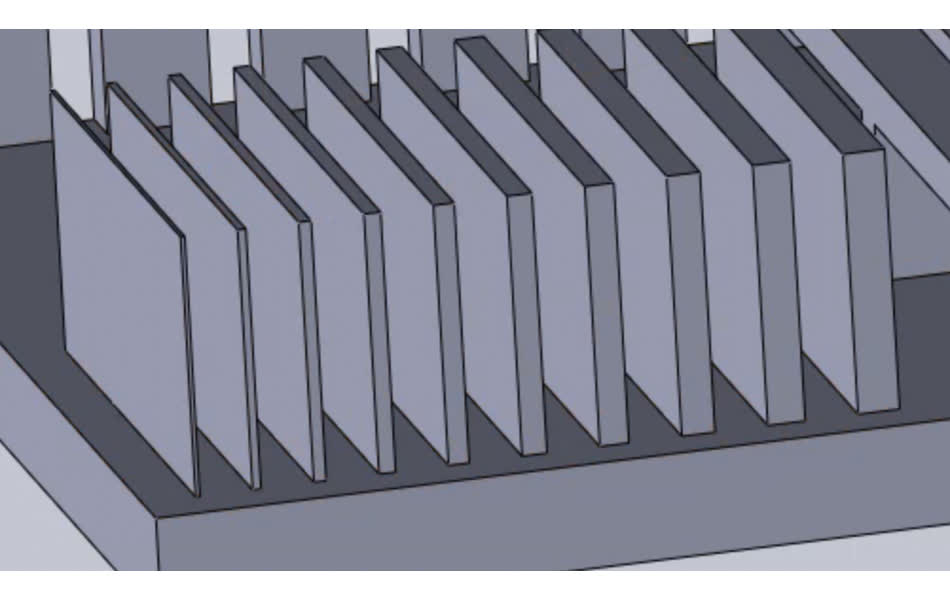
Our task this week was to identify 3D printer capabilities by challenging it's wall thickness, overhang, and bridging performance.
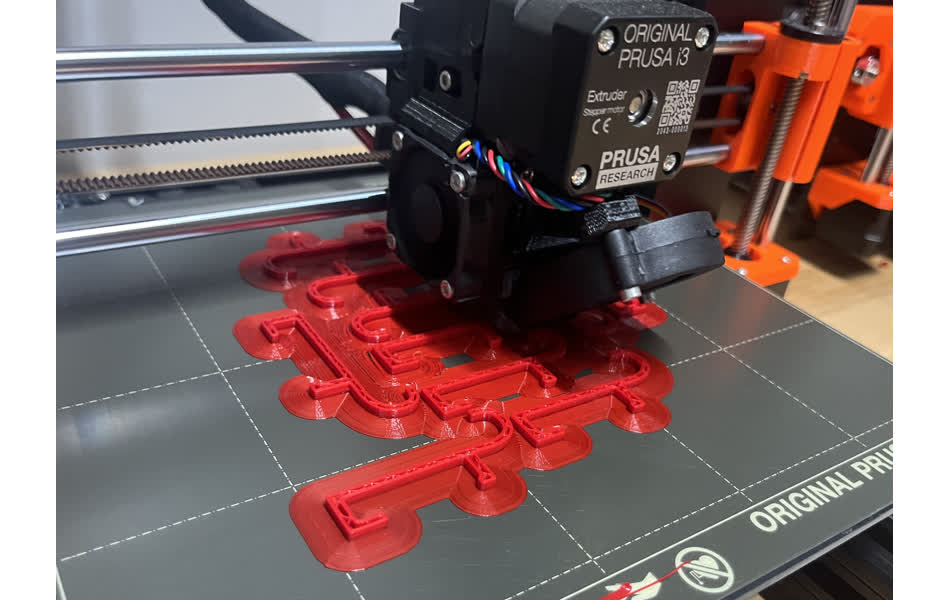
I tested overhang angle, length, bridge length, and wall thickness, all without support. This was with a prusa MK3 printer, and the stl was sliced with UltiMaker Cura software.
- Overhang Angle
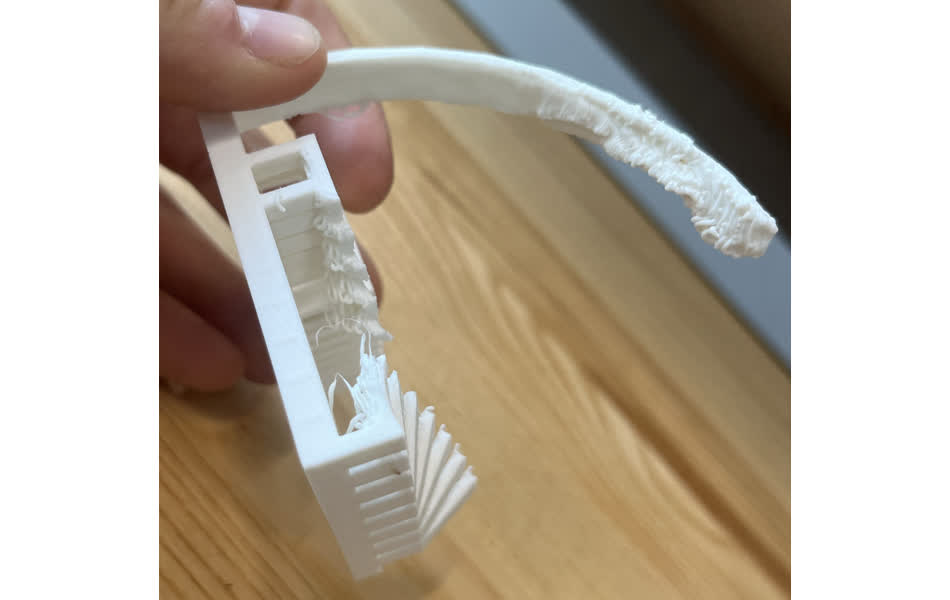
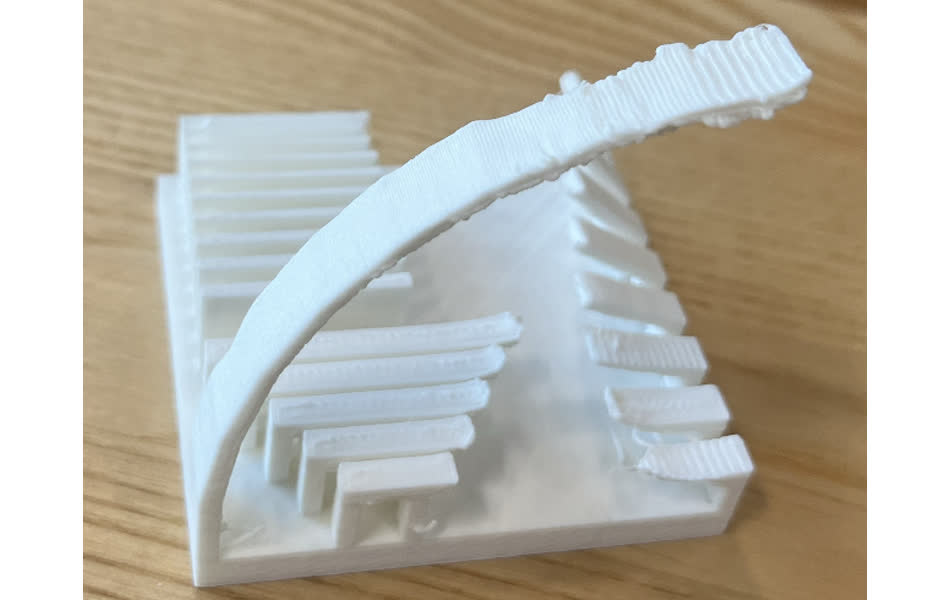
- Continuous Angle Increment Overhang: a single arc created by decreasing angle relative to horizontal by 10 degrees every 0.4 inches from 90 degrees to 10 degrees.
- The printer performed well until angles above 40 degrees
- At less steep angles there is significant bulging and sagging
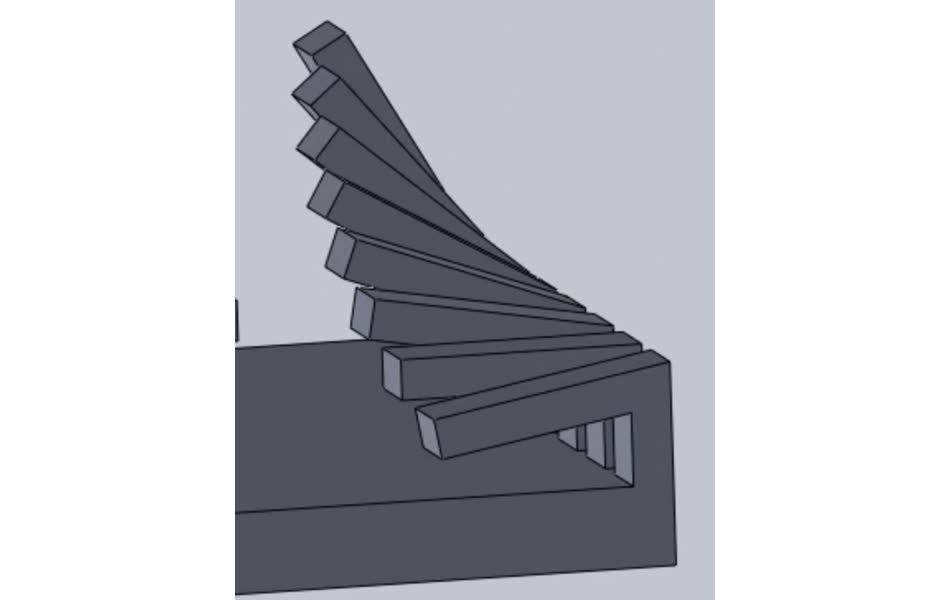
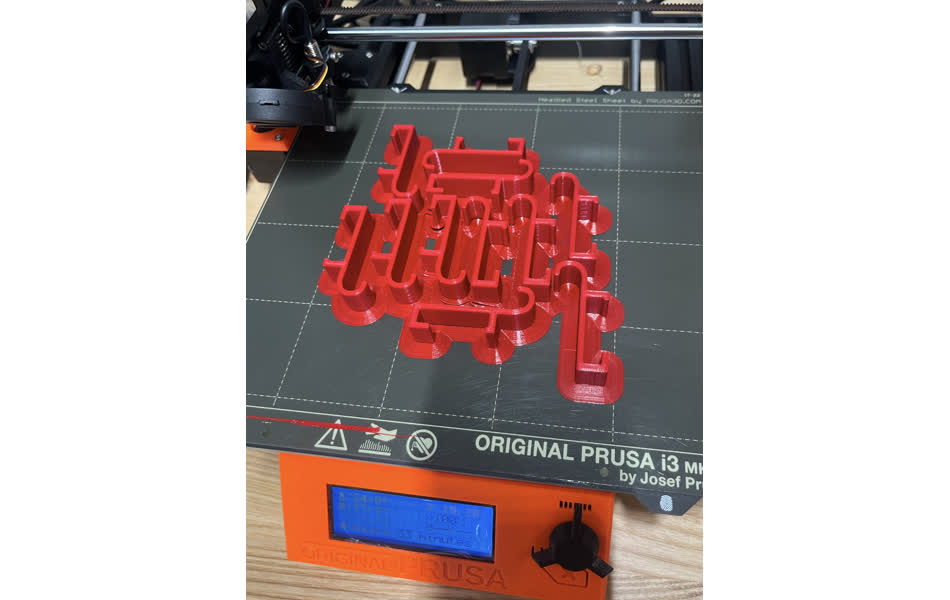
- Isolated Angle Increment Overhang: 8 independent 0.6 inch overhangs varying by 10 degrees from -10 to 60 degrees.
- I realized it was impossible for the printer to print a negative angle overhang, so the first increment was an oversight
- The printer performed well with overhangs above 30 degrees.
- At lower angles, the bottoms of the overhangs have significant printer slop
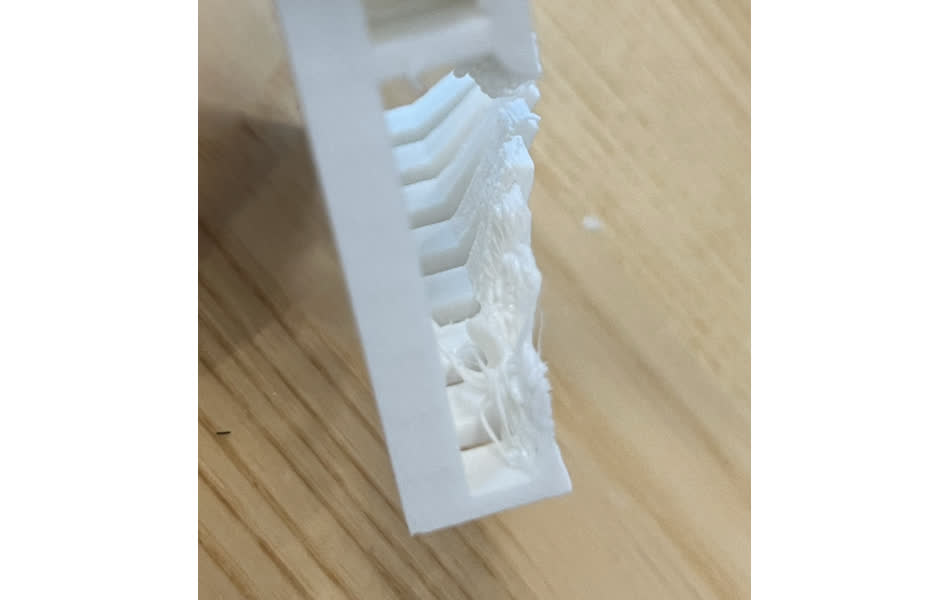
- Overhang Length
- Zero Degree Overhang With varied lengths from 0.1 inches to 0.6 inches by 0.12 inch increments
- All of these looked bad
- There was more bulging, stringing, and sagging as the overhang length increased
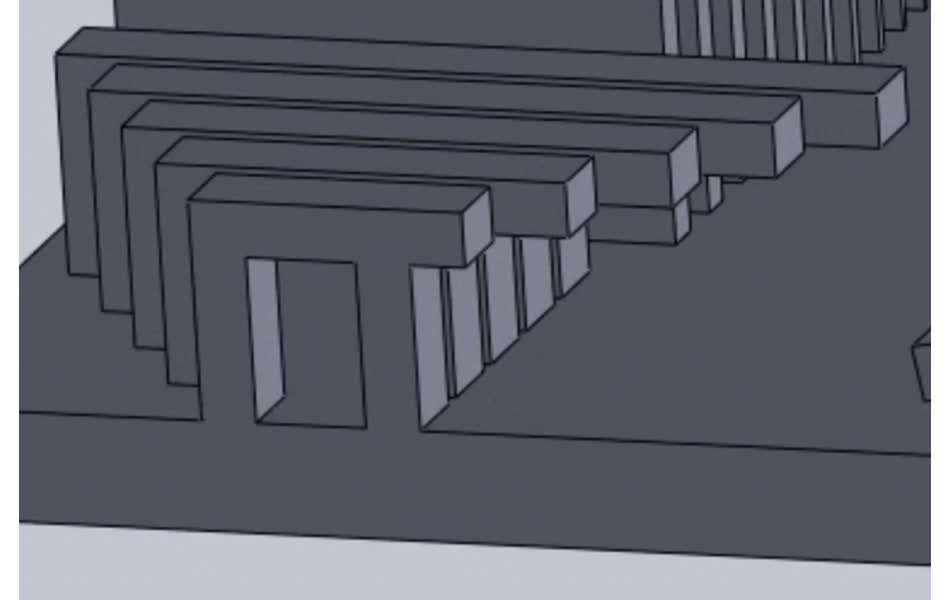
- Bridge Length
- Bridge with varied distance gap from 0.2 inches to 0.7 inches
- These were surprisingly good
- There was some insignificant bulging on the underside of the bridges
- Wall Width
- Wall width varied from 0.2 mm to 2 mm by 0.2 mm increments
- These were also surprisingly good
- There were some printer artifacts at the three thinnest layers, and their lengths were inconsisntent
- The thinnest wall was very weak
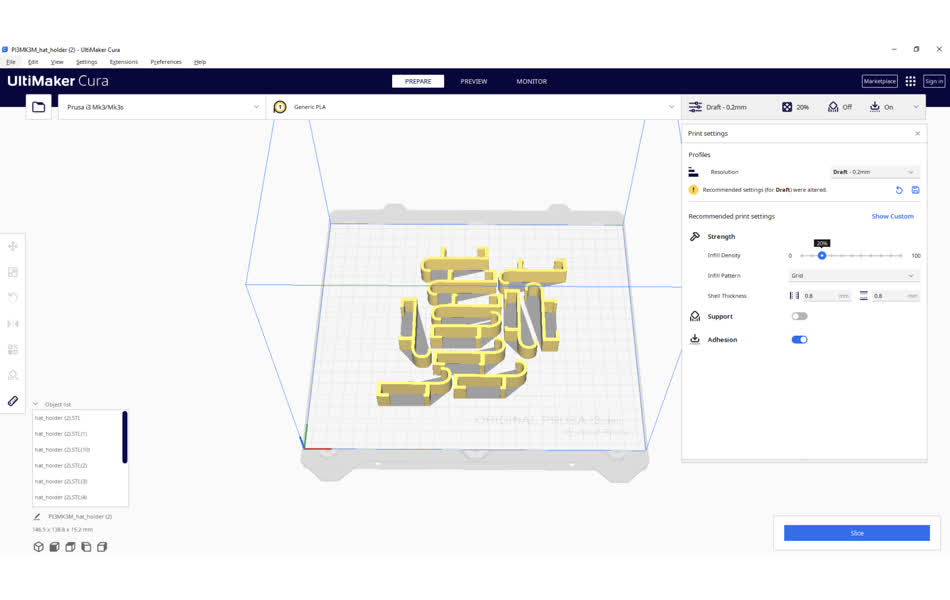
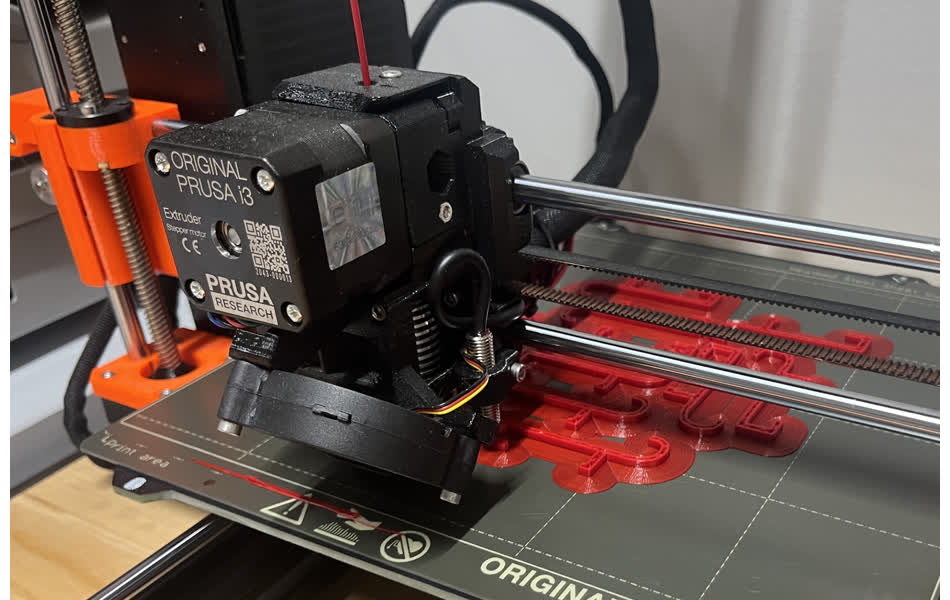
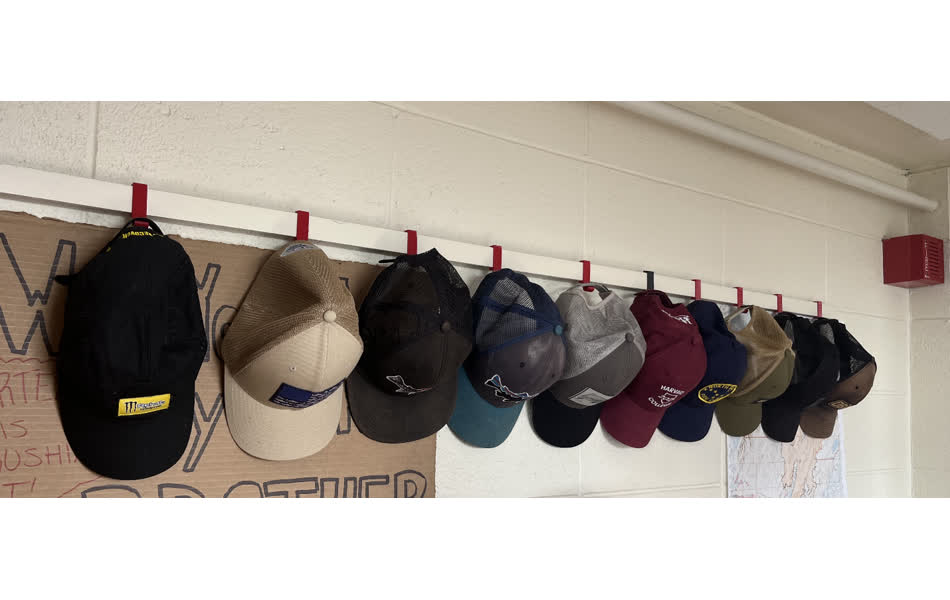
Next, I made hat hangers that fit onto a bracket in my room.
They make a nice satisfying snap as they clip in, which is pretty cool.
I made a simple design in solidworks, and printed a big batch on the Prusa Mk3. Below is an image of the sliced rendition on the UltiMaker Cura software, followed by some pictures of the print in progress.
Here they are. Organizing my room.

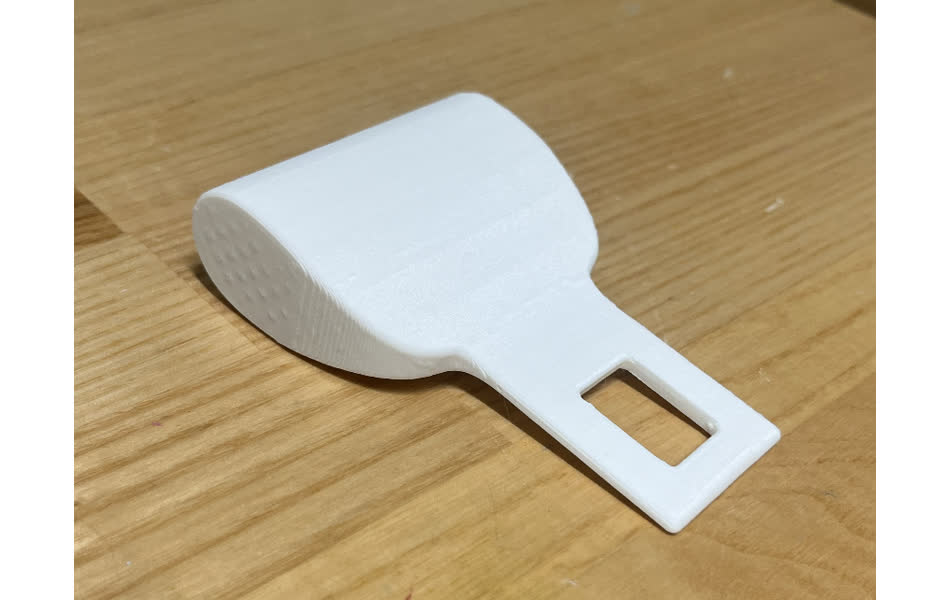
I also made a seatbelt buckle. Let me explain. I do a lot of camping, huting, fishing, and hiking in areas that require remote access, usually involving some offroading to get there. This involves a lot of stop and start driving, and I often get out of the car to take in views or analyze road obstacles. Constantly buckling and unbucking is cumbersome, and the car alarm is even more unbearable. Therefore, I 3D printed a seatbelt buckle with the same dimensions as a seatbelt. Afterall, I'm not going fast enough on those roads to require the seatbelt functionality.
3D Scanning
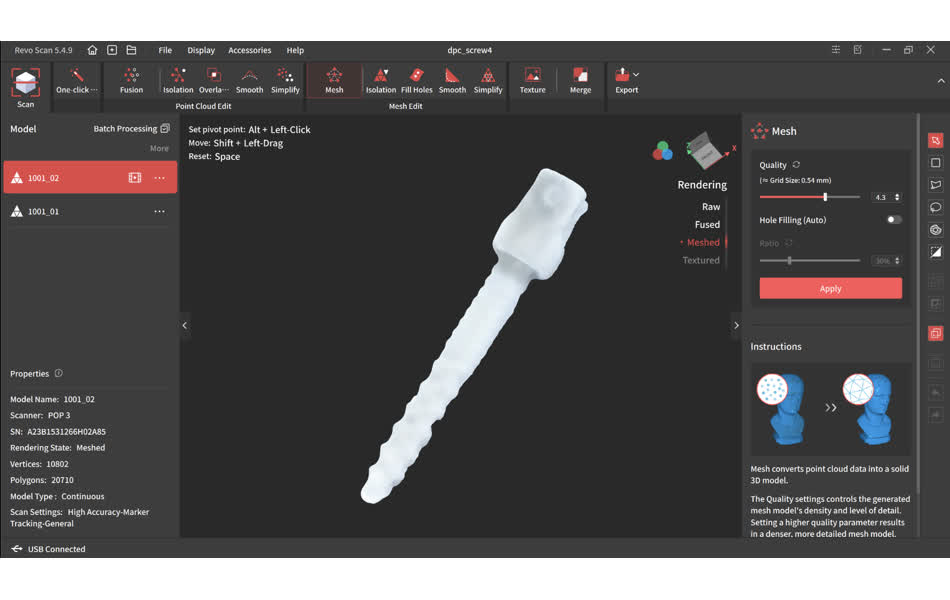
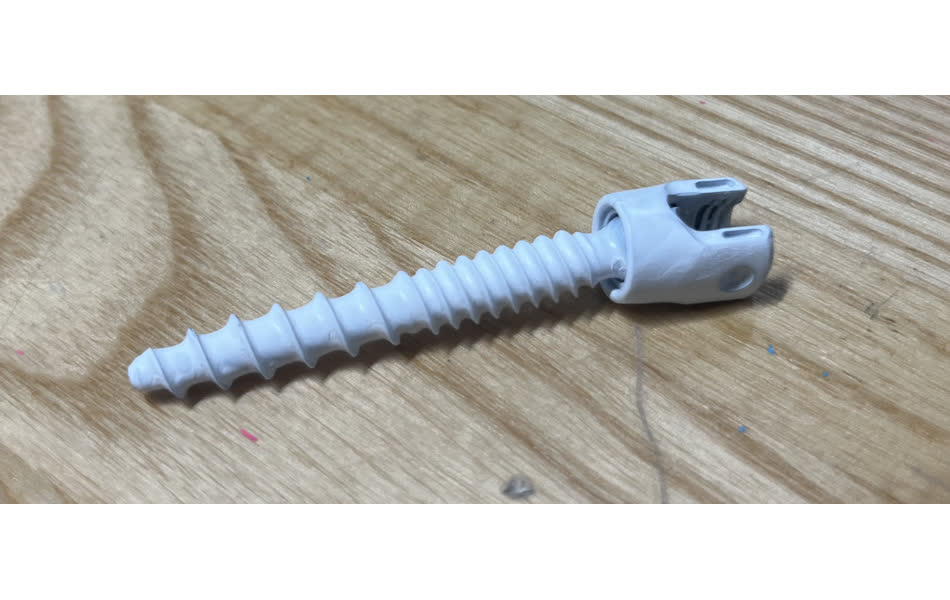
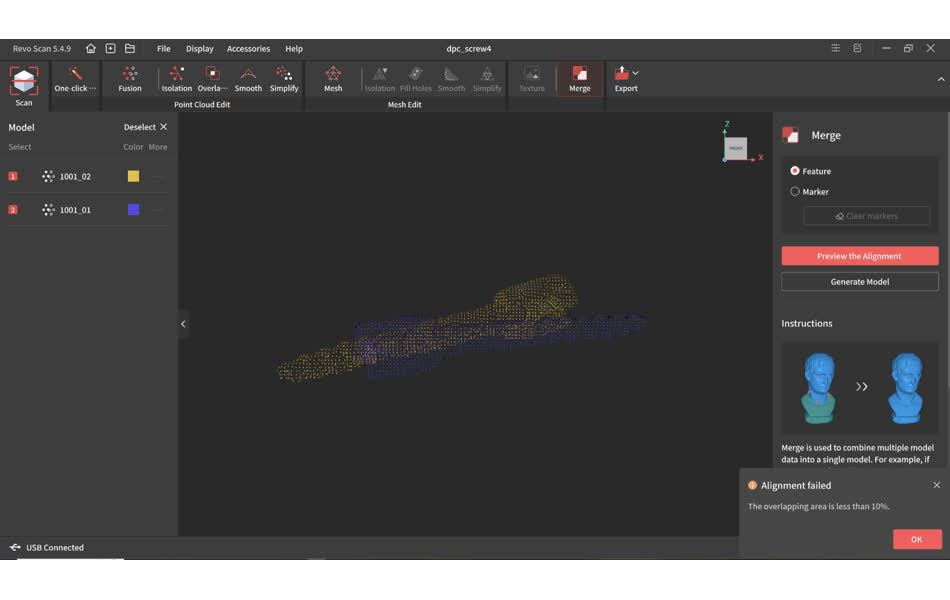
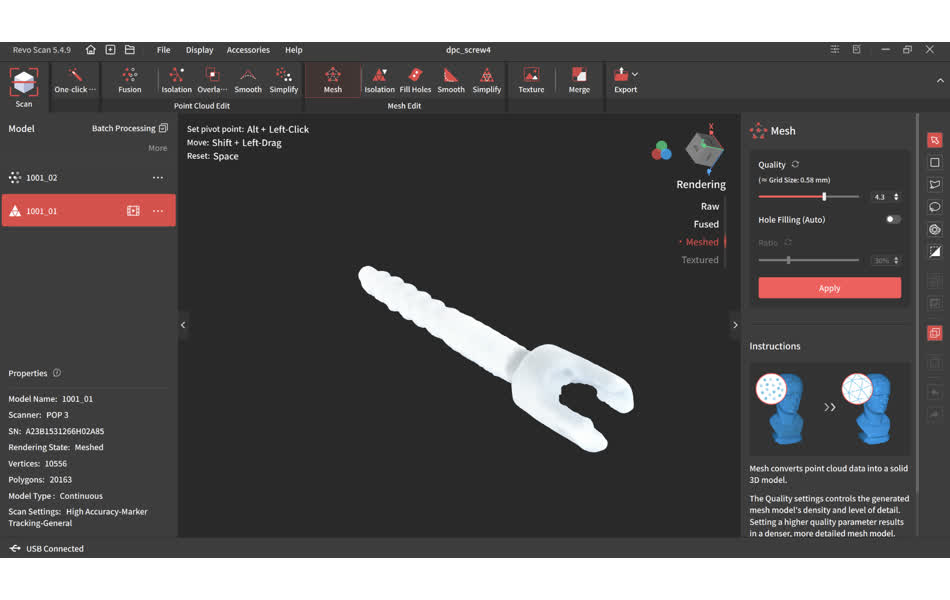
I did the part of the assignment with the revoscan 5 in the makerspace. I first tried scanning a pedicle screw, which is relevant to my project. The objective was to be able to use the stl from the scan for finite element modeling. The small size and reflective surfaces made this very challenging.
Here's what I made

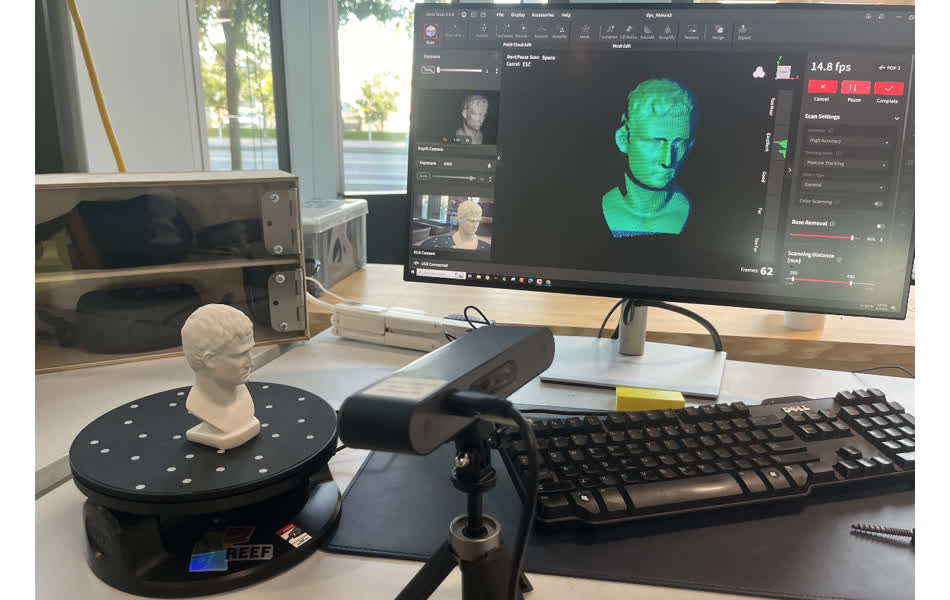
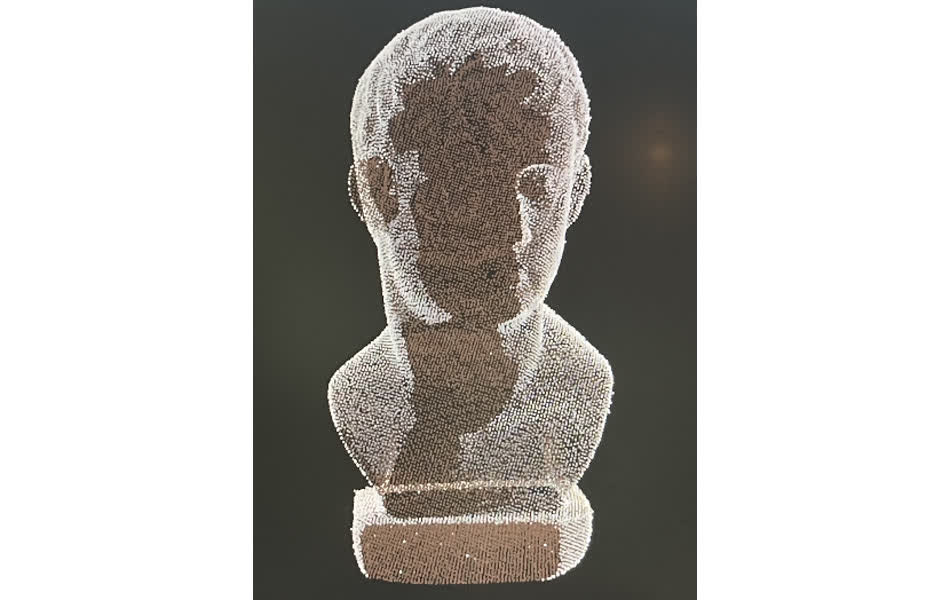
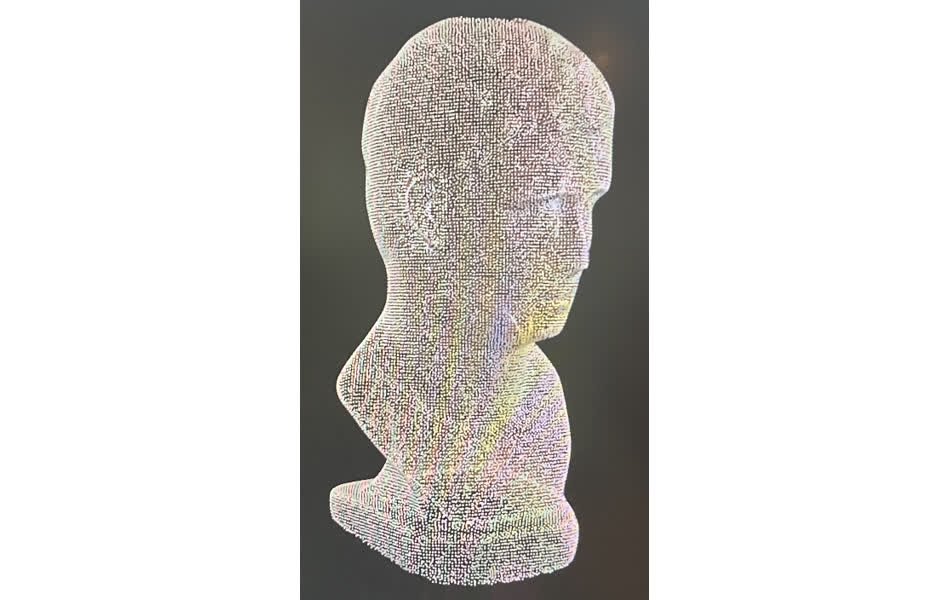
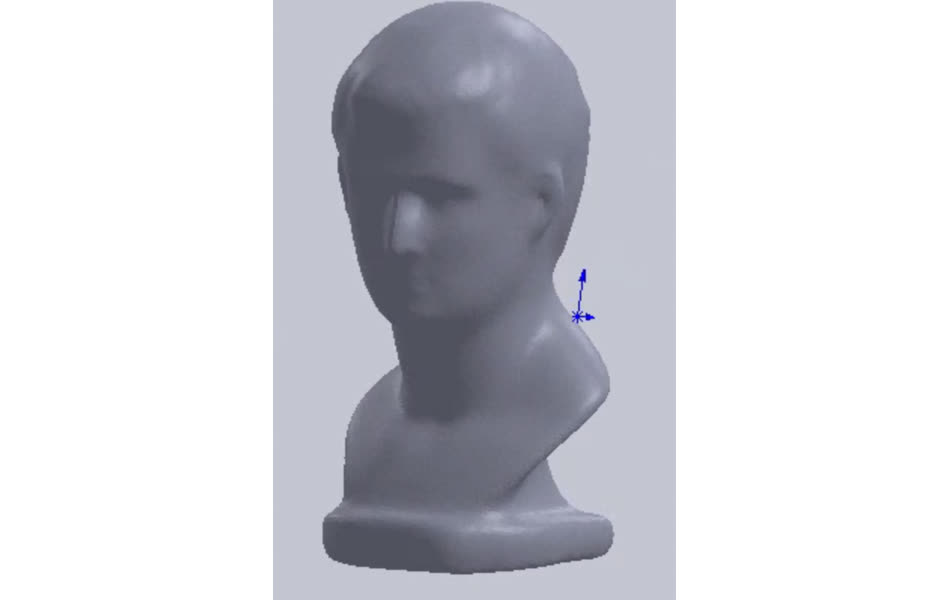
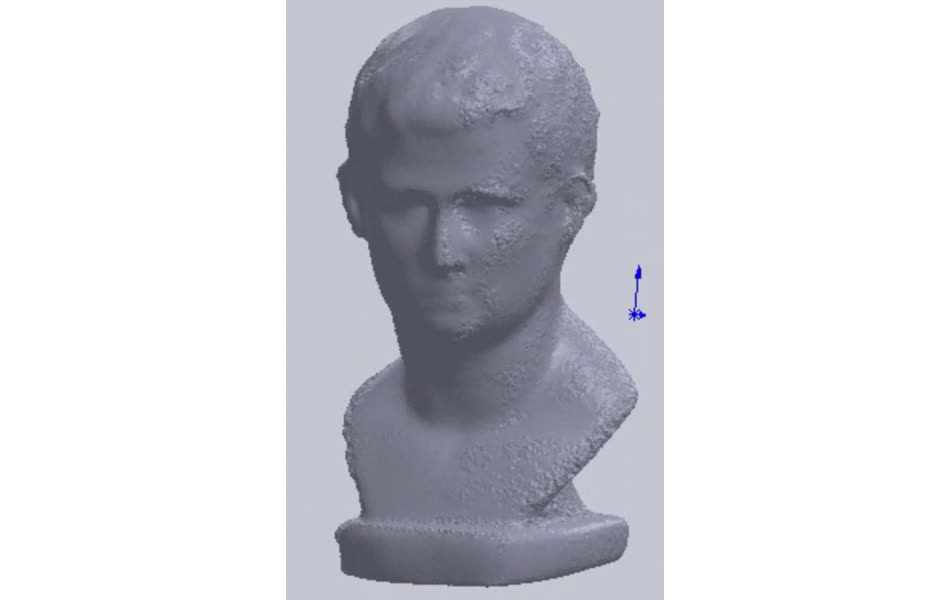
Next, I scanned a face, which was the standard sample that came with the sample.
I set the fce on the rotating table and started the scan with the face in the upright orientation. Here's my setup.

With the familiarity I gained by scanning the face, I wanted to retry scanning the screw.
I started by spray painting it matte white.
Heres's all my files for this week Week 4 Files