#10 remote servo
during this week i tried to make my xiao seeed esp32-c3 connect host a local network and website through which i want to control a simple servo motor. in the long run i hope to control a my final projects spraycan actuator with it, and maybe even find a way in which i can load a gcode and manual control to my device. but for now, i try to look into how to host a web html interface through the xiao
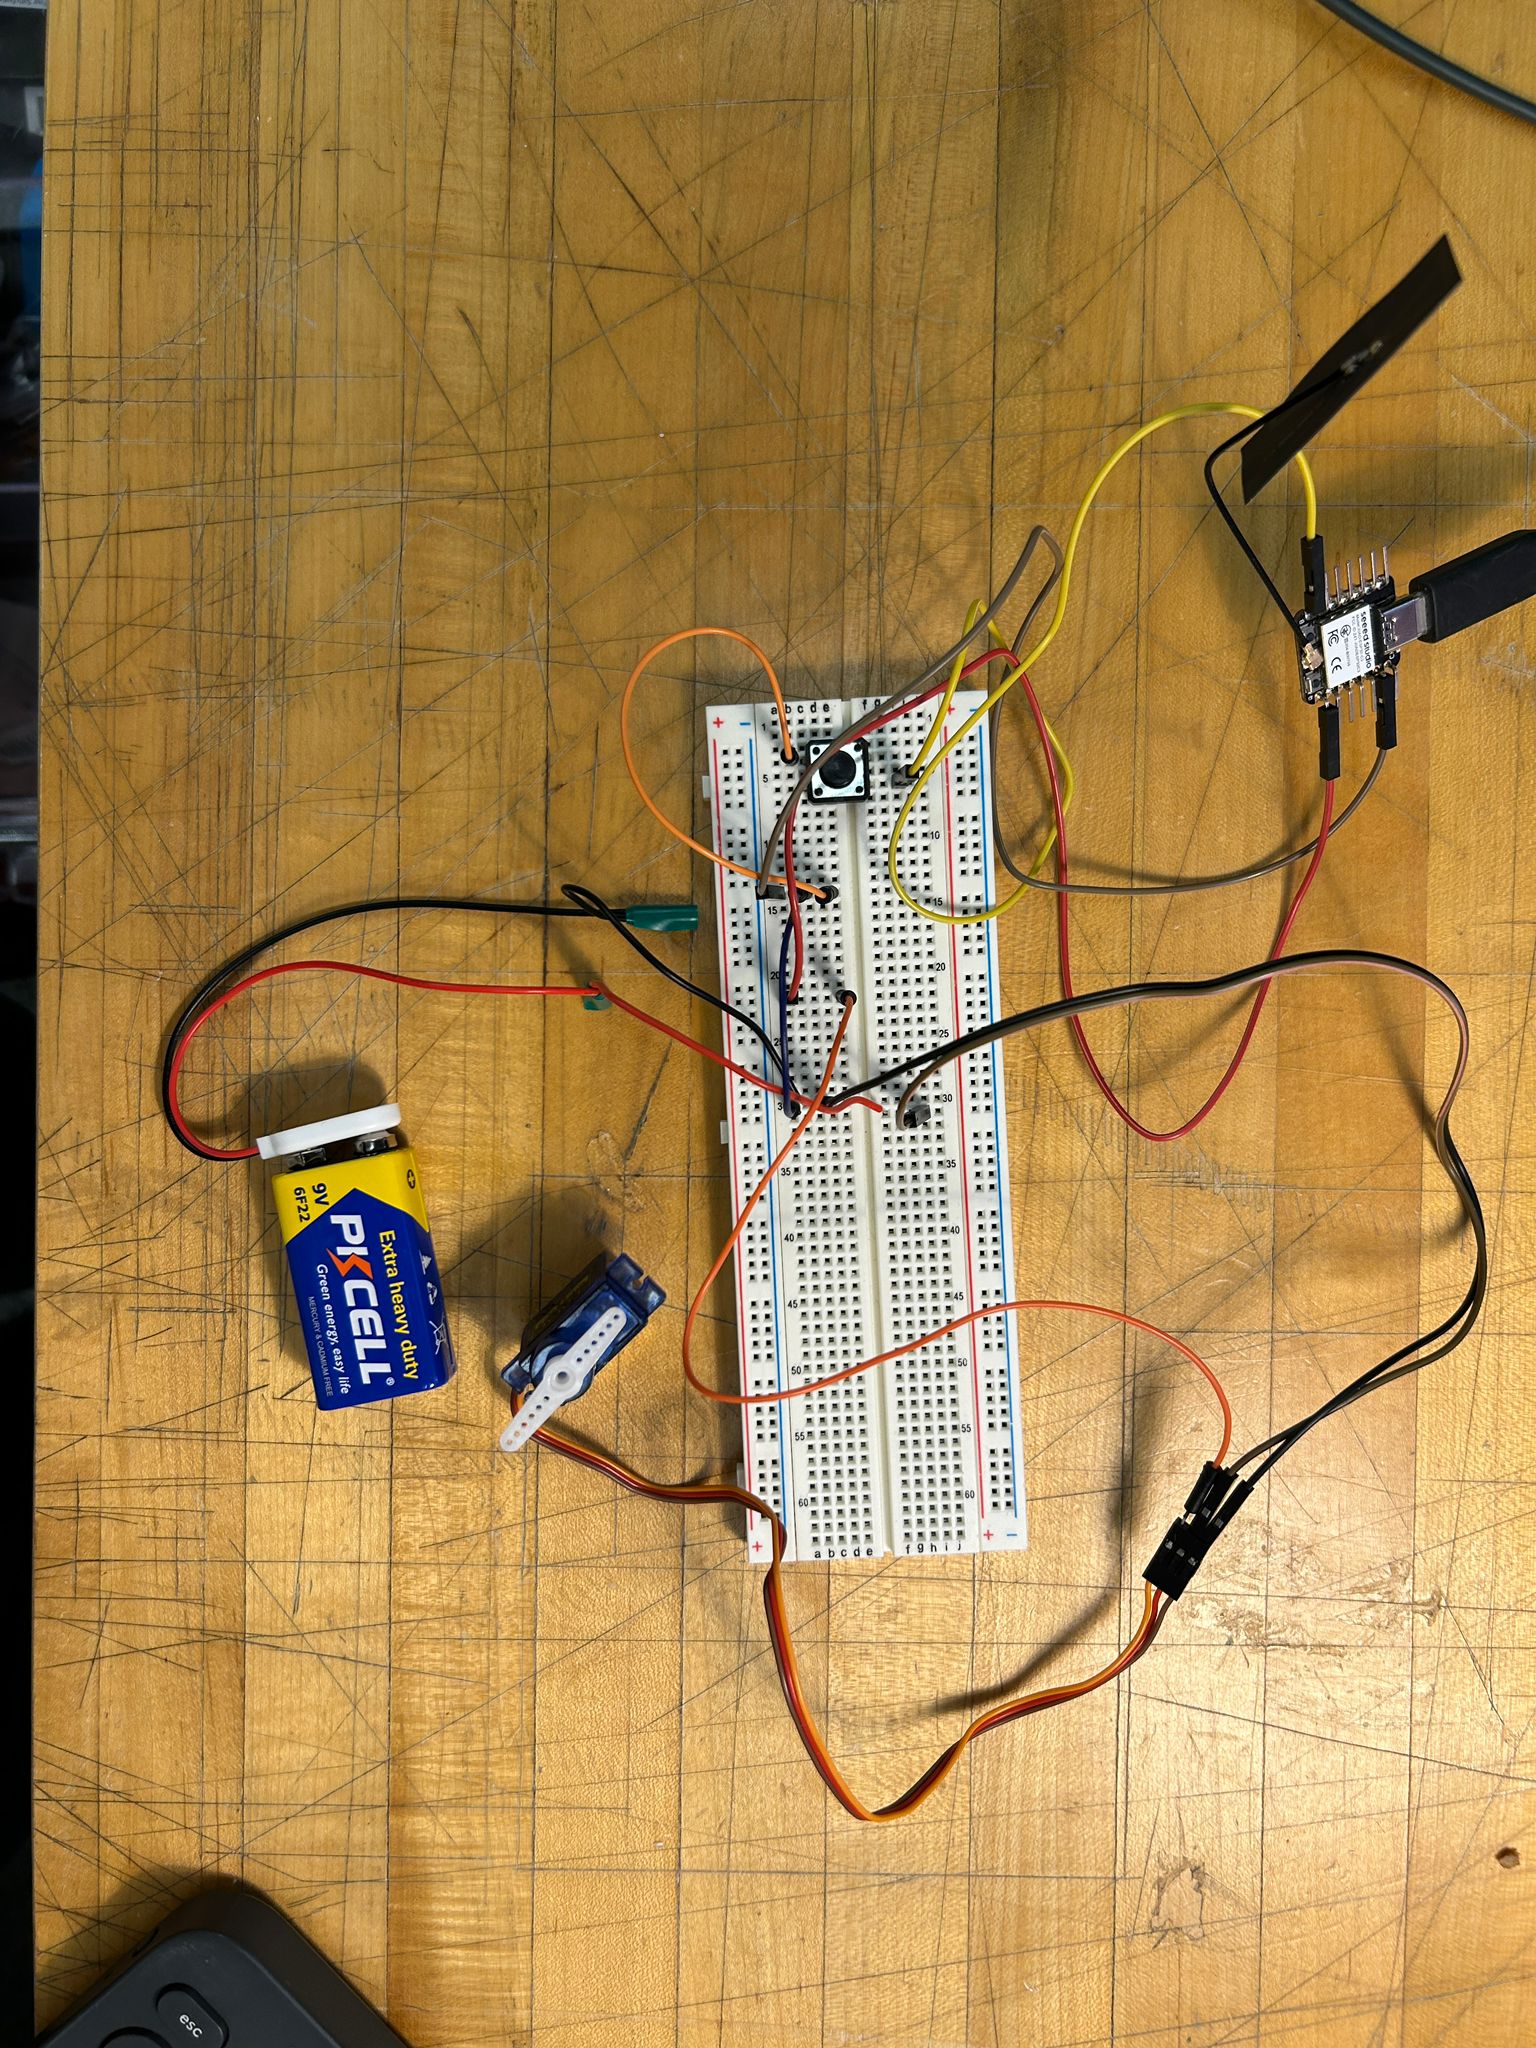
since my pcb broke i decided to make it work with a breadboard. the esp is connected to a button and the servo, and the ground is running through the servo while also connecting to the ground of the external power supply that would provide the servo. the microcontroller is actually just powered through the usb-c cable (through the computer). the external power supply is technically not necessary for such a small servo motors, since it is unlikely that this motor causes any current to run into my pc, but it seems to be best practice (especially since i hope to run a larger servo motor later)
to start of with this, i was looking into the example on the class website called "hello.Web-blink.py" where niel shows a similar setup,
controlling a led both through a button as well as through the website hosted by the esp32-c3.
starting from this, i initially just recreated the example. i had to flash the esp32-c3 to install python, and the open the python scripts in the
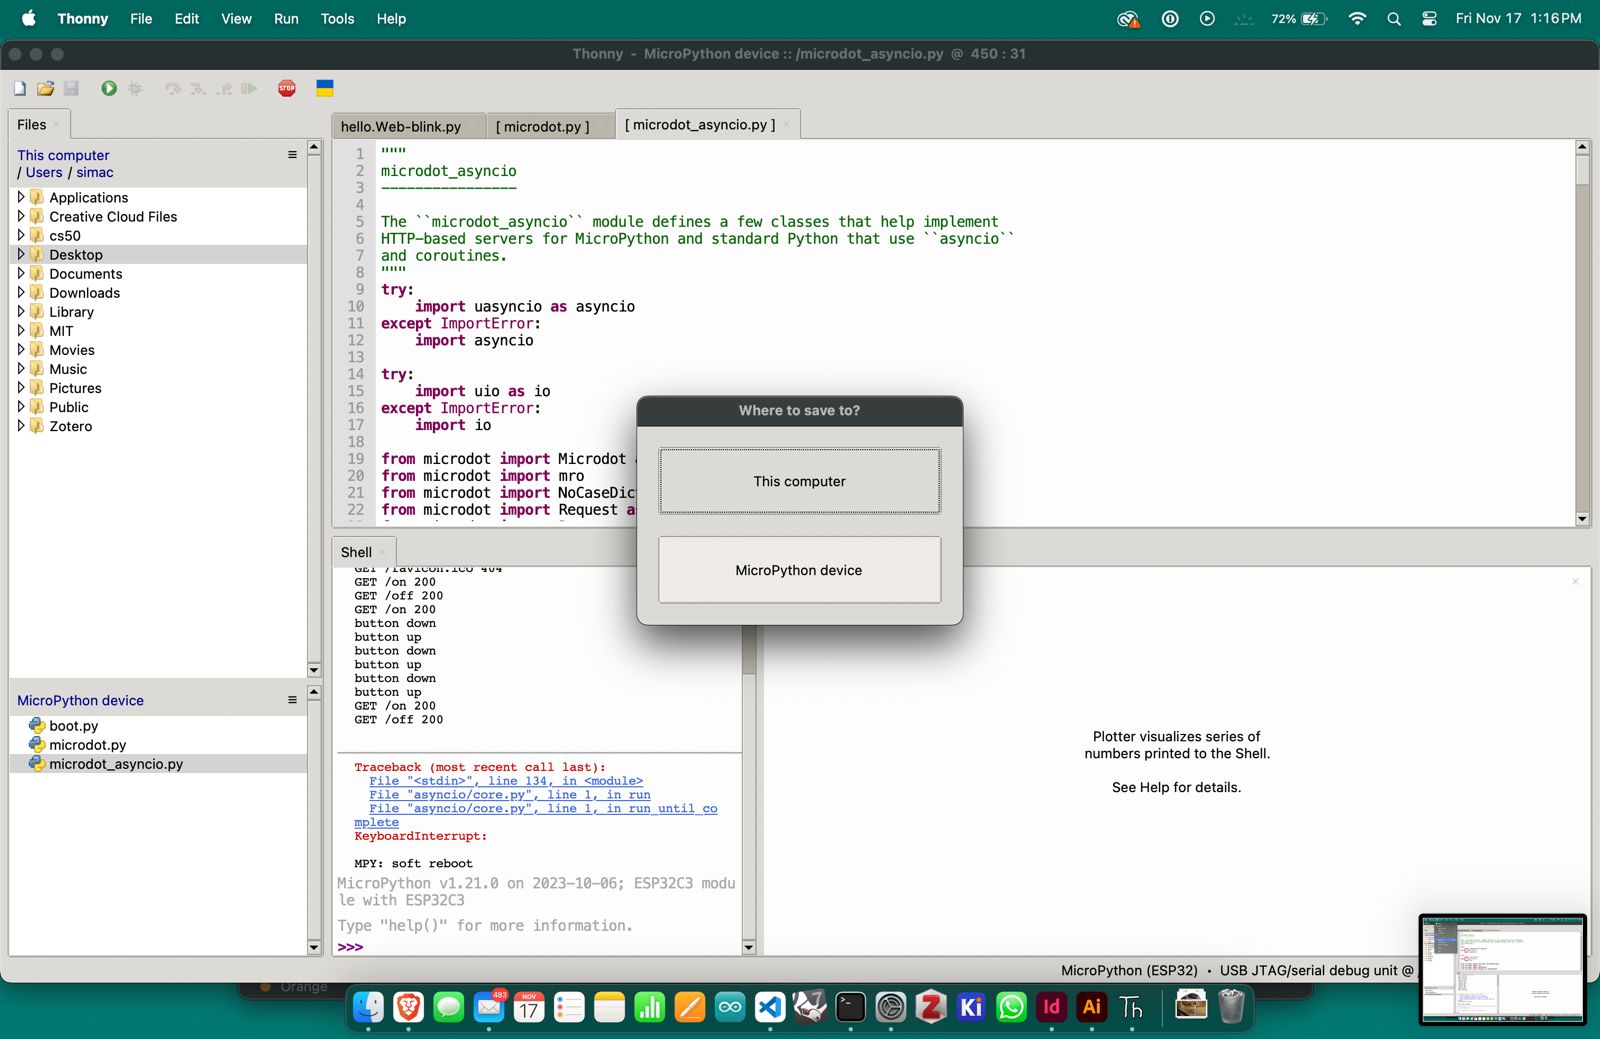
Thonny IDE. once everything is ready, i opened all 3 files required for this exercies, comprised by "hello.Web-blink.py", "microdot.py", as well as "microdot_asyncio.py".
once connected with the esp32-c3 i had to run the "microdot.py", as well as "microdot_asyncio.py" and save them not to "this computer" but to the "MicroPython device", since
these are the files the actual code will call upon to set up the communication in between the ip network and the device itself.
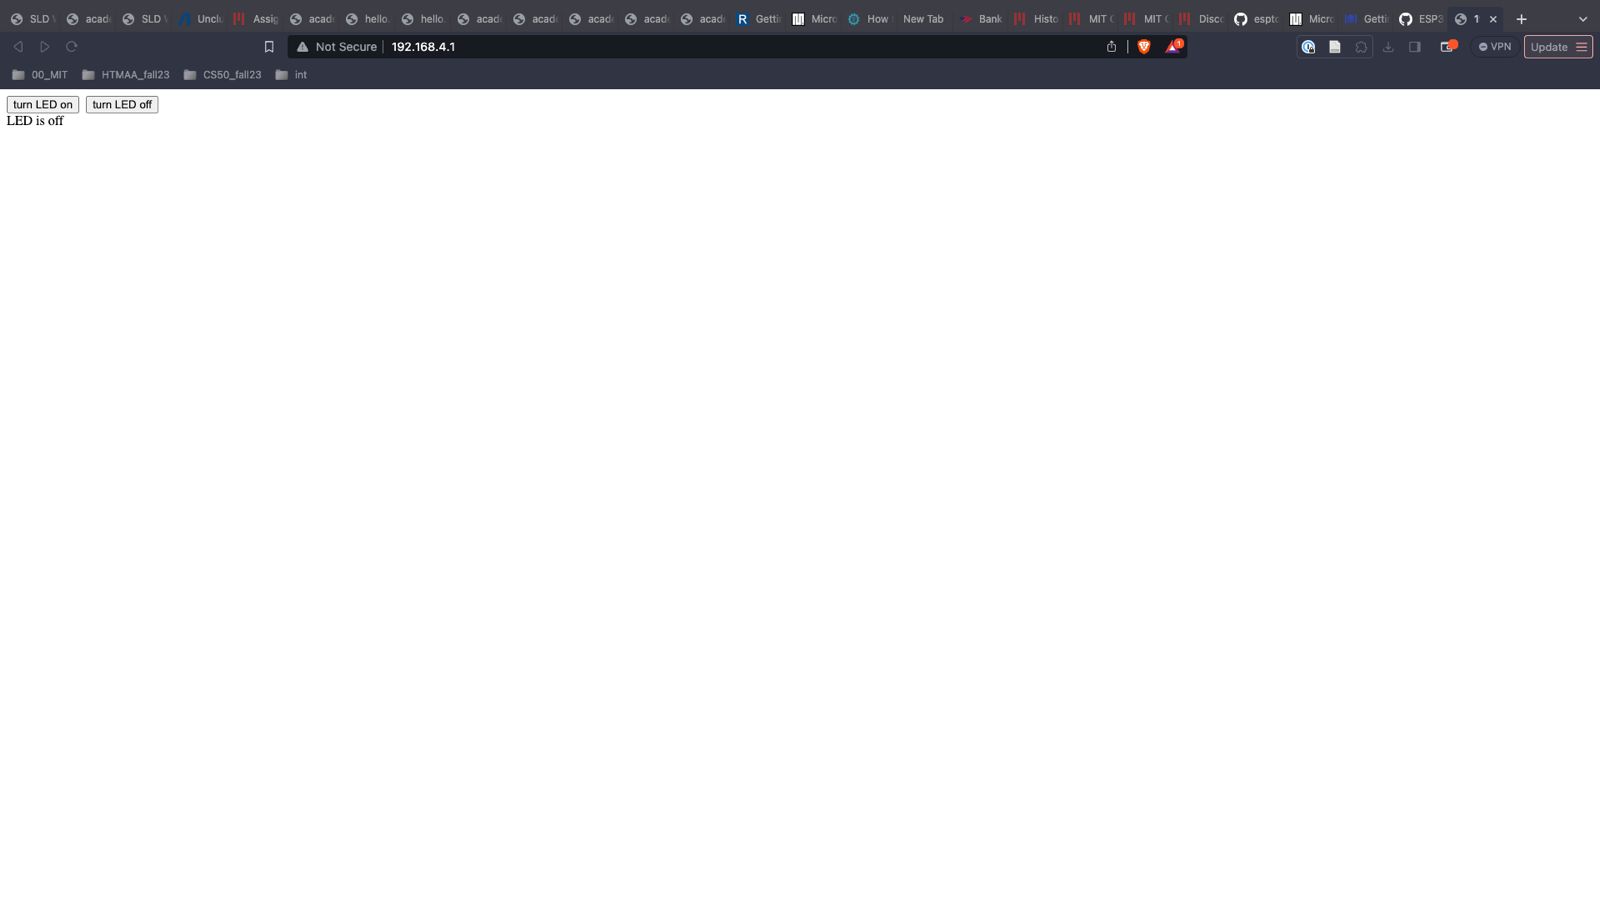
once this was done, i was able to run the "hello.Web-blink.py" script, and search for the wifi network called "fab" and connect with it. once this connection is established, i can go to the ip address (defined in the hello.Web-blink.py), in my case 192.168.4.1, and i should see the website that was built as html code in the .py script.
after this worked, just like in niels example, i wanted to re use it so it would be working with my servo insted of the led. while this might not be a difficult task for many, having never done anything like this before i started by simply controlling the servo using micropython in thonny.
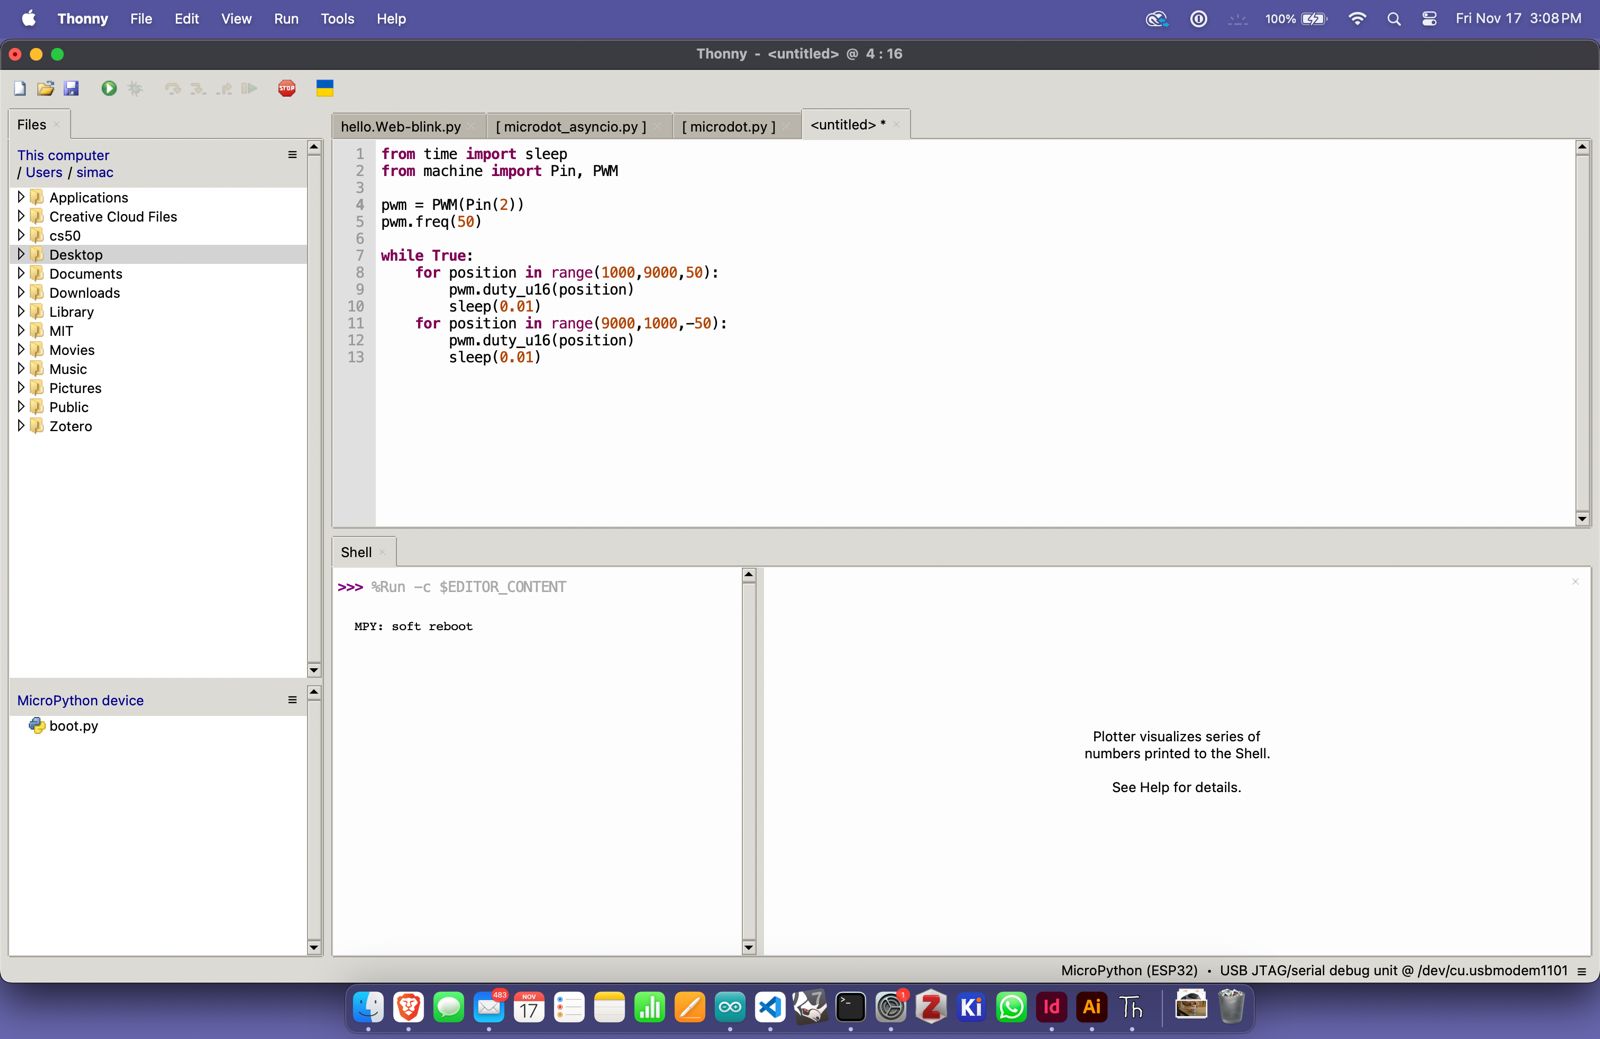
the code for this is simple, i define the pin (in my case pin #2) which is the the orange wire of the small servo, define a pwm frequency, and went on to set a case for the duty cycles positions ranging from 50 to -50, so it would go back and forth in between these two positions.
here is the code for this simple rotation:
from time import sleep
from machine import Pin, PWM

pwm = PWM(Pin(2))
pwm.freq(50)

while True:
for position in range(1000,9000,50):
pwm.duty_u16 (position)
sleep (0.01)
for position in range(9000, 1000,-50):
pwm. duty_u16 (position)
sleep (0.01)
from this point it was time to implement this logic into the hello.Web-blink.py from neil.
here is the code i came up with (as an alteration of the original led blink), i had to insert some *** in between the html related functions of this code, since this website is written in html, and it would try to alter my website's formating:
                    from time import sleep
from machine import Pin, PWM
import network
import uasyncio as asyncio
from microdot_asyncio import Microdot,Request,Response
#
led_pin = 20
button_pin = Pin(21, Pin.IN)
led = Pin(led_pin,Pin.OUT)
button = Pin(button_pin,Pin.IN,Pin.PULL_UP)
button_up = True

pwm = PWM(Pin(20))
pwm.freq(50)
#
# start Wifi access point
#
wifi = network.WLAN(network.AP_IF)
wifi.config(ssid='fab',key='class')
wifi.active(True) # 192.168.4.1
while (wifi.active() == False):
  pass
print("AP started at",wifi.ifconfig())
print("ssid: fab, key: class")
#
# connect to Wifi access point
#
'''
wifi = network.WLAN(network.STA_IF)
wifi.active(True)
while (wifi.active() == False):
   pass
wifi.connect("ssid","key")
while (wifi.isconnected() == False):
   pass
print("connected to AP at ",wifi.ifconfig())
'''
#
# create Web server
#
server = Microdot()
#
# root Web page
#
def root_page():
    html = '''
<***!DOCTYPE html>
<***html lang="en">
<***head>
<***script>
function TurnOn() {
   fetch('on')
    .then(response => response.text())
    .then(data => {
         document.getElementById('message').innerHTML = data
         })
   }
function TurnOff() {
   fetch('off')
    .then(response => response.text())
    .then(data => {
         document.getElementById('message').innerHTML = data
         })
   }
<***script>
<***/head>
<***body>
<***button onclick='TurnOn()'>turn motor on<***/button>
<***button onclick='TurnOff()'>turn motor off<***/button>
<***div id='message'><***/div>
<***body>
<***/html>
    '''
    return html
#
# server routes
#
@server.get('/')
async def get_root(request):
    return root_page(),200,{'Content-Type':'text/html'}
@server.get('/on')
async def get_on(request):
    for position in range(1000, 9000, 50):
        pwm.duty_u16(position)
        sleep(0.01)
    for position in range(9000, 1000, -50):
        pwm.duty_u16(position)
        sleep(0.01)
    return "motor is on",200,{'Content-Type':'text/html'}
@server.get('/off')
async def get_off(request):
    pwm.duty_u16(0)
    sleep(0.1)
    return "motor is off",200,{'Content-Type':'text/html'}
#
# local task
#
async def local():
    global button_up
    while True:
        if button_pin.value() == 0:  # Assuming the button pulls the pin to ground when pressed
            for position in range(1000, 9000, 50):
                pwm.duty_u16(position)
                sleep(0.01)
            for position in range(9000, 1000, -50):
                pwm.duty_u16(position)
                sleep(0.01)
                print('motor on')
                button_up = False
        elif ((button.value() == 1) and (not button_up)):
            pwm.duty_u16(0)
            sleep(0.1)
            print('motor off')
            button_up = True
        await asyncio.sleep(0)
#
# main tasks
#
async def main():
    local_task = asyncio.create_task(local())
    server_task = asyncio.create_task(server.start_server(port=80,debug=True))
    await asyncio.gather(local_task,server_task)
#
# run main tasks
#
asyncio.run(main())
here is the download for all three files necessary to run this:
servo actuation via local web network
later i was able to actually build my spraypaint actuator and make it work with the same script (the pcb and laptop have not been in the video, since i had to test it in the spraybooth of the arch shop where strictly speaking, no electronics are allowed within 6ft of the spraybooth)