#2 large file size check
having had to chose between the rp2040 and the esp32-c3 without knowing what they are about, what the differences are and how the build in capabilities could be used, prompted my motivation to look at these two microcontrollers (while trying to understand the difference in between the implementation of the rp2040 in the seeed xiao vs. the raspberry pi pico w). looking at wiki.seeedstudio, we were able to identify how to connect and run arduino for the respective microcontrollers, as well as some simple led blinking applications and micropython experiments.
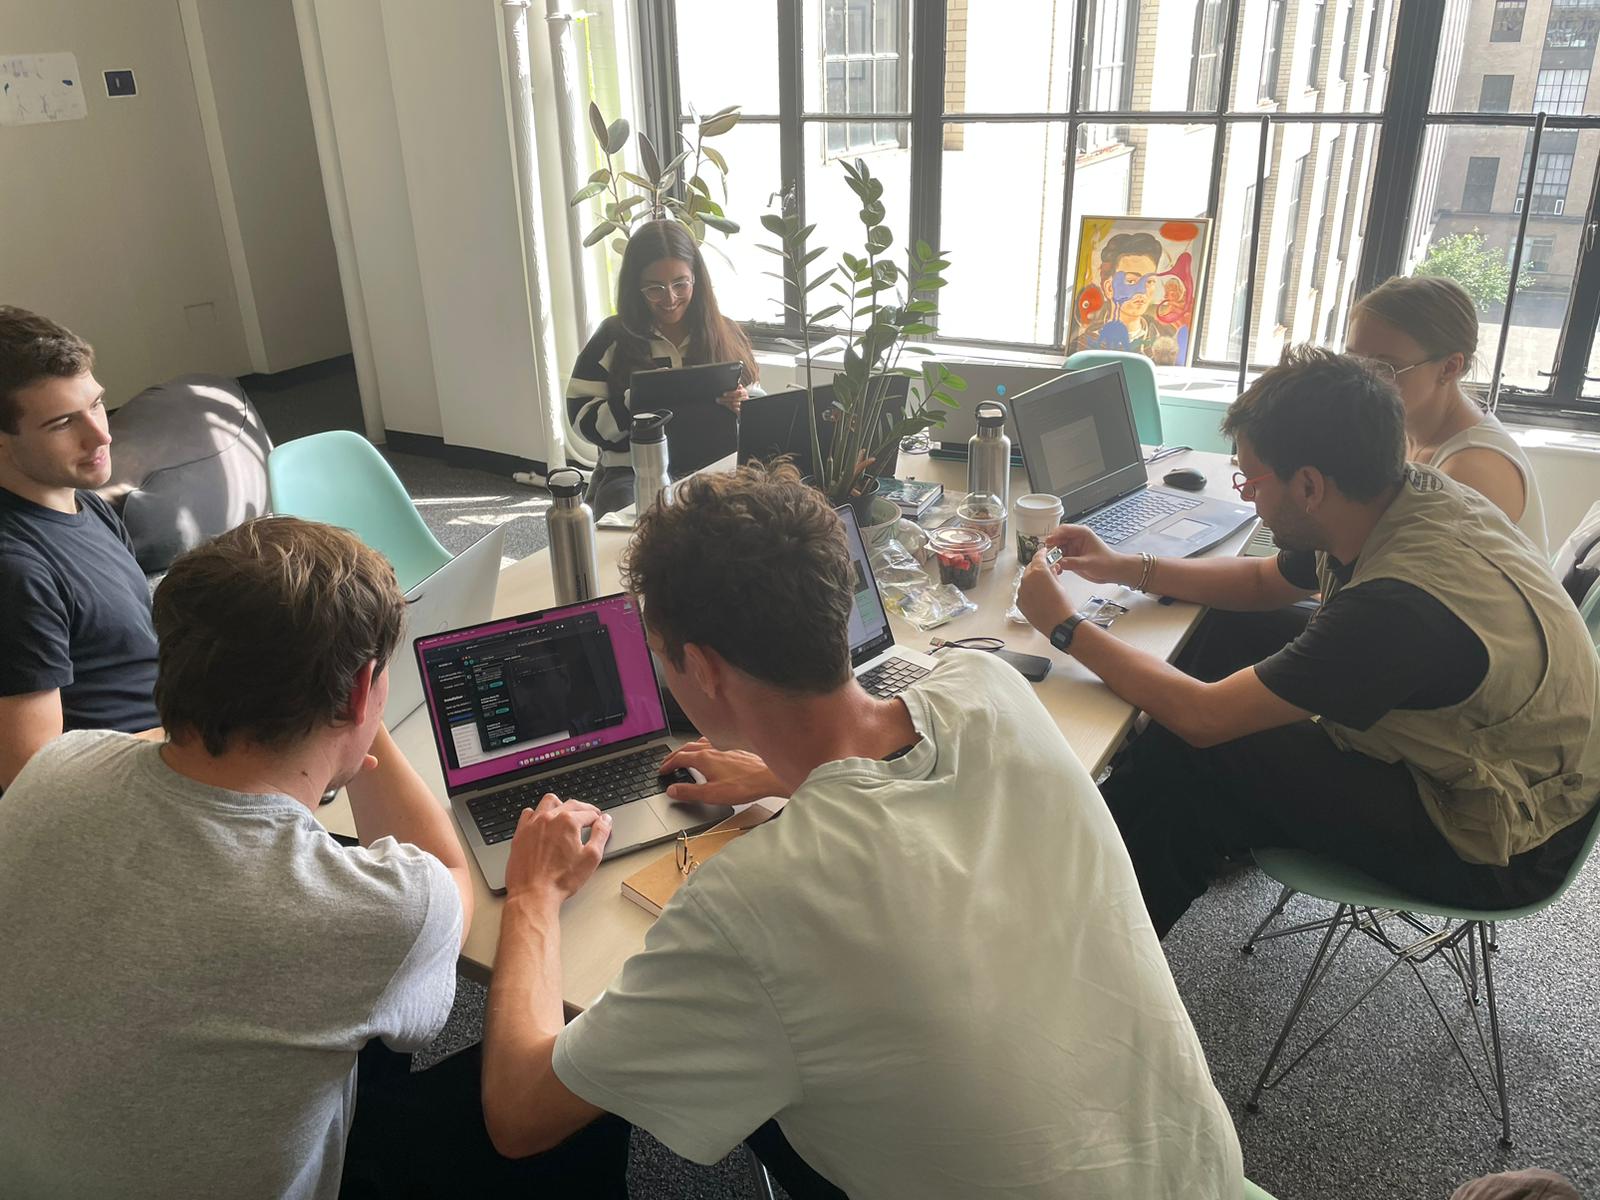
meeting with other students from the architecture section of the class, we discussed the opportunities and options on working with either chip and had the chance to compare their pinout diagrams.
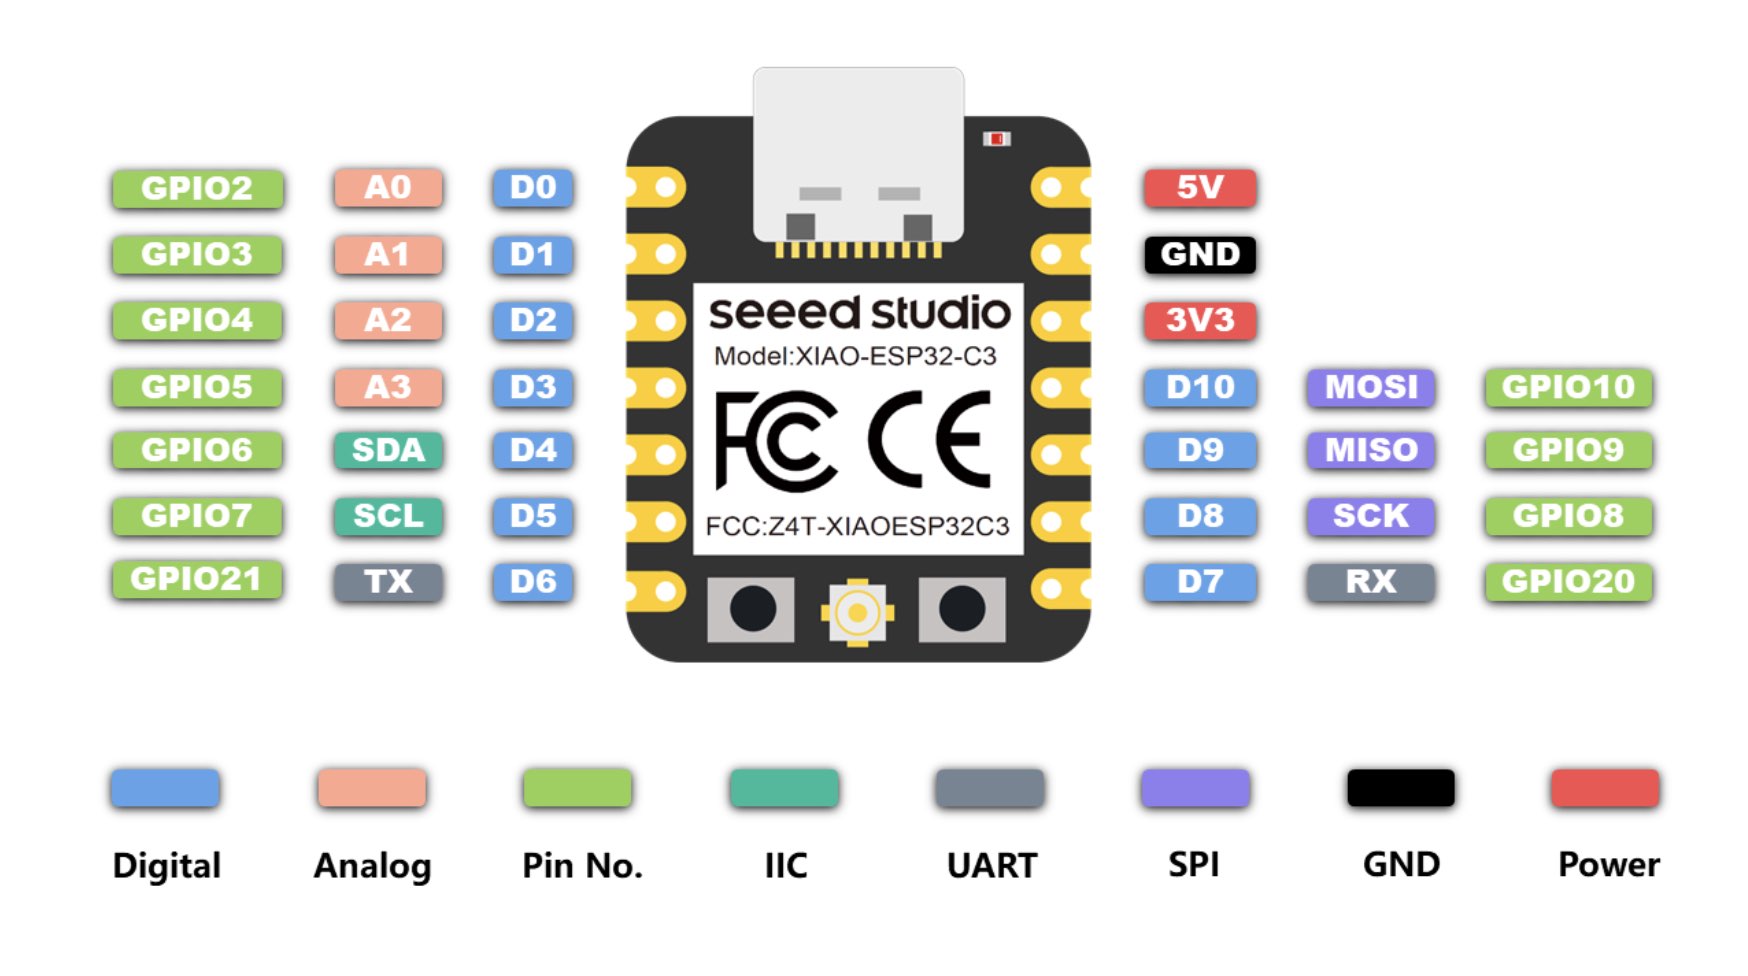
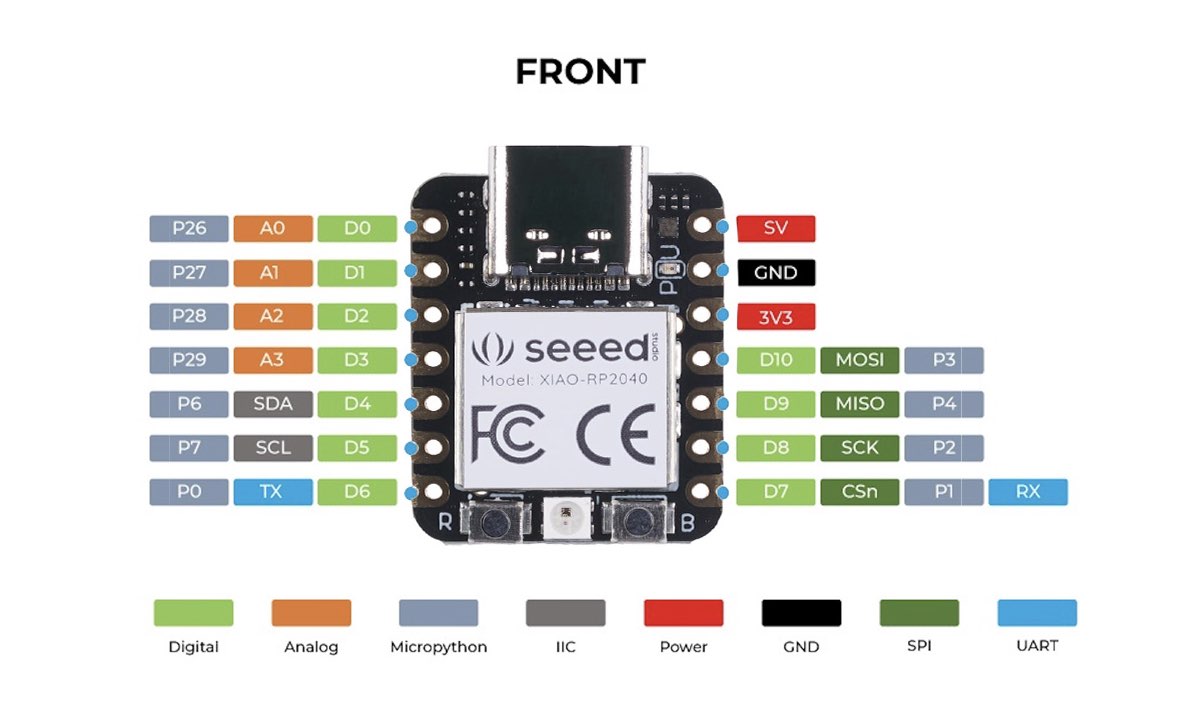
something that we noticed in the data sheets was that the rp2040 is running on a dual core processor while the esp32 is just using a single-core chip. While the rp2040 has less memory than the esp32, it has the capability to split it in between the two cores and should be able to communicate the memory well, while the esp32c3 has more memory, but only accessed by one core. while i decided to try my assignment to be built with the rp2040, id like to eventually work with the esp32-c3 for its build in wifi connectivity. while i can see that the rp2040 would be more powerful and versatile using gpio peripherals, also because raspberry pi pico w is using this chip, many libraries are optimized and easily used with the chip, the built in wifi capability of the esp32 would make it more usable for iot applications.
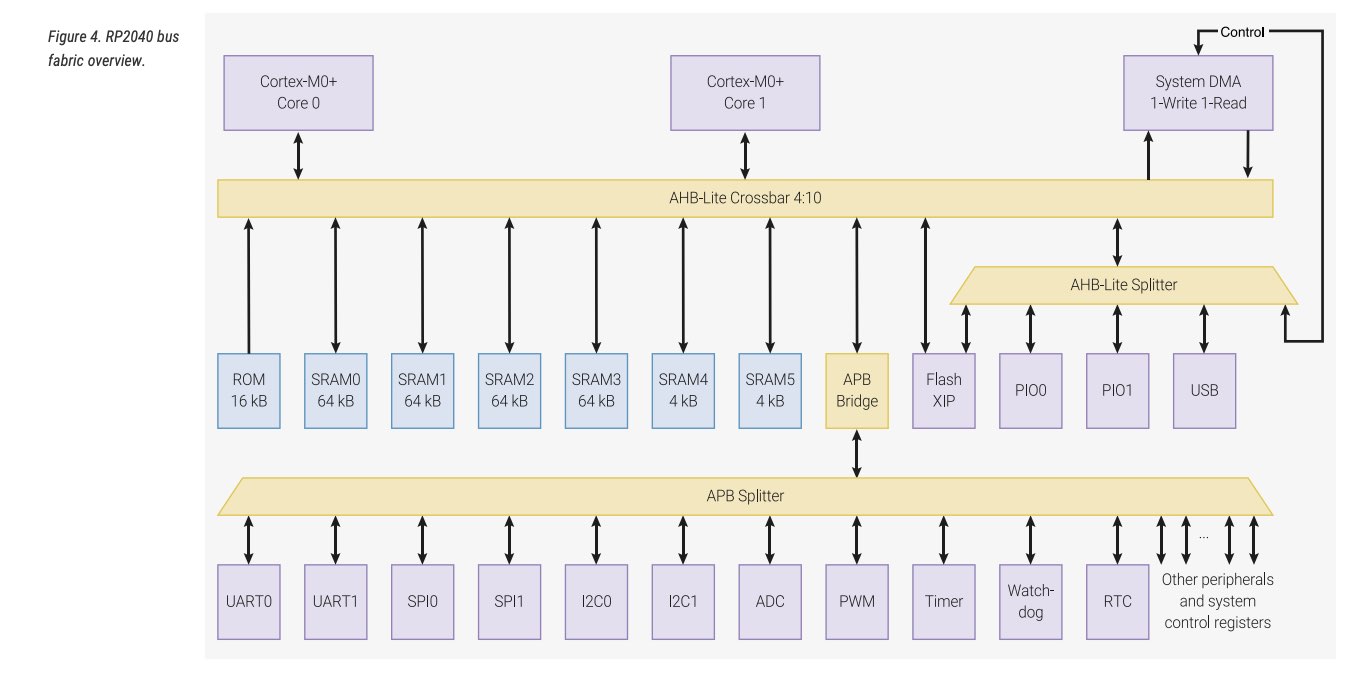
rp2040 bus fabric
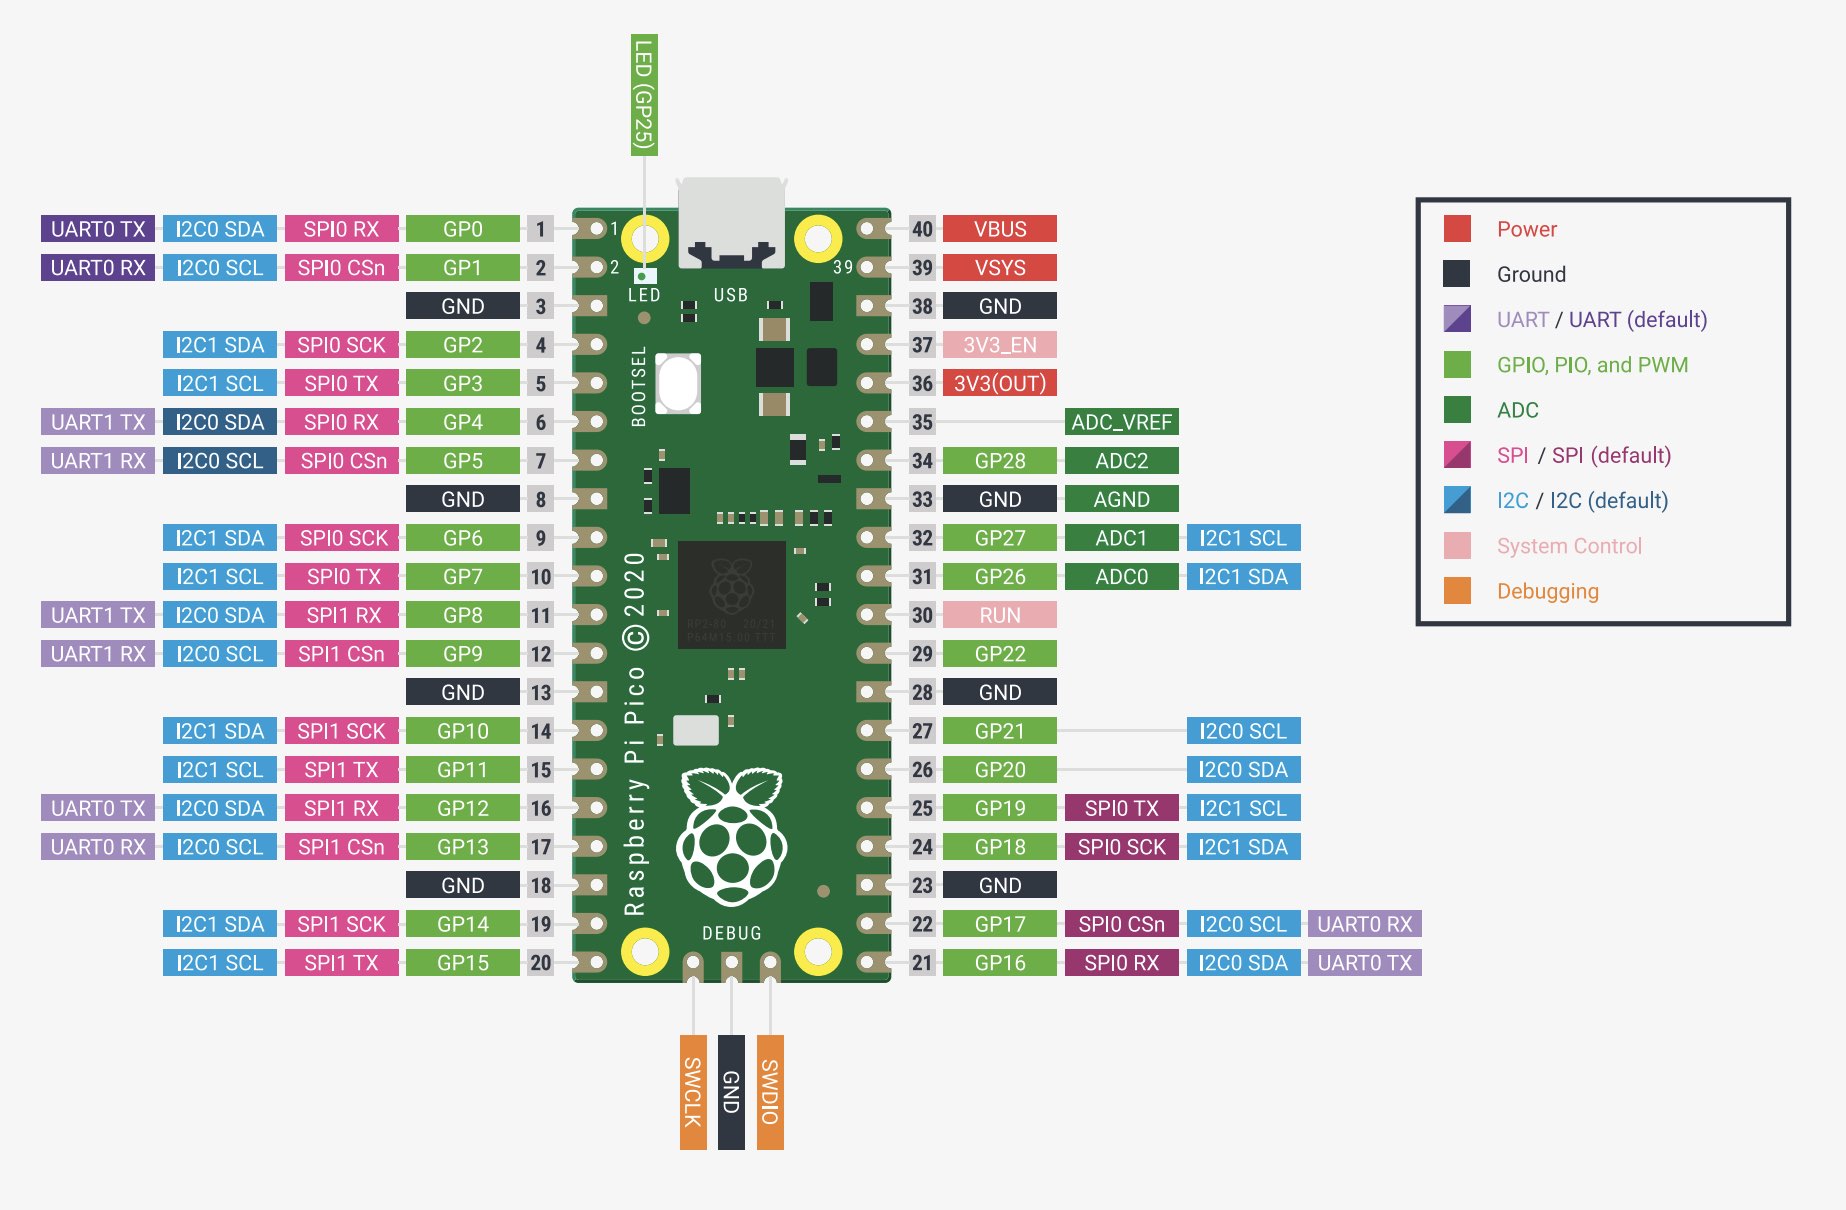
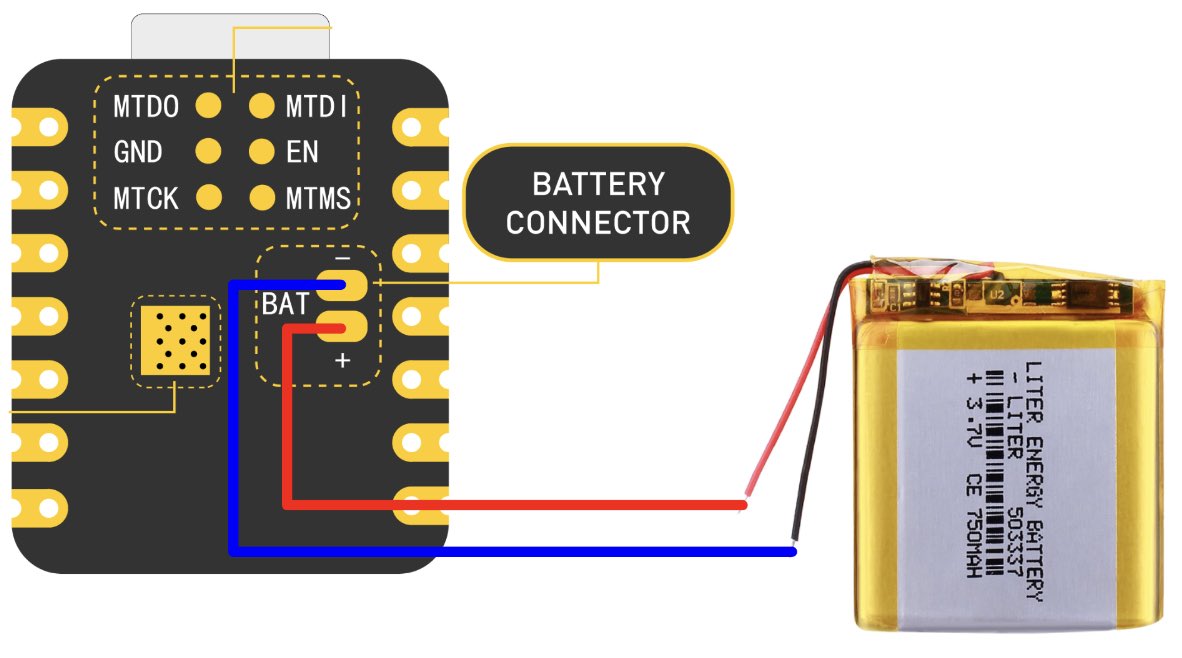
additionally, we found differences in the power consumption and where rp2040 generally supports higher voltage use, where the esp32c3 is more useful for lower voltage applications, it has therefore also two pins for a battery attachement on the underside of the chip. both chip types seem to have similar pinout connections, but the rasperry pi pico w offers different power pins, that i am not sure yet how to use.
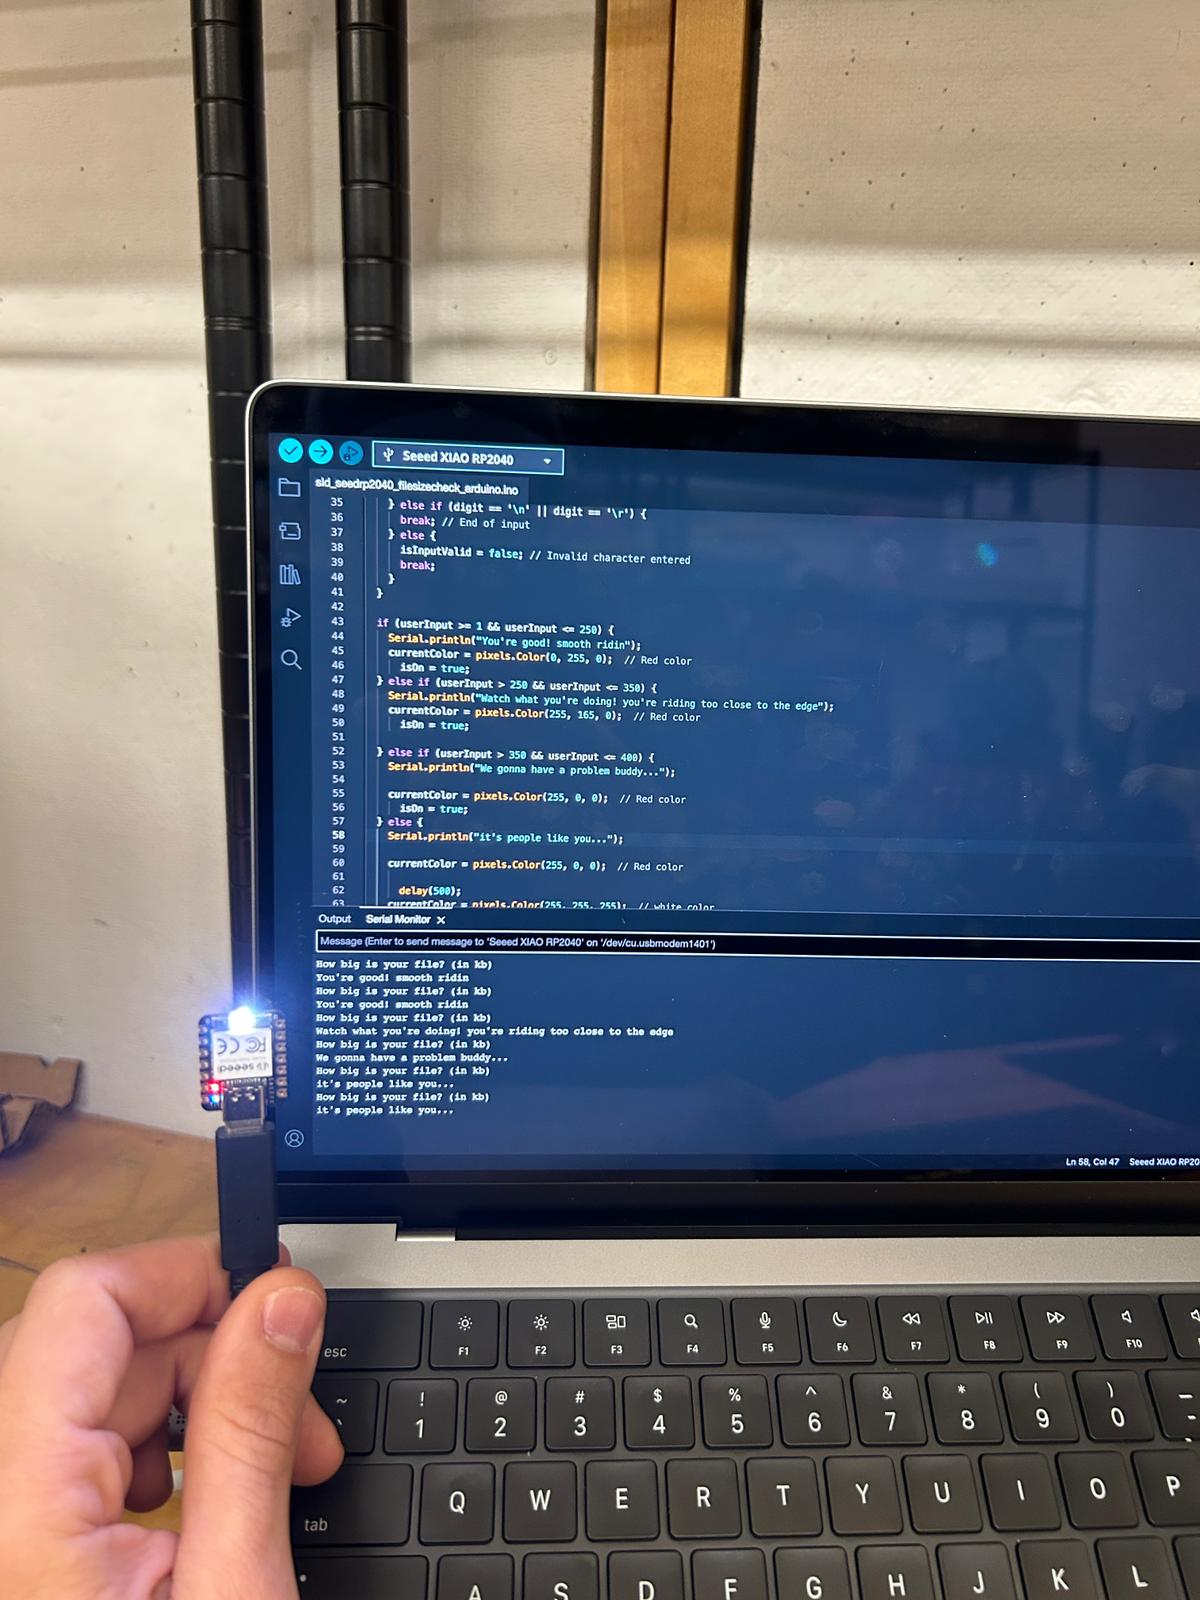
this week i tried to wrap my head around the seeed rp2040 and how to make something do something. first things first: i have to get my usb-c port to recognize the microcontroller
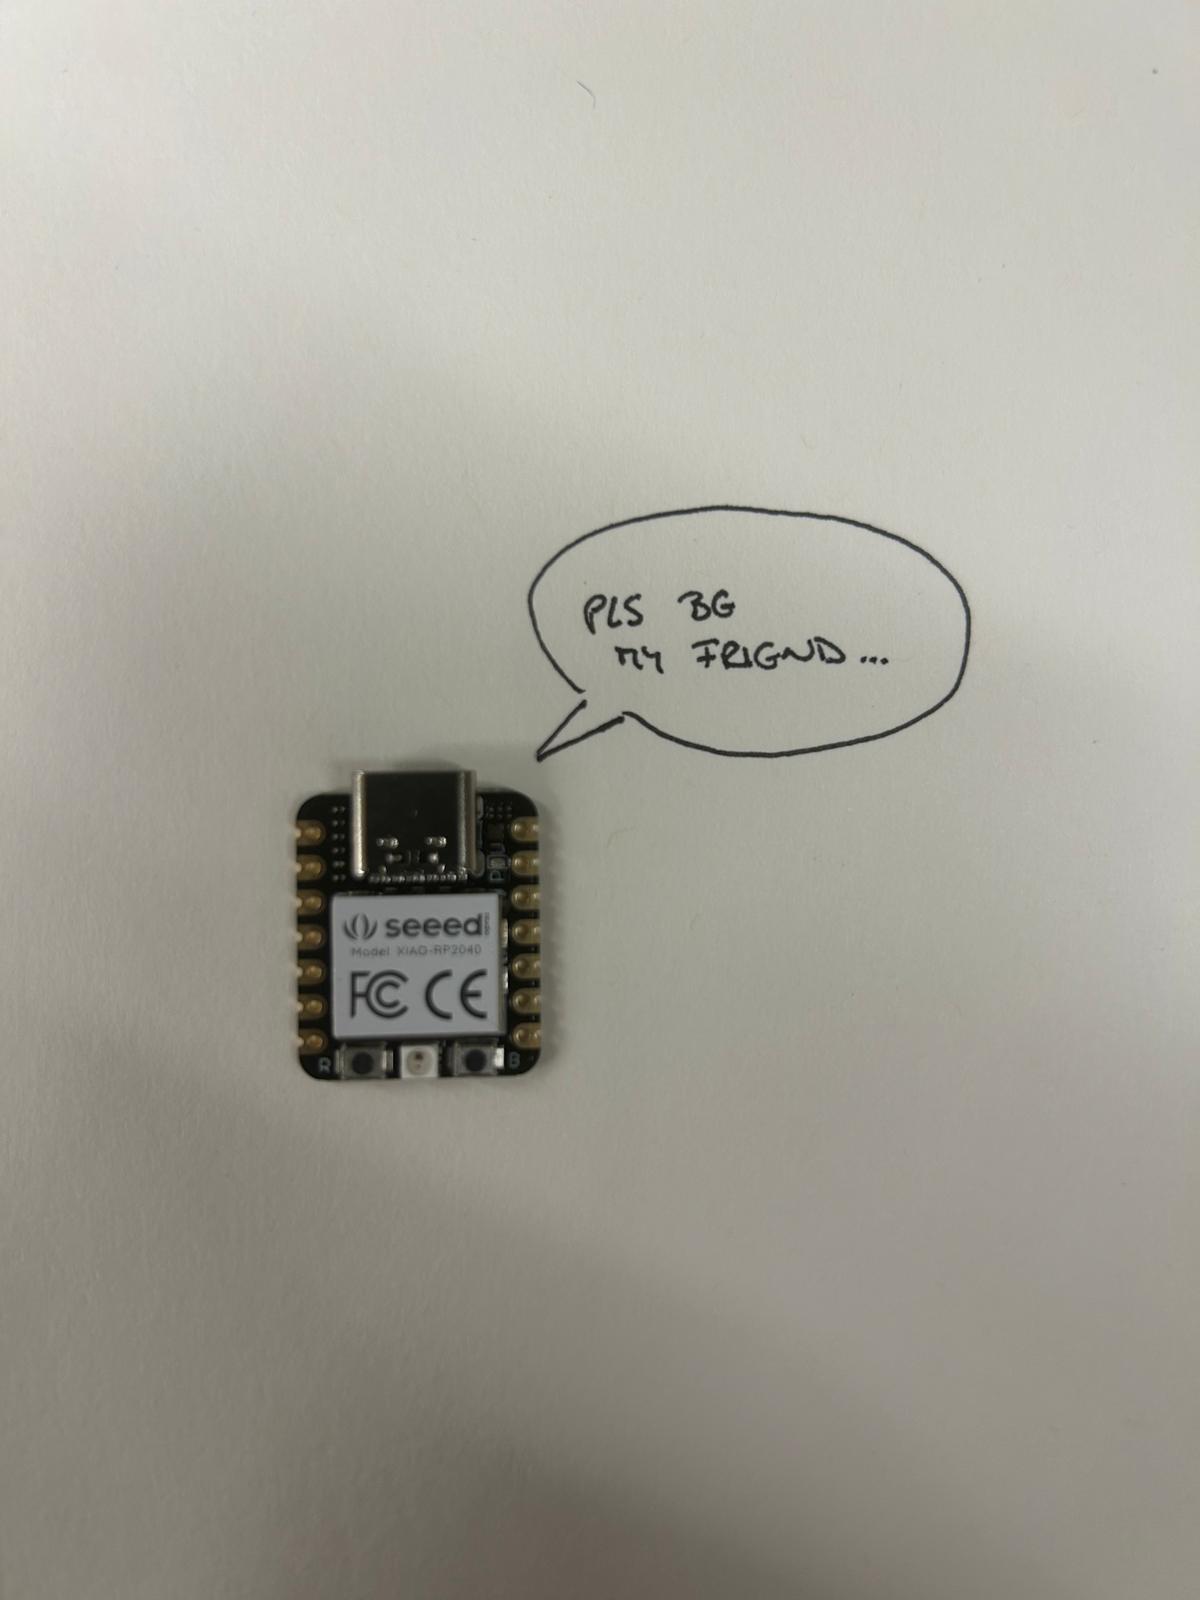
the solution to my microcontroller not showing up in arduino was to put a usb-c to usb3 converter, and all over sudden i was able to select the port.
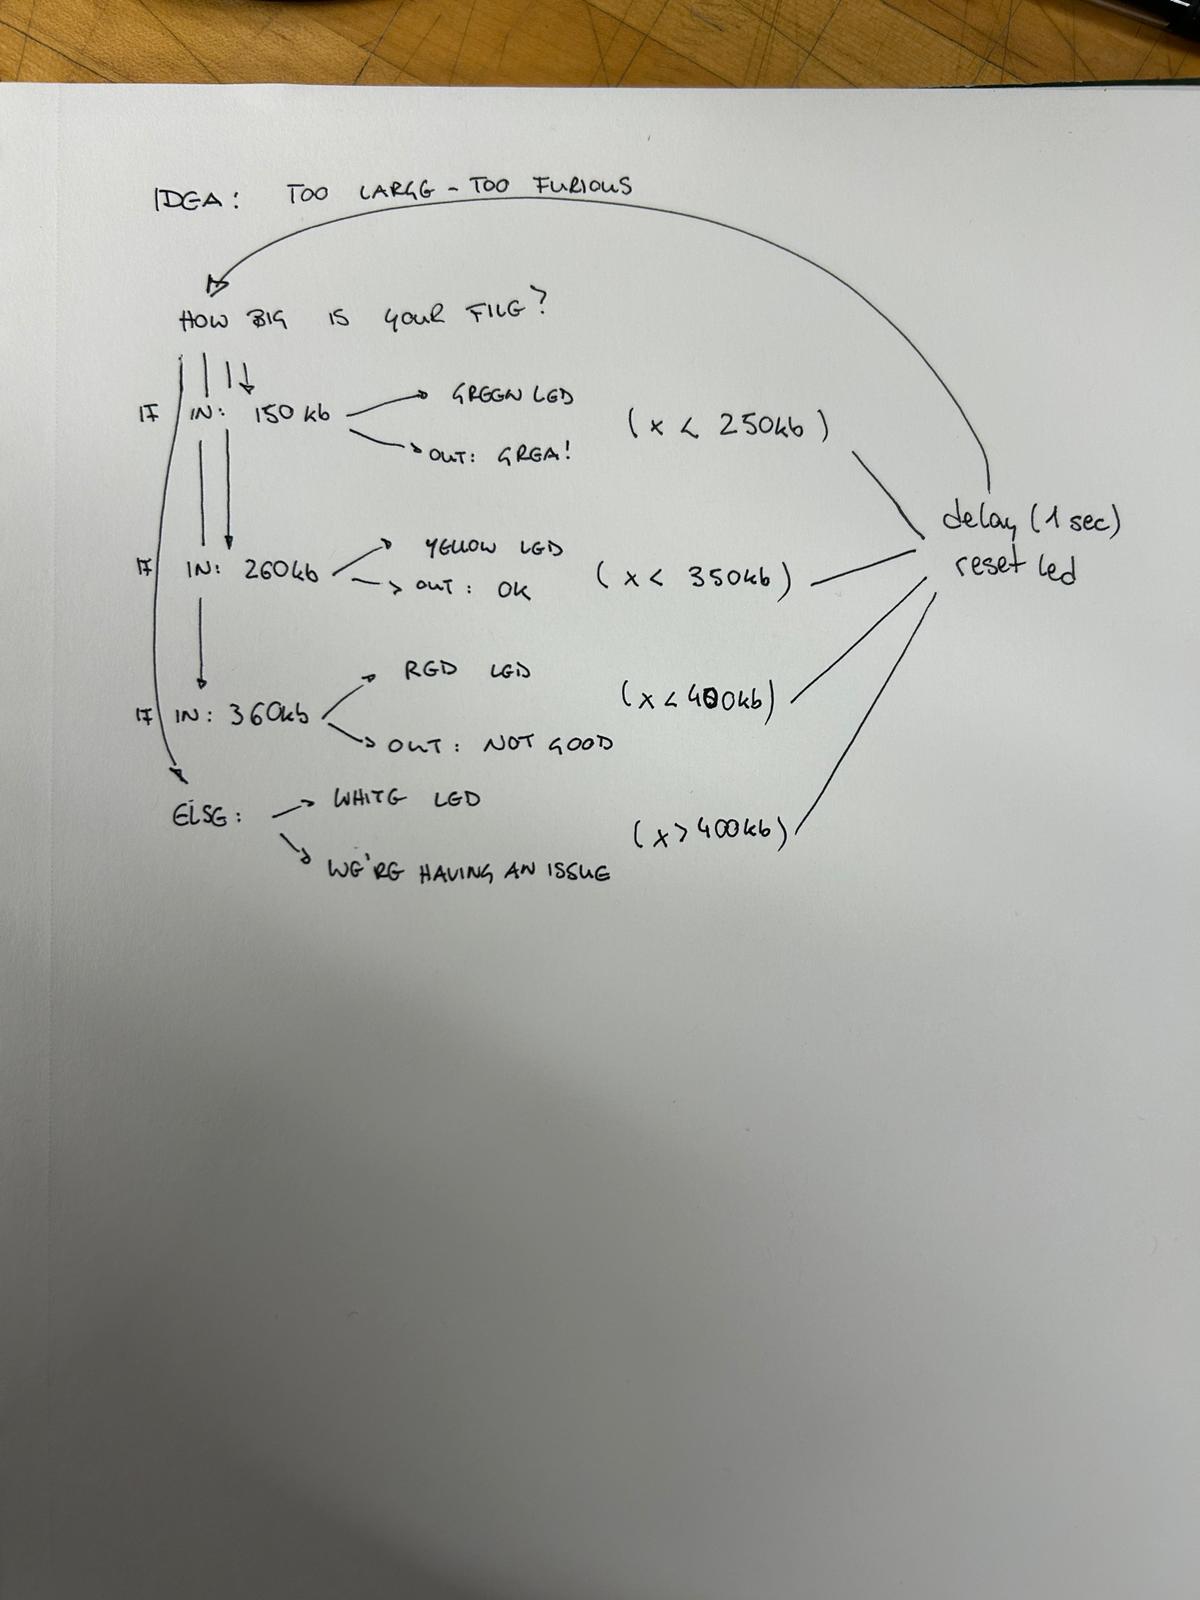
the idea for this week is to have the code prompt a question in the serial monitor in arduino, asking about the size of the file we are trying to upload onto git, and waiting for a response. the answer should trigger different responses from both the rp2040 as well as in the serial monitor.
the challenge using arduino for the first prototype was to make the input from a string to a numeric value that i would be able to evaluate and prompt a response.
int userInput = 0;
  boolean isInputValid = false;

  while (Serial.available() > 0) {
    char digit = Serial.read();
    if (digit >= '0' && digit <= '9') {
      userInput = userInput * 10 + (digit - '0');
    } else if (digit == '\n' || digit == '\r') {
      break; // End of input
    } else {
      isInputValid = false; // Invalid character entered
      break;
    }
  }
another minute was spent to understand how to control the led that is already on the microcontroller. i eventually learned from a friend in the class that i would need to install the Adafruit_NeoPixel.h library and was able to set different values entered in the serial monitor to different led responses and print outputs
                    if (userInput >= 1 && userInput <= 250) {
                        Serial.println("You're good! smooth ridin");
                        currentColor = pixels.Color(0, 255, 0);  // Red color
                          isOn = true;
                      } else if (userInput > 250 && userInput <= 350) {
                        Serial.println("Watch what you're doing! you're riding too close to the edge");
                        currentColor = pixels.Color(255, 165, 0);  // Red color
                          isOn = true;

                      } else if (userInput > 350 && userInput <= 400) {
                        Serial.println("We gonna have a problem buddy...");

                        currentColor = pixels.Color(255, 0, 0);  // Red color
                          isOn = true;
                      } else {
                        Serial.println("it's people like you...");

                        currentColor = pixels.Color(255, 255, 255);  // white color
here is the arduino code i came up with:
                    #include

                        int Power = 11;
                        int PIN = 12;
                        #define NUMPIXELS 1

                        Adafruit_NeoPixel pixels(NUMPIXELS, PIN, NEO_GRB + NEO_KHZ800);
                        uint32_t currentColor = pixels.Color(255, 255, 255);  // Initial color: White
                        bool isOn = true;  // Initial state: On

                        void setup() {
                          pixels.begin();
                          pinMode(Power, OUTPUT);
                          digitalWrite(Power, HIGH);

                          Serial.begin(9600); // Initialize serial communication at 9600 baud
                          while (!Serial) {
                            ; // Wait for the serial monitor to open
                          }
                        }

                        void loop() {
                          Serial.println("How big is your file? (in kb) "); // Prompt the user
                          while (Serial.available() == 0) {
                            ; // wait for user input
                          }

                          int userInput = 0;
                          boolean isInputValid = false;

                          while (Serial.available() > 0) {
                            char digit = Serial.read();
                            if (digit >= '0' && digit <= '9') {
                              userInput = userInput * 10 + (digit - '0');
                            } else if (digit == '\n' || digit == '\r') {
                              break; // End of input
                            } else {
                              isInputValid = false; // Invalid character entered
                              break;
                            }
                          }

                          if (userInput >= 1 && userInput <= 250) {
                            Serial.println("You're good! smooth ridin");
                            currentColor = pixels.Color(0, 255, 0);  // Red color
                              isOn = true;
                          } else if (userInput > 250 && userInput <= 350) {
                            Serial.println("Watch what you're doing! you're riding too close to the edge");
                            currentColor = pixels.Color(255, 165, 0);  // Red color
                              isOn = true;

                          } else if (userInput > 350 && userInput <= 400) {
                            Serial.println("We gonna have a problem buddy...");

                            currentColor = pixels.Color(255, 0, 0);  // Red color
                              isOn = true;
                          } else {
                            Serial.println("it's people like you...");

                            currentColor = pixels.Color(255, 0, 0);  // Red color

                              delay(500);
                            currentColor = pixels.Color(255, 255, 255);  // white color

                              delay(500);
                            currentColor = pixels.Color(255, 0, 0);  // Red color

                              delay(500);
                            currentColor = pixels.Color(255, 255, 255);  // white color

                              delay(500);
                              isOn = true;
                              }

                         if (isOn) {
                            // clear the pixel before setting a new color
                            pixels.clear();
                            pixels.setPixelColor(0, currentColor);  // Set the current color
                            pixels.show();  // Update the pixel color
                            delay(1000);
                            pixels.clear();
                            pixels.show();
                          } else {
                            // turn off
                            pixels.clear();
                            pixels.show();
                          }

                          // clear the serial buffer
                          while (Serial.available() > 0) {
                            Serial.read();
                          }

                          delay(1000); // delay for 1 second before going again
                        }
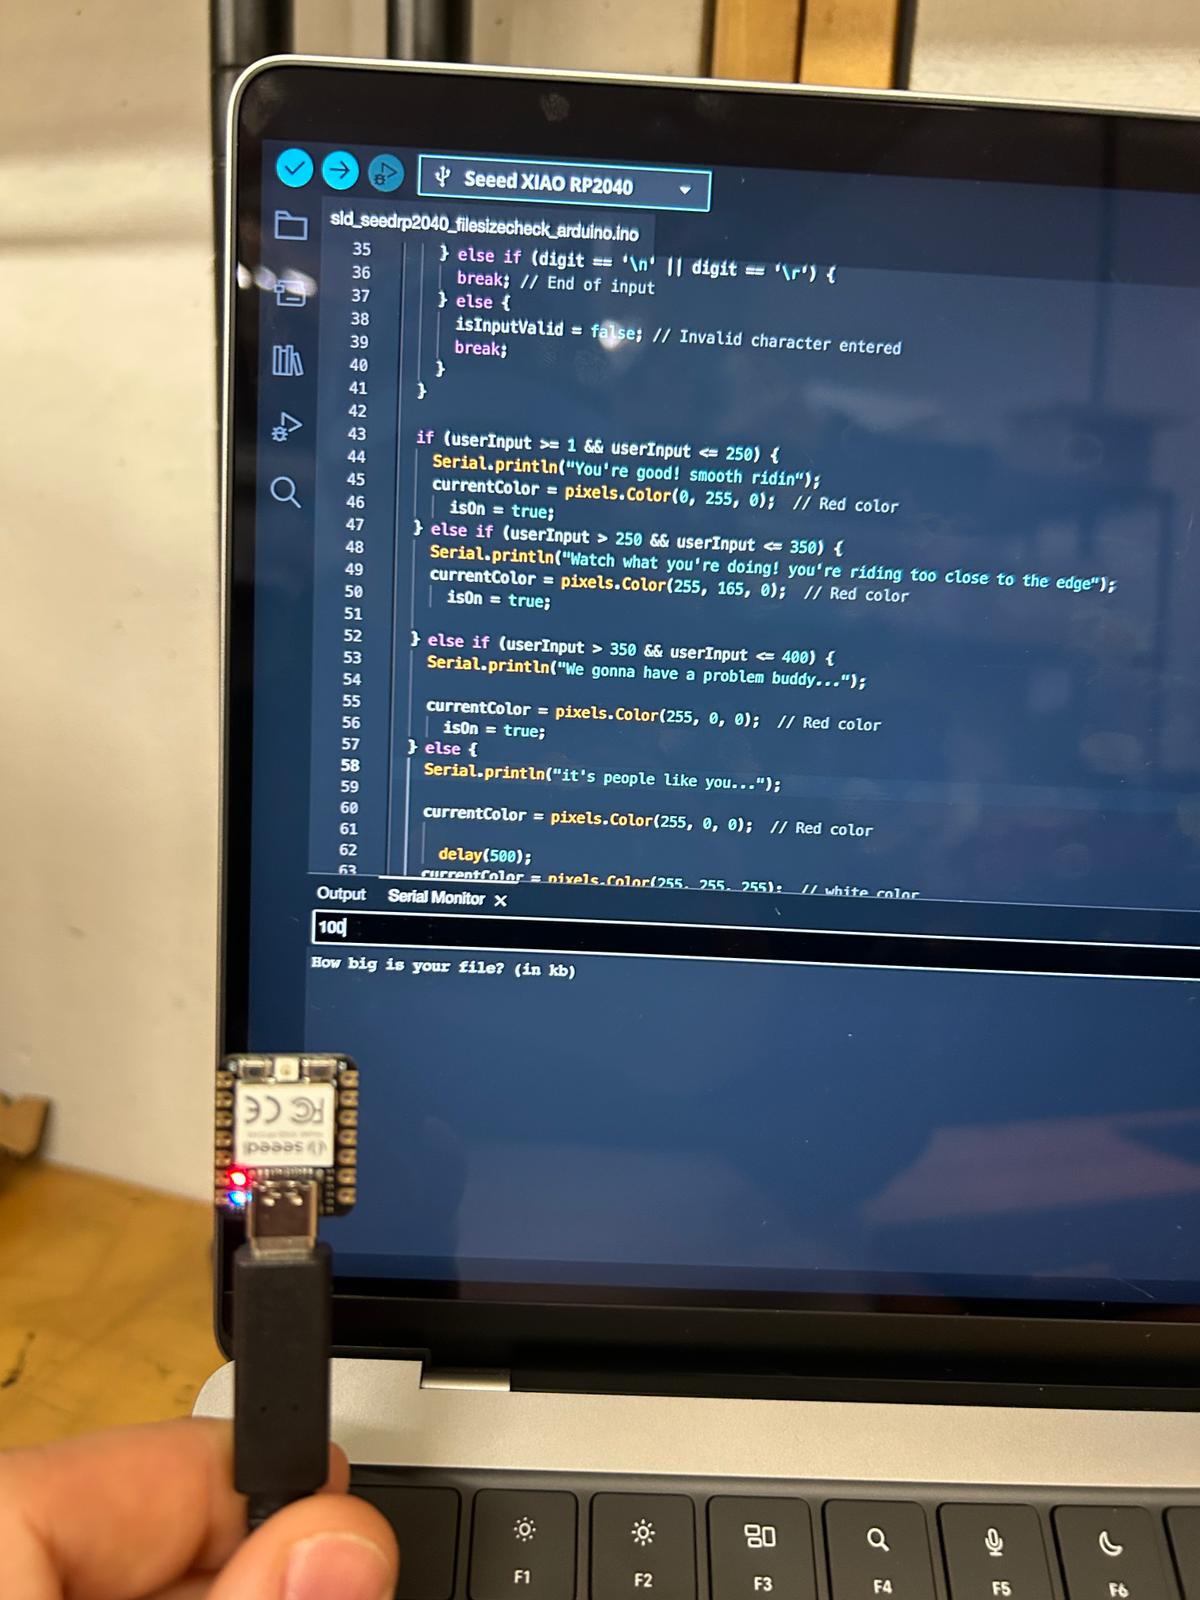
once uploaded, the controller asks "How big is your file? (kb)" in the serial monitor. if you enter 100 ...
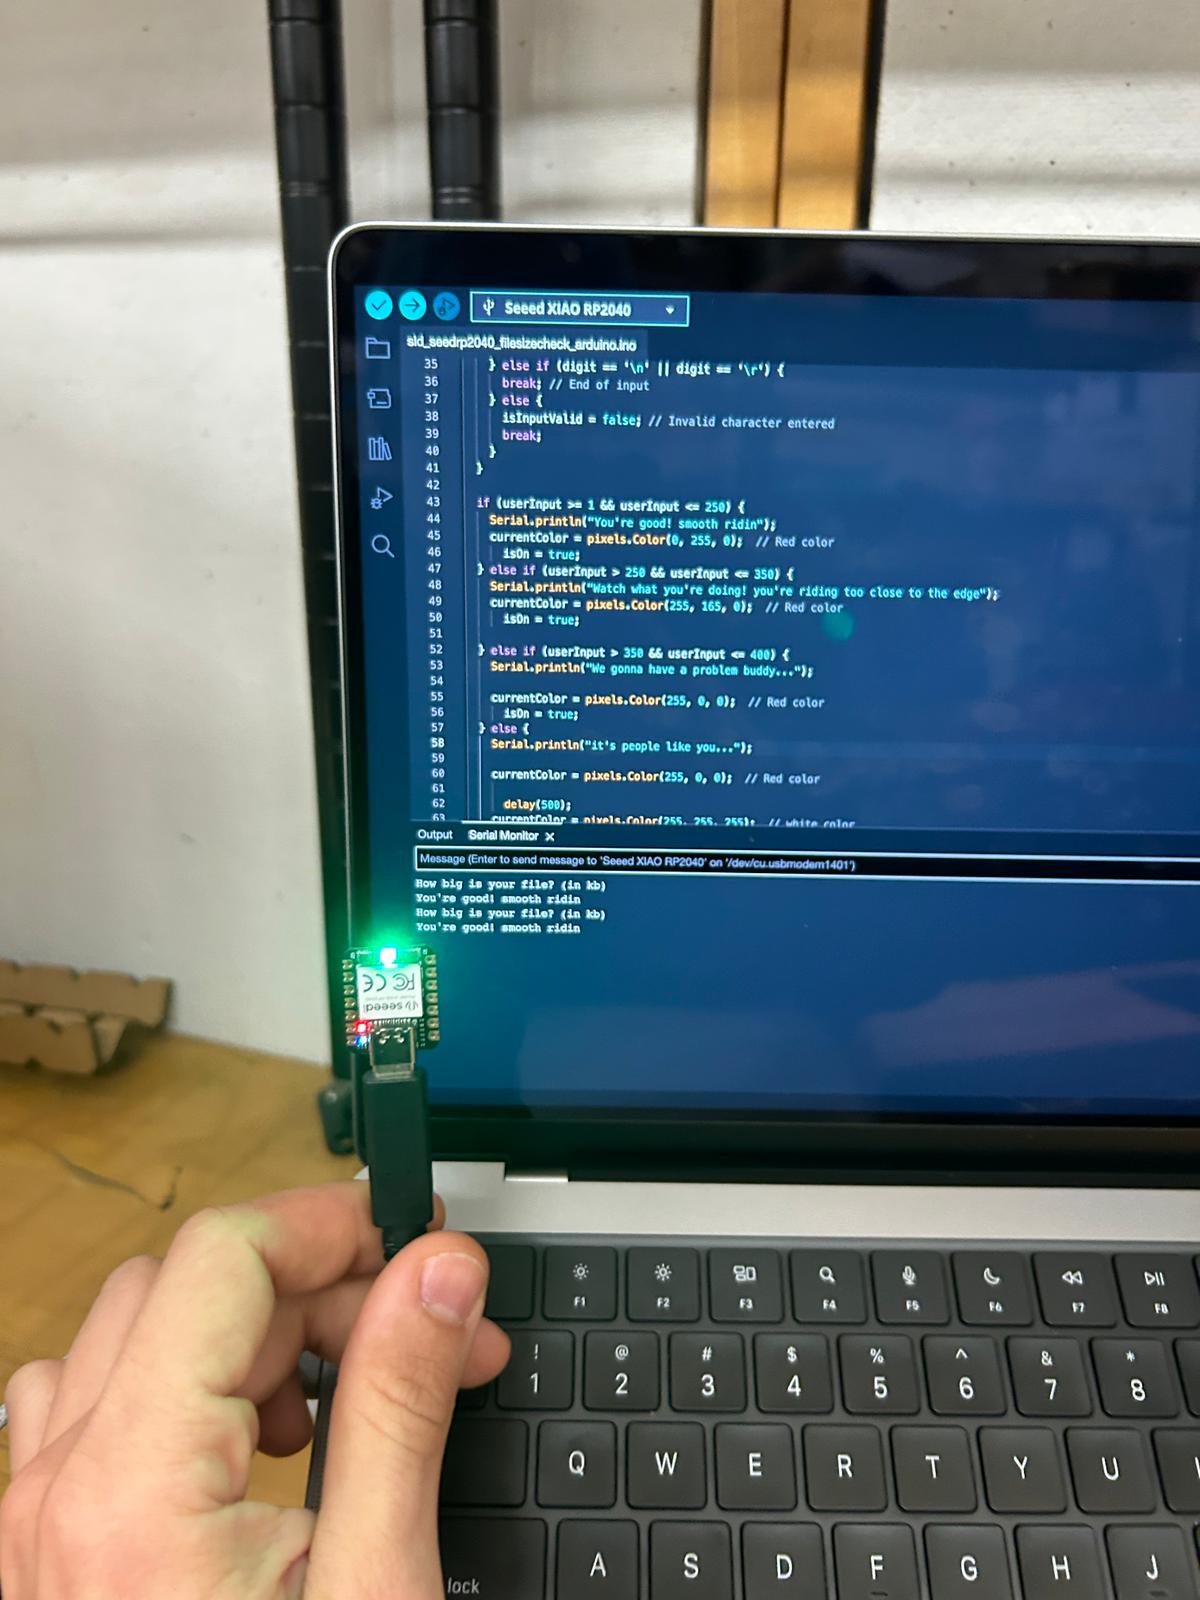
... you ged a green led and a "You're good" response
it will reset and ask the same question again. If we enter a value > 250kb ...
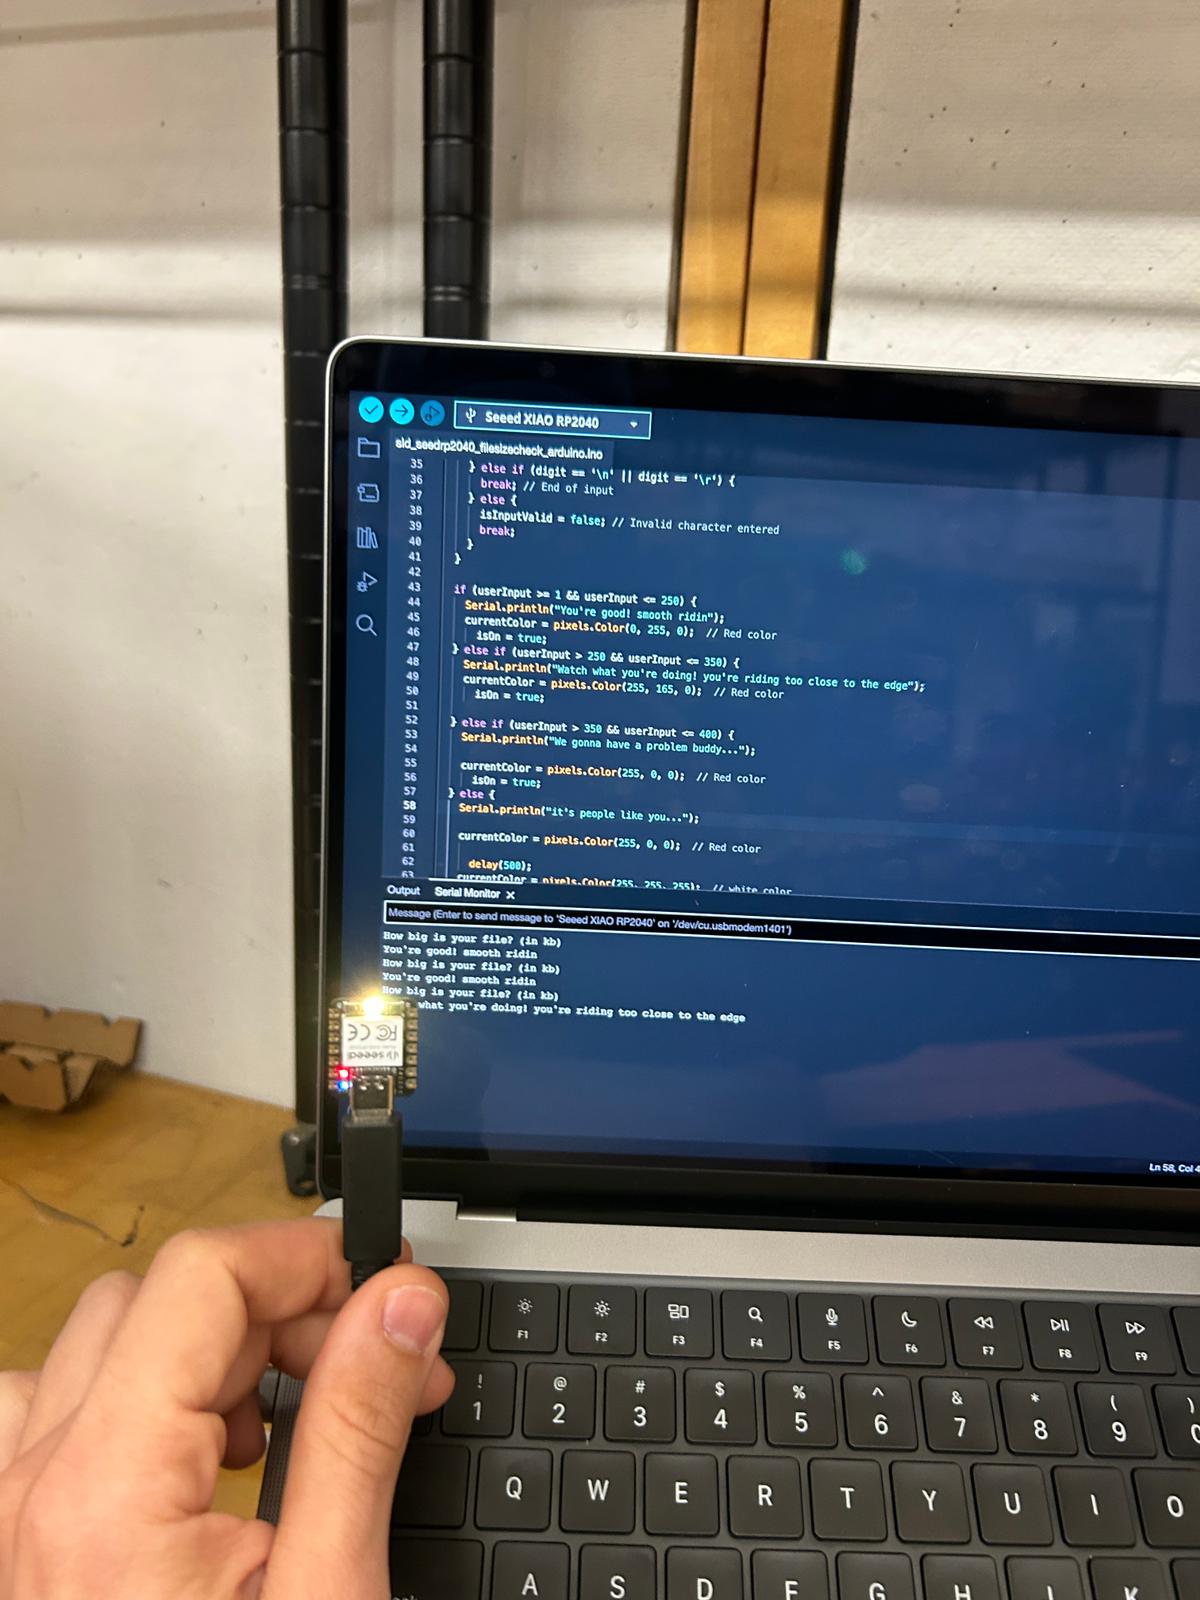
... we get a yellow led and "Watch what you're doing! you're riding too close to the edge"
for a value > 350kb ...
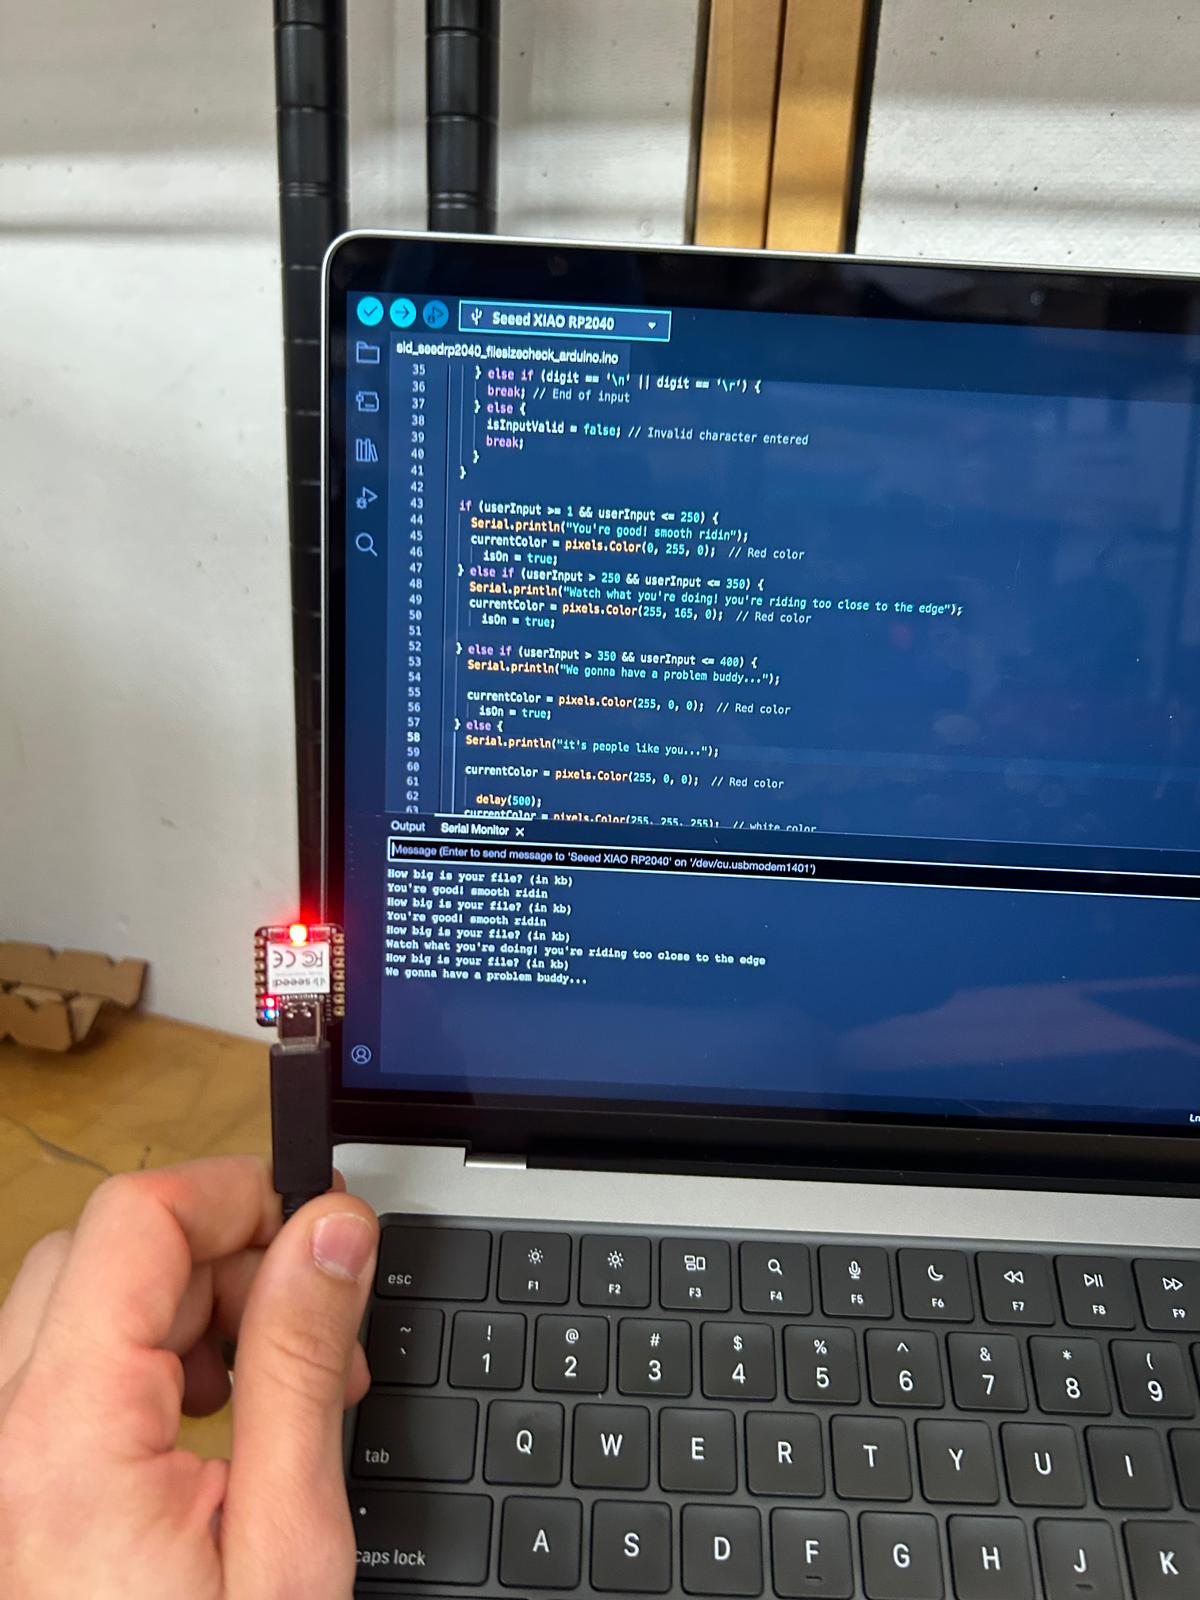
... we get a red led and "We gonna have a problem buddy..."
and finally, for a value over 400kb ...
... we get a white led, since there is no saving you, and "it's people like you..."
i have not had much time to get into micropython, since i have never written anything in any language but arduino before this semester, and am not sure if that is in any way or form the way to do it:
import time
from machine import Pin
import neopixel

Power = Pin(11, Pin.OUT)
PIN = 12
NUMPIXELS = 1

pixels = neopixel.NeoPixel(Pin(PIN), NUMPIXELS, bpp=3)

currentColor = (255, 255, 255)  # Initial color: White
isOn = True  # Initial state: On

def setup():
    Power.value(1)  # Set Power pin high
    print("How big is your file? (in kb) ")

def loop():
    userInput = 0
    isInputValid = False

    while True:
        if uart.any():
            digit = uart.read(1)
            if digit.isdigit():
                userInput = userInput * 10 + int(digit)
            elif digit == b'\n' or digit == b'\r':
                break
            else:
                isInputValid = False
                break

    if 1 <= userInput <= 250:
        print("You're good! smooth ridin")
        currentColor = (0, 255, 0)  # Green color
        isOn = True
    elif 250 < userInput <= 350:
        print("Watch what you're doing! you're riding too close to the edge")
        currentColor = (255, 165, 0)  # Orange color
        isOn = True
    elif 350 < userInput <= 400:
        print("We gonna have a problem buddy...")
        currentColor = (255, 0, 0)  # Red color
        isOn = True
    else:
        print("it's people like you...")
        currentColor = (255, 0, 0)  # Red color
        time.sleep_ms(500)
        currentColor = (255, 255, 255)  # White color
        time.sleep_ms(500)
        currentColor = (255, 0, 0)  # Red color
        time.sleep_ms(500)
        currentColor = (255, 255, 255)  # White color
        time.sleep_ms(500)
        isOn = True

    if isOn:
        # Clear the pixel before setting a new color
        pixels[0] = currentColor
        pixels.write()
        time.sleep(1)
        pixels[0] = (0, 0, 0)  # Turn off the pixel
        pixels.write()
    else:
        # Completely turn off
        pixels[0] = (0, 0, 0)  # Turn off the pixel
        pixels.write()

    # clearthe serial buffer
    while uart.any():
        uart.read(1)

    time.sleep(1)  # delay for 1 second before going again

uart = machine.UART(0, baudrate=9600)
setup()
while True:
    loop()
simultaneously i have tried to dive further into the website building and was able to create a style.css sheet where i have played around creating a navigation bar that i don't hate as well as multiple different text types, h1, h2, paragraph, as well as the monospace one for code and the crossed-out "text-decoration" that i used for the nav bar titles.
a much more difficult task (for me) was to figure out how to split the display in half and have both sides show content independently. i found an example of a split container, that is able to divide the display with in half, always dependent on the screen size, and found a scrollbar style that i was able to make work for me, see below the abstract of my css style sheet:
/* Split layout */
.split-container {
    display: flex;
    height: 100%;
    overflow: hidden;
}

.left-side, .right-side {
    flex: 1;
    overflow-y: auto;
    padding: 20px; /* Add some padding to separate content from scrollbar */
}

.left-side::-webkit-scrollbar, .right-side::-webkit-scrollbar {
    width: 10px; /* Adjust scrollbar width as needed */
}

.left-side::-webkit-scrollbar-thumb, .right-side::-webkit-scrollbar-thumb {
    background-color: #888; /* Scrollbar thumb color */
}

.left-side::-webkit-scrollbar-thumb:hover, .right-side::-webkit-scrollbar-thumb:hover {
    background-color: #555; /* Scrollbar thumb color on hover */
}