| HOW TO MAKE (ALMOST) ANYTHING MAS.863.12 |
|
PROJECTS | ABOUT | CONTACT | ||||||||
 |
||||||||||||
|
|
|||||||||||
| ELECTRONICS DESIGN- week5 | ||||||||||||
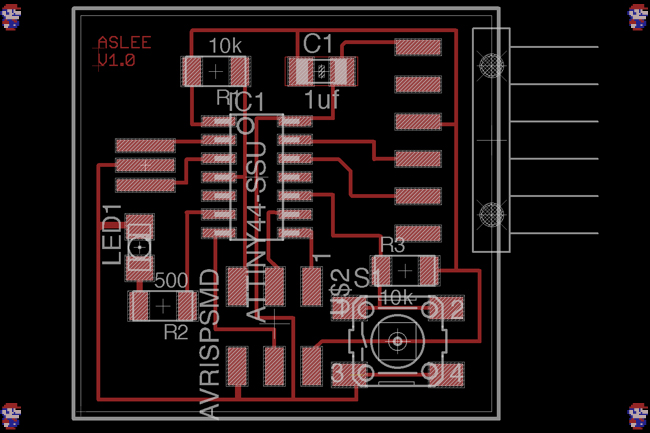
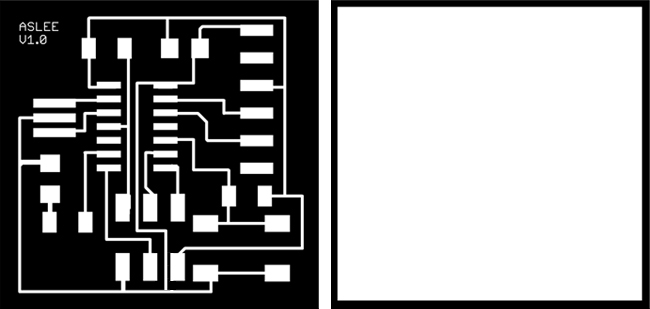
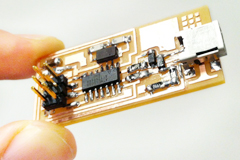
| This week I redrew the echo hello-world board. I modified the design by adding a button, LED and some resistors. I used the Fab ISP from week3 to program the ATtiny44 on my board so that the LED would light up when the button was pressed. I used free version of EAGLE for Mac OS X to design my board. Here is an online Tutorial for the EAGLE software. I found a great documentation on exporting PCBs from Eagle for fab modules here. You can download my modified schematics and board files. | ||||||||||||
 |
||||||||||||
 |
||||||||||||
 |
||||||||||||
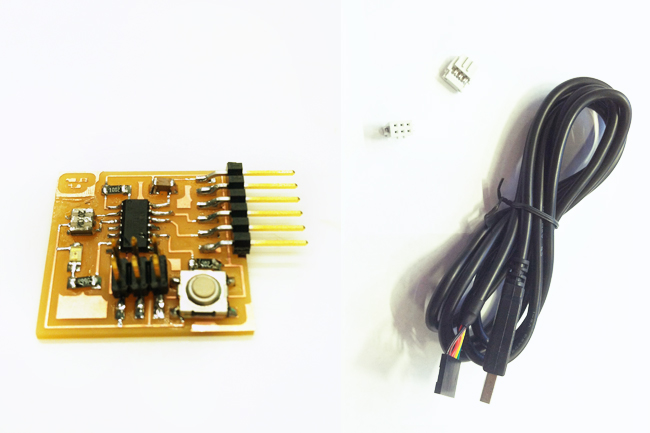
| Preparation For Microcontroller Programming | ||||||||||||
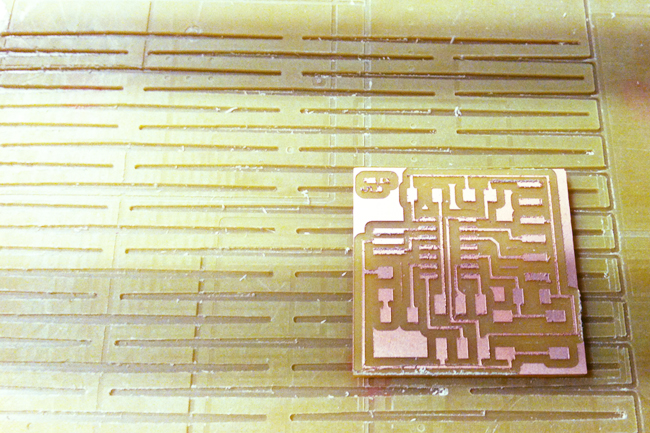
| Please check out my documentation in week 3 to learn how to stuff boards. Here is the list of the components I used for the board design: (ISP header, 1X06-SMD, 1uF, 10K resistors x 2, 500 ohm resistor, Resonator EFOBM, LED1206, 6MM switch, and ATtiny 44-ssu). Once the board was soldered completely, I had to build my own jumper that connected each the of the ISP headers on Fab ISP and the LED board. I was able to borrow FTDI USB-TTL cable from the fab lab. I chose to use Arduino software to program the ATtiny. ATtiny is a microcontroller for simple programs. I used David Mellis’s Fab ISP(in-system programmer) I made in class. I first downloaded the Arduino Software version 1.0.1. and ATtiny(GitHub repository) support. I created a sub-folder called hardware inside the sketchbookfolder like this: Documents>Arduino > hardware > attiny. I restarted the Arduino software. Here are some great tutorials on programing an ATtiny w/Arduino 1.0.1 which I referenced from: HLT and FabAcademy | ||||||||||||
 |
||||||||||||
 |
||||||||||||
|
|
|||||||||||
| Programming ATtiny with Arduino | ||||||||||||
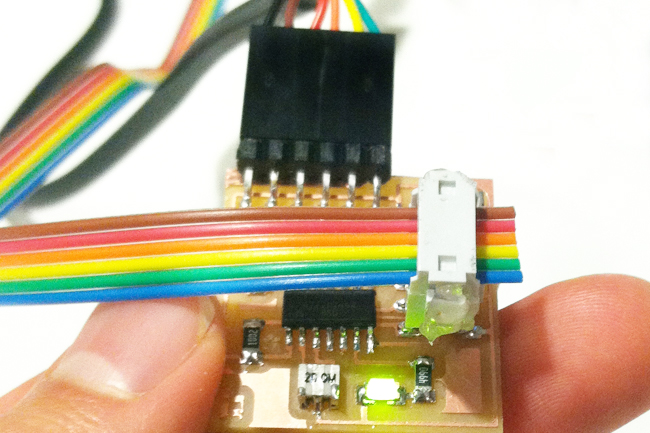
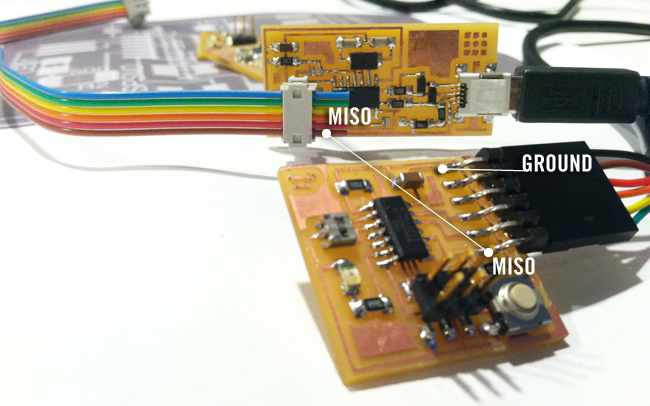
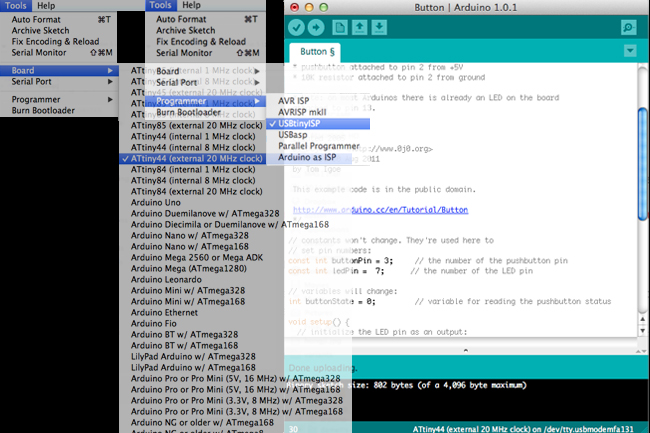
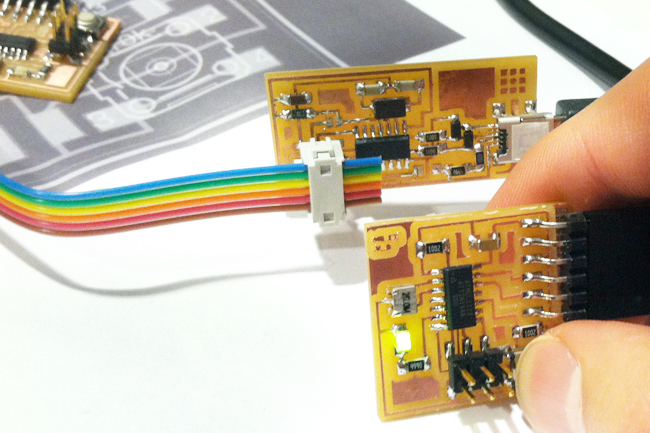
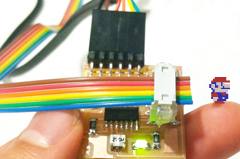
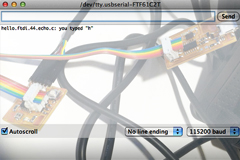
| In order to provide power to the ATtiny, connect the board to the laptop using FTDI USB-TTL. (FYI, an error message indicating that the USB is draining too much power means there is short. I learned this tip thanks to Jennifer and Nan.) Using the datasheets, make sure you check where the GND pin is. Also, connect the Fab ISP to the laptop through USB cable. Make sure the pins are aligned when you connect Fab ISP’s header with the LED board’s header. In my case, I checked where the MISO pin was located using my schematics. Once the boards were plugged into my laptop successfully, I went to Tools menu on the Arduino software and selected ATtiny44(external 20 MHz clock) for the board and ran the Burn Bootloader command on the same menu. Then I went back to Tools menu and selected USBtinyISP for the Programmer menu. I opened the Button sketch from the default examples menu. File>Examples>Digital>Button and changed the pins used for the LED and the button on my Hello Button + LED board. I doubled checked my Board and Programmer settings on the Tools menu and uploaded the sketch. I was able to see my LED glowing on the board. I modified the code example so that the LED would light up when I pressed the button. Here is the arduino example code. | ||||||||||||
 |
||||||||||||
 |
||||||||||||
 |
||||||||||||
FINAL PROJECT PROPOSAL.
My ideas for the final project- week1 |
PRESS-FIT CONSTRUCTION KIT.
Learn how to make something using vinyl cutter and laser cutter - week2 |
FAB ISP (IN-SYSTEM PROGRAMMER) Learn how to make a custom PCB - week3 |
||||||||||
3D SCANNING AND PRINTING. Learn how to make 3D printed model - week4 |
ELECTRONICS DESIGN. Learn how to redraw the echo hello-world board - week5 |
MOLDING AND CASTING. Learn how to design a 3D mold, machine it, and cast parts from it - week6 |
||||||||||
EMBEDDED PROGRAMMING. Learn how to program a custom board to do something - week7 |
MAKE SOMETHING BIG. Learn how to make SOMETHING BIG through computer-controlled machining- week8 |
INPUT DEVICES. Learn how to add sensor to a microcontroller board and read it - week9 |
||||||||||
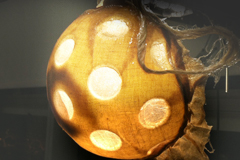
COMPOSITES. Learn how to assemble a 3D mold, and lay up a fiber composite part in it - week10 |

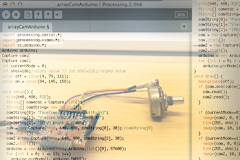
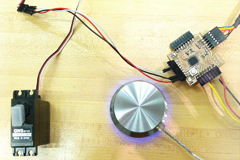
OUTPUT DEVICES. Learn how to add an output device to a microcontroller board and program it to do something - week11 |
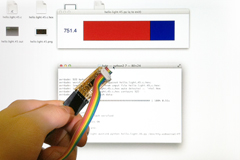
INTERFACE AND APPLICATION PROGRAMMING. Learn how to write an application that interfaces with an input &/or output device - week12 |
||||||||||
NETWORKING AND COMMUNICATIONS. Learn how to build a wired &/or wireless network with at least two nodes - week13 |
MECHANICAL/MACHINE DESIGN. Learn how to design or modify a machine and automate the machine - week14 |
FINAL PROJECT. My final project for How To Make (almost) Anything - week15, 16 |
||||||||||

MAS.863 Learn about the How To Make (almost) Anything course at MIT |
||||||||||||
| Copyright © 2012 by AUSTIN S. LEE | ||||||||||||