For my “something big”, I decided to scale up my molded hypercube from two weeks ago. If this works, I might make a few into some type of furniture or just use them as strange lawn ornaments.
It would take too much rubber to make 6 big molds, so I decided to make the molds directly out of insulation foam.
I increased the size of my design in kokopelli in order to make a cubic foot cube, and put three next to each other:
The pedestal (outside of the cube, for the molds to connect) is 2″ deep, so the stock size is 48″ x 16″ x 8.” After the first batch of three molds, I made a few changes to make it easier to machine: I truncated the top inch of the inner cube filler and stopped the cutting for the bottom inch of the diagonal mold mating surfaces.
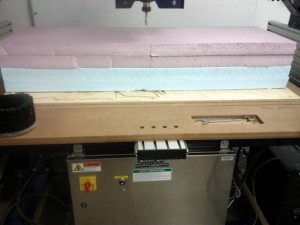
To make my stock, I glued together hand-cut foam insulation sheets (two 8′ x 2′ x 2″ pink sheets from Home Depot and one 8′ x 2′ x 2″ sheet from the N51 shop). I used Gorilla Glue and let it cure overnight while compressed.
Making mega-blocks:
One advantage of this stock size is that it can run the ShopBot Buddy in the Arch. FabLab, avoiding the rush at the N51 shop.
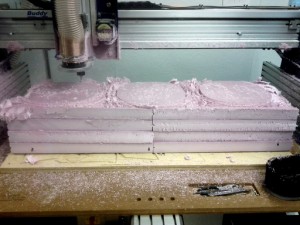
Foam mega-block on the ShopBot Buddy (this is actually the second run):
I used Fab Modules to convert my png to SBP format (see details below). Here’s the beginning of the rough cut (circular passes, this is the first batch):
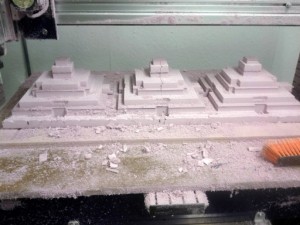
Finished rough cut (first batch):
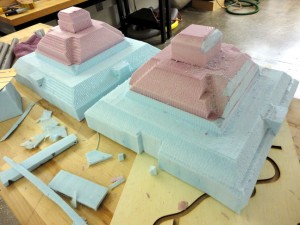
Completed finishing cut after removing from machine (from second batch here). Notice the reconstructive surgery on the right mold (blue foam pieces in the pink foam levels):
I used a 1/2″ flat endmill for everything. With the size and depth of the model, I was concerned about runtime. I did 1″ cuts for each rough cut round. The first batch used a cut speed of 101 mm/s with a jog speed of 150 mm/s.
The first batch took 2:15 for the rough cut and wanted to take 3:00 for the finishing pass. I used the “Run file from line number” feature to skip to certain parts of the piece that needed finishing. This let it complete in around 2:00.
For the second batch, I upped the cut speed to 140 mm/s with a jog speed of 170 mm/s. I dropped the overlap for the rough cut to 0.075 (from 0.1) and to 0.6 for the finishing pass. This led to better runtimes: 1:15 for the rough and 1:30 for the finishing pass. Since the features of my model are mostly planes, even 60% overlap with a 1/2″ endmill gives a good surface finish.
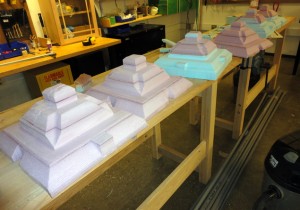
Current set of molds:
Unfortunately, during the second cut, the mega-block came off the cutting surface near the end of the rough cut. The endmill gouged one mold while it flailed around. I had hot glued the stock, but the collet ran into a higher layer when rough cutting the lowest layer (because the angles are steep and the rough cut depth is very aggressive) and pushed the block loose. I reset the stock with the correct vertical position, but the horizontal position was about 1/2″ off (in retrospect). I tried fixing it with the “Nudge” feature, but I couldn’t get it correct. The result is that 3 of my molds have small gaps on one face where the rough cut doesn’t overlap the finish cut location. I had to patch up these guys with hot glued foam bits and sand them to restore the surface quality.
Compared to rubber molds, the foam molds are much less forgiving. I had to spend a lot of time fine-tuning the registration pegs so that they fit correctly and exactly. With rubber, the molds would flex and mate with little trouble.
Because of this and general hurricane troubles, I’m behind schedule and haven’t had time to layer the molds with gesso. The plan is applying gesso, then maybe another sealant, then casting Hydrostone or Drystone with a mold release agent.
Tips:
- Ensure your stock is square on the ShopBot surface. If your stock isn’t square itself (as with my first batch of hand-cut pieces), you need to be more careful and maybe true to the midpoint.
- Attach the stock well! This caused me a few headaches.
- Think about the design. I turned 1/2 to 2/3 of the blocks into powder. If I were doing it again, I’d consider trying to make the rough-cut pyramid forms additively. I might cut rough pieces from a flat single piece and glue them together into the pyramid pattern. Then I’d follow with the same finishing pass. This would waste less material and be quicker, but registration might be a problem.
- The “run part from line” (under the File menu) feature is very useful.
- Foam makes a terrible mess when you subtract so much material. The particles float away and cling to anything around them, as opposed to sawdust which usually just falls down. Be aware and plan to take an extra 30-60 minutes to clean up.


