Networking and communications
This week's assignment: design and build a wired &/or wireless network connecting at least two nodes.
The method I chose to pursue:
Asynchronous
In this asynchronous setup there is no 'master' or 'slave' microcontroller. Rather, TX and RX buses are used. Each microcontroller has the ability to take over the line and send messages while the others receive messages. For this example all of my microcontrollers will be receiving messages from the serial port. The message will contain a node number corresponding to the node number of one of the boards. This board (and only this board) will then blink an extra time. I added an additional LED to each design in order to prove to myself that I could independently control two pins on each microcontroller; from here it would be possible to extrapolate to a network of LED arrays, as I would like to make in the future.
Boards milled as in previous weeks (no issues):
Bridge (the controller connected to the computer via FTDI):

Nodes (the boards daisy-chained from the bus):

* Connect as many nodes as you want (within reason), giving each a different node number to allow independent control. You'll eventually hit a current/power maximum, but that will take a fair number of boards.
Upload the example code onto each board, changing the node_ID for each board. I used nodes 1-3, labeling the back of my boards in sharpie for ease of debugging. Once the code is uploaded, open the serial monitor in Arduino (ctrl + shift + M). In the text field type one of the node numbers and press enter. All of the LEDs should blink once followed by a single blink from the node specified.
Tips and Tricks:
-Start with something that works. Sometimes the issue is something other than your circuit. Bring along a test board that you know works to see if you can still upload a basic sketch to it (my go-to debugging sketch is Blink).
-Use a multimeter to check your connections. Some multimeters have an audio setting that outputs a beep whenever two things are electrically connected. This is an easy way to find shorts in your circuit.
-Use the ARDUINO PIN NUMBER equivalents instead of the microcontroller pin numbers. These can be found here (along with information about how to use ATTiny with the Arduino IDE).
-Power: there is no voltage regulator in this circuit, therefore it should not be connected straight to a 9V battery like circuits were in previous weeks. Solutions:
-Connect smaller batteries that add up to 5V
-Add a voltage regulator to the circuit
- Daisy-chain power and ground from the bus circuit while powered through FTDI
-What I did: used a power supply [settings: 5V, max 1A (looked like the circuit was drawing no current because it was drawing so little)]
-Sometimes the third time really is the charm. A connector may have jiggled loose or something strange may be happening in the background on your computer. If you get an error, try uploading your code again to see if there is a difference.
In the future: It took me an obscene amount of time to debug control of a single LED per board; I need to go back and build upon the now working base to get both LEDs working independently.
Things to try later: I2C
Boards milled as in previous week (no issues):
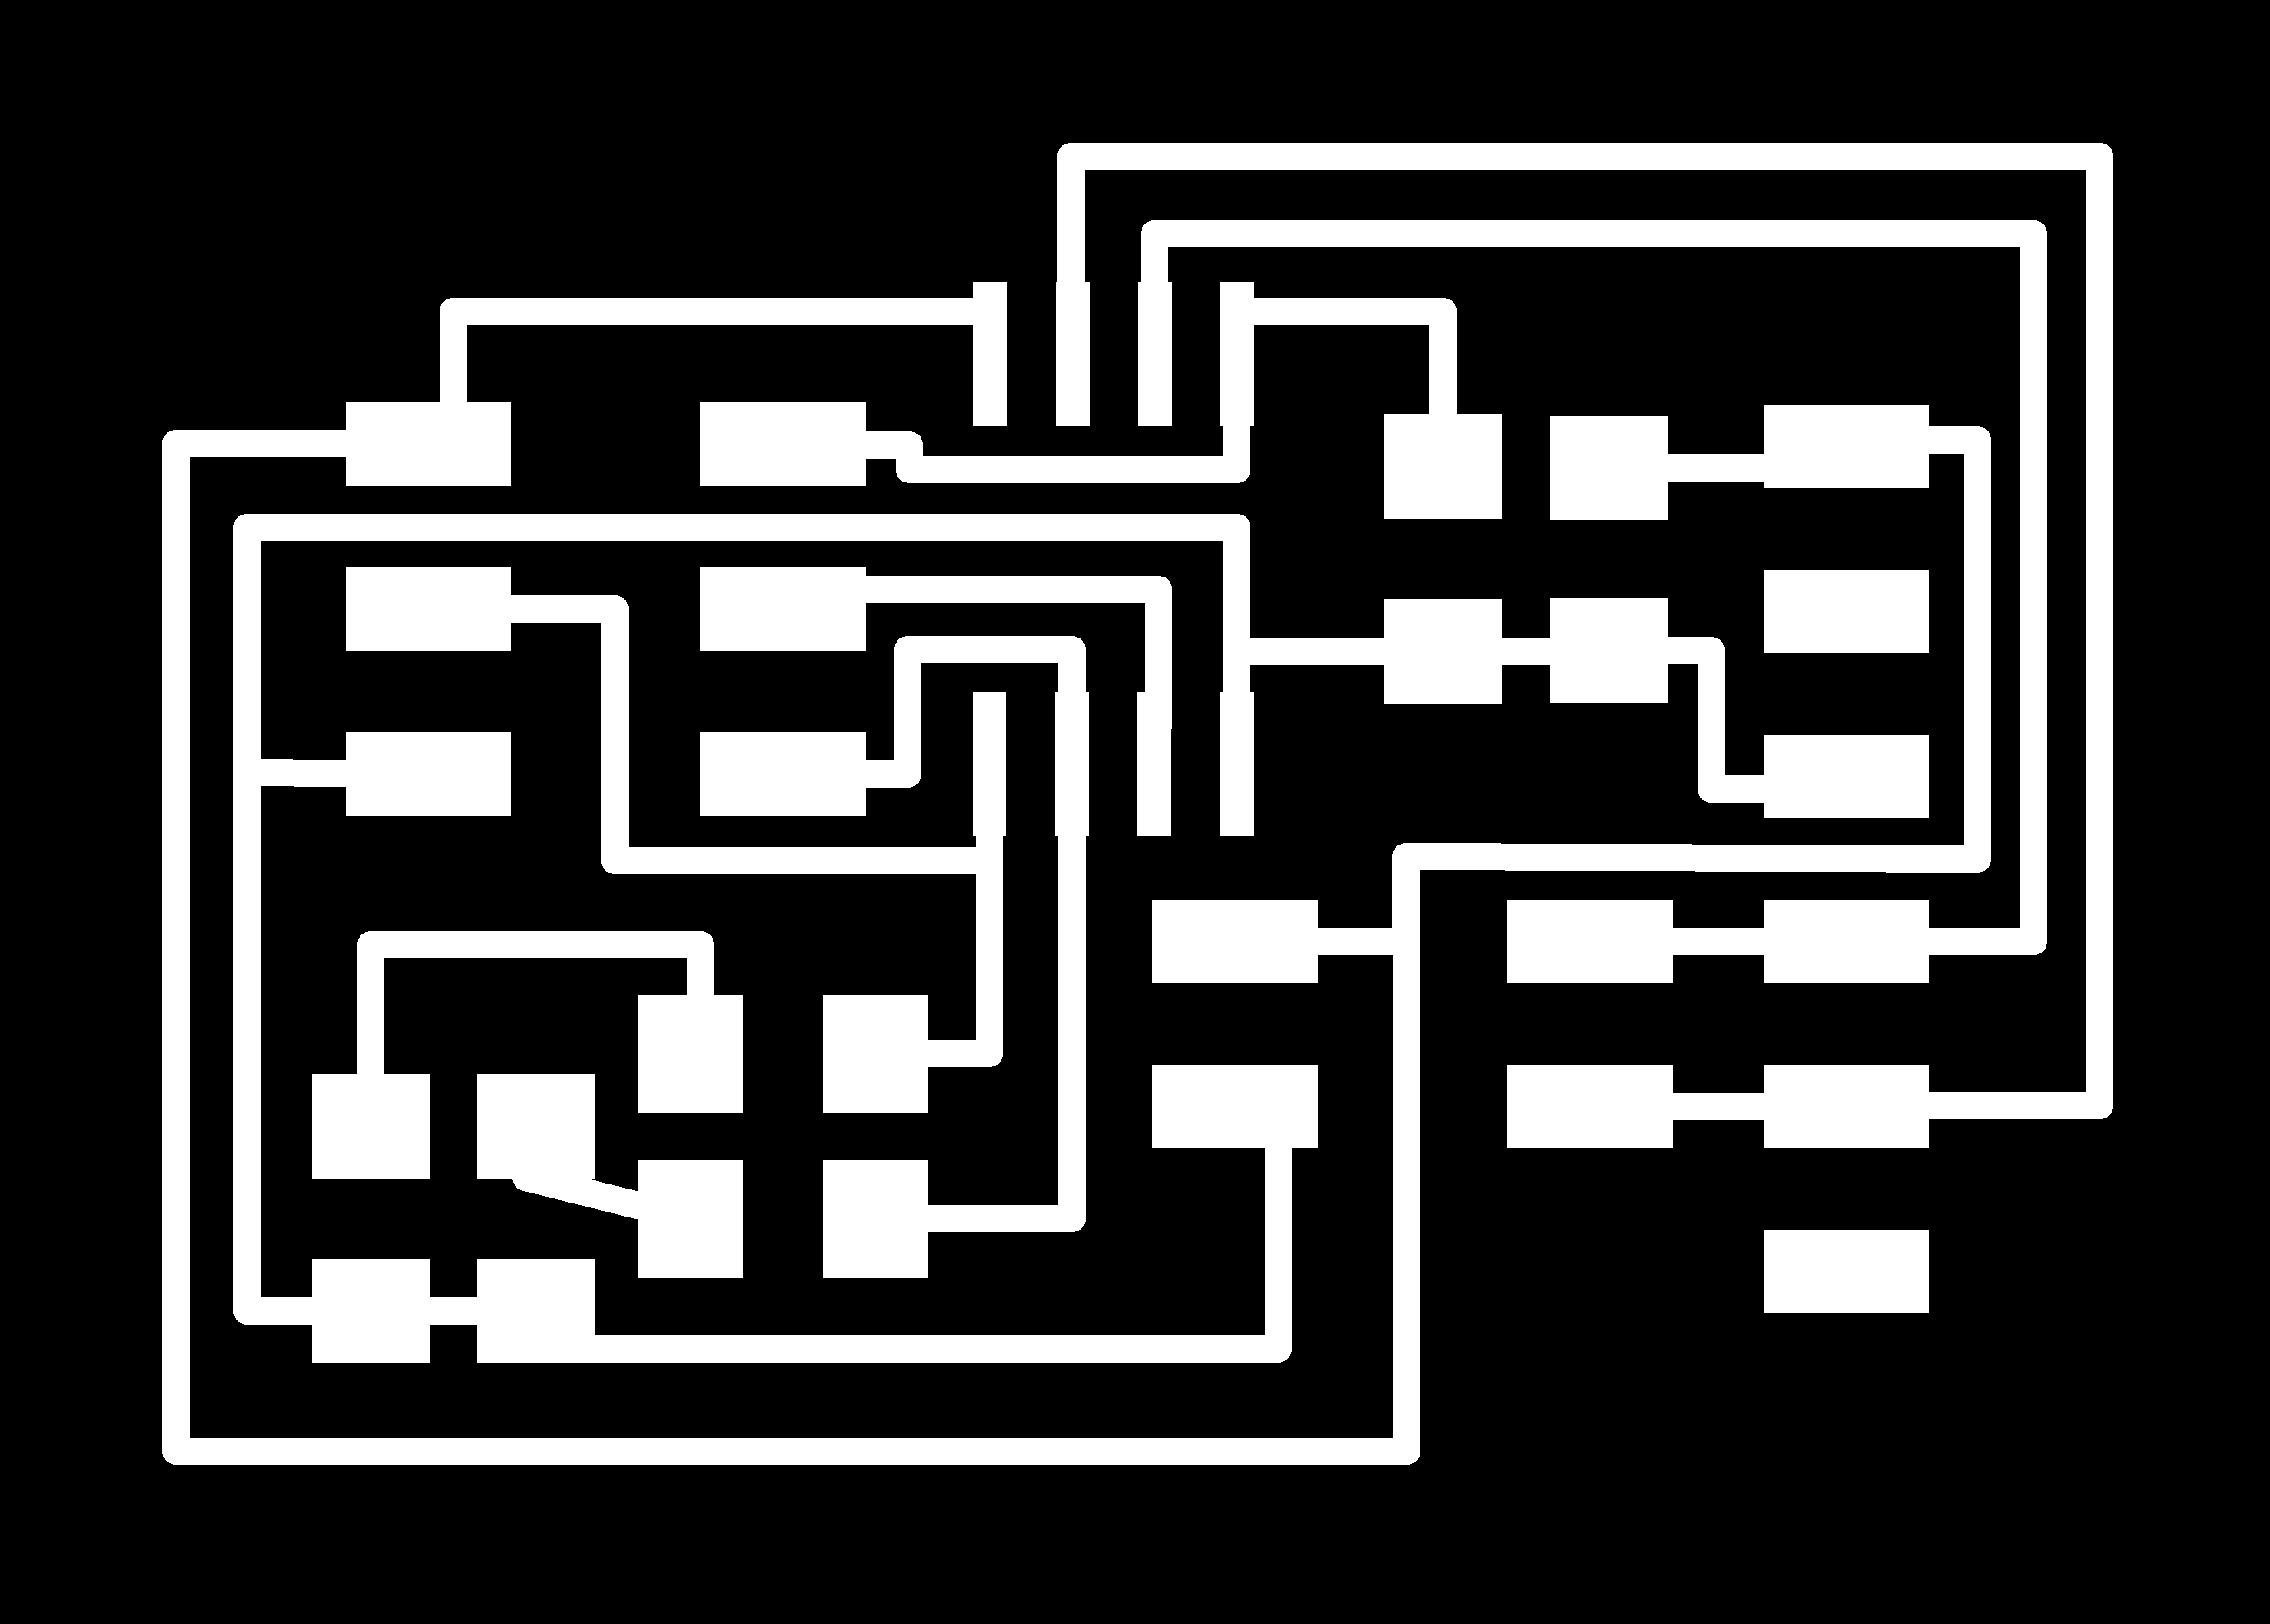
Node Traces:
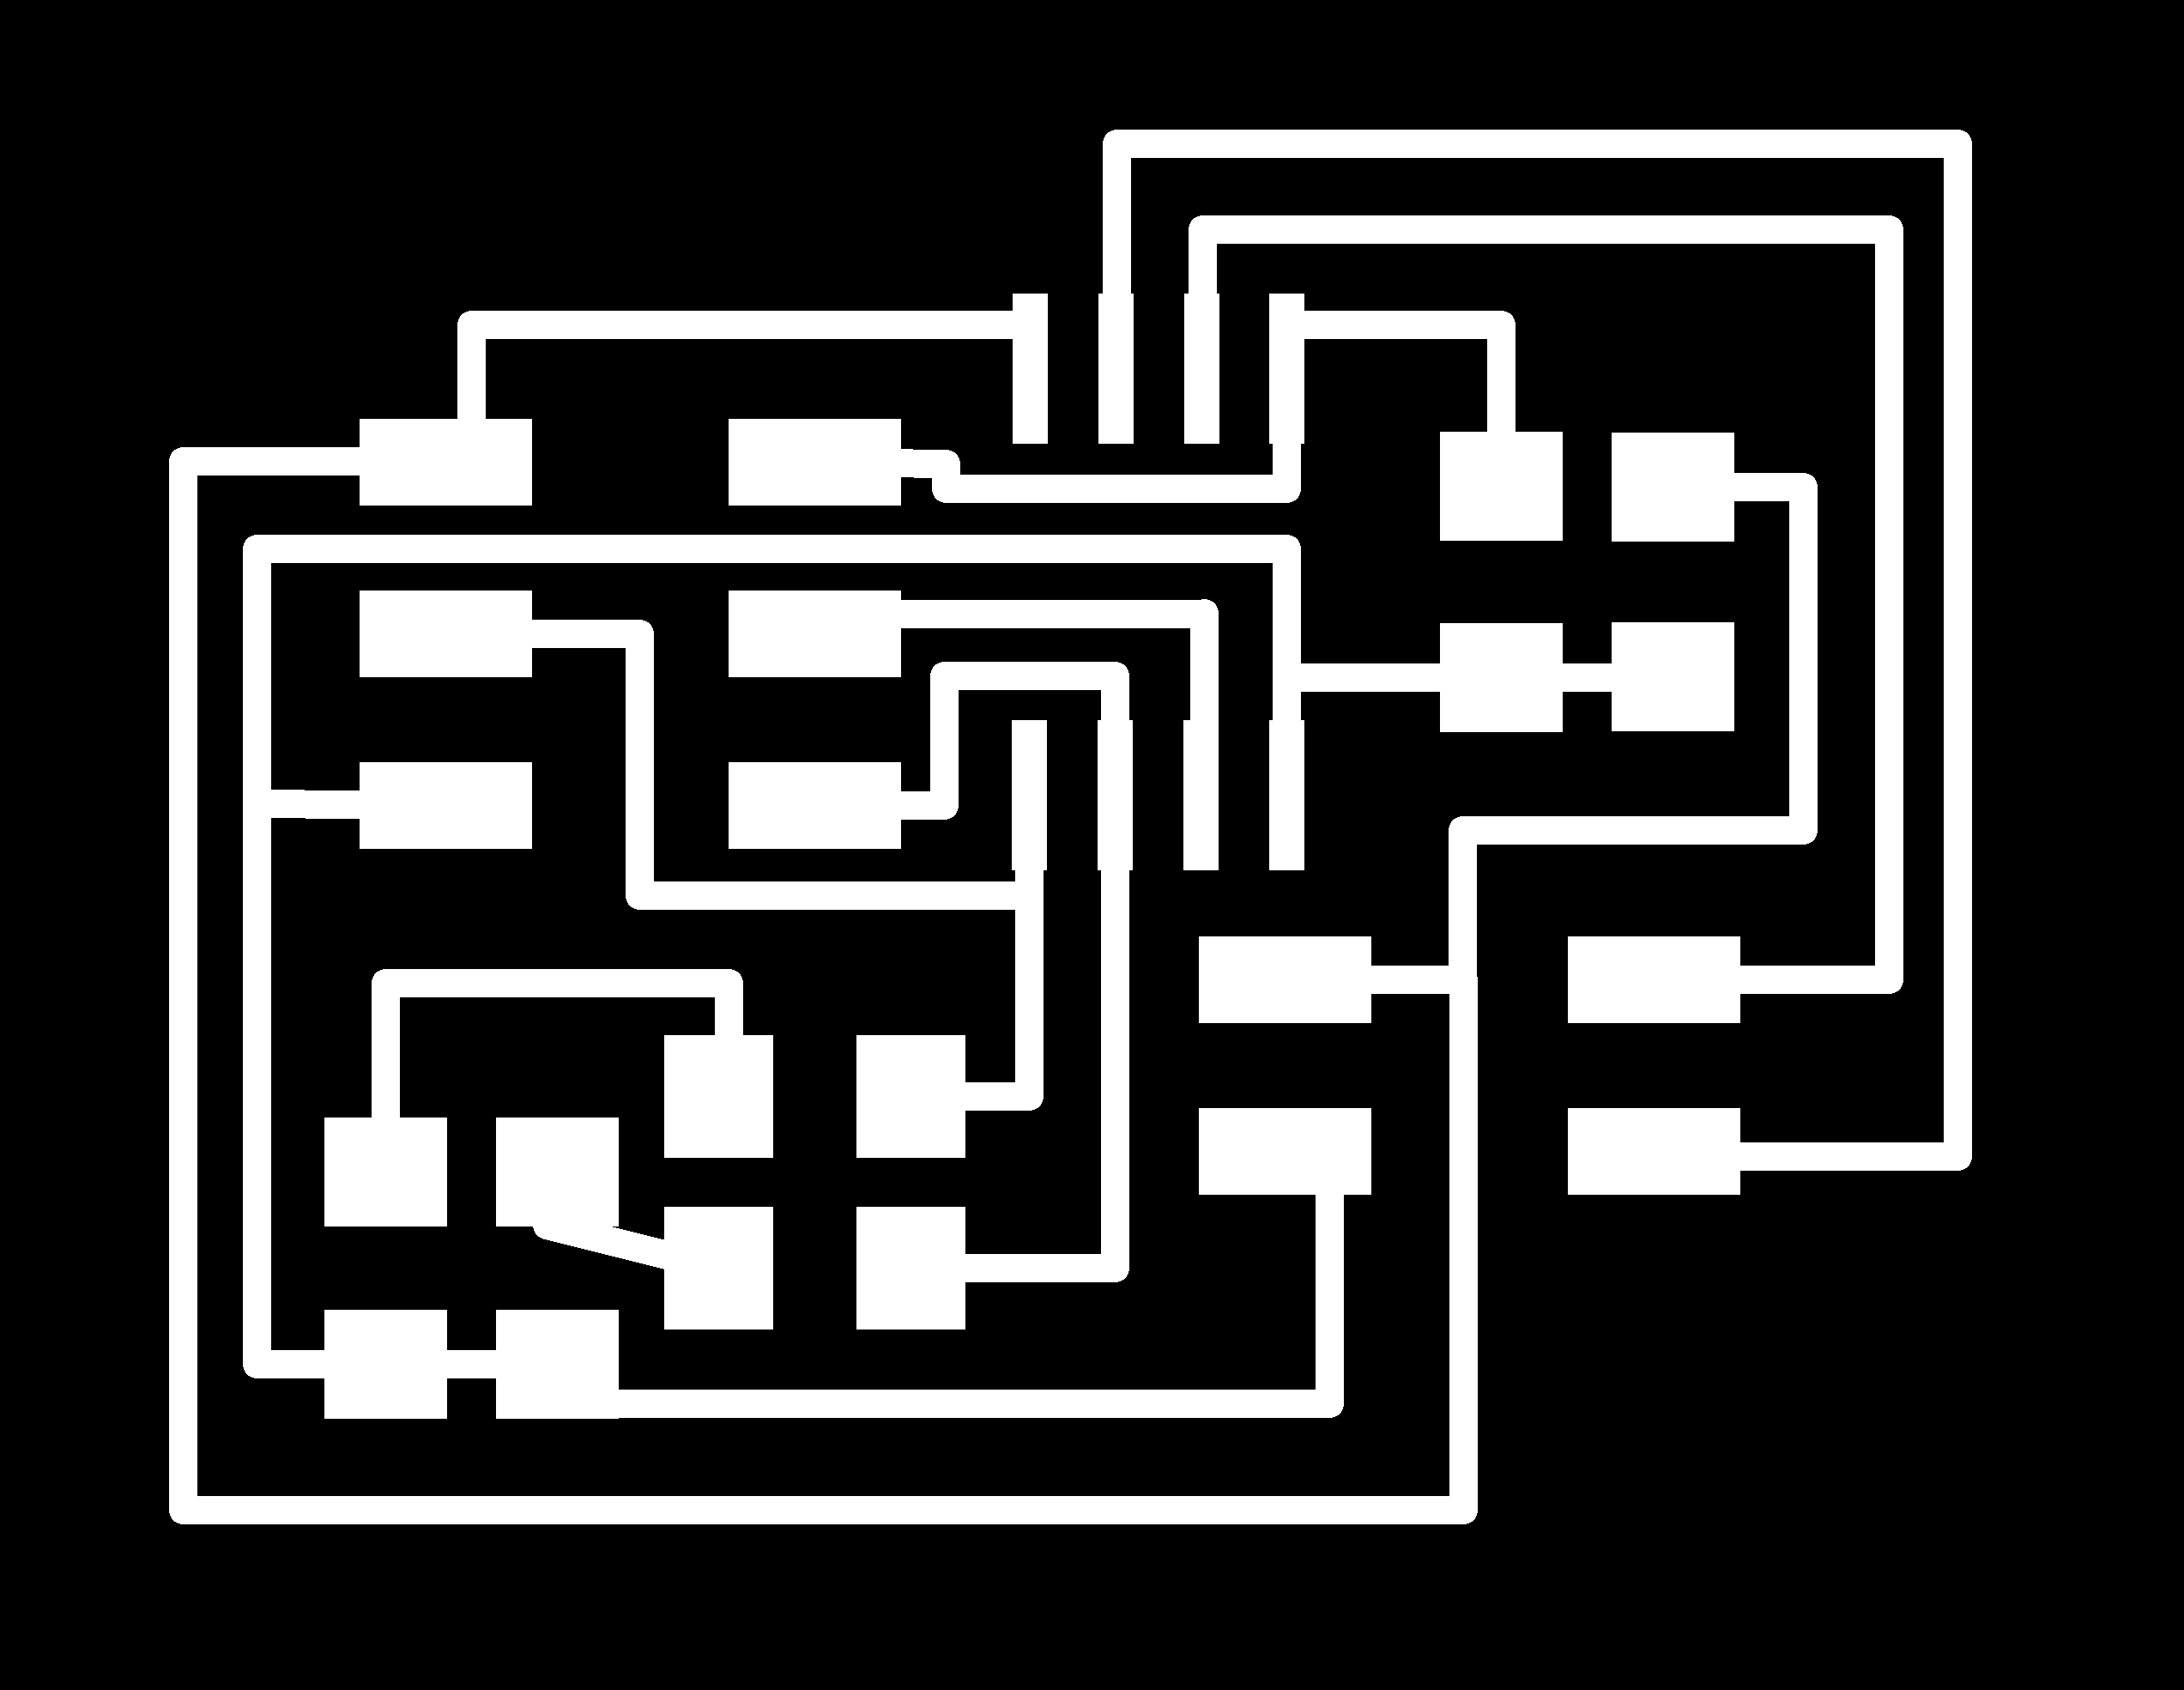
Node Outline:

Class example Bridge board:
I milled three I2C circuits, adding a second LED to each node. I didn't find any example code, but would like to look further into I2C in the future. I think, though, that asynchronous buses will work for my current idea of networking multiple independently controlled LED arrays.
Failures:
-Software Serial. I wasn't able to get mySerial.println("Hello") to return anything in the serial window.
-I tried writing a networking protocol from scratch. I was able to get individual boards to blink, but again, software serial didn't seem to be working. I'm sure the problem is on my end, but I've been unable to locate a solution as of yet.
Excellent resources: