Final Project updates
This week my focus was on designing and building my final project. Ideation for my final project has been interesting. I started off thinking about hexapod furniture and steampunk timepieces and have more recently been planning a surrealist raft and prototyping an Iron Man Arc Reactor.
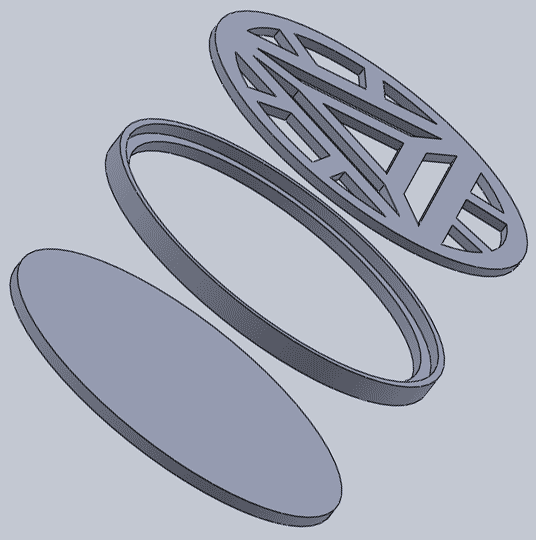
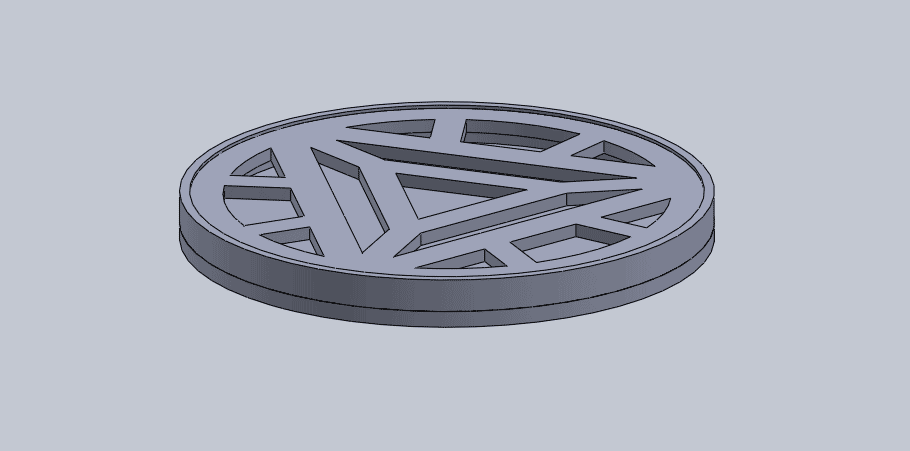
This week I worked on my Arc Reactor and went umbrella shopping for my raft. I initially made a charlieplexed board for this application before realizing that charlieplexing was pointless for this particular application. I want all of the LEDs to be on at the same time or all of them pulsing simultaneously; either way, this is easily accomplished by instead wiring the LEDs in parallel and connecting them to a single output pin. Click here for my design. Unfortunately, made the cutout path the incorrect radius. I fixed it on the scroll saw, but I haven't added the circuit cut-out file because it is currently incorrect.
I stuffed the board; it lights up!

A few mistakes to fix next time:
-cutout path (the electronics all fit on the board, but the cut-out path was too big for the circuit blank)
-Add a 2x3 header- the shop was out of most header sizes, so I soldered six strands of wire to the pads instead. I used single pins from strips of connectors as the method for plugging into the ISP (necessary since we only have multi-stranded wire). I was getting inconsistent results and the pins were too crowded to fit correctly into the ISP, so I couldn't program this week.
Tips and tricks:
-mark cathodes of LED pads with a marker. This way I didn't need to keep referencing the schematic to get proper LED orientation as I went; this is especially important for more complex wiring schemes.
-Adobe Illustrator works much better than Eagle for circular circuits
I'd like to put this LED panel behind a faceplate with the silhouette from Iron Man 2 with a light-diffusing layer. The light-diffusing layer has been more difficult than I anticipated. I've tried frosted glass, etched acrylic, tracing paper, and distance for light diffusion. None gave the desired result of semi-diffuse light that isn't too dim to be visible. Many tutorials I was referencing recommended polymorph plastic, which melts at a low temperature so is easy for hobbyists to use. However, I don't have any of this plastic on hand and didn't want to spend $30 on a small amount of the plastic. One tutorial recommended using a channel filled with hot glue. This approach wouldn't work well for this particular generation of arc reactor, as there is more continuous surface area to cover and hot glue would be difficult to lay flat, but it got me thinking. Could I use a layer of epoxy to diffuse the light? There's still plenty left in the shop. Lo and behold, I found an Internet forum in which talcum powder was recommended for this very purpose. I am going to try this method with the mold below (when I say mold I more-so mean casing; it will be epoxied to the switchboard for life) once I get my circuit programmed. There isn't really any way to debug the circuit once encased in epoxy, so I need to debug ahead of time.
My umbrella shopping proved fruitful. I went to Garment District in hopes of getting a cheap used umbrella, and, sadly, found none. However, I found a cheap (and awesome!) new umbrella. It even looks like what I pictured: a large black umbrella with a curved polished wood handle. If you Google 'Magritte Umbrellas' you should see why this umbrella is the perfect surrealist umbrella.
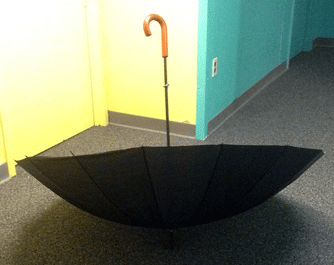
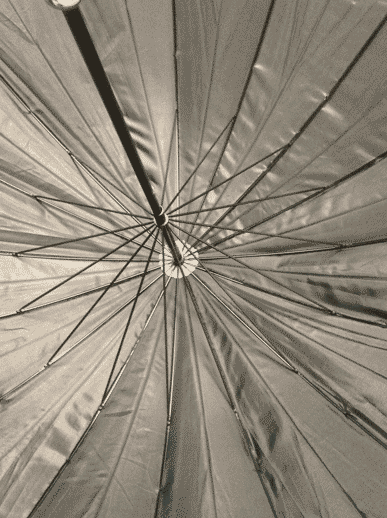
The only downside to this umbrella is that it has more supports than a normal umbrella. This makes it stronger but also leaves very little foot-room when upended and turned into a raft. (Left: new awesome umbrella. Right: Old, more roomy umbrella).

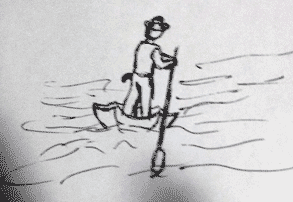
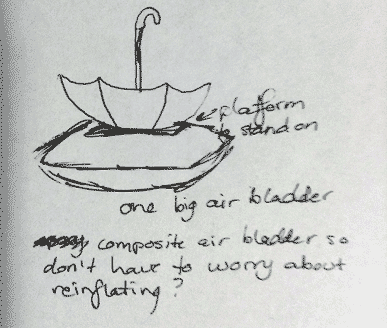
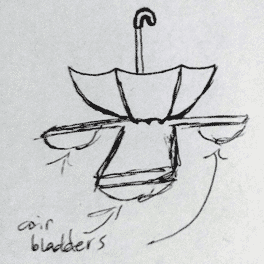
Here's a quick sketch of (sort of) what I'm picturing. Floating the the Charles on an umbrella Gondola.
Components:
-platform under umbrella to stand on
-air pockets for buoyancy. Either inflatables or composites around an inflatable.
Preliminary testing suggests that umbrellas are water-tight membranes rather than merely water-resistant (tested by pouring a glass of water into an overturned umbrella and checking for sweat on the umbrella). This will make it much easier to design a craft that doesn't just sink when the person stands on it or leans over.
Random ideas for future pursuit (I'd love to do a few quick mock-ups if I have time):
-Vinyl Cutter for glass etching
-Stained Glass on the waterjet
-Inflatable stuffed animals using mylar (emergency blankets), an iron, and this pattern.
(By Nooby-Banana on DeviantArt)
-Water-jetted Batarangs
-Icicle Chandelier using clear casting medium and small glass beads for light diffusion (or bubbled acrylic rods for stalagmite-type lamp).