Molding & Casting
Tiny Toilet
Step 2: Draw your piece; in my case, this was a tiny toilet. Some pro tips:
- Intersect a plane through the middle, and lay one half in each half of your stock.
- Draw male and female registration marks that can interlock to keep your flexible mold aligned.
- Add two holes: one for pouring and one for venting. As you draw these, keep your pouring hole as wide as possible; the vent hole does not need to be as wide. Also consider how your hydrostone slurry will distribute itself through the void, and try to position your pour hole to avoid trapping air in random crevices.
- Make sure the highest point of your piece is 1/8"-1/4" below your stock surface to avoid any super thin walls on your flexible mold. I believe the Oomoo box recommends 1/2" tolerance, but that seems like overkill.
- Finally, make sure all the features of your piece, all your registration marks, and all the gaps between your piece, registration marks, pour hole, vent, and walls are wide enough to accommodate a 1/8" end mill. This could be exactly 1/8" if needed, but watch out for corners!
Time: 4h
Step 4: Set up toolpaths. We started parallel roughing with 1/4" ball end mill, leaving a few hundredths of an inch for the finishing cuts to clean up. Next, we added a scallop finishing pattern using the 1/8" ball end mill and a 1/64" step over. Finally, we used a 1/8" flat end mill to clean up the corners where the ball end mill couldn't quite make a 90 degree angle.
Step 5: Simulate your toolpaths and export a separate g-code file for each toolpath. The whole Mastercam process took an incredibly long time, mostly because there were lots of adjustments to the drawings that needed to be made along the way. For example, we rounded the corners on my rectangular registration mark so that we didn't have to turn it into a dog bone. Also, a lot of the tips in Step 2 were painfully figured out during the Mastercam process. If I had one big take away, it would be to draw your piece early and reach out to Zain (or your shop's resident Mastercam expert) immediately.
Time: 6h
Step 7: Mill! Hang out with your machine to make sure it doesn't make any funny noises and it's making good chips. Good chips are sizeable in two dimensions, whereas bad chips are small in one or both dimensions. Bad chips may indicate your speeds or feeds are too high.
Time: 2h
Step 9: Pour some Oomoo. I tried to get as thin of a pouring stream as possible to further eliminate any bubbles, but this slowed down the process as well. Once I reached the top level, I pounded the mold on the table again to try to remove any remaining bubbles. According to the box, Oomoo 25 has a 75 minute cure time, but it still felt a bit sticky after 75 minutes, so I waited a few hours before prying my flexible mold out of the rigid mold.
Side note: While Molly was helping me set up my Mastercam file (attempt 1 of 3), she suggested I make tiny chocolate toilets as gifts, so I also poured a food safe mold using SORTA-Clear 37.
Total time: 2h
Step 11: Pour some Hydrostone. I basically had to drip the Hydrostone solution into the pour hole because it took so long to slide its way in. I also recommend tilting your flexible mold to make sure no air pockets form in any odd crevices. Tapping can also help any bubbles escape.
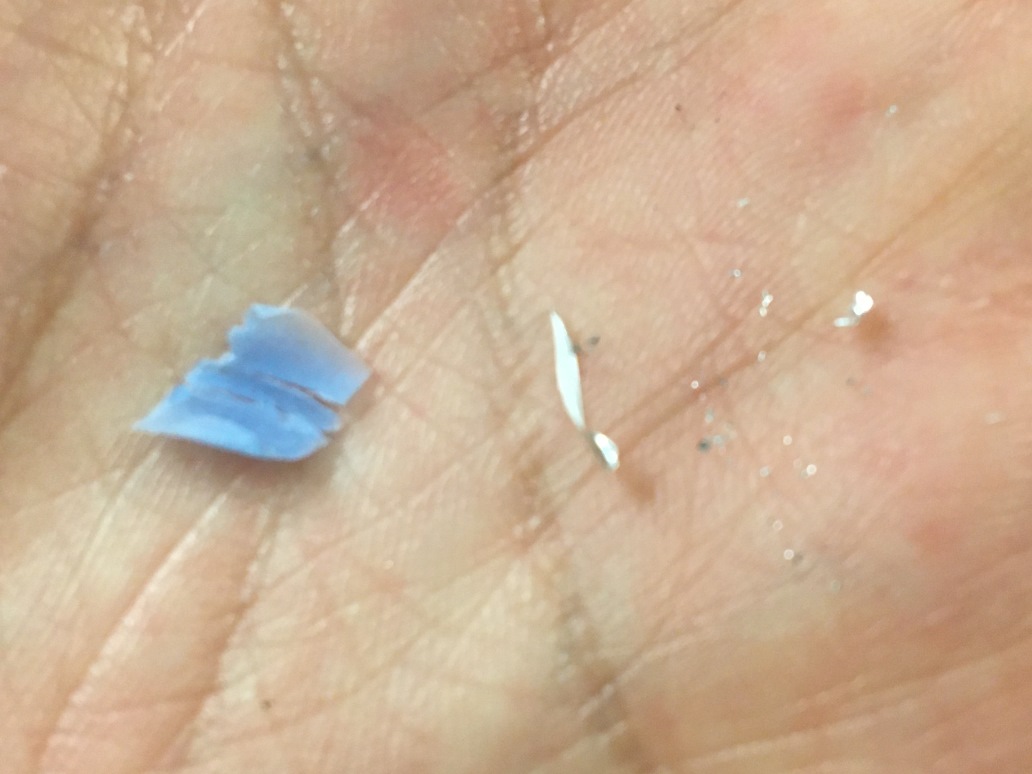
Step 12: File down any imperfections. During the Mastercam step, I had forgotten to have the final 1/8" flat end mill run around my actual piece to ensure those nice 90 degree corners that I had for my registration marks. This created a seam around the center line of my tiny toilet, which I had to file down to make sure it could stand properly on a flat surface. I left the rest because I had already spent way too much time on this project.
Time: 4h


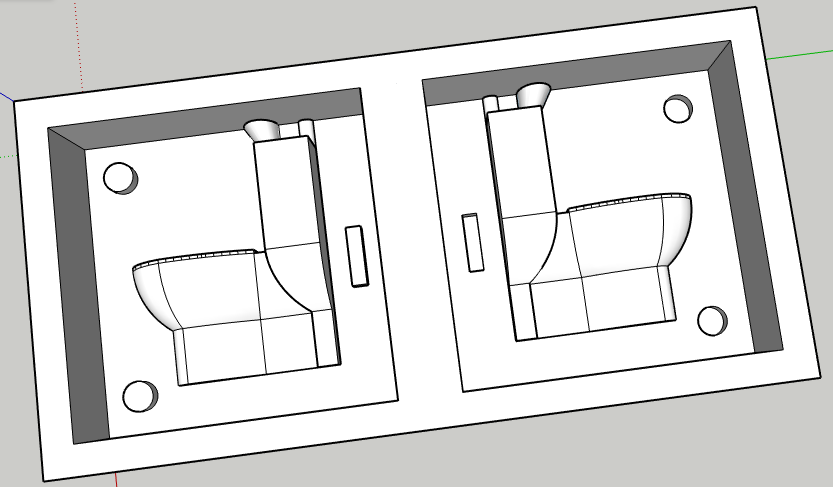
Drawing #2
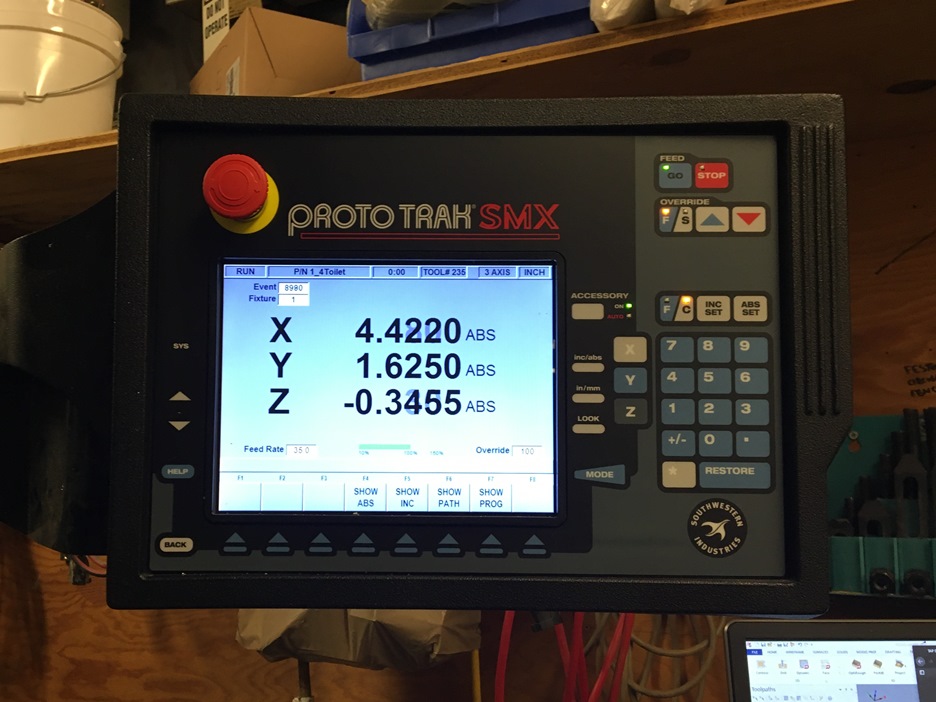
ProTRAK SMX

Surface roughing
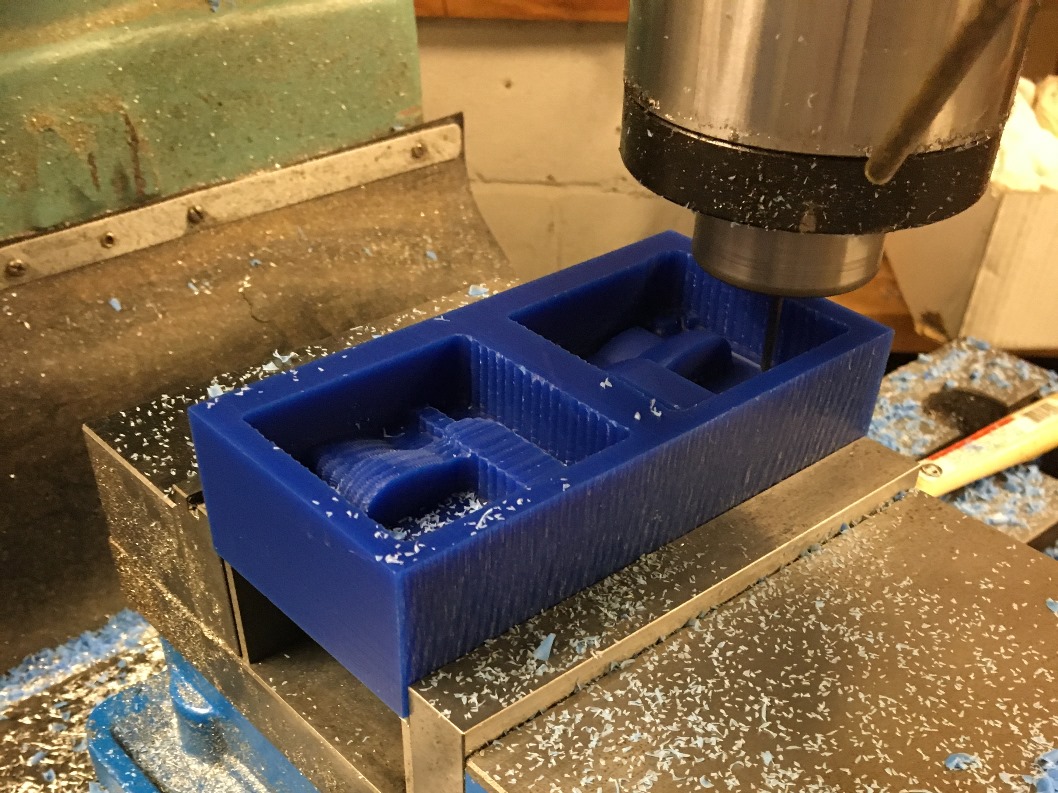
Milling
Scallop finish
Good chips and bad chips
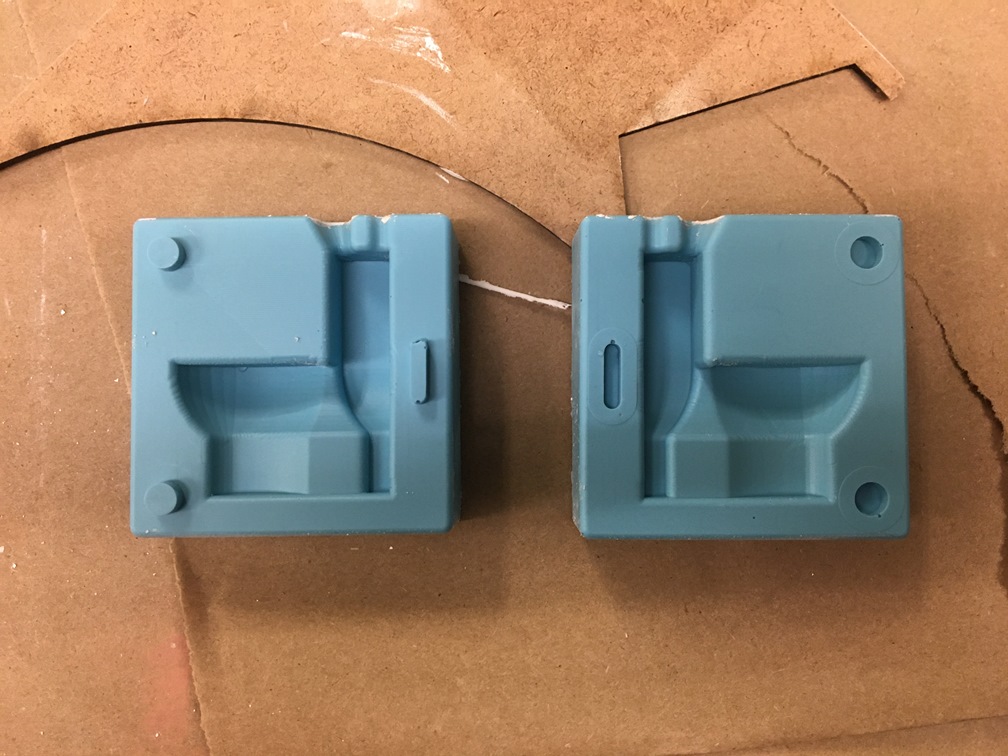
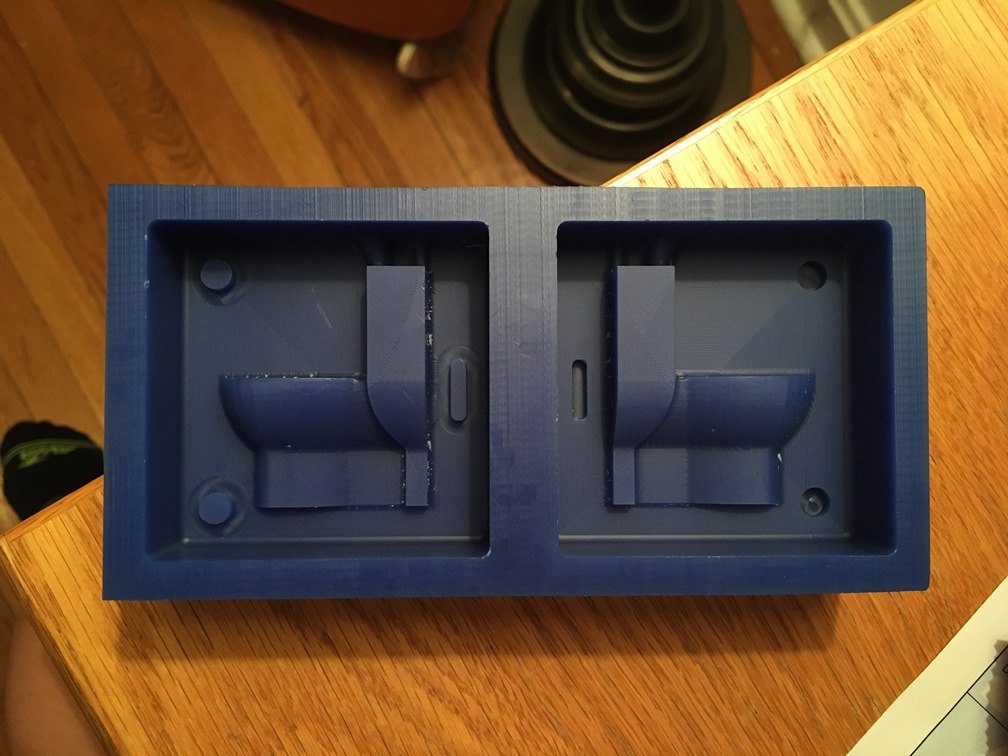
Oomoo flexible mold
SORTA-Clear flexible mold
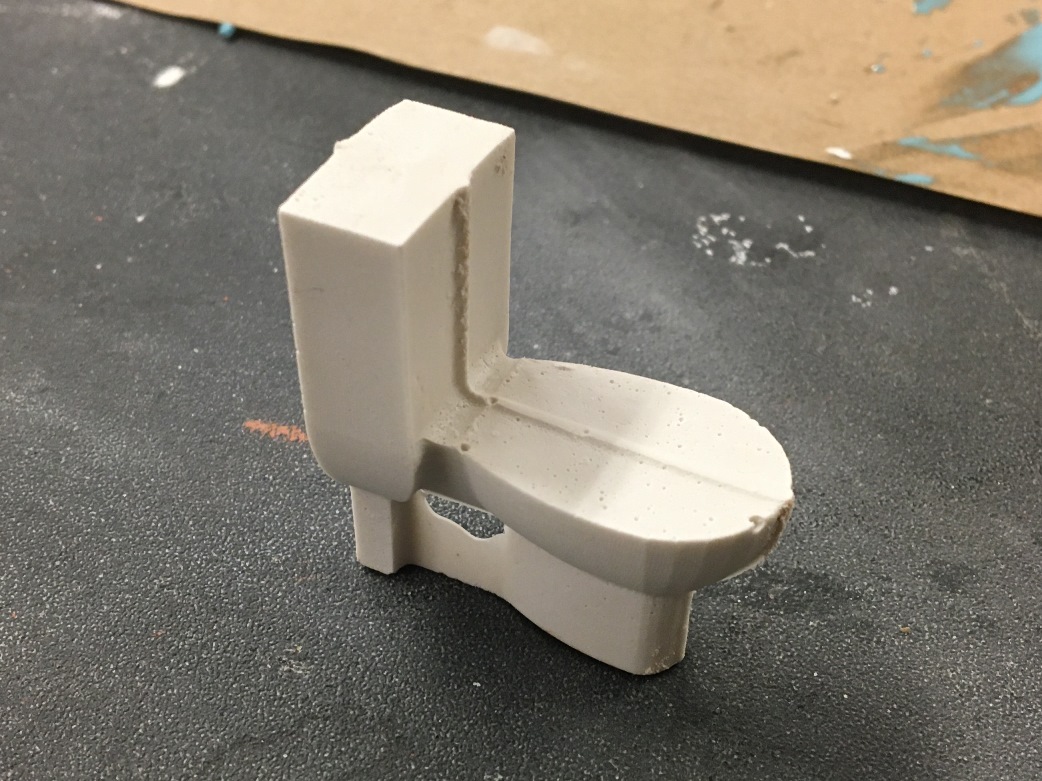
Tiny toilet!