Programming
Reading the data sheet
There was very little of the data sheet that I understood, but with a little help from our friend at Harvard, Brian Plancher, and his handy guide to
Electronics Design, there were a few pages that
I did manage to understand. They are as follows:
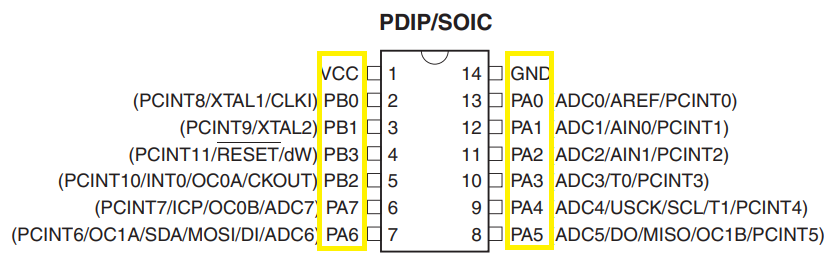
- Page 2: Pin configurations (Figure 7a), key to programming your board correctly
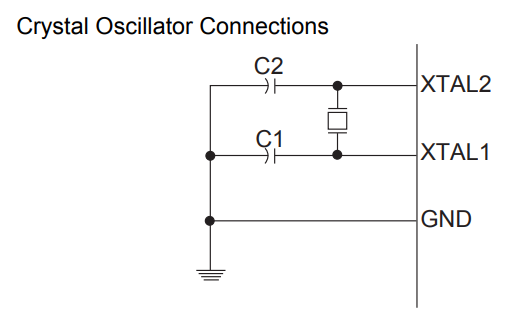
- Page 28: How to attach your resonator (Figure 7b)
- Page 60-62: Alternate functions of port A, aka what all those letters stand for!
Programming the board
I struggled with programming using straight C without libraries, so instead, I followed the tutorial and instructions for using Arduino on
Jacklyn Berry's page. The key here was to replace the pin
numbers in her code with the relevant pin numbers from my own board using the unique numbers (Figure 7a, highlighted in yellow) Arduino assigns to its
pins.
The final result: the blue LED remains on when attached to power and turns off when the button is pressed!
Total time: 2h
×
![]()
Figure 7a
×
![]()
Figure 7b
Figure 7b
×
![]()
Figure 7c