Final Project
Robotic fish
- Create bouyancy without the foam block
- Add functioning sensors
- Add second servo motor for better fin movement
- Dip entire circuit in a resin/epoxy
- Create swim controller
For input week, we made a list of possible sensors that we could attempt: turbidity (phototransistor), pH (difference in voltage), temperature, and electrical conductivity (following the alcoholic beverages example?). I recently found this great tutorial for a DIY turbidity meter that could help me with the turbidity meter while Patricia works on the pH meter. For output week, we could look at creating a user interface that displays information from the sensors, ideally via bluetooth. For machine design, we could look into different types of motors and how we could use them to mimic the movements of a fish, particularly the tail.
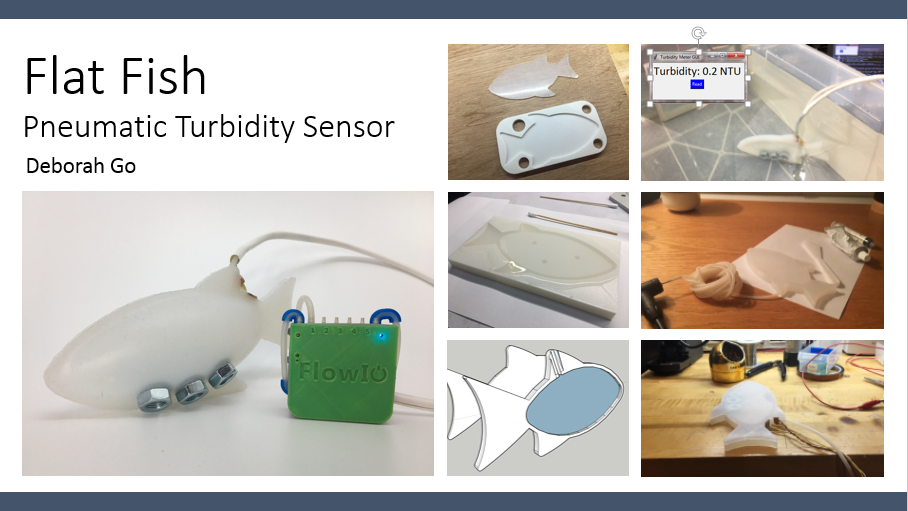
We will consider casting the body in silicone (Oomoo), where the bottom is solid, but there are pockets of air in the top to keep the fish upright. Similar to Jin's project, we will leave a cavity for electronics and seal the fish with glue. One key challenge will be to position the sensors so that they can test the water quality but also not become damaged from contact with water.
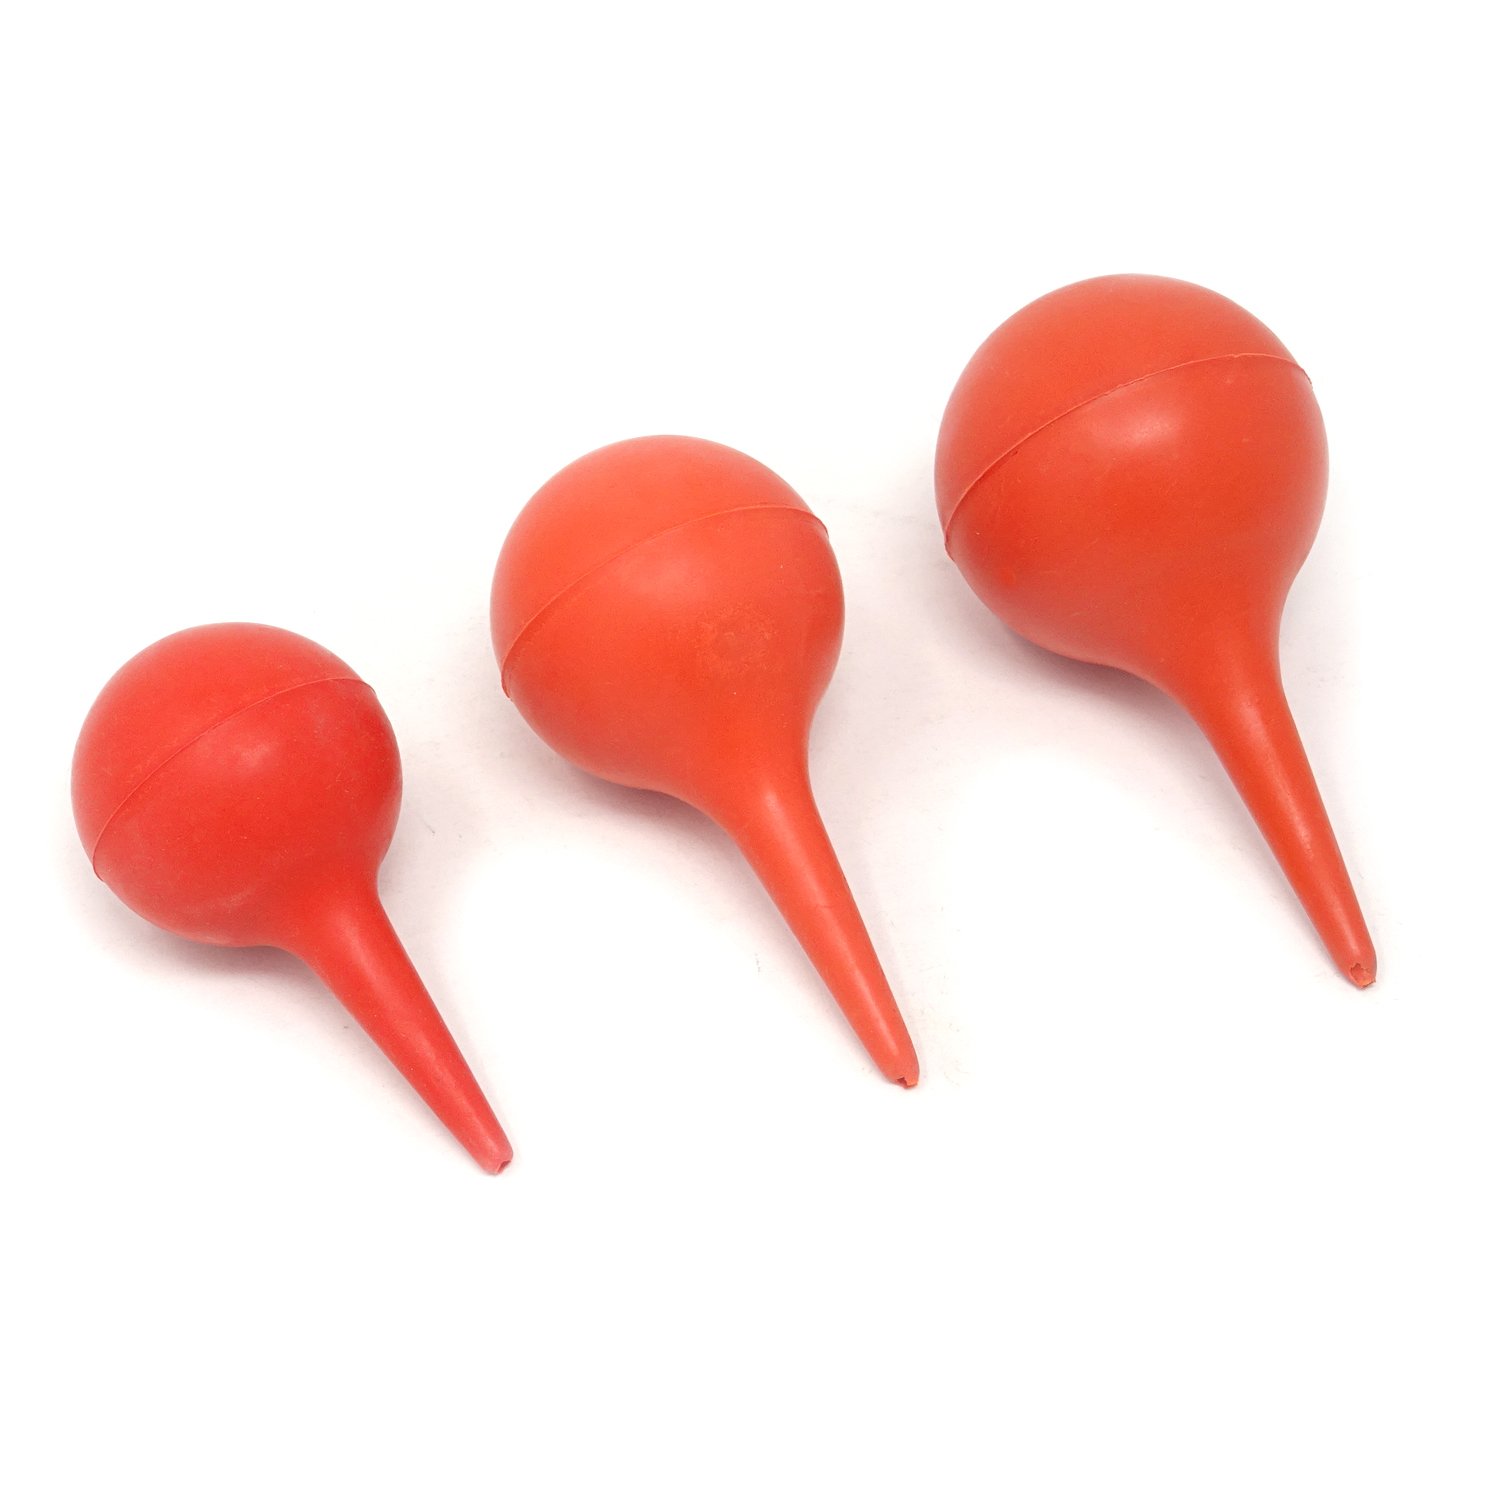
- Bouyancy: To achieve the desired bouyancy--a fish that remains right side up, below the surface of the water, and doesn't sink to the bottom--we will need to consider its center of gravity and the material of the fish and, ultimately, balance mass and volume to achieve a density equal to water (997 kg/m3). Paloma suggested a sort of eyedropper/basting bulb design where we could squeeze water in and out of the fish body to adjust the vertical position of the fish, take in water for measurement, or less likely, propel the fish forward.
- Water considerations: While none of our electronics would be damaged by the water itself, we would run the risk of shorts. To avoid this, we could coat electronics in some sort of acrylic seal or, once we know everything works, cast our electronics into a flexible mold. It's also worth noting that bluetooth, which we planned to use to communicate sensor readings to a GUI, may struggle to work at certain depths of water.
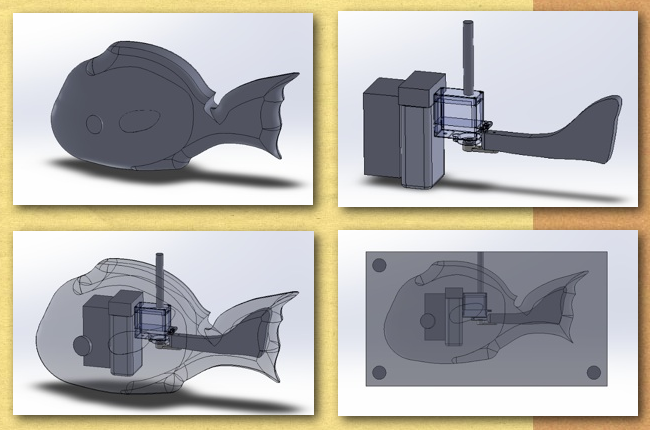
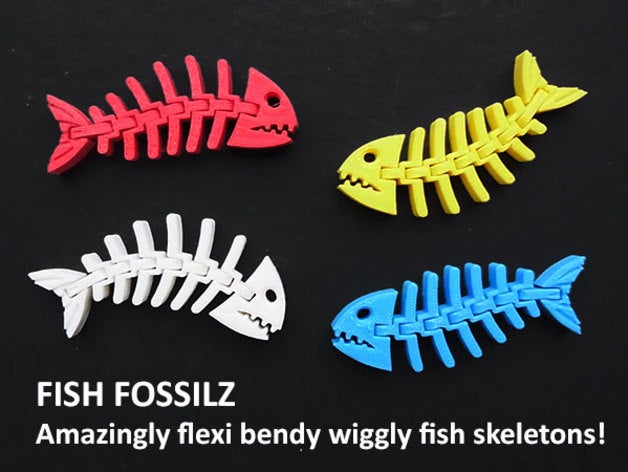
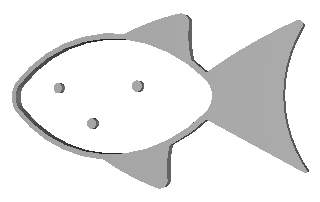
- Materials: Some fun material ideas that came from our conversations included laser cutting plexiglass "eyes" that the sensors could read through and 3D printing a fish skeleton that would constrain the back and forth motion of a servo motor into a translating wave, mimicking the motion of a fish tail and generating actual forward motion.
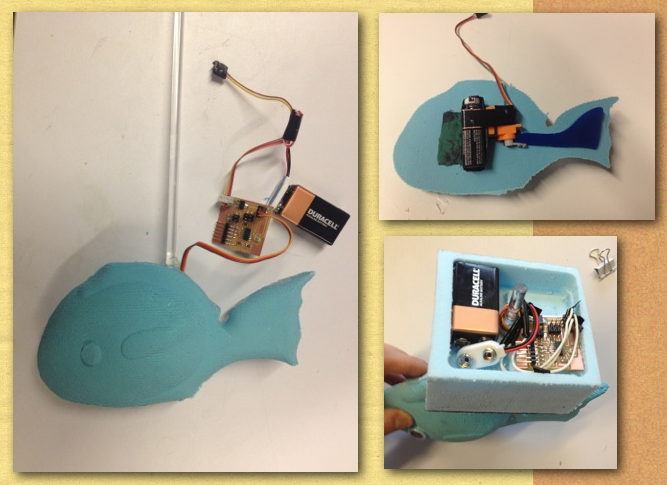
- Power source: Jiri suggested a lithium battery with a nominal voltage of 3.7V for its energy density and small mass. He cautioned us to make sure we have undervoltage protection in place, perhaps an LED that illuminates when the voltage is low, to protect the microprocessor. Jiri also suggested we check that the microprocessor and sensors will work with the lithium battery voltage. Apparently servo motors are commonly for 5V power sources.
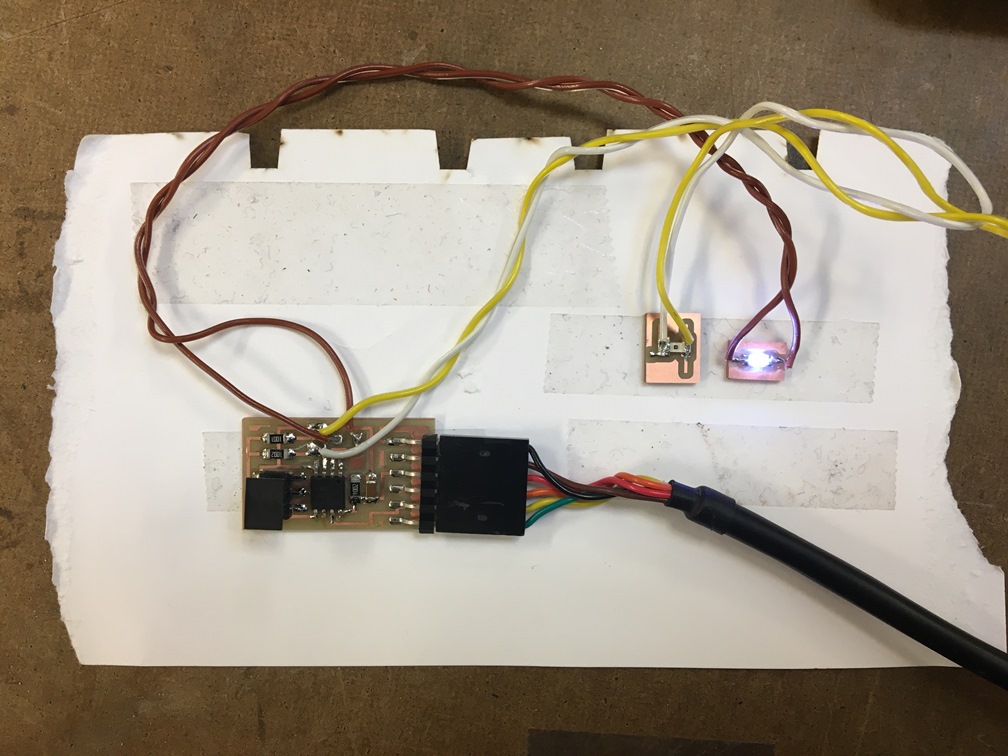
Input devices: This week I built a rudimentary turbiditimeter that would estimate water turbidity based on the amount of light sensed/scattered between an LED and phototransistor. I tried out my turbidimeter in some clear and murky water and learned a few quick lessons.
For starters, when I dunk both the LED and phototransistor in the water at the same time, the readings on the GUI go off the charts. I proceeded to keep the phototransistor out of the water moving forward, which means I'll also want to keep the phototransistor behind some sort of clear window (eye?) on our fish.
I also found, as Jiri predicted, that the phototransistor couldn't really detect a difference between the clear and murky water. To decrease the brightness on the LED, I replaced the LED's 1k resistor with a 10k resistor.
Output devices: This week I made an OLED board to display readings from the turbidimeter.
Networking: This week I made two radio boards to transmit readings from the turbiditimeter and receive readings to the OLED. For some reason, I thought it would be pretty straightforward to get all my boards to talk to each other. That was ludicrous, especially since I understand nothing about c programming.
I learned from Anthony and Alexandre that I first needed my radio transmitter to receive characters serially from my turbiditimeter. This involves the addition of a "get_char" function, which I borrowed from Neil's asynchronous serial bus c code.
I also learned that my transmitter radio was sending messages in hexadecimal. I found this Programming Basics: Hexadecimal video helpful in demystifying this otherwise terrifying looking language. I also borrowed some c code to convert decimal to hexadecimal and tried adding that to my turbiditimeter code to get everything in the same language. I also found this Hex to ASCII Text Converter helpful to have in my back pocket in the event I needed to convert everything to one language or another.
Machine week: This week I worked on controlling the servo motor that actuated our claw. Thanks to some fortuitous trialing and erring with Jung, I learned that the speed of the servo can be altered by redefining the loop count. This came in handy when I wanted to increase the speed at which our fish moves its tail. I also learned to interpret Neil's servo code and adjust the position of the servo arm. Finally, I also found a wealth of servo attachments on Thingiverse that we can use to actuate the fish tail.
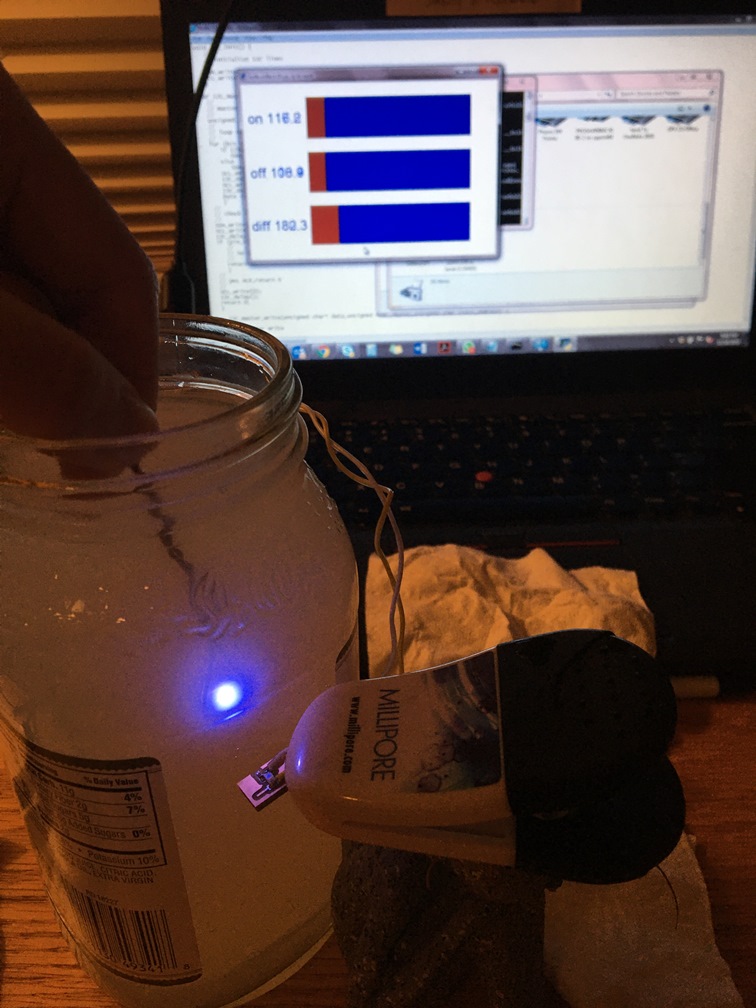
User interfaces: This week I created a simple user interface that can read the turbidity measurement from my input device.
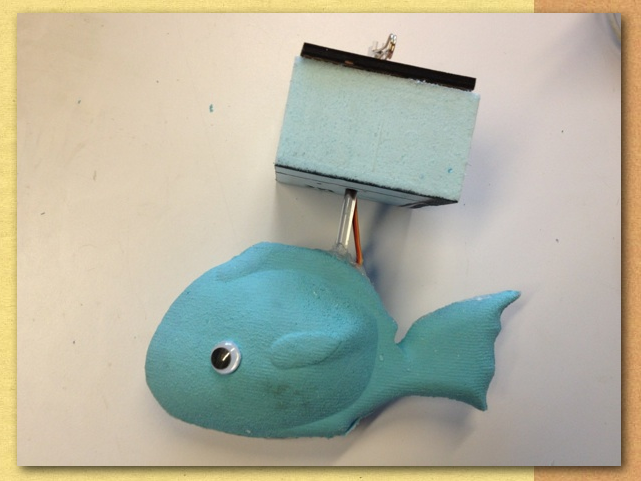
Wildcard week: This week I joined Ali's soft robotics group. I attempted to make a soft robot that resembled a fish when inflated (harder than it sounds) and increase or decrease in bouyancy by inflating or deflating.
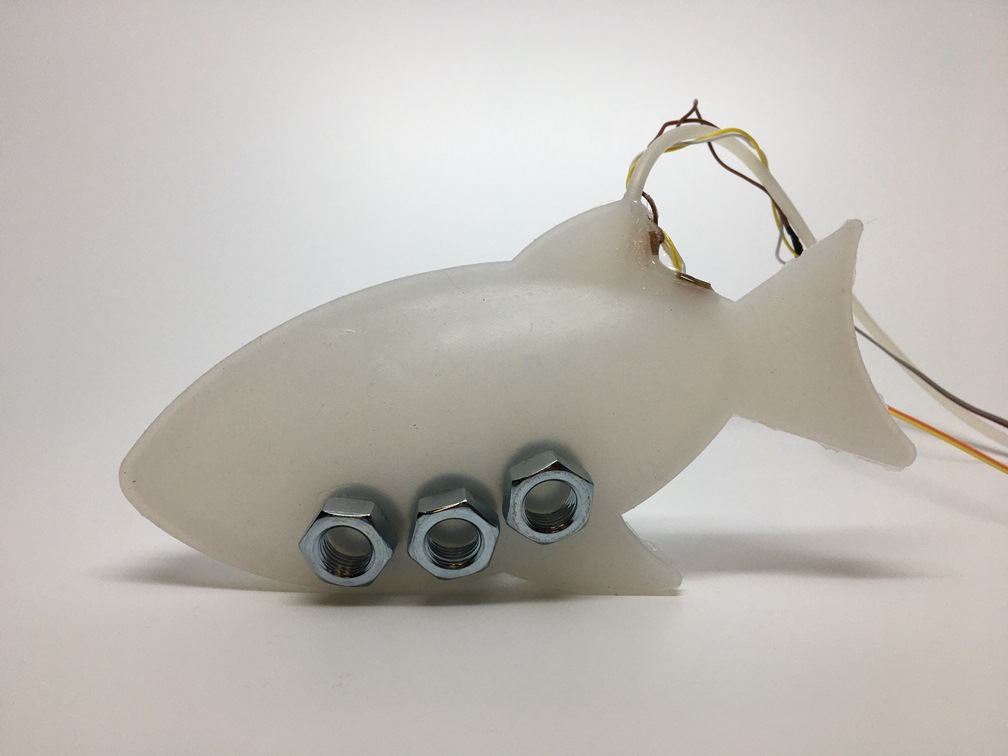
Once I had my fish inflating, it simply became a matter of 1) properly orienting the fish in the water and 2) waterproofing the sensors. With some help from Ali and Anthony, I found some heavy washers and nuts to Sil-Poxy on the inside and outside of my fish. By placing these in/on the "belly" of the fish, the fish stayed right side up in the water (rather than flopping on its side) and sank to the bottom of the tank (so it could then be raised up pneumatically). Anthony also set me up with some 5-minute epoxy to smother my LED and phototransistor in so that they didn't short in the water.
After many, MANY long hours, my fish was able to raise and lower itself to different water depths, read the turbidity of the water at varying depths, and send those readings to a simple user interface on my computer.
While there is definitely more that could be done, including the wireless transmission, servo motor, and OLED ideas mentioned above, at this point, I'm not sure it's worth it to continue developing the idea. On one hand, there are countless water quality measurement tools that already exist, and adding another to the market seems superfluous. On the other hand, most water quality measurement tools require taking water samples at regular intervals to monitor water quality. The convenience of this fish is that it could continuously monitor water quality without constant sampling.
- Smooth-On Dragon Skin 10 NV Silicone Rubber: $4
- Smooth-On Slo-Jo Silicone Cure Retarder: $1
- Smooth-On Sil-Poxy Silicone Adhesive: $1
- Silicone tubing 2mm ID x 4mm OD: $4
- 6 large nuts: $1.50
- 6 large washers: $0.60
- Hardman Extra Fast Setting Epoxy: $1.60
- 6"x8" single side circuit board stock: $1.40
- ATTiny45: $1.23
- LED white: $0.25
- Phototransistor: $0.15
- 3x10k resistors: $0.02
- 1uF capacitor: $0.07
- FTDI header: $0.50
- AVRISP header: $0.60
- Indiscriminate amounts of wire, housing, and heat shrink

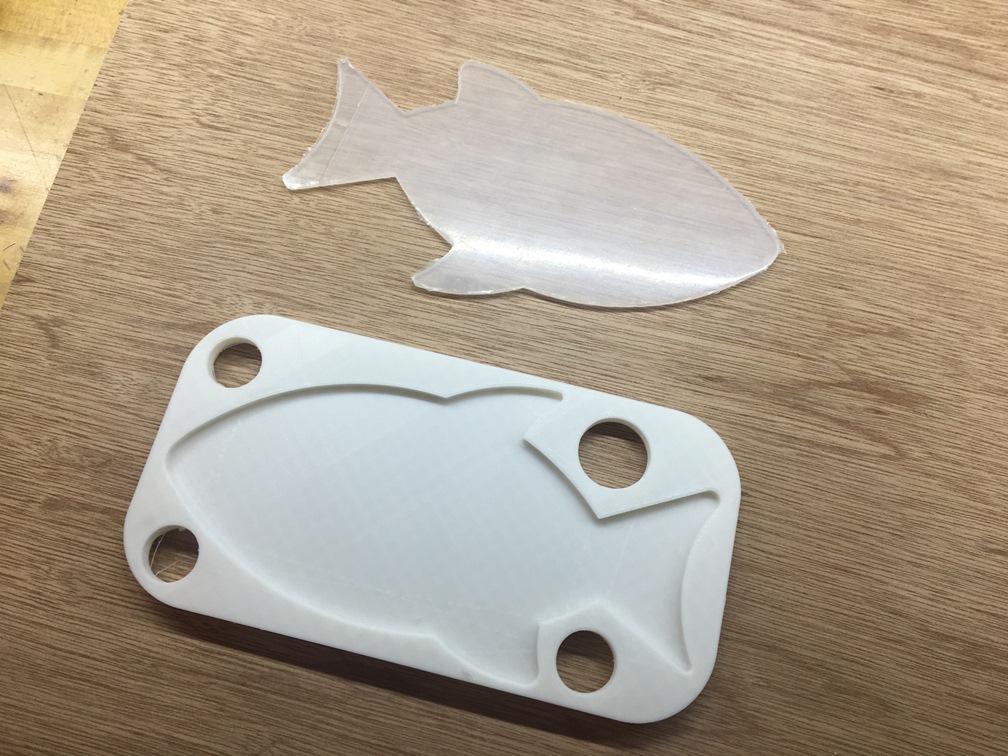
Silicone only
With weights and sensors
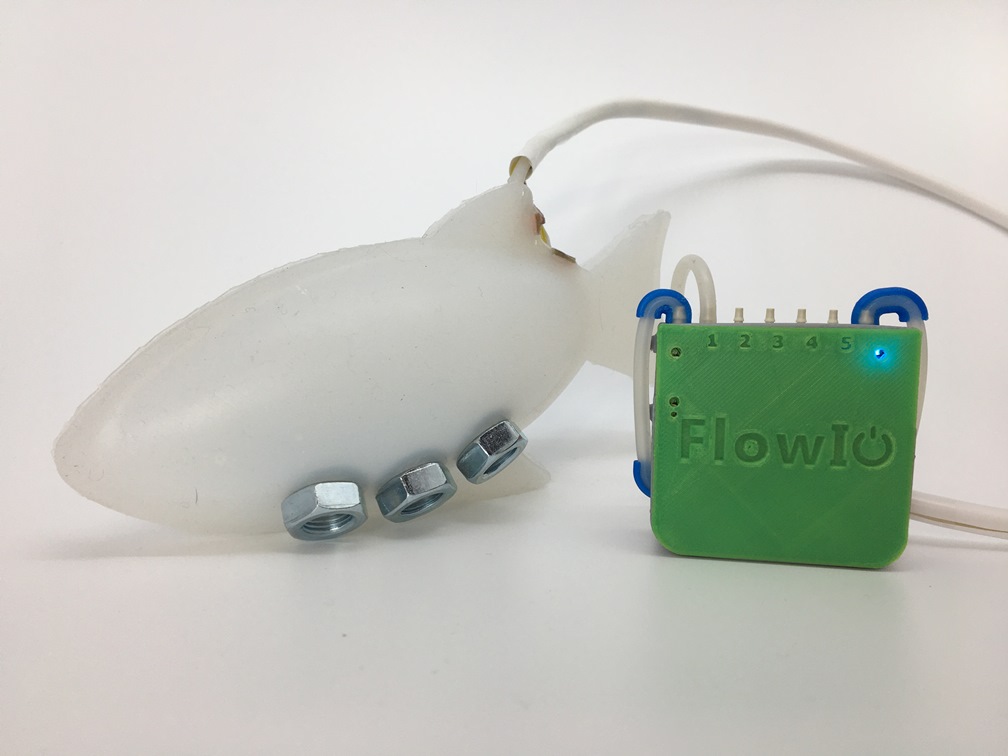
Fully functioning!