Vinyl & Laser Cutter
Making a sticker
Vinyl cutter
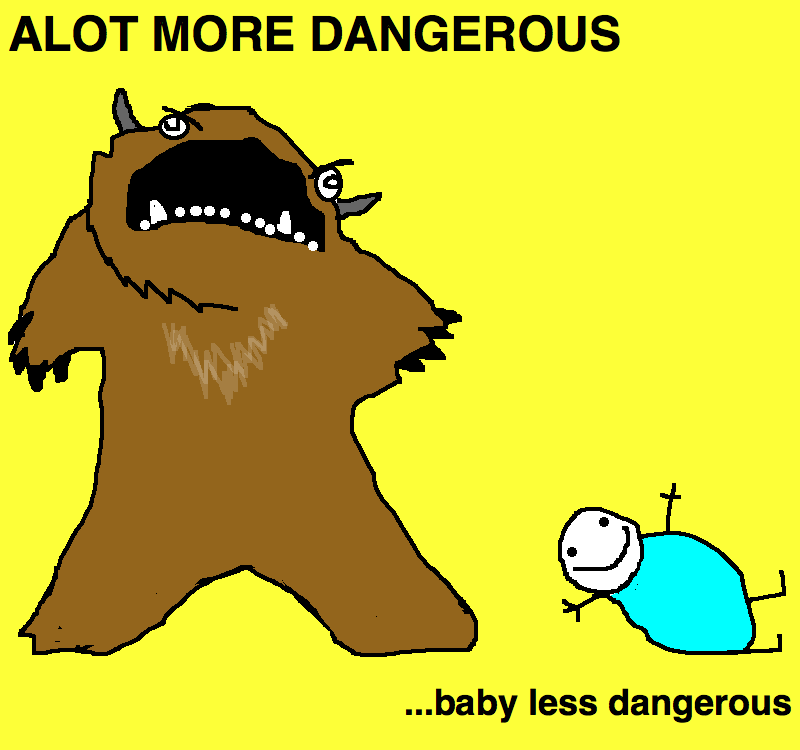
The inspiration for my sticker came from a comic titled
"The Alot is Better Than You at Everything" by Hyperbole and a Half. Rather than getting upset everytime someone spells "a lot" as one
word rather than two, the author imagines people are intentionally referring to a monster called the Alot. The comic depicts multiple scenarios
in which the Alot finds itself--I care about this Alot, Alot of beer cans, I hear that Alot, I like this Alot more, etc. I chose the depiction
shown to the right (Figure 2a) for my sticker.
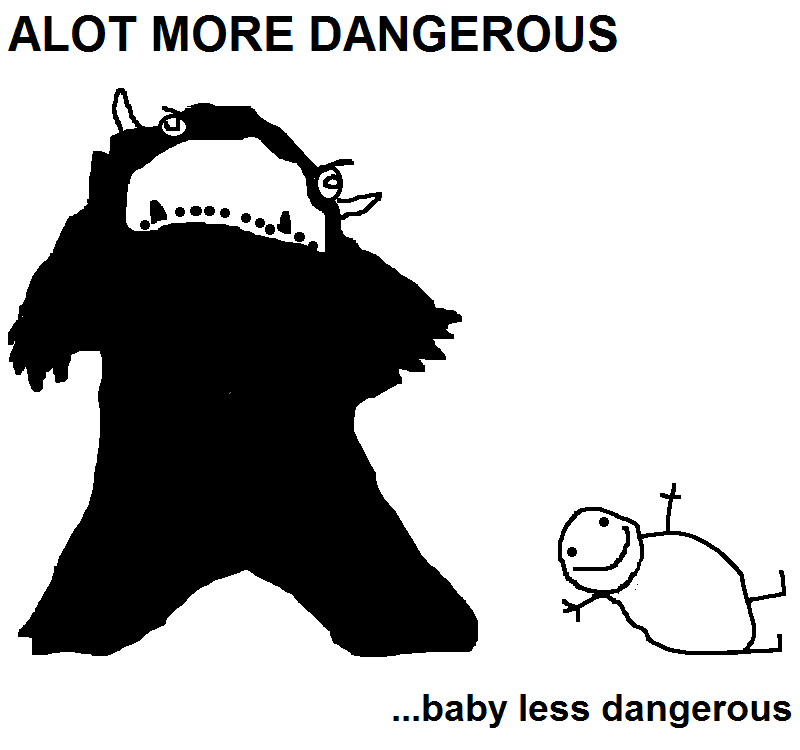
My first task was to turn the image into something monochrome (Figure 2b) for the laser cutter. Anything beyond basic technology still scares me, so I
used a combination of artistic effects on Word and the paint bucket tool on MS Paint.
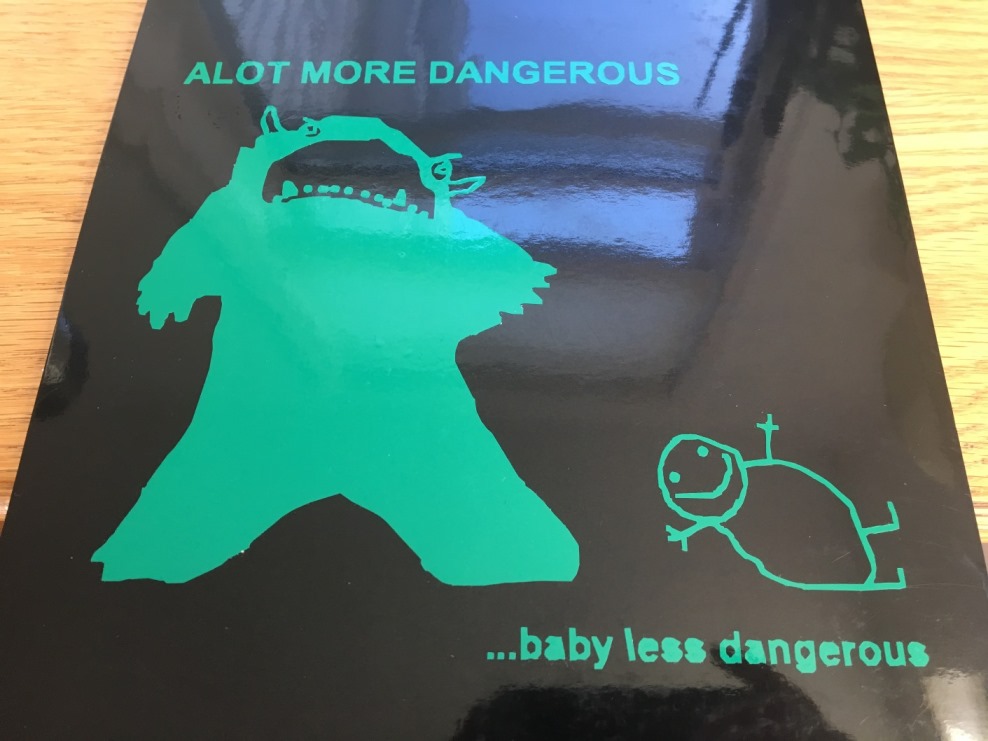
I tested the vinyl cutter with Jordan, and in hopes of a slightly clearner cut, we moved the fine adjustment slider to +2 from the standard
90 gram force. Even with the slight increase in gram force, I still had to hold some of the small pieces down with the tweezers while weeding. The
result is shown to the right, covered with contact paper and ready to transfer.
When I transfered the sticker, I got a few air bubbles in my Alot, so I took an X-Acto knife, made a tiny incision in each
bubble, then smoothed the air out of the cut (Figure 2c).
Total time: 2h
×
![]()
Figure 2a
×
![]()
Figure 2b
×
![]()
Figure 2c
Press-fit construction kit
Laser cutter
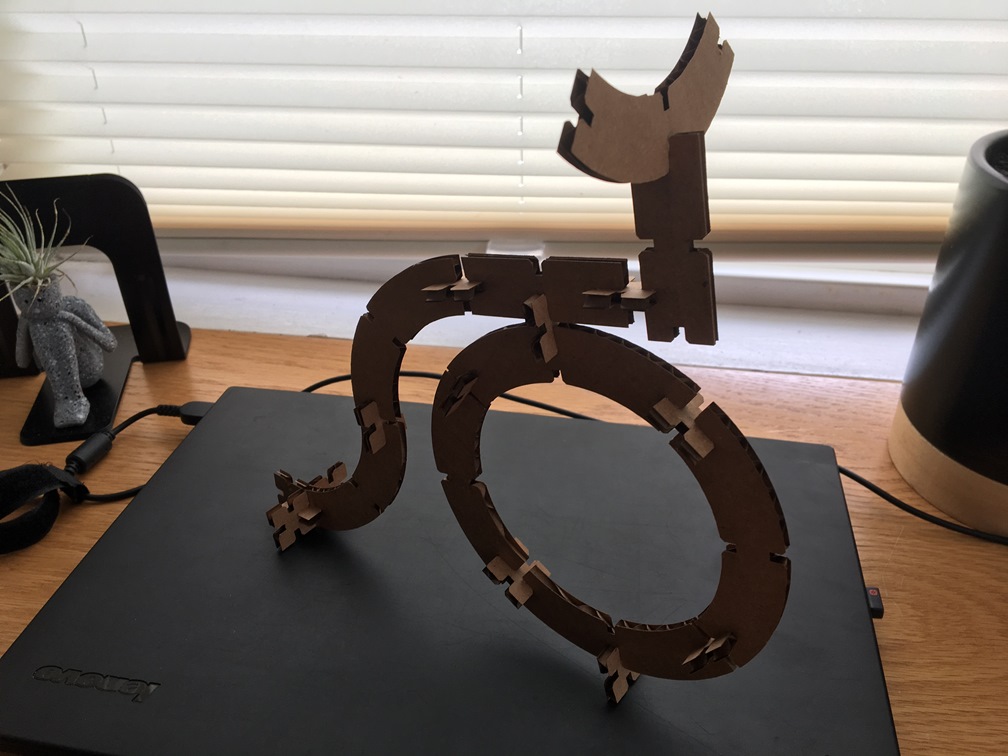
I started off wanting to make things like a penny-farthing (Figure 2d) or a pen holder. I stumbled across
Elliott Forde's laser cutting project from last year and decided
the pieces he cut would be the perfect multi-purpose set with which I (and my niece and nephews) could make bicycles, cylinders, and so much more. I
liked the idea of having a few basic shapes that could reassemble into seemingly endless configurations.
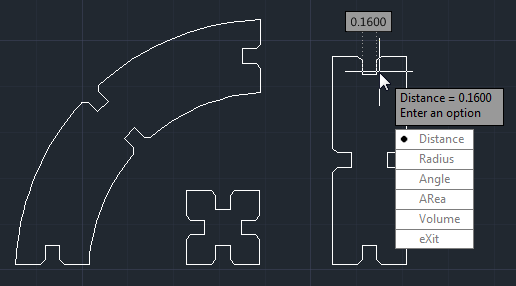
In my laziness, I borrowed the dimensions from Elliott's drawing, which used .16" as the width of my slots, and I assumed the material used
was 3/16" (or .1875") corrugated cardboard. I drew my pieces in AutoCAD (Figure 2e), which I had learned 10+ years ago and felt easier than
learning a new software.
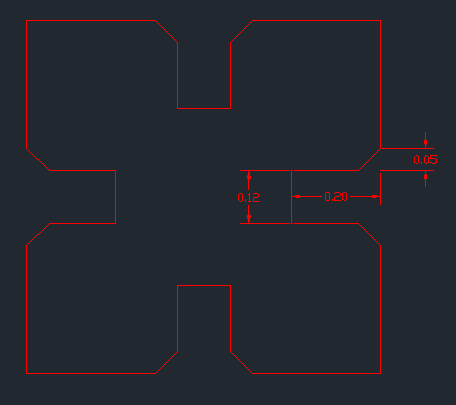
When I arrived at the lab, I realized our cardboard was 1/8" (or .125"), but I tried my drawing anyhow as part of the
characterization process, and as expected, the slots were far to big. Going back to my assumptions about the width of Elliott's slots and the thickness
of his material, I tested .10" slots, which accommodated the material with much cajoling and deformation of material. I finally settled on a .12" slot,
which was just right (Figure 2f).
The laser cutter I used did not manually focus, so I first checked to see that the laser was 2" above the cutting surface. The first couple times I
printed, I found some lines cut super well, while others did not. Some random guy in the lab helped me
figure out that I had a bunch of double lines in my drawing that were causing the laser cutter to cut over the same area twice. I increased power from
the recommended 15 to 16 to account for the lines that were not punching out well. Finally, I made a point to print only
selected items just in case there were other lingering parts of my drawing that I didn't want printed.
The resulting pieces instantly transformed me into a kid, and I spent the rest of the day building different configurations and showing all my friends
the cool things I'd made (Figure 2g).
Total time: 3.5h
×
![]()
Figure 2d
×
![]()
Figure 2e
×
![]()
Figure 2f

×
![]()
Figure 2g