how to (almost) make (almost) anything
electronics design
 hello world.
This week was back to the (printed circuit) board to fabricate the "echo hello-world" programable circuit. This was another exercise in following instructions, with the added task of including a button that switches on a light emitting diode (LED).
The footprint was provided with clues regarding the components, but an exhaustive schematic design was not. I used previous class years to track down the list of parts required to replicate the design.
 any questions?
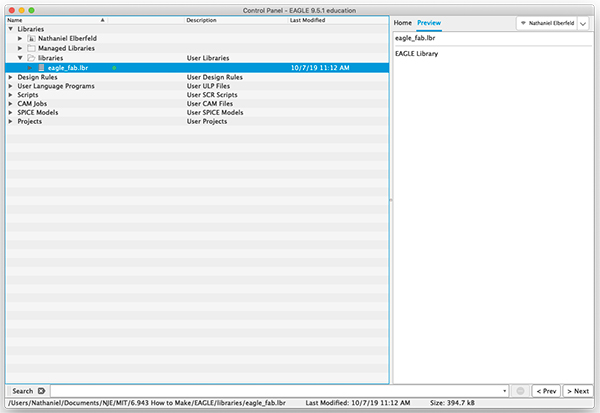
The workflow centered around Autodesk Eagle, a program with which I started to develop Stockholm syndrome. I installed the "hello world" library from the course resources page and loaded it into my project directory. First, ensure that you are in the Control Panel interface:
Multiple libraries may be loaded and will be separated by a single colon in the Libraries textfield.
 more libraries, more problems
Back in the Control Panel, click on the small circle to activate libraries of your choosing. Load as few libraries as possible to avoid confusion. A similar process is followed to load appropriate Design Rules.
One particularly strange "feature" is that when searching the library, the *search term* must be surrounded by asterisks or it will not show results.
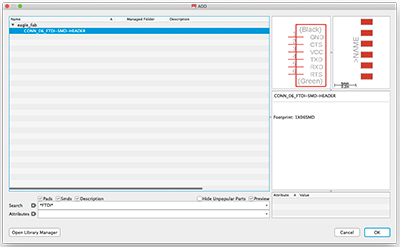 use asterisks to *search for something*
Eagle includes two workspaces: Schematic and Board. You can toggle between these windows with the small red or green icon on the top left of the window or by selecting
Beginning in the Schematic space, type add in the command line to pull up an interface to search the library. Do not forget the asteriks around your *search*.
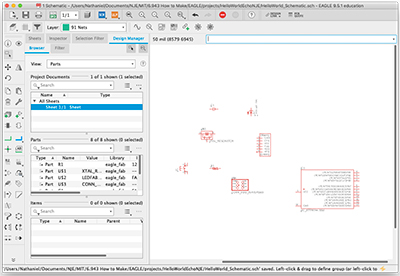 populating the schematic
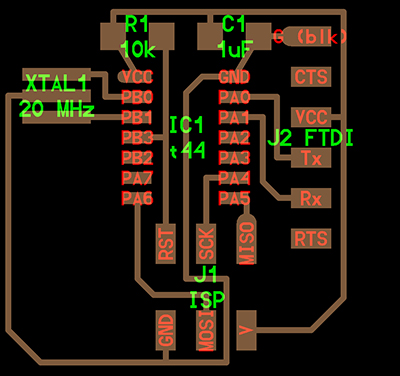
Referencing the "echo hello-world" image provided, I connected the schematic diagram. I found it useful to have the schematic diagram as a separate entity than the board layout so that I could focus first on connecting everything correctly.
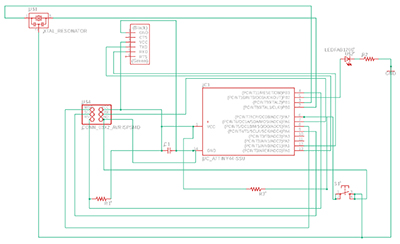
A sort of oral tradition has developed around this course, and by asking fellow classmates and TAs, we were able to build consensus on how to connect the LED and button, which are not on the original "echo hello-world" design. The LED is connected to an open pin on the ATTiny44 and in series with a current limiting resitor. A quick application of Ohm's law and a 499 Ohm resistor was selected. For the button, we employed a pull up resistor also at 499 Ohms between the VCC and another open pin on the microcontroller and connected the button between the resistor and pin; we also grounded the button.
 now for a fun puzzle
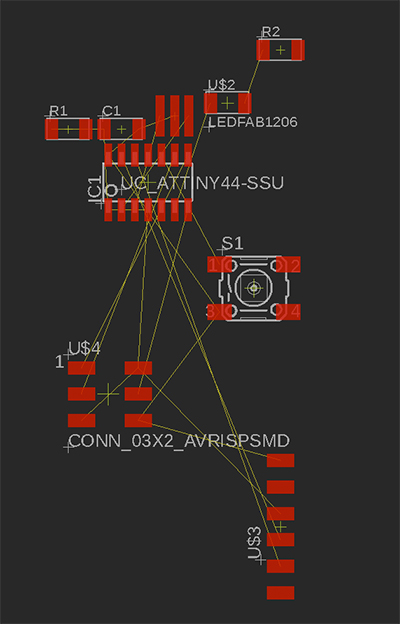
With the schematic completed, I switched to the Board workspace to design the board. This part is a spatial exercise and is well-suited towards architects. The design starts as a jumbled mess, but components are arranged and pulled into place satisfying the connectedness of the circuit and the design parameters of the tooling (be sure to load the design rules as stated above).
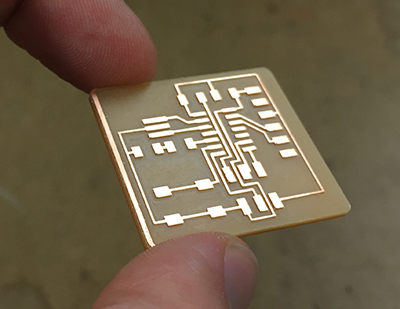
After the design was completed, I exported it as a PNG at a resolution of 1000 (on the order of the resolution for the Roland milling machine.) I milled the design on the copper board per the sequence in electronics production.
 just a trace
I had designed and milled my board before I heard the rumors circulating about pull up resistors, and so it was, again, back to the (printed circuit) board.
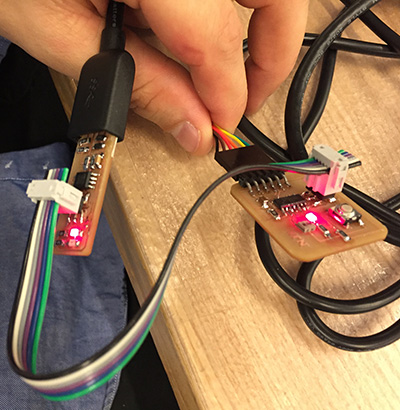
let's try that againOnce the final board was milled, I soldered the components to it and began the process of programming. After three members of our group recieved the same error at the architecture workshop, we went to EECS office hours (these new crossover episodes of office hours seem to be beneficial) to program the boards. We programmed the board. One of the boards was still receiving an error and we used a multimeter to detect a short in the board.
 beep
beep
Finally, I connected my programmer to the new board and was able to program it and confirm that the light turned on (and went off at the press of a button) and they lived happily ever after.
 new besties