how to (almost) make (almost) anything
molding & casting
 watchtower
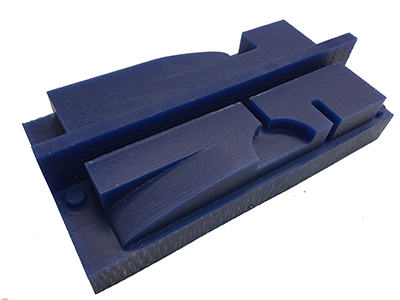
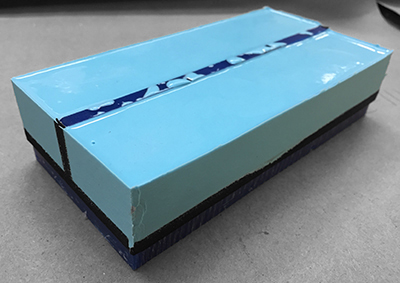
This week was a play on last week's concept of an "embedded system" with the design and fabrication of a cast Hydro-Stone piece with a flush pocket for the magnetic induction charger for my watch.
designing positive
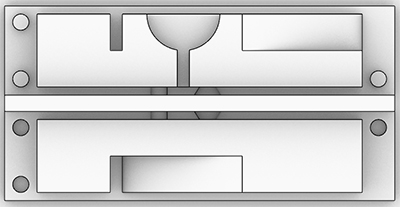
If milling is a subtractive manufacturing process, this week was also an exercise in designing backwards from constraints. First, the blocks of wax made available to us measured 1.5"x3"x6" and set the maximal boundaries of our casts. Next, as we would first mill a positive mold and pour Oomoo 25 into it to create a negative mold for casting, we were advised that any walls remaining in the wax for the retention of the silcone negative be 1/4" so that they survived the milling process. Similarly, any troughs remaining in the positive mold would become the walls of the negative mold and we were advised to use a minimum thickness of 1/8" for these features. As is customary for a CNC workflow, it was important to design around the contraints of the bits, including their diameter, cutting length, and overall length. I planned on using the Intelitek and its associated tool library, including a 1/4" flat mill and 1/8" flat mill. As I designed the positive, I kept in mind the process of casting and made sure that there would be no undercuts from each side of the piece as it faced the mill to make a double mold. External to the process of casting was the constraints of my watch and charger. Given all of these constraints, I designed the "watchtower" to hold half of the induction charger and curvature to sling the wrist band over. The gap features provide room for the cord on one side and the watch band on the other.
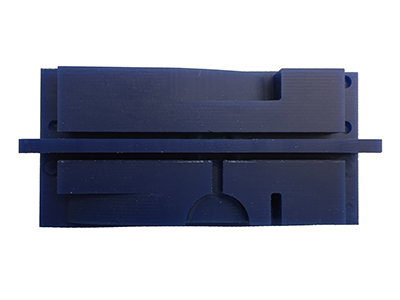
 positive mold
I left a single wall at 1/4" thick on the long bisecting axis of the block to create two long molds that would form a single piece when cast. I planned on making the exterior retention walls out of scrap or chipboard; this decision gave me another 1/2" in each axis for the cast, which I needed since the watch was already going to be halfway off the stand. To align the two molds, I made registration markers at 3/8" in diameter and 1/8" deep or high. Because the mold is silicone, I left no tolerance for the male and female registration markers and they fit perfectly.
CAM
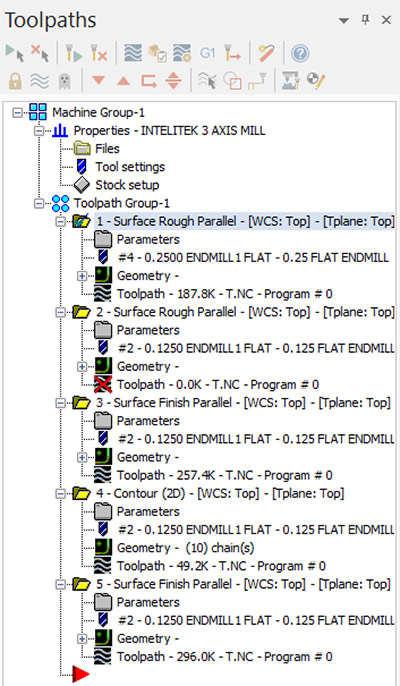
After the piece, and the positive mold, was designed in Rhino, I needed to generate G-code to run the job on the Intelitek. This required two items: MasterCAM and somebody who can use MasterCAM. Fortunately, Jung was available to help and we spent several hours working through each toolpath:
1. Surface Roughing Parallel with 1/4" flat endmill
2. Surface Roughing Parallel with 1/8" flat endmill
3. Surface Finish Parallel with 1/8" flat endmill
4. Contour with 1/8" flat endmill
5. Surface Finish Parallel with 1/8" flat endmill
 MasterCAM image
After a lot of trial and error, and using the preview feature, we were able to create a set of paths that would mill the block of wax. The paths got progressively finer in resolution and stepover size, culminating with a very small stepover path to finish the curved surfaces.
I think, therefore I CAMmilling positive | Intelitek
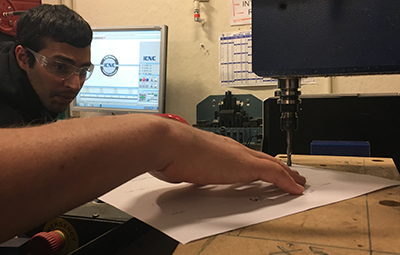
After tracking down most of the architecture shop staff, we were able to get the Intelitek running. First, we zeroed the machine by incrementally moving the head down onto a sheet of paper until the paper was not entirely stuck, but was not completely loose. We set the XY origin by aligning the head to markers on the spoil board to which we also aligned the block of wax.
 setting zero
I used the nearby hot glue gun to fixture the wax to the spoil board.
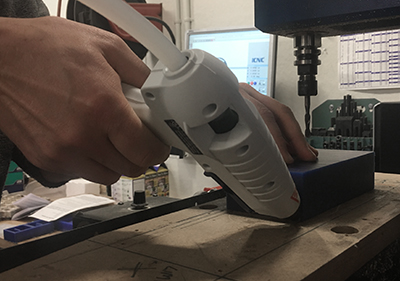 hot glue fixturing
After the piece was secure, and the correct tool was loaded, we raised the Z position to 4" but told the machine it was at 2" so that we could "cut air" to make sure the paths looked good and were not obviously awry. After this confirmation, we gave the correct Z coordinates and began the job.
air cutJen noted that the tool was only cutting at the tip, which would cause uneven wear. In the future, milling could use the full cutting edge of the tool for more effective cuts and better use of the tool.
for real
 roughing it
The Intelitek does not change tools automatically, but will prompt when there is a change. To be safe, we ran the first toolpath as a separate job. When it completed, I changed the head, zeroed the new tool, and ran the rest of the paths as one job until completion.
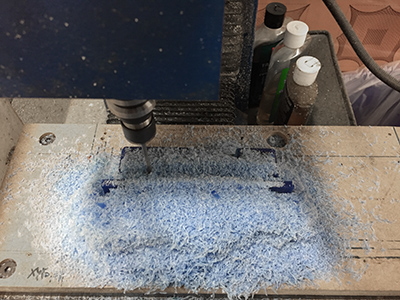
 inside job
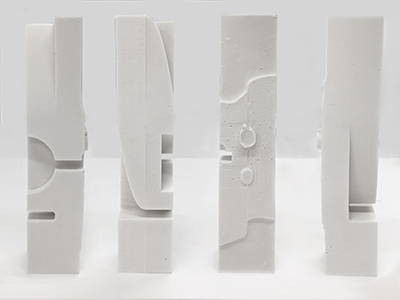
 is there anything left?
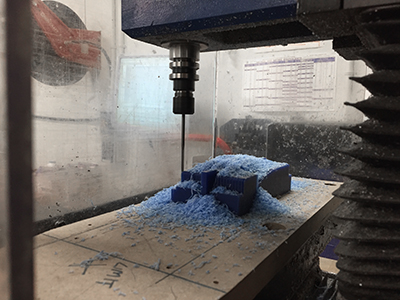
When the final path had run and the machine stopped, I vacuumed the shavings and hoped that there was still something left of the wax block.
behold!The piece was milled as I hoped and I was glad that this step of the process was succesful.
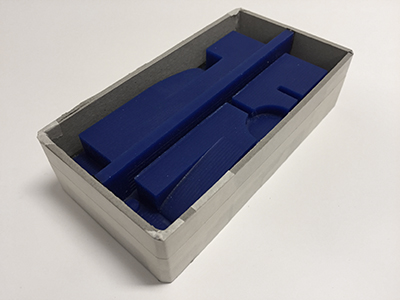
casting negative | Oomoo 25
Before I could cast the silicone mold, I had to build the rest of the retaining walls around the positive. I used a tape sealer to prevent leaks and to build out one of the edges which was narrower than the 1/8" I had intended (probably as an artifact of the block not being cut to exact specifications).
 pass the Oomoo
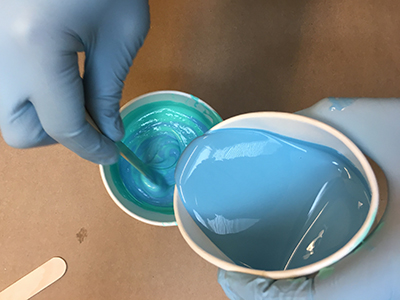
As a precaution, I sprayed mold release on the chipboard sides that could stick to the silicone mold. I mixed the Oomoo parts A and B together in the easy-to-remember ratio of 1:1.
 yummy* (*don't eat)
The safety and data sheet for Ooomoo 25 claims a 15 minute pot life and 75 minute cure time, so after the parts were mixed well for a few minutes and there were no streaks, I poured a thin bead into each side of the mold.
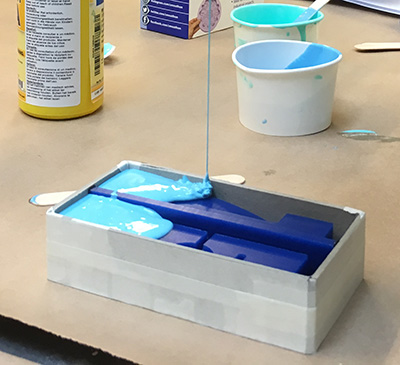 a thin pour can get into the crevices of the mold
After the Oomoo was poured, I vibrated the mold to get any air bubbles to the surface. Techniques included dropping the mold with force onto the table, banging on the table from below, batting the mold around like a cat toy, and using an electric sander with the sandpaper removed. Eventually, I was satisfied that I had done the best that I could to remove bubbles from the negative mold.
out, damned bubbleI returned to the mold after about 90 minutes, but the surface was still a bit tacky, so I waited another hour or two before taking the silicone molds out.

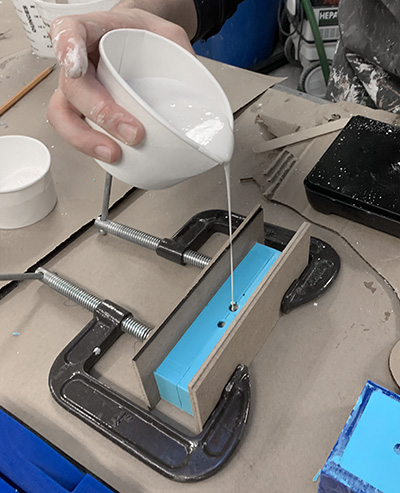
casting positive | Hydro-Stone
I clamped the two negative molds together using the registration markers for alignment and some heavy chipboard to distribute the force evenly along the sides.
I mixed (a lot, too much) of the Hydro-Stone in the ratio provided on the bag: 32 parts water to 100 parts powder by weight. I used a scale and measured out 8oz of water (that seemed reasonable) and then 1lb 9oz of Hydro-Stone (this seemed excessive). As I was mixing, I was concerned that the gypsum cement seemed too watery. I remembered that Jen said it should pour like a thin yogurt, so I went ahead and poured it into the negative molds.
I left for an hour or so and returned. The extra plaster had solidified and so I decided to de-mold. Much of the cast came out very well, however the top of the mold (adjacent to the central wall in the positive mold) was too thin and for the long span of the negative mold and dipped into the gypsum cement. It seemed that the mold was full as the liquid started to come out of the pour and vent holes, but the mold was drooping in the middle and perhaps trapping the liquid from flowing to the ends of the mold. In the next cast, I will try to fix this by attaching an external rigid support to the top of the molds so that they do not interfere with the casting process. Otherwise, pretty, pretty, pretty good.