Week 05: COMPUTER CONTROLLED MACHINING
A. MACHINE CHARACTERIZATION
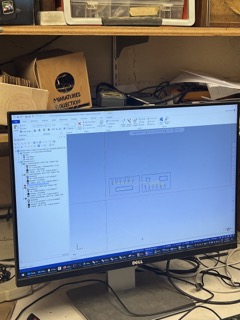
A1. Making a cut file on mastercam
1.1 To learn how to mill on the CNC machine I first went through the group assignment so I could see how to generate cut files in mastercam before sending it to the Onsrud. Chris is often in the shop and can help with generating mastercam files for your personal assignment, but the TA helping us with the group assignment walked us through the basic steps for using mastercam.
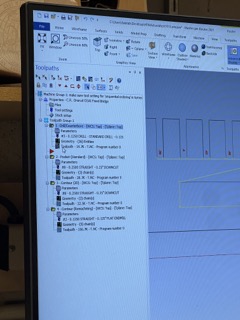
1.2 First you want to load your cut file into mastercam and generate tool paths for each type of cut. To do this you select the type of tool path you want, then the geometries that that cut is applied to and then set the cut parameters.
1.3 Next you want to determine your cut order: 1st is drill points at all of your connection corners to create tolerance. 2nd is pocket cuts. 3rd is contour or outline cuts. 4th is remachining to go over any cut paths you may want to.
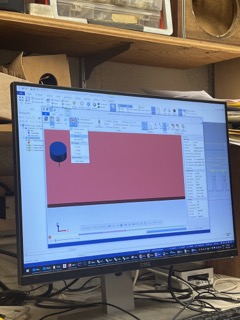
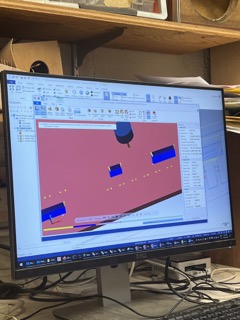
1.4 Once you've set up your tool paths and cut order you will want to verify them by pressing the "verify selected operations" button. This will create a simulation of all of your cut paths, watch it step by step to find any issues.
1.5 Lastly you will export the mastercam as a gcode file for the onsrud, also known as an NC file. Put the NC file on a shop USB drive and bring it to the onsrud.
A2. Milling on the Onsrud
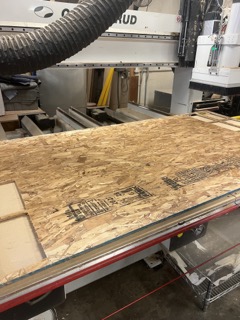
2.1 First measure the thickness of your material and make sure its the same dimension that you set in the mastercam file.
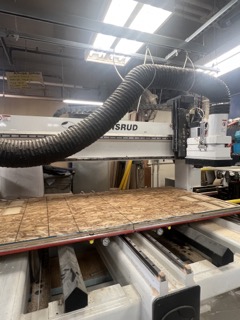
2.2 Next, place your material on the bed. If the material is bowed place it so that the bow is shaped like a dome and not a bowl. Then drill 1 - 2 screws in the material to counteract the bowing. Make sure you don't drill screw across a cut path.
2.3 Once the material is drilled onto the bed turn on both vacuum pumps and then press the yellow buttons underneath the bed to turn the vacuum on.
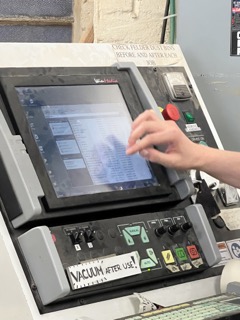
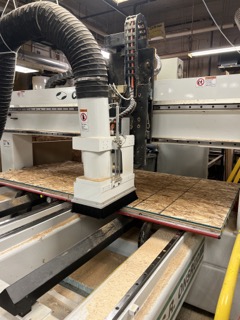
2.4 Load your file onto the onsrud computer by plugging in the USB and dragging the file into a folder on the device.
2.5 Next to send the file you just loaded to cut, press part program > activate cut > and select your file from the correct folder.
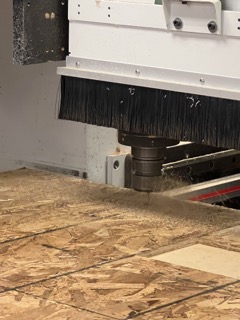
2.6 Wait for the machine to finish milling.
2.7 Turn off the vacuum and remove the nails from the board.
2.8 Use the shop vacuum to get rid of excess saw dust.
A3. Group assignment results
3.1 For our group assignment we used the sample cut file from the archshops website.
3.2 From this we found that .42" - .43" works best for the joint width. So this is the value I used when modeling my actual project for this week.
B. MY PROJECT
B1. Idea!
1.1 I did a UROP with Larry Sass last semester making CNC cut shelters, so am pretty familiar with designing for CNC fabrication and assembly. UROP project can be found here.
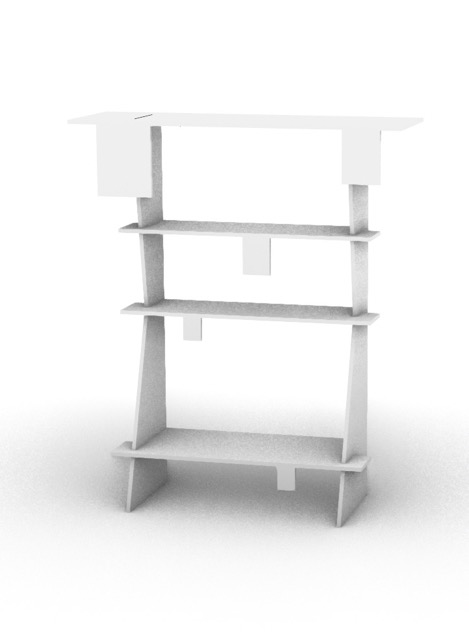
1.2 I originally wanted to make a bookshelf for my apartment, but given that it is quite small and already over flowing I instead made a shelf for a friend.
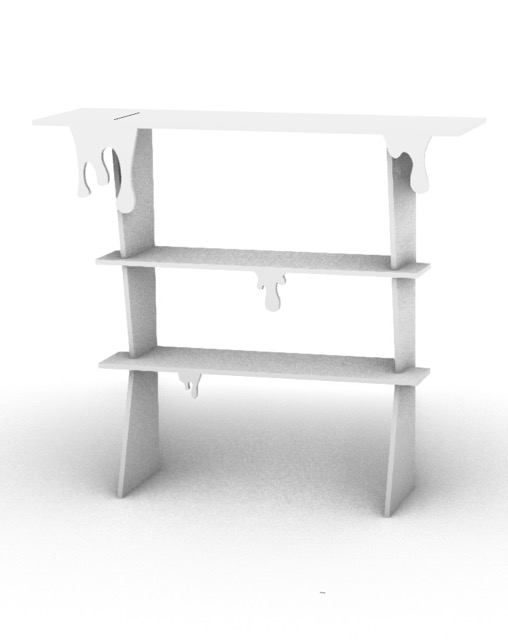
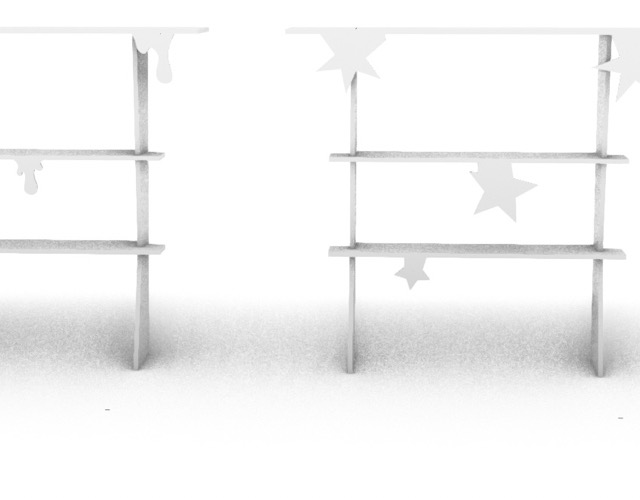
1.3 I wanted to add a level of customization to the shelf, so beyond the basic design I added different notches in the shelves for decoration pieces to be attached. I then designed different kinds of attachable pieces, one version with a dripping motif, and the other to look like stars.
B2. Modelling in rhino
2.1 I first modeled the shelf in rhino based off of the dimensions from my friend. I modeled two version in order to visualize the two different decoration options.
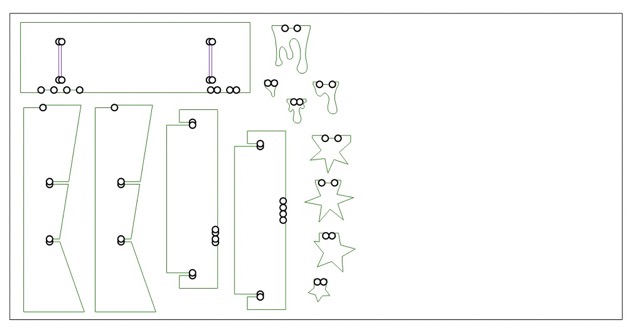
2.2 After 3D modeling I separated each piece of the bench, laid it flat on the 4'x8' cut sheet and duplicated the boarders so that I now have a 2D drawing of my pieces.
2.3 Lastly, I set my different kinds of cuts to different layers to make it easier when I brought my file into mastercam. Green in for contour cuts, purple is pocket cuts, and the dots are drill holes. Make sure to add points for your drill holes before brining it into mastercam! This will save you the trouble of having to add them all individually on the shop computer.
B3. Generate cut file in mastercam
3.1 To generate the cut file I sent exported my rhino cut sheet as a .dxf file and sent it to Chris, the shop manager for the wood shop.
3.2 Once in shop, Chris helped me generate the file but we followed the same steps as I listed earlier in the group assignment section.
B4. Mill on onsrud
4.1 Chris also helped me in setting the file up on the milling machine and prepping the machine, but again we followed the same steps that I listed previously in the group assignment section.
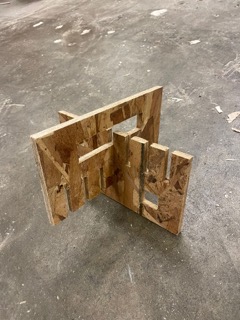
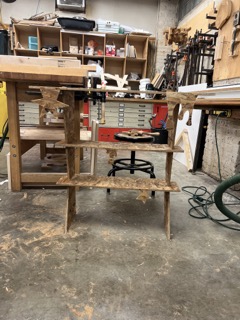
4.2 Once my pieces were cut, I made sure to file the edges down using the metal files in the shop. This helped clean up rough edges and also made assembly smoother.
B5. Assembly
5.1 Once I had all of my pieces I assembled the shelves and played around with different decoration variations.
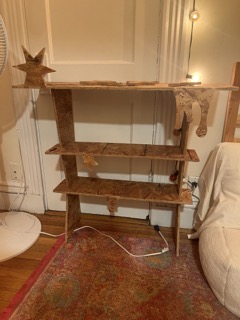
5.2 Surprisingly the shelf is actually quite easy to carry around because it can quickly be taken apart and put back together. The photo on the right is of the shelf after a quick trip on the 1 bus.