Week 13: Embroidery
A. DESIGN IN ILLUSTRATOR


A1. For wildcard week I decided to learn how to use the embroidery machine! I was still in need of some holiday gifts for my family, but also wanted to learn how to use it as a back up for my final project. If my polymerized fabric doesn't work I'm hoping my fall back will be conductive thread, which can be used on the embroidery machine.
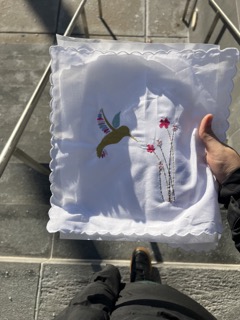
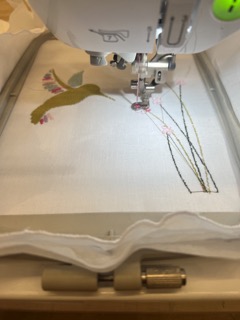
A2. My first design is a hummingbird for my aunt, I just referenced some hummingbird clip art I found online in order to create my own design in illustrator.
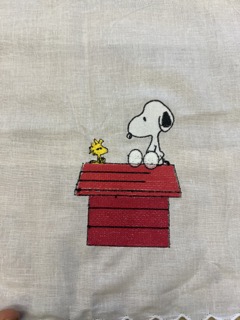
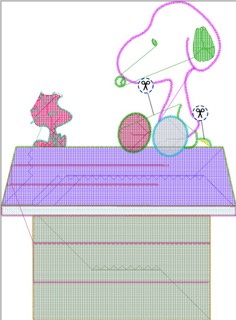
A3. My second design is a snoopy and woodstock for my other aunt. Again, I found an image online and re-created it in illustrator using the pen tool.
A4. I then exported both images as SVG files in order to bring them into Inkscape, the embroidery software.
B. GENERATE STITCH PATTERN IN INKSCAPE
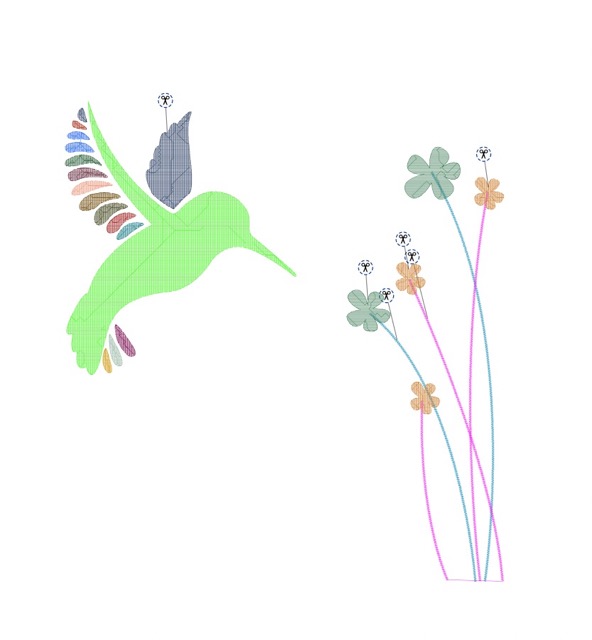
B1. I first brought my SVG designs into Inkscape. Make sure your designs are sized to fit in the embroidery hoop (I believe its around 115 mm wide and 150 mm tall). My hummingbird ended up being too big so I had to go back into the file and resize it before sending it to the machine.
B2. After you bring your files into the software go to extensions > ink/stitch > visualize and export > simulator/realistic preview. This will open another window that simulates your stitch pattern. Also make sure you download Inkscape AND the Ink/Stitch extension in order to access it.
B3. If you want to make any changes to the stitch types go to extension > ink/stitch > and then use the tool: fill, tool: satin, tool: stroke to change the stitch types for each of your objects.
B4. Once you are happy with your stitch preview save the file as a .dst and put it on a thumb drive so you can then transfer it to the machine.
C. EMBROIDER PATTERN ON MACHINE
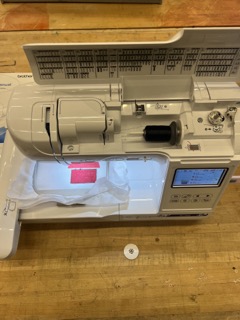
C1. First you want to prep your fabric in the hoop. I was using handkerchiefs which are pretty thin so I put two layers of stabilizer behind it and then pressed it into the hoop. Make sure all corners of the hoop are flush before tightening it with the screw at the bottom. Once you tighten the hoop into place gently pull the fabric taught from the sides.
C2. Next, you want to load your file onto the machine by inserting the thumb drive and then clicking on the file you want. You will then have the options to adjust the location of your pattern on the canvas, and resize it slightly if needed.
C3. To insert your hoop, lift up the presser foot and slide your hoop with the fabric in. There are silver clips on the left side of the hoop that slot into the left side of the machine.
C4. Now you are ready! The machine will display which part of your design is next to be embroidered and then you will manually load whichever thread color you want for that part. To load the thread you insert it on the top of the machine and then follow the numbers to thread it through the machine. Once you have threaded the machine make sure you cut off the excess (there is a small blade for this on the left side of the machine) so that it doesn't get stuck under the presser foot.
C5. The last step is to lower the presser foot and then press the green button above it. This will start the machine! Now just sit back and watch your design come to life!! After each part is done you will have the option to change the thread color to whatever your heart desires, repeat step 4 to rethread.
C6. Once your design is done, remove the hoop from the machine and gently remove the stabilizer paper from the back. Then cut any loose or unwanted threads and you are all done!! I loved this machine and was really happy with the results :)