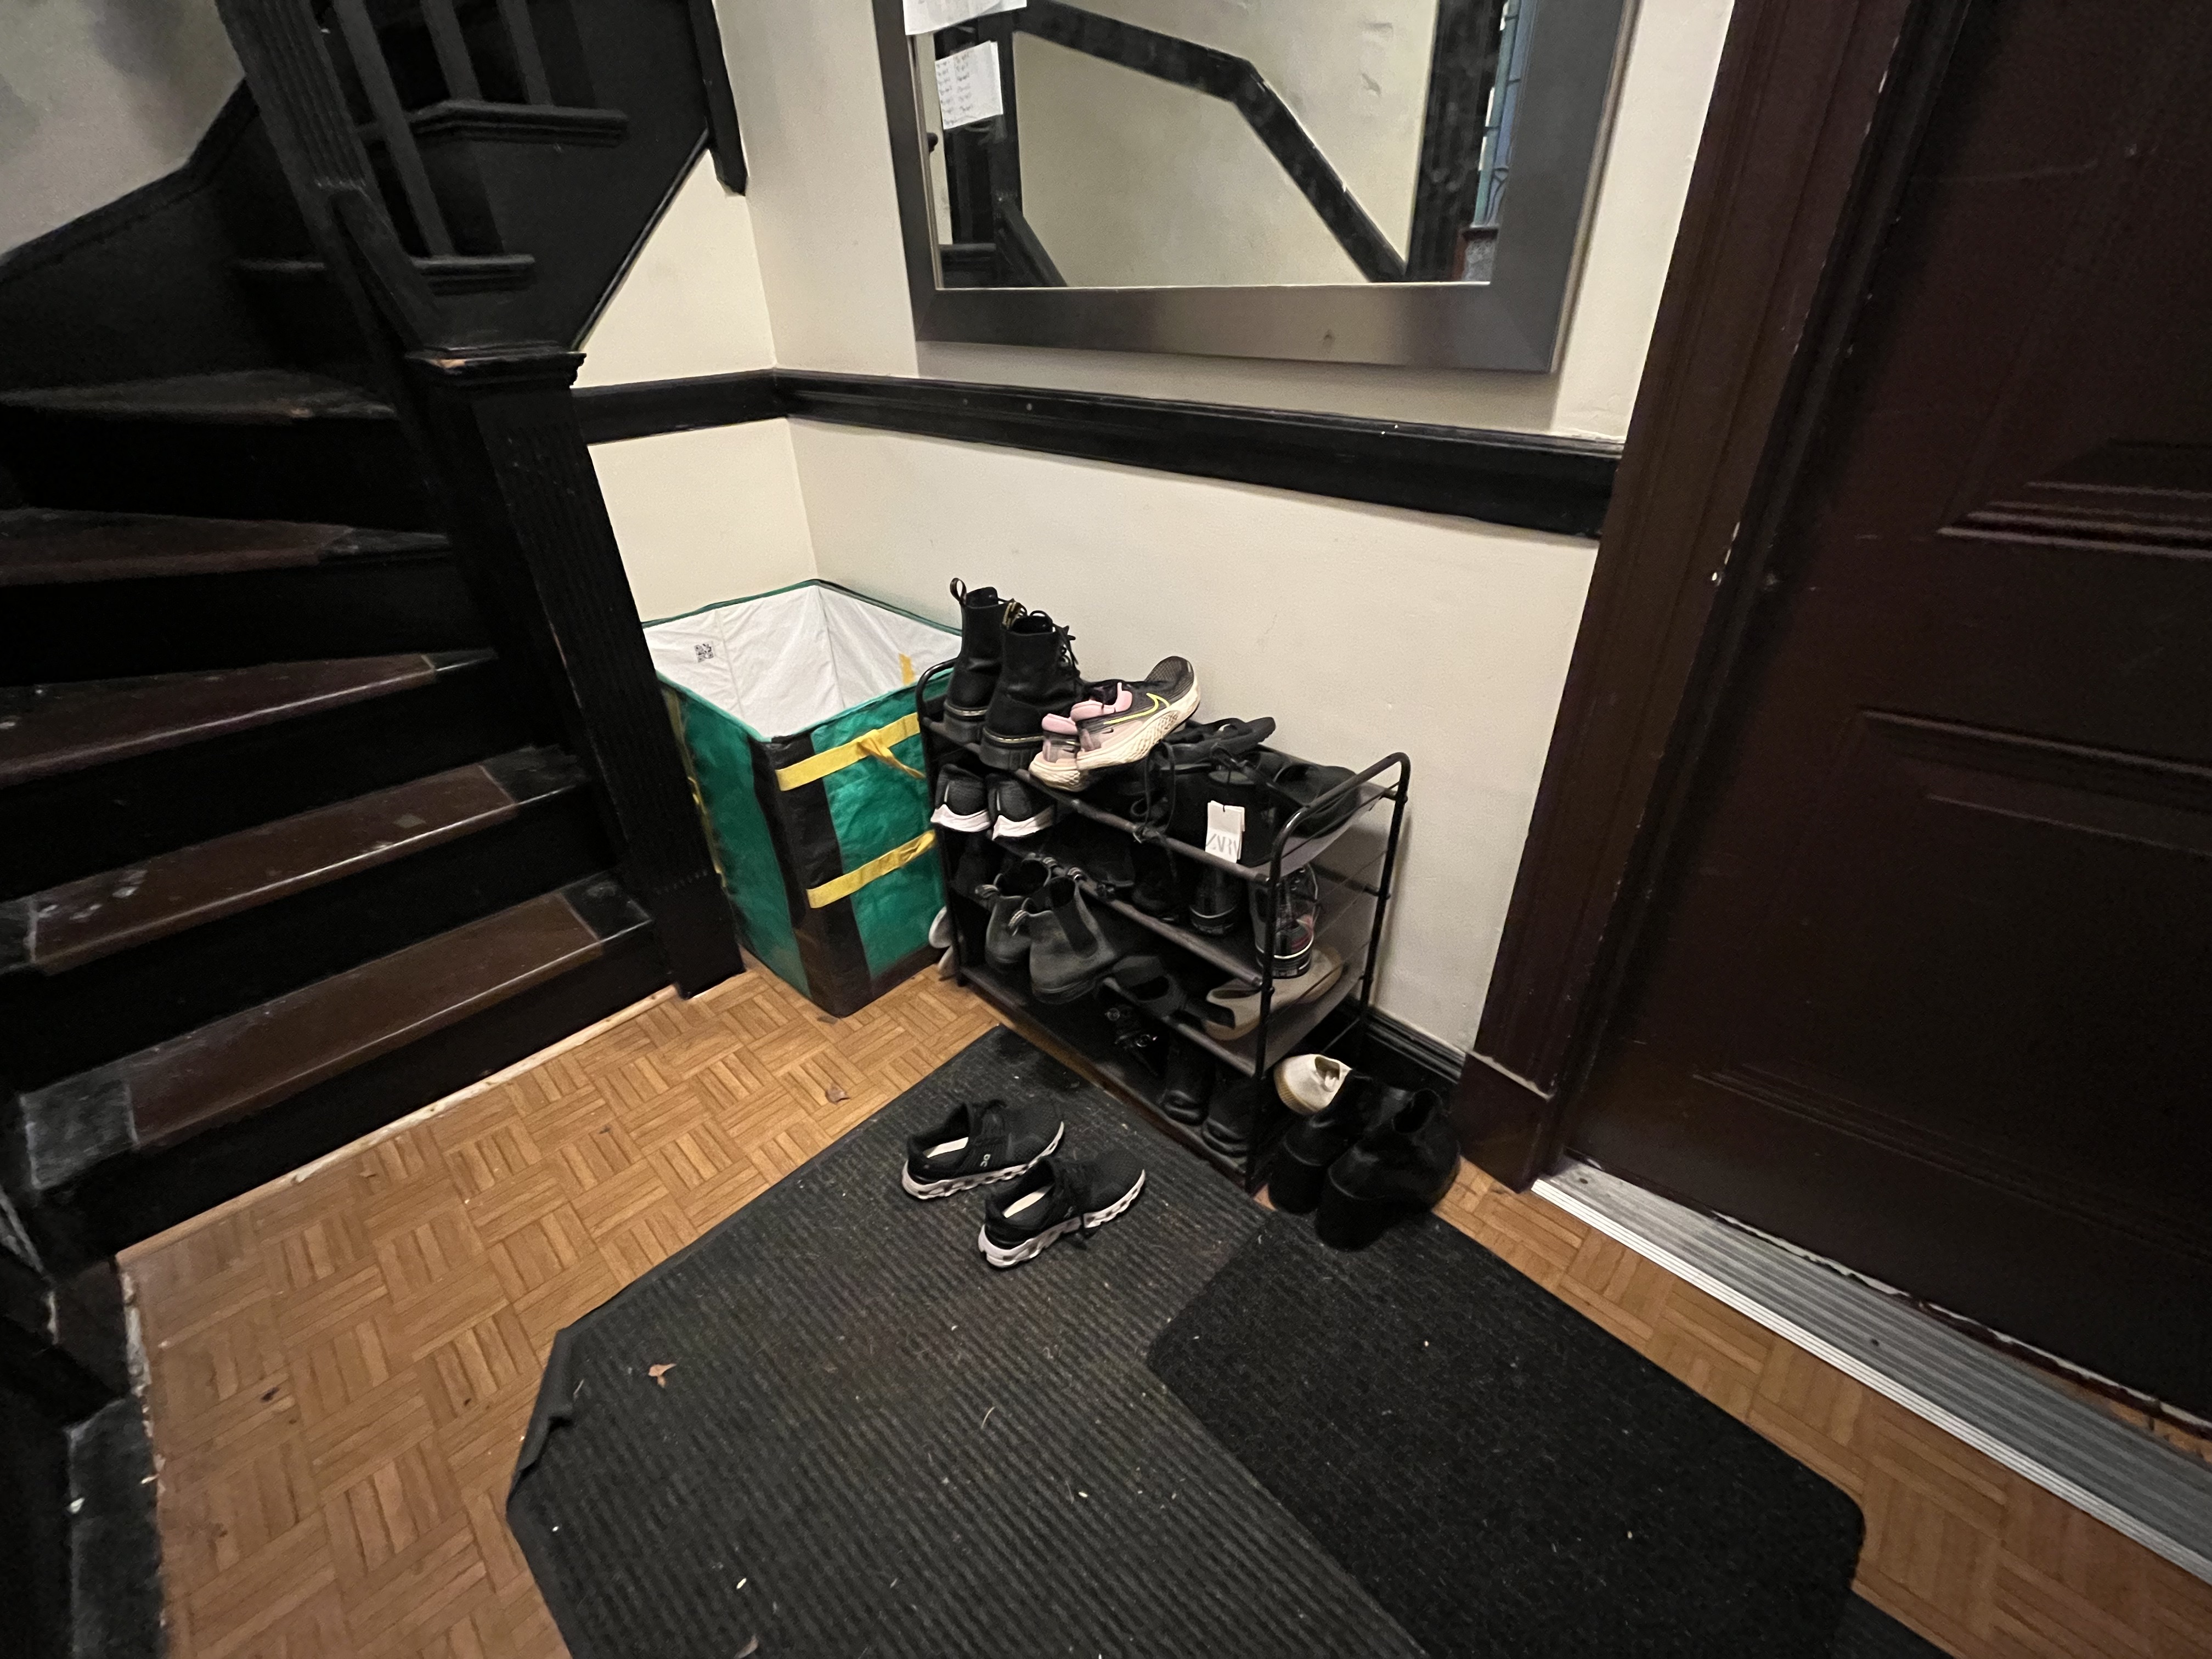
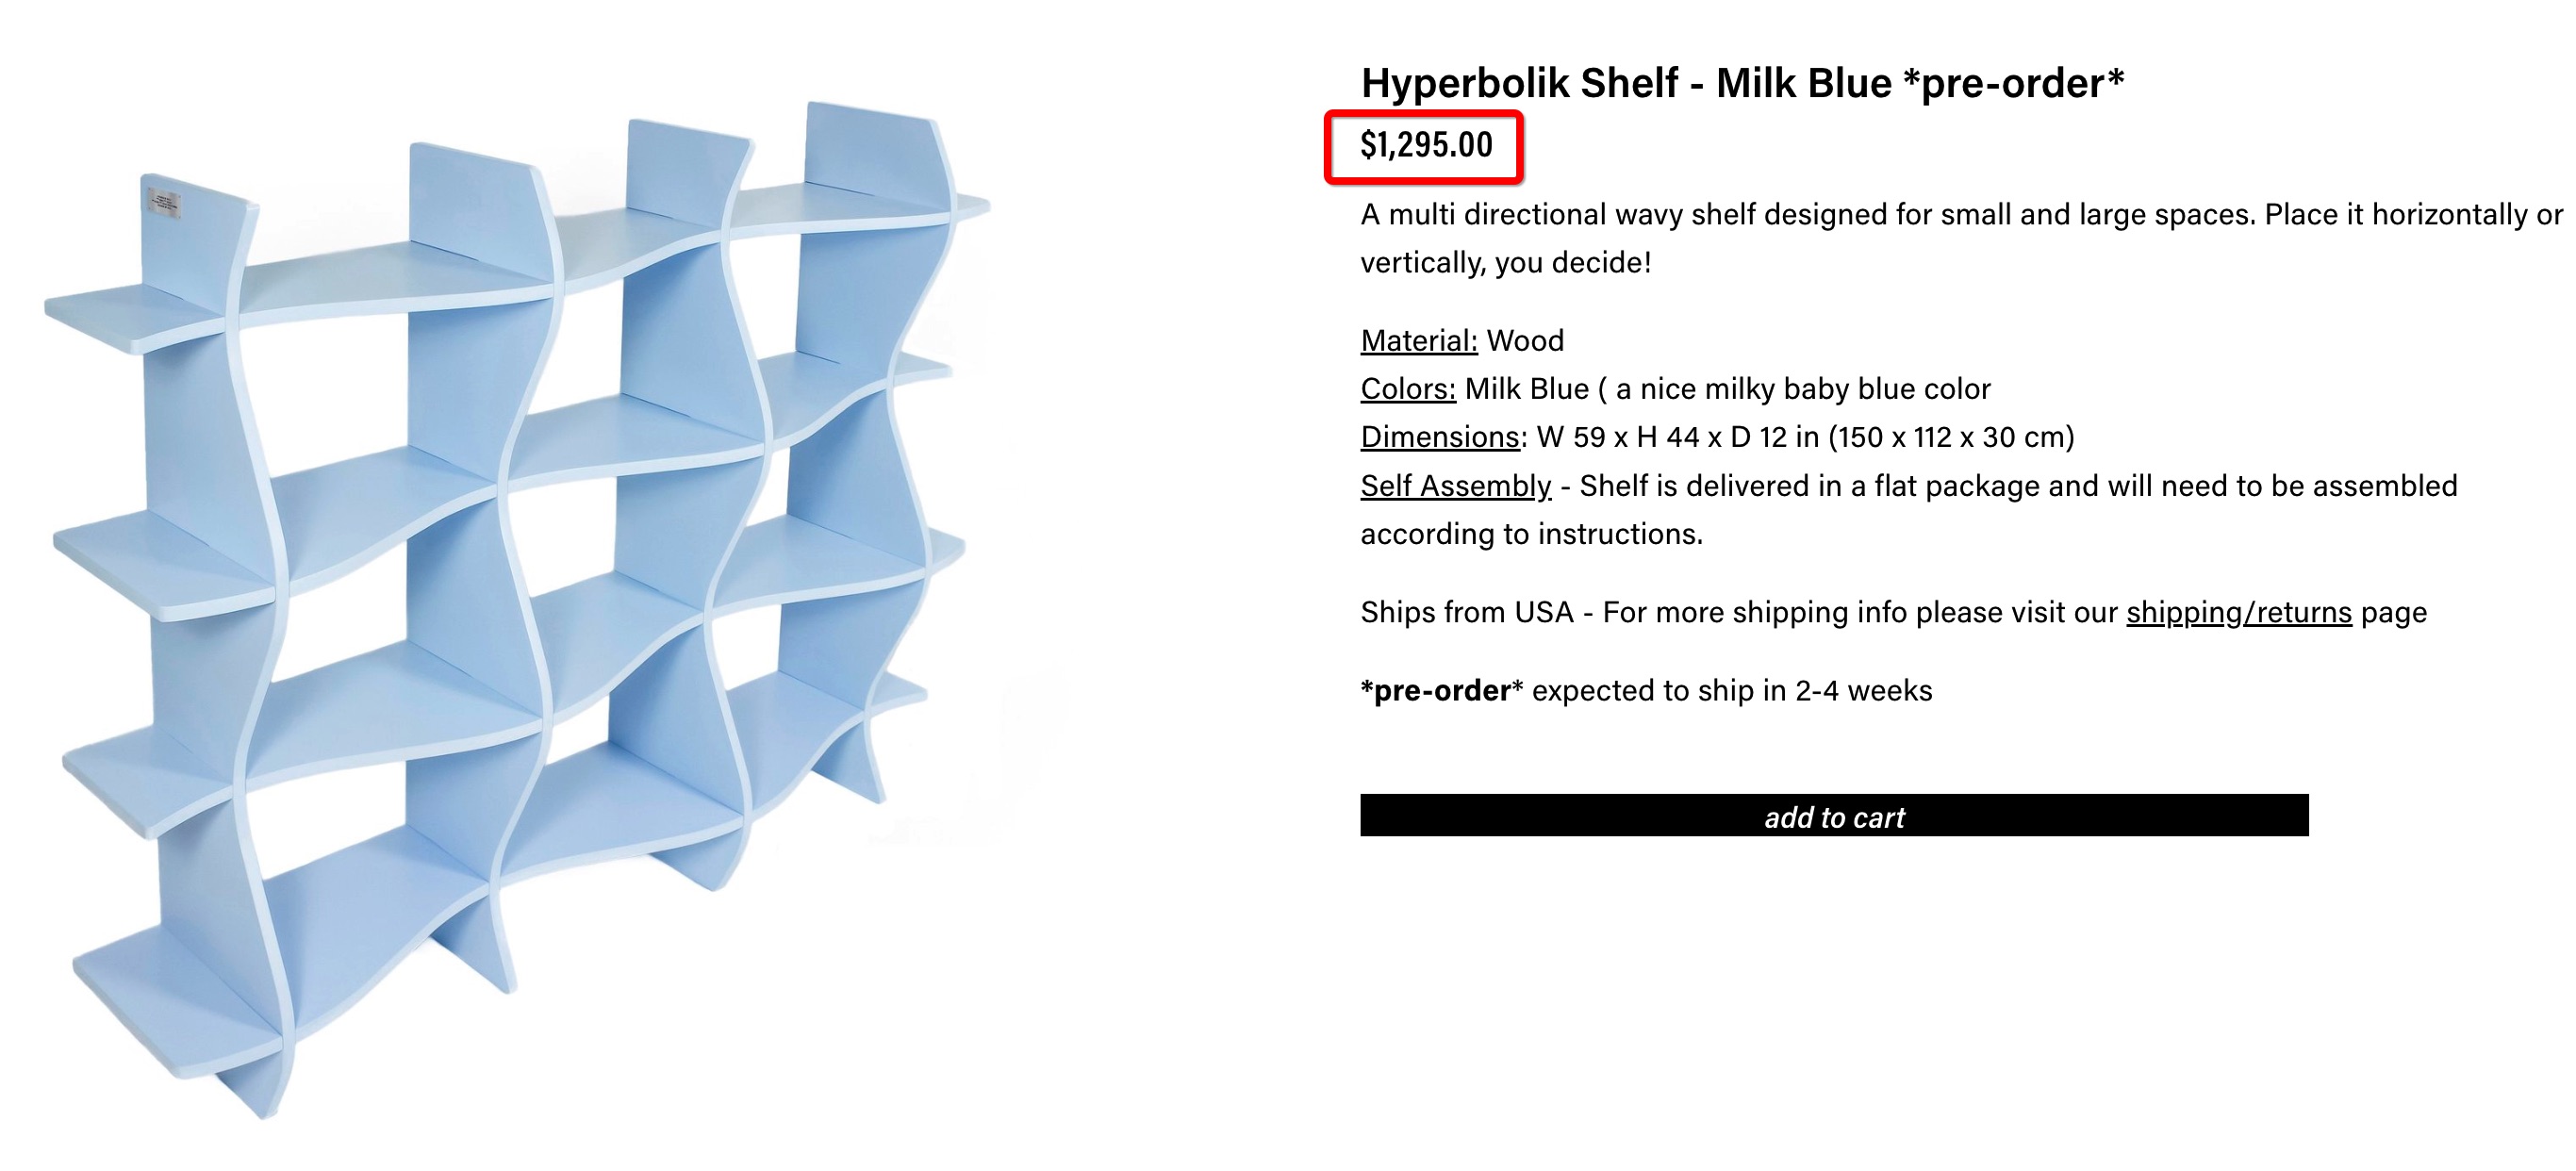
This week’s theme revolves around computer-controlled machining, specifically large-format machining. Living in a rented house with my roommates, I faced the ever-pressing issue of having too many shoes and a flimsy plastic shoe rack. I found an ideal shoe rack online but it was shockingly expensive, costing $1,300. Determined not to spend a fortune on it, I embarked on a DIY journey to create my very own shoe rack using large-format machining techniques. However, this endeavor took an unexpected turn as I encountered challenges along the way.
The Design Phase:
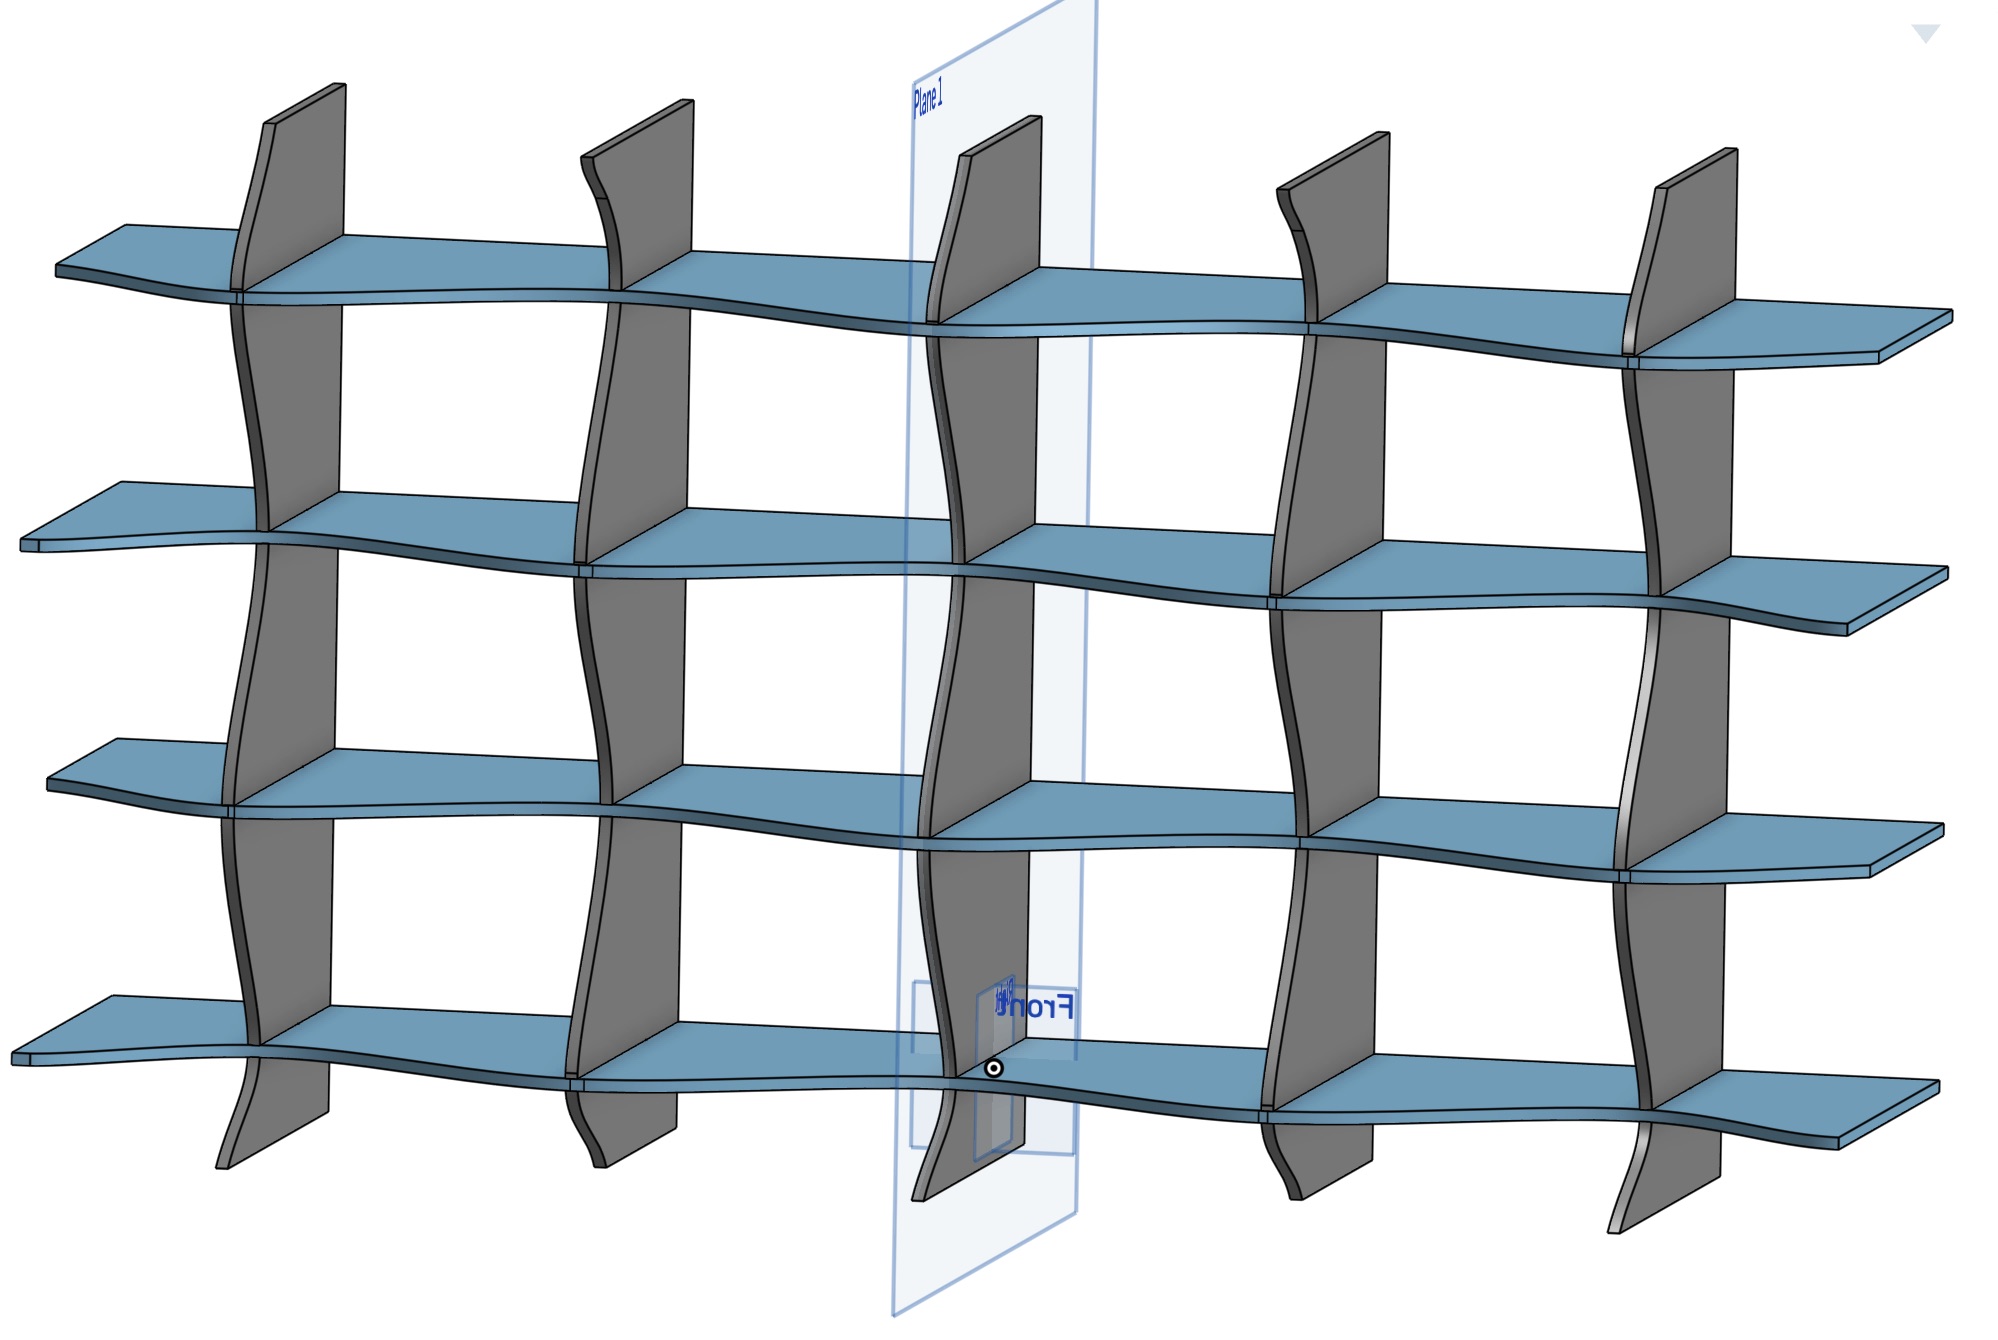
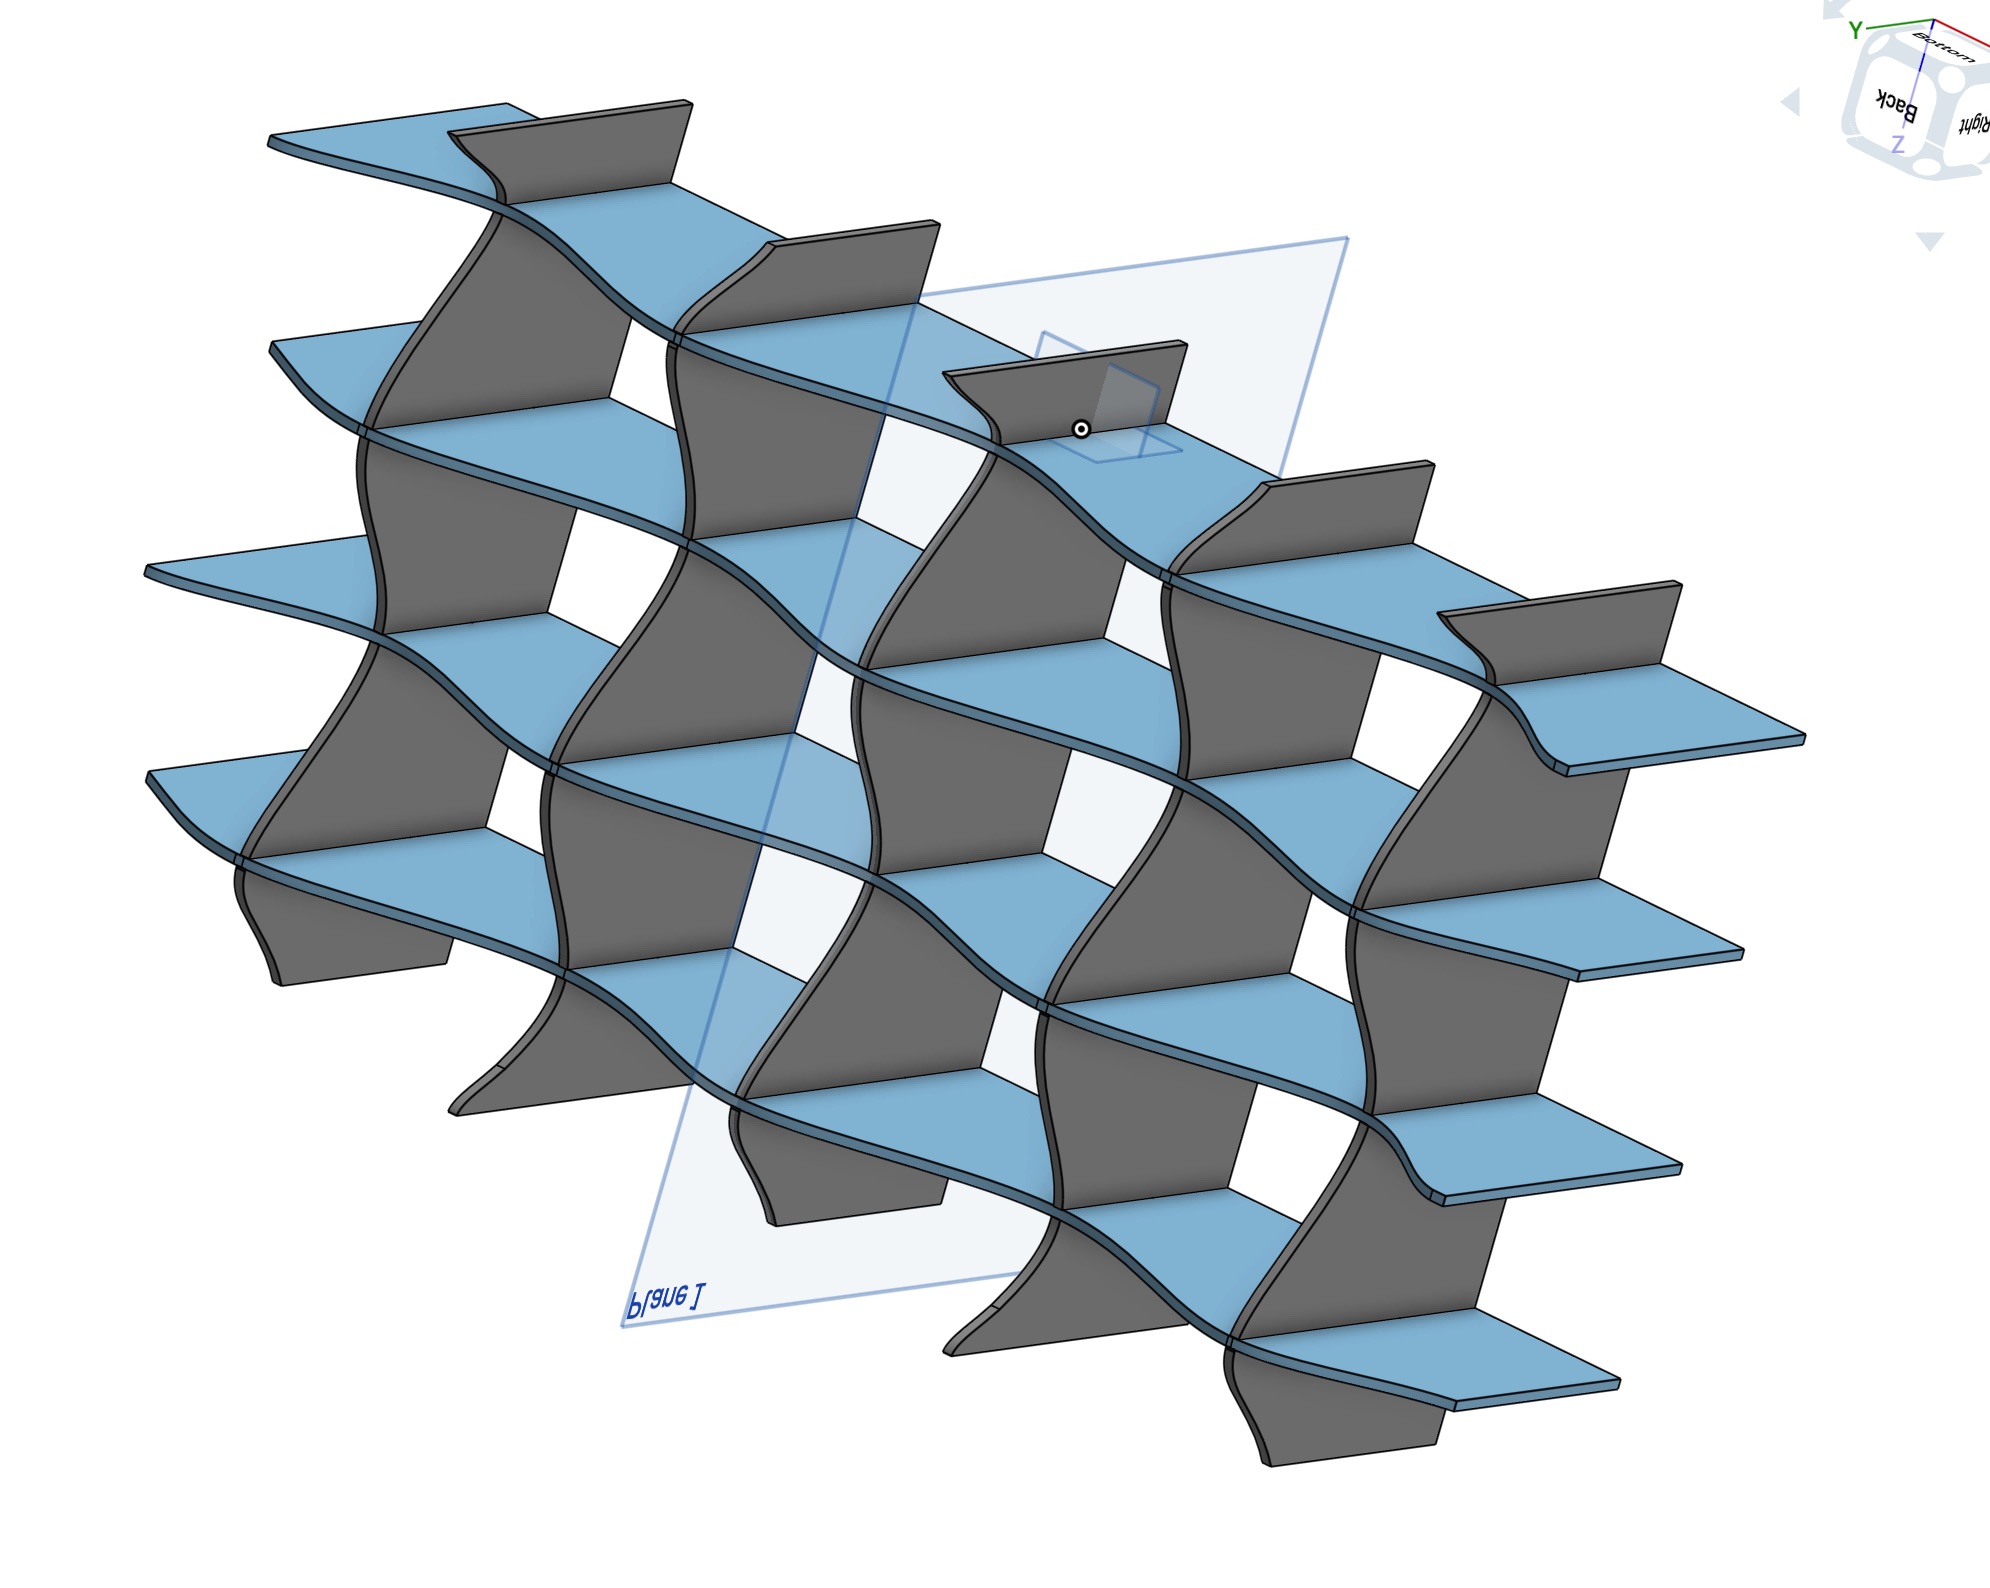
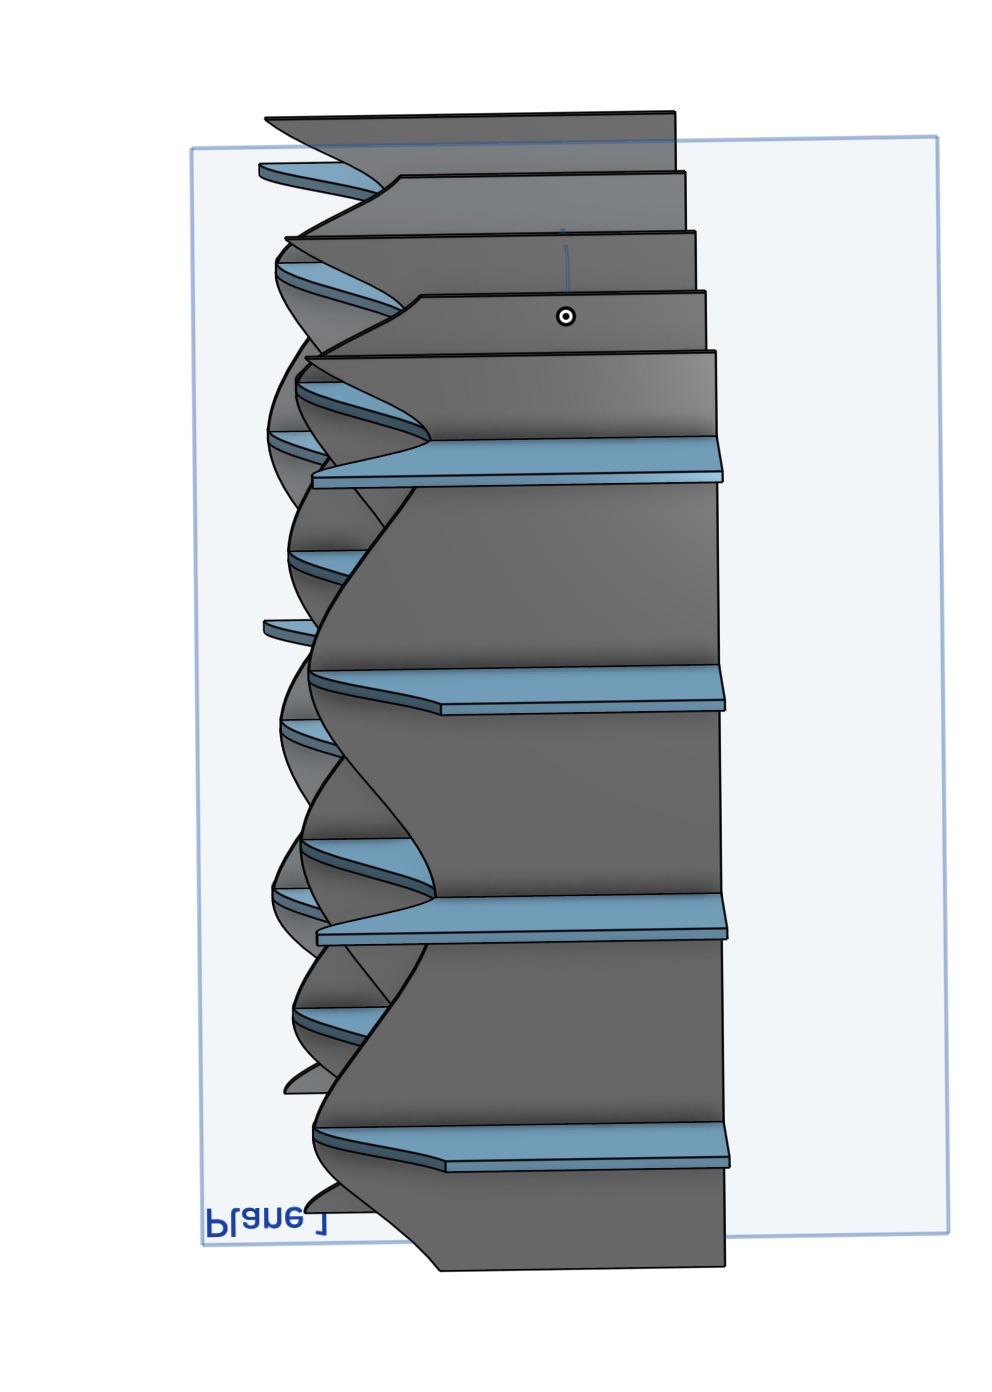
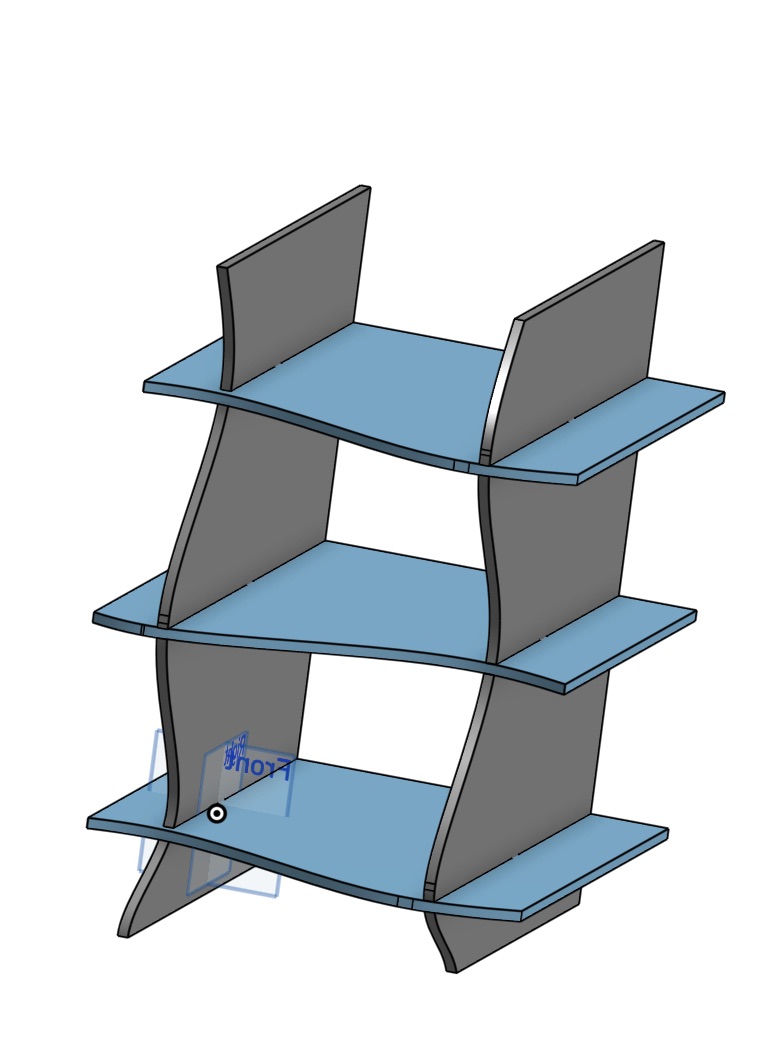
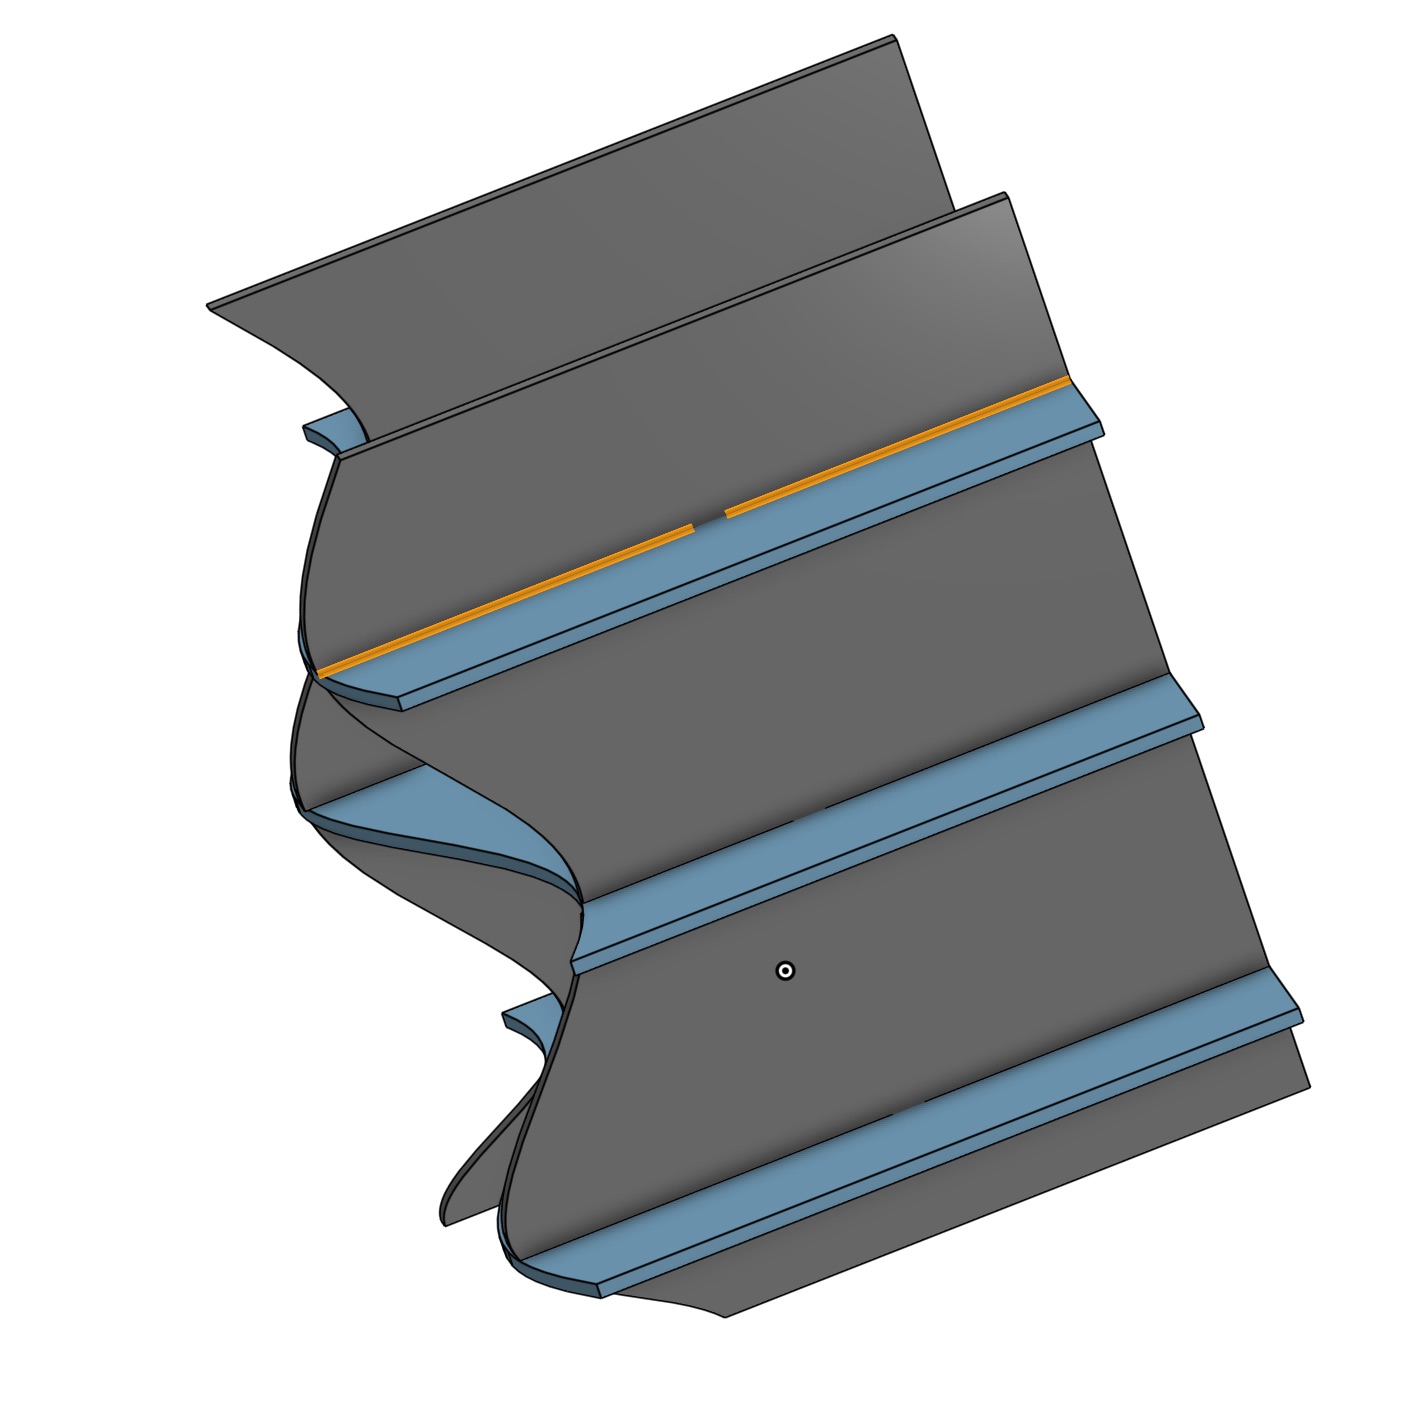
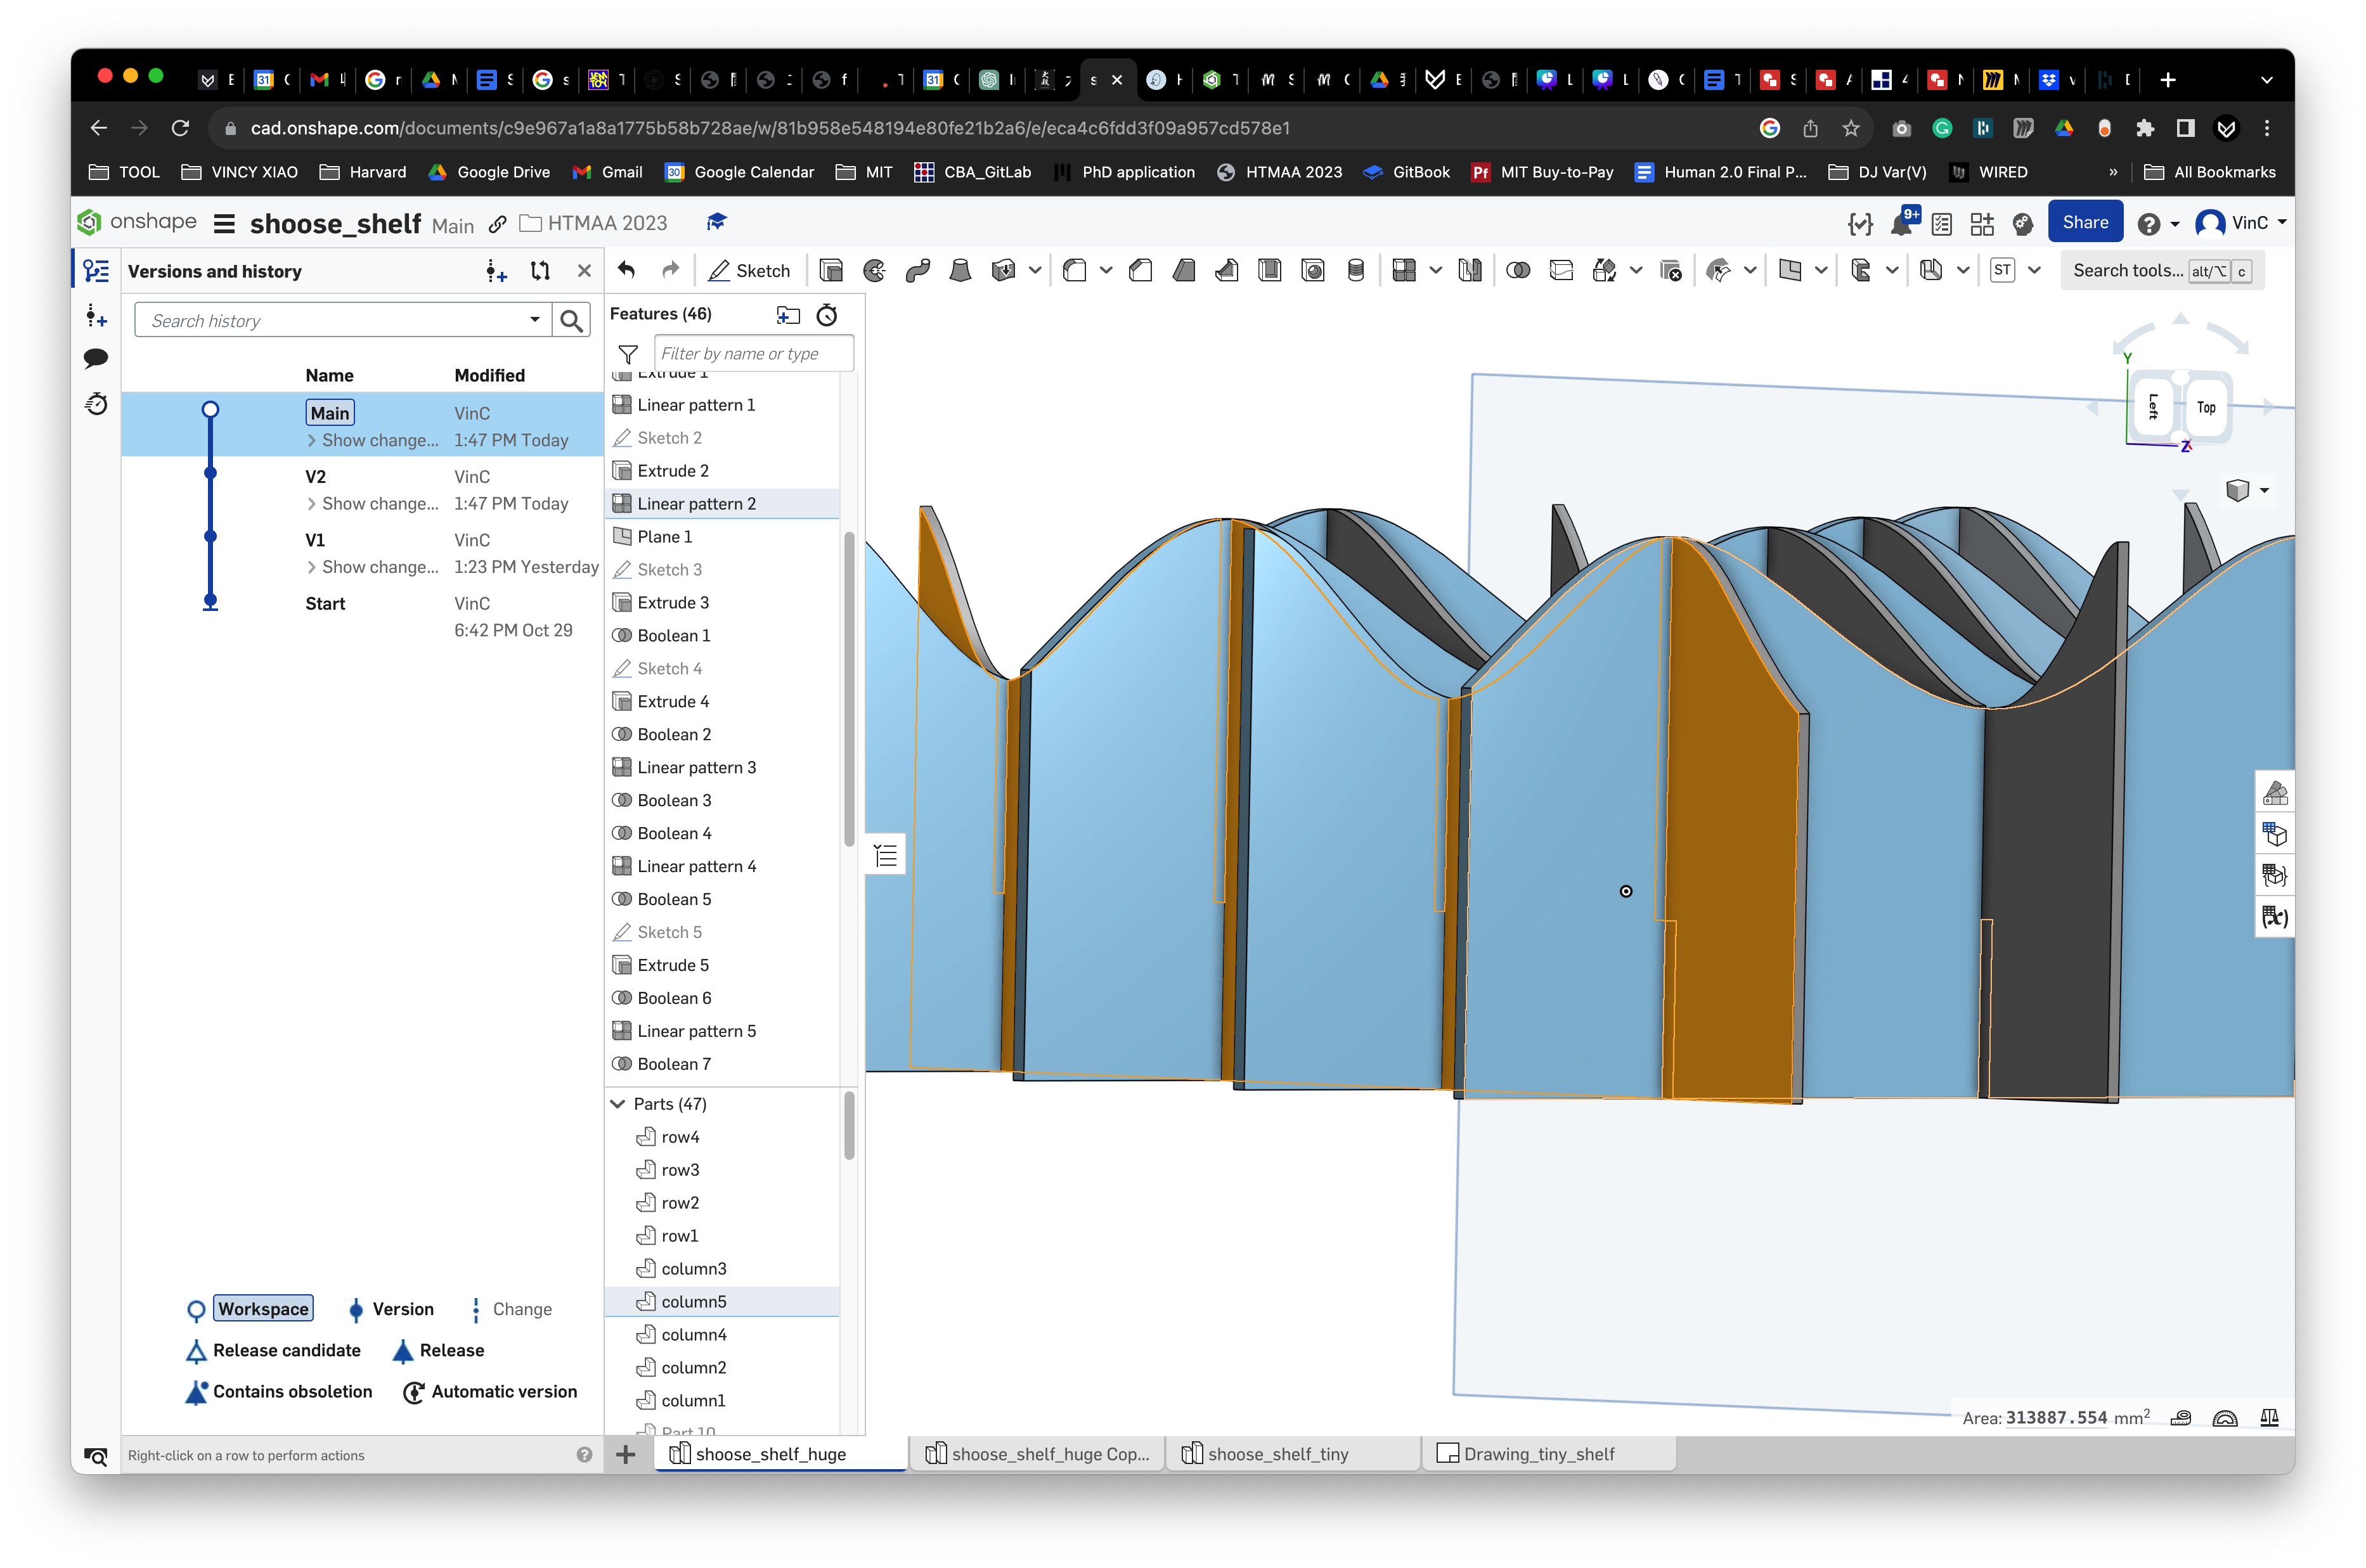
I started to design the shoe rack on Onshape, envisioning a beautiful and functional addition to our home. The initial plan was ambitious, but I was ready to tackle it head-on. I prepared the shopbot file, excited to bring my design to life.
The Reality Check:
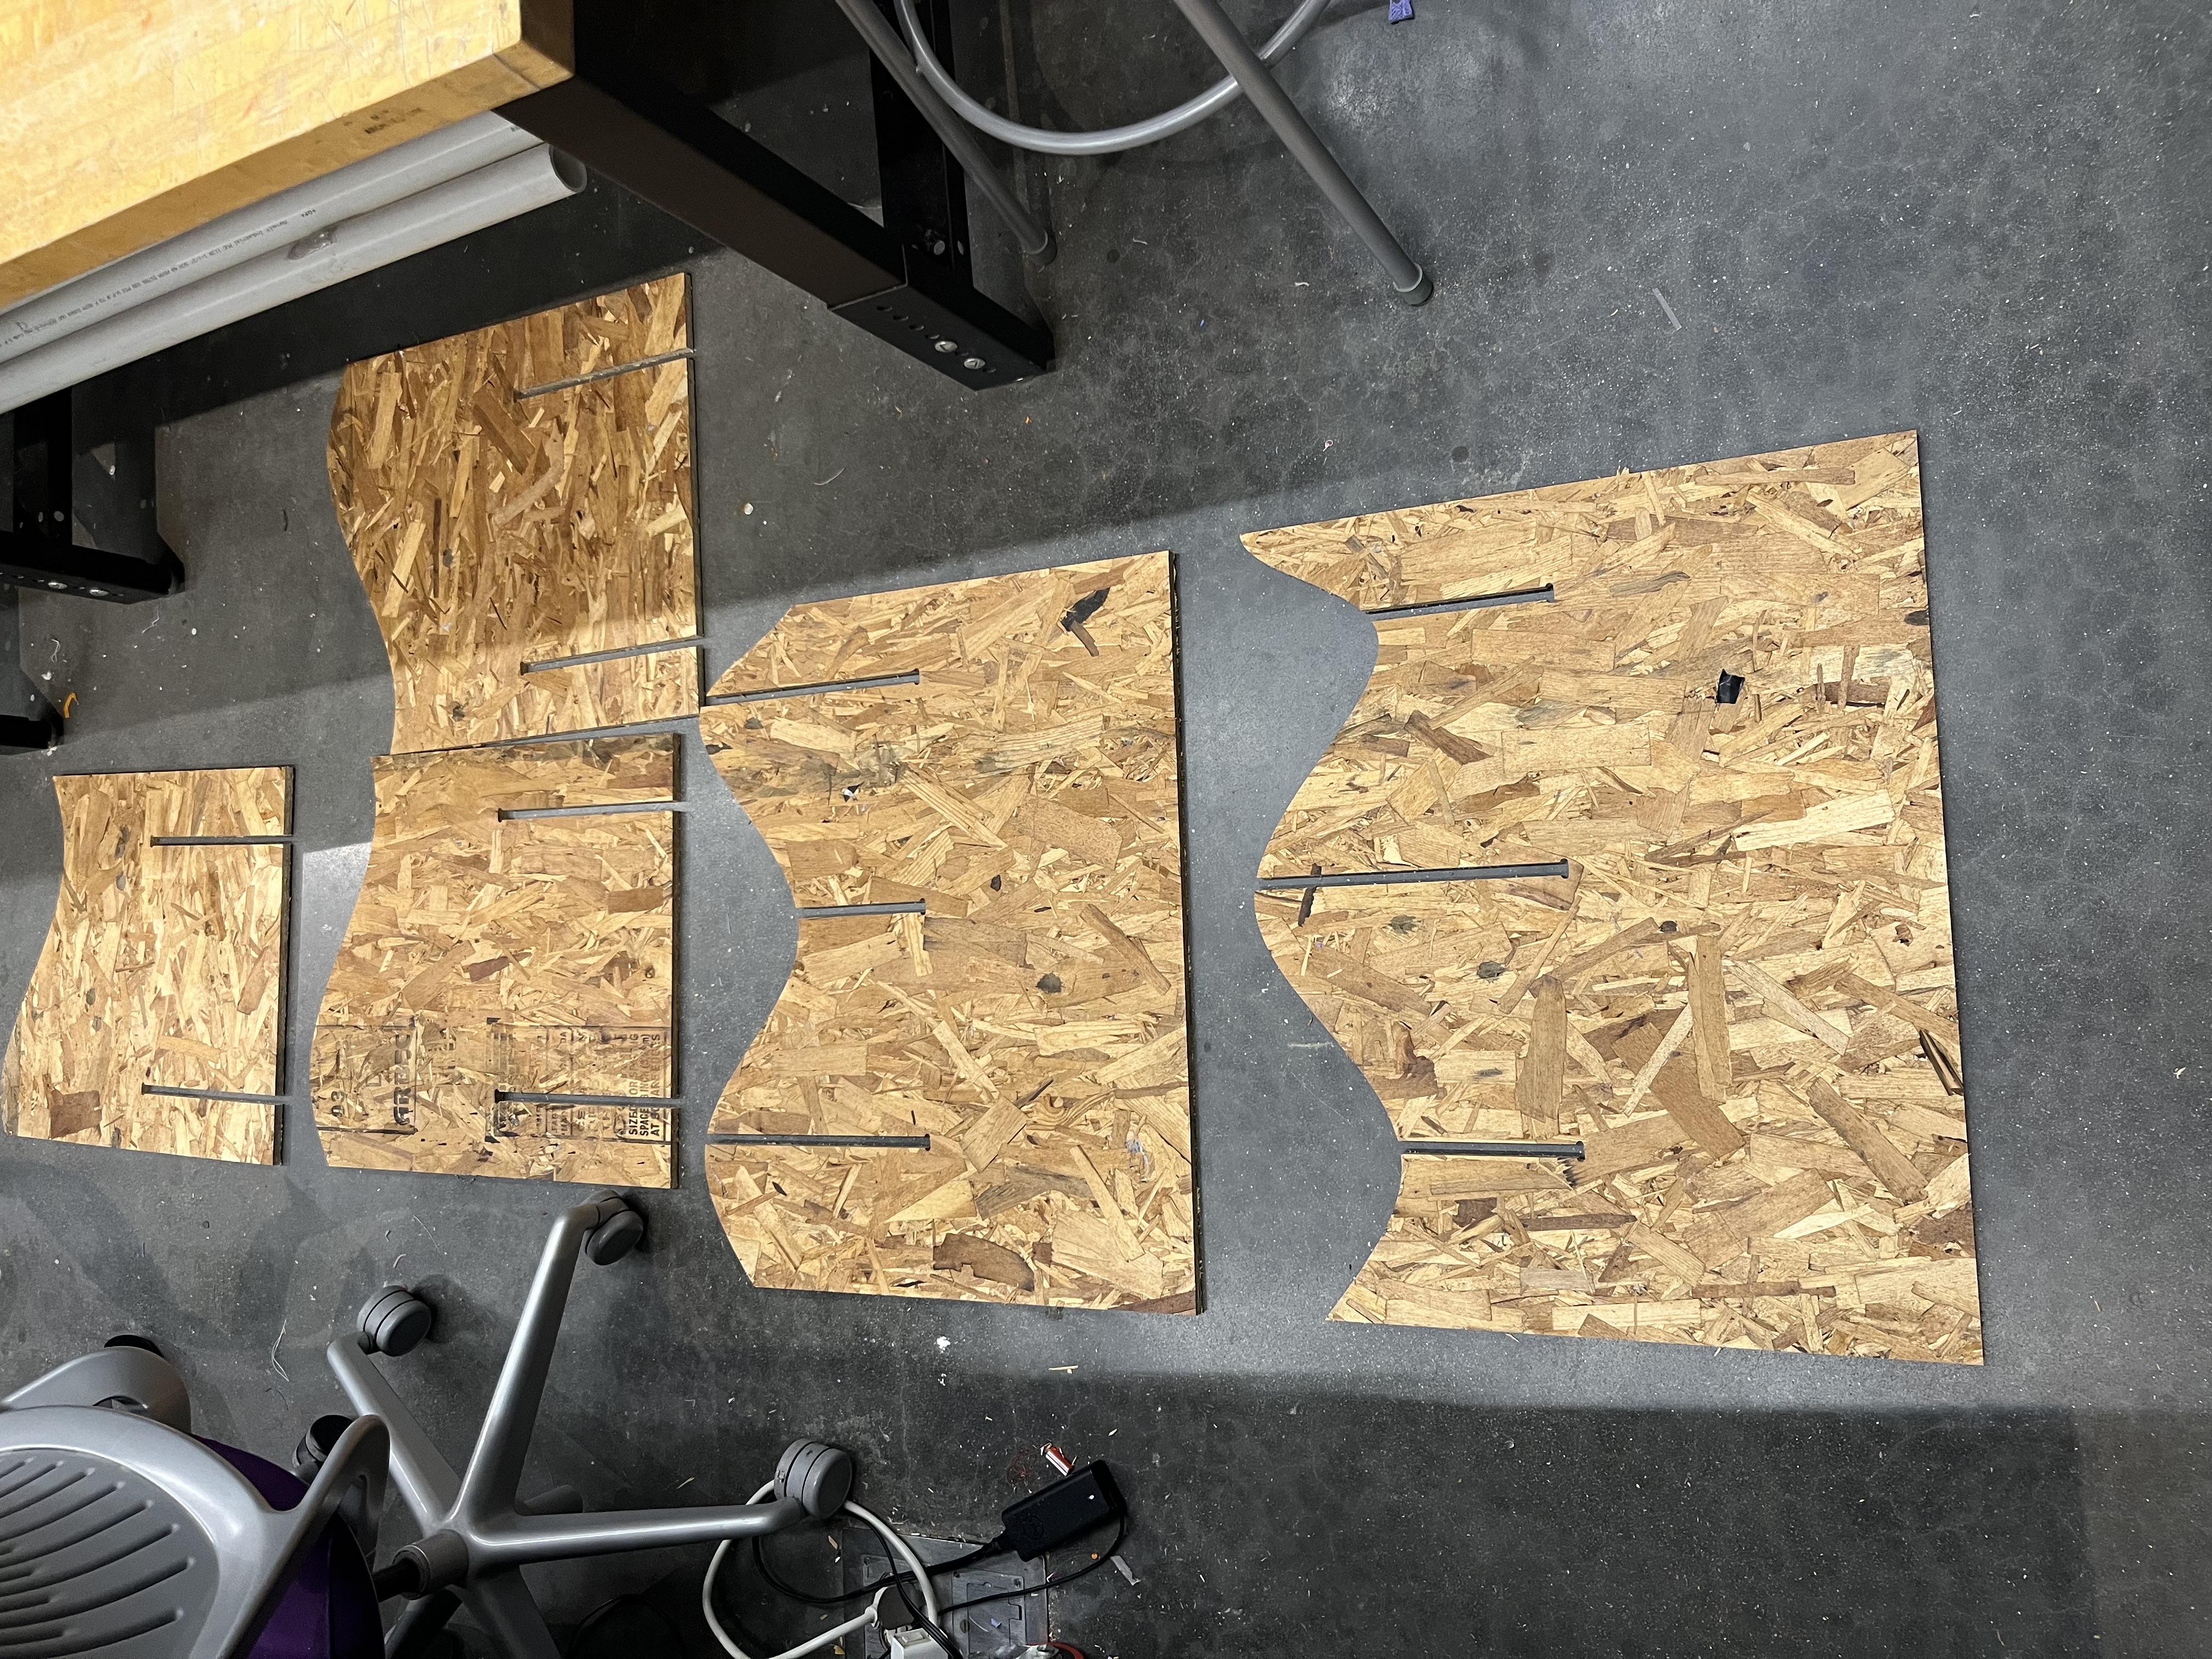
Unfortunately, my enthusiasm was met with a harsh reality. Each student had access to only one OSB board for this week’s project, forcing me to reconsider my design. I had to scale down my grand vision to fit within the constraints of a single board.
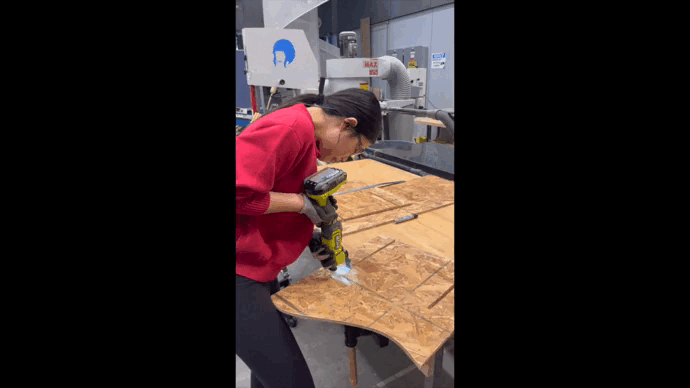
The Cutting Process:
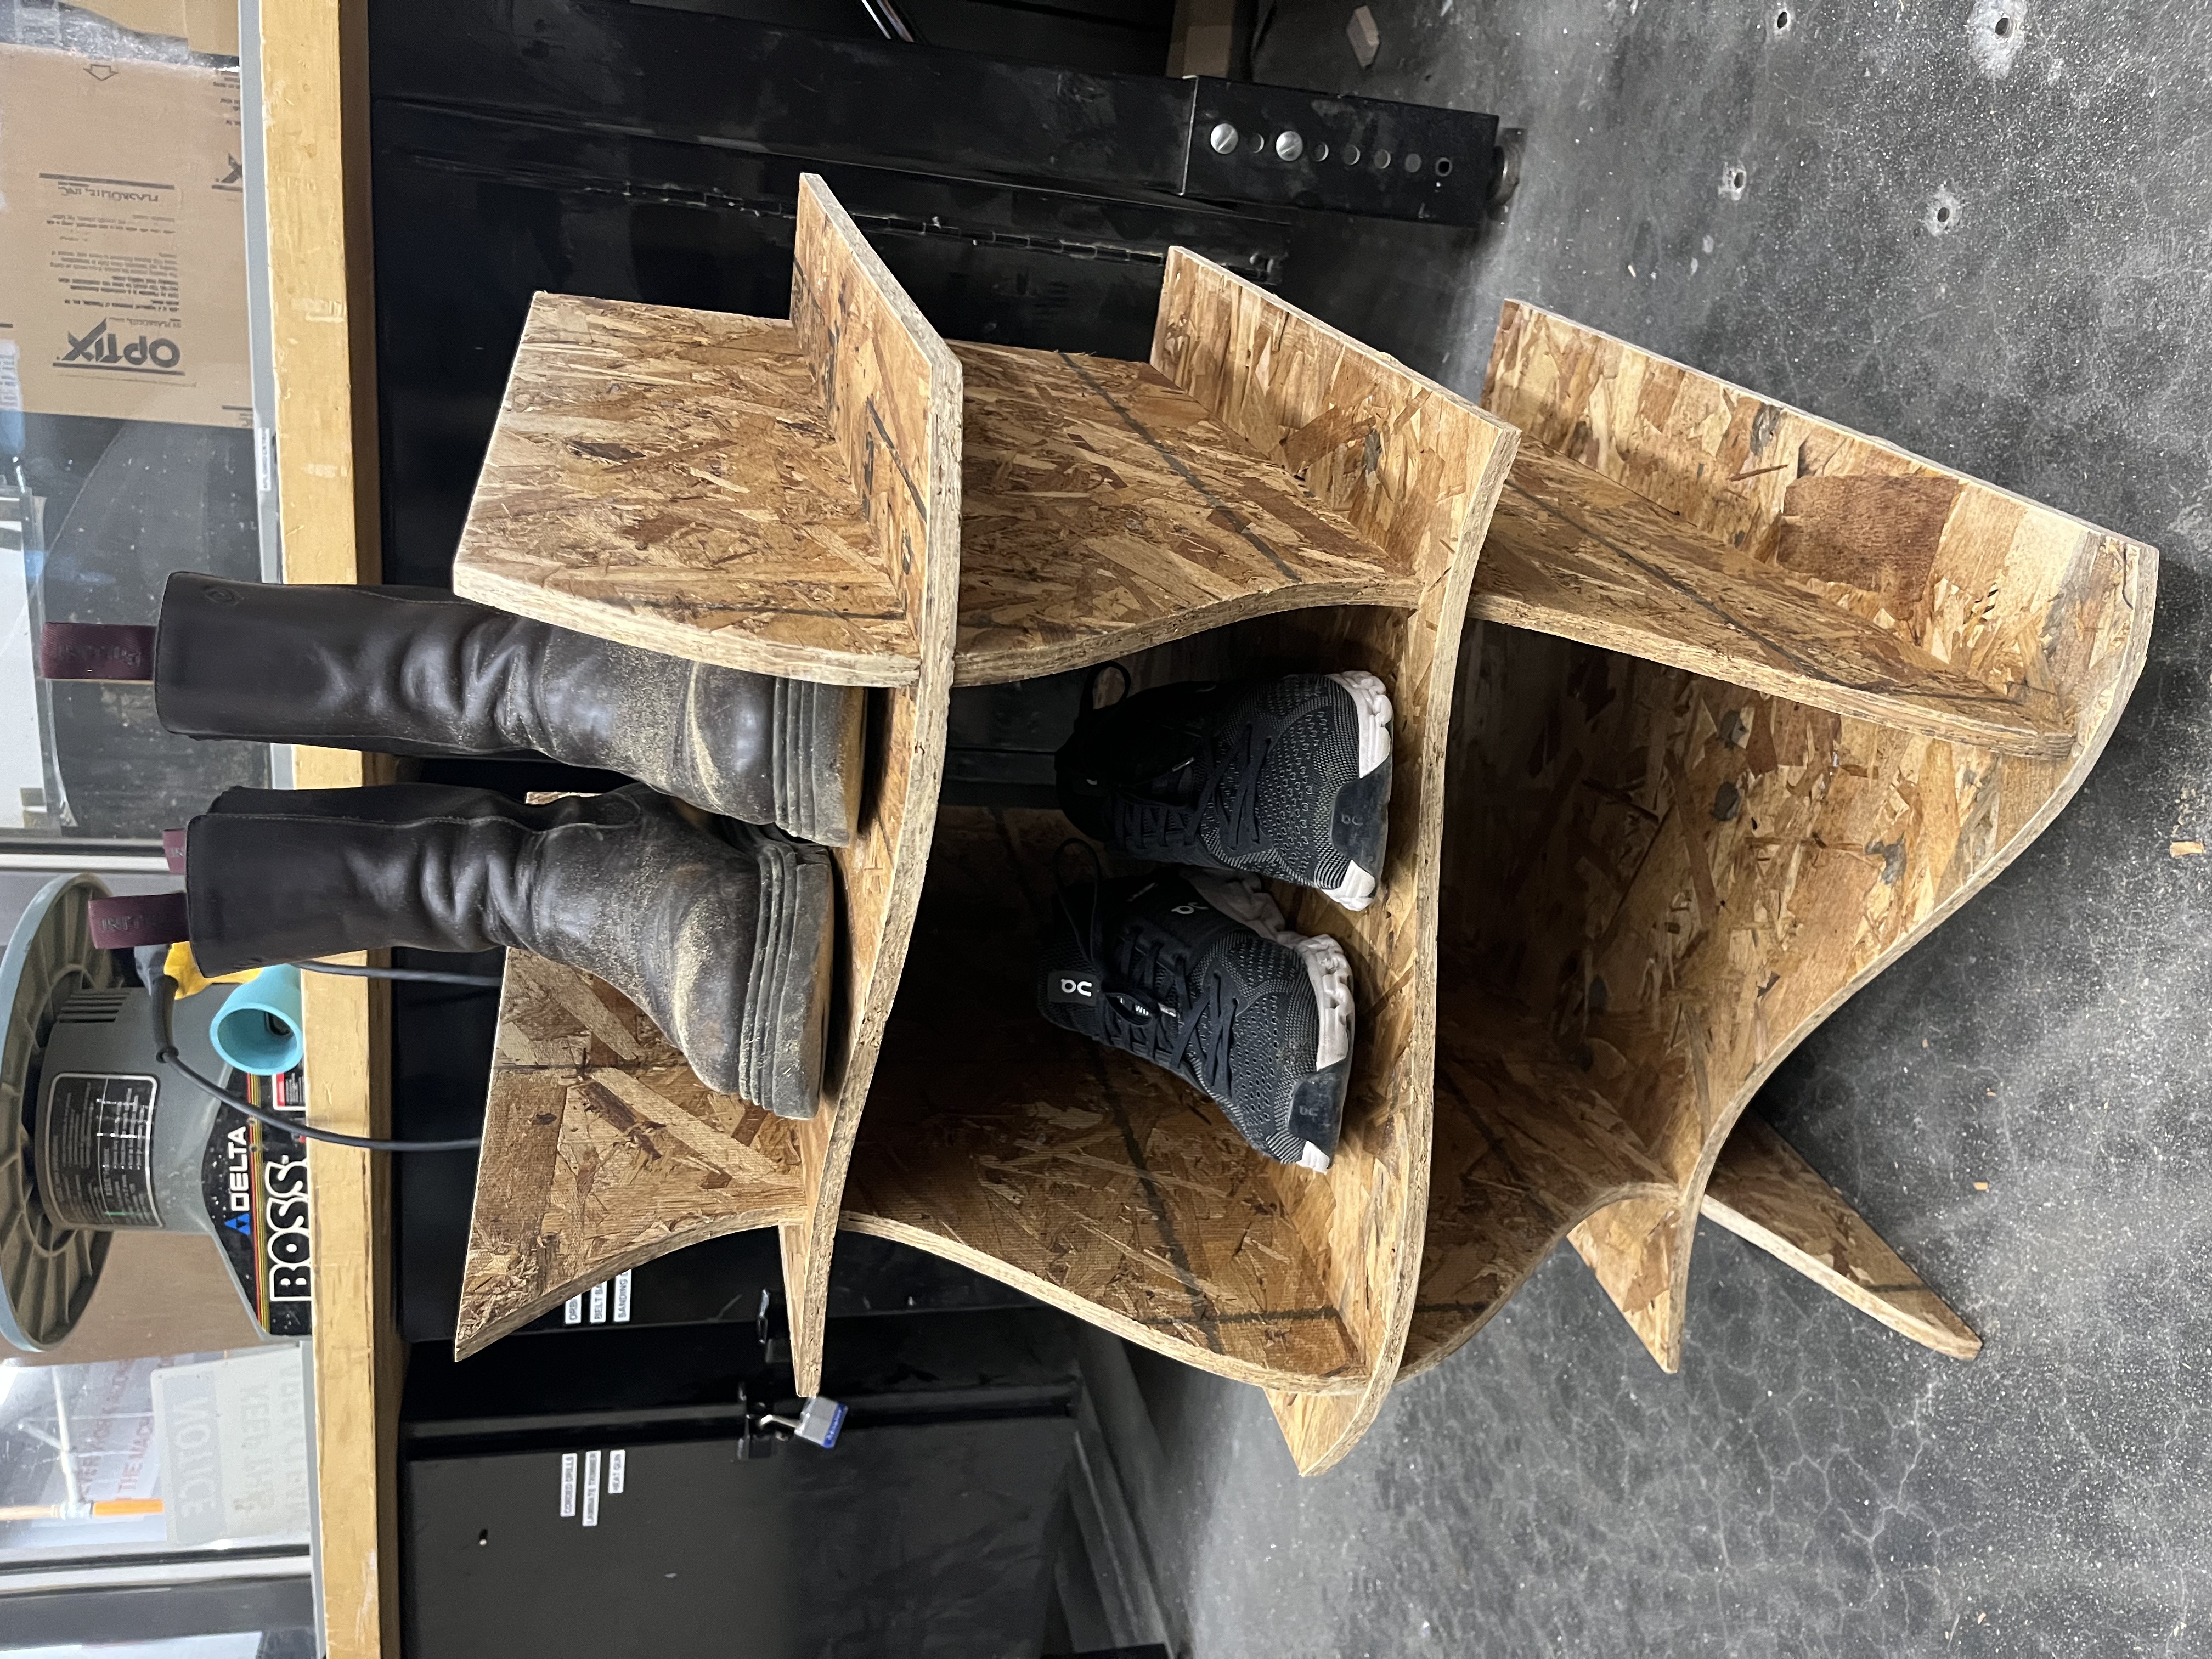
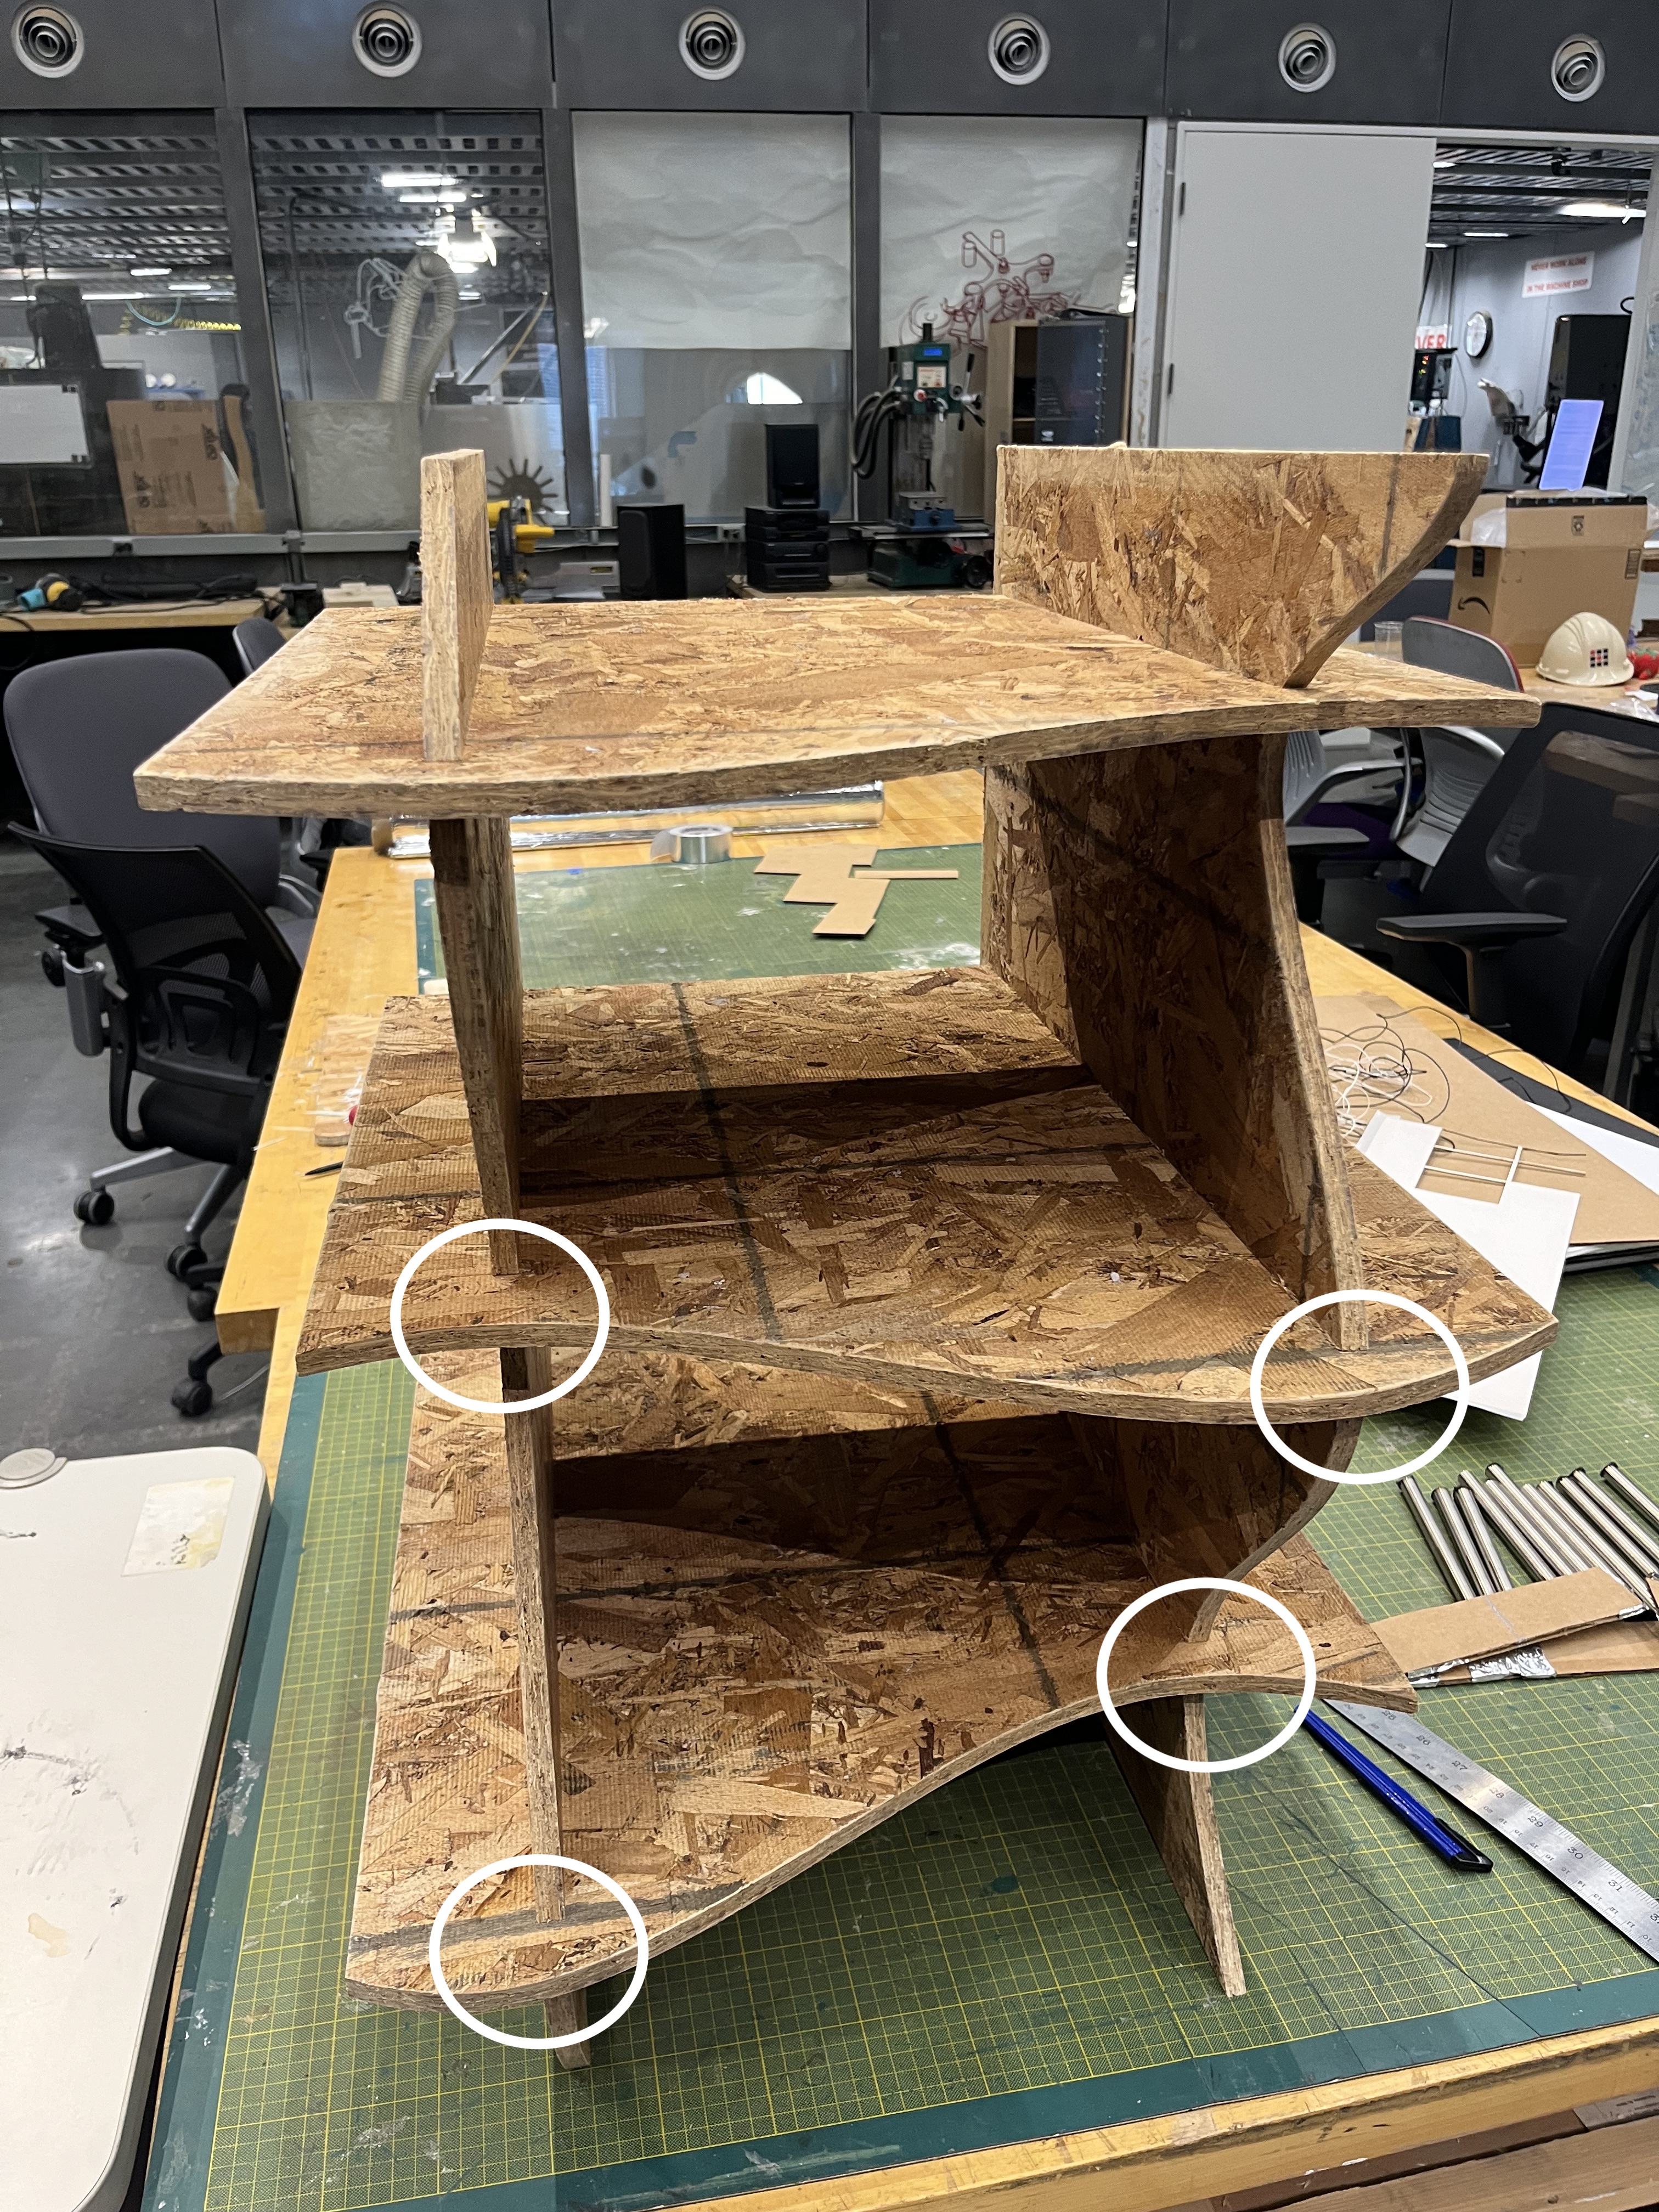
After the first round of cutting, all the pieces seemed to be in good shape. However, as I started to assemble them, I noticed some design flaws that needed attention.

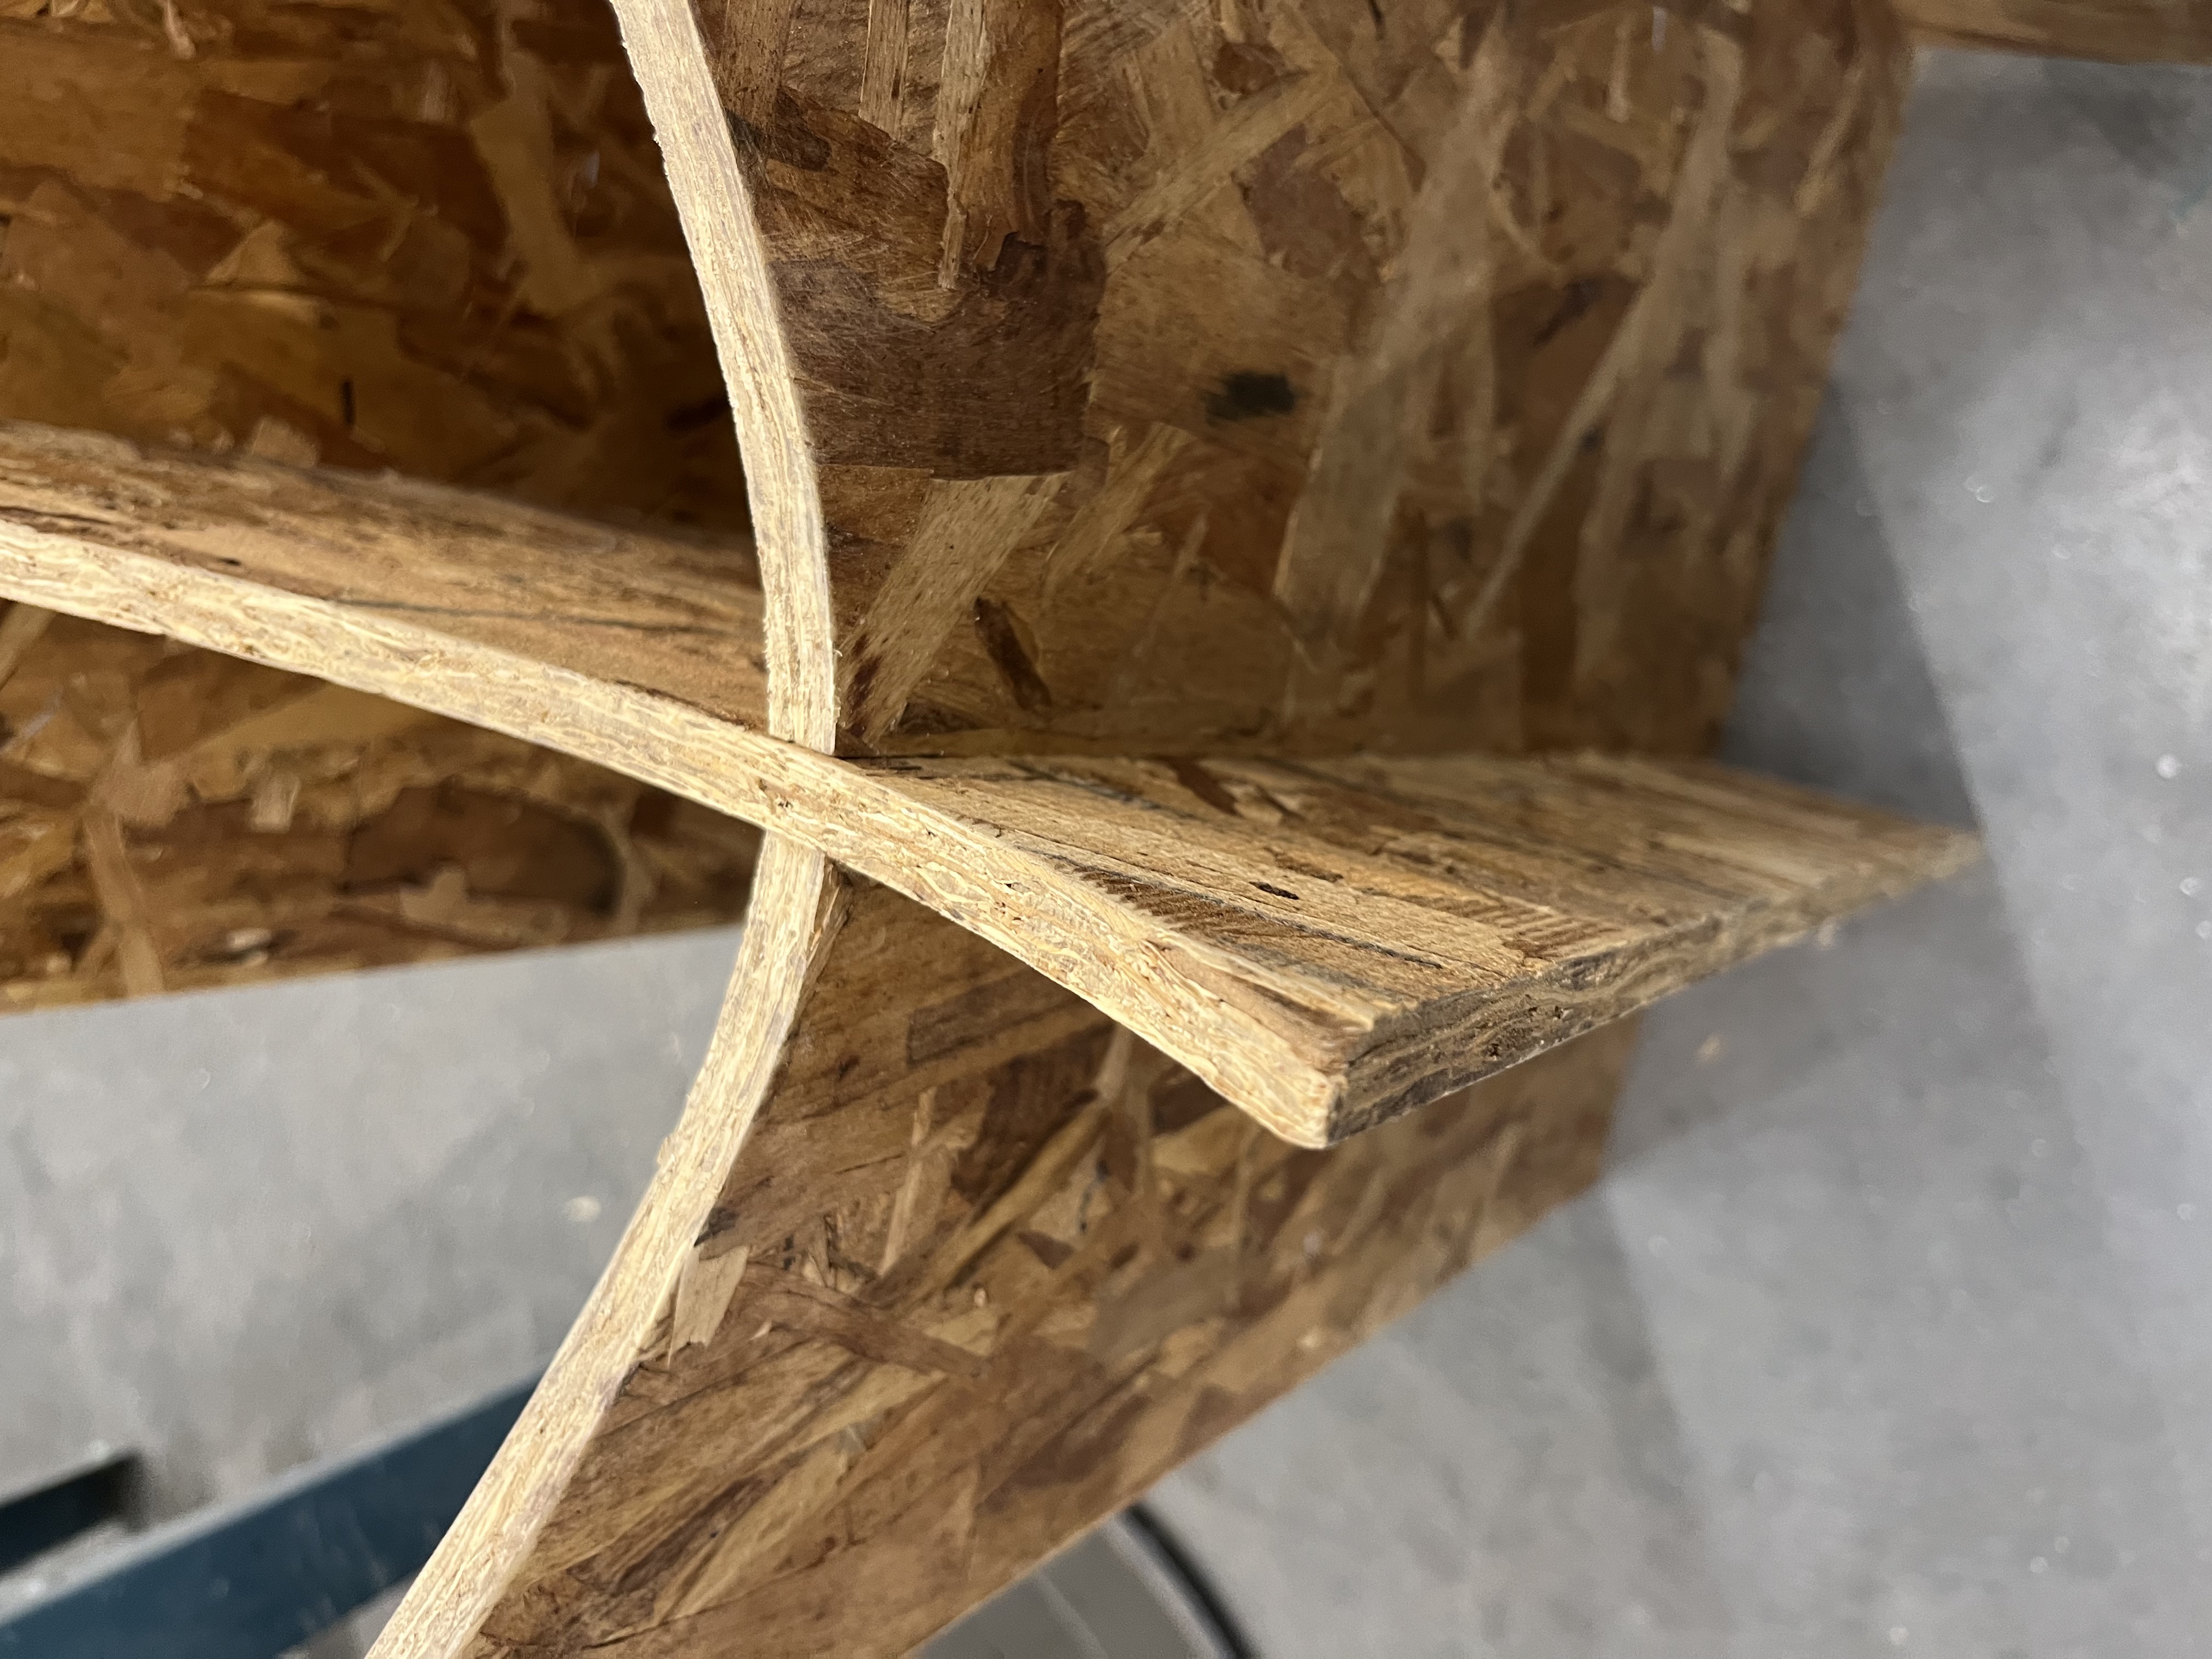
Design Flaws:
1. Depth Issue:
The depth of the shoe rack turned out to be too deep, making it less practical for our needs.
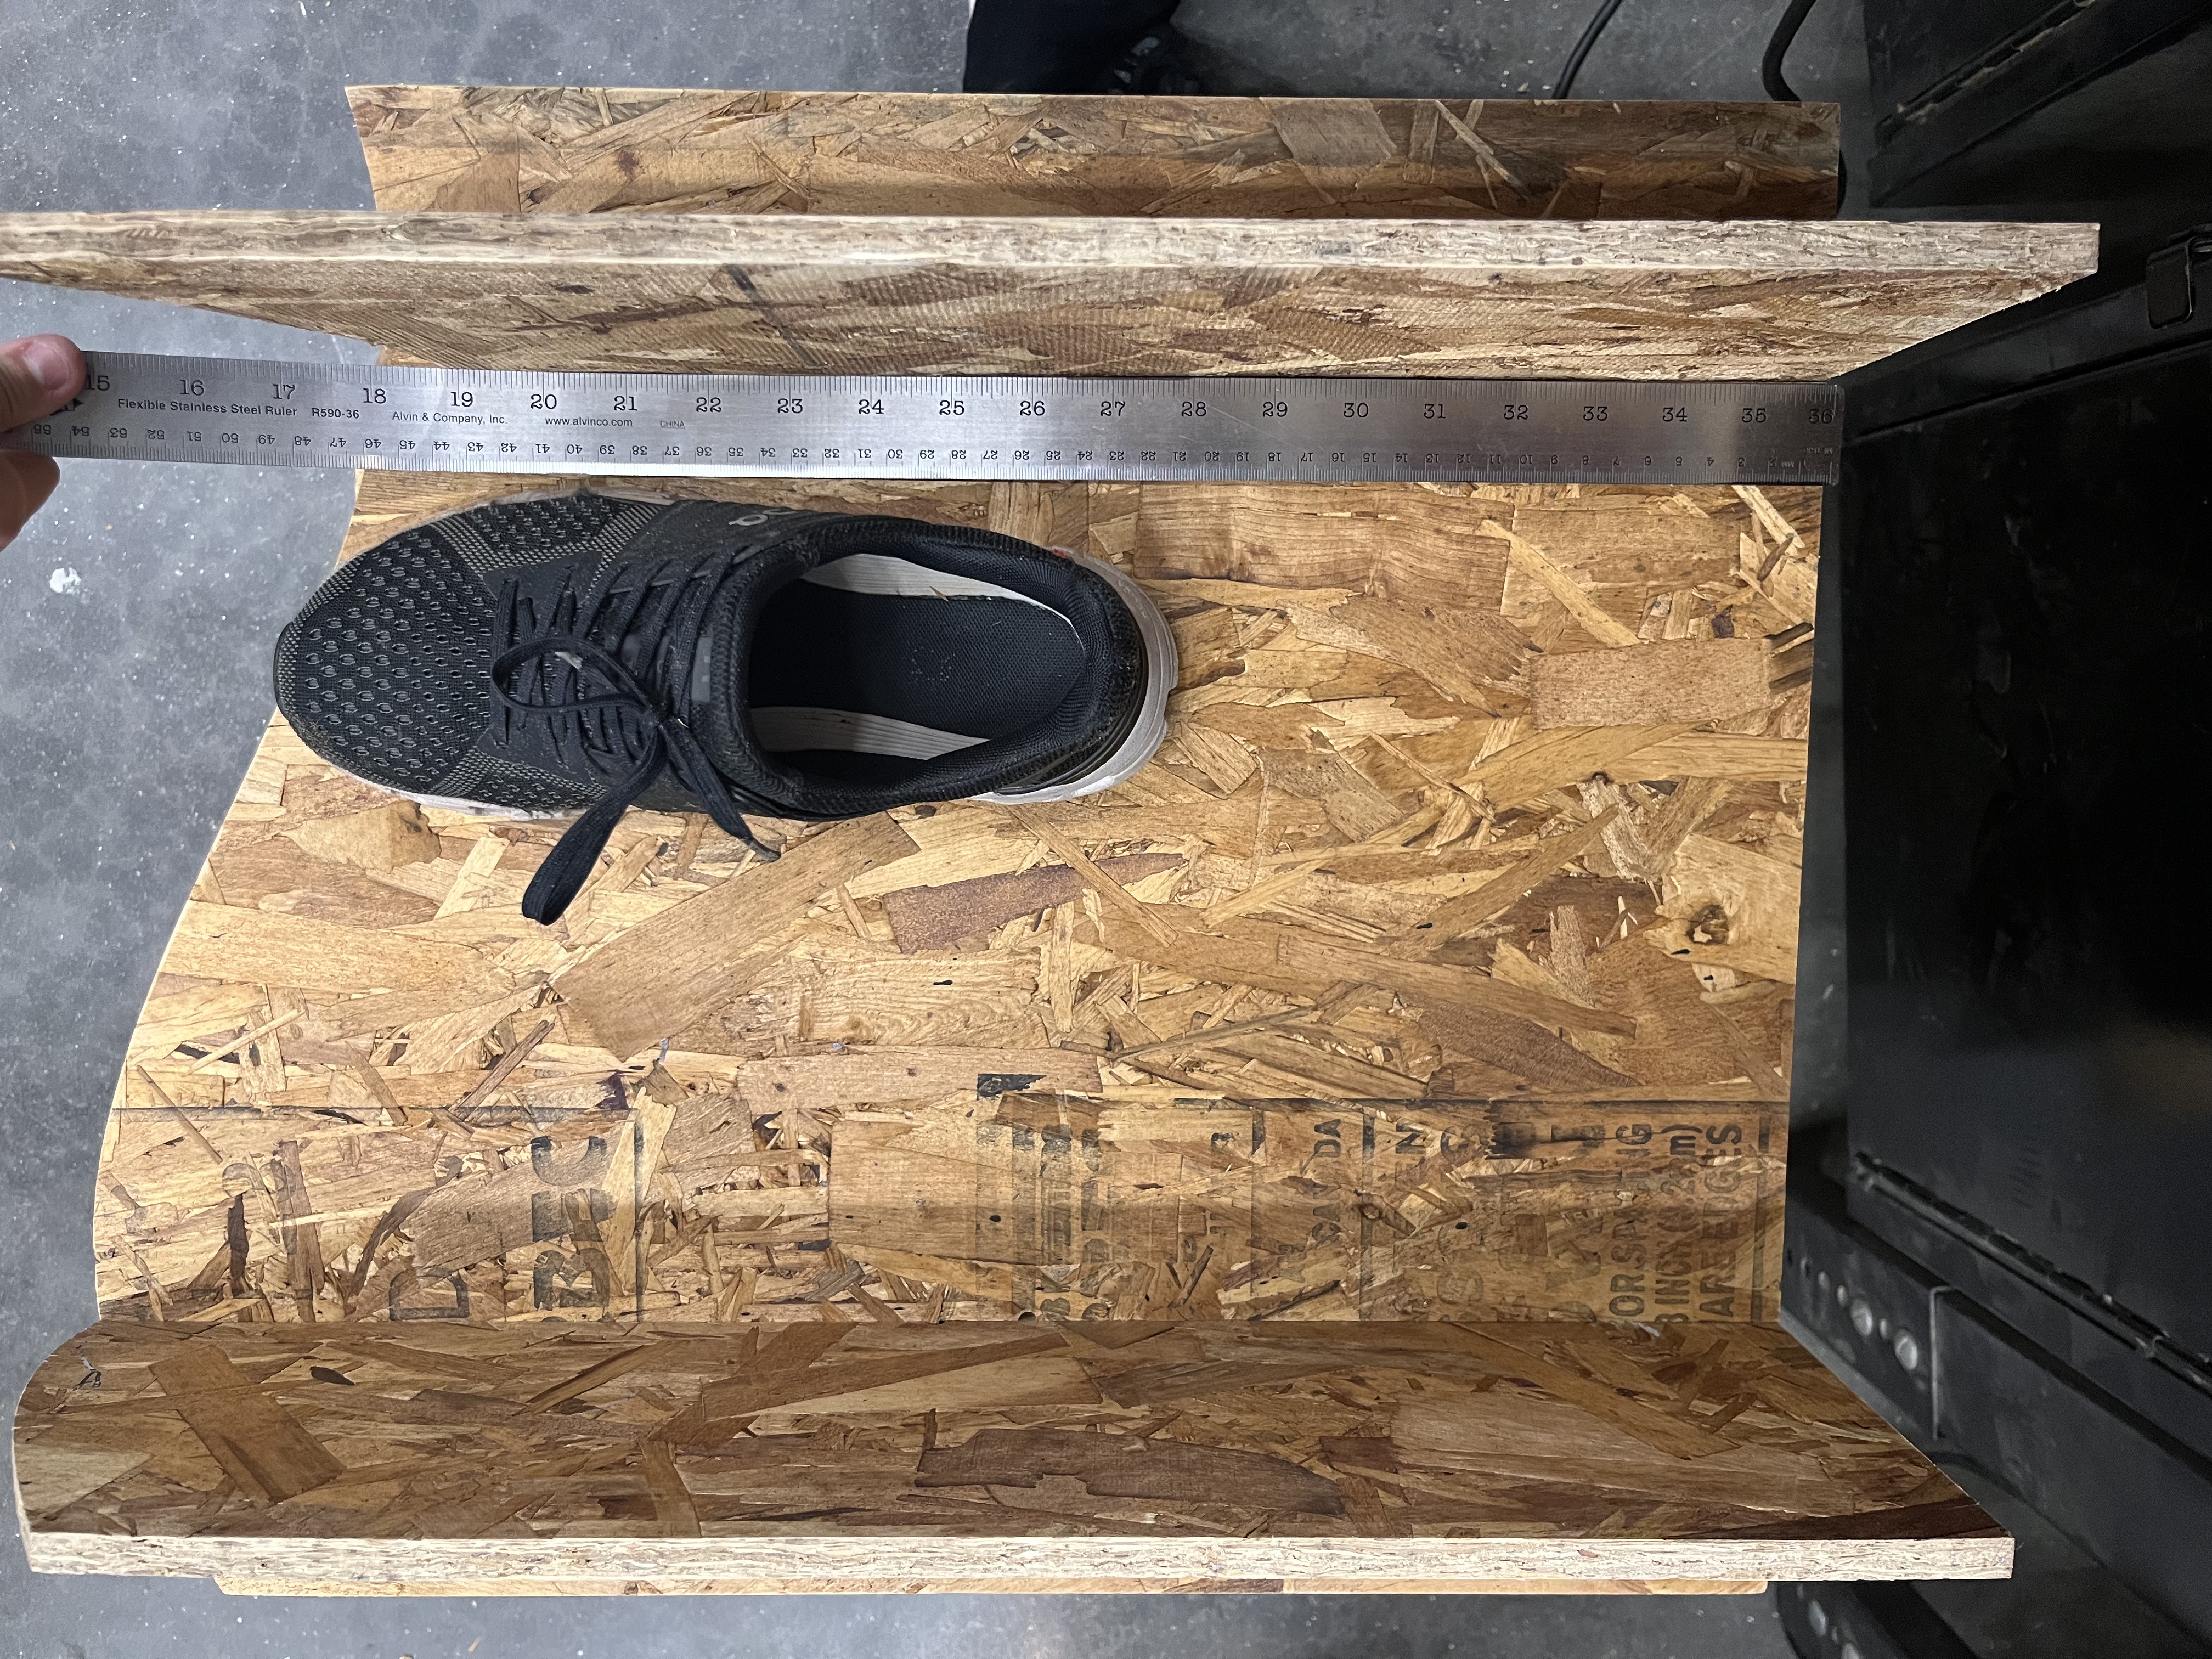
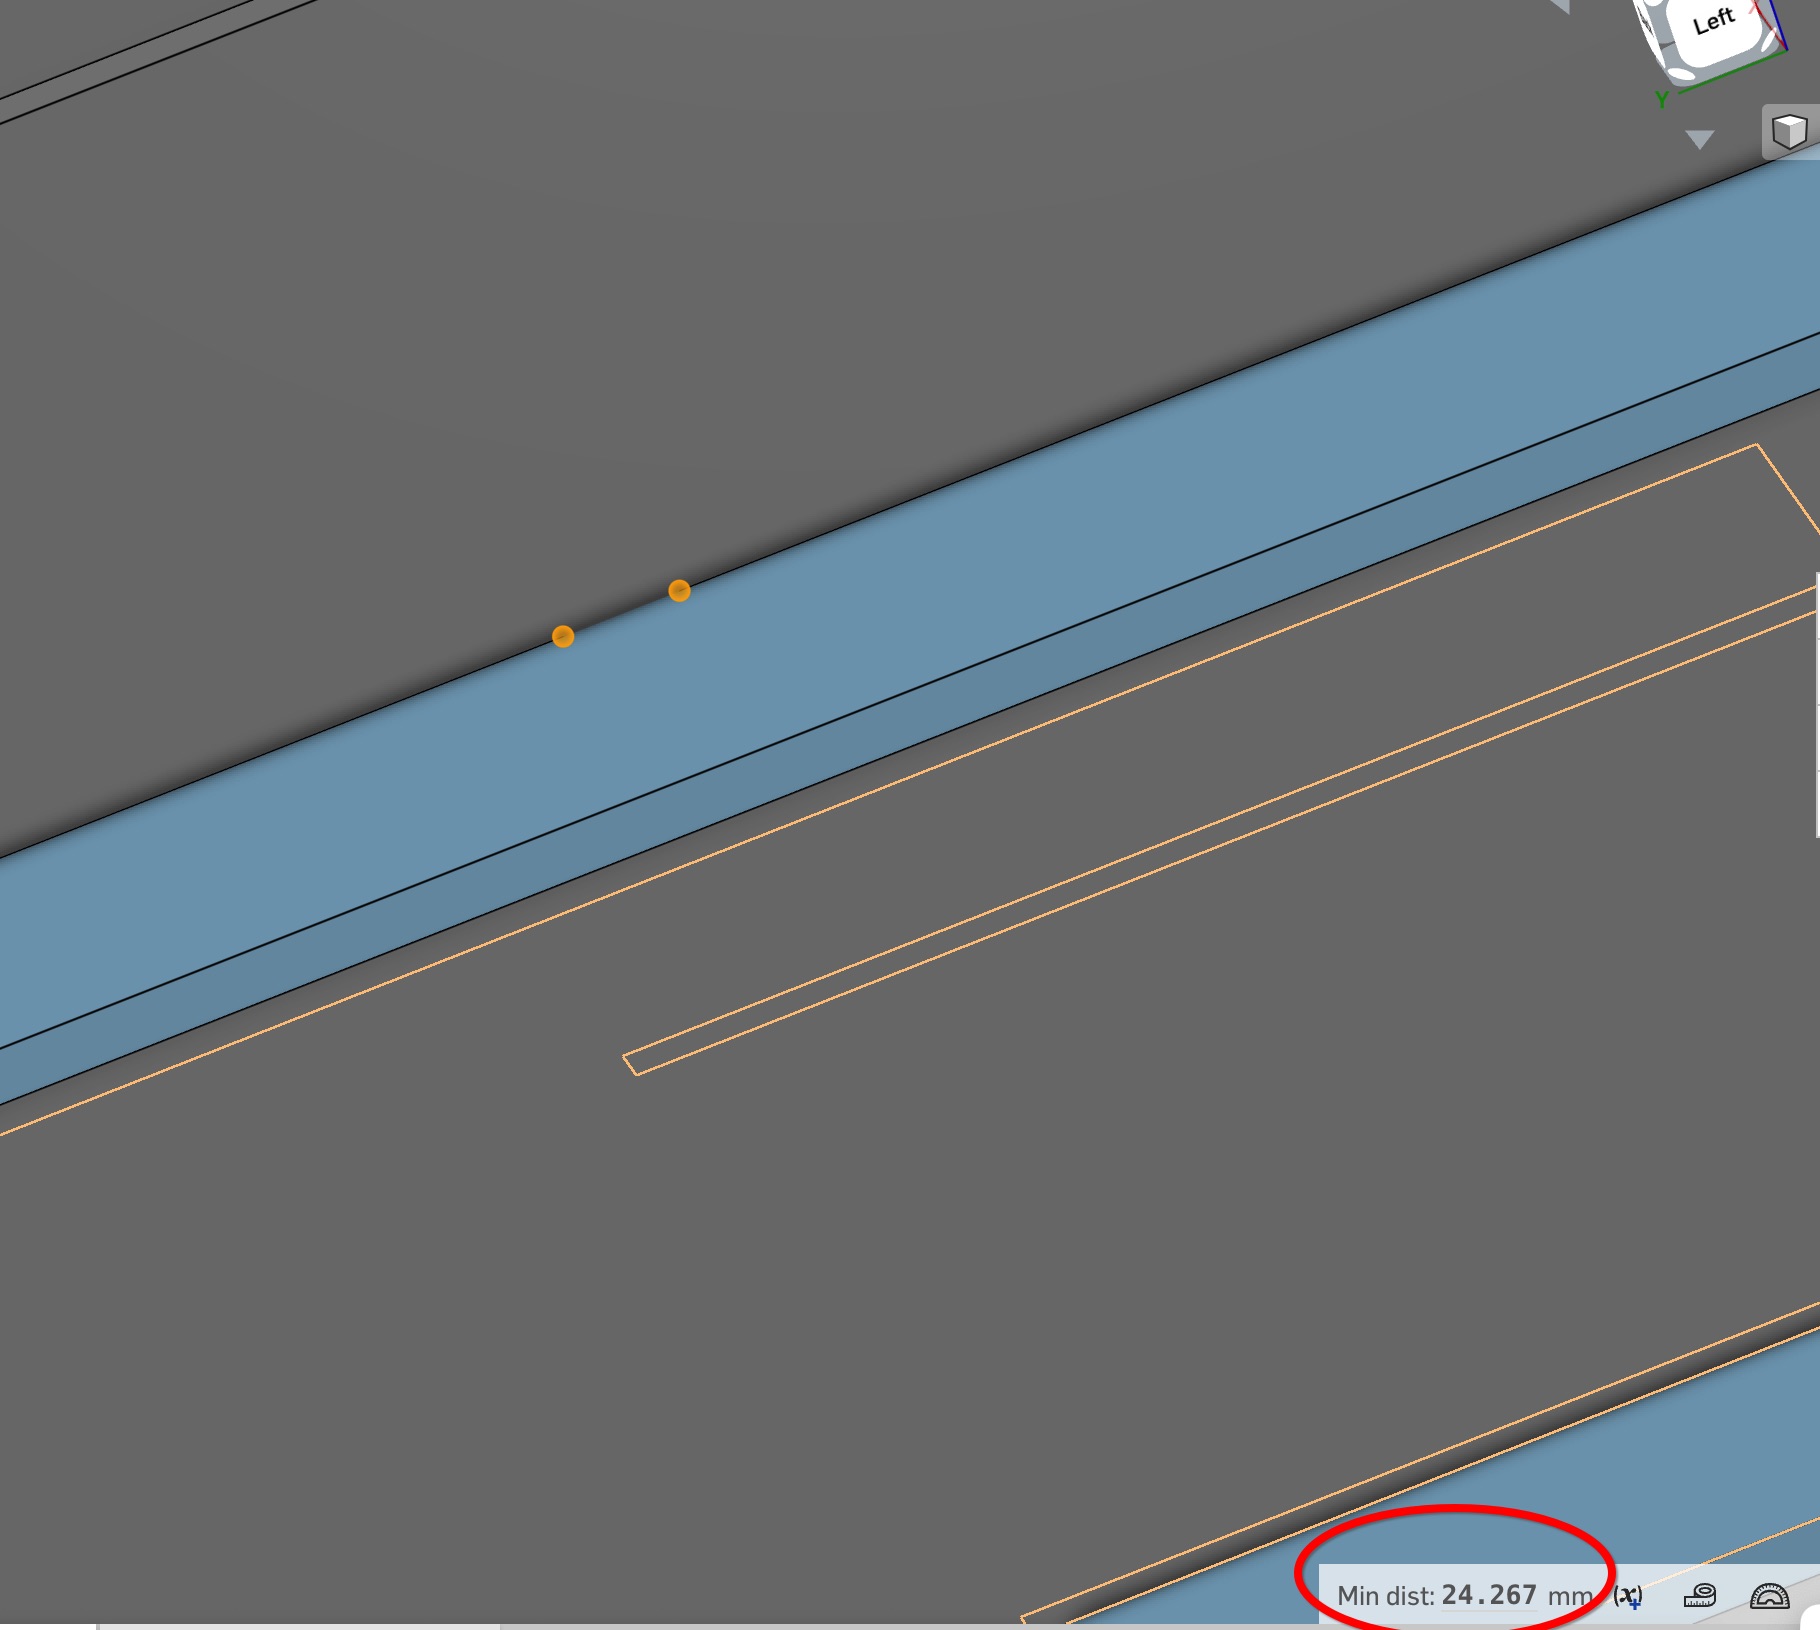
2. Joint Depth Size: The joint depth size appeared to be incorrect, resulting in an uneven and jagged edge on the sine wave curve.
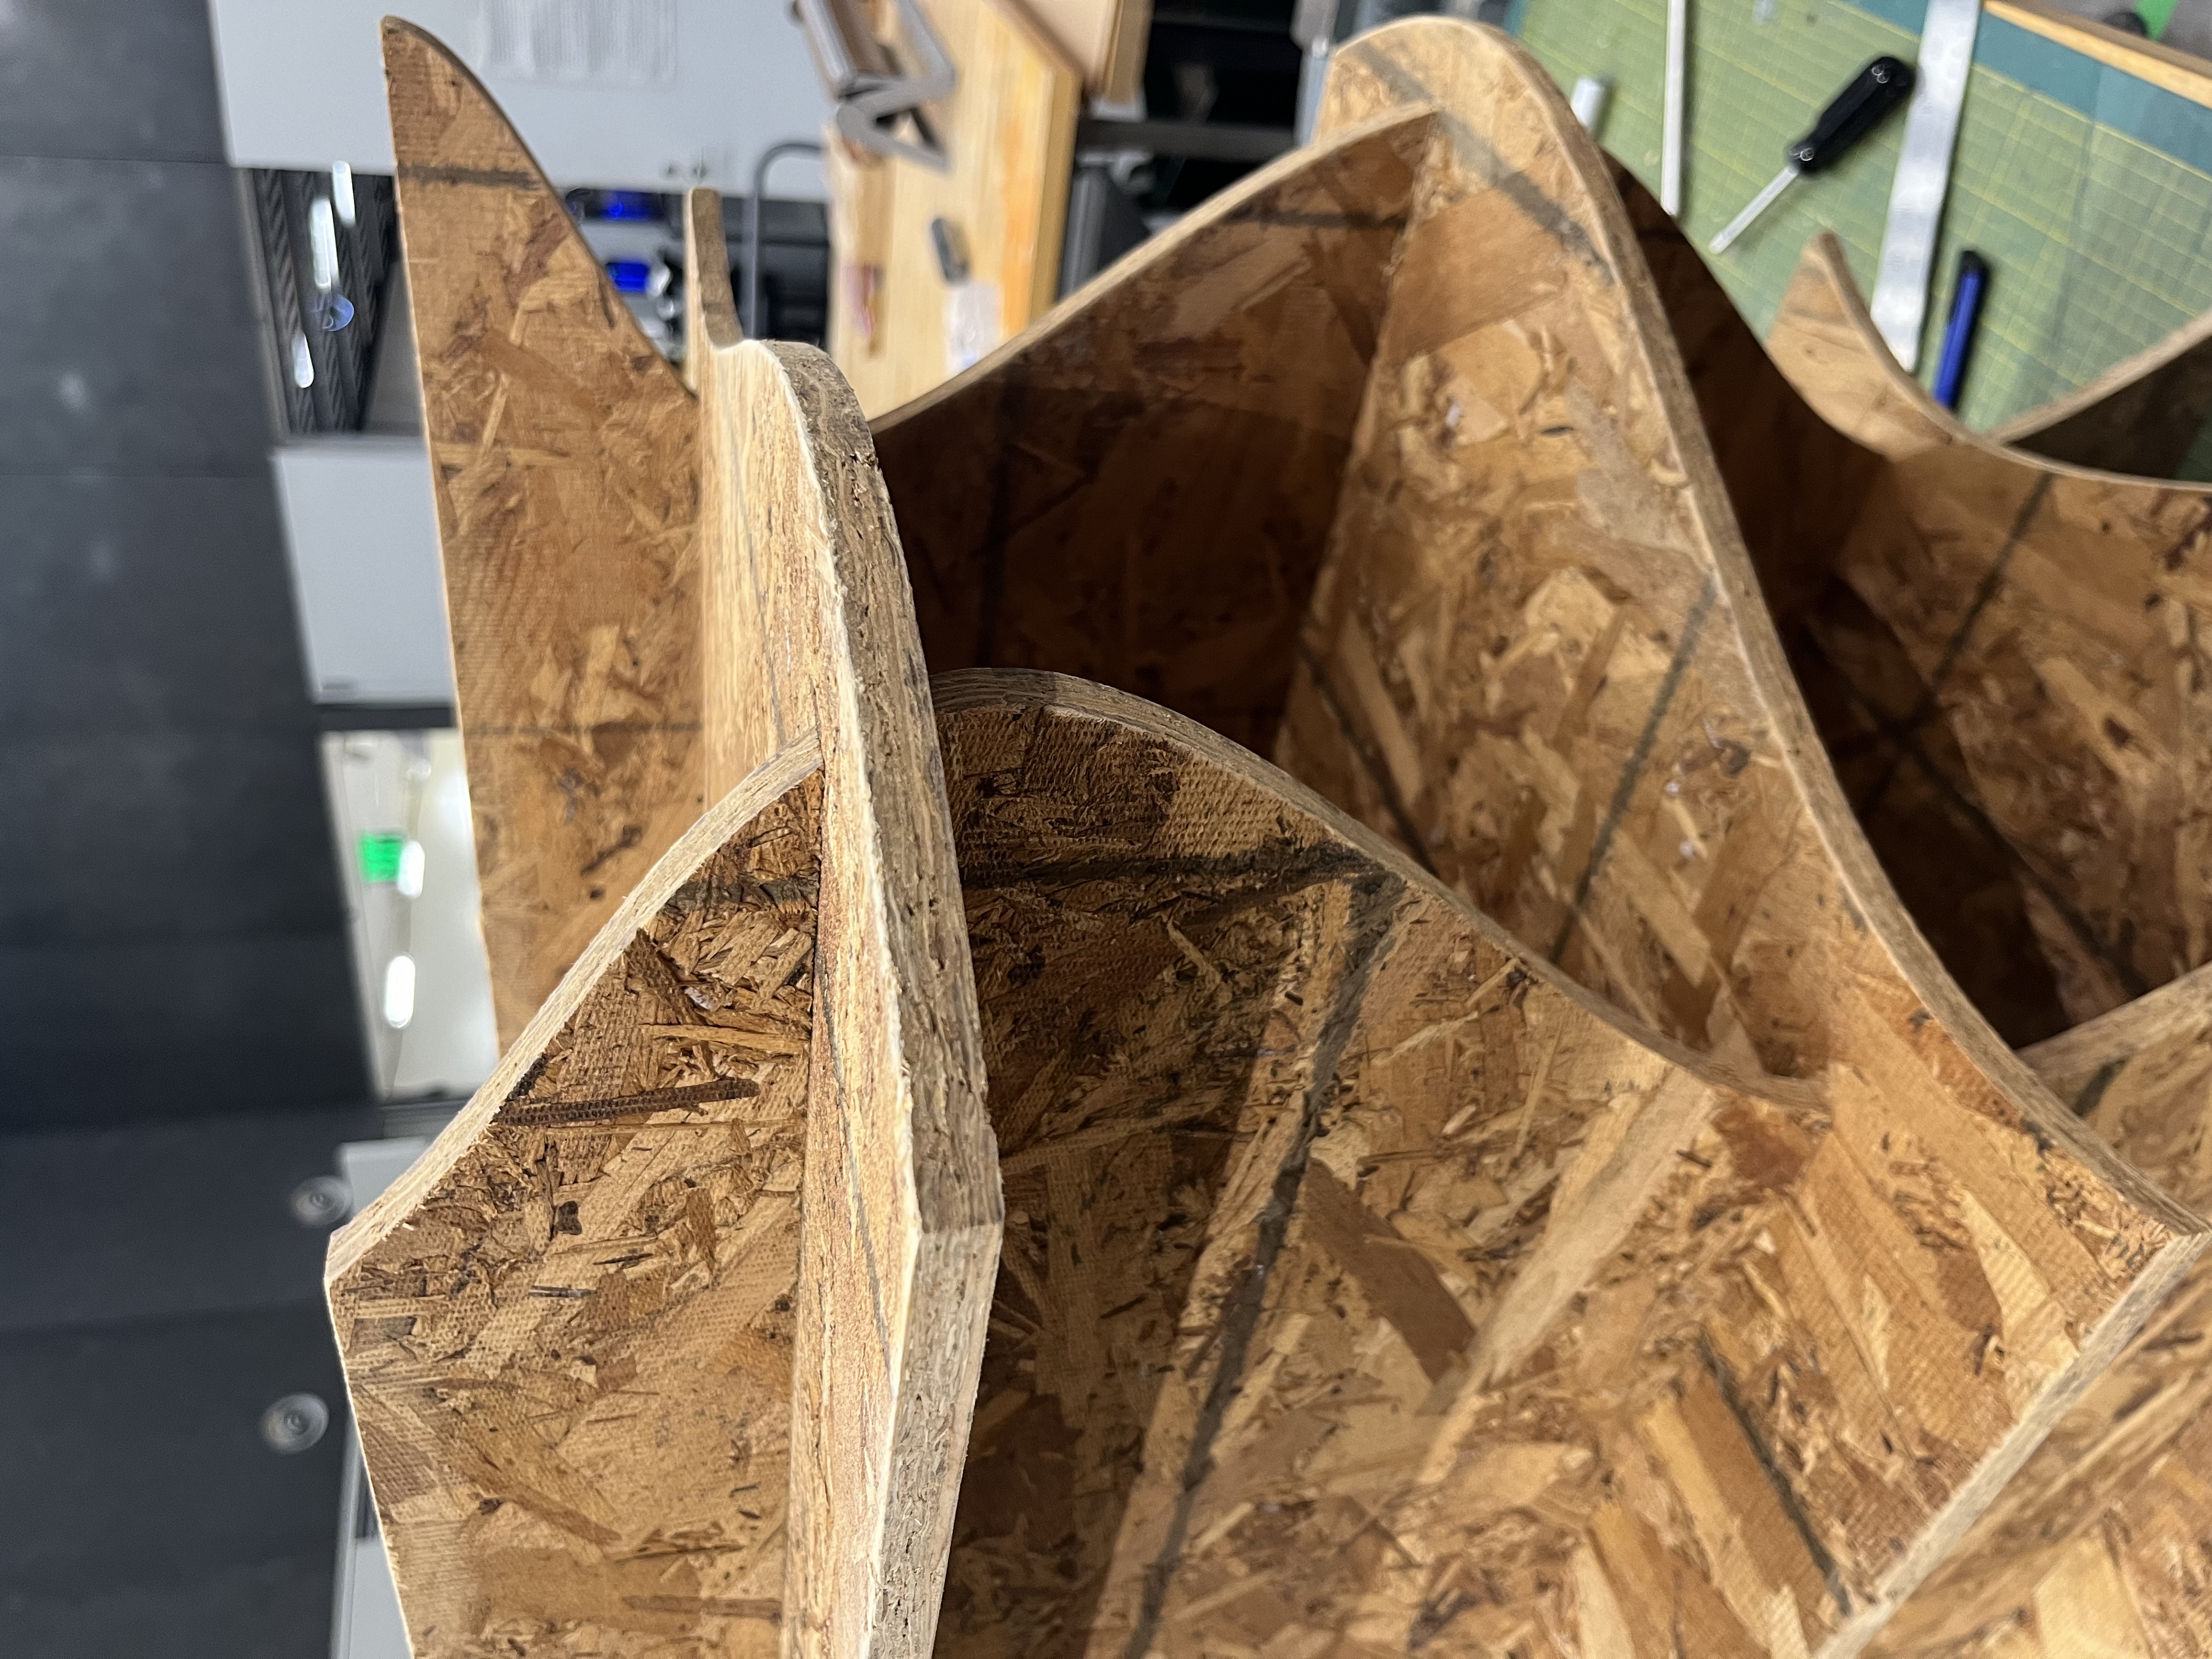
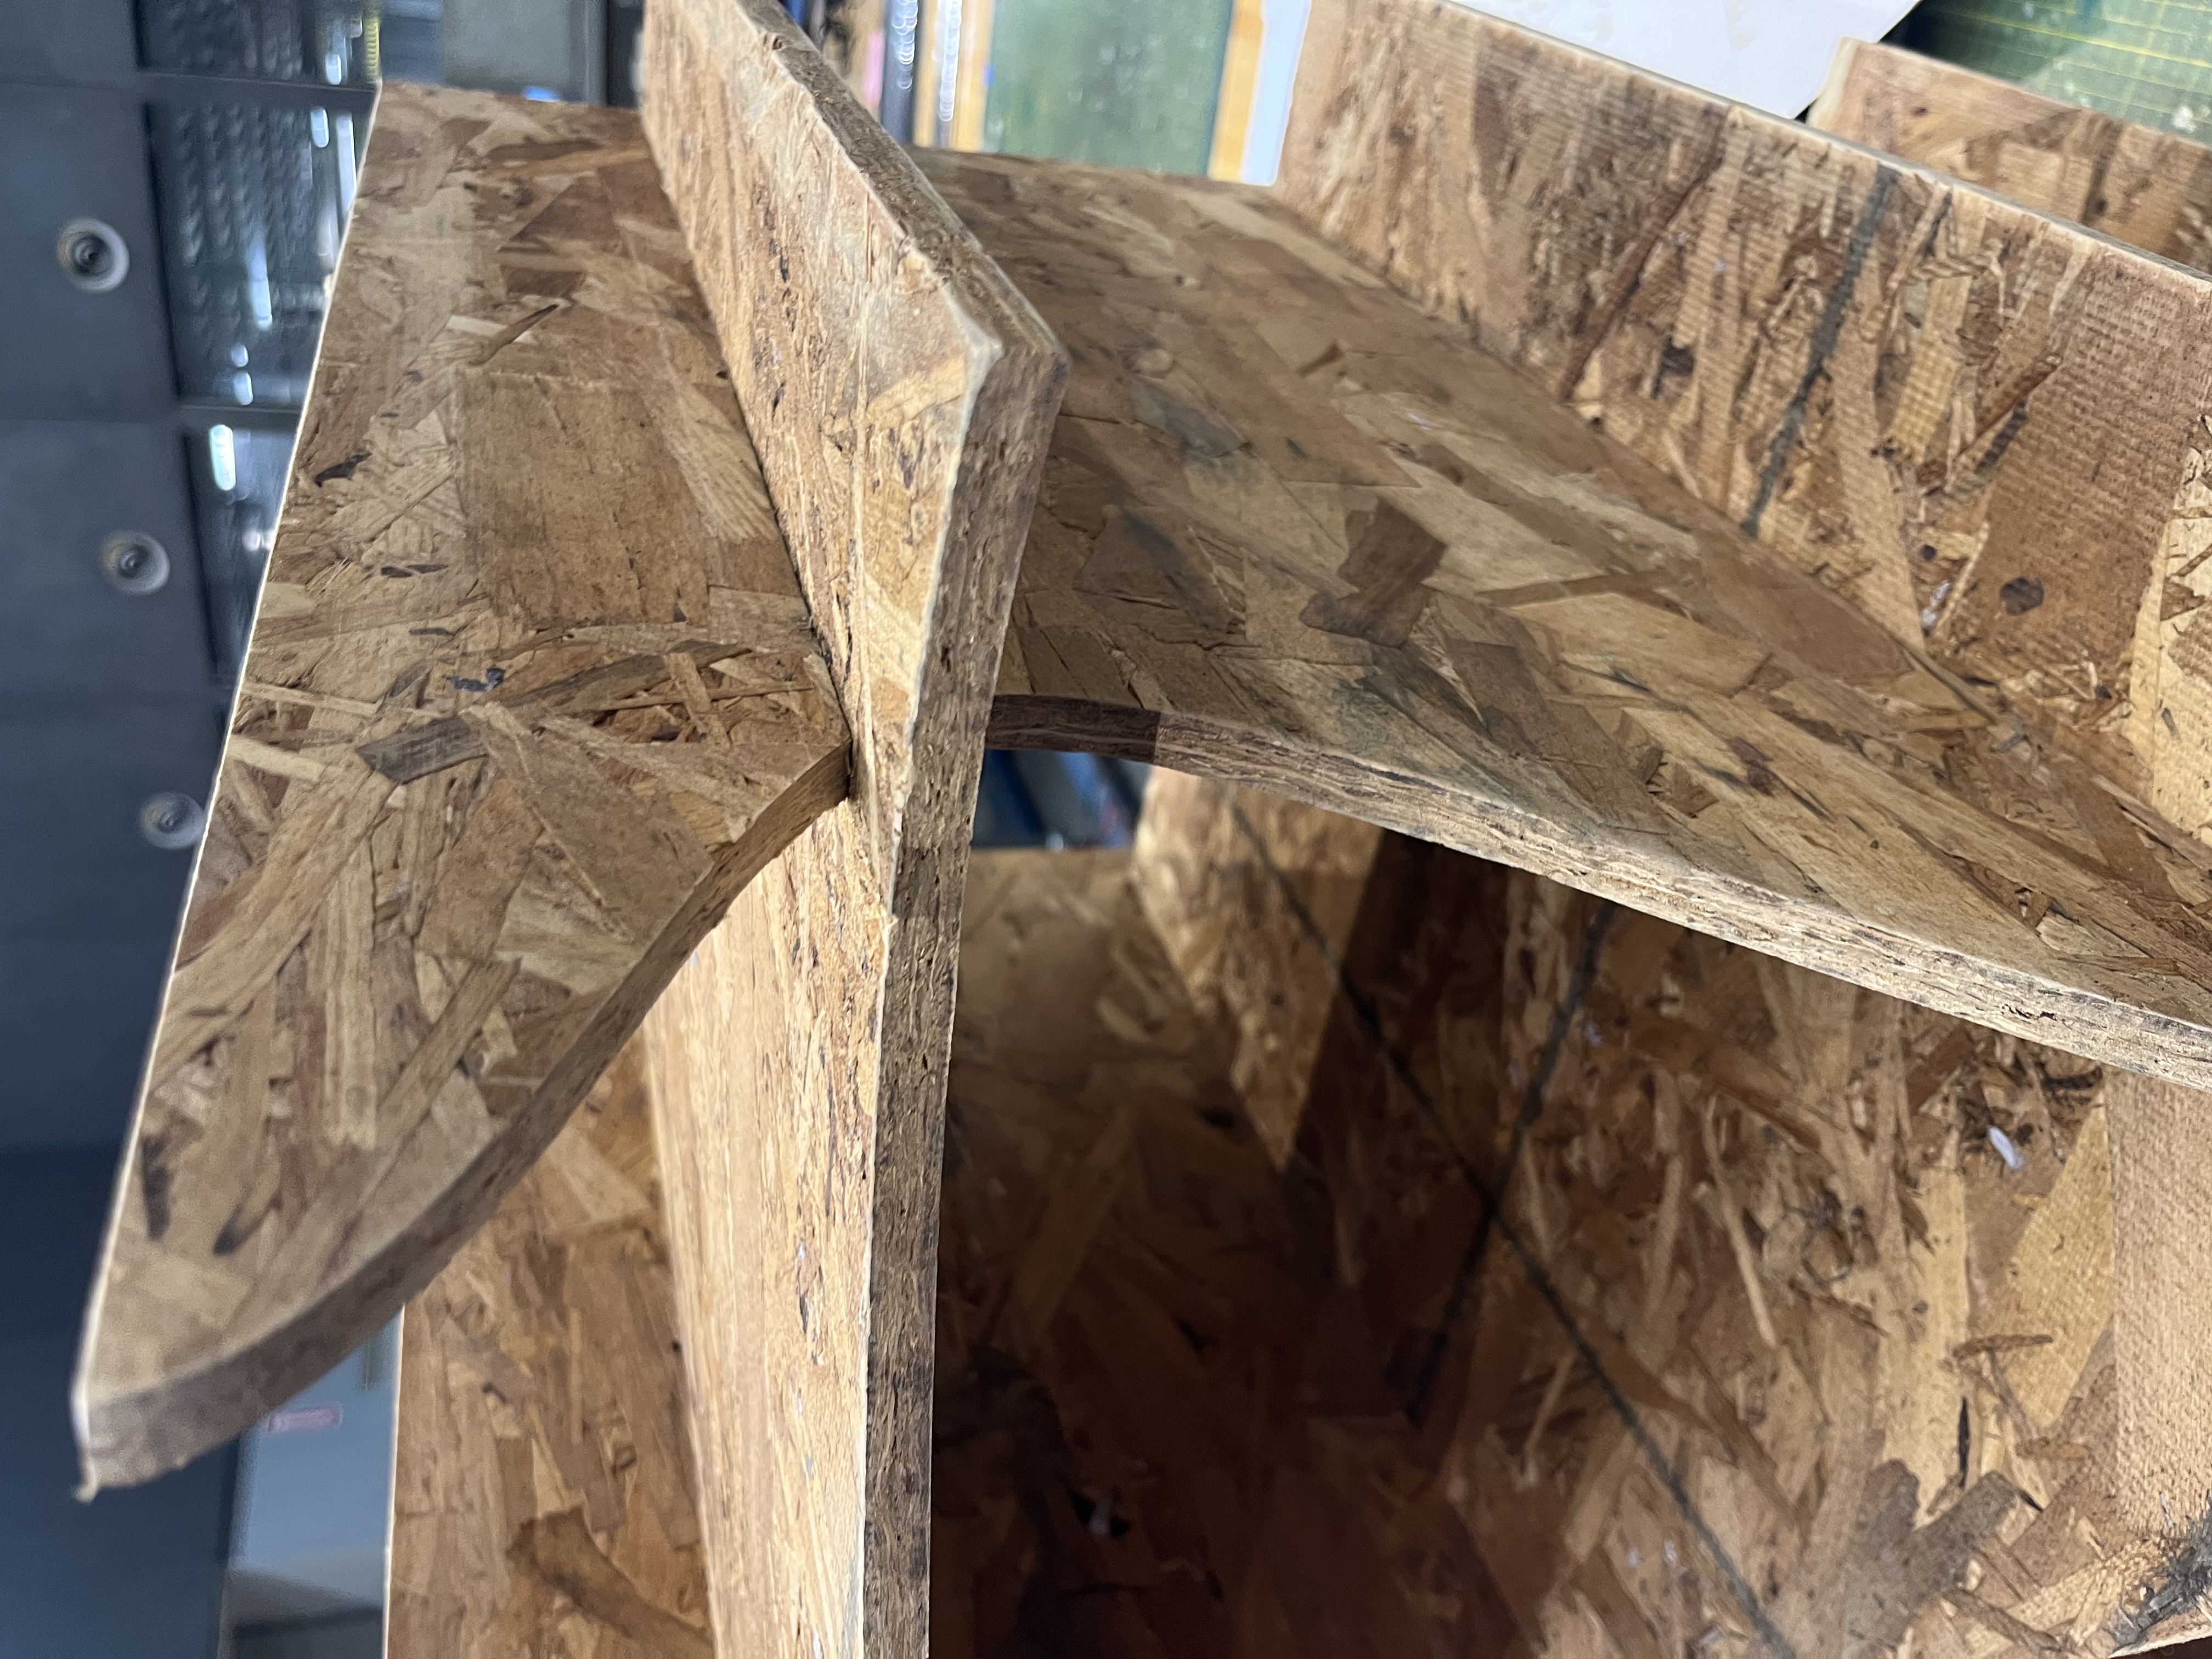
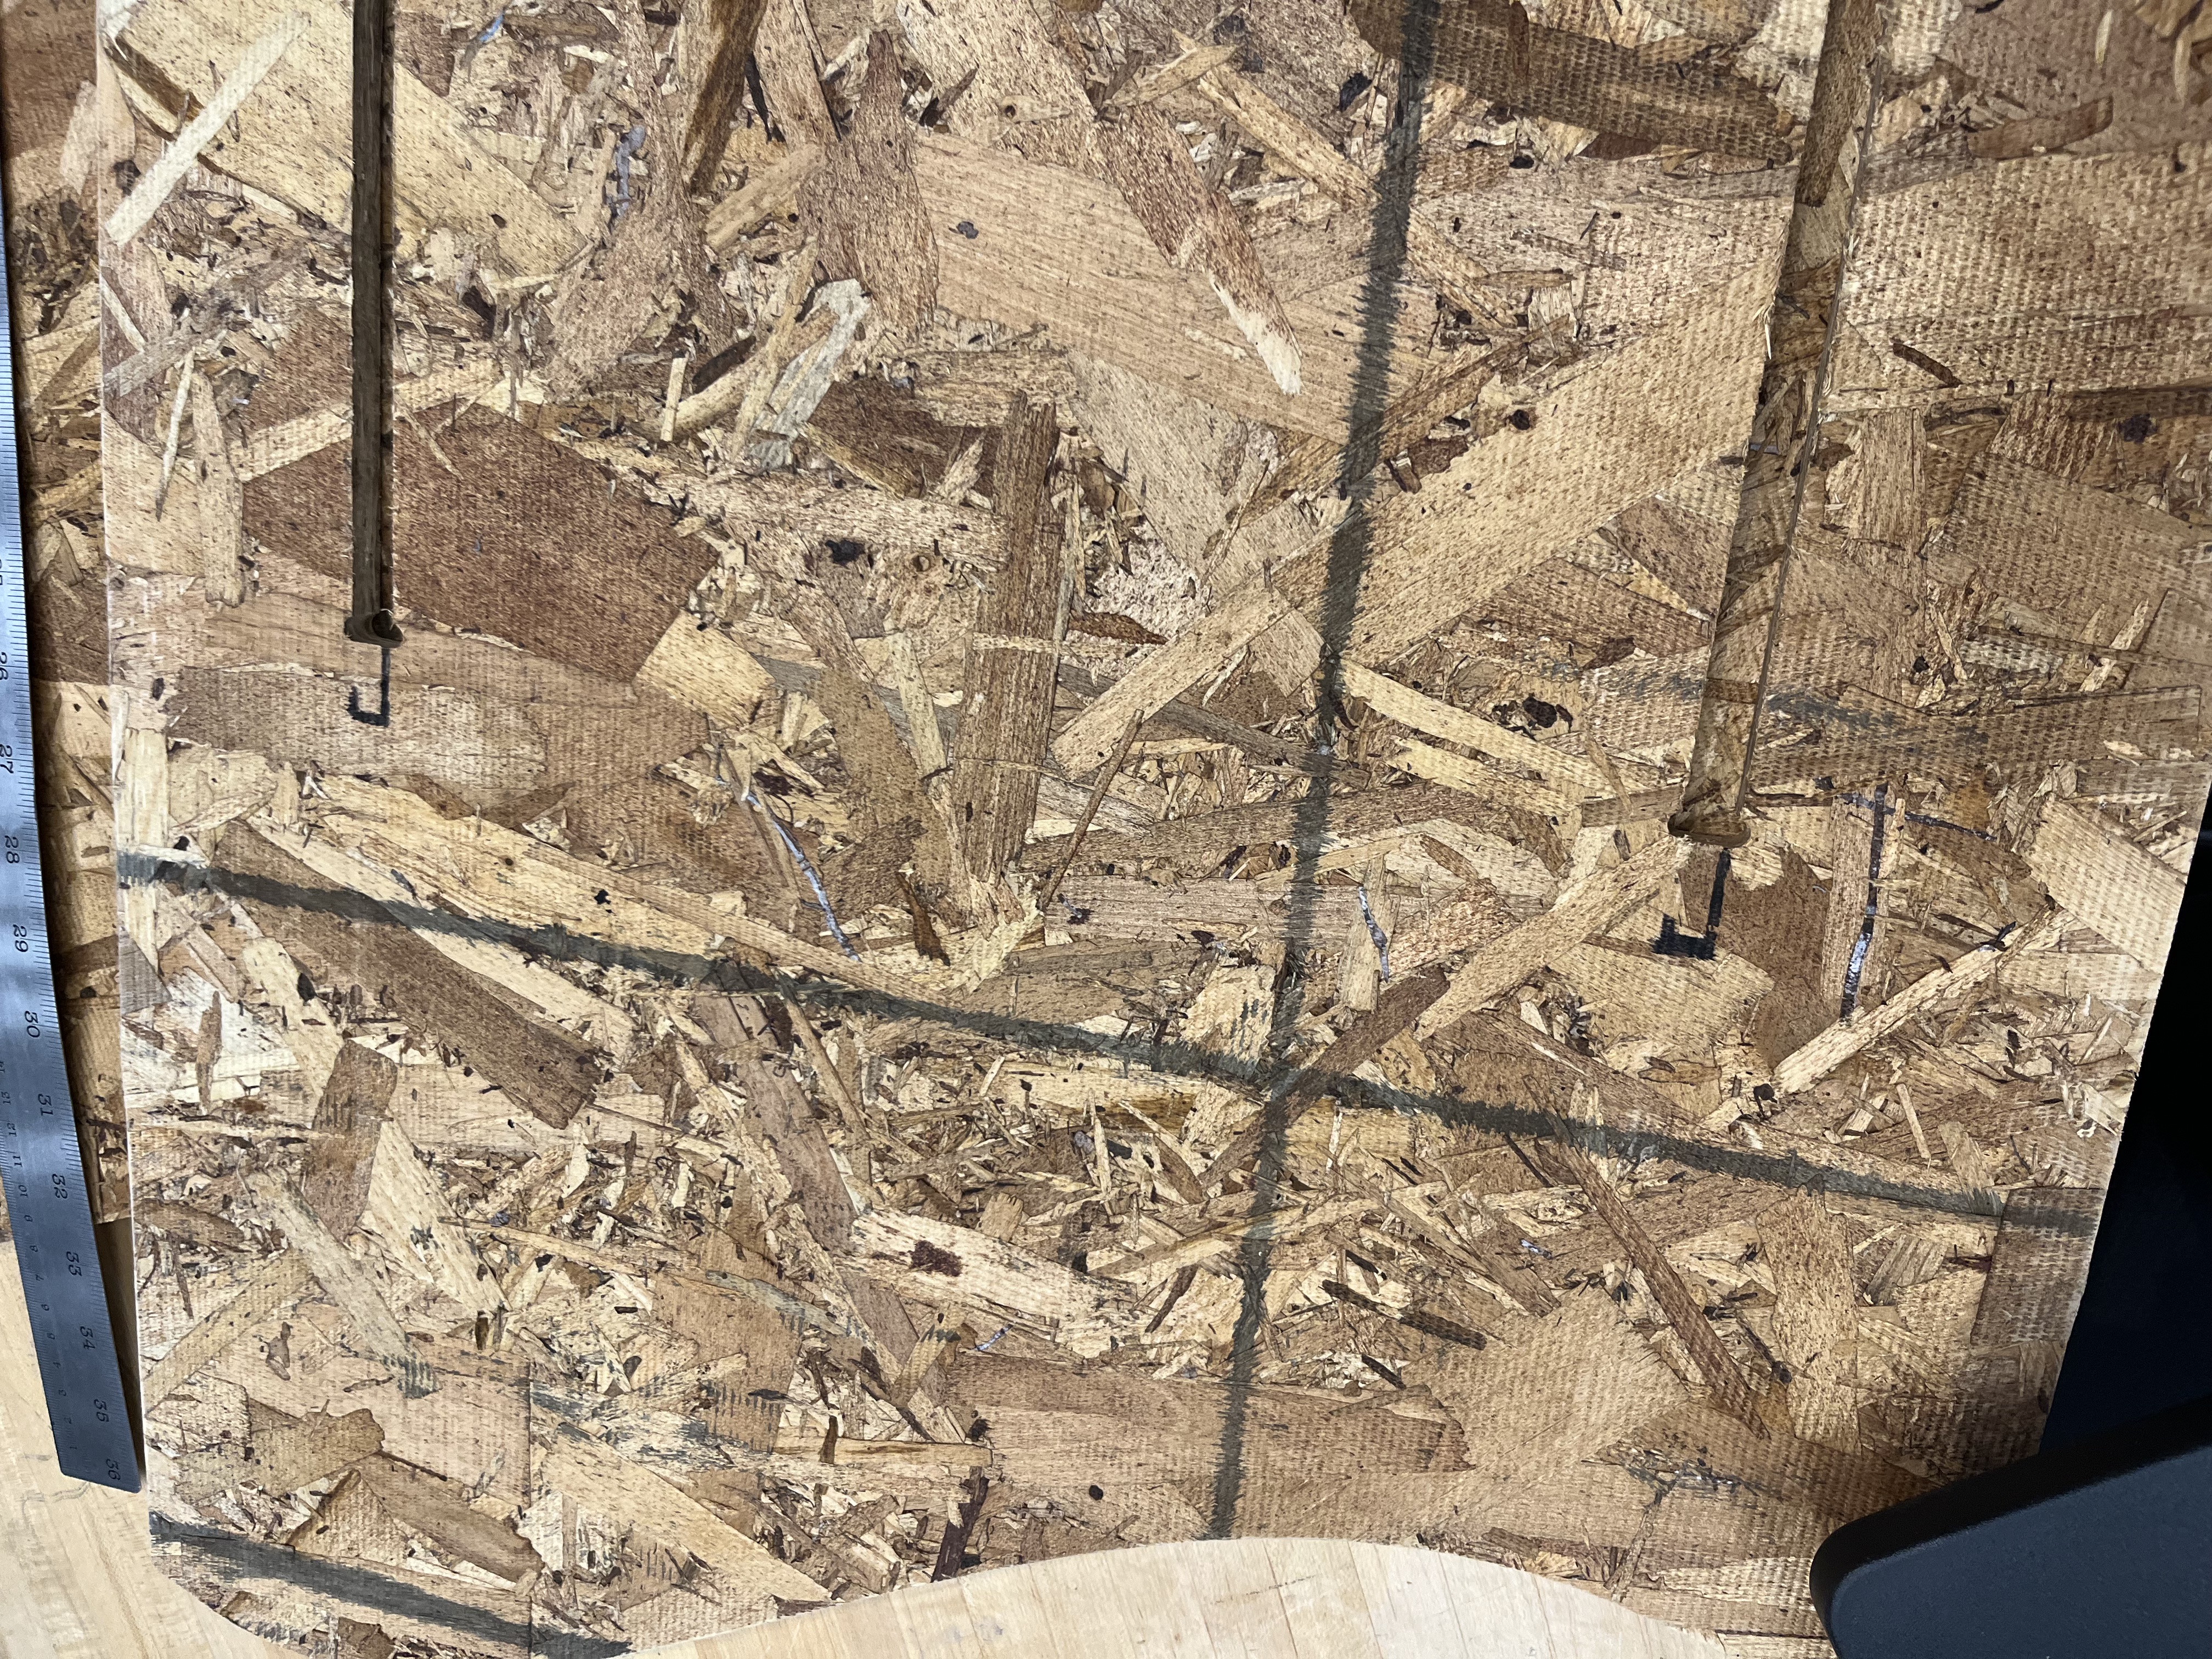
Solution: Determined to make the best out of the situation, I revisited the original CAD file and identified gaps between two joints that were causing the uneven edge. Measuring the distance of these gaps, I marked the correct depth on the joint slots. Using an automatic hand tool, I carefully cut out the excess depth to fix this issue.
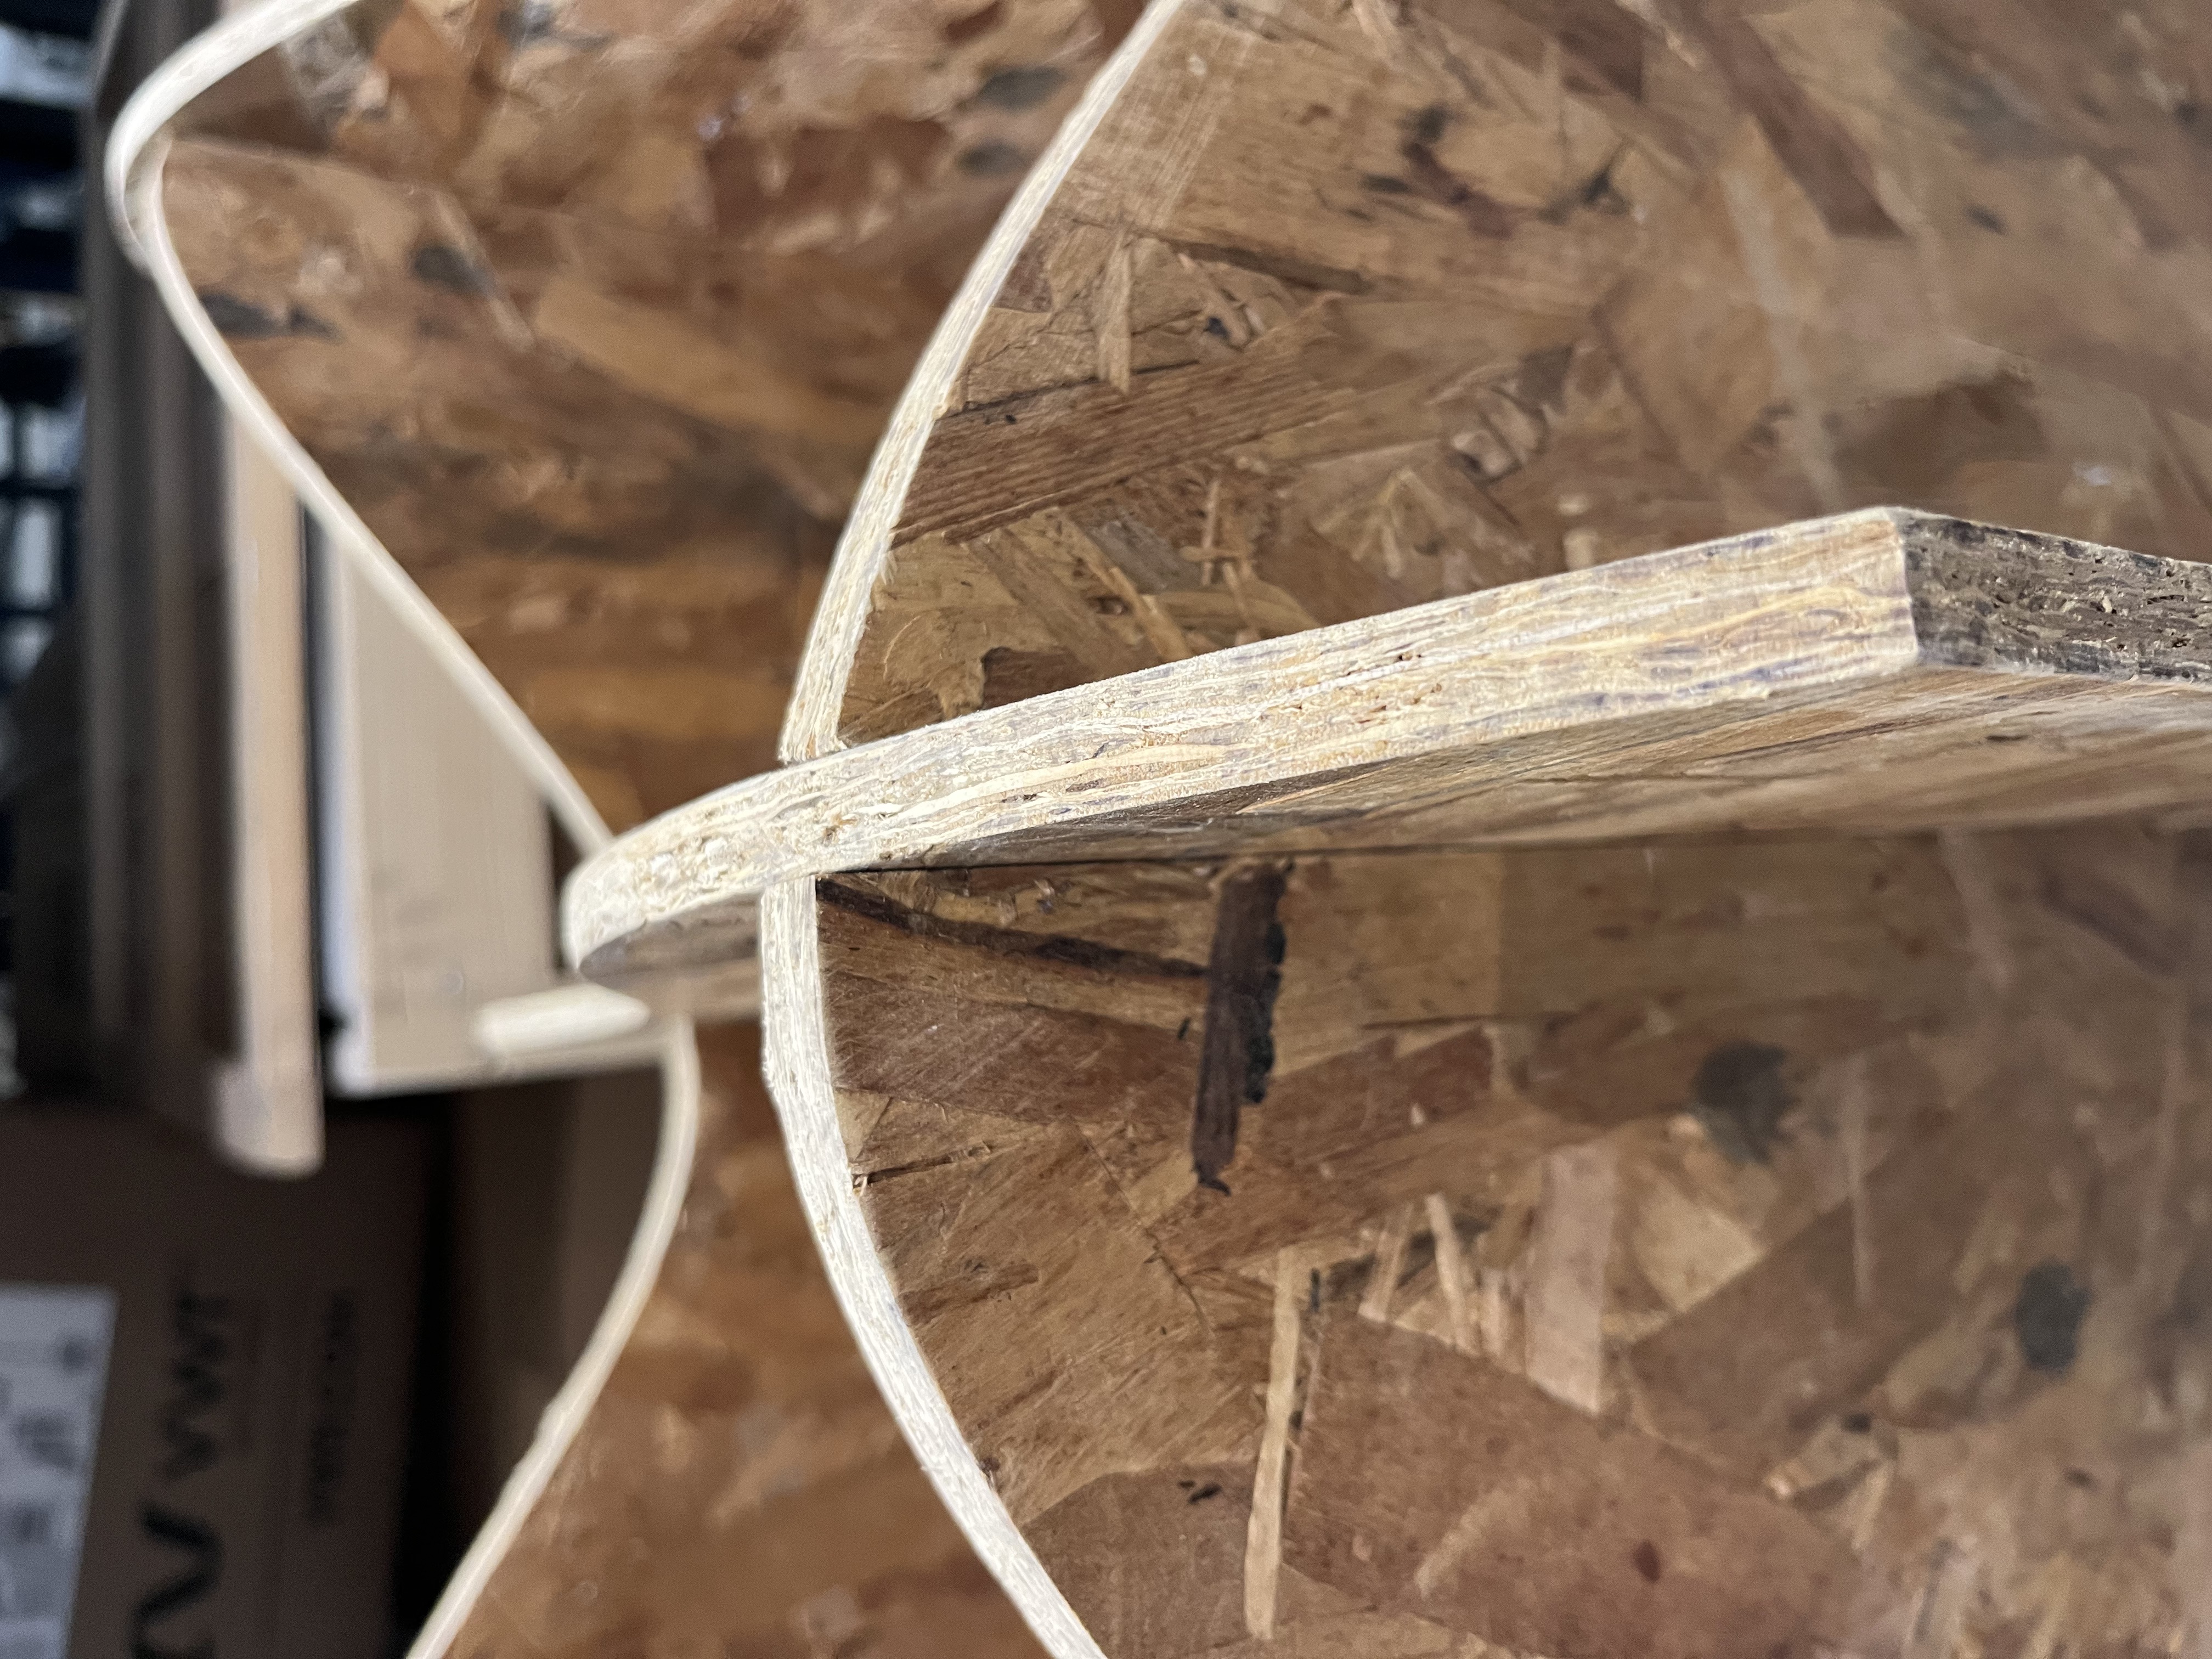
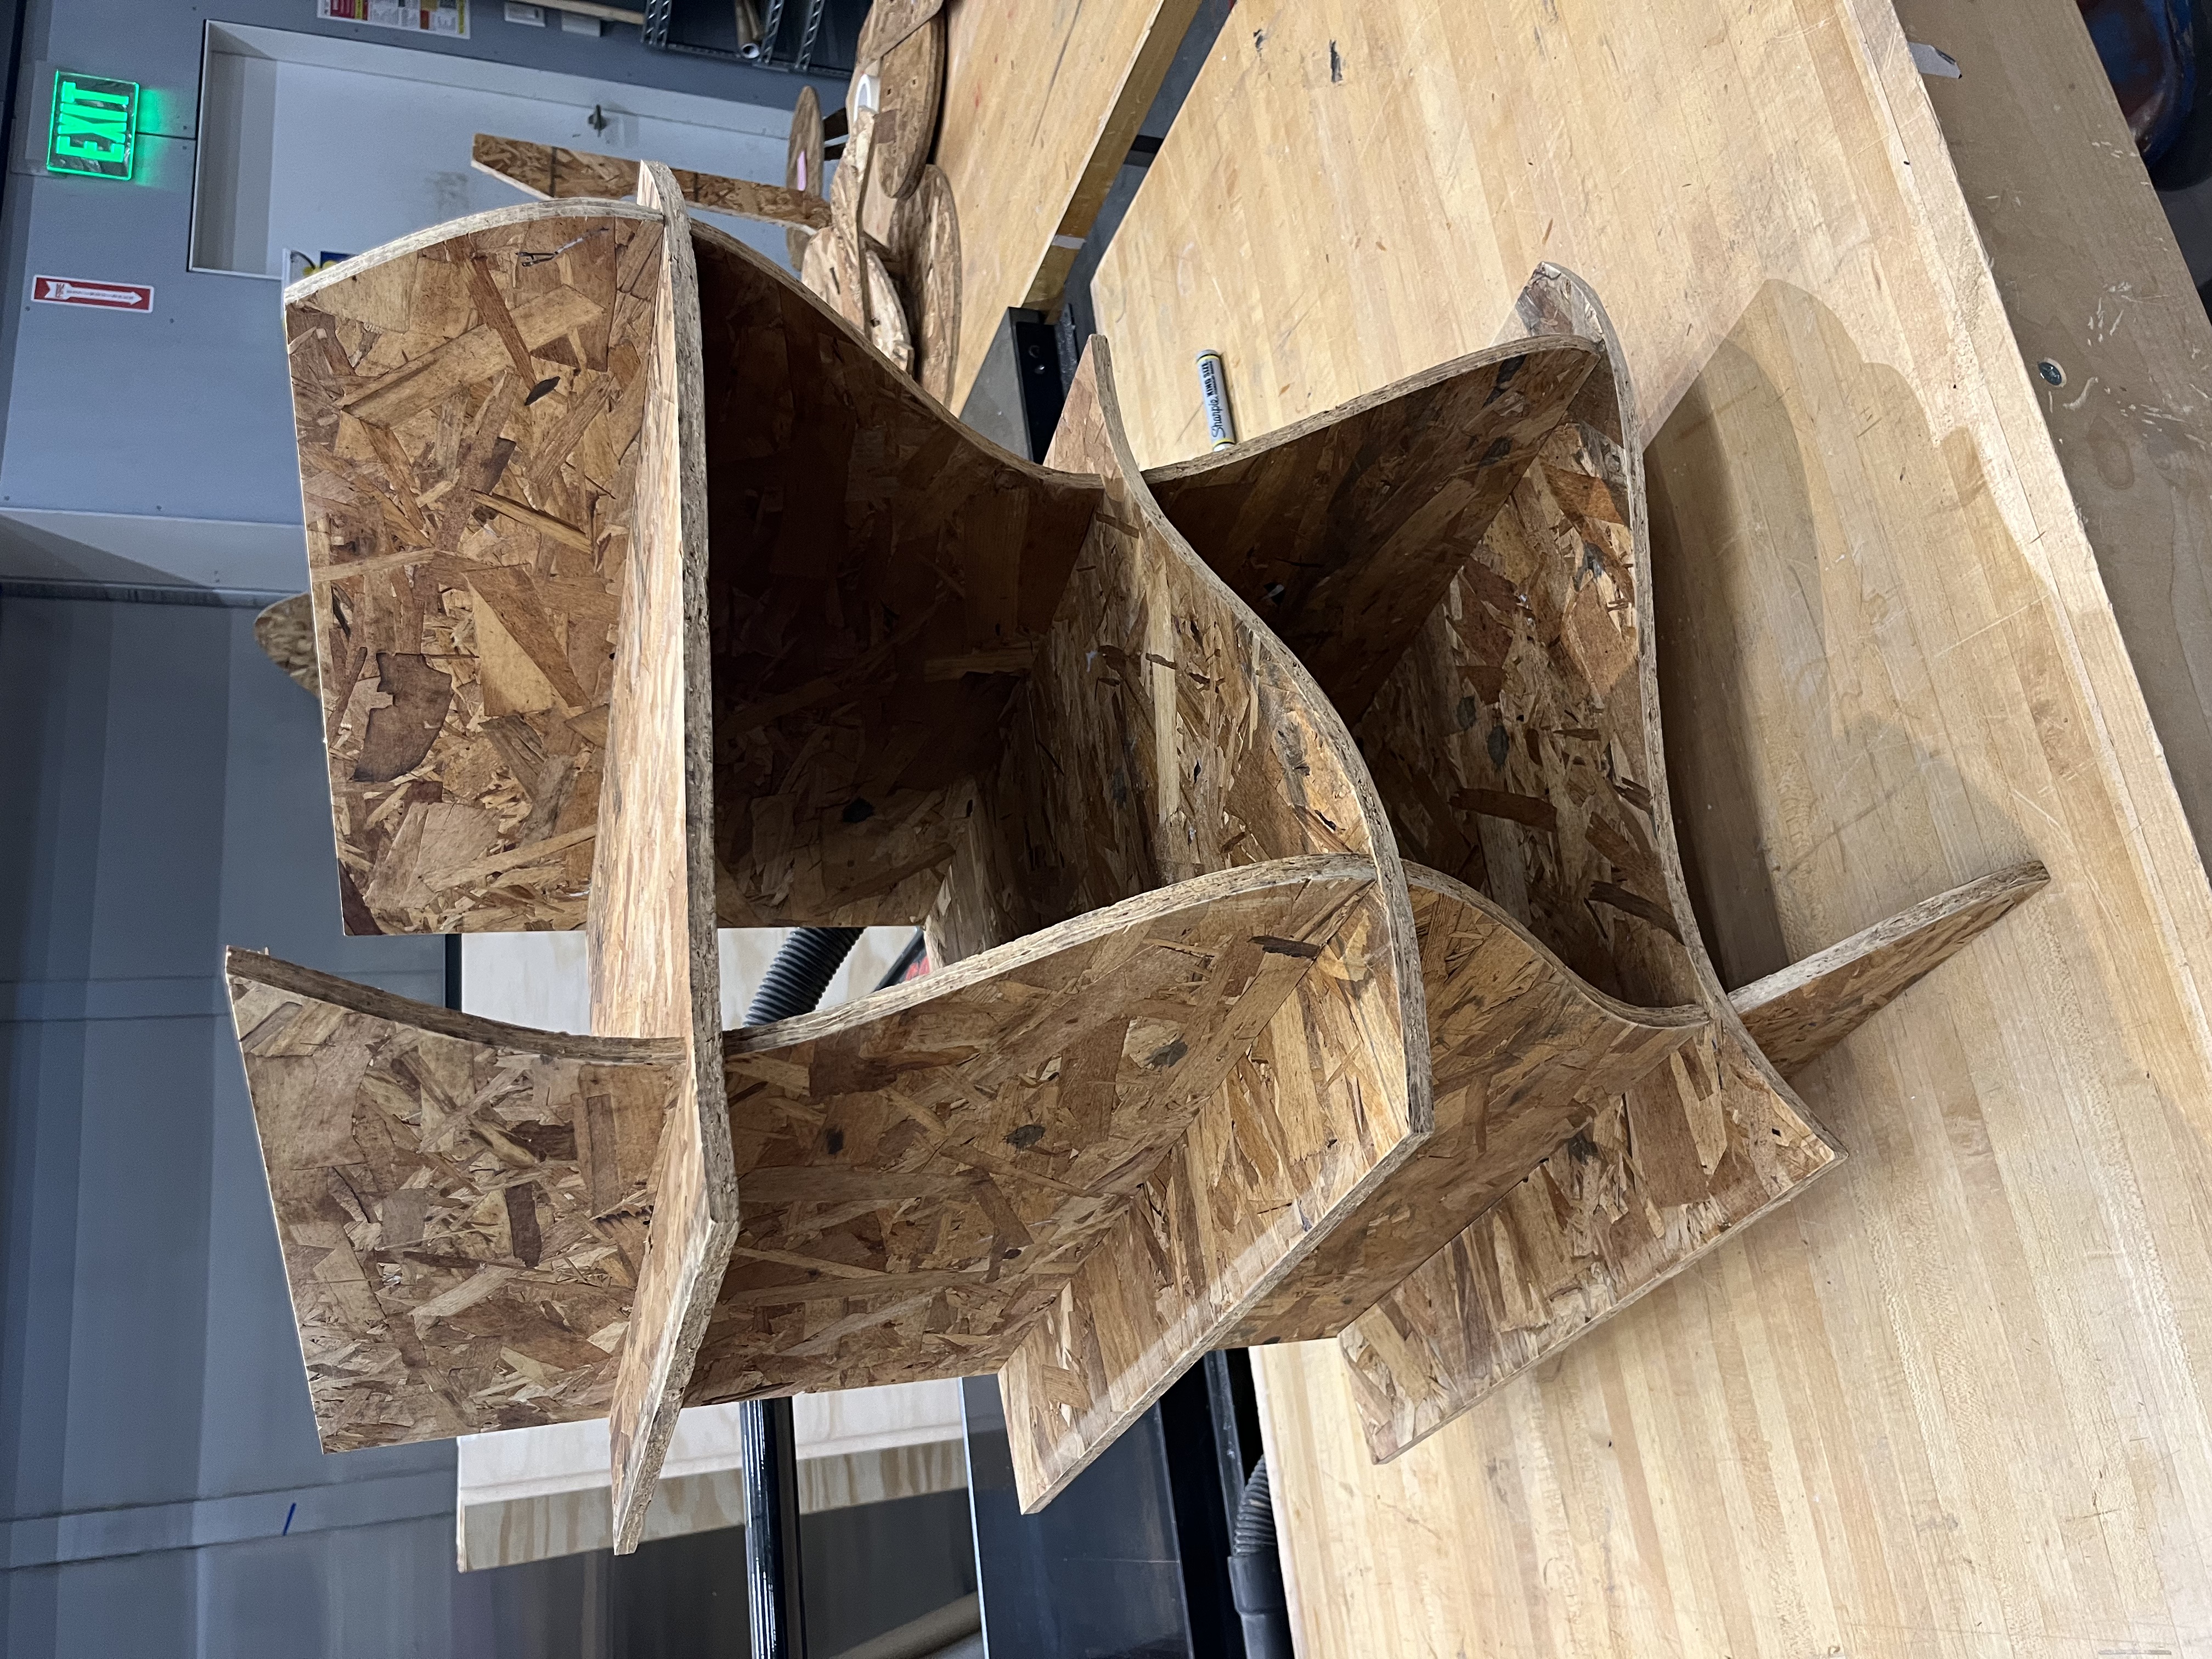
The Outcome:
After these adjustments, the outcome was much improved. I could now proudly admire a smoother sine wave curve on the front of my shoe rack. Despite the initial setbacks and challenges, I successfully created a functional and aesthetically pleasing shoe rack that perfectly suited our needs.
What’s Next:
This project has ignited my passion for large-format machining, and I’m now considering the possibility of purchasing finer wood boards to create a full-scale shoe rack to replace the cheap plastic one in our rented house. This journey into large-format machining has not only solved a practical problem but also opened up exciting possibilities for future creations.
In conclusion, the world of large-format machining has taught me valuable lessons in problem-solving, adaptability, and craftsmanship. I look forward to further exploring this fascinating realm and sharing my adventures with you in the future. Stay tuned for more exciting projects on the “How To Make Almost Anything” website!