[06] Computer-controlled Machining
Summary
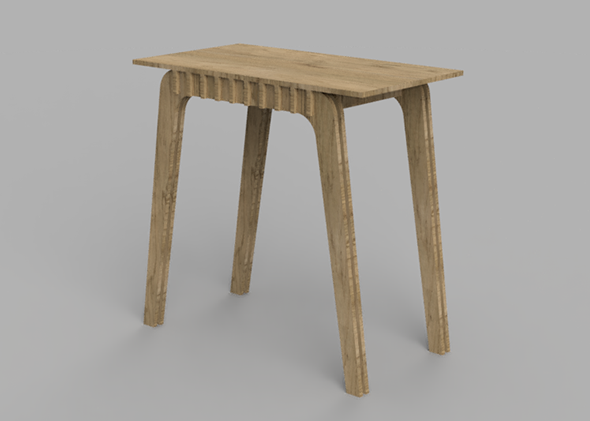
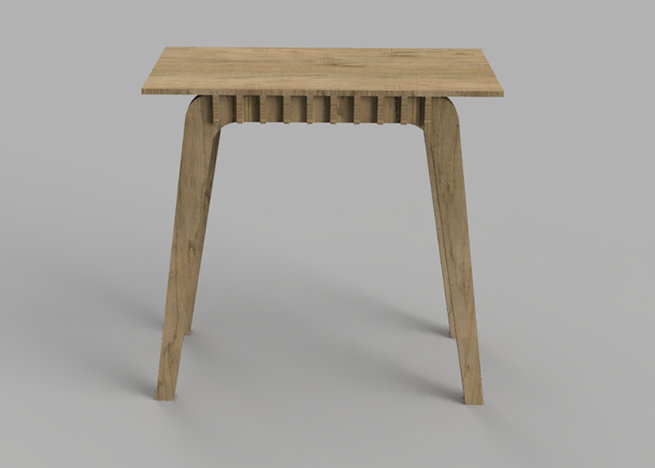
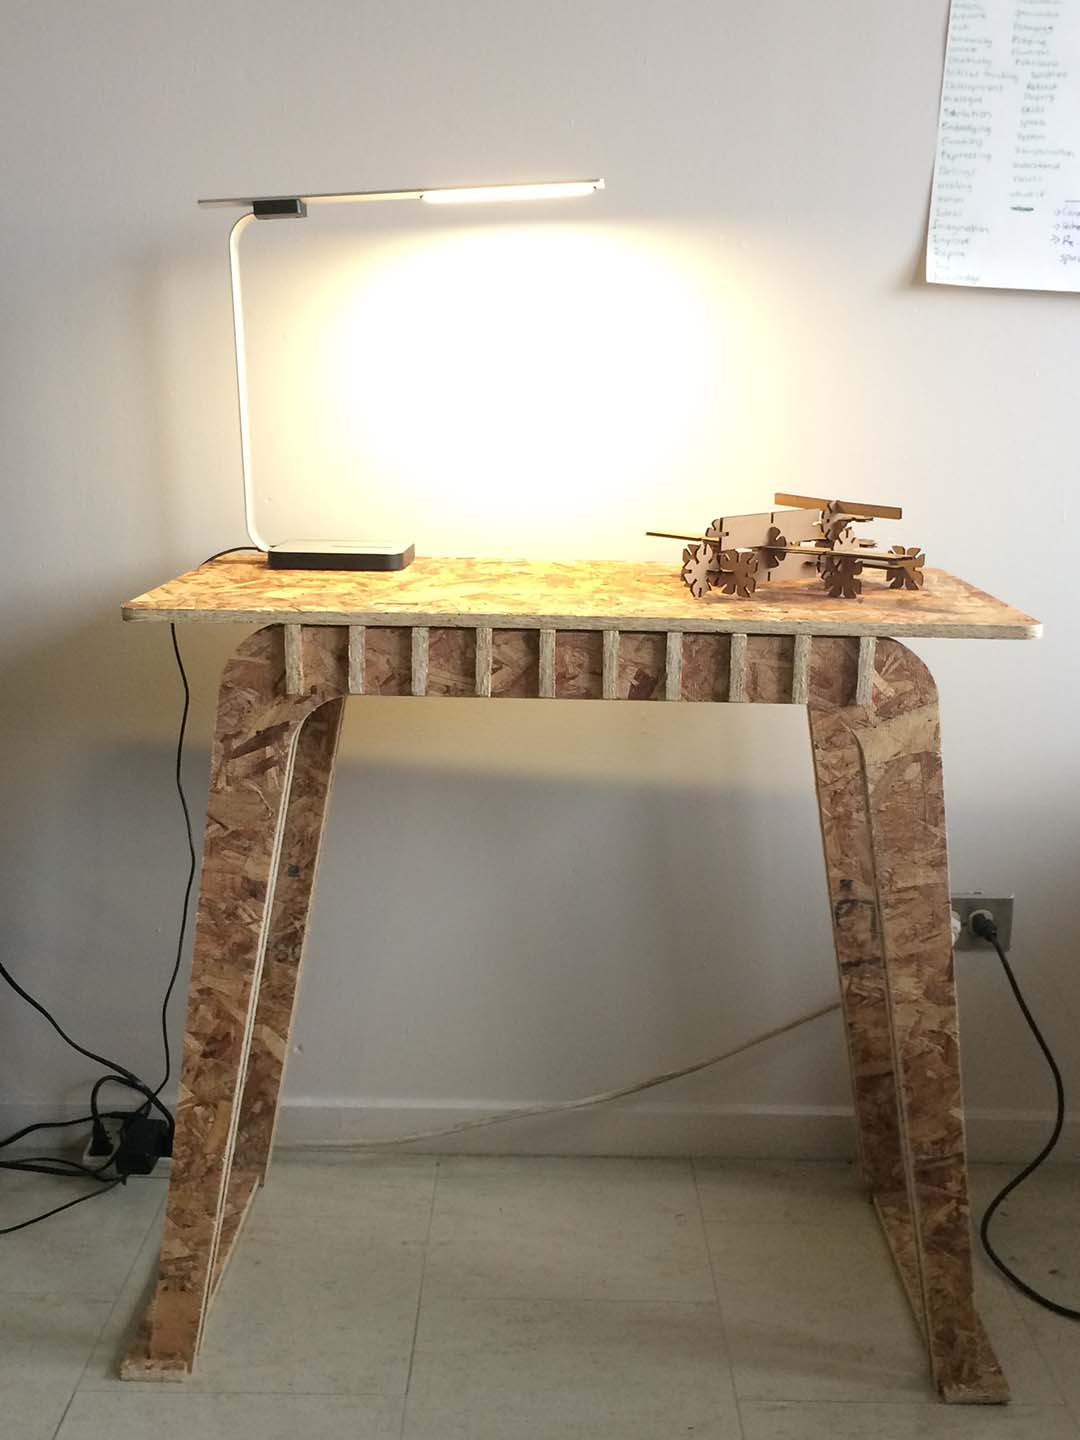
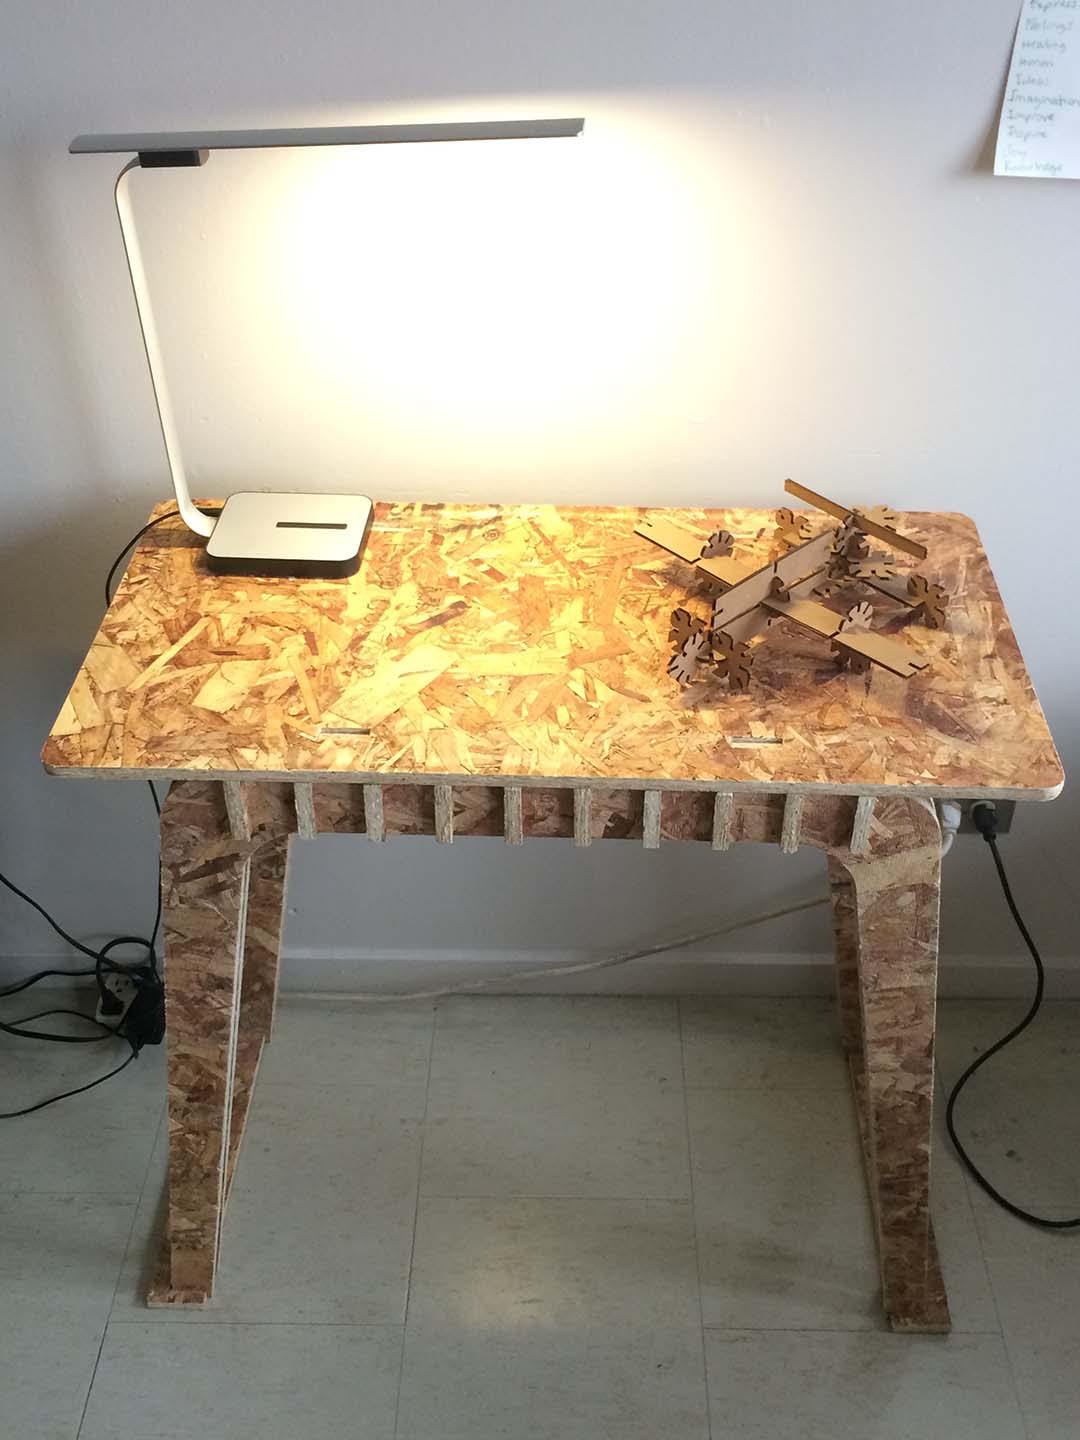
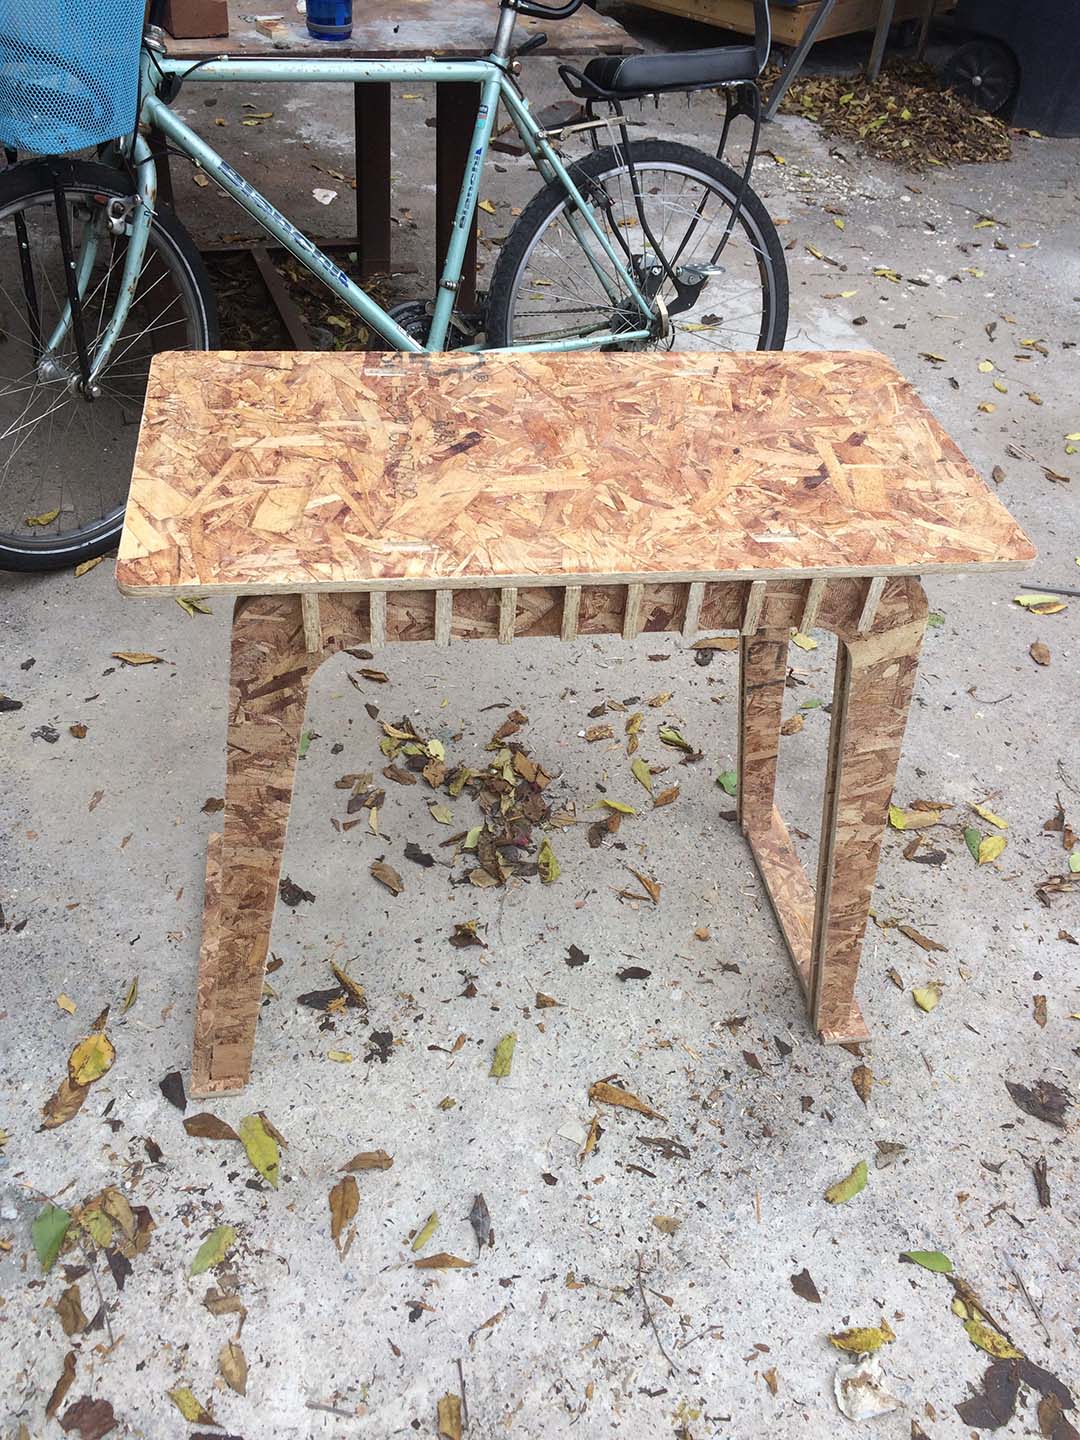
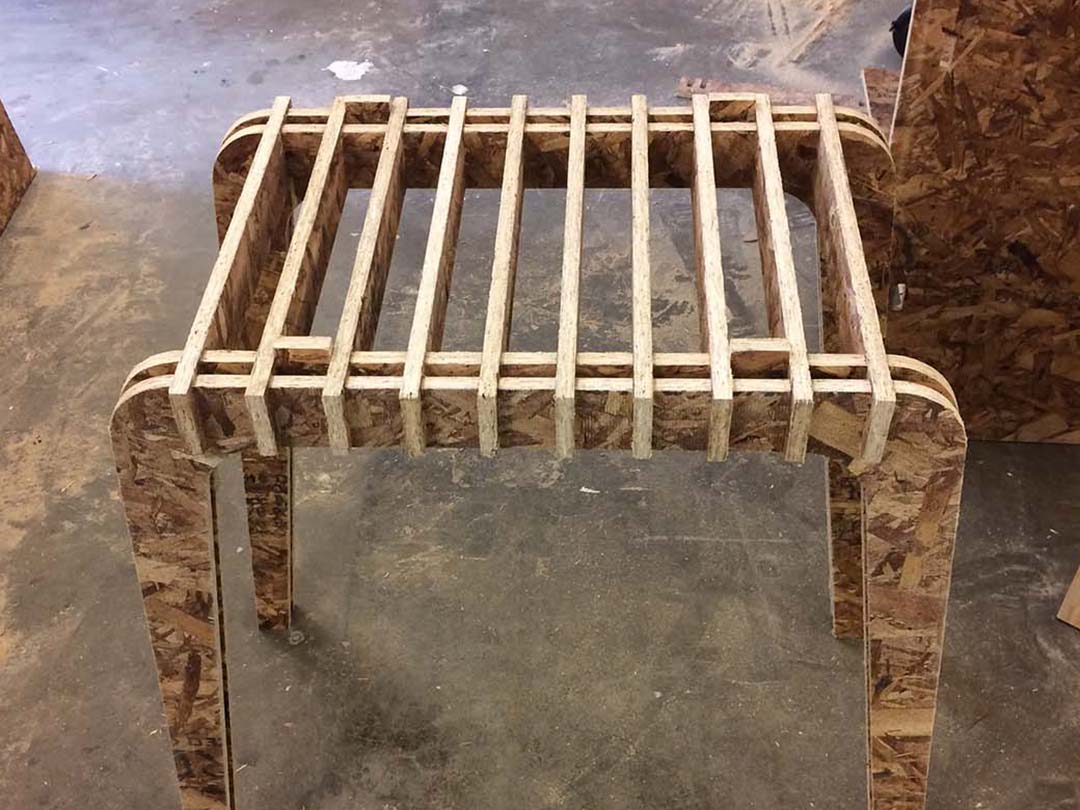
This week we have to do something BIG. I learned how to create a press-fit table.
What I did in this session:
- Design a Table in Fusion 360.
- Use MasterCad to prepare cutting intruction for the ShopBot.
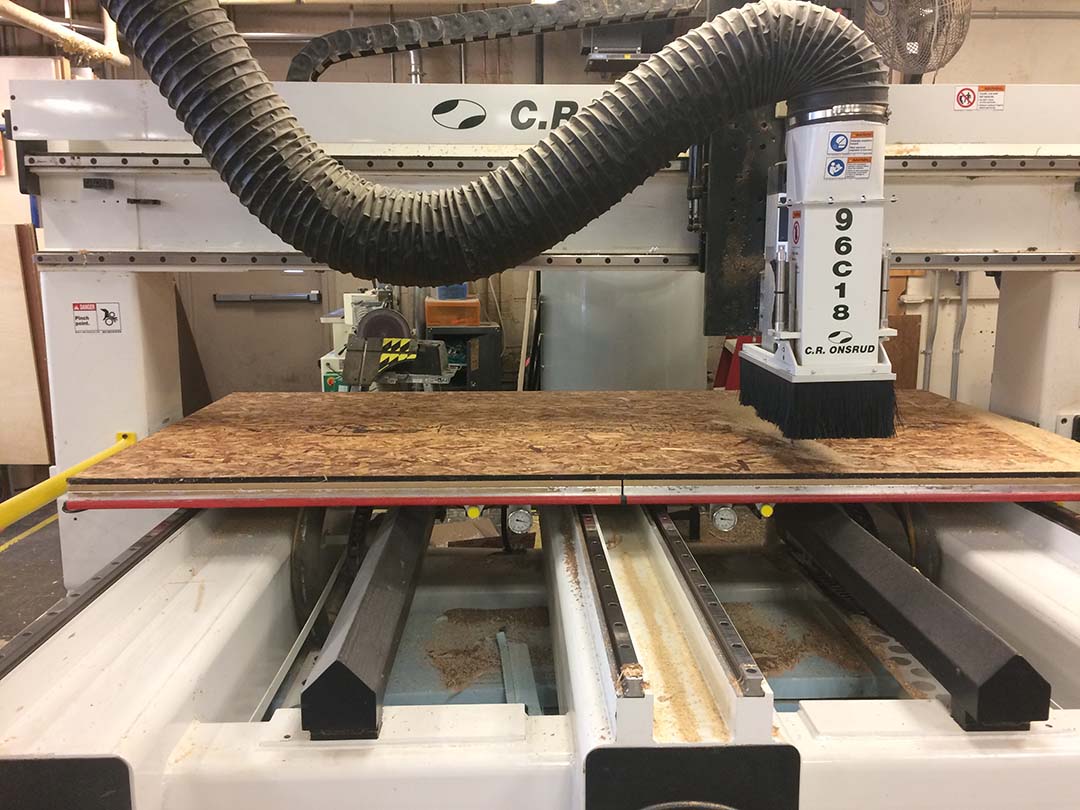
- Cut the pieces in a ShopBot.
Building a Table
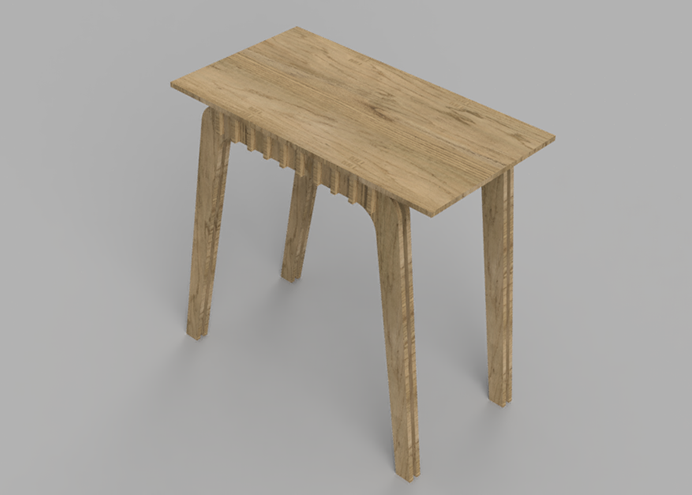
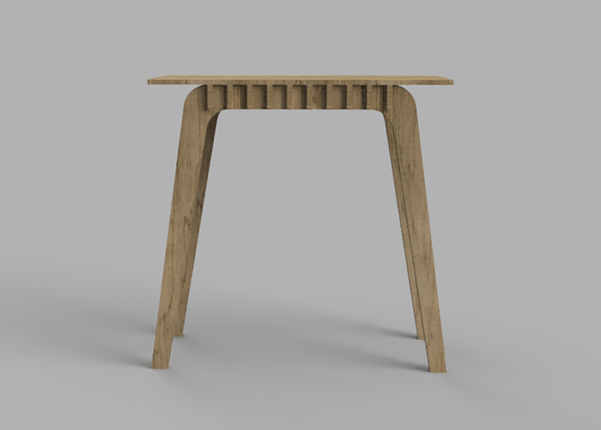
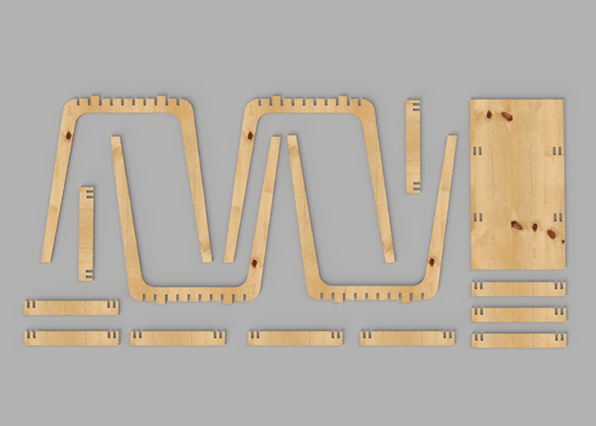
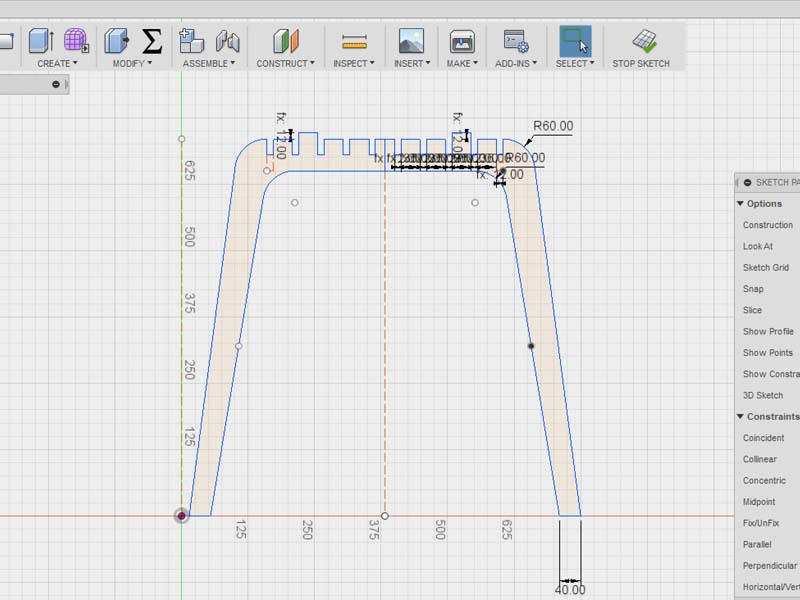
Based on what I learned in the previous classes, I choose to use Fusion 360 to design the table. My design was 2D and could not master how to create a 2.5D design. Given this, I decided to use my knowledge to create a press-fit desk:
- Design a table in Fusion 360.
- Put the drawing in a 2D Drawing and export the drawing to DWG so Rhino can read it.
- Open your pieces in Rhino and put them in their cutting position.
- Prepare the file in MasterCam.
- Open a new file.
- Merge your Rhino design.
- Select the operation you want to do.
- Select the lines that you want the machine to follow.
- Save your GCODE
- Bring your file to the Shopbot and cut your sheet.
It is important to take into account the thinkness of the material. I recommend to use a parametric drawing so you are able to adjust this measurement in case the material is less or more thick than expected.
Since we had to use MasterCam and my design did not use 3D y only exported the Sketches. To do that you go to the Sketch> Right click > Save as DWG.
Open the files in Rhino, put them in the correct position and the file will be ready for MasterCam. Remember the origin is in the X and Y axes, Y being the lenght of the table and X the width.
Remember to check if you are cutting on the correct part of the piece.