Introduction
In the second week, I have learned how to design a drawing for a press-fit project, and cut the press-fit kit with a laser cutter. In addition, I have learned a very powerful tools in version management, git
Laser cutting and Vinyk cutting
There are several key points to remember when designing a press-fit kit:
- Parametric designing is very powerful
- Remember that the laser beam usually has a width of seveal mm, which should be counted when designing your slot
- There are different kinds of joints. Don't just use one kind of joint.
- Use laser cutter with caution. It can set a fire in a very short duration of time. Therefore, watch yuor laser cutter all the time.
- Be sure to double-check the laser settings before actually start cutting.
- Check the materials list before cutting. Some materials are not suitable to be cut by laser cutter.
For my press-fit design and laser-cutting part, I decided to make a skywheel.
Press-fit Design
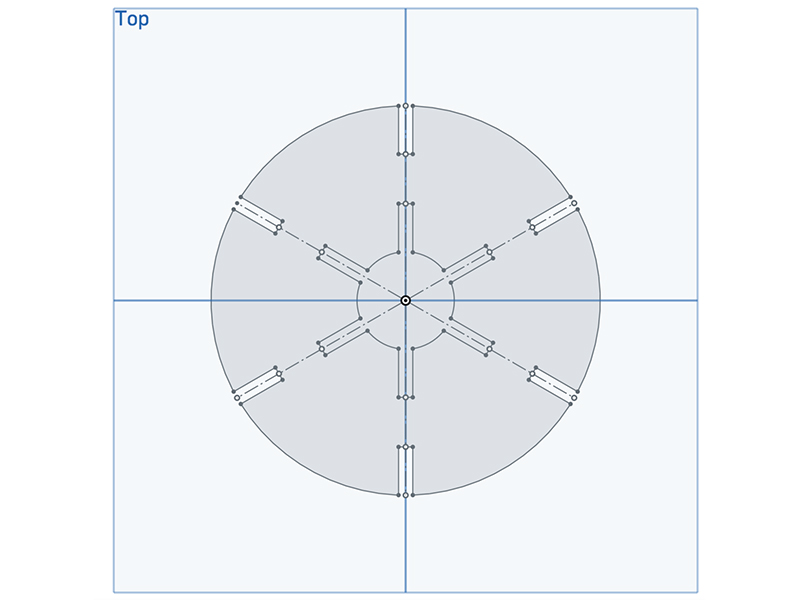
This is the central rings of the skywheel. There will be three identical copies of this part. Six small pieces with three slots on each of them will be used inside the central hole to fix the positions of these three rings, and leave a perfect circle for rotation at the same time.
On the outer side of the central ring, there are another six slots. They are designed for connecting the central rings with outer rings. Similarly, there will be three slots on each central supports to match the central rings, which will be shown below.
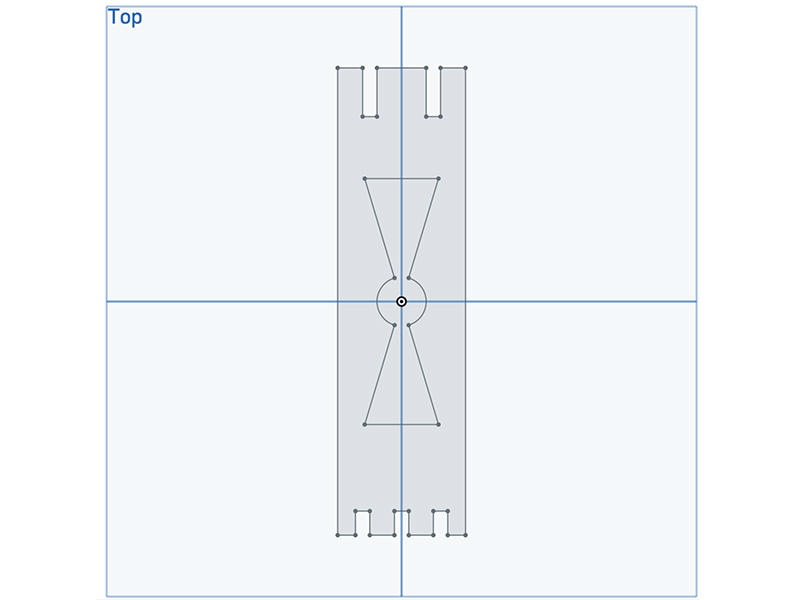
This is the central supports that connect the inner rings and outer rings of my skywheel.
There are three slots in the bottom to connect three pieces of inner rings and fix their position. There are also two slots on the top edge connecting outer rings to form the main structure of the skywheel. To make the whole skywheel look better, I decided to cut some patterns on the central supports as well. Basically, the pattern is formed by connecting two mirrored triangles with a small circles in the center.
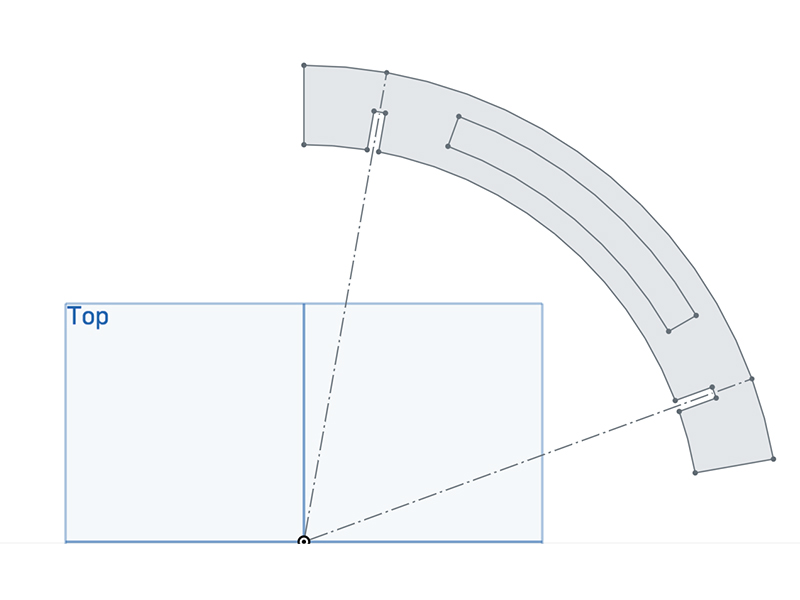
This is the outer rings of the skywheel.
The outer rings are designed to be interlocked to each other, to make full use of limited space. In addition, there is a pattern on each of outer ring for better look.
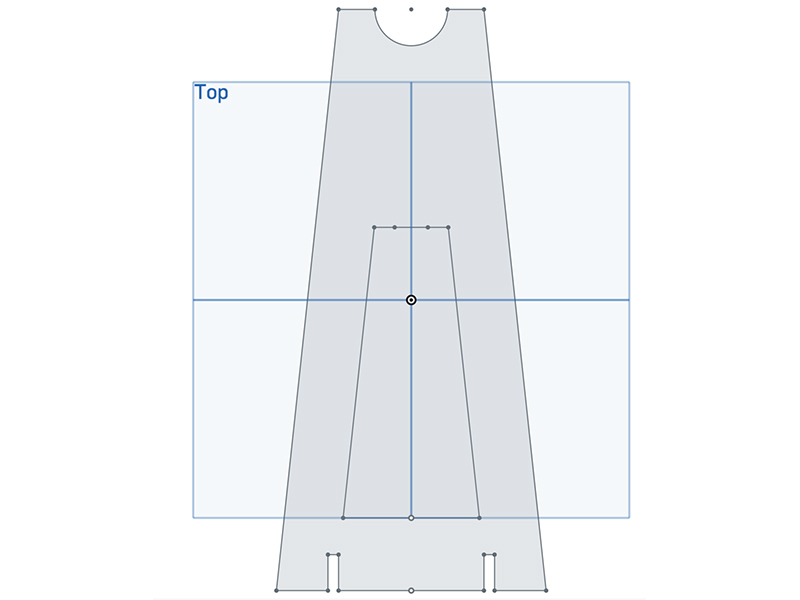
This is the standing of the skywheel.
All the strutures will be supported by these two standings. On top of the standing, there is a semi-circle that can hold the rotation axis of the skywheel. On the bottom of the standing, there are two slots to fix the position of the standings.
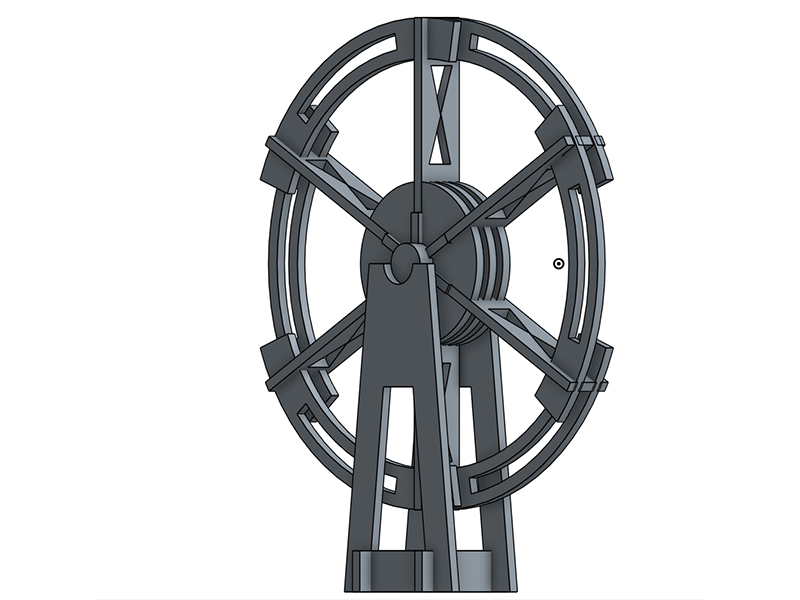
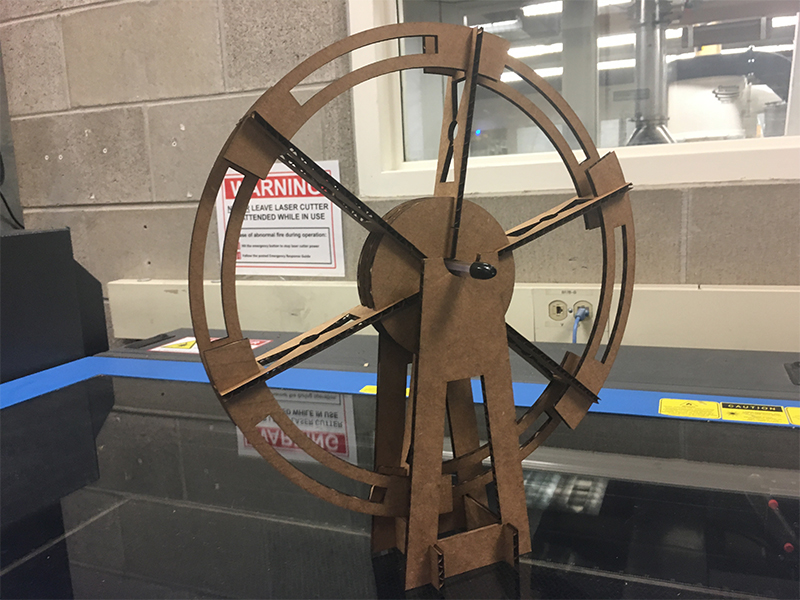
This is the 3D view of assembled skywheel.
Laser Cutting and Assembling Skywheel
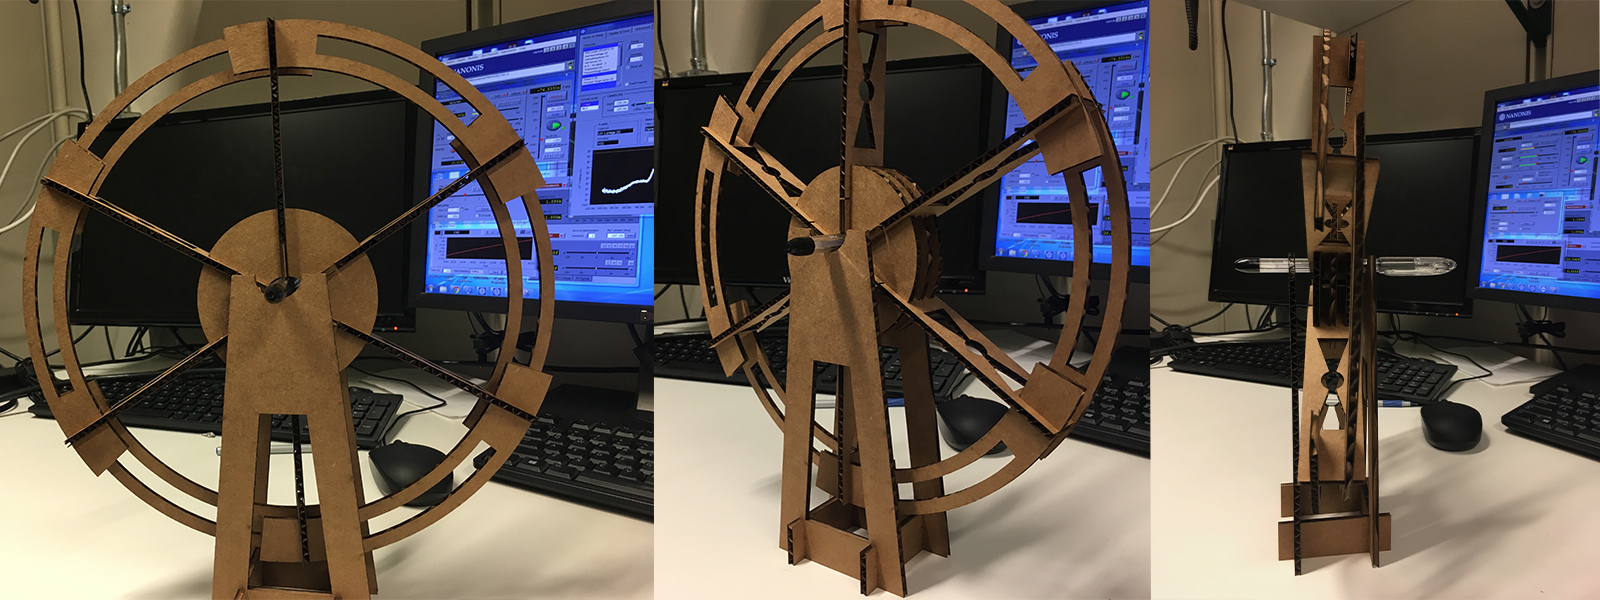
I did the laser-cutting in the machine shop at GSD, with the red laser machine. The laser-cutting itself went pretty smooth, and the only thing I'd like to mention was when I was going to estimate the size of laser beam, I found we didn't have measurement tools with high enough precision as calibres. Therefore, the way I did the estimation was to do a series of testing cut, with each time reducing the assumed laser beam width by a little bit, until the slots can match the width of cardboard perfectly.
Here are the results of my laser-cutting: