Group Assignment
The group assignment was to test the design rules for our 3D printer. This was done in collaboration with with Jordan, Maya, Gil, and Emma. The process and results can be viewed here.Assignment: design and 3D print an object (small, few cm3, limited by printer time) that could not be made subtractively. Also 3D scan an object (and optionally print it).
3D Scanning
The first thing we did was use the 3D scanner in the Arch Shop. I worked on this with Maya.
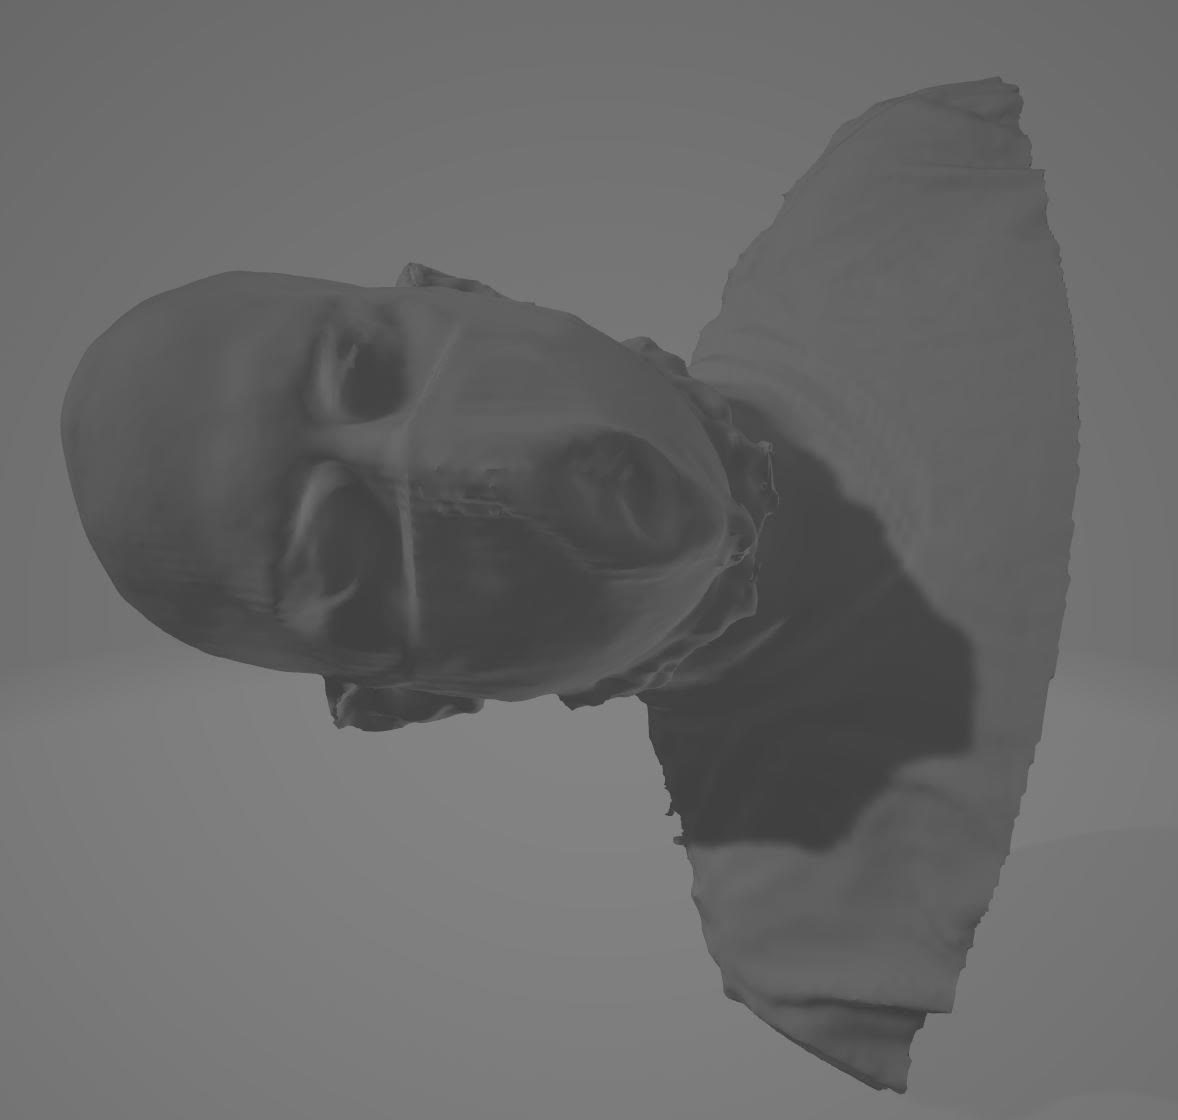
she scanned my head, and here's my face:
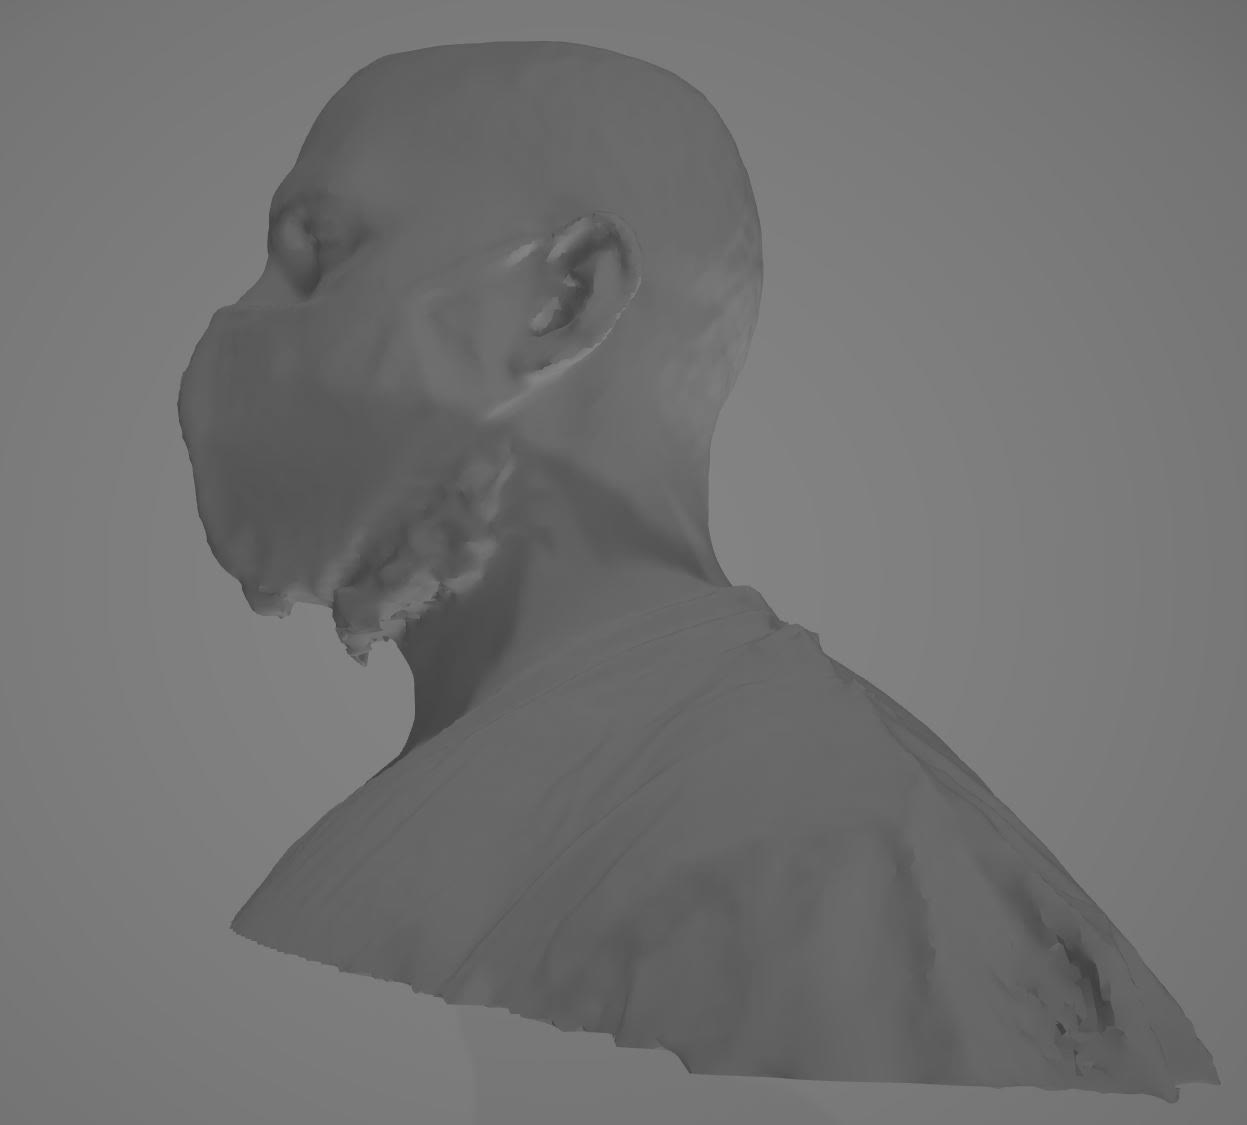
Here is my profile:
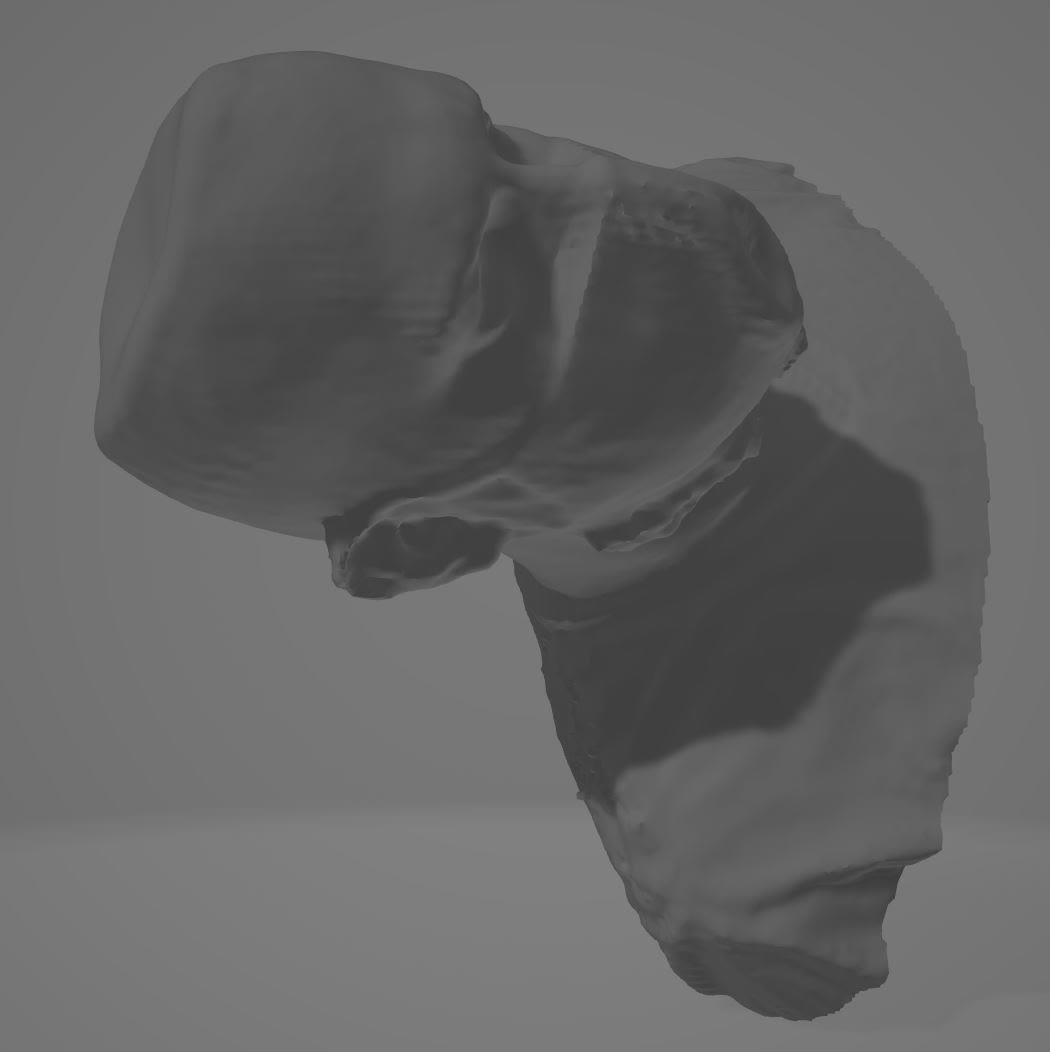
Here is what it would look like if my skull got crushed with an iron:
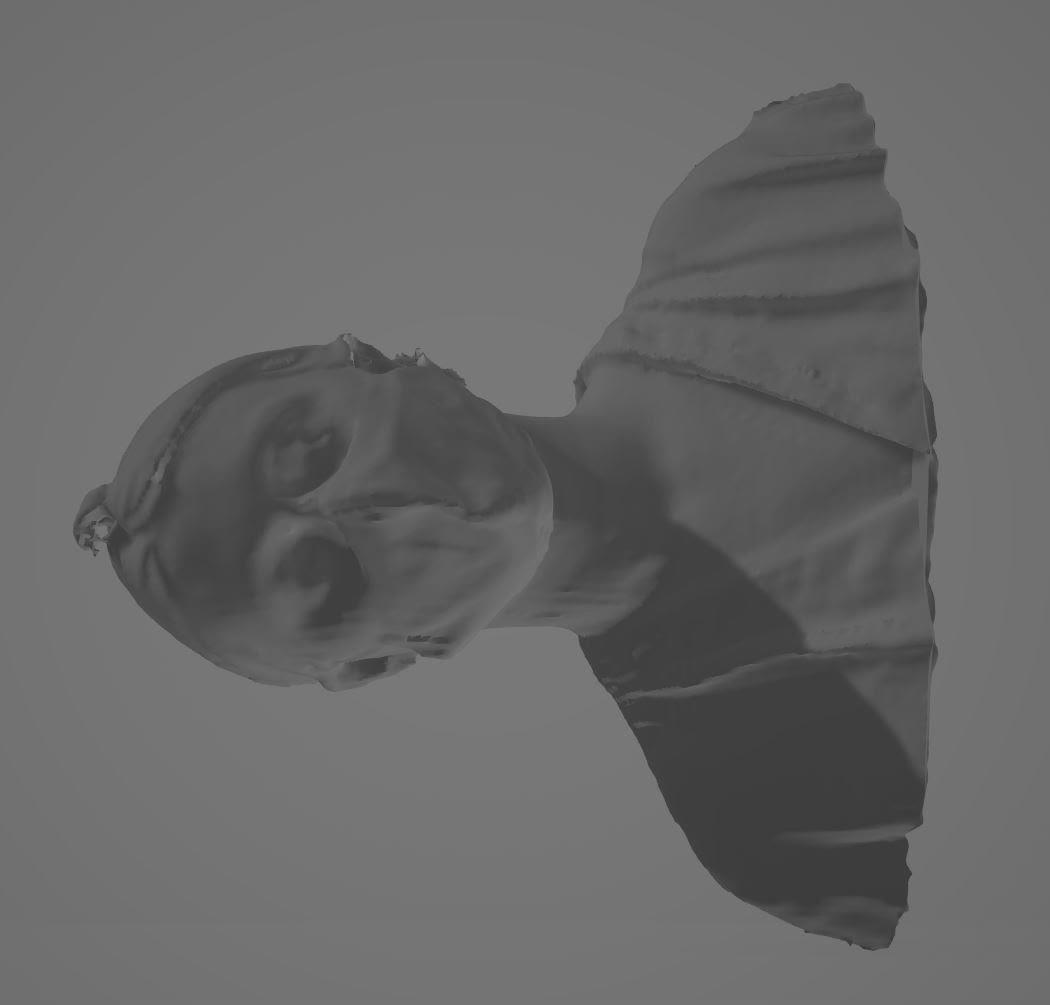
This is a scan I took of Maya:
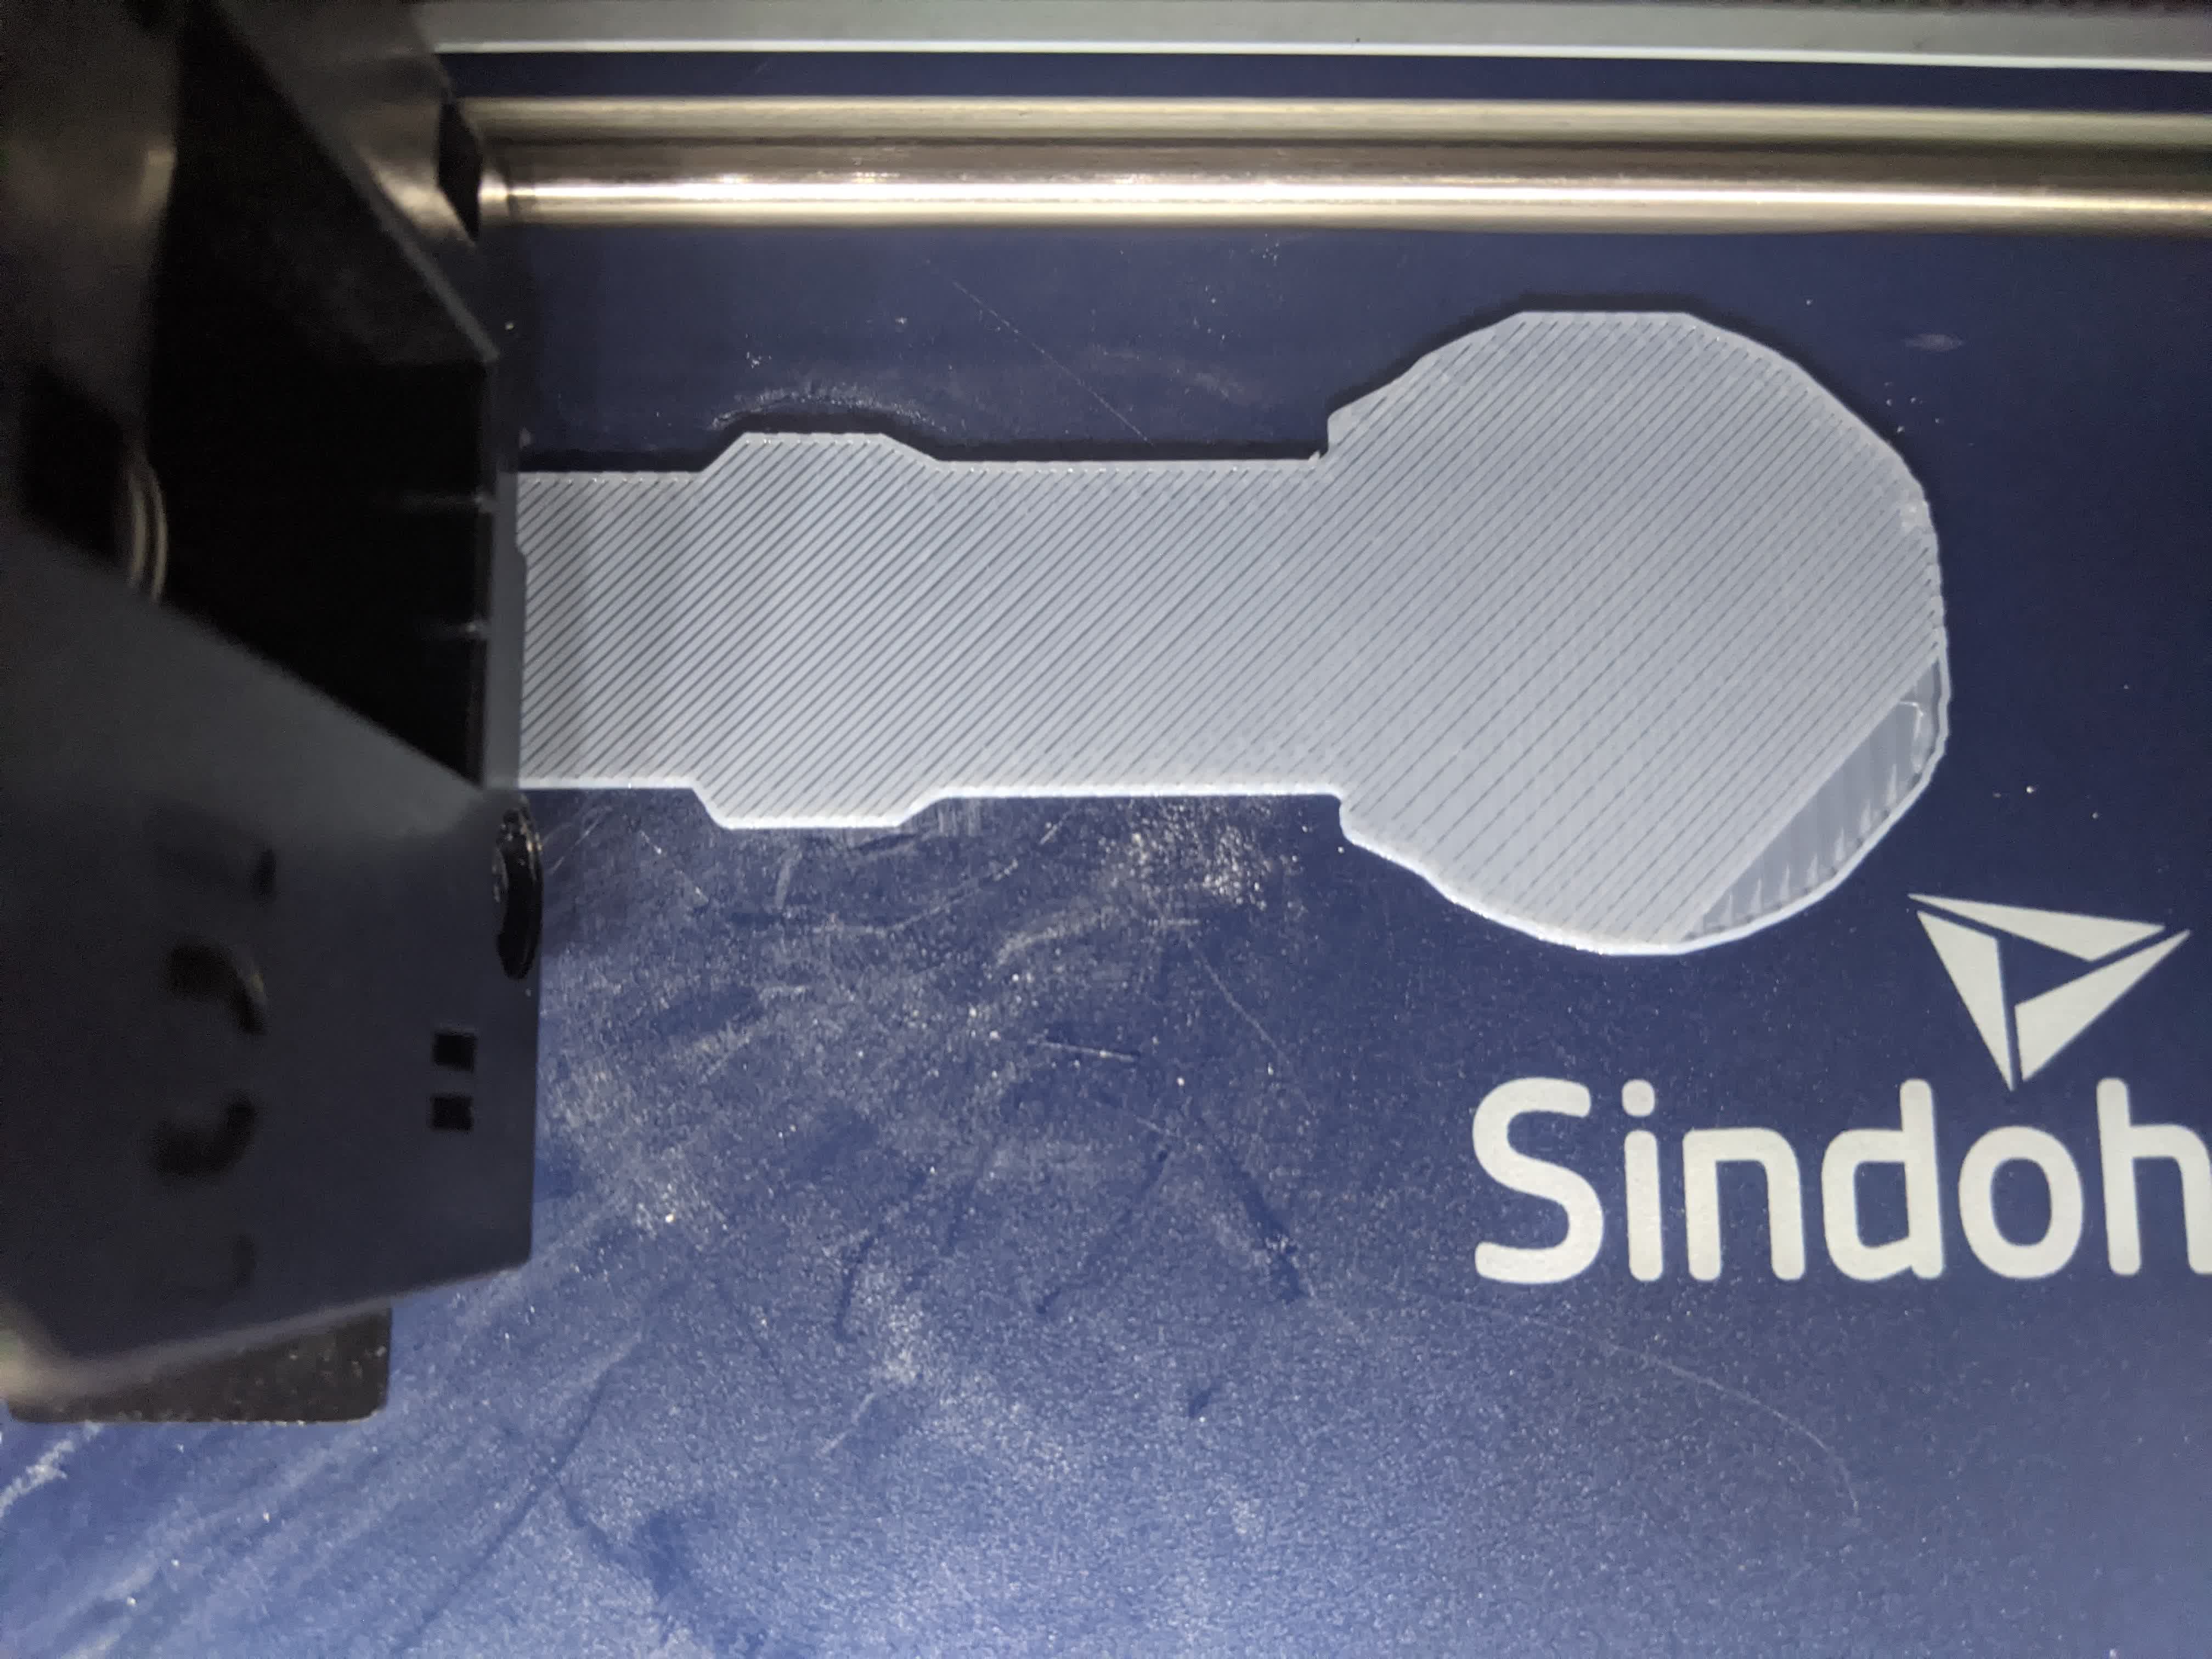
Everything up to now was us just messing around. I didn't bring anything interesting to scan for the assignment, but I found a broom without a handle. I hung it on a string like so:
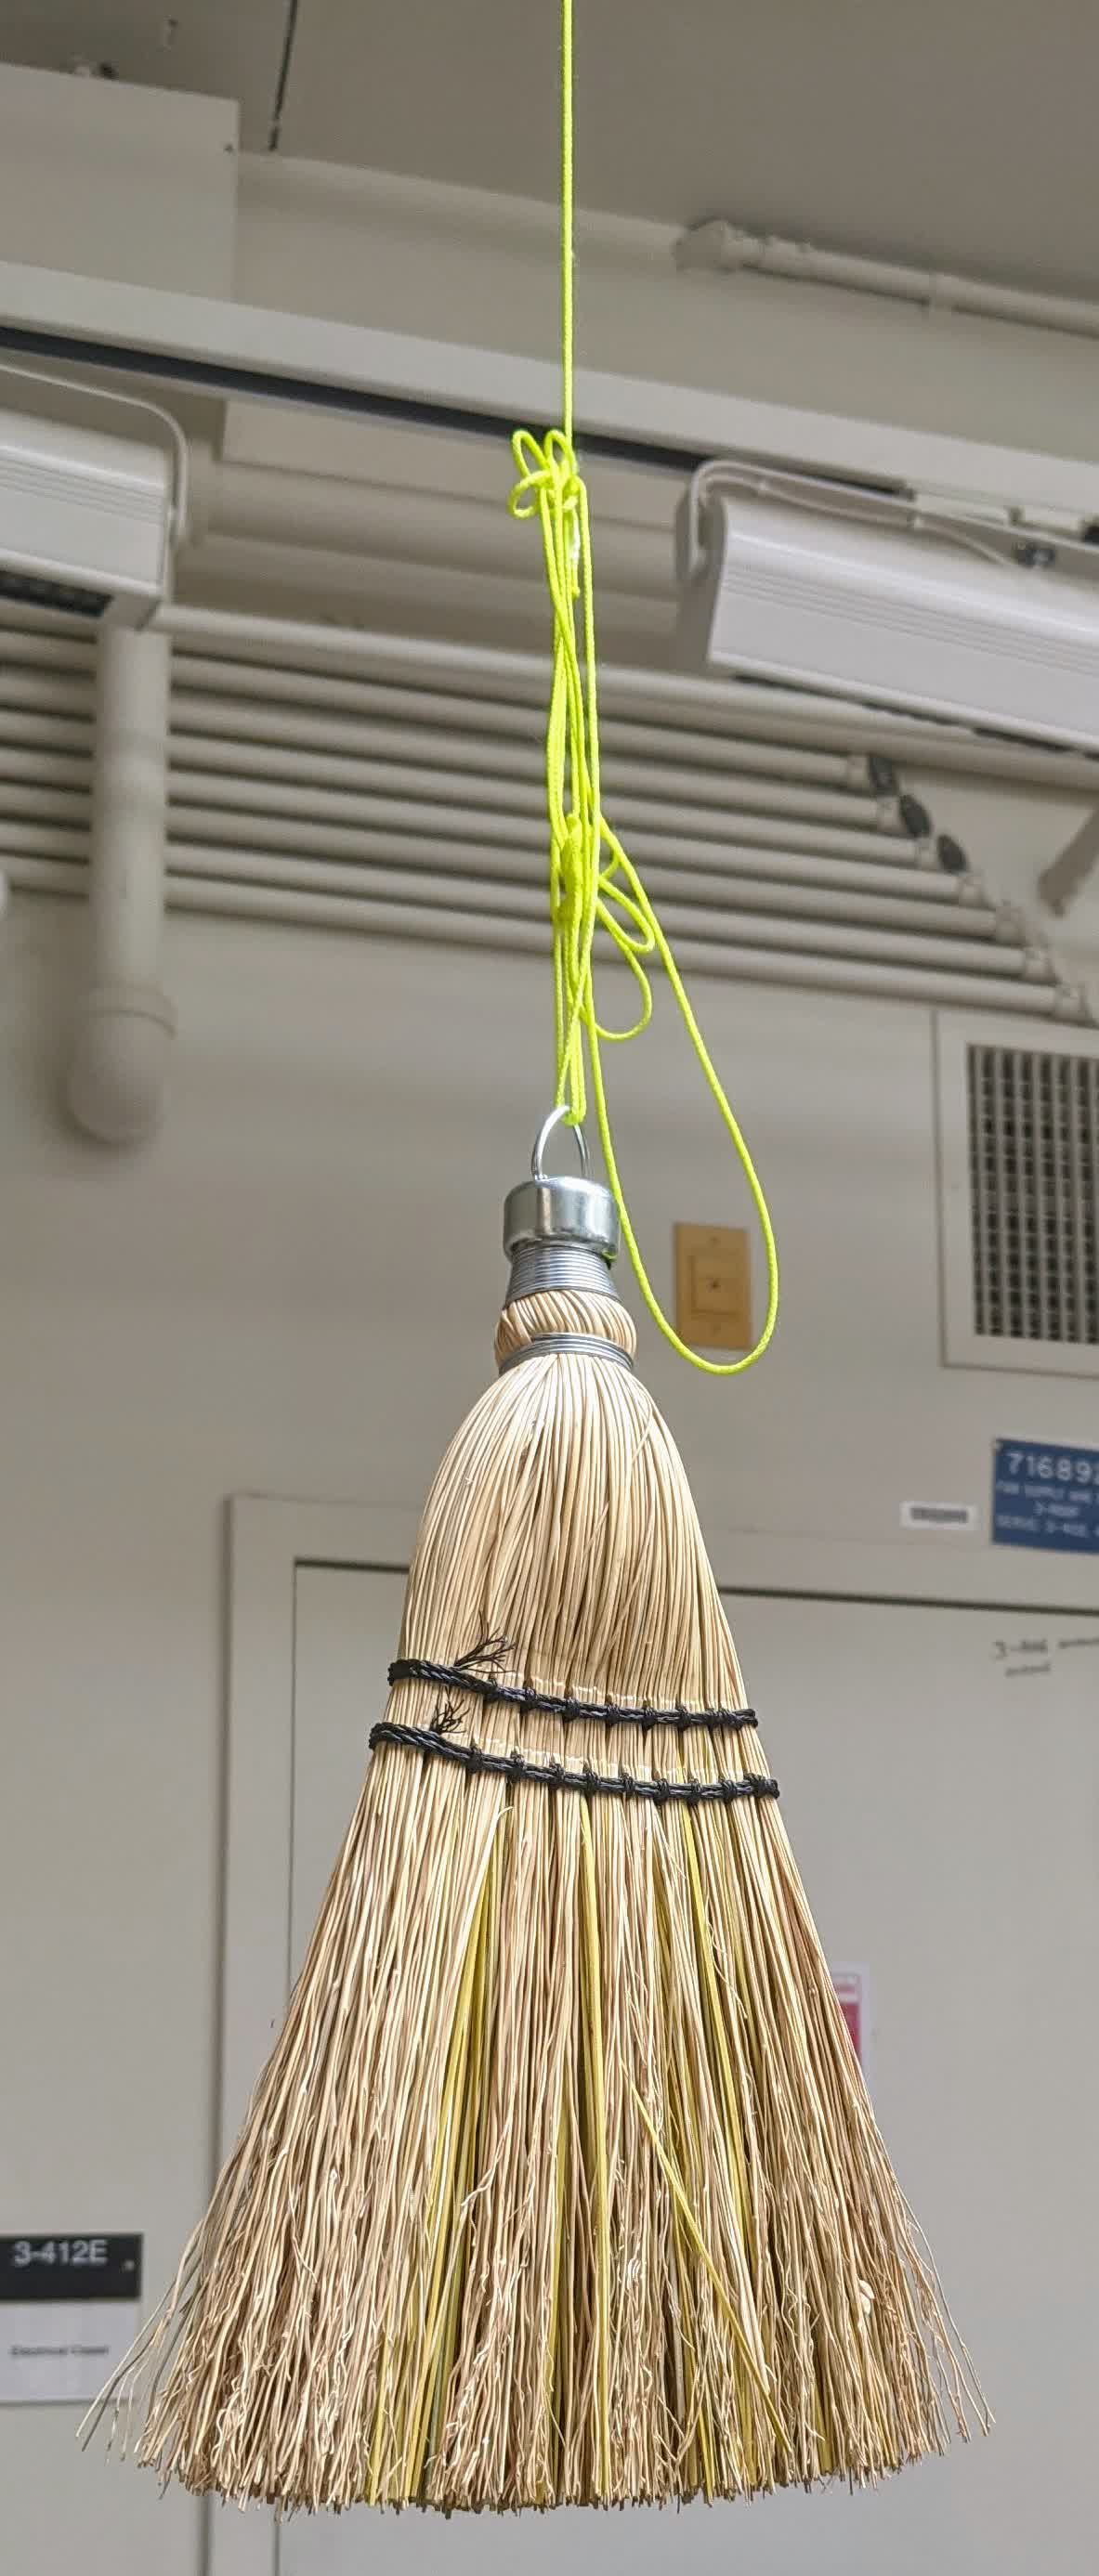
I proceeded to rotate it in place being careful that it is rotating in place and not swinging around. I stood holding the scanner about 15 in away.
Here is the resulting scan:

I then took the .stl file, generated a gcode, and printed it on a Sindoh 3D printer:
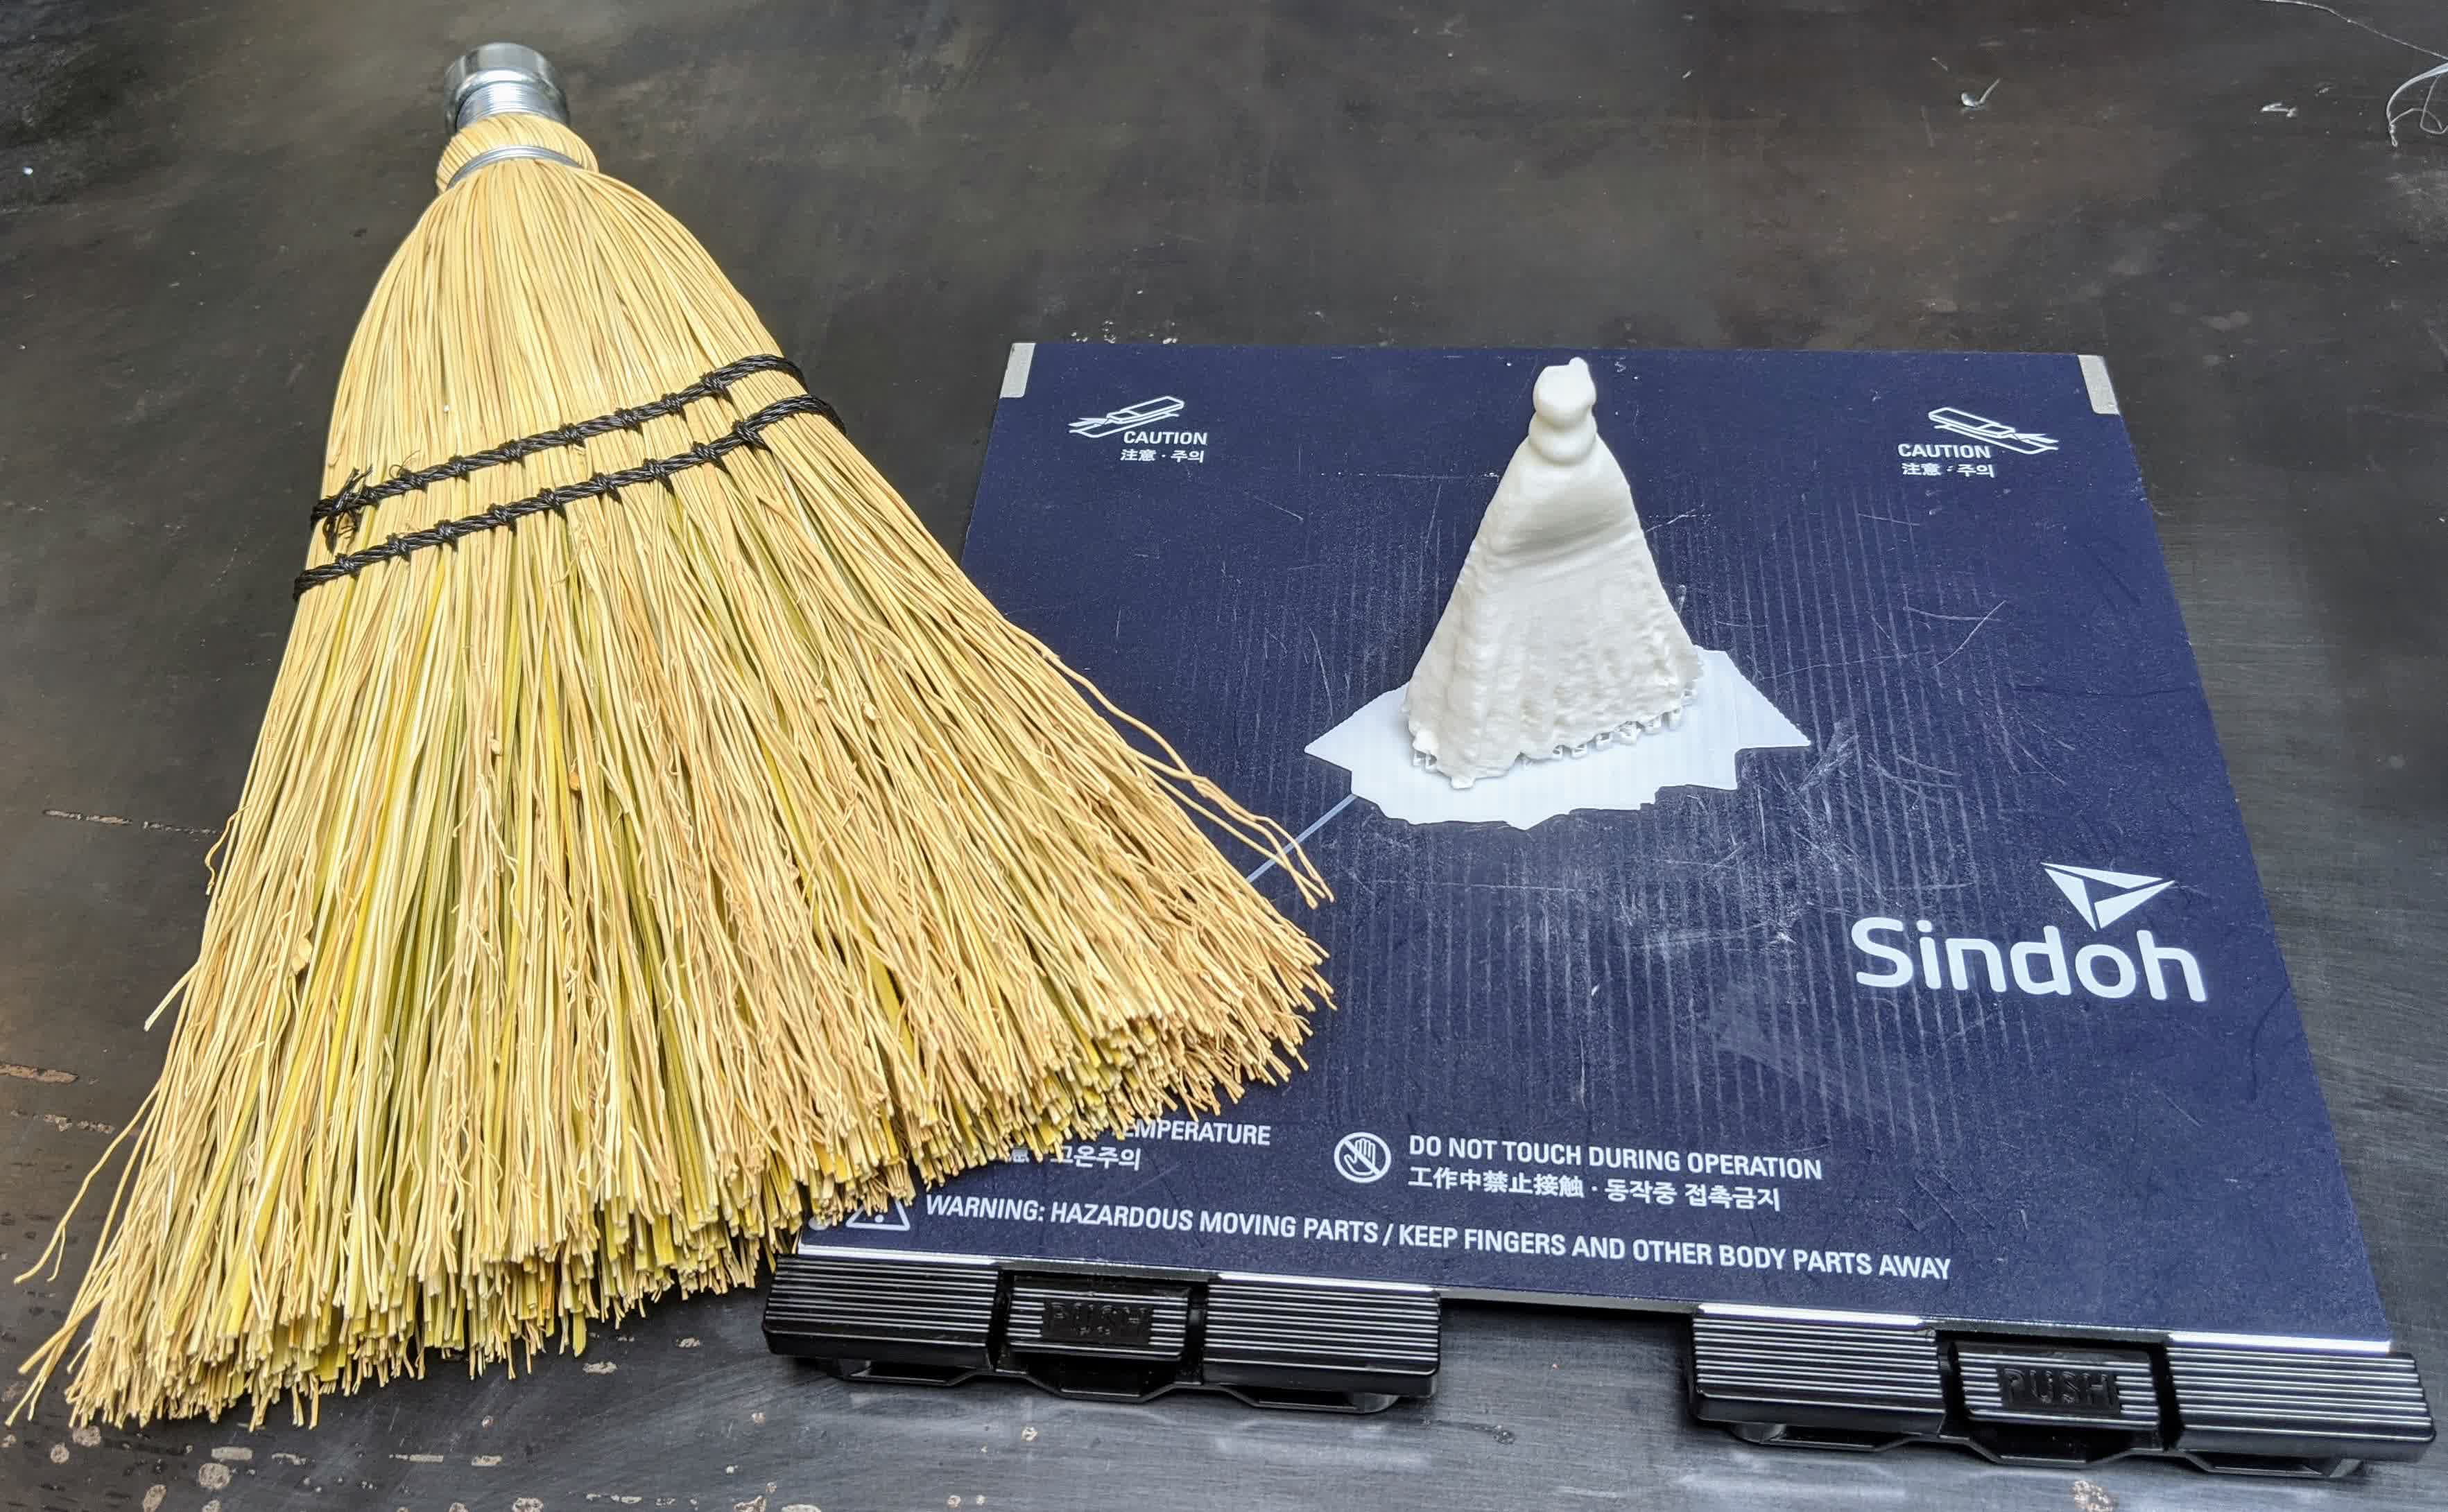
Removing the support was easy. It just snapped off.

I'd say this was an overall success.
Lessons learned:
-3D scanners are pretty bad at capturing detail
-It is extremely difficult to scan anything small (less than 6 in)
-It is extremely difficule to scan anything glossy, reflective, or bright (like the color white)
-Ideally, you want something with a matte finish, and to place the subject in good lighting, and for it to have good contrast with its surroundings
3D Printing
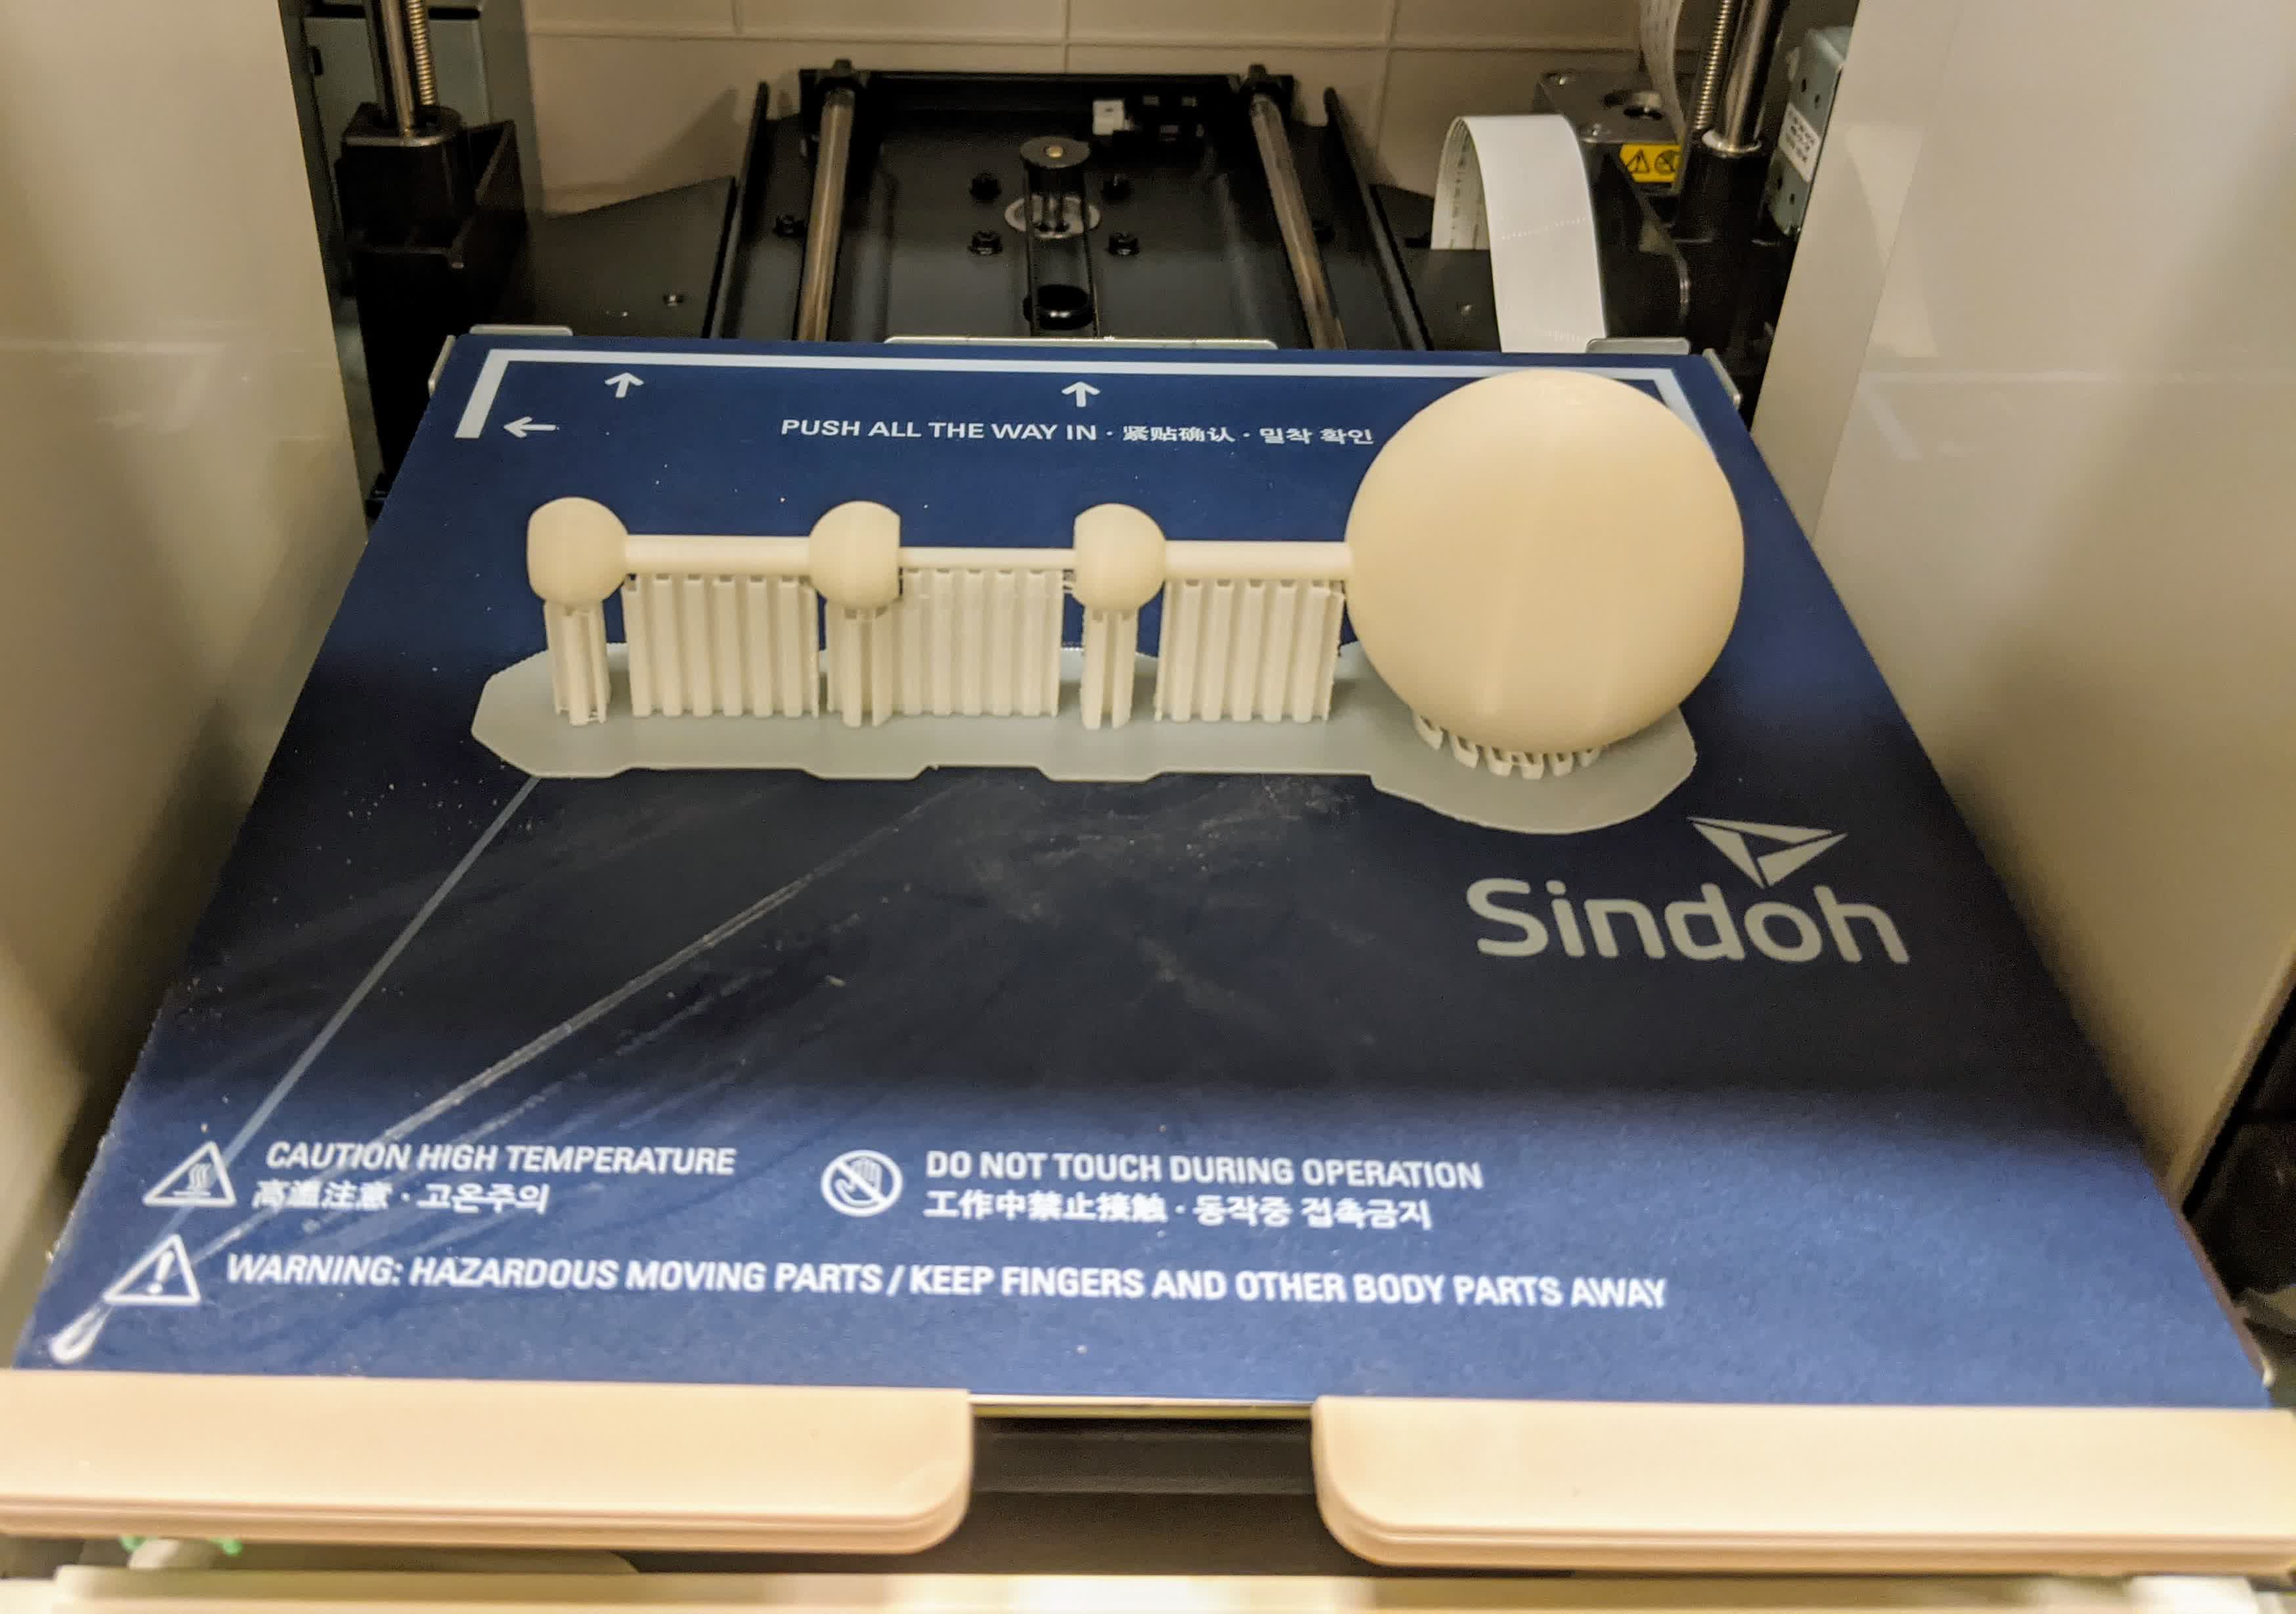
We had to 3d print something that could not be made subtractively. I personally wanted to make a toy for my daughter, Acia. I know she likes things that move, and she likes things that make sounds. So I decided to make a multi-jointed rattle toy.
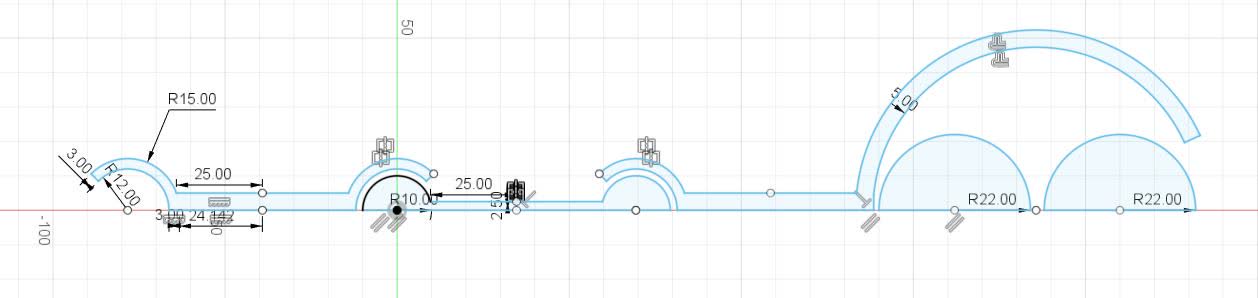
It took me a while to figure out 3D design, and I am by no means an expert at it now. Last week's laser cutting was only done with 2D sketches. This week, I learned how to use the "Revolve" function to turn the 2D sketch into 3D, and mostly utilized spheres and cylinders. The image below shows the 2D sketch. From left to right: I have a female-female unit, a male male unit, the rattling unit, and 2 spheres to rattle. The male-female mating joints were arcs designed to fit, but allow 45 degrees of dip and 365 degrees of azimuthal rotation. The two spheres in the rattling part were made from 2 semi circles, and the rattle opening was made to constrict 4 mm of the sphere diameter. This opening serves both to hold the spheres in, but also to allow me to remove any support material from the printing process.
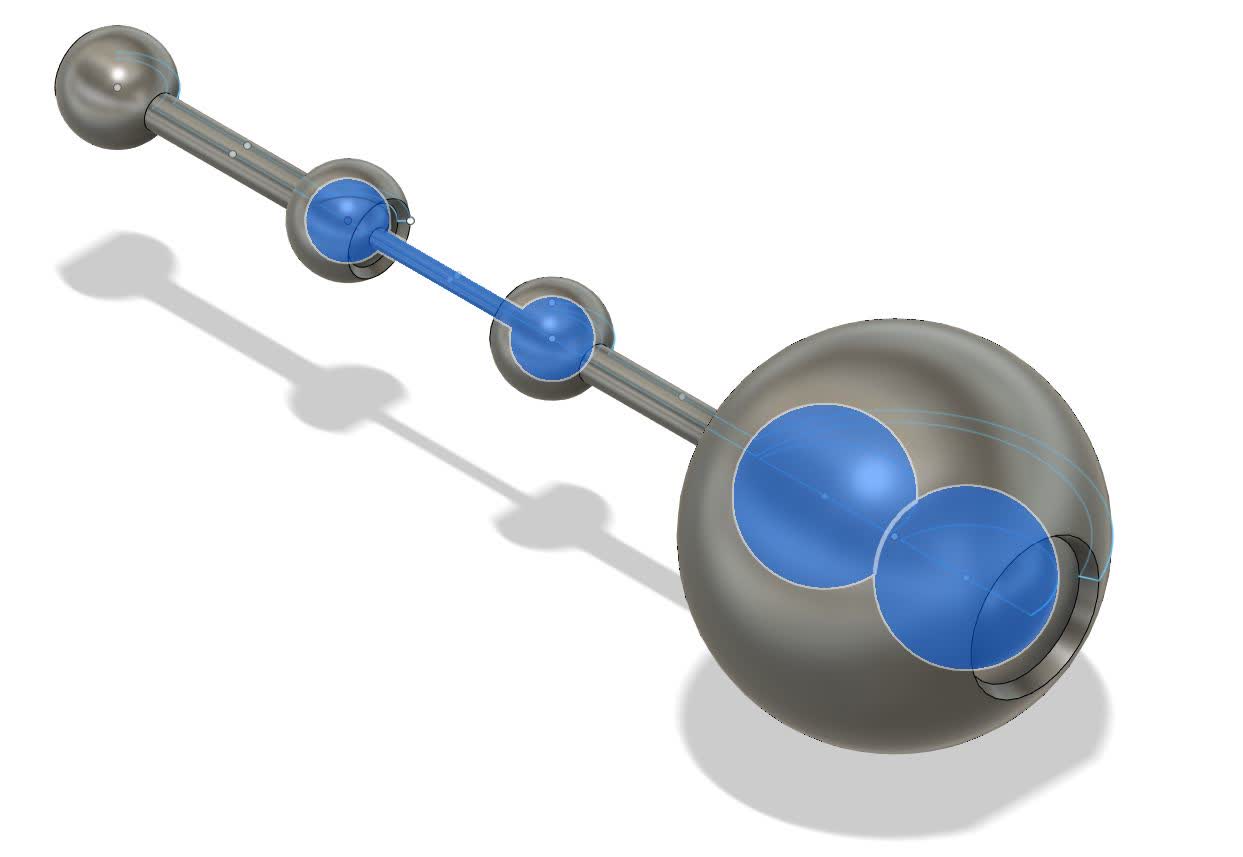
This is the 3D render of my revolved solid. I highlighted the inner components for visual clarity.
Generating the .stl for all the components was a bit of a hurdle. It seemed like I could only export 1 body at a time, but then I would only be able to print seperately. Using Fusion 360, I found that I had to go to File --> 3D Print --> and then select all the bodies I want from the tree. This was the only way I found to export the .stl file of multiple bodies.
After doing so, I simply generated the gcode from the Sindoh software, generously adding support material inside the spherical shells. Then loaded the gcode onto the printer, and here it goes:
Here is the product fresh and hot out of the printer. I definitely wanted to do this while it was still warm to ease the process of removing the support material.
Here is what it looks like off the printing pad, fully suppoted and rigid!
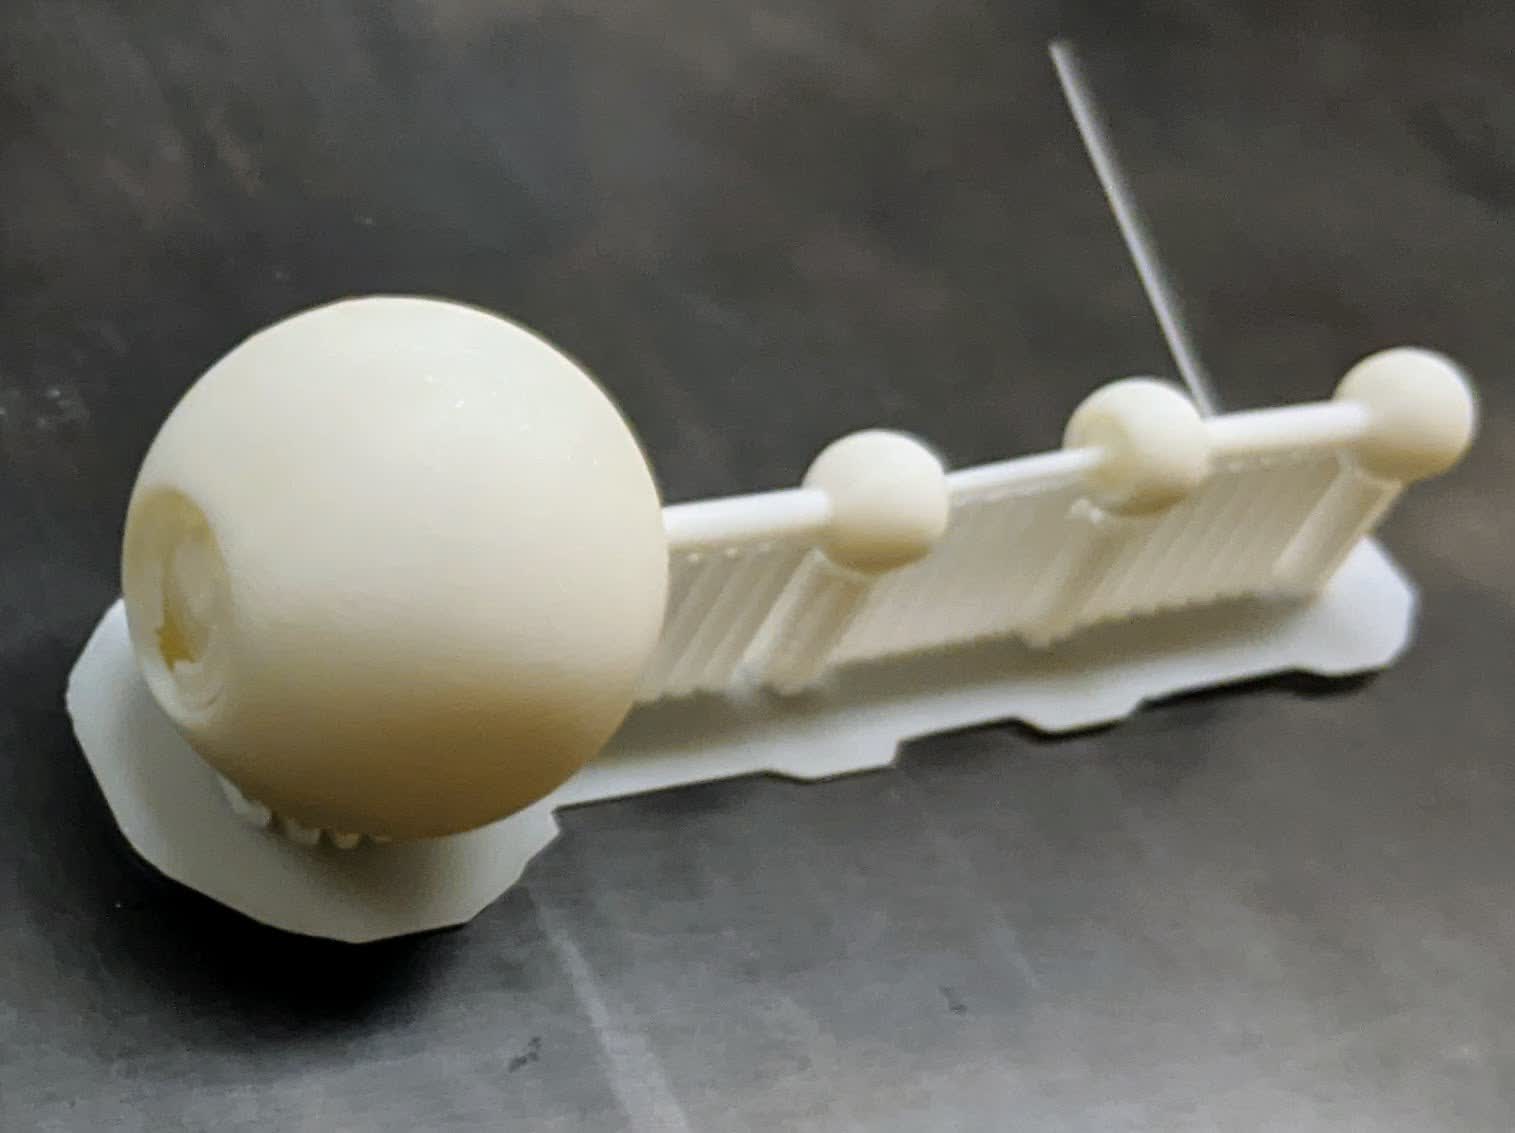
Removing the external support was easy. It just snapped right off. The joints were also easy, with a little force, the support snapped and the joints were free to rotate. The major challenge was the internal support. The rattling spheres were big relative to the rattle shell. I used a screw driver, a chisel, and shears to clean out the inside of the rattle shell being careful not to break the spheres. I also found that the cylinder connected to the rattle shell was pretty flimsy and was starting to bend from the force I was using to grip while cleaning. It took a while, but I cleared everything out.

Here is the finished product:
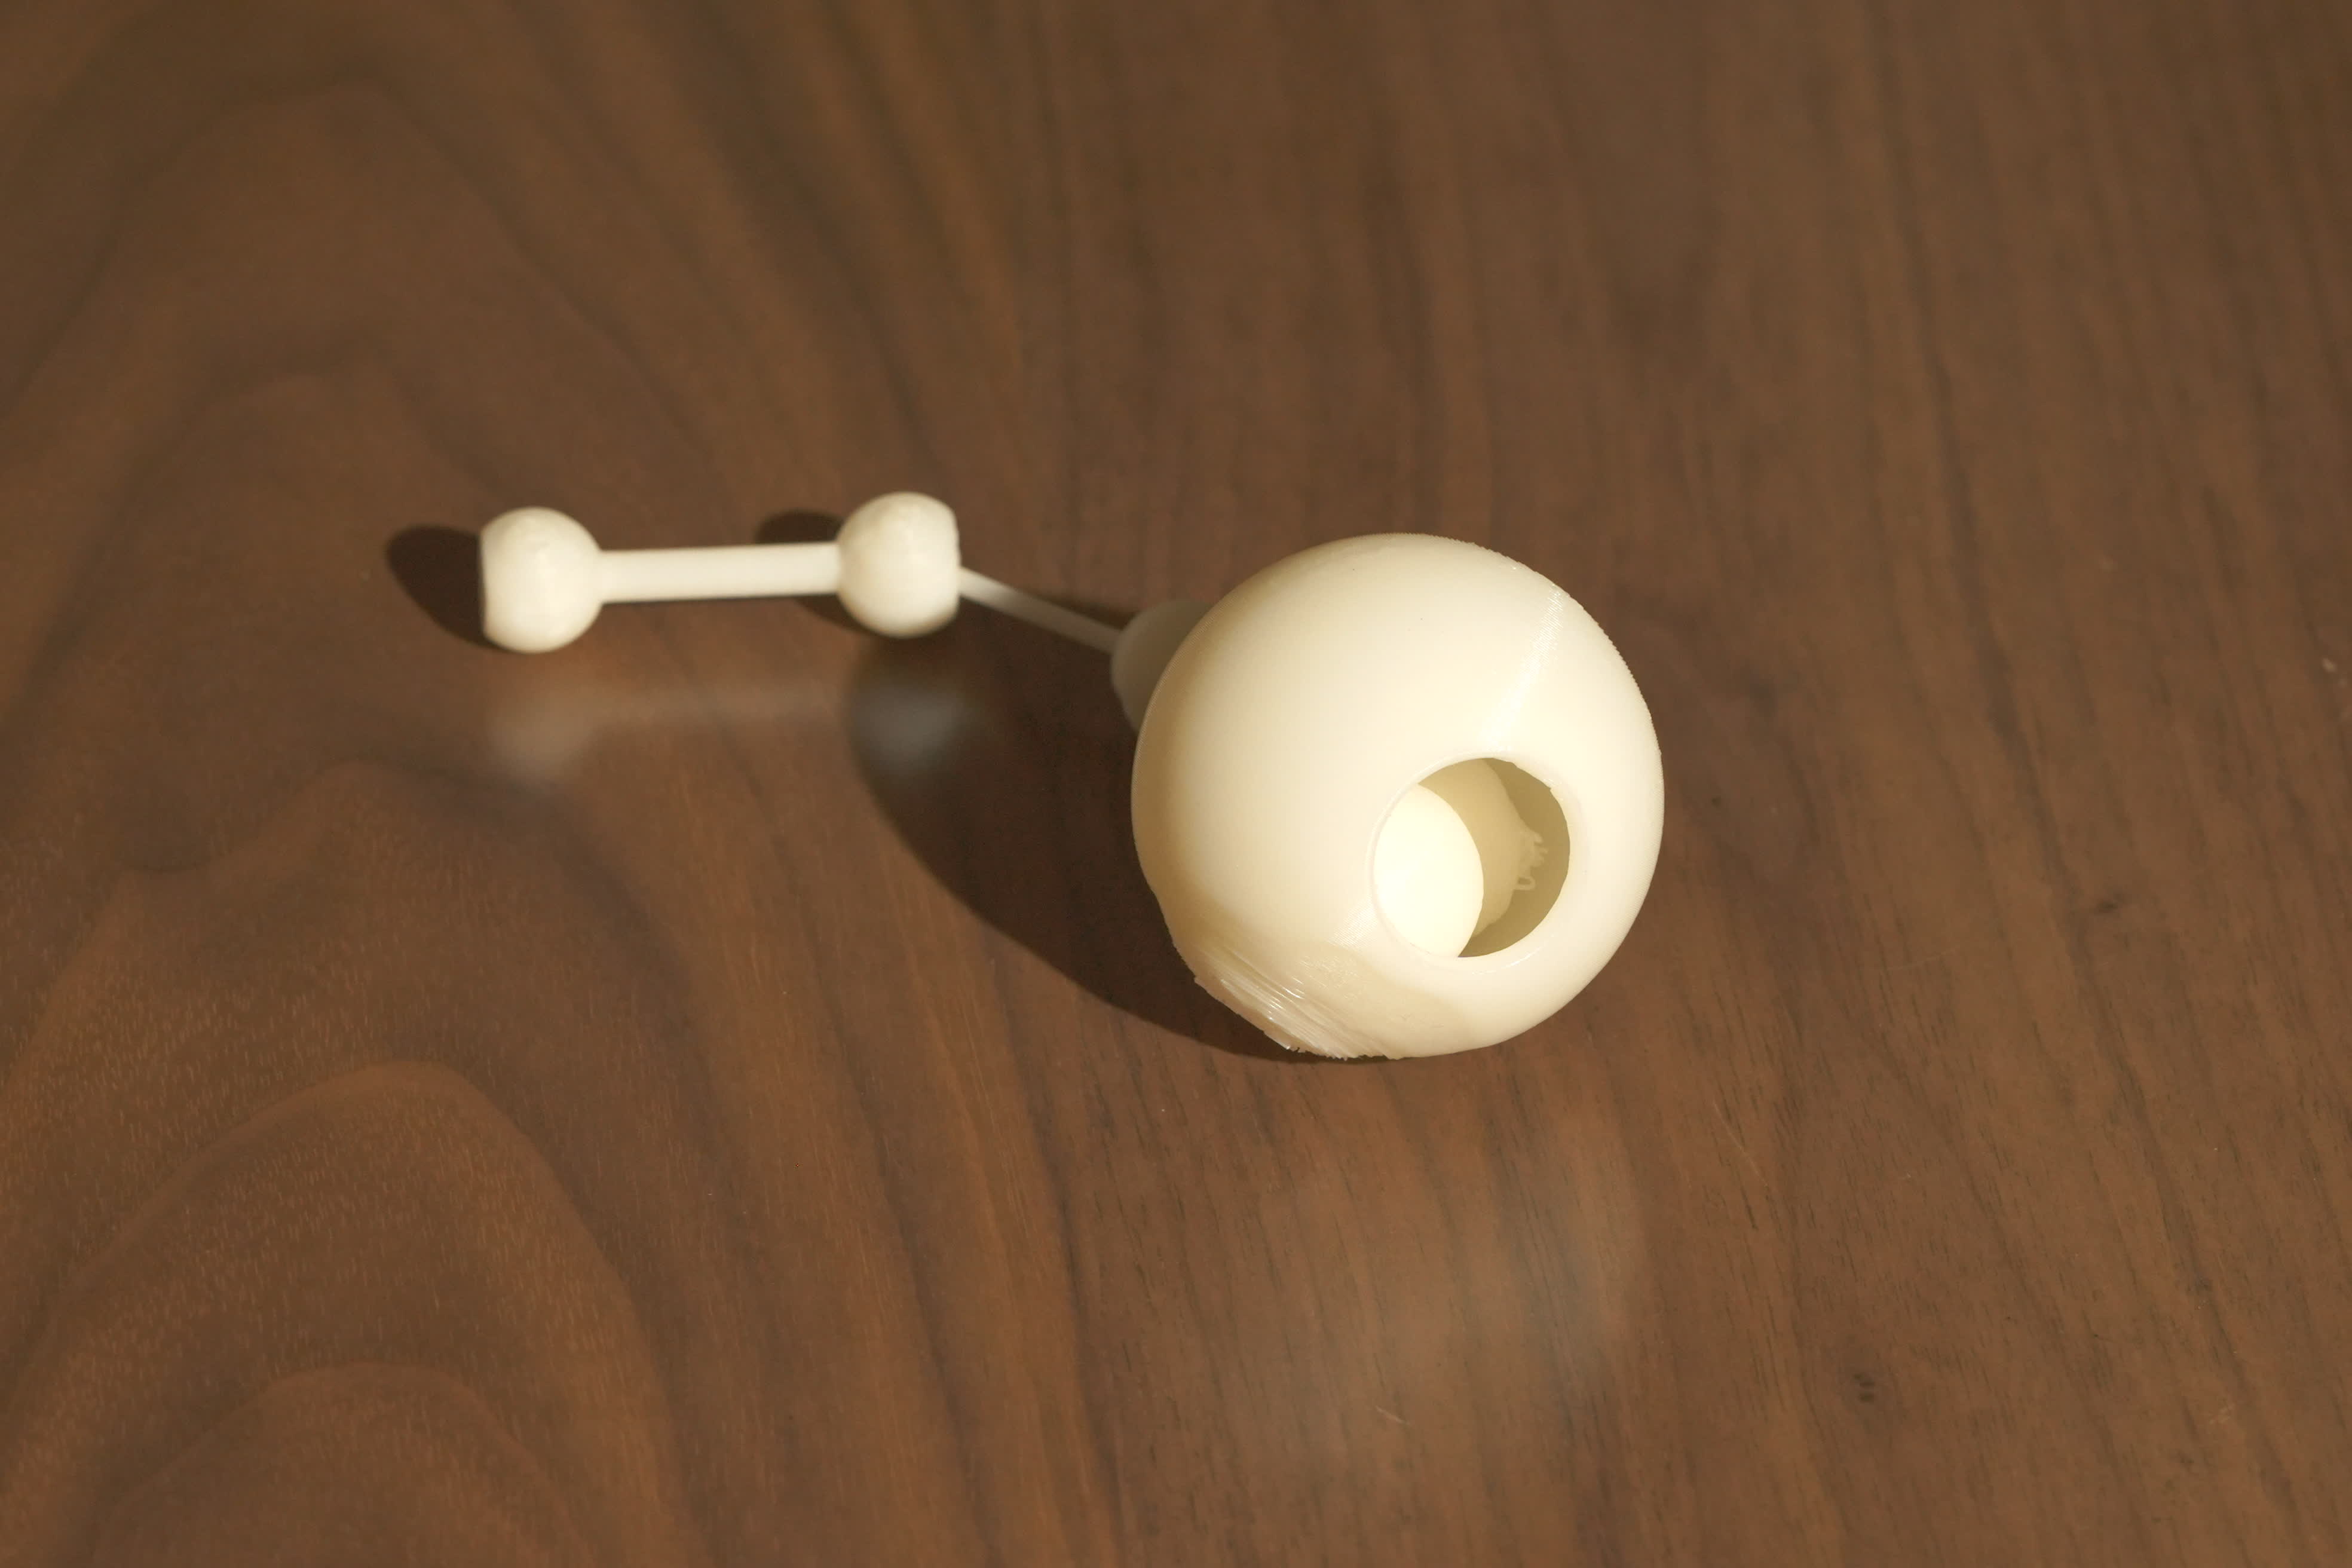
It RATTLES!!!
Give toy to Acia.
IF she likes it ... success
ELSE back to the drawing board ...
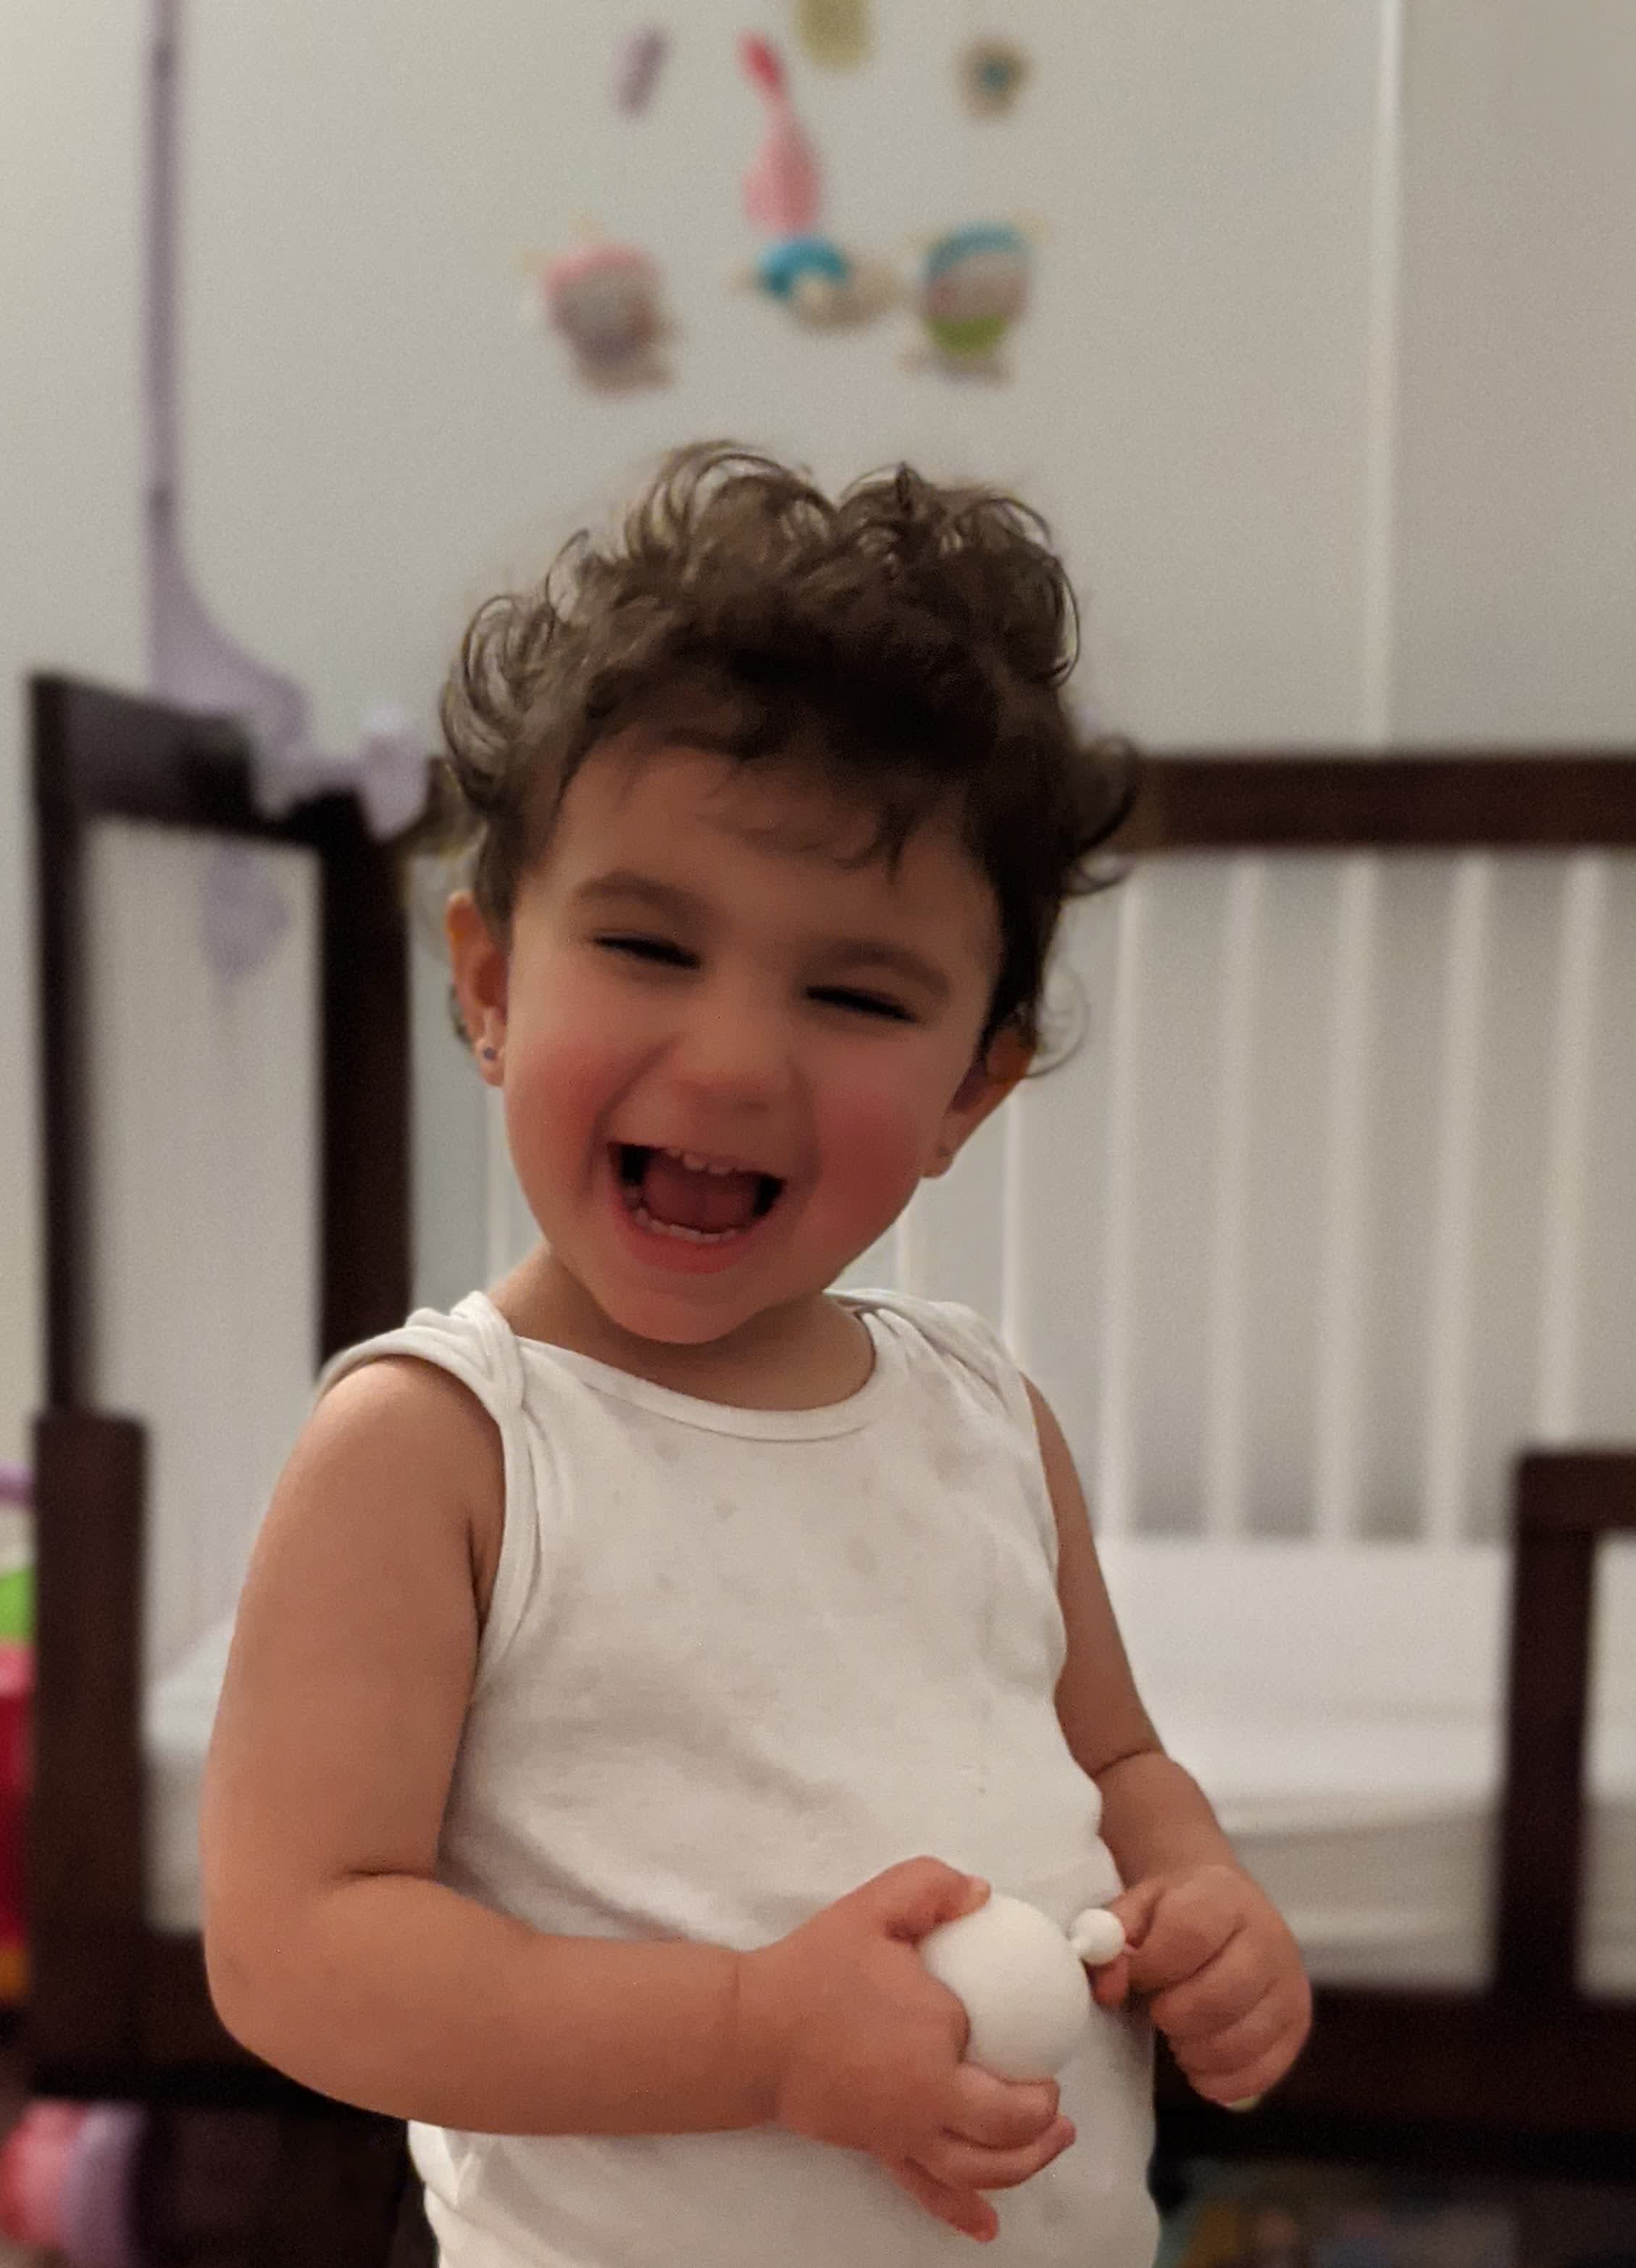
I'd call that a success!!
Of course she will play with it under strict supervision because of the small parts.
I'm just happy she's happy and that this all paid off!
That smile means the world to me!! Thanks HTMAA!!
Files: RattleToy.dxf