Week 14 - Wildcard Week
This week is very open-ended as we have the option to choose one of a number of different specialized techniques to learn more about. Some of these include NC grinding (stone milling), 5-axis machining, making PCBs using the laser, and glass etching.
Assignments:
Laser Micro Machining and CT Scanning
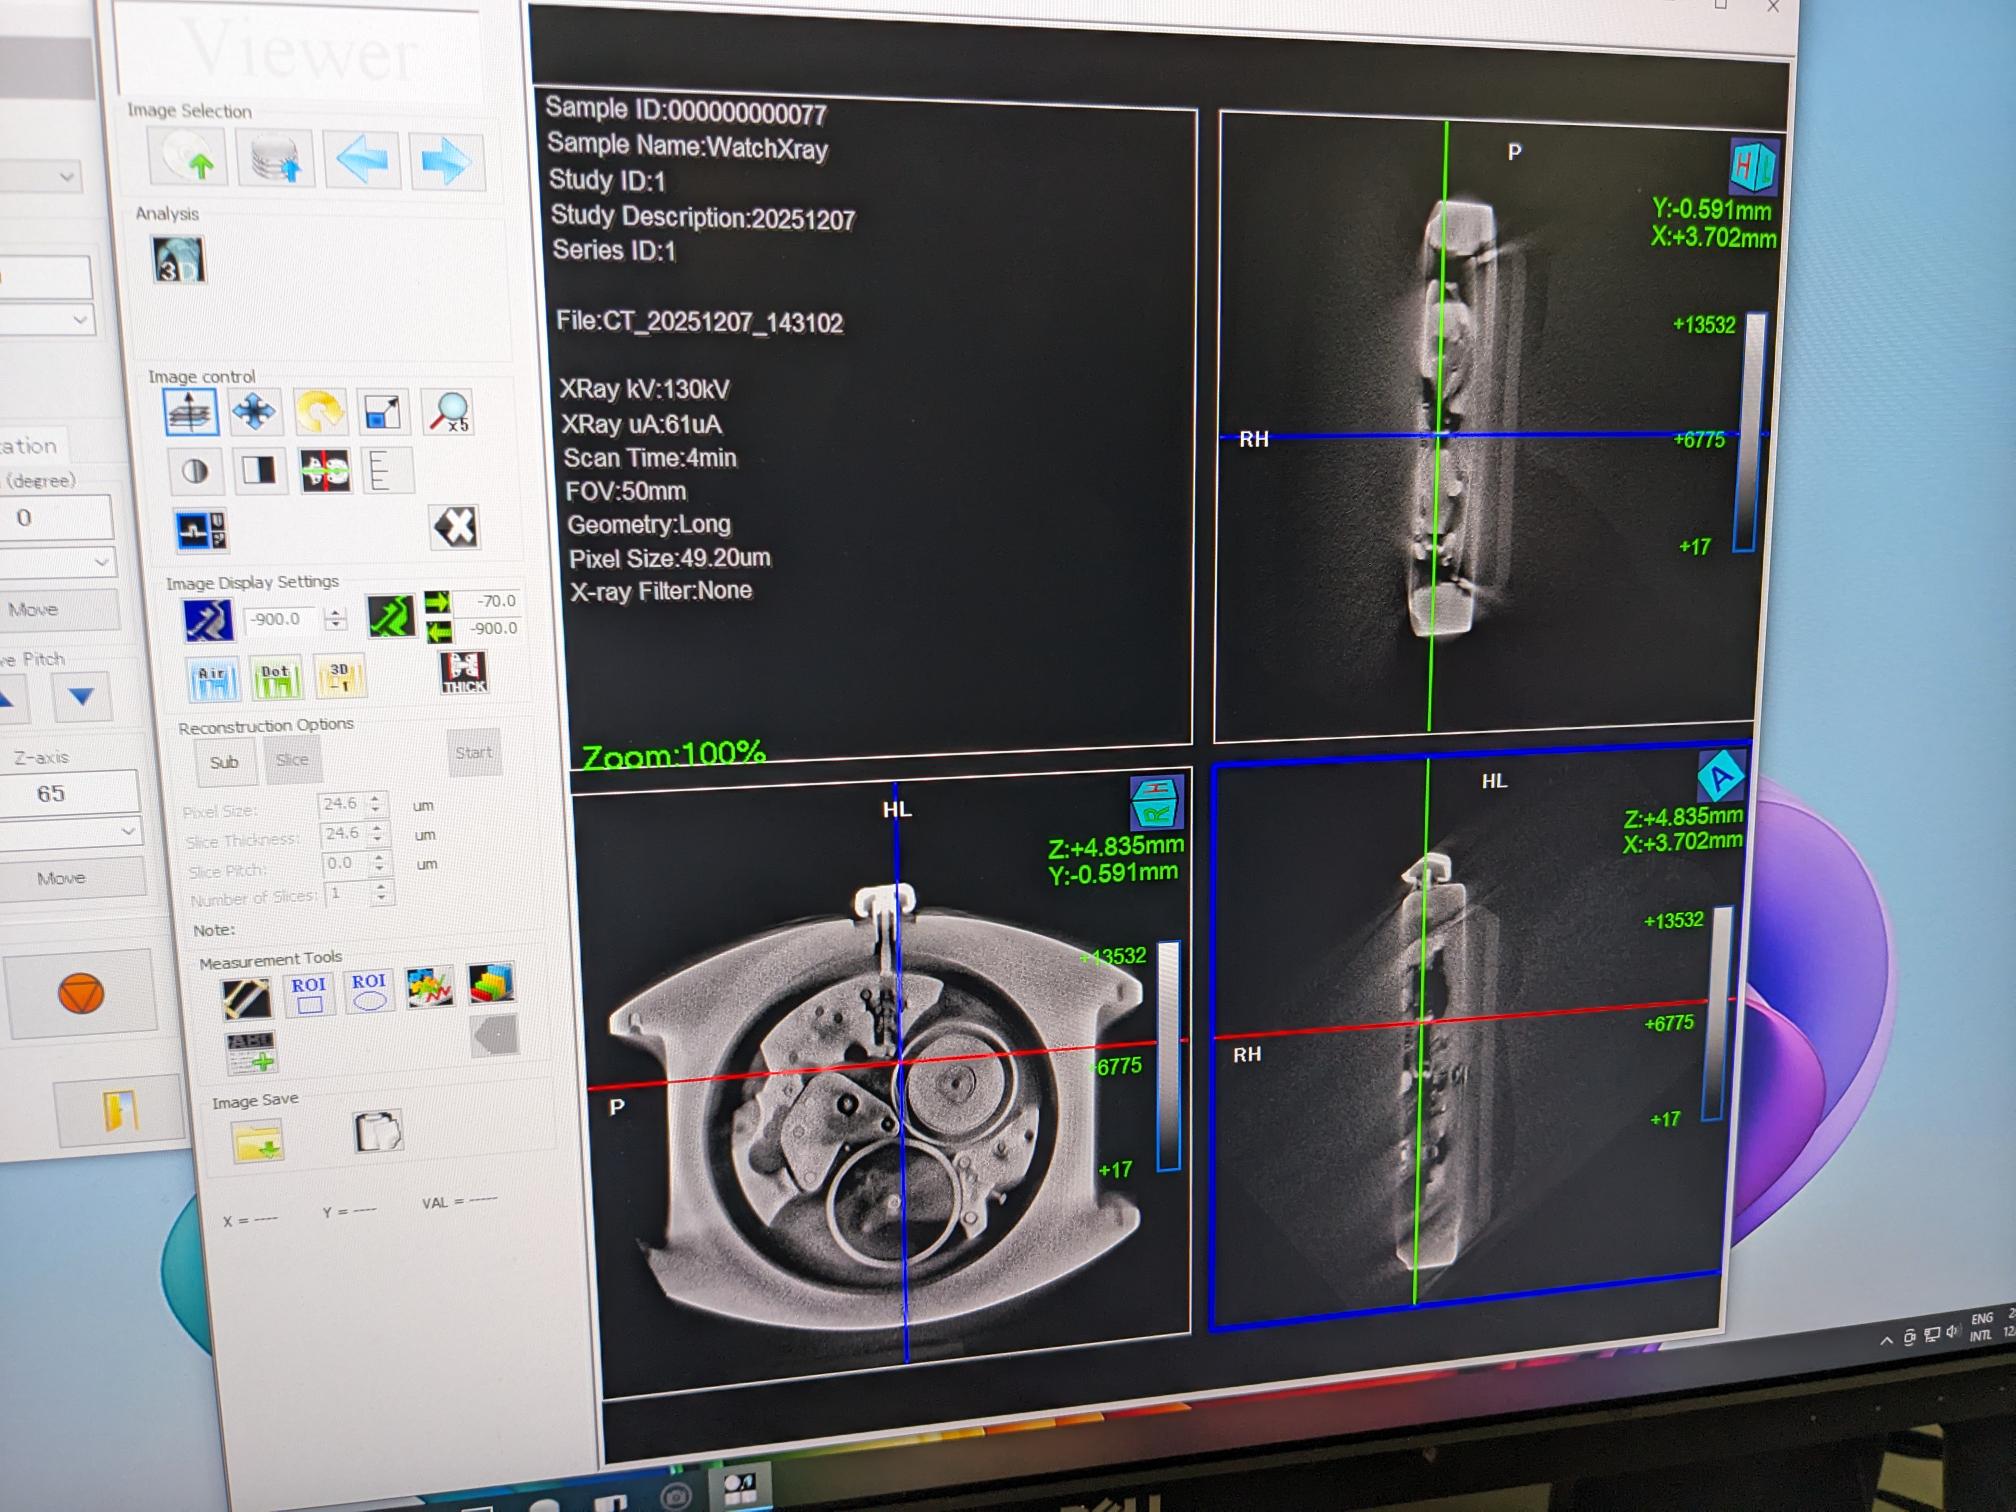
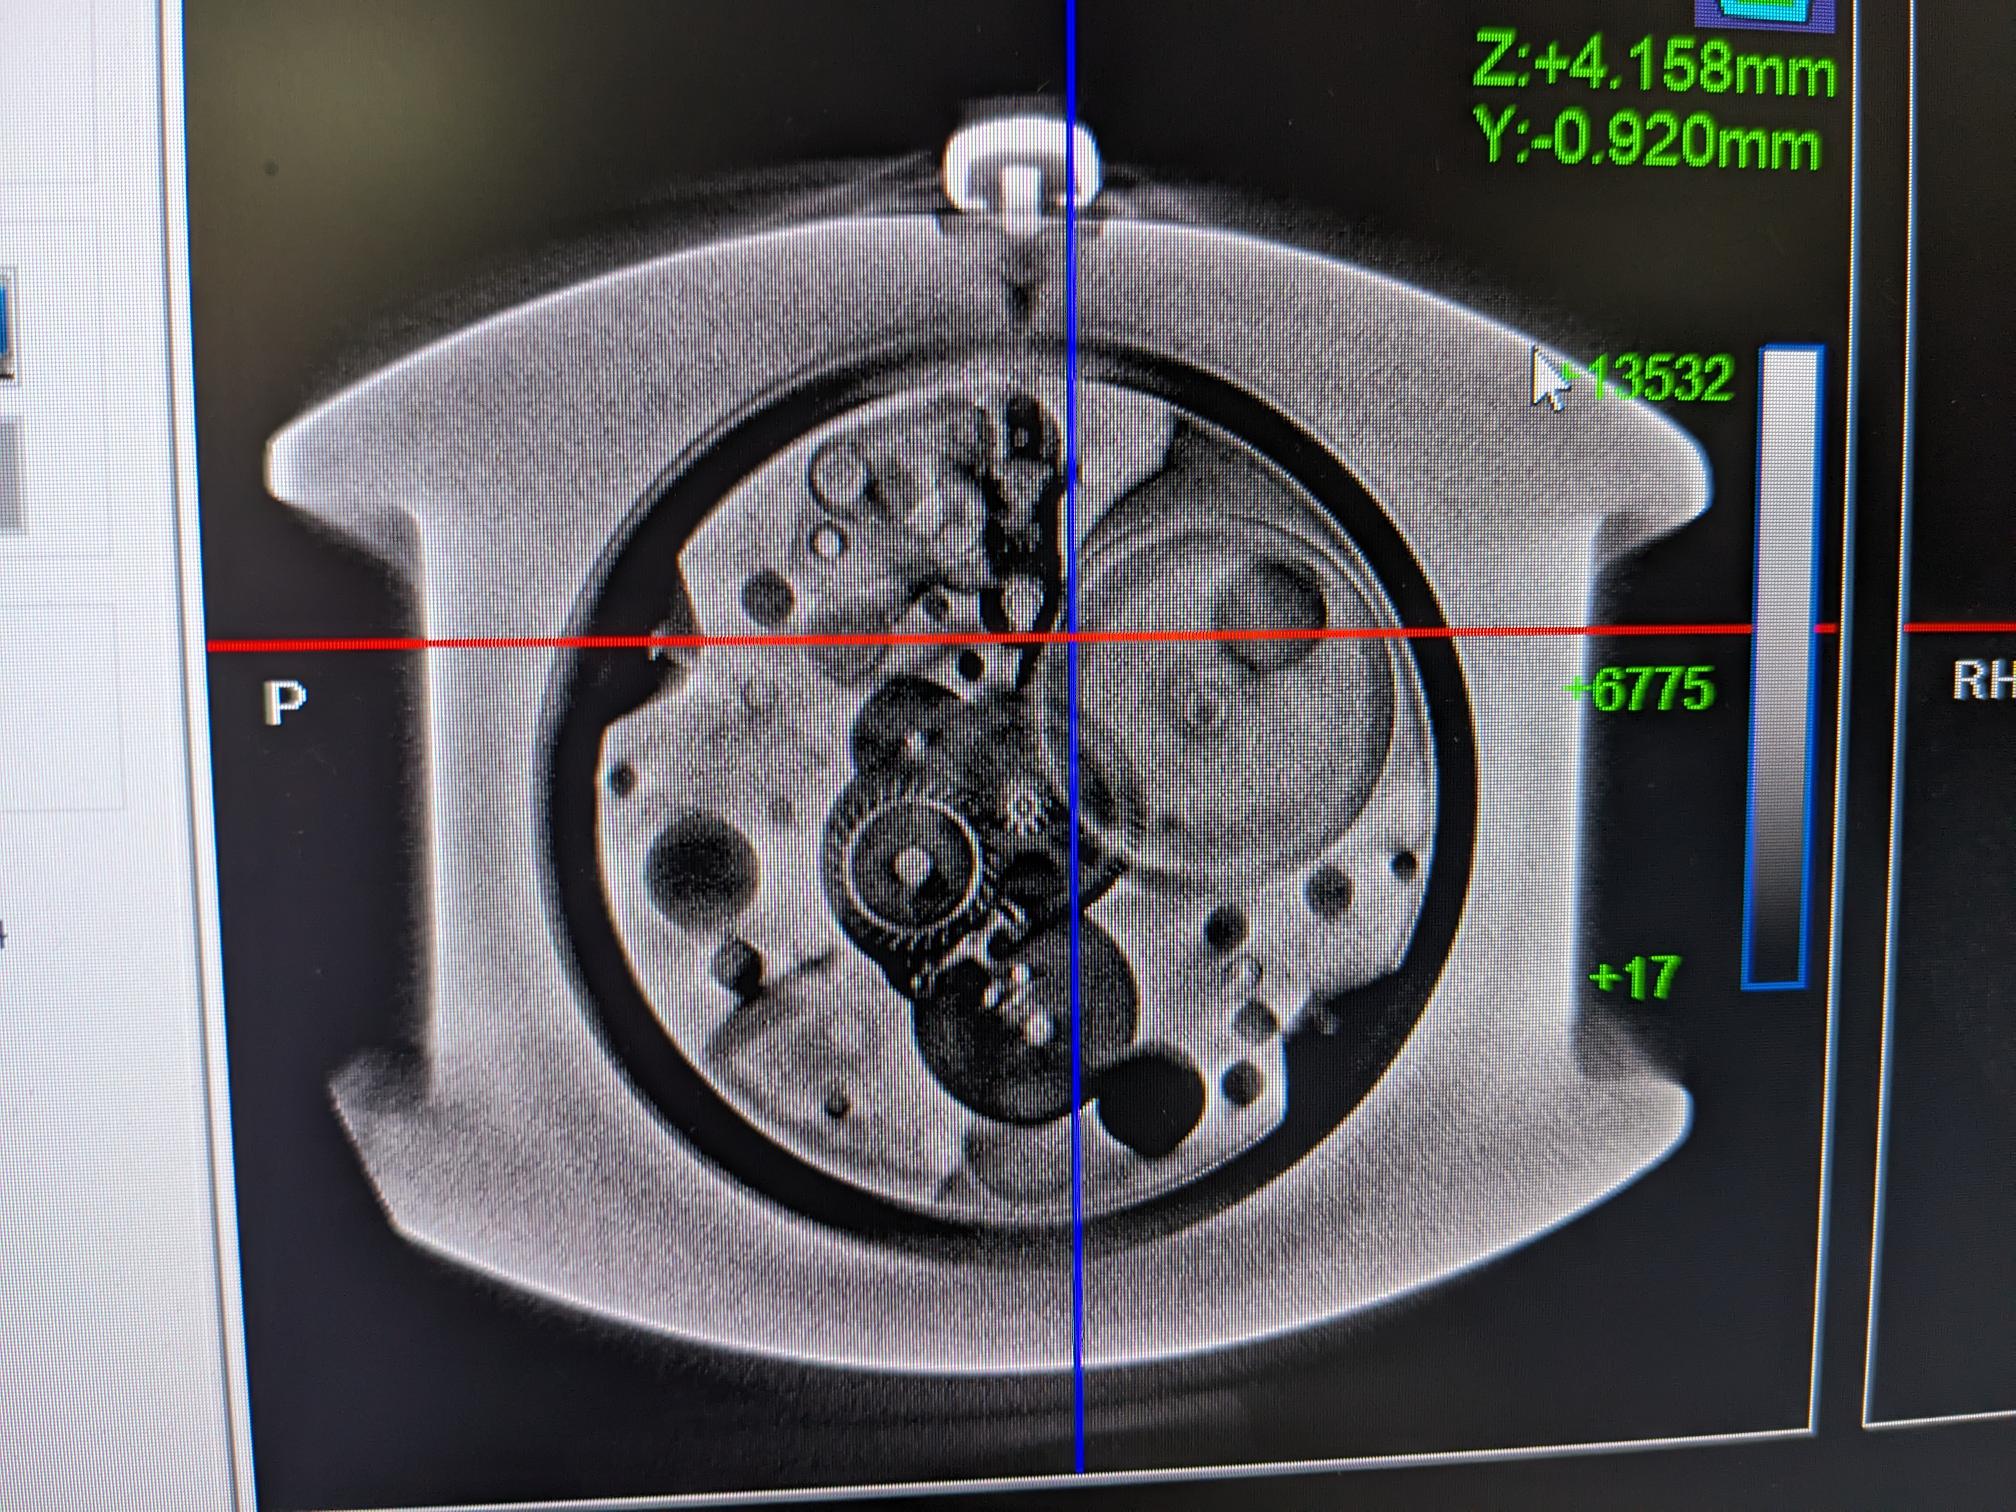
One of my personal projects I am working on is fabricating watch parts. Right now I am still focused on dials and cases, but one day I hope to work up to actually fabricating my own movement. With that in mind, this week I joined the section on laser micro machining and CT scanning with the hope of learning how very small features are fabricated. This section talked about the XTool F2 Ultra (new version of the F1 we have been using in the CBA shop), an Oxford laser tool, and a Micro-CT scanner. While talked about the capabilities of the Oxford laser, primarily as it was related to Jiaming's research on cutting diamond samples, we did not make use of it to fabricate any parts. Instead we primarily used the F2 and the CT scanner. All of our work as a group is documented in a canvas on slack, so as soon as I figure out how to link to the canvas or to a PDF that is supposedly going to be created to store the work, I will do so here.Starting with the CT scanner, this is an X-ray tool that can be used to look through objects. This technique is very useful when trying to debug issues with complex structures or when trying to reverse engineer how a particular device works. I brought two objects with me to potentially image on this tool; an old hard drive and a mechanical watch. Since the ability to see through materials is largely related to their density, I removed the back of my watch to get a better view of the mechanical components inside it without losing too much signal to the steel back. In order to get a good view of the interesting parts, we set the watch on an angled lump of wax inside the chamber. The live view of the watch did not show too much going on, so we took a longer scan that rotated the sample and integrated a series of scans together to create a 3D object. We did have to account for the sample tilt in the final processing of the scan, but after we did we could drag a slider through the resulting object and look at the equivalent slice through the watch which was super cool. We could very clearly see the individual gears, the main spring within the barrel, and the pallet fork and balance wheel which were slightly blurry because they were in motion during the imaging process.

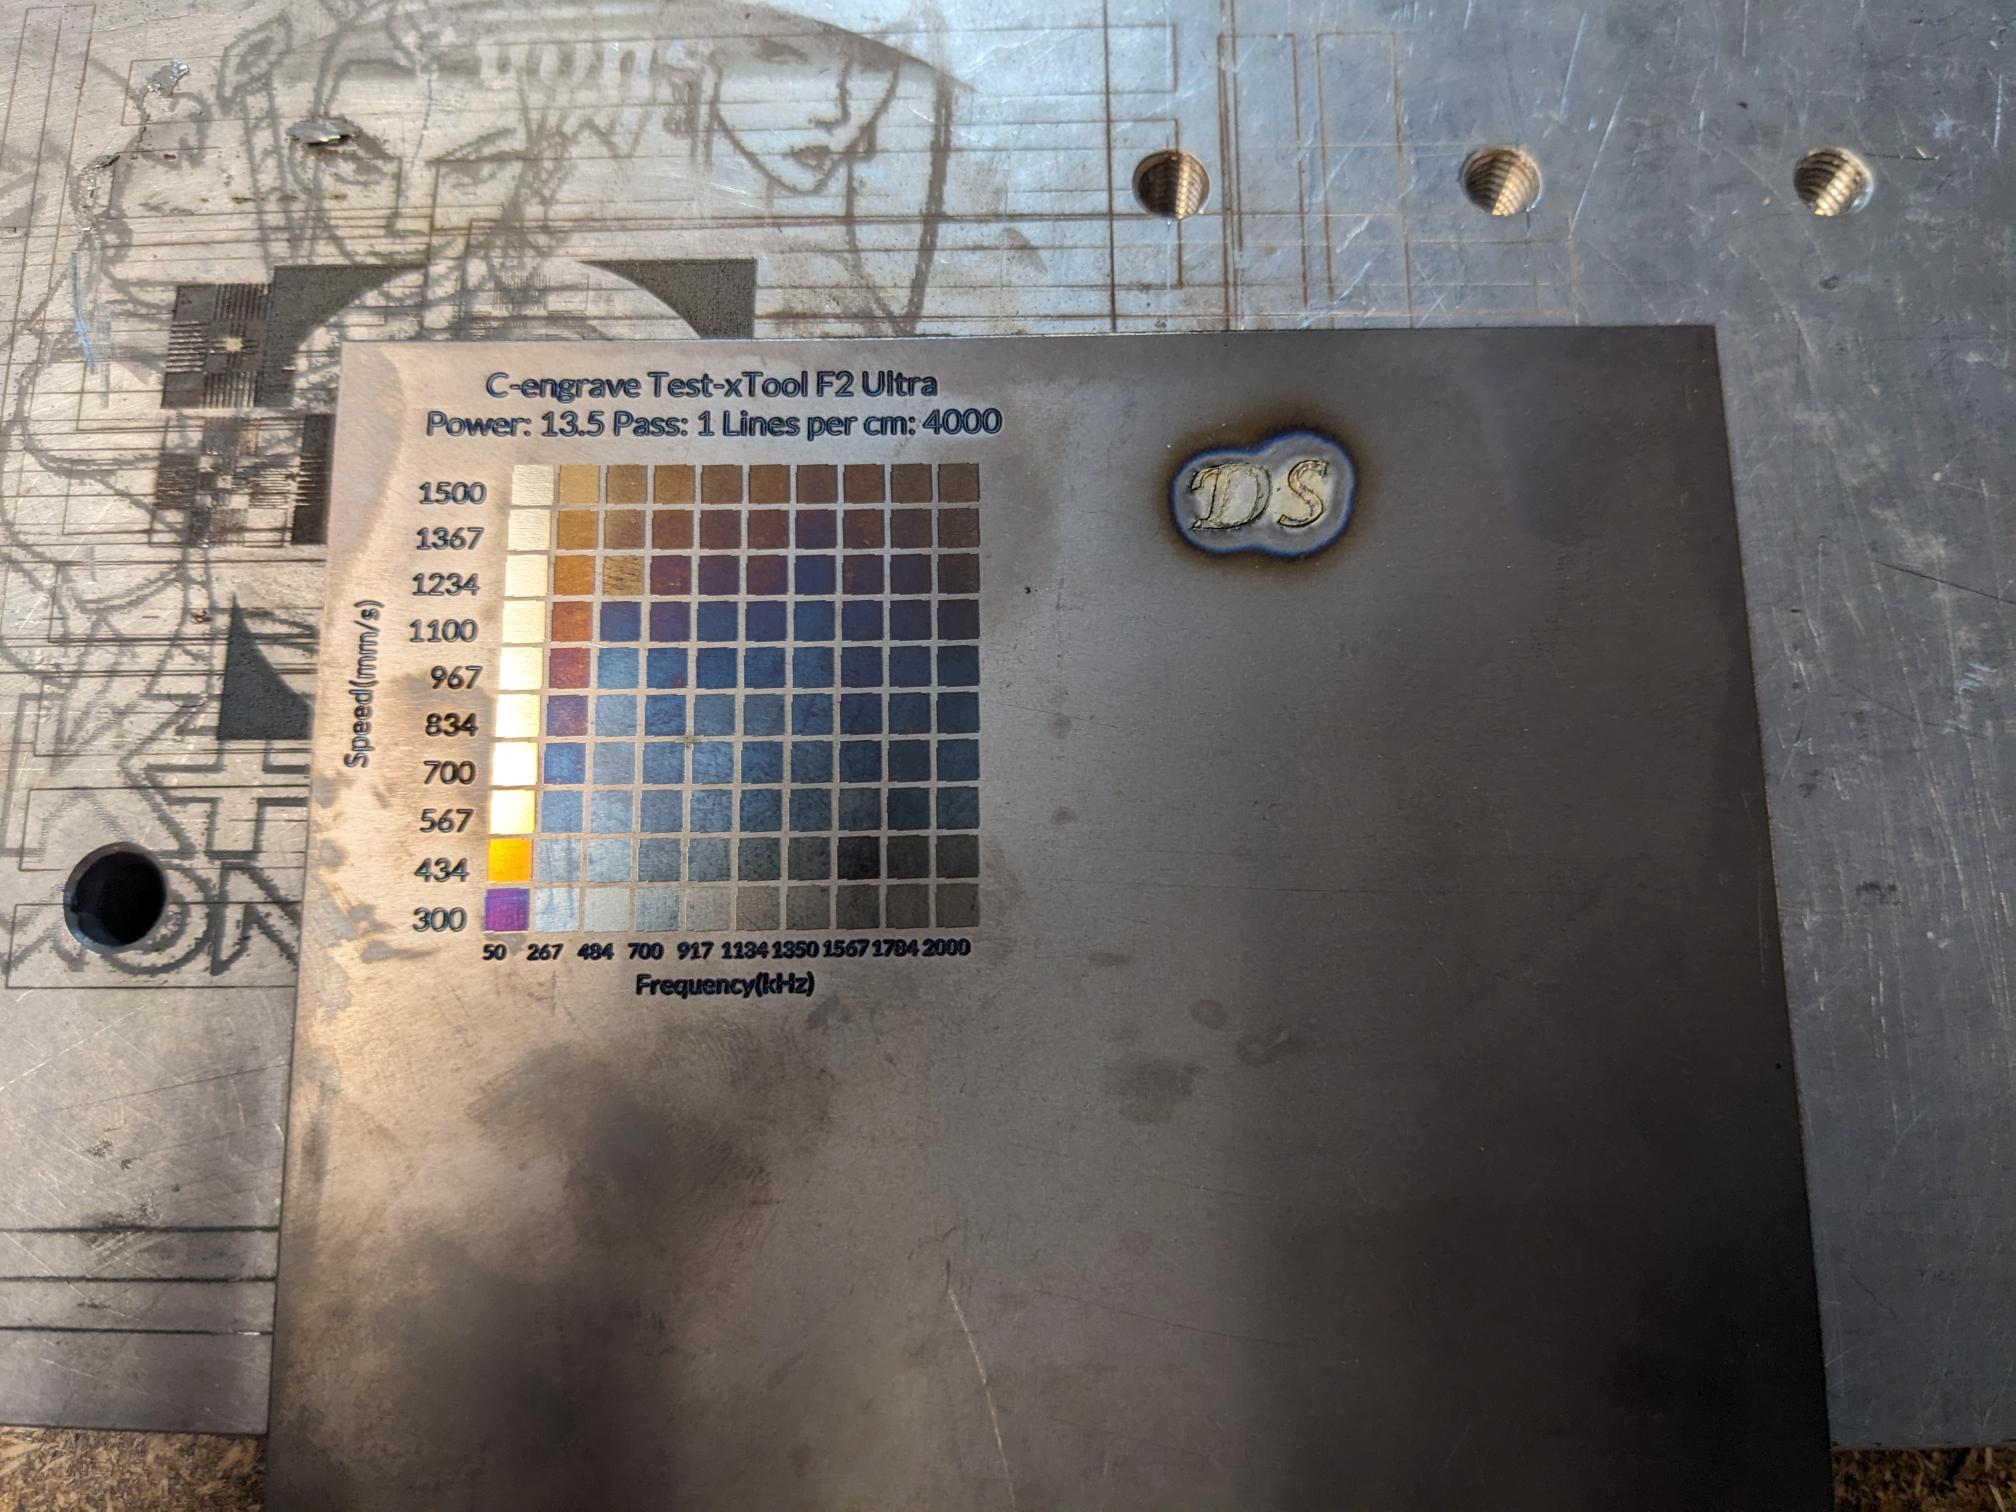
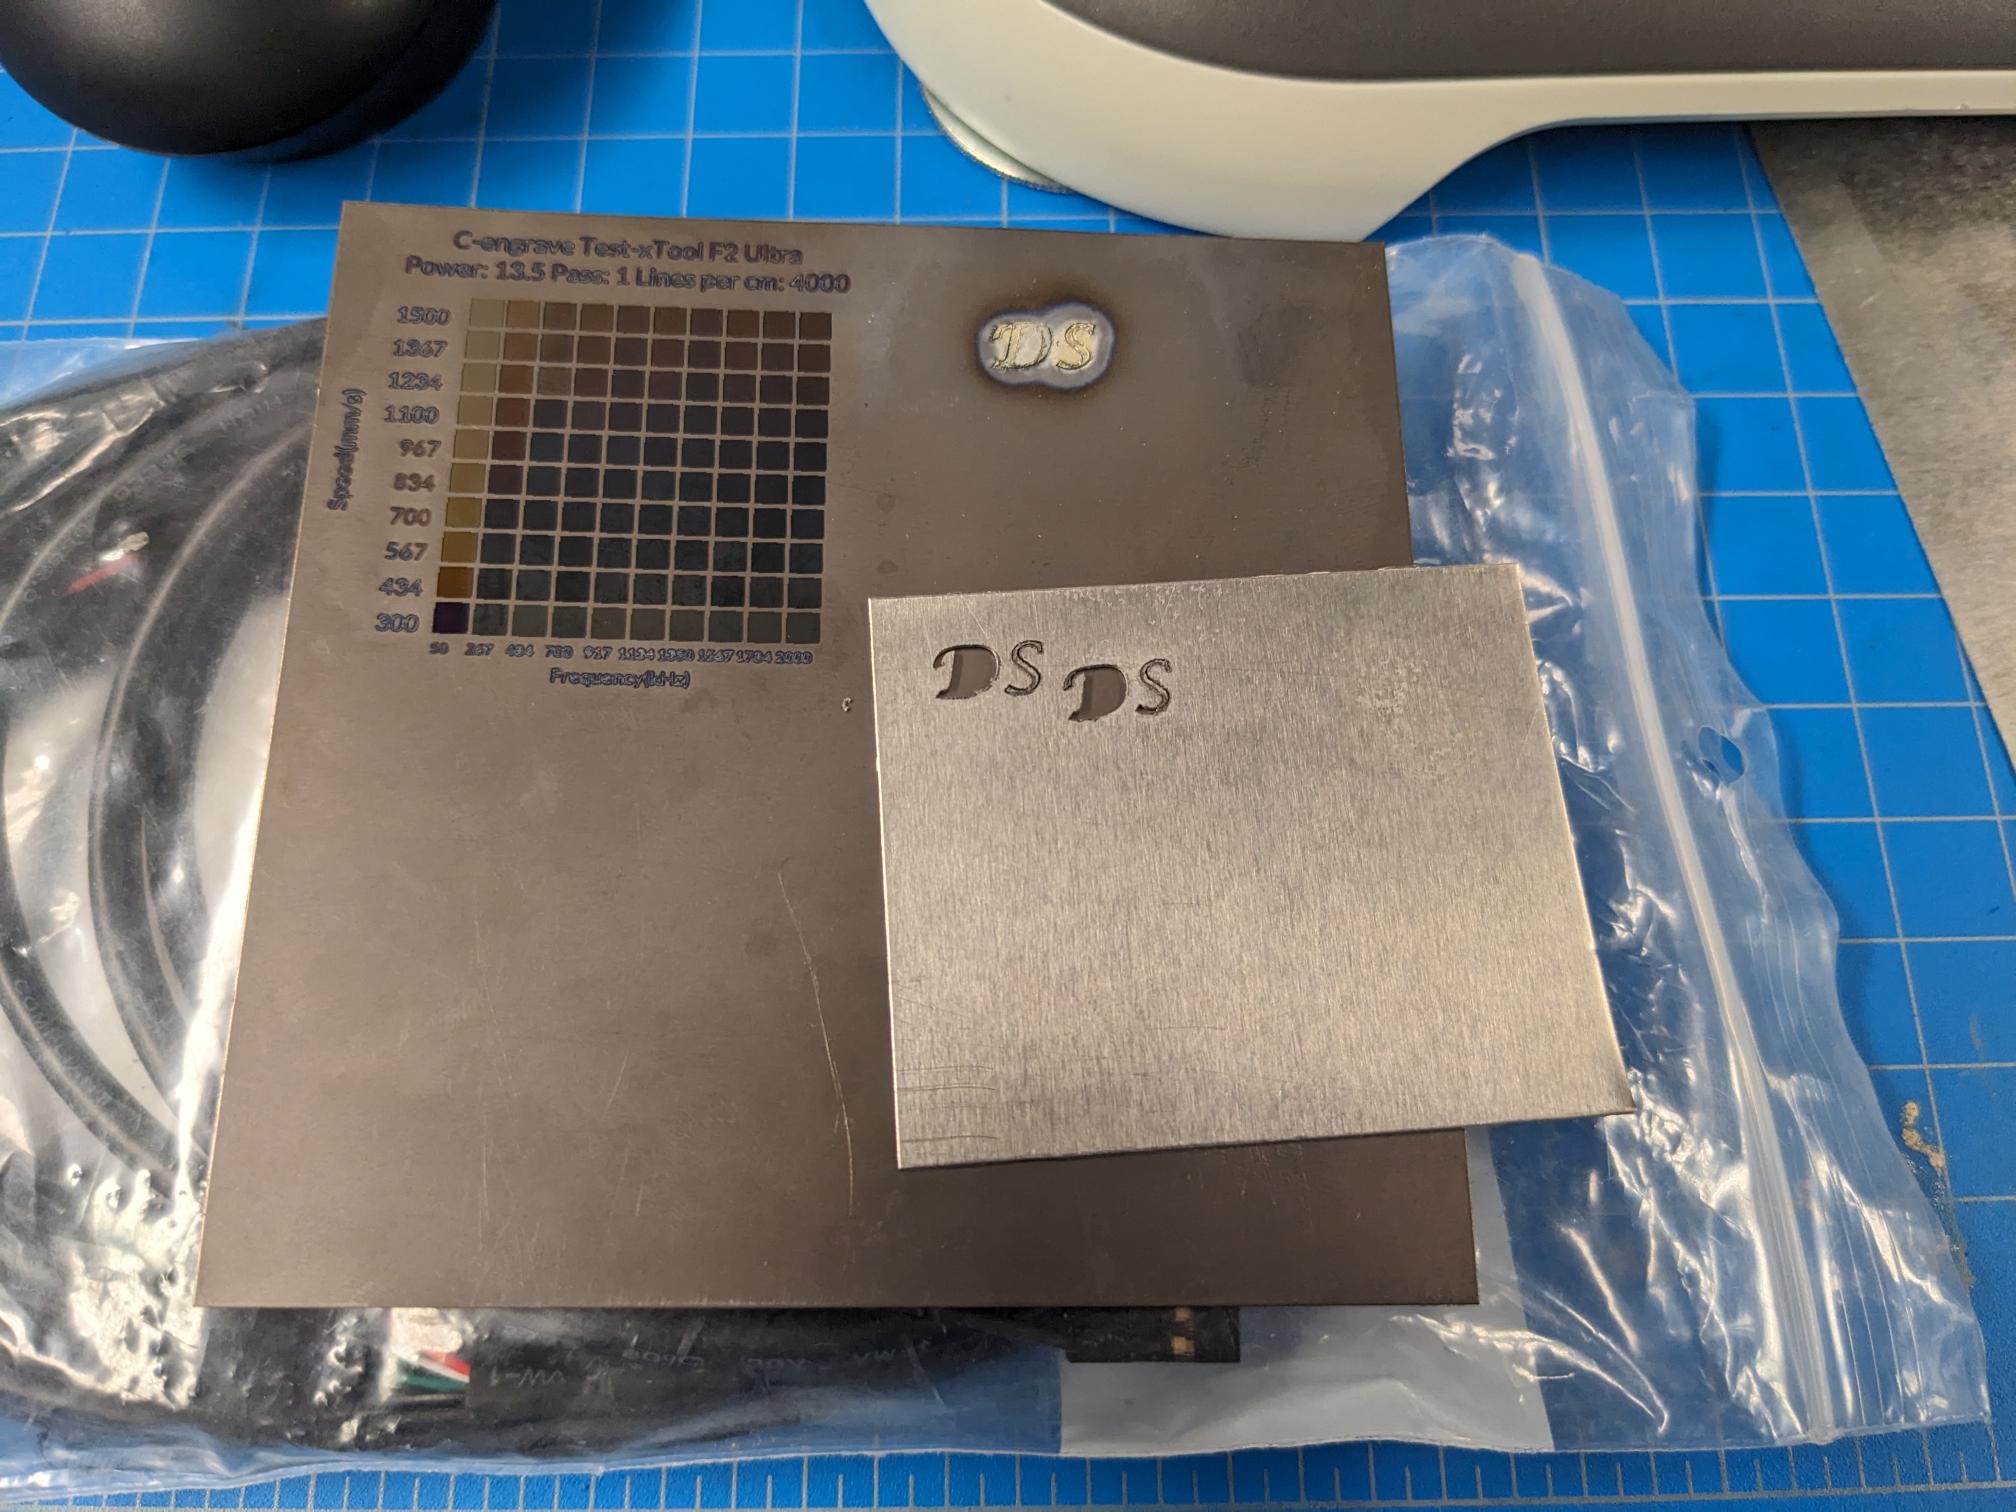
Even though I brought the hard drive with me to also image on the CT scanner, due to the size of it I ended up not imaging it. Instead, I moved onto the F2 laser and started to play with that tool's capabilities. As mentioned earlier, this tool is pretty similar to the F1 that we have been using in the CBA shop but it is higher power. I believe the F1 might also be able to colorize certain metals by oxidizing the surface, but due to the increased power it is easier on the F2. I brought some thin sheets of both Al and Ti stock with me that I had from some of my watch part projects with the intent of trying to cut out lettering/markers for dials. The laser was able to cut through the Al stock, but the process created so much heat that the localized area of the lettering bowed fairly significantly and therefore came out very rough. Jiaming also mentioned that some of the contact points may essentially be re-fusing together which tracks with the fact I could not remove the thinner "S" that I tried to cut despite seeing the outline on the backside of the stock. I will likely try to so dome more tests on cutting out features at a later date. I them moved onto working with my Ti stock, and I built off of some of Edward's efforts in characterizing the colorization of titanium. He found that changing the frequency also allows you to change the color without etching far into the actual material. I then created a grid of test elements and shot it on my Ti stock. I also tried to cut out lettering on this material too but that went worse than on the Al because everything turned a weird white color with a strange surface texture.
I mentioned earlier that I chose not to image my hard drive in the CT scanner, but then I had the idea to try engraving the plate within the hard drive enclosure. I borrowed a screwdriver from Jiaming and disassembled the casing so I could remove the disk and put it in the F2. Jiaming was very curious to see how the F2 would do since he had never tried to engrave anything nearly as reflective, so we ran a small test grid with low power to see what would happen. The engraving process actually worked great, so I picked a set of parameters that created the nicest looking pattern, flipped the disk, and engraved a better design into it. I then put the disk back in the case but left the front off. This came out really well and I think it might be one of the coolest things I have made in this class so far.
